


Feelworld FPV-101A User Manual
TFT LCD COLOR LCD MONITOR
Manual of operation

Dear users,
Welcome to use the company's color liquid crystal display monitor(touch
for optional), the display employs the latest digital processing circuit and the
high quality TFT LCD display, not only has low power consumption, stable
performance, emits no radiation, easy operation, safety, etc. advantages, but
also has VGA, AV, HDMI, YPbPr signal inputs. Sunshade cover
installation ,can be monitoring for outside, Mainly used in closed-circuit
surveillance systems, car video, PC operating systems, vehicle navigation
systems supporting display, can also be applied in support POS, ATM and
instrumentation, industrial automation display systems. AV2 Video input is
special for FPV monitor system, NO Blue screen under weak signal。
To ensure the best use of the unit, please read this handbook carefully
beforehand.
CAUTION
1. Please use the adapter attached in the accessory.
2. Do not expose this product to direct sunlight, heat or humid conditions.
3. Keep away from strong light while using this product so as to obtain the
clearest and the most colorful picture.
4. Please avoid heavy impact or drop onto the ground.
5. Do not use chemical solutions to clean this unit, please simply wipe with
clean soft cloth to keep the brightness of the surface.
6. Without adjustable component in the unit, please do not take apart or repair
the unit by yourself, to avoid damage the product.
1

Product Features
● FPV aerial dedicated input port,High Definition, High Brightness, No
Blue Screen under weak signal
● 1024*600 high resolution, view details of the image
● Multiple color format support, manually enter the menu to select the
appropriate standard, stronger adaptability
● Analog composite video AV input, connect FPV aerial camera
● 16:9 screen ratio, switch 16:9 & 4:3 display mode freely.
● Connect with camera, as a monitor or aerial monitor
● High brightness, contrast ratio sunshade cover, can see clearly under
sunlight.
● Multiple installation ways, convenient for different angles to view
CONTENTS
1. Product Instruction----------------------------------- 3
1.1. Front Panel Instruction------------------------ 3
1.2. Unit Back & Input port Instruction--------- 4
1.3. Remote Controller Instruction--------------- 4
1.4 Attached Cable Instruction--------------------- 5
2. Operation Instruction--------------------------------- 6
2.1.Panel Button Operation Instruction--------- 6
2.2.OSD Operation Instruction--------------------- 7
① PC Mode------------------------------------------ 8
②.AV、HDMI、DVI Mode----------------------- 12
3. Parameters---------------------------------------------- 16
4. Accessories--------------------------------------------- 17
5. Trouble Shooting-------------------------------------- 18
2
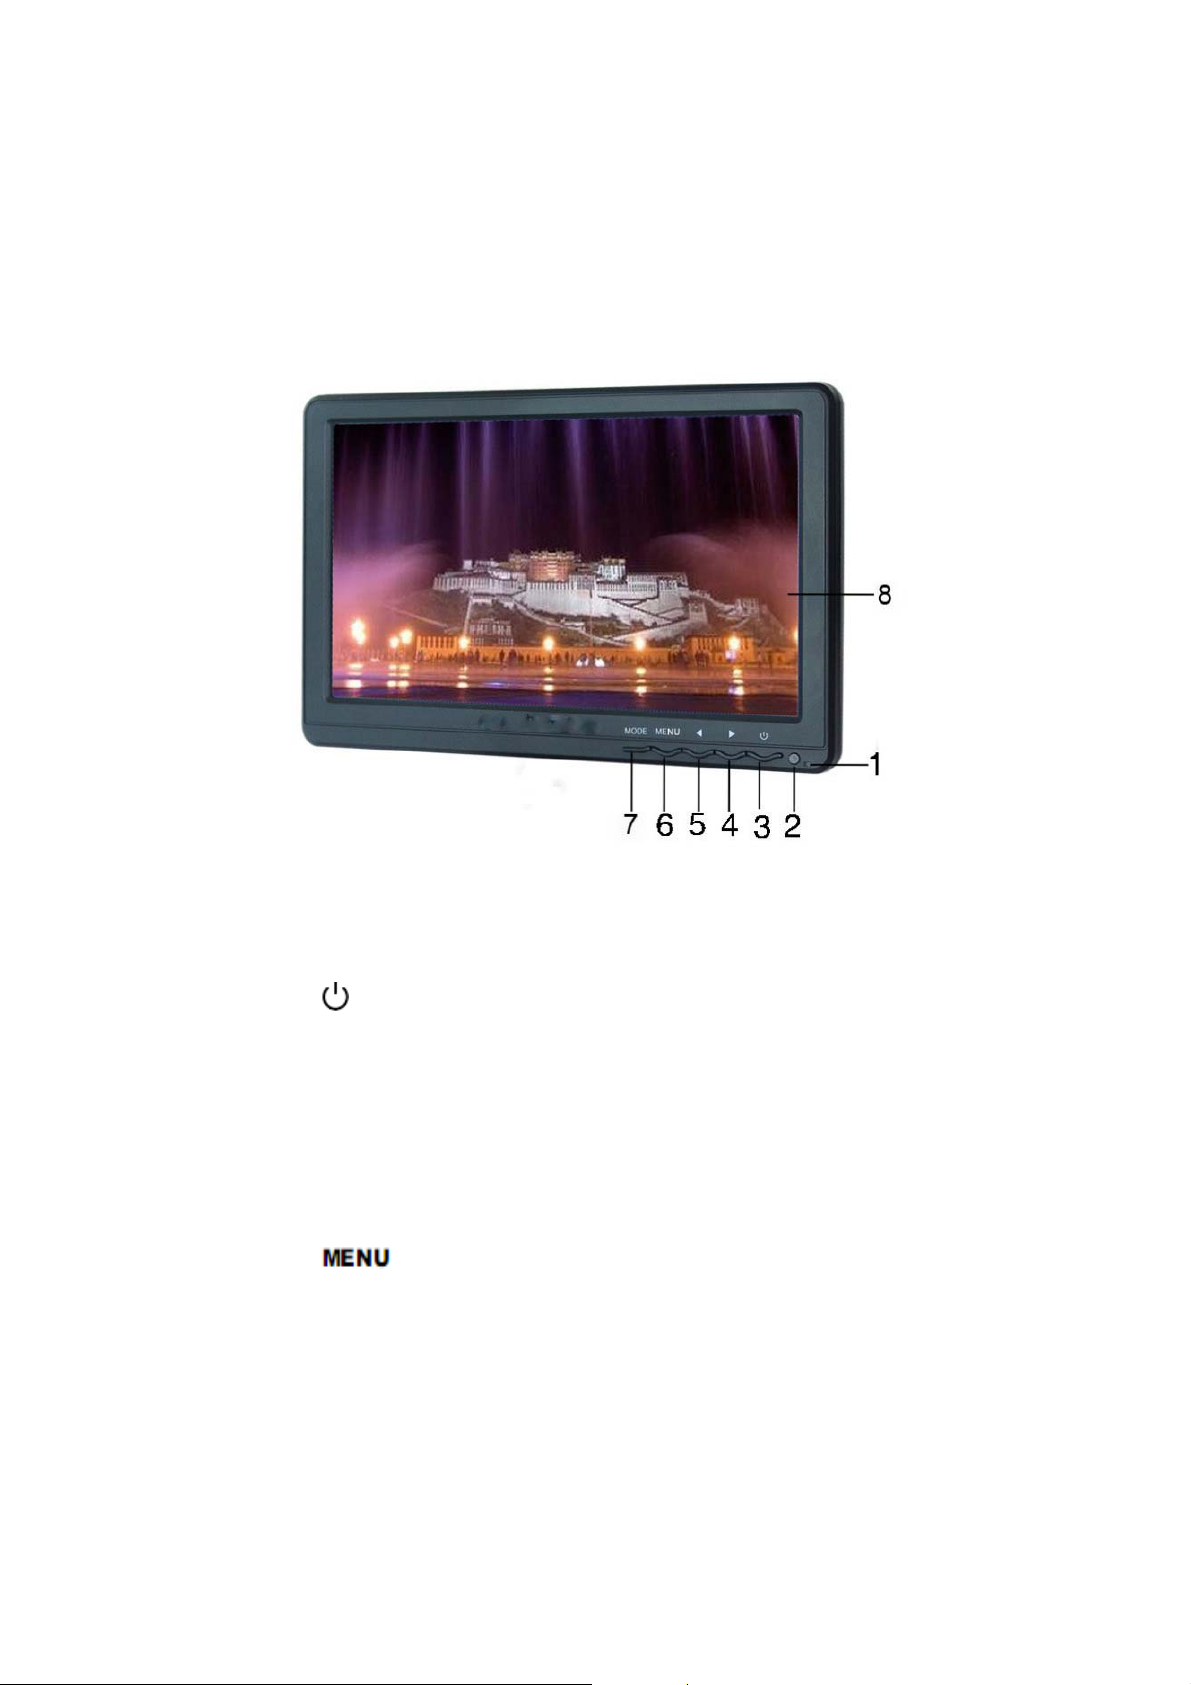
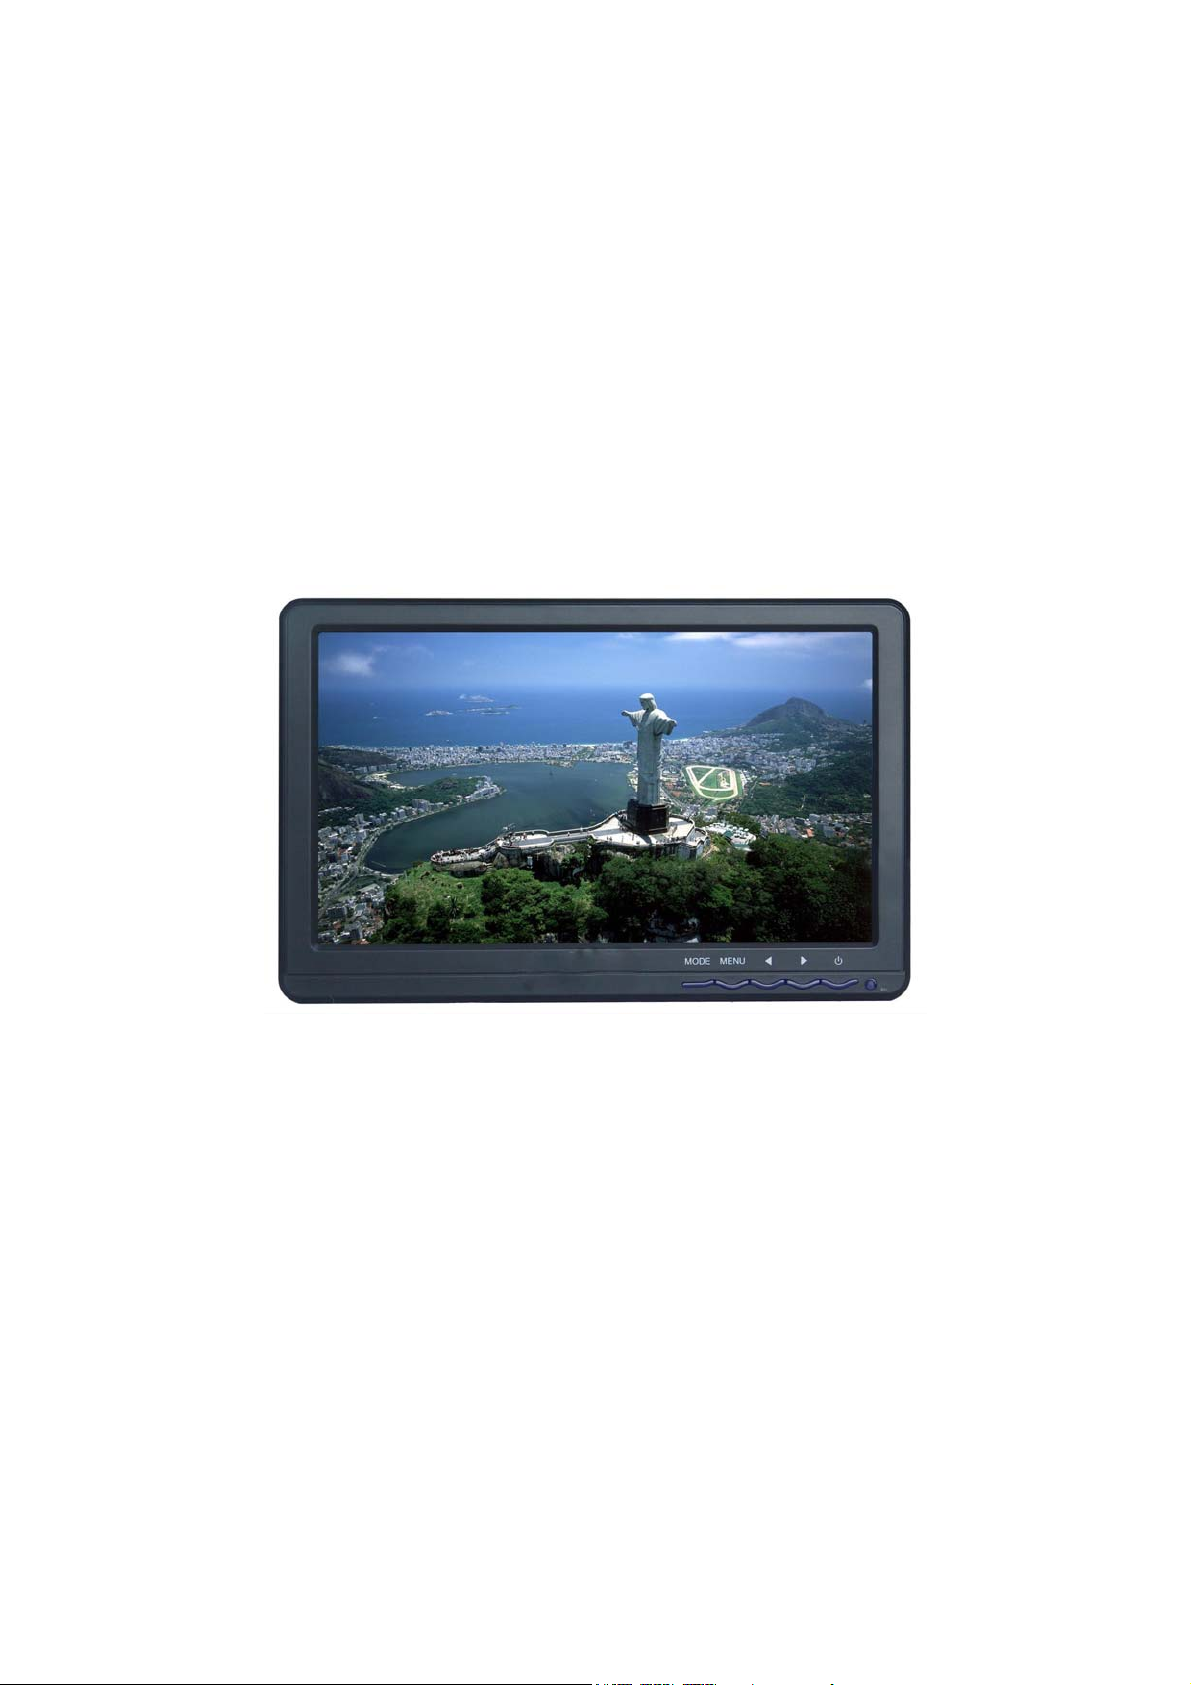
1. Product Instruction
1.1 Front Panel Instruction
Picture 1:
1. Power Indicator:
2. Infrared remote control signal receiving window
3. :Power On/Off, to select the state of operating or standby
4. ►: Volume up, press the button to control the volume up, menu
to select and adjust the value of setting
5. ◀: Volume down, press the button to control the volume down,
menu to select and adjust the value of setting
6. : Press this button to pop up or close OSD menu
7. MODE: To swtich VGA、AV、HDMI、YPbPr input signals
8. Display screen
3

1.2 Unit Back & Input port Instruction
Picture 2
1.
YPbPr : Component video signal input
HDMI : HD digital video/audio signal input
2.
3. SKS plug: VGA signal, audio signal and touch USB signal
input interface(see SKS plug cable instruction)
4. 1/4 bracket installation screw hole, can convenient for hot
shoe mount , three tripod connection fixed installation
5.
POWER: DC12V input voltage port
1.3 Remote Controller Instruction
Picture 3:Remote Controller
1. : Power control button, use to select the operating mode and
standby mode
2. : Mute button, press the button to close sound, repress to recover
3.
4.
4
: OSD button, press the button to pop up OSD menu
:Volume down or to adjust the value of setting function
5. : Volume up or to adjust the value of setting function
6. : OSD item select button or No menu state press it to cycle adjust
the 5 level brightness
7. : OSD item select button or under VGA state press it to auto switch
8. : Image 4:3/16:9 switch
9. :Image switch up/down(this monitor without this function)
10 . :Image switch left/right(this monitor without this function)
11. :To select video signal input switch
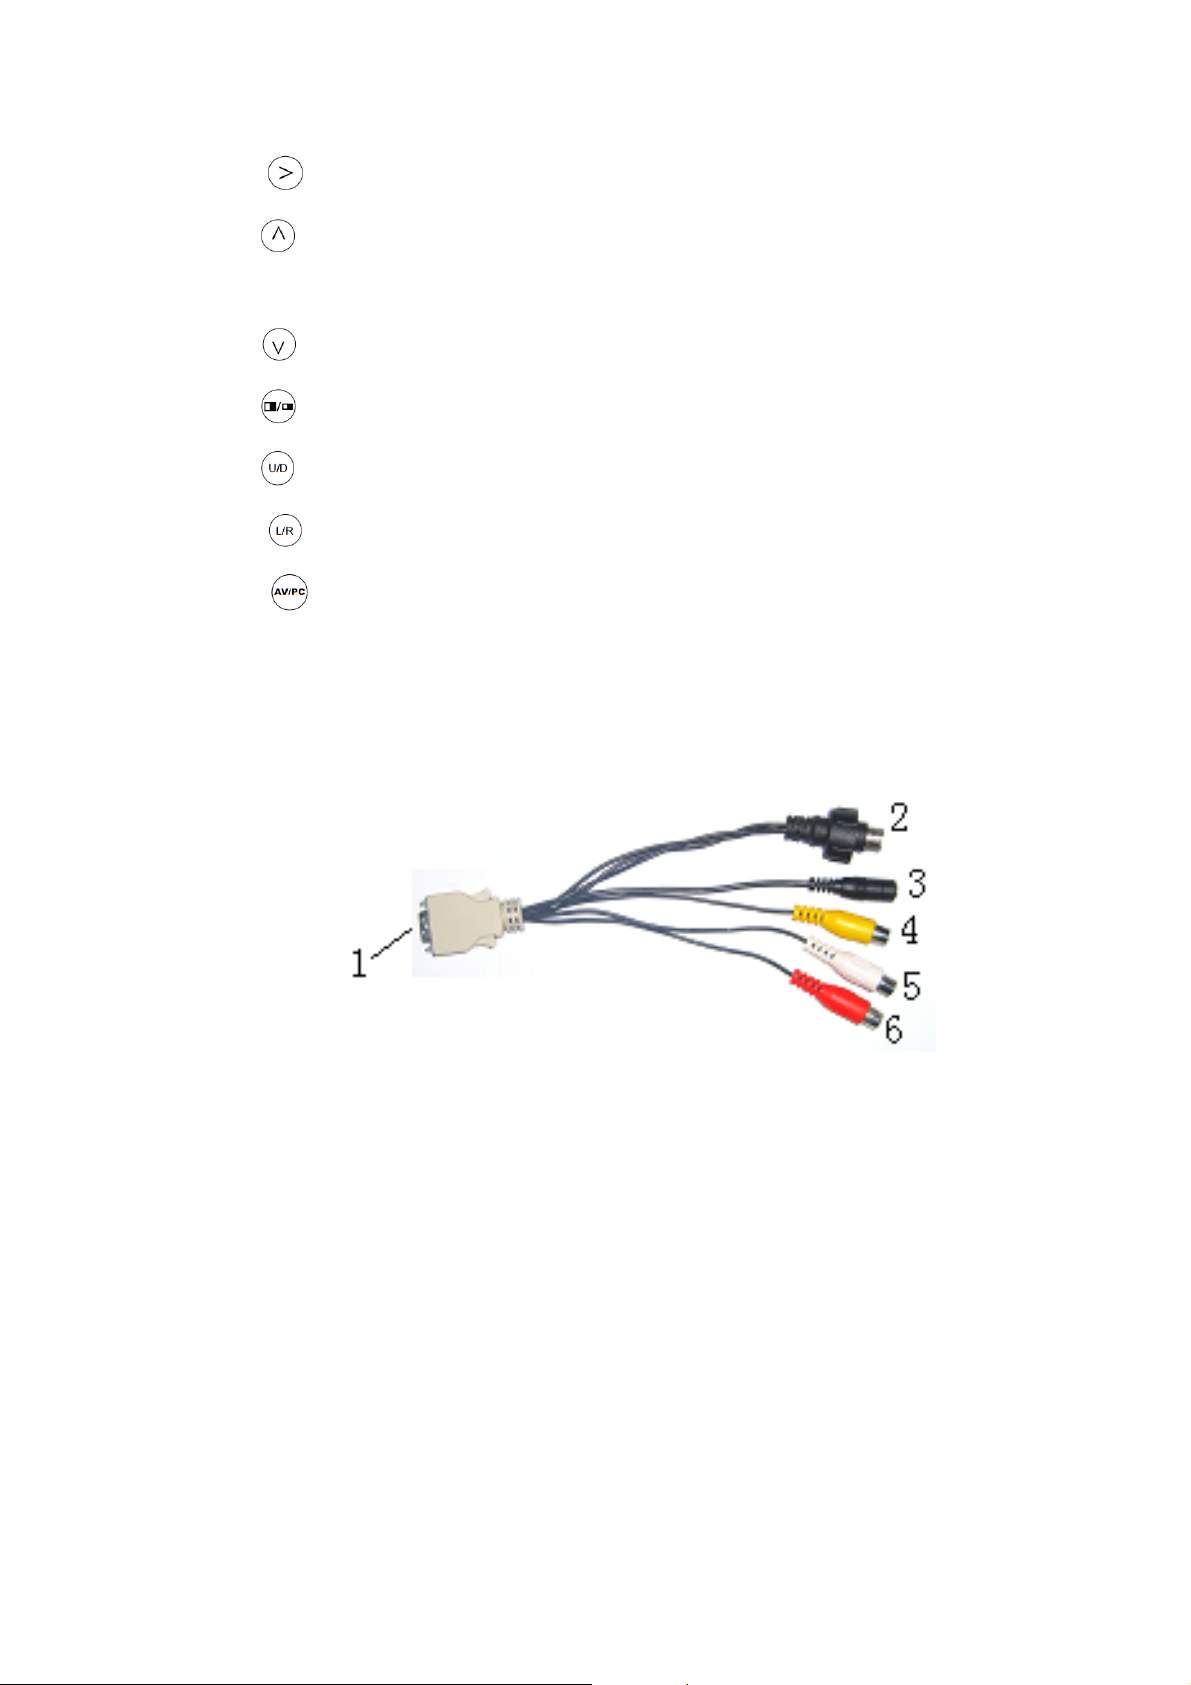
1.4 Attached Cable Instruction
Picture 4: SKS cable
1. Connected to the monitor of SKS input jack
2. Black 9-pin plug for VGA signal input
Link to Picture 5-1 of 9 pin socket
3. Black DC jack for DC12v power input
4. Yellow RCA(V1)jack, video signal1 input port
5. Yellow RCA(V2)jack, aerial video signal dedicated input
port
6. White RCA jack, audio signal input
5