

Page 1
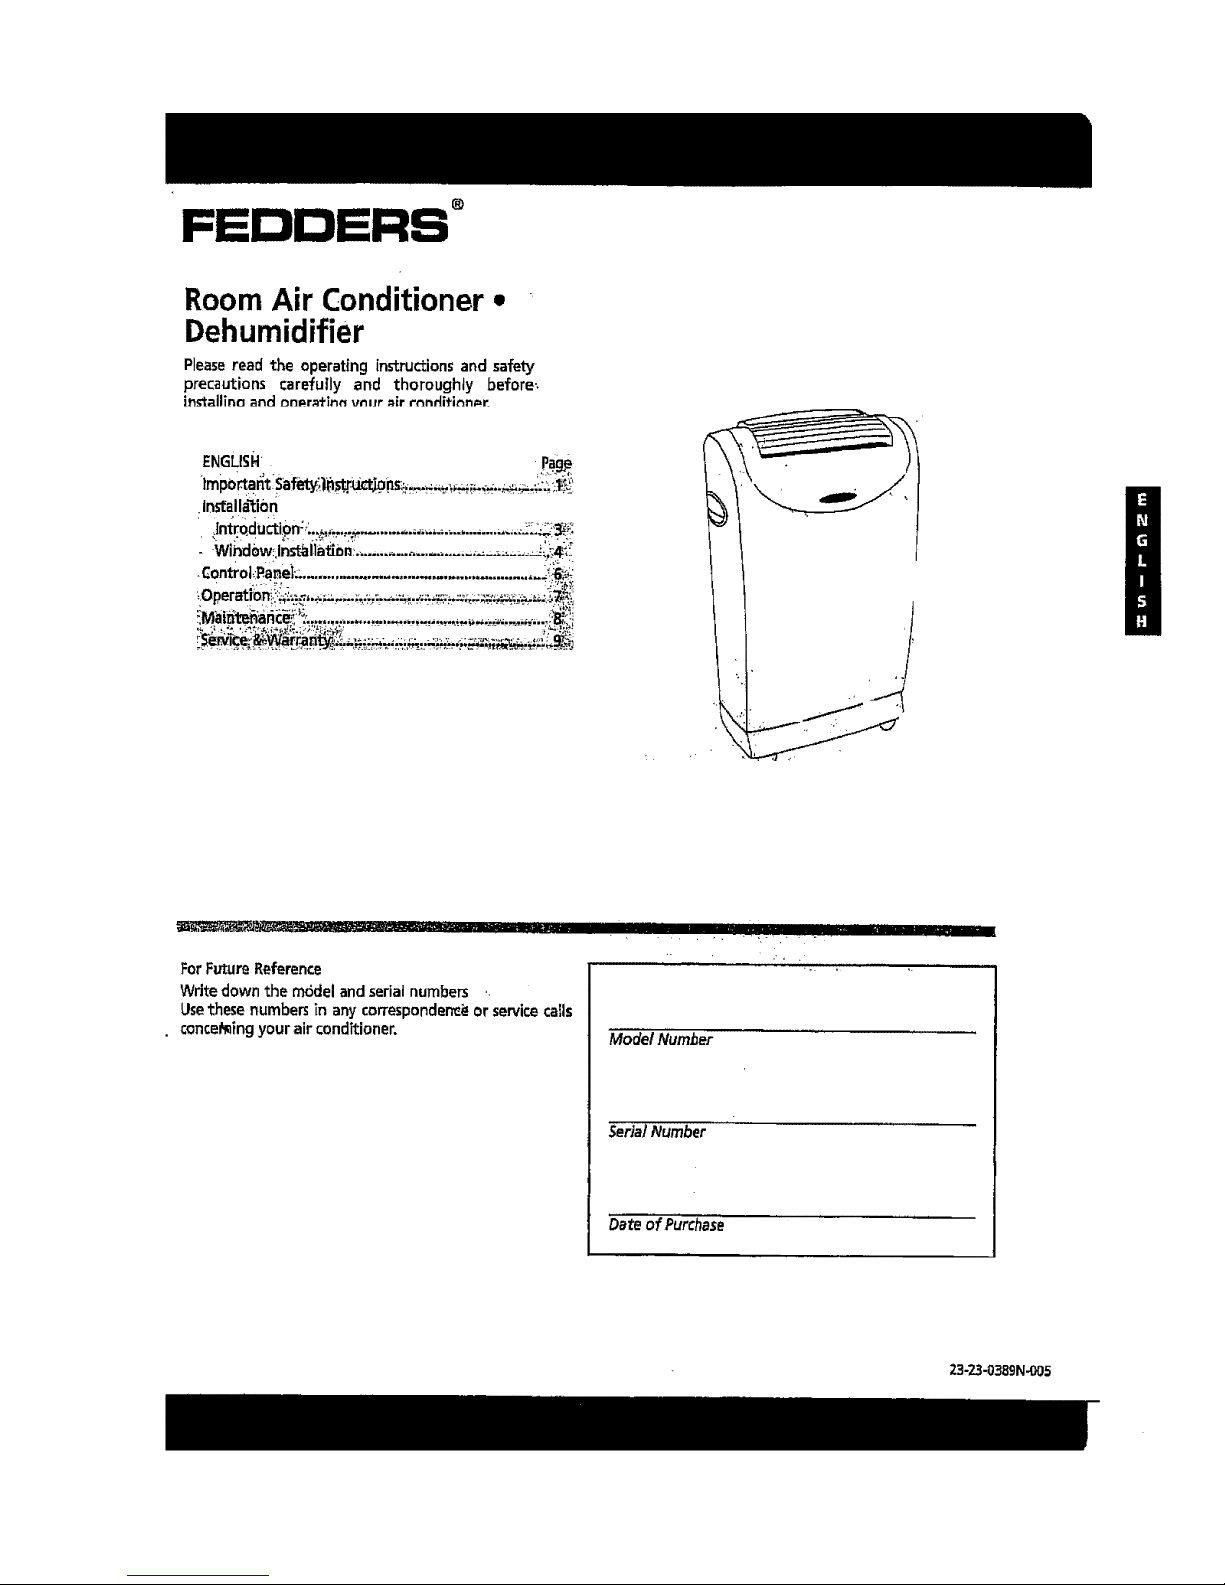
FEDDERS °
Room Air Conditioner •
Dehumidifier
Pleaseread the operatinginstructionsand safety
precautions carefully and thoroughly before',
installinn and _n_=r_lnn vnltr _ir rnndiHnn_=_
ENGLISH' ,,page,,
•Installa_tion
- Window_Jnst_llattnn:v................................. _:_._
ForFutureReference
Writedownthe m6delandserialnumbers
Usethesenumbersin any cormsponden_orservicecalls
conceMingyourairconditioner.
I , • III............
Model Number
SerialNumber
Date of Purchase
'll
23-23-0389N-005
Page 2

RECOGNIZE SAFETY SYMBOLS_
WORDS AND LABELS
Wh_ You Need To Know About
Safety_ Instructions"
.warningandJmportant6afetyinstructionsappearingir
this manual are not meant to Coverall possible
conditions andsituationsthat mayoccur.Common_:
sense,cautionandcareimustbeexerd_edwhen
operatingor cleaningtools,andeuuitoment." ..
Alwayscontactyour'deale_distPibut0r;sewice.agem:-or
manufacturer about'pPo_]emSOF:Cond,tionsYoucto::not
understand.,
_1_T_isisthe safetyalertsymboLit is used'toalert,you
to potentialpersolial_injuryhazards;Obepall:safe_:
•messagesthat follow this symbolto avoidpossible
injury ordeath.
_L_tK_
DANGERindicatesan imminently hazardoussituation
which,if notavoided,will resultindeath or serious
injury.
r A WARNING ".'}
WARNING irfdicatesa potentiallyhazardoussituation"
which,if notavoided,couldresultindeath orserious
injury.
l& CAUtiONr I
_ttrlON indicatesan potentiallyhazardous'sltuation.
which,if not avoided,mayresultin minorprmoderate
injury.
I.cAuTIoN t
CAUTIONusedwithodt the safety,alektsymbol
indicate_a potentiallyhazardoussituationwhich,if not
avoided,may result in propertydamage.
Important Grounding Requirements
• Air conditionerhasa three-prong grounding plug
on the powersupply cord, whichmustbe plugged
into a properly grounded three-prong wall
receptaclefor your protection against possible
shock.hazard. For models up to and including 7.5
amperes,usea grounding type wall receptacleto
match.the cordplug.
• For mode!s above 7.5 amperesuse a-single outtet
grounding t_pe wal! receptacle to match the cord
plug,
Do not operate this air conditionerwithout proper
time delay circuitprotection(circuit breaker or fuse),
Refer to serial plate for proper power supply
requirements.
%,
Recommended Wire Sizes
(Asinstalledper building code):
PROTECTORSIZEWIREGAUGE
,15 AMP#!4 MINIMUM _'(_ (_._"
:20"AMP#i_'MINIMUM 125V 250V 250V 250V
30 AMF#;i;_:r_NIMUM _ 15A 20A 15A 30A
Electrical Shock Hazard
• Plugunit onlyinto a _'?aundedelectricaloutlet
• Db not use an extension'cord or plug adapter with
this unit. Do not alter cord or plug end. Do not
remove warning label on cord.
• Dp not operate unit with decorative front or filter
removed.
, tf the air conditioner has a serial plate rating of 115
volts and greater than 7.5. amps, it must have its
own fuse or circuit breaker, and no other device or
•.unit should be operated on that fuse or circuit
breaker.
• if the air conditionerhas a sedaJ plate rating of 230
volts, it must have its own fuse or circuit breaker,
and no other device or unit should be operated on
that fuse or circuit breaker.
• We recommend that a qualified electrician insta[I
unit in accordance with the National Electrical Code
and local codes and ordinances.
• Use copper conductors of correct wire gauge and
protector size only,
Page 3
Power Cord with
Arc Detection Device
The power cord supplied with this air conditioner is
equippedwith an Arc DetectionDevicedesignedto shut
off powerto the unitwhenit sensesanarcfaultcondition.
An arcfault is an unintentionalelectricaldischa_gethat
occurswhen electricalproductsor wiresare damaged,.
aged_'or"improperly used.An arcfauit can.be potentially
hazardousif left'undetected..
• Do notremove or modifythis plug
• Do not useasan on/off switch
• Do not useoutdoors
• Do notpush_fu,rnitureagainstorplacefurnitureonthe
electricalcordZThis can trip the test switchand/or
damagethe cord and becomea po_ntJal condition
for arcing
• Do not attemptto repairthe cord.If the cord requires
replacement,call anauthorizedseniicer.
• The Arc_Dete_tion De'viceis not a Groun_l"Fauttl_.
Interrupterand shouidnot beusedassuch
= TheArcDetectionDevicecontainsan electronic_drcuit
board and should not be submergedor eXl_bsedt;o
water spray ...... .
Resetting •
if the ArcDetectionDevicehastripped,"thereset
button will pop up.
Followthesestepsto,reset theArc DetectionDevice:
I. Unplugunit from electricaloutlet
2. Pressthe resetbutton
3. Plugthe unit backintoelectricaloutlet
4, Checkto seeif powerhasreturnedto the unit
Testing
You shouldtest _he Arc Detection.Device equipped
power cord monthly,after everymaj0_;electricalstorm,
or if _ower to your RoomAir Conditioner has been
interrupted.
Followthesestepsto test the ArcDetectionDevice:
1. Unplugunit fromelectricaloutlet
2. Pressthe resetbutton
3. Plugthe unit back into electrica|outlet
4, Presstest button.Unitshoutdtripandresetbuttonwill
popup.
5. Pressresetbutton againfor use
il AWARNING
I Usetwo or more people to move and install air
conditioner. Failureto. do so can result in back or
otherinjury,
CAUTION
Do not cut, alt_P,or removeany of the expanded
polystyrene(styrofoam)insidethisairconditioner':
• Donot introduceobjectsin t.,beair_tischargearea.This
could causepermanentdamage,
• Donot pourliquidsontheair conditioner asthiscould
ca.usea maffunction, With the unit unplugged,use a
dampcloth.for cleaning the u_nit,
CAUTION
Donot u_estrongsoiventsto cleanthe air conditioner_
• CJeanr,the.air conditionerfiltei" every'two weeks.,to
avoid rOVe_e_ingcause_ by air obstruction. Do not
operatew]_fi_ut.filter..
• Do not 6b_?UCt thi_ air';.intak'earea of your air
conditi_ne_:as this could cause overheating, thus
activatina,the"unit'ssecurityswitchandshuttingoff the
"unit.
• Do not ,block air"circula_:_onto outside louvers of
cabinet."
• Do not blockair flow inside with blinds,curtains,or
furniture, or outsidewith shrubs,endosures,or other
buildings.
• Do not run the air conditioner with an outside
protectivecover in place. Thiscould resultin fire or
mechanicaldamage"withinthe air'conditioner,
• Carefullyinspectthe locationwherethe airconditioner
will.be installed, Besureit will supportthe weightof
the unit overan extendedperiodof time.
2
Page 4

DescriptionofPartsonthe
PortableCoolingUnit
Control Panel
Air OutJet
Handles
,Castem.
Room Air Intake
System Air In_ke
Exhaust Port'
Serial Plate
Drain._Valve
' Power Cord
Use the electronic control panet to select
the mode, fan speed, set the timer_ or
view the current and set room
temperature.
The air outtet discharges the air from the
unit into the room. Usethe adjustable: '
louvers to direct the air.
Use the,handles to held move,me,.un_,.
,.arour_l'the room '
Allow you to move the uiiit from onei_=.
r6bm tO another without iffing. •
Brings room air into.the unit for cOob_i
heating, or dehumidifying • . _.::''
.,
Outside air is brought into.the unit toe.
cool the internal components. ,,,
Exhaustswarm air from the internal, "
components to the o_utside.
identifies unit model and serial number
Drains the interna[,condensatiofl tank. ,=
,
Usesa 3-pronged, grounding plug and
must be plugged i_o.a proper:ly ,. •
grounded outlet. Do,n_ altar ¢ofdor
plug end. Do not use an'extei_sion_ord,
Before you start
• Readthe instructionmanual.beforeoperatingthe unit.-
forthe firsttime. It contains important information on
operation,safety, maintenance,,seTviceandwarranty.
- _Oanotstart a damagedunit
, The assemblyandconnectionof=theunit must becarried
out accordingto the instructions,iftheyare not
followedyourun the risk ofvoidingthe warranty.
• Thepowercord islocatedinthe rearof the unit,Donot
useplugadaptersor extensioncords, Do t_otalter plug
end.Only usea groundedelectricaloutlet.
• Do not allowcontactbetweent_e unit andwater,
• Do not coverthe air outlet orairintake
louvers.ofthe unit.
* Toavoid the possibility of personat injury, always
disconnectthe power supplyto the unit before installing
and/or servicing,
Control
Panel
Air Outlet
Caster
Room
Air.intake
• System
-Air Intake
Port
Drain
Power Cord
Page 5

Window adapter kit
An installation parts kit ispacked with your unit in a separate
carton_ Before.you discard the packaging that your unit came
in, please locate the carton that contains these parts and
ensurethat all parts are present.
Wtndow panel
Window panel extensions
Tube adapters
Screws
Attachesto windowopeningto
allow air exchangefor Systemair
transfer.
Extenclswindow panel to fit .i
windows of Variousdimension_.=
Connect Air exchange tubes to
window panel
12screwsare included for
assernb[ing the window adapter
kit. Somescrews may be partially
assembled onto window panel.
Airexchangetubes Exchangesairbetweenthe unit
andoutdoors.
J
Window panel extensions
E
Window panel
Screws
@@
Tube Adapters.
=/
Air Exchange:Tubes
Instructions-forassembling,the window adapter kit
1.Insert tube adapters '_hrough:the back,of the window panel
2. Secure each tube adapter with four screws through the
front of the window panel.
3. Insertwindowpanelextensionsinto window panel. Lightly
tighten the screws'.inthe window panelto hold the
extensionsin ptace.
.
Tube Adapters
Back of
window panel
,
[]
Window Panel
Extension
Window Pane!
Window Panei_lk_ Extens,on scr,w_l_
4
Page 6

installing the window adapter kit
Note:Thewindow adapter kit must be Installedand
connectedfor the air conditioner to workproperlyin
Coolmode.Thewindow adaptertritisnot mquir_
whenusingthe unitin Heat,Dehumidify.or Fan
modes.
Yourwindowadapterkit hasbeendesignedto fit
moststandardverticaland horizontal:window ....:
applications,However,it maybenecessarYfor you_o
,improvise/modifysomeaspectsof theinstallation_.'i
'procedures'for'ce_aii_ty_e_;of_itndowsJ , °
1. Openwir_dow.(fig.A)
2. Placewindowp_aneiwjth extensionsintb:window
frameand adjustto widthofwindow, [fig.B)_:__=,
Windowadapterkit maybeinstalted,vertiCallyas
well as hoffzontally.Thisinstallatonmayalsobe
usedfor _:rankstylewindows.(fig;E) •
3. Tightenthefour screwson the window panelto
securethe window panelextensions.,
4. Closewindow._g;C)
5. Thewindowadapterkit shouldnow,fit sL_curel_
Within the windowframe andyoucannowattac_
,the air exchangetubes.Ifyouapehavingtrquble
attachingthe air exchangetubes,you.mayattach_
thetubes priorto installingthe windowadapter kit_
Attaching the air exchangetubesto the air
conditioner
1. Attachthetubesto th_ wi0dow adapter kit.
2. Attachthe otherendto the airconditioner.
To attachair exchangetubes: pushtube ontotube
adapterand_wistuntilthe tab isin placeinthe hole
onthetube.
Toremoveair exchangetubes:twi_the end until the
tab isclearof the hole inthe tube andpulloff.
Maintaina deardistance{from,walls,furniture,etc.)
of at least10 inchesaroundthe unit to allowproper
air circulationandpreventdamageto t!_eunit.
Important: Do not over-stretch the exhaust tube or
make any unnecessary bends in It.
i.
[
Page 7

Warning
Light
I
Power Control
J[
Power Mode_ . . T,
Cont7ot ,Control ' +,Fan Spe_d
., ,-Contro!
Thepowercontrolturnstheunit onandoff.
Warning Light +
Condensedwater may accumulate in the untt. It the
internaltankbecomesfull,the Warning Lightw_llshine
and the unit will not operate until the unit has been;
drained. See Draiping ExcessWater section,,for
instructions on how to drain the water.
Mode Control
The Mode Controlhas4,settings:
Coot,Heat, Dehumidify andFan.
The settings areadjusted_viththe ModeControl:, -,
bu_on. A light will indicate whichsettingiscurrently_
being used.
Cool Mode
WhenCoolmode iss'etected,the ind{cator light
will shinegreen.During the cooling modethe air
iscooledand hot air is exhaustedto theoutside
air through the exhausttube. Adjustfan speec_
andtemperature_tosuityour desiredcomfort
eveLNote;The air exchangehosesmust vent
outsidetheroomwhen usingCoolMode.
Heat Mode
Whenthe Heat modeis selected the indicatorlight
will shinered.Heatedair is circulatedthroughout
the room.Adjustfan speedand temperature to
suityourdesired comfortlevel.
Note:The air exchangehosesmustvent insidethe
roomwhenusing HeatModel
Caution:Heat/Coolmodelsor unitswith electric
heat aredesignedto be usedonlyasa
supplementalheat source,They shouldbe used
inadditionto regularheatingsystemsandnever
asthe primarysourceof heat,
_mer
V
Mode Timer _imeriTempSet
Indicators Control _ Controls
Dehumidify Mode
When Dehumidifymode'is selected,the indicator
light wi!l shineorange.Air is dehumidifiedasit
passesthrough the unit,without being in full
coolingmode.Thefan speediSnot adjustable
underthe Dehumidificationmodewhilethe room
temperature is below 78°F(26°C).
Fan Mode !-
When Fa_+'modeis sei'ectedthe LEDlight willshine
yeltow_+_rjscircula:tedthroughout the roomwith
no cooling;(Note,_unit+'_o_snot needto bevented' '
in Fan"_e3 " +
Fan Speed C0ntrct_
TheFan SpeedControl has-3settings:
High,M_dium,andLow.
Timer Control
Auto turn off:
With machine poweredon, presstimer button to
selectnumberofhoursyouwould like the unit to
run in air conditioningmode untilit automaticaUy
,shutsoff.
Auto turn on:
With machinepoweredoff, presstimer button to
selectnumberof hoursuntil youwould likethe
unitto automaticallystart runningin air
conditioning mode.
TempiTimer Set Controls
Usedfor adjusting the timer and thermostat.
Thedefault displayisroom temperature.
In cooling mode,when %" 6r "-" button ispressed
the set temperatureisdisplayedandmay beadjusted.
After 1Ssecondsthe displaywill revertback to room
temperature.TemperatureisadjustabfeinCool, Heat
and Dehumidifymodes.
Note: By pressingboth Temp/_limer Set buttons
on the unit at the same time for S seconds, the
display will toggle between Celsiusand
Fahrenheit.
Page 8

Beforestartingthisunit
•1.Selectasuitablelocation, making sureyouhavea levelsurfacewith no obstructions,andeasyaccessto an electricaloutlet.
2. Installthe windowadapter kit, as describedinthe Installation.sectio'n.
Note:Thewindow adapterkitisrequiredonly whileusingthe Coolmode.
• 3.Plugthe unitinto agroundede['ectricaloutlet. Do notusean extensioncord.
Operating Instructions
Air Conditioner/CoolMode
1. Installthe widow adapterkit andhosesto theunit.
2. Pressthe On/Offbuttonto turn the unit on,'Theunitwill.
powerupand dkplay!he roomtemperature.
3.Press{he Mode button udtil the green indicator light
shines.
4. Pressthe" Terfip!TimerSet buttons to set the desired=
Dehumidify Mode
1.Pressthe On/Offbuttonto turn the uniton.Theunit will
• powerupanddisplaythe roomtemperature.
2. Pressthe Mode buttonuntil the orangeindicatorlight
shinesabovethe word Dehumidify.
3.The fan will operate in Med speed.Thefan speedisnot
adjustable underthe Deh.umidificationmodewhile the
temperature.While'_youare adjusting the setting, the Set. roomtemperatureisbelow78_F"(26°L'),
Temperatureindicatorwill shineandthe displaywitl.show'_ 4. Condensedwater may accumulatein the.unit. If the
the settemperature. After youhavefinishedadjustingthe
temperature,the displaywill defa!Jit backto the room
temperatureandthe =RoomTemp"indicator will shine.
5. Pressthe FanSpeedbutton to selectthe desiredsetting:
(High,Med, Low).The fan speedindicatorlightwiJ]shine
for the selectedspeed. .
6. Condensed water may accumulatein the unit. If the
internaltank becomesfull, the warninglightwillshineand
•the unit will not operate untilthe uni_hasb'_endrained..
See DrainingExcessWater section for instructions on how:
to drainthe "water.
7. Once the room reaches the set.'=tempera:_ure_the
compressorwill turn off and the fan wiiFcontinue to
operate,
Heat Mode
1. Pressthe On/Offbuttonto turn the unit on.The unitwill
powerup and displaythe roomtemperature.
2. Pressthe ModebuttonuntJtthe red indicatorlightshines.
3. Rressthe To,p/Timer Set. buttons to set the desired
temperature. Whileyou areadjustingthe setting, the Set
Temperatureindicatorwillshineandthe displaywitlshow
the settemperature,After youhavefinished adjustingthe
temperature, the displaywill .default back to the. room
temperature andthe "RoomTemp"in:dicatorwill shine.'
When the room temperature fails below I° of the set
temperature, the unitwill start heatingthe room.Whethe
roomtemperaturereaches1° abovethe set temperature
the unitwill stop heatingthe room.
4. Airflow isadjustedusingthe FanSpeedControl Pressthe
FanSpeedbuttqn to selectthe desiredsetting (High,Med,
Low).The fan Speed indicator tight will shinefor the
selectedspeed.After the unit has _opped heating the
room,the fanwill continueto run.
5. HeaterSafetyfeature: Whenthe unit is turned off (or if
power isinterrupted durin_heating mode), the fan will
continue to run for 5 secondsto removeanyresiduatheat
from the unit.
primarysourceof heat. !
J
internaltank becomesfu[I, the warning lightwill shine
and the unit will not operate until the unit has been
drained, SeeDrainingExcessWater section,
FanMode
1.Pressthe OntOffbuttontoturn the uniton.Theunit wU]
powerupand displaythe_roomtemperature.
2.Pressthe Mode button u'ntilthe veliowindicator]ioht
Shines.
3,Pfe_slt_eFanSpeei:lbutton to selectthe desiredsetting
(Hig'_:Med,Low).Thefanspeedindicatorlight wt[ shine
foi ,the sele'cted"_spleed,The unit wilt operate
cb_ir_ously in Fanrhode.
Timer"_
The'timercan'be_s_to turn the unitoff or on,Thetimer is
adjust_ablebetween1 _n_l_l2 hours.
To:turn unitoff automatically:
1. With unit poweredonand runningin desiredmode,
presstimer button.
2. UseTemp/TimerSetbuttonsto select numberof hours
youwouldlike the unitto run untilit automatically
shutsoff.Afteryou havefinishedadjusting thetimer,
the displaywilldefault backto the roomtemperature
andthe "Room Temp"indicator wilt shine.Timer
indicatorwill blinkwhenset,Toturn timeroff pressthe
timerbutton,
Toturn unit onautomatically:
1. With unit poweredonselectdesiredmode and fan
speed,then powerunit off.
2. With machinepoweredoff, presstimer button to seiect
numberof hoursuntil you would like the unit to
automaticallystart running in air conditioningmode.
Timerindicator witi blink when set.The displaywill
showthe numberof'hours the unit issetuntil it beqins
operation. To turntimer off pressthe timer button."
Page 9

"Cleaning and Maintenance
• The unit hasanair filter that mustbe cleaned with
water every two weeks and put backin the unit after it
iscompletely dry.
• The air discharge grille canbe cleanedwith a rag or
sponge,warm water and mild detergent.
° Neveruse hot water, bleach, gasoline, acids,cleaning
fluid ora brushto clean the unit. Thiswill damage the
cabinetand the air dischargearea.
• Donot wash the unit with a hq.s__.
Cleaning the filter.:
1.Turn Power OFE
2.Remove the air filter by grasping the bottom and
pulling it upand out of the unit.
3. Washin hot soapywater, rinse and shake dry.:
4. Replacethe filter wi_hthe front of the filter toward you.
5.To drythe filter thoroughly, run your unit In fan mode
for afew minutes. Remember,onlya clean filter works
properly and deliverstop efficiency at every _tting.
_k Warning: Make sure unit isunplugged before
performing alny maintenance procedure..
Draining excess water
;Condensed_water may accumulate in the _n_t.If the!_'
:: internaltank becomesfull, the WarningLight.wi![ spiller"
and the unit will not operate until the unit has been.
drained.
First,uplugelectricalcordfrom wall outlet.Then,.drain
ex.cesswater fromthe tank by placinga pan underthe
d_ainvalve,removingthe drainpluq, and letting the
water drainintothe pan.
Whenthe water stops draining out, replacethe drain
plug,andremovethe pan of water, Operatethe air
conditioner in fan mode to drythe interiorof the unit.
Alwaysdrain the unit.before putting it intostoraqe.
Air Conditioner Remote Control
Batteries:Removethe cover on the backof the remote
controllerand insertthe batterieswiththe (+) and (-)
polespointinginthe properdirection,
Properuseand careof
your air conditioner will
help ensurelonger life of
the unit. it is
recommendedto have a
professionalannually
inspectand cleanthe coils
and condensatewater
passages.Expenseof
annua] inspectionisthe
consumer'sresponsibility.
Drain Valve
• UseonlyAJkAor IECR03 1.5V batteries,
, Do not attempt to rechargethe suppliedbatteries
=Atl batteries shoutd bereplacedat the same time.
• Do notdisposeof the batteriesin a fire asthey may
explode.
° Do not mix otdand new batteries.
• Do not installthe batteries with.the polarity (+/-)
reversed.
• Do notmix alkaline, standard (carbon- zinc), or
rechargeabte (nickel-cadmium)batteries.
• Keepbatteriesand other thingsthat couldbe
swallowed away from youngchildren.Contact a
doctor immediatelyif an objectisswallowed.
Page 10

How_o obtain WarrantyServiceor Parts
Servicefor your unit will be provided by CareCo0with
authorized independent CareCoservice_nationwide.
Note:Beforer.ailingfor service,carefullyreadthe installation
and Operatinginstructionsbooklet.
Then if you needservice':
1. Catla CareCoauthorizedservicerand advise them.of
model number, serialnumber,date of purchaseand
nature of complaint, Servicewill be providedduring
normal working.hours. Contact your dealer forlthe
name ofan auth_PizedseNicerif unknown_toyouL:=:_"
2, If your de'ater,isLinable to give you the name of a
service'r.or _f you need otherassistance,call the
following toll-tree number for the name of an_
authorizedservicerorauthorizedpartsdistributer:
1-800-332-6658
or yoa may write:
CareCo, Service Department
415 W. Wabash Ave., RO. Box 200
Effingham, iL 62401
Proof of Pur_chaseDate
Warranty
Full (Five Year) Parts and LaborWarranty
Duringthe five years after the date of original purchase,
FeddersNorthAmerica wiII, through itsauthorized servicers
andfree of chargeto the owner oranysubsequentuser,repair
or replace any parts which are defective in material or
workmanshipdueto normal usewhenthe unit is deliveredby
the owner to and pickedup from one of our authorized
servicers,if requested,in-homeservice,pick-up,redeltve_yand
reinstaltation will be provided, but are the owner's
responsibility.
Note:in the eventof anyrequiredpartsreplacementwithintheperiod
ofthis'warranty,FeddersNorthAmericareplacementpartsshaJlbeused
andwi]lbewarr_medonlyfor th6perJ'o_[remainingon the odginat
warranty.
Exceptions
The abovewarrantydoes_notcoverfaifure tofunction caused
by damageto the unit whilein your possession(other than
damagecausedby defector malfunction), or by its improper
instaliation,or by unreasonableuse of the unit, including
withoutlimitation,failureto provide reasonableand necessary
maintenance or to follow the written Installation and
Operating instructions.If the unit is put to commercial,
,business,rental or other_use,or application other than for
It ls the responsibility of the consumerto estab!ishthe _consumer: _se, we make no warranties,express or imptied,
originalpurchasedatefor warrantypurposes.W_er.ecommend including"_Ut not limited to, any impiied warranty of
that a bill of sale,canceUedcheck,or someotber=appropHate
paymentrecoirdbe keptfor that purpose.
Tolocateyour nearestServiceCehteF _al!800;.332-6658;
.Formodels installedin North America- If serv|oeorparts are
rdquired -
First,makethe _ecommendedchecks,if itappearsthat service
or partsare stillrequired,seeyourwarranty"How to Obtain
WarrantyServiceorParts",Pleasehavethe modelnumberand
serialnumberwith youwhen calling.
Formodelsinstalled outside_f North Axn_ica
For modelspurchasedfor use,._utsideNorth America,the
_anufacturer doesnot extend anywarranty eitherexpressed
or implied.Consultyour local dealerfor any warrantyterms
extendedbythe importer inyourcountry.
merchantabiJity orfLtness.for._pa_icutaruseor purpose.
THE :RE}_'_DIES"PR'OVID'I:DFOR IN THE ABOVE EXPRESS
WARRANTY ARE TH'ESOLEAND EXCLUSIVEREMEDIESAND NO
"bTH'ER,,EXPRE.S_WARRANTIES ARE MADE, ALL IMPLIED
WARRANTIES,IN_LUDINq::BUTNOT LIMITEDTO ANY IMPLIED
WARRANTY OF MERCHANTABILITY OR FITNESS FOR A
PARTICULARUSE OR PURPOSE,ARE LIMITEDINDURATION TO
FiVEYEARS FROM THE DATE OF ORIGINALPURCHASE.INNO
EVENTSHALL FEDDERS NORTH AMERICA B_ UABLE FOR
iNDIRECT,INCIDENTAL,ORCONSEQUENTIALDAMAGES,EVEN
IF ADVISED IN ADVANCE OF THE POSSIBILITYOF SUCH
DAMAGES.NOWARRANTIES,EXPRESSORiMPLIED,AREMADE
TO ANY BUYERUPONRESALE.
Somestatesdonot al]0wlimitations onhow long animplied
warranty lastsor do not allow the exclusionor limitationof
incidental or consequential damages,so the abovelimitations
or exclusionsmay not apply to you. Thiswarranty givesyou
specificlegal rights, andyou mayalsohaveother rightswhich
mayvaryfrom stateto _ate.
No warrantiesare made for unitssold outsideof the above
stated areas. Your distributoror final seller may provide a
warrantyon unitssold outsideofthese areas.
 Loading...