

Page 1
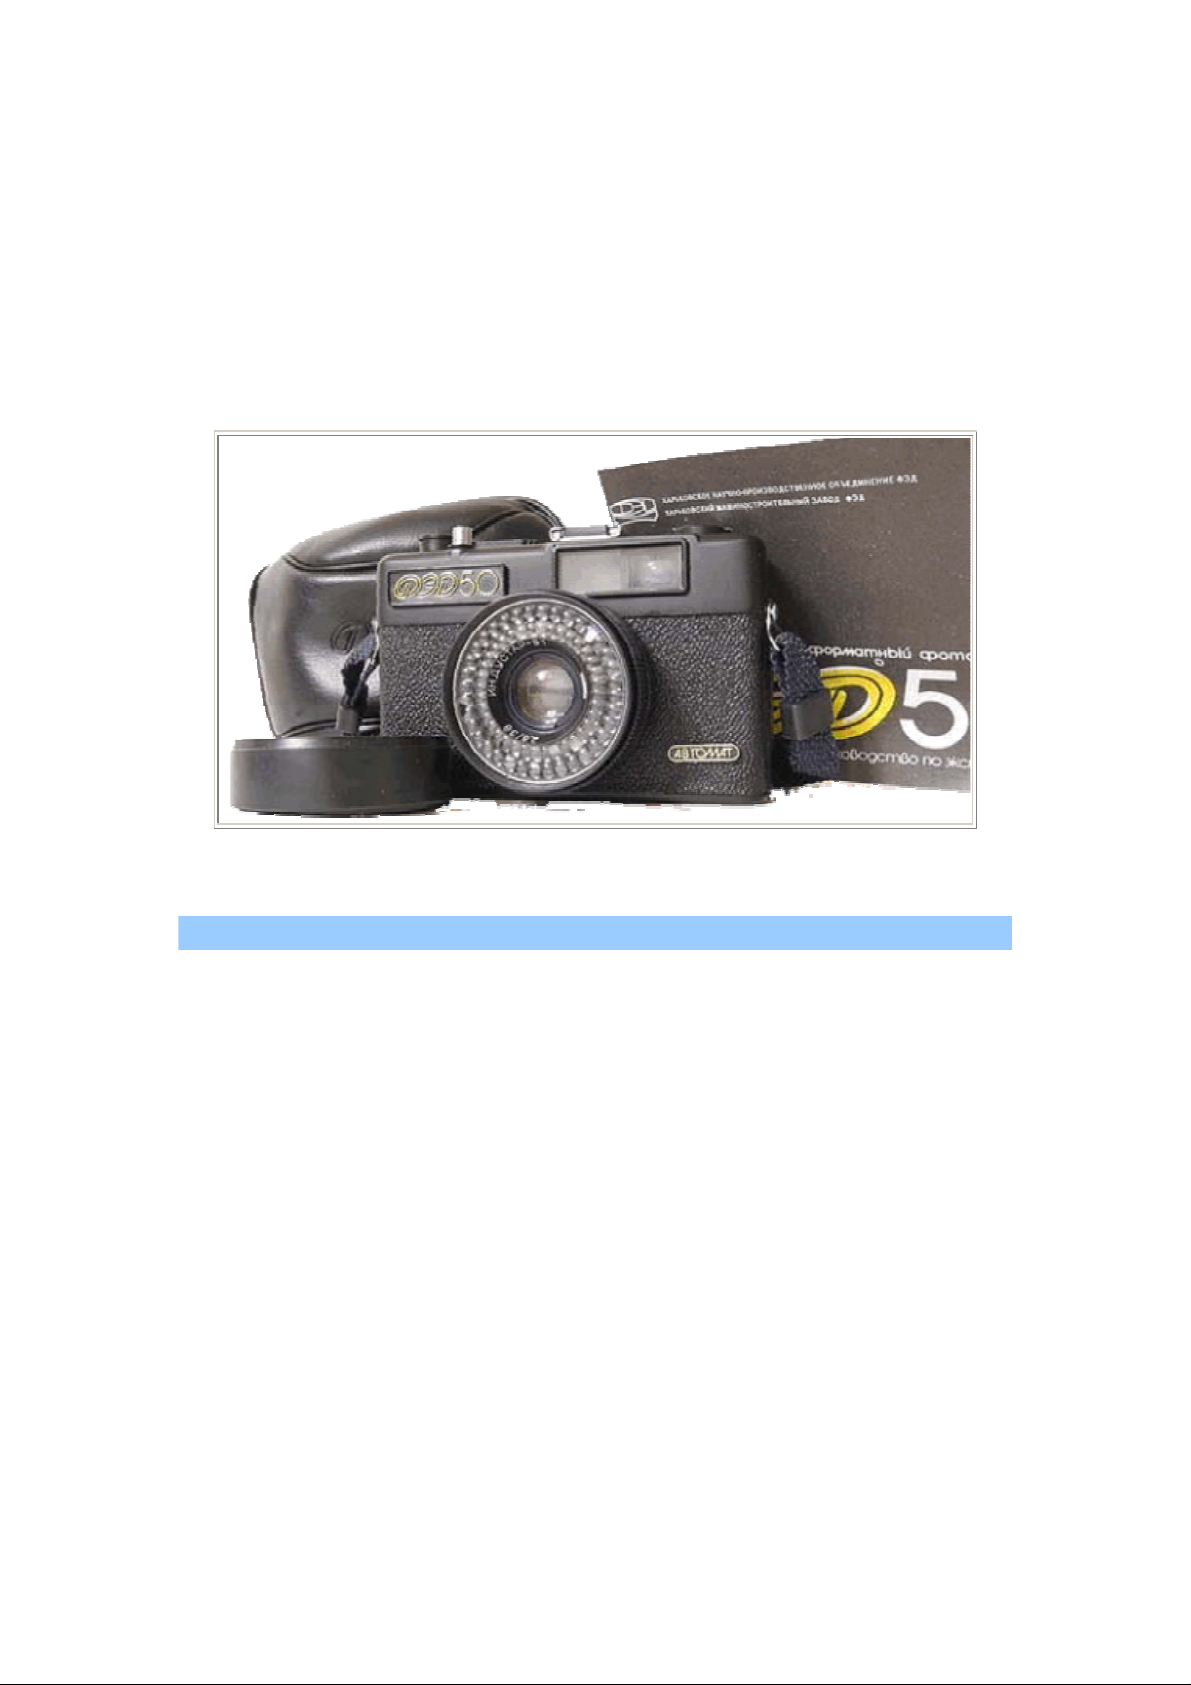
FED 50
Automatic miniature Rangefinder 35mm camera
Instructions for use
Since efforts are continually made to improve the reliability and performance of
the product, minor changes may be Introduced without special notice.
1. GENERAL DIRECTIONS
The FED 50 is a modern miniature camera intended for amateur
shooting on standard black-and-white and colour perforated film 35 mm
wide. The camera operates in the automatic and manual control modes.
In the field of vision of the view finder the information is available on the
shutter speed and diaphragm processed in the automatic mode. For
accurate framing of a picture the lighted frame provided with the marks
for parallax correction is available. The camera is furnished with a selfreset picture counter. The interlocking of a release button in the
automatic mode in the event of insufficient lighting as well as the
interlocking of the shutter cocking (which prevents the repeated or
incomplete cocking) are envisaged by the design of the camera.
The automatic system of the camera operates from a photocell which is
designed for long-term use. The replaceable power supply sources are
not required. Thoroughly familiarize yourself with the present
instructions before using the camera. The observance of all
recommendations set forth in the instructions will ensure the reliable
operation of the camera for many years.
Page 2

© Vneshlorgizitat, 1992
2. SPECIFICATIONS
Picture size, mm....................... 24 x36
Quantity of pictures...................., 36
Photographic lens INDUSTAR-81:
focal length, mm..................... 3839x1 mm
relative aperture..................... 1:2.8
focusing range, m.................... from 1 to oo(infinity)
Coupling dimensions, mm:
for plain attachments.................. Ø48
for threaded attachments ............... M46x0.75
Shutter ............................ aperture-type, behind-the-Iens
Automatic mode:
exposure, s........................ from 1/30 to 1/650
diaphragm........................ from 1: 2.8 to 1:14
Manual control mode:
exposure, s........................ 1/30 and «B» (by hand)
diaphragm........................ from 1: 2.8 to 1 :16
View finder.......................... optical, with cutting frame
Synchronization with frash lamp............. «X»-contact
Tripod thread ........................ 1/4"
Camera mass, kg, not over................. 0.49
3. DELIVERY SET
Page 3

Camera..................................................................................................1
Shoulder strap .......................................................................................1
Magazine................................................................................................1
Lens protective cap.................................................................................1
Flash lamp clip stopper...........................................................................1
Lens hood ..............................................................................................1
.......................................................................................................1
Case
Shoulder strPacking box ....................................................................... 1
Instructions for Use............................................................................... 1
4. DESIGN
Page 4
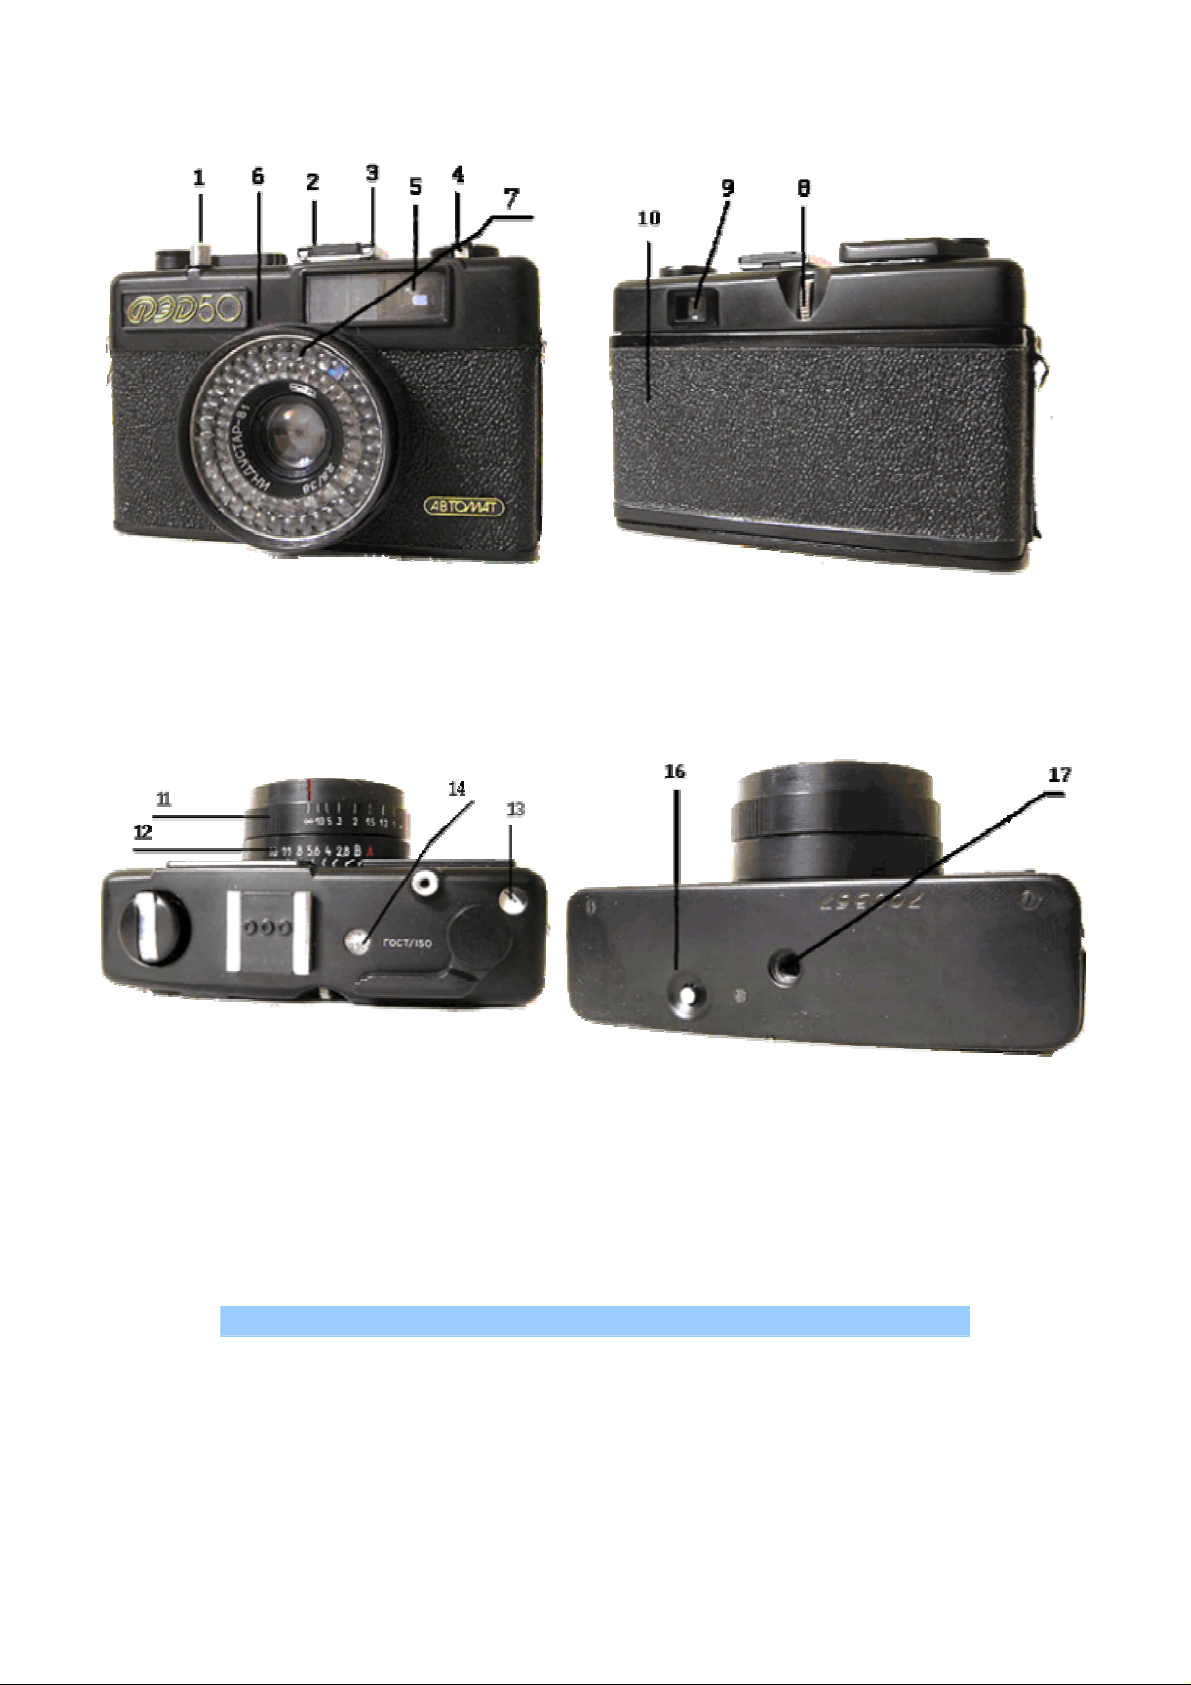
Fig. 1:
1 — release button; 2 — clip stopper; 3 —
clip; 4 — rewinding knob; 5 - view finder
aperture; 6 — operation mode Index; 7 —
photocell embossing
11 — distance limb; 12 — operation mode
limb; 13 — picture counter aperture; 14 —
film sensitivity scale aperture; 15 — shutter
cocking
lever
Fig. 2 :
8 - film sensitivity setting disk; 9 - view finder
eyepiece; 10 - rear cover
16 — rewinding button; 17 — tripod thread
5. PREPARATION FOR OPERATION
Page 5
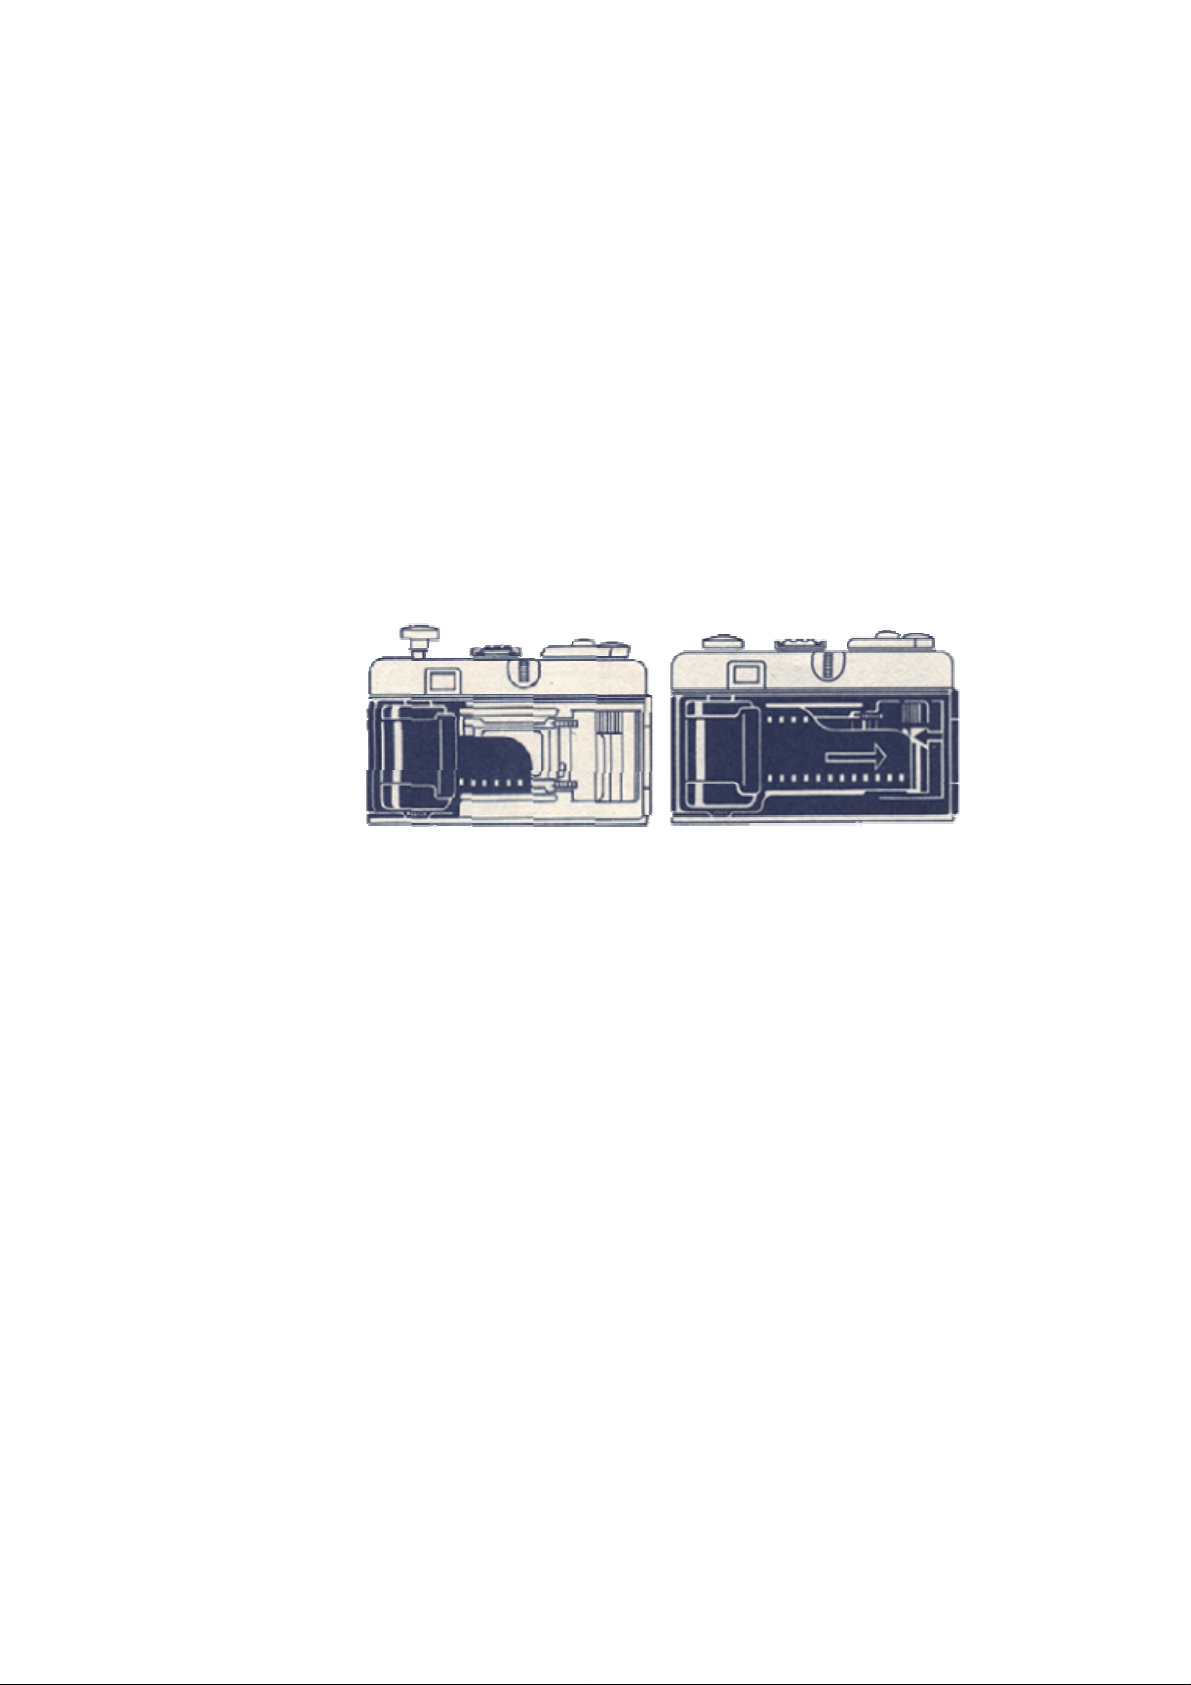
Remove the
camera
from the
case. Pull
up the
rewinding
knob until
the opening
of a rear
cover
occurs.
Load the
camera
with the
magazine
with the
film and
lower the
rewinding
knob (Fig.
5). Insert
the
threading
end of the
film under
the spring
of the takeup sleeve
and, while
rotating the
sleeve
taking its
knurled
part by
hand or
turning the
cocking
lever, pull
up the film
so that its
perforation
holes would
get onto the
teeth of
both rims of
the
transport
drum (Fig.
6). Close
the rear
Fig. 5
Fig. 6
Page 6

cover until
g
g
g
y
the click is
heard
.
For
convenience
in use the
shutter
cocking
lever has
two
positions: a
working
position
and a
transport
position. In
the workin
position the
lever end
protrudes
beyond the
camera
shield. To
shift the
lever from
the workin
position to
the
transport
one, it is
sufficient to
press on its
protruding
end (Fig. 7)
by applying
a small
force
.
To rewind the light-struck part
of the film and to set the picture
counter to the readin
the shutter several times,
pressing on the release button
(Fig. 7) each time. In this case
the operation mode indicator
limb must be set to an
except the position «A», since
under conditions of insufficient
lighting or in the event of the
closed cap on the photographic
«1», cock
position,
Fig. 7
Page 7
lens the release button will be
y
g
j
interlocked (Fig.. 8). When
using the film with the speed
expressed in the units of COST,
set the nearest value of theunit
of GOST/ISO specified in
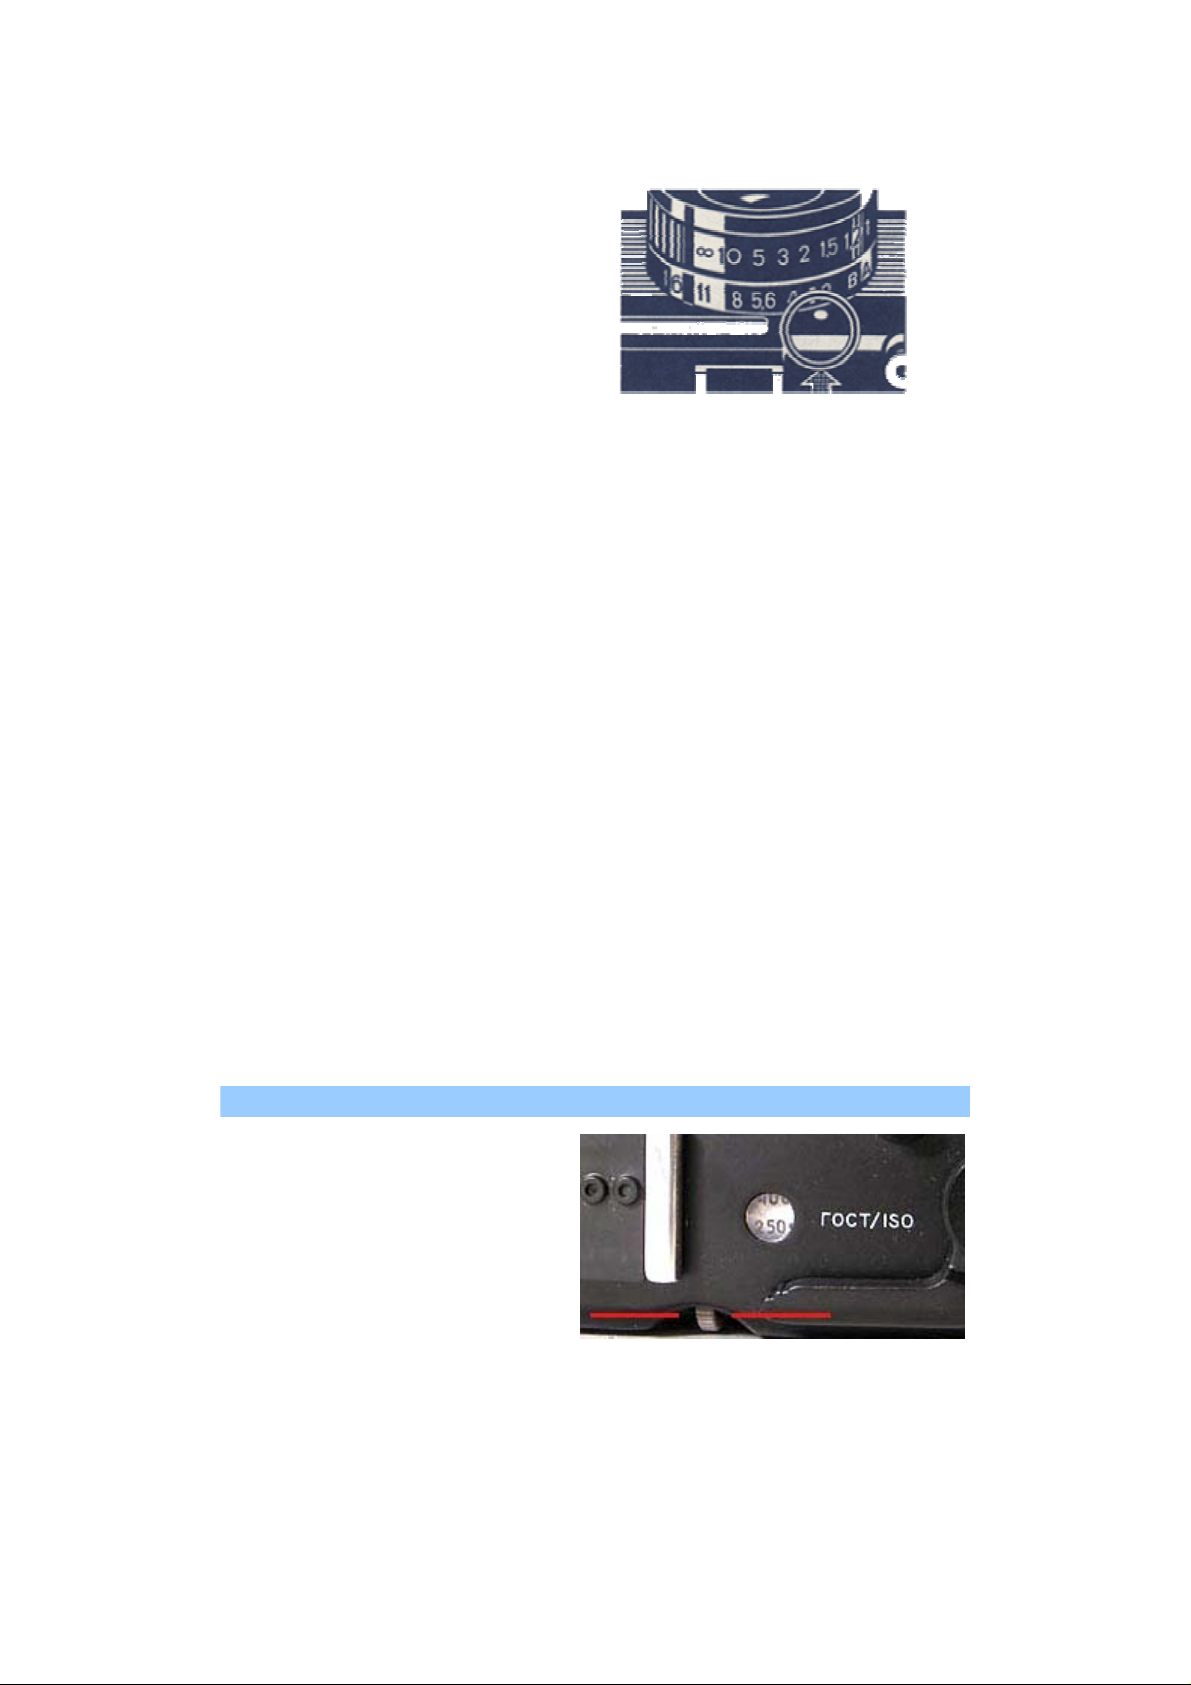
theTable. Set the film sensitivit
whose value is seen in the
aperture (Fig. 9) by rotating the
disk. The ratio of the speeds of a
used photo
of the marking on the camera
scale is specified in the Table.
raphic material and
Fig. 8
Speed of used
photographic
material in
the unite of
GOST/ISO
16; 20 16 * 13;14 13*
25 25 15 15
32; 40 32* 16;17 16*
50 50 18 18
64;80 64* 19;20 19*
100 100 21 21
125;160 125* 22;23 22*
200 200 24 24
250;320 250* 25;26 25*
400 400 27 27
6. OPERATING PROCEDURE
Marking on
scale
Speed of used
photographic
material In
the units of DIN
Marking on
scale
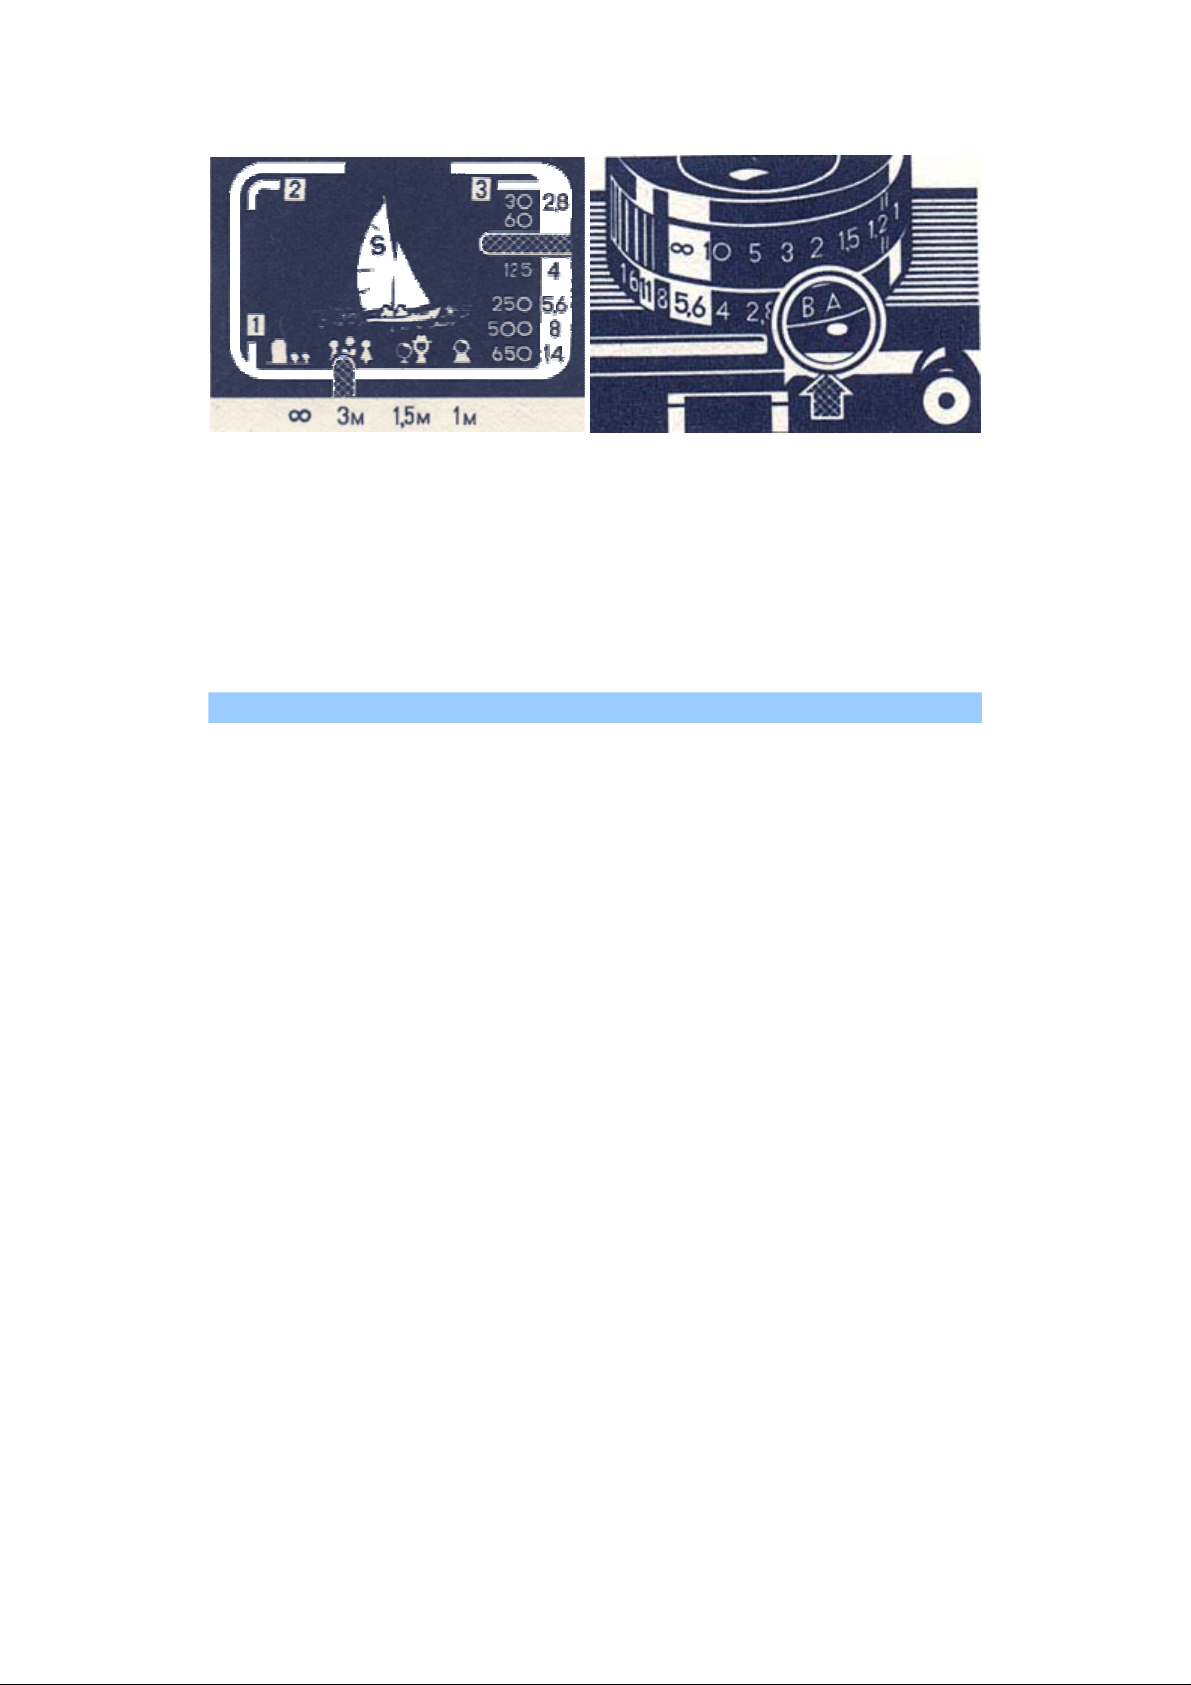
Choose an object for shooting by
observing through the eyepiece
the picture boundaries,
designated by the lighted cutting
frame. When the ob
at a distance of 1—2 m, the upper
and side boundaries of a picture
are determined by parallax
correction marks 1,2,3 (Fig. 10).
ect is located
Fig. 9
Page 8
g
g
Fig. 10
Match the pointer in the lower part of the view finder field with the
required symbols (Fig. 10) by rotating the distance limb or set the required
distance on the distance scale.
7.AUTOMATIC MODE
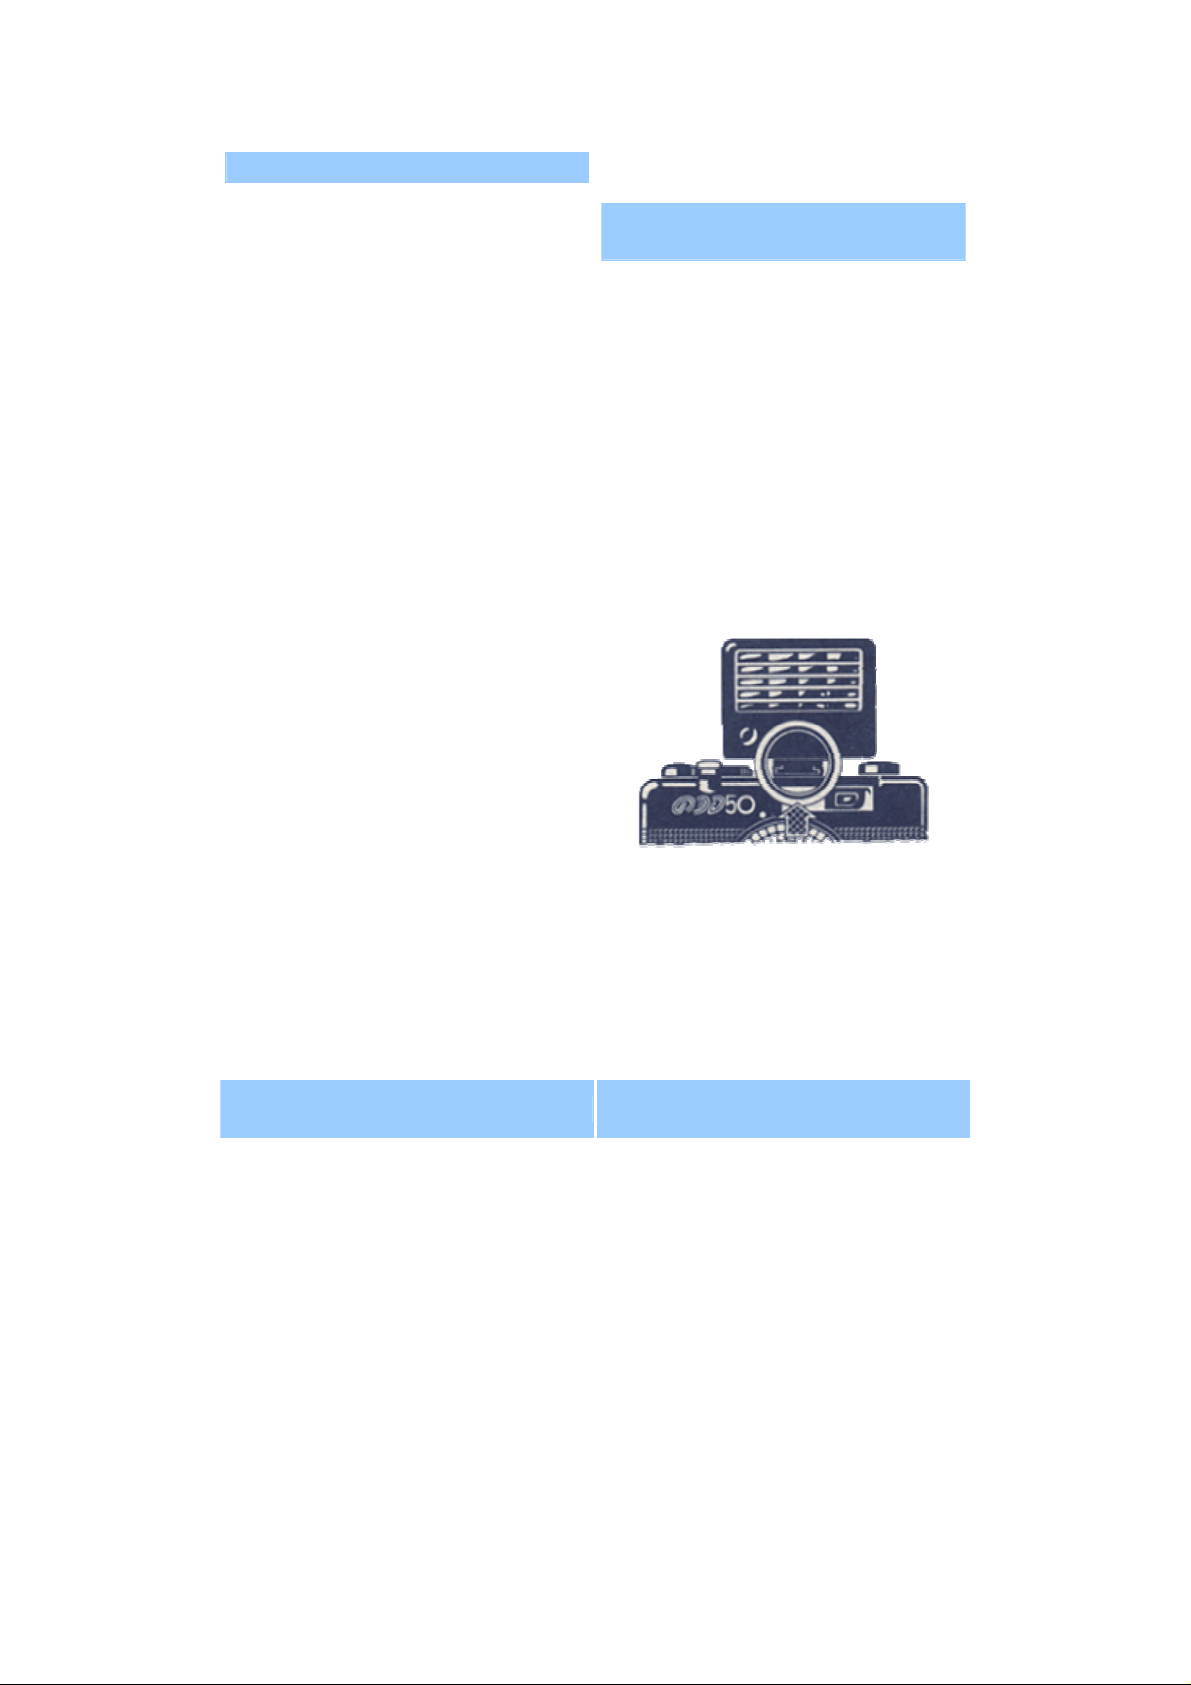
Set the operation mode limb to the position «A» (Fig. 11).
Smoothly press on the release button, the camera automatic system will
ensure the setting of the required exposure and the pointer will read the
tentative value of a shutter speed and a diaphra
the right-hand part of the field of vision of the view finder. When the
necessity arises to preliminarily (without exposing a frame) estimate the
exposure value, sli
combination of a shutter speed and a diaphragm. Important! In the event of
insufficient lighting the shutter will not operate and the pointer will be set
htly press on the release button, the pointer will read the
above the number series of diaphragms.
Fig. 11
m. The pointer is located in
Page 9
8.MANUAL CONTROL MODE
g
Set the diaphragm and operation
mode indicator limb to any
position, except the position «A».
When the limb is set opposite the
readings «2.8», «4», etc., the preset
shutter speed is 1/30 s and the
diaphra
preset reading. When the operation
mode limb is set to the position «B»,
the shutter speed is controlled by
hand, i. e. the shutter is kept opened
until the release button is
depressed. The minor protrusion of
blades does not affect the shutter
operation in the position «B». In
this case the diaphragm «2.8» is
used.
m value corresponds to the
9.SHOOTING WITH FLASH
LAMP
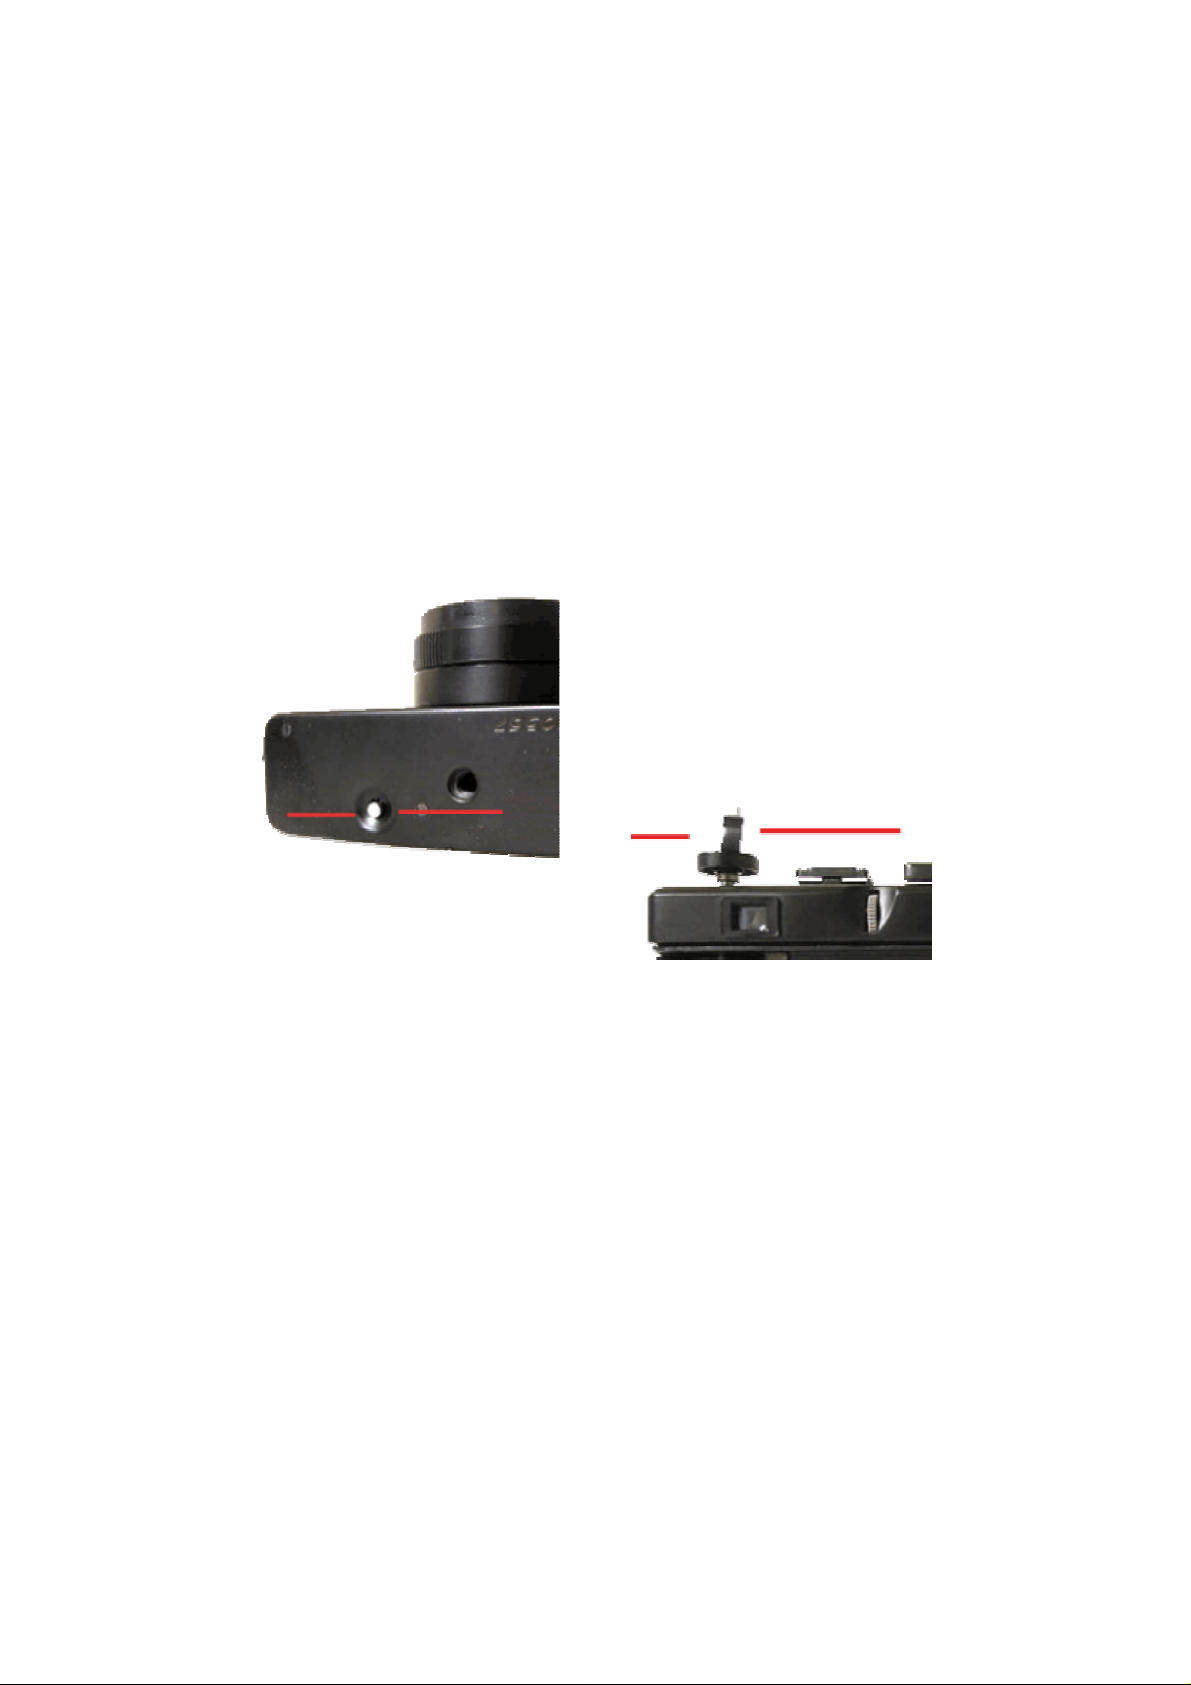
Remove the stopper from the clip of
e
th
camera (ref. to Fig, 1)- Insert the
electronic flash lamp into the clip
(Fig. 12). Use the special adapter in
operation with the
flash lamps provided with the cable
connection.The detailed description
of operation with the electronic
flash lamp is given in its Operating
Instructions
.
10.SHOOTING END
PECULIARITIES
Fig.12
11.OPERATION
Page 10
When the picture counter reads 36
pictures, press on the rewinding
button, which releases the film
transport mechanism (Fig. 13).
Unfold the handle on the rewinding
knob, rewind the film into the
magazine (Fig. 14). Open the rear
cover by pulling up the rewinding
knob, remove the magazine with
the film. The film transport
mechanism will be engaged
automatically upon the first
cocking of the shutter.
Load and unload the camera in the
premises or in the shadow,
avoiding the direct solar rays.
Shift the cocking lever as far as it
will go. Otherwise the lever fails to
return to the initial position,
indicating that the shutter has not
been cocked.
The rotation of the rewinding knob
upon cocking the shutter is
indicative of the fact that the film is
pulled normally. When shooting in
the automatic mode, the used filter
factor is taken into account
automatically.
While shooting, avoid getting of
direct rays from powerful light
sources to the photocell — this can
result in the errors in operation of
the automatic system.
Fig.13
The system of measurement and
setting the exposure in the
automatic mode is designed for the
most frequently occurring average
conditions of lighting of objects to
be photographed. In some cases it
is required to increase or decrease
the exposure. This is attained by
varying the preset film speed
relative to the speed of a loaded
film. First of all the correction of
exposure is recommended in
shooting on the reversible films.
The setting of the lesser value of
speed corresponds to the increase
in exposure and vice versa. For
example, in shooting on the
reversible film in the cases when an
object is located opposite a light
source, on the background of
Fig.14
Page 11

bright snow or on the sea coast in
sunny weather you are to set the
film speed equal to 40 or 50 units
by GOST/ISO instead of the film
speed equal to 64 units by
GOST/ISO. In the cases when a
light object is located on the dark
background, the value of preset
film speed is to be increased, e. g.,
set the film speed equal to 100—
125 units by GOST/ISO instead of
the film speed equal to 64 units by
GOST/ISO.
STORAGE RULES
The camera is a precise optical-and-mechanical device. Handle the
camera with care, keep it clean, protect from impacts, dust, dampness
and abrupt changes of temperatures, avoid the long-time effect of direct
solar rays on the photocell. Store the camera in the case. In doing so, the
photographic lens must be covered by a cap. Do not leave the camera for
a long time with its shutter cocked.
Page 12
APPENDIX
RULES OF LOADING THE MAGAZINE WITH A FILM
The camera is completed with the magazine type 135M intended
for repeated application.
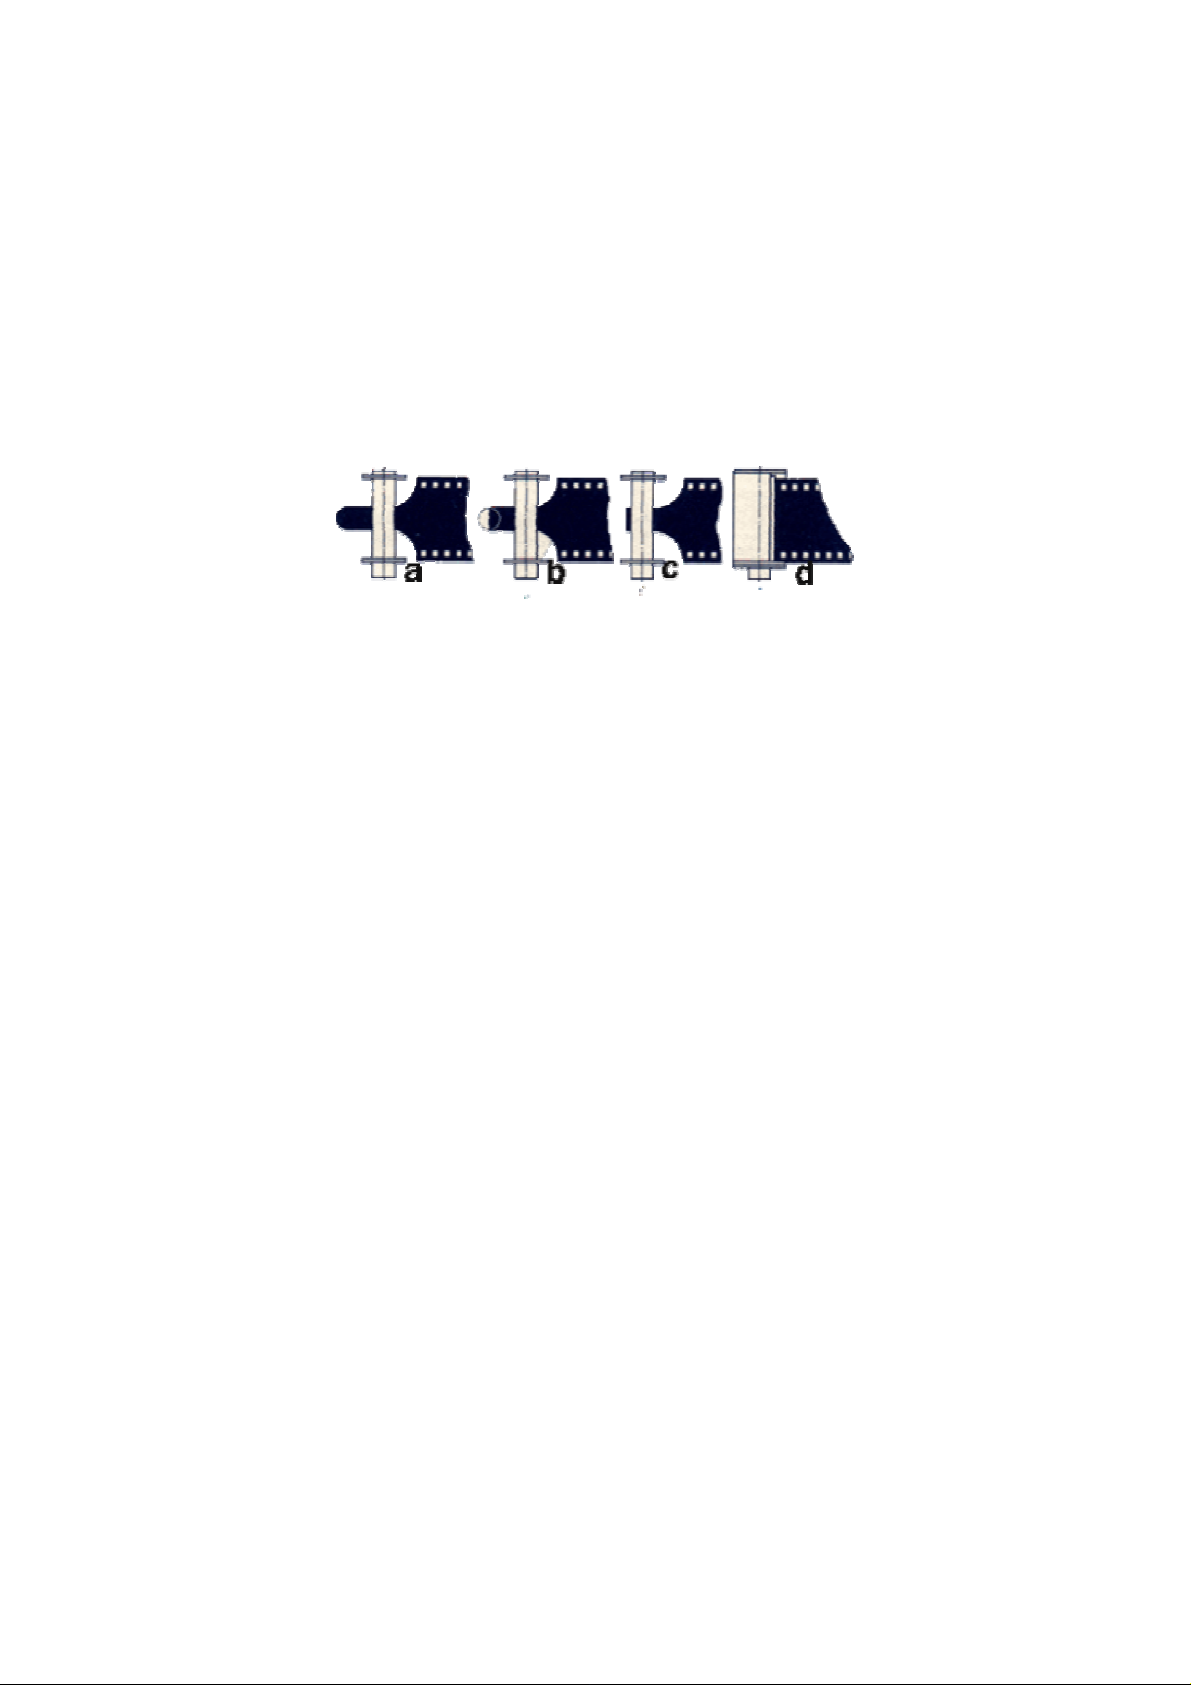
Take the reel out of the magazine and insert the film end into
the reel slot as shown in Fig. 15, a. Fold the free end of the film
twice according to Fig. 15, b and, pressing it by the thumb of the
left hand, pull the film out of the reel with your right hand. In
this case the
Fig 15
folded end of the film should pass into the reel slot
Pull the film so long as it will be fixed (Fig. 15, c).
Load the reel with the wound film into the
magazine. In this case the film end should enter
the slot of the magazine housing (Fig. 15, d).
Reload the magazine in the reverse order. To
avoid the film fault it is necessary to clean
the packing piece of the magazine removing the
dust and emulsion re ains from the film.m
 Loading...