

Page 1
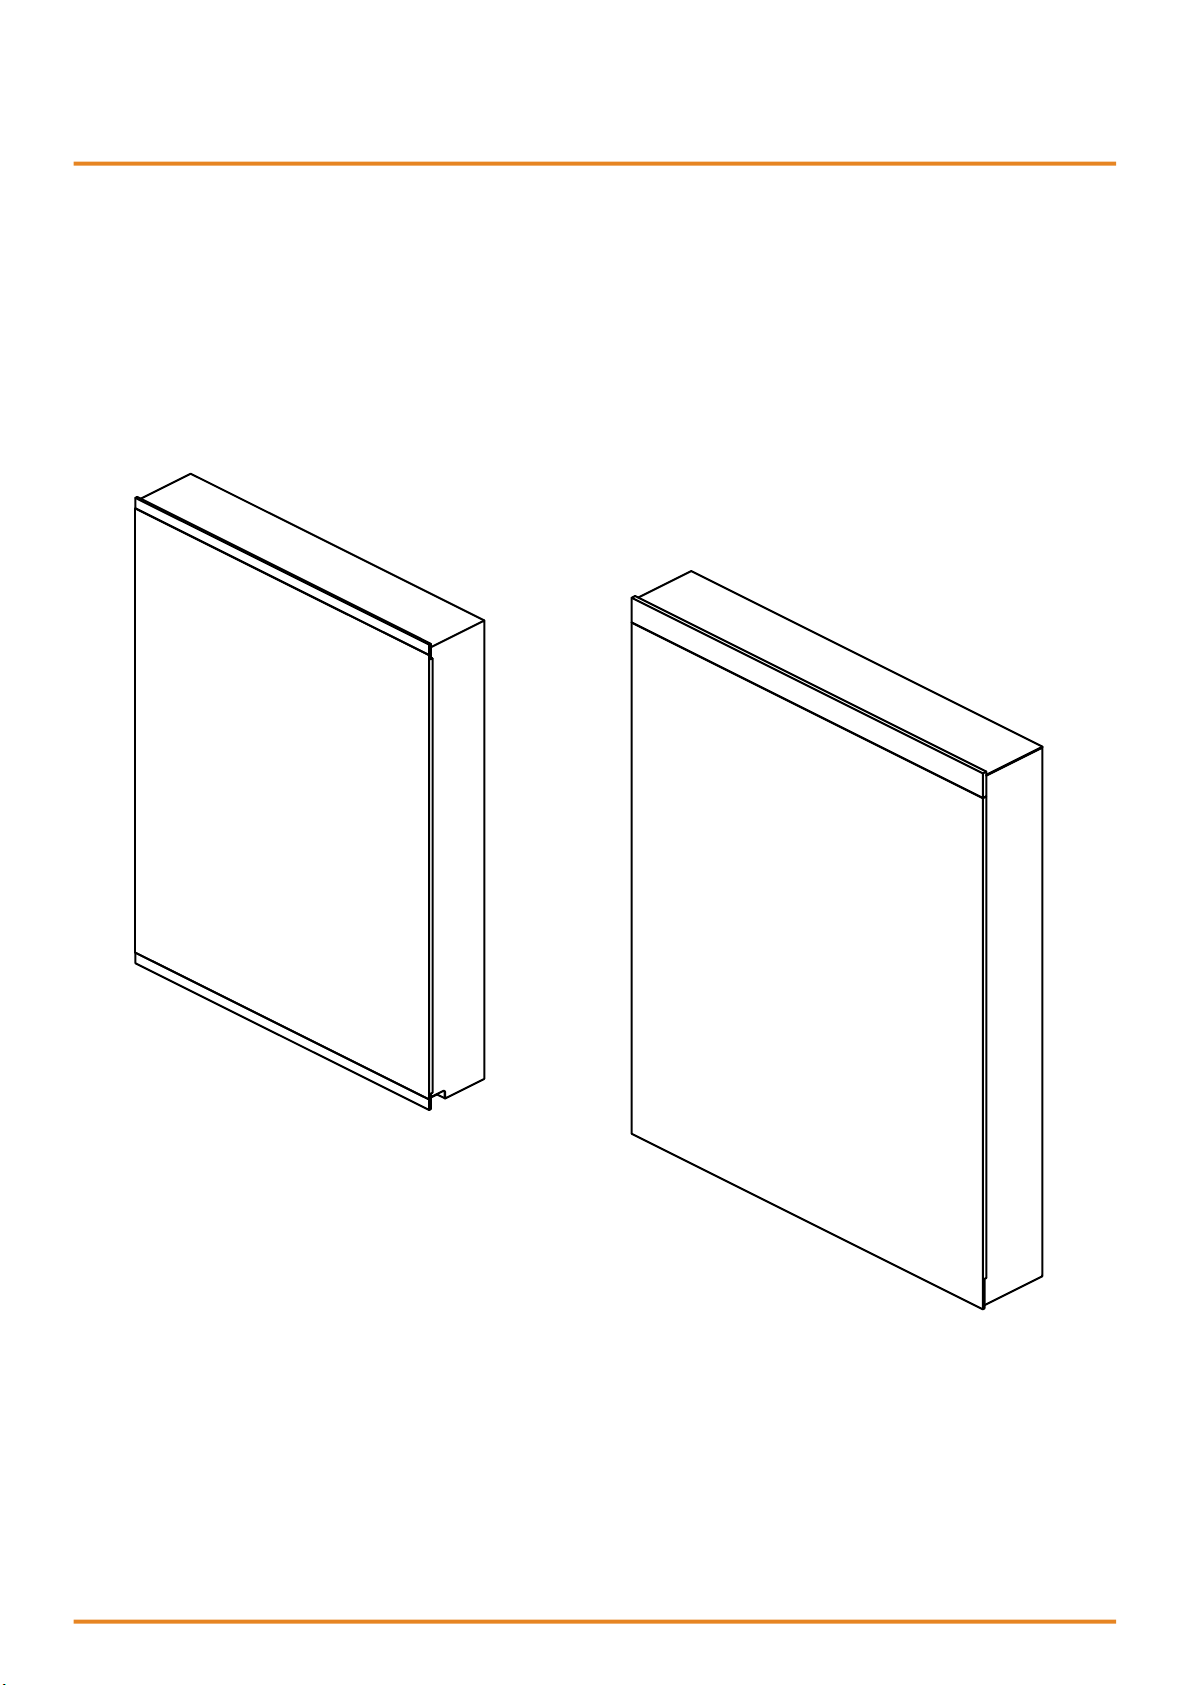
LED Lighted Medicine Cabin
Installation and Operating Manual
et
Page 2
LED Lighted Medicine Cabin et
INSTALLATION INSTRUCTIONS
BEFORE YOU BEGIN
Please read these instructions carefully to familiarize yourself with the required tools, materials,
and installation sequences. Follow the sections that pertain to your particular installation. This
will help you avoid costly mistakes. In addition to proper installation, read all operating and
safety instructions.
All information in these instructions is based upon the latest product information available at the
time of publication. J Sing LLC reserves the right to make changes in product characteristics,
packaging, or availability at any time without notice.
These instructions contain important care, cleaning, and warranty information please leave
instructions for the consumer.
Before installation carefully inspect the new fixture for any signs of damage.
WARNING: Risk of injury or product
damage. Be careful when opening the
door to avoid pinching fingers.
CAUTION: Risk of electric shock.
Electrical wiring may need to be
relocated.
Important Information: This cabinet is
designed for either right or left door
swing. Check the wall cavity for
obstructions.
WARNING: Don't use acidic or alkalic
cleaners or alcohol to clean the surface.
Use a dampened cloth to clean.
CAUTION: Risk of property damage.
Use anchors (not provided) rated for the
loaded weight of this product. Refer to
the anchor manufacturer's instructions.
Grounding Instructions
This product should be grounded. In the event of an electrical short circuit, grounding reduces
the risk of electric shock by providing an escape wire for the electric current.
WARNING: Risk of electric shock. Improper use of the grounding plug can result in a risk of
electric shock.
If repair or replacement of the cord is necessary, do not connect the grounding wire to either flat
blade terminal. The wire with insulation having an outer surface that is green with or without
yellow stripes is the grounding wire.
Check with a qualified electrician or service personnel if the grounding instructions are not
completely understood, or if in doubt as to whether the product is properly grounded.
This product is factory equipped with a specific electric cord. If the product must be
reconnected for use on a different type of electric circuit, the connection should be made by
qualified service personnel.
Page 3
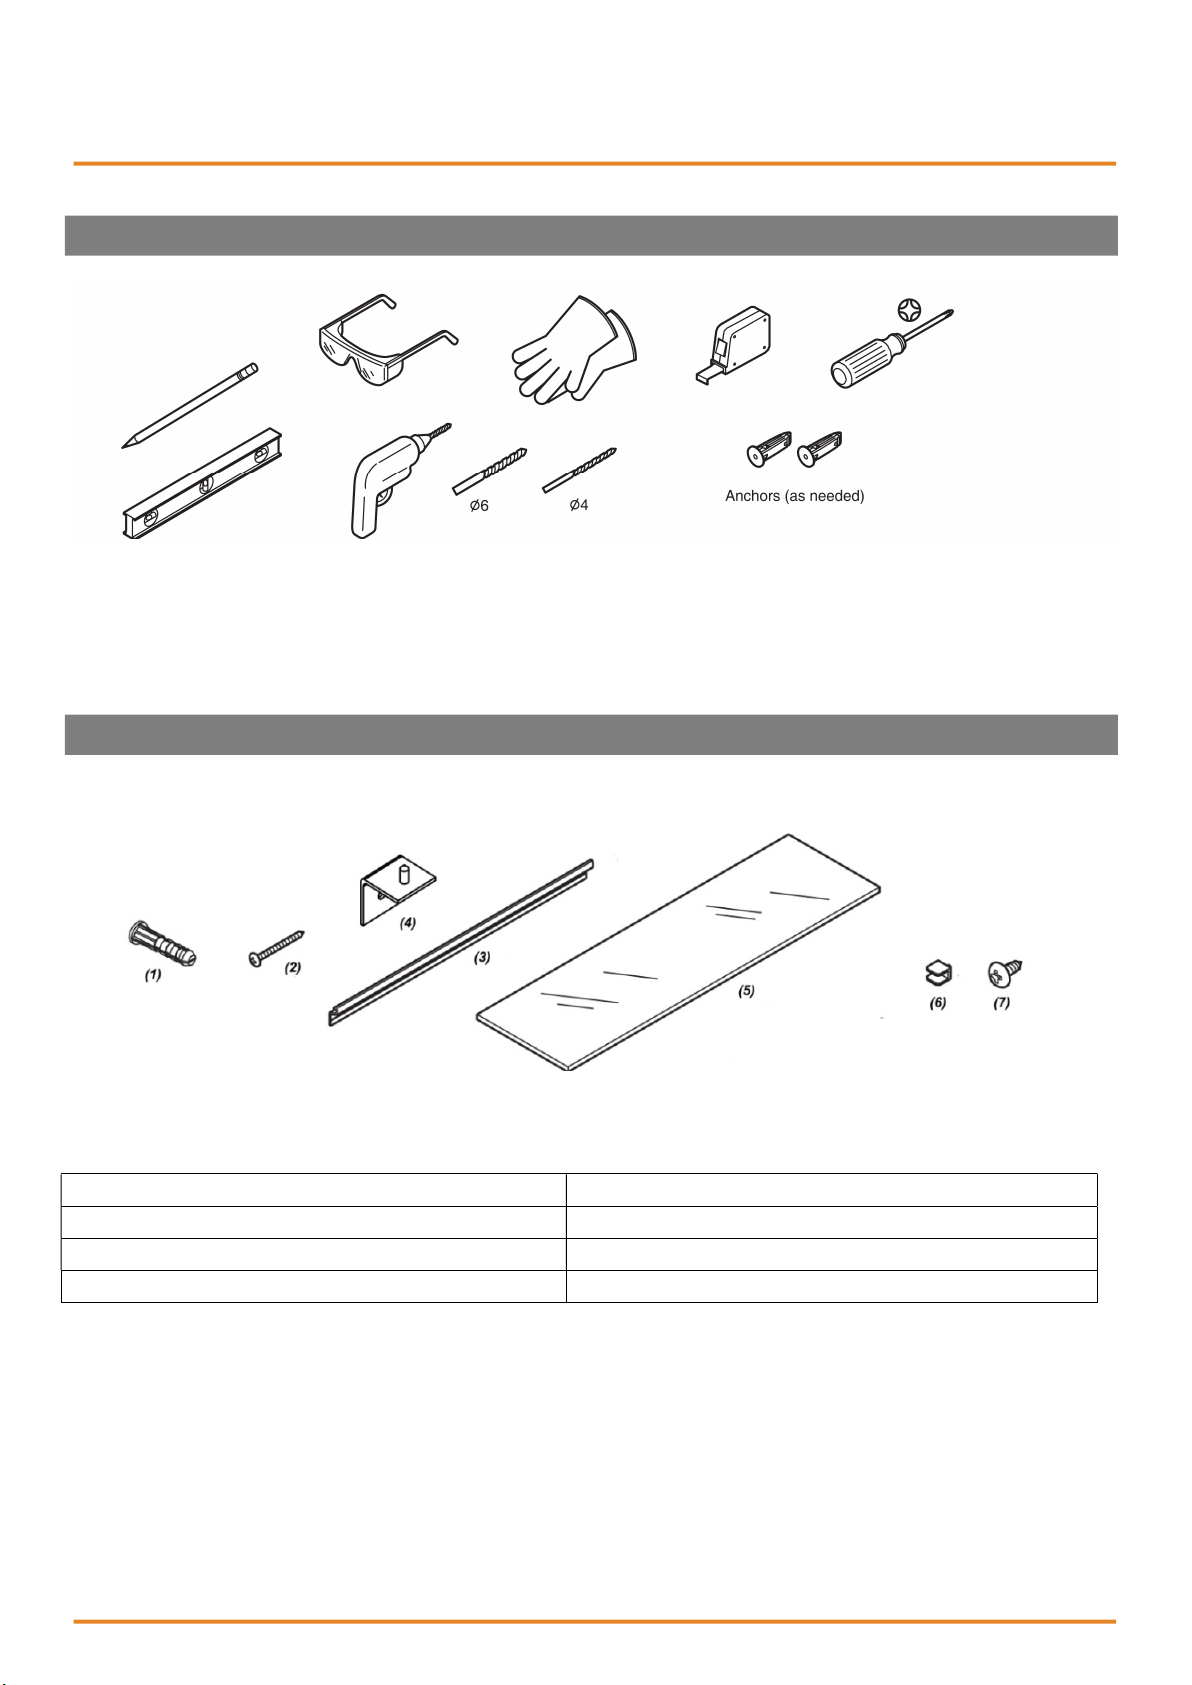
TOOLS REQUIRED
LED Lighted Medicine Cabin et
PARTS SUPPLIED
Item (1) Anchors x 6PCS
(2) Screws for wall
(4) Support Angle x 2PCE (5) Glass panel
(6) Clips
x 4PCS
8PCS x
(3) Mounting Bar
(7) Screws for Support Angle
x 1PCE
x 2PCS
x 2PCS
Page 4
LED Lighted Medicine Cabin et
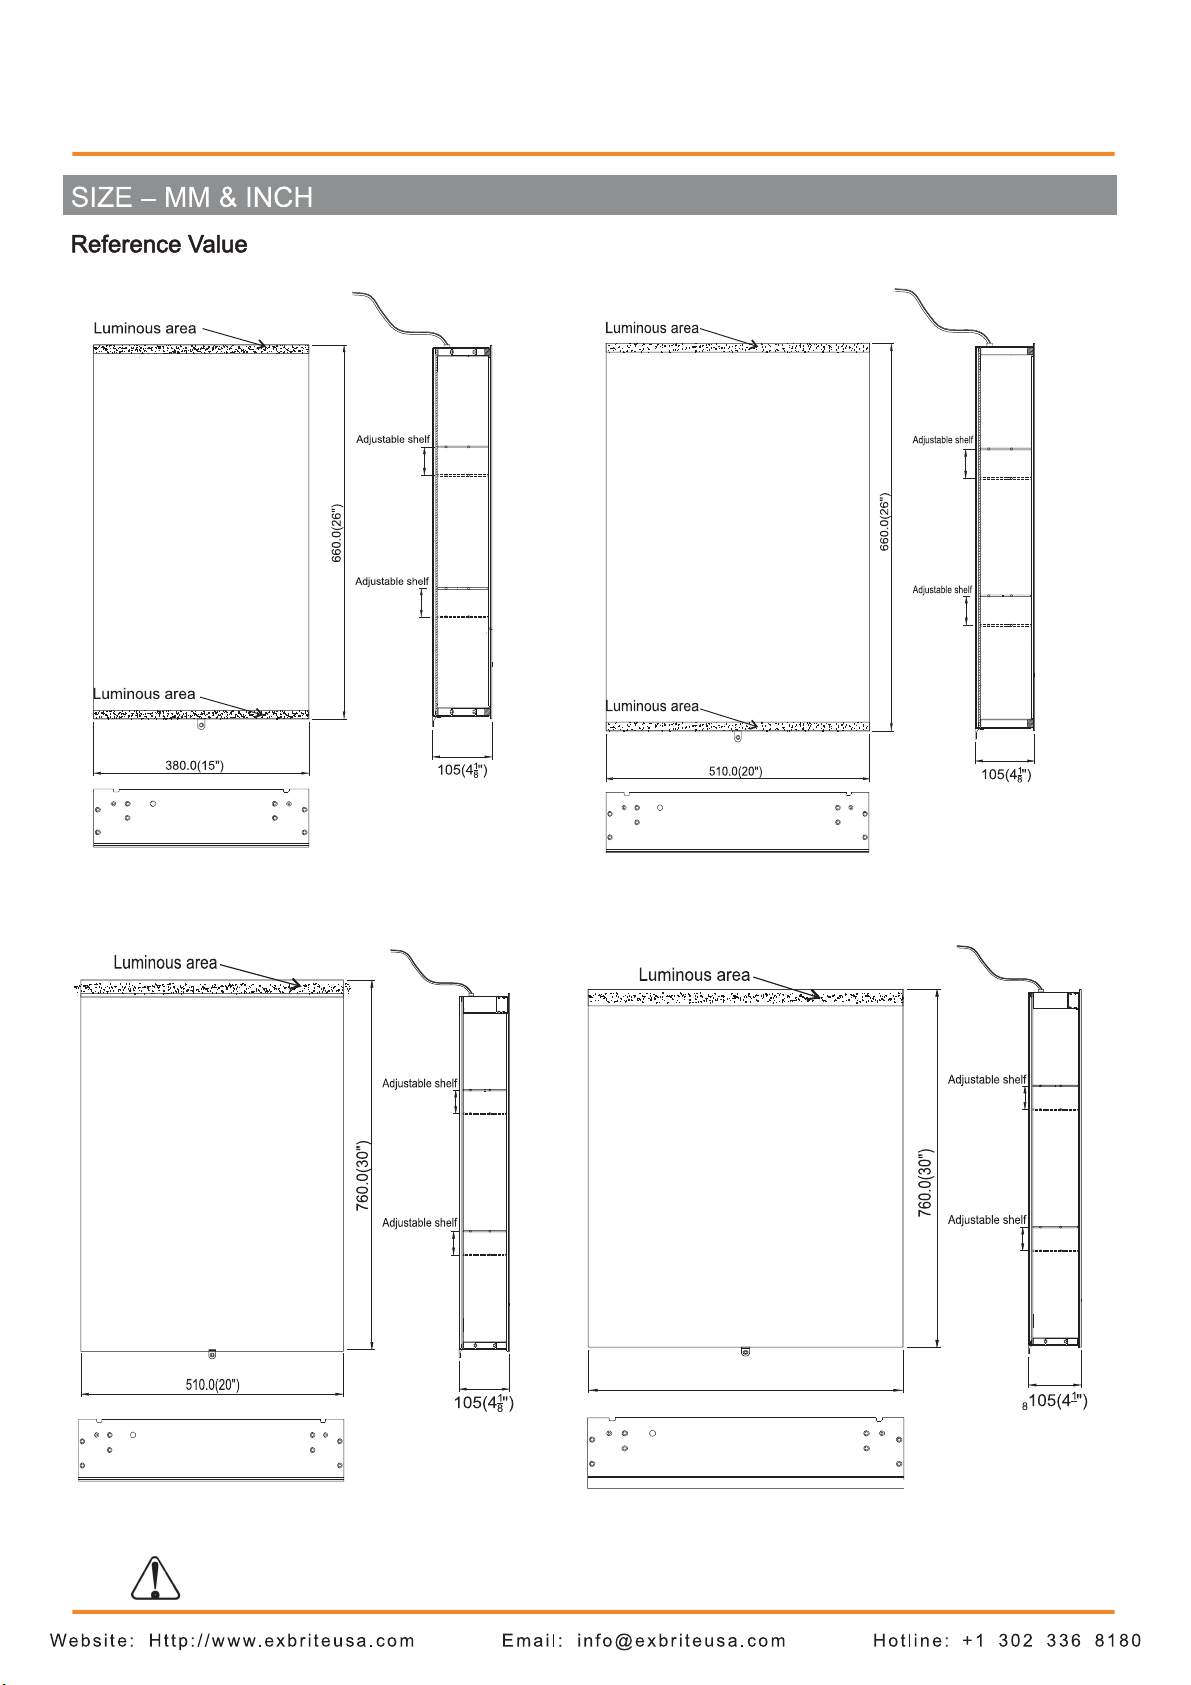
DHJSMC1526SKSXLDX
DHJSMC2026SKSXLDX
DHJSMC2030SKSXLDX
DHJSMC2030SKSXRDX
DHJSMC2430SKSXLDX
DHJSMC2430SKSXRDX
610.0(24")
ExBrite reserves the right to change marked dimensions without prior notice.
Page 5
LED Lighted Medicine Cabin et
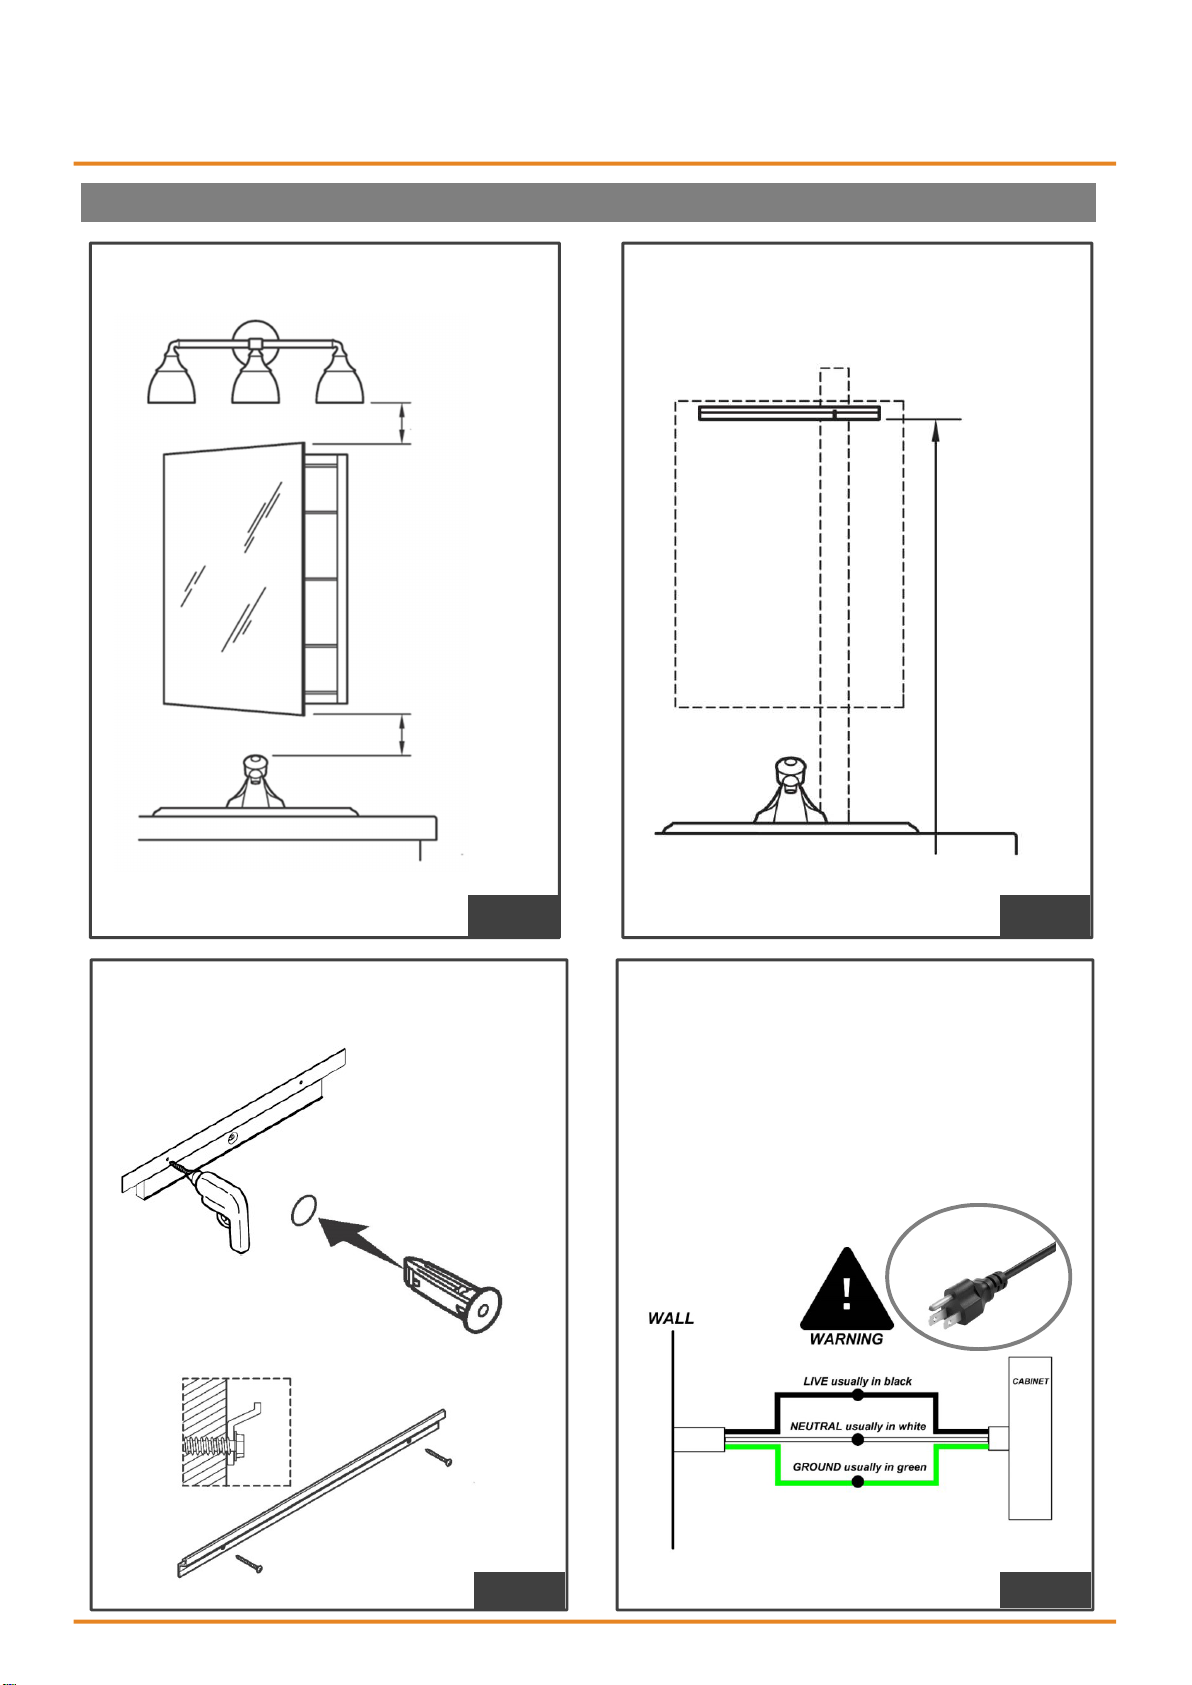
INSTALLATION for
Verify minimum clearances.
DHJSMC1526SKSXLDX and DHJSMC2026SKSXLDX
Place the Mounting Bar on wall and make
sure it is horizontal by level.
3
"
3
"
Suggest
"
75
to floor
STEP 1
Drill holes. Insert anchors where needed.
Secure the mounting bar with screws.
STEP 2
We provide plug along with cabinet.
Optional to cut the plug directly and connect
to electrical wiring if using a wall switch.
STEP 3
Webs i te : Htt p: //ww w.ex br it eusa . co m Em ai l: info @ ex brit e us a.co m Ho t li ne: +1 302 33 6 8180
STEP 4
Page 6
LED Lighted Medicine Cabin et
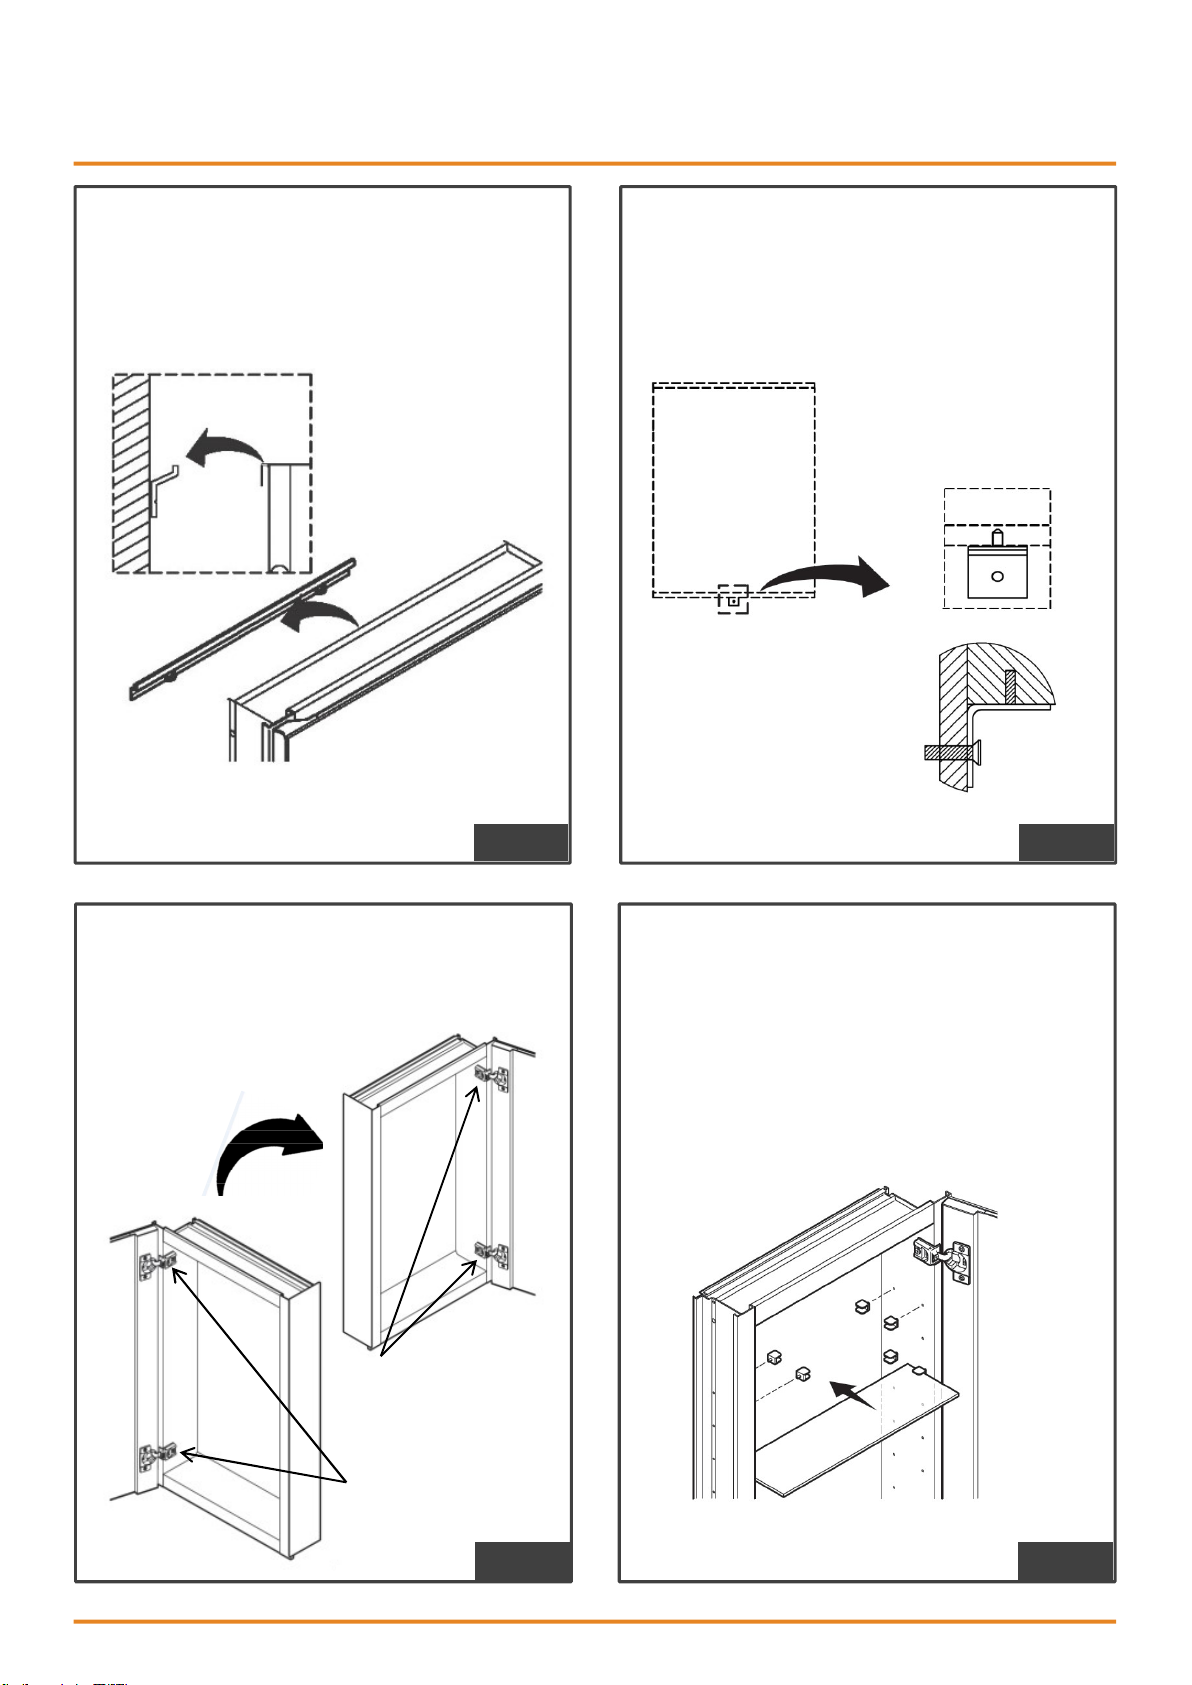
Lift the cabinet onto the mounting bar.
Ensure the hooks engage the mounting bar.
Place the support angle on the bottom of
the cabinet. Mark hole location on wall.
Drill hole. Insert anchor where needed.
Fixed the support angle by screw.
STEP 5
If the door is left open, it can be changed to
right open by releasing the hinge and rotate
the door, and vice versa.
Rotate the door
Secure hinges by scr ews
STEP 6
Install the clips. Insert the shelves between
the clips.
Loose screws to
release hinges
STEP 7
STEP 8
Page 7
LED Lighted Med
icine Cabin et
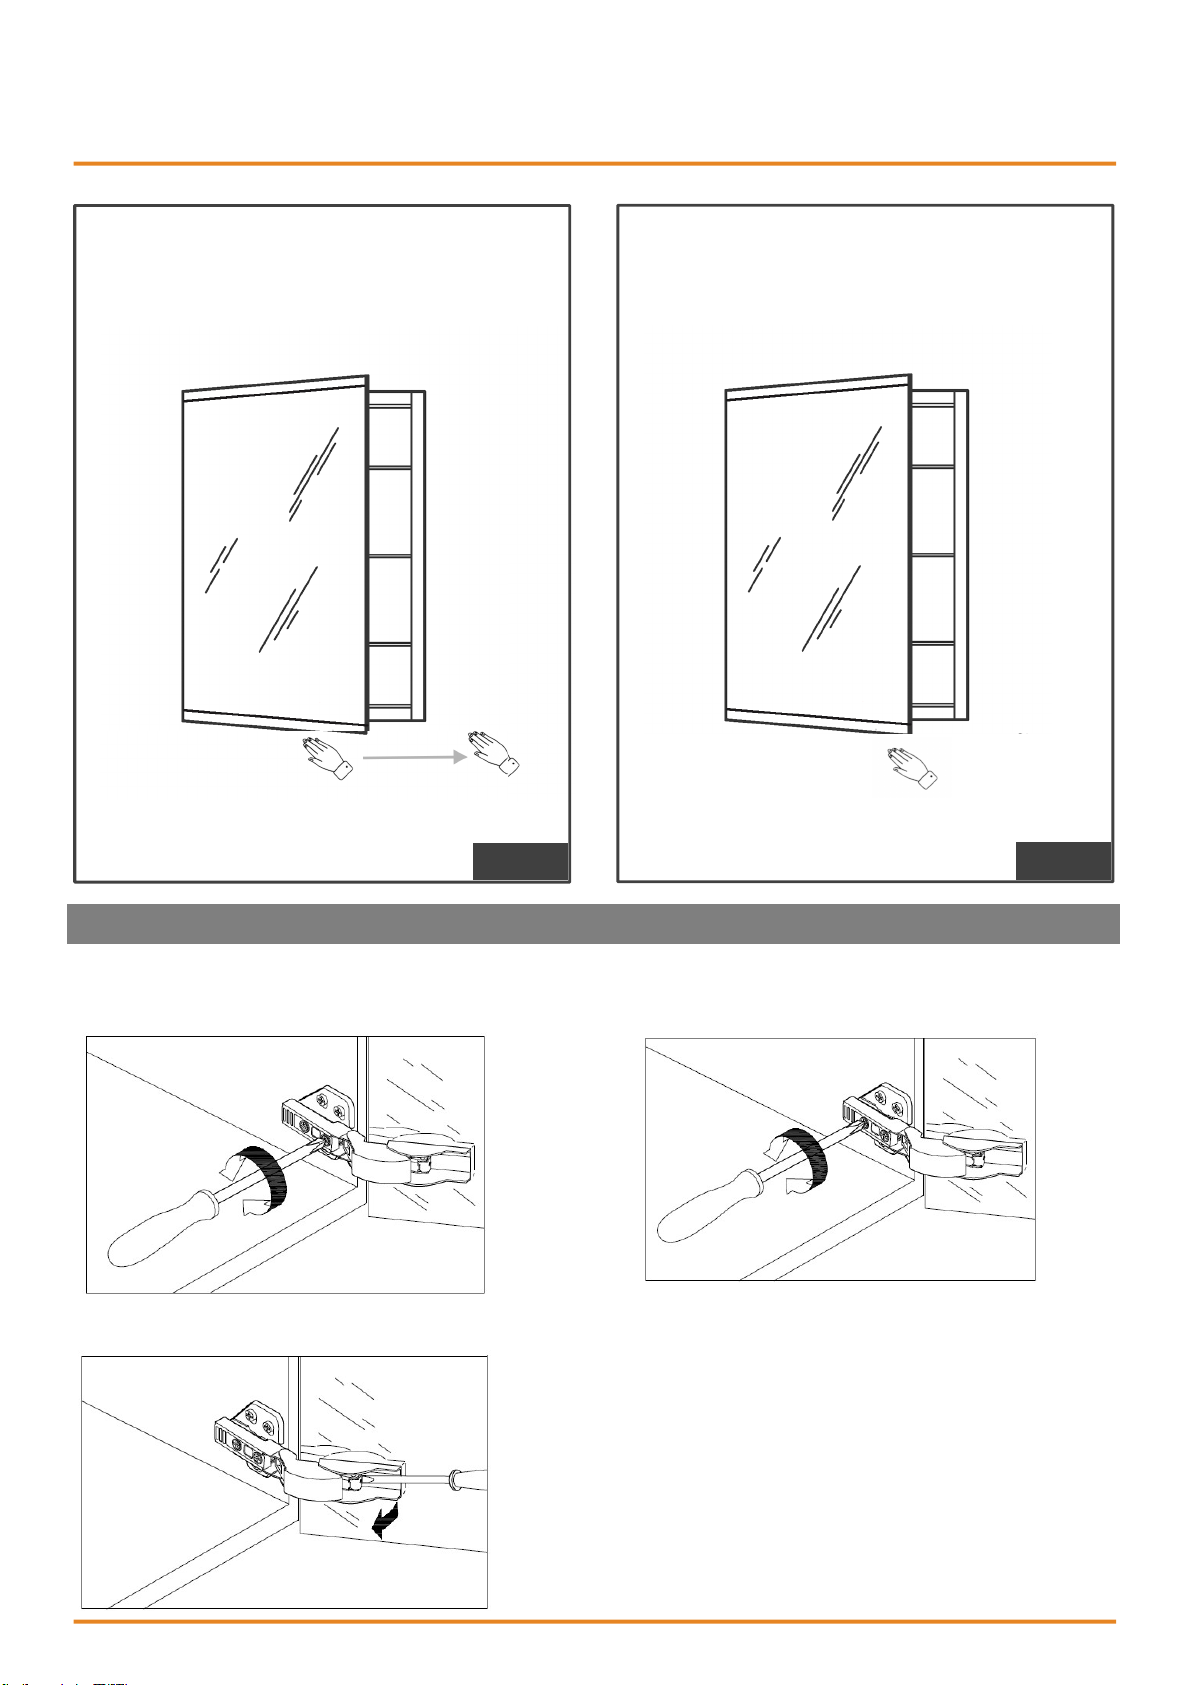
Turn on/off the light by waving your hand
underneath the cabinet or control by wall
swatch.
WAVE HERE
Dimming by placing your hand under the
sensor.
STAY HERE
STEP 9
STEP 10
DOOR ADJUSTMENT (IF NEEDED)
Adjust corresponding screws on the hinge to align the doors, ensure that gaps are even and the
doors open and close smoothly .
Adjust door gap
Adjust gap between door and
cabinet
Replace door mirror
Page 8
INSTALLATION for
LED Lighted Medicine Cabin et
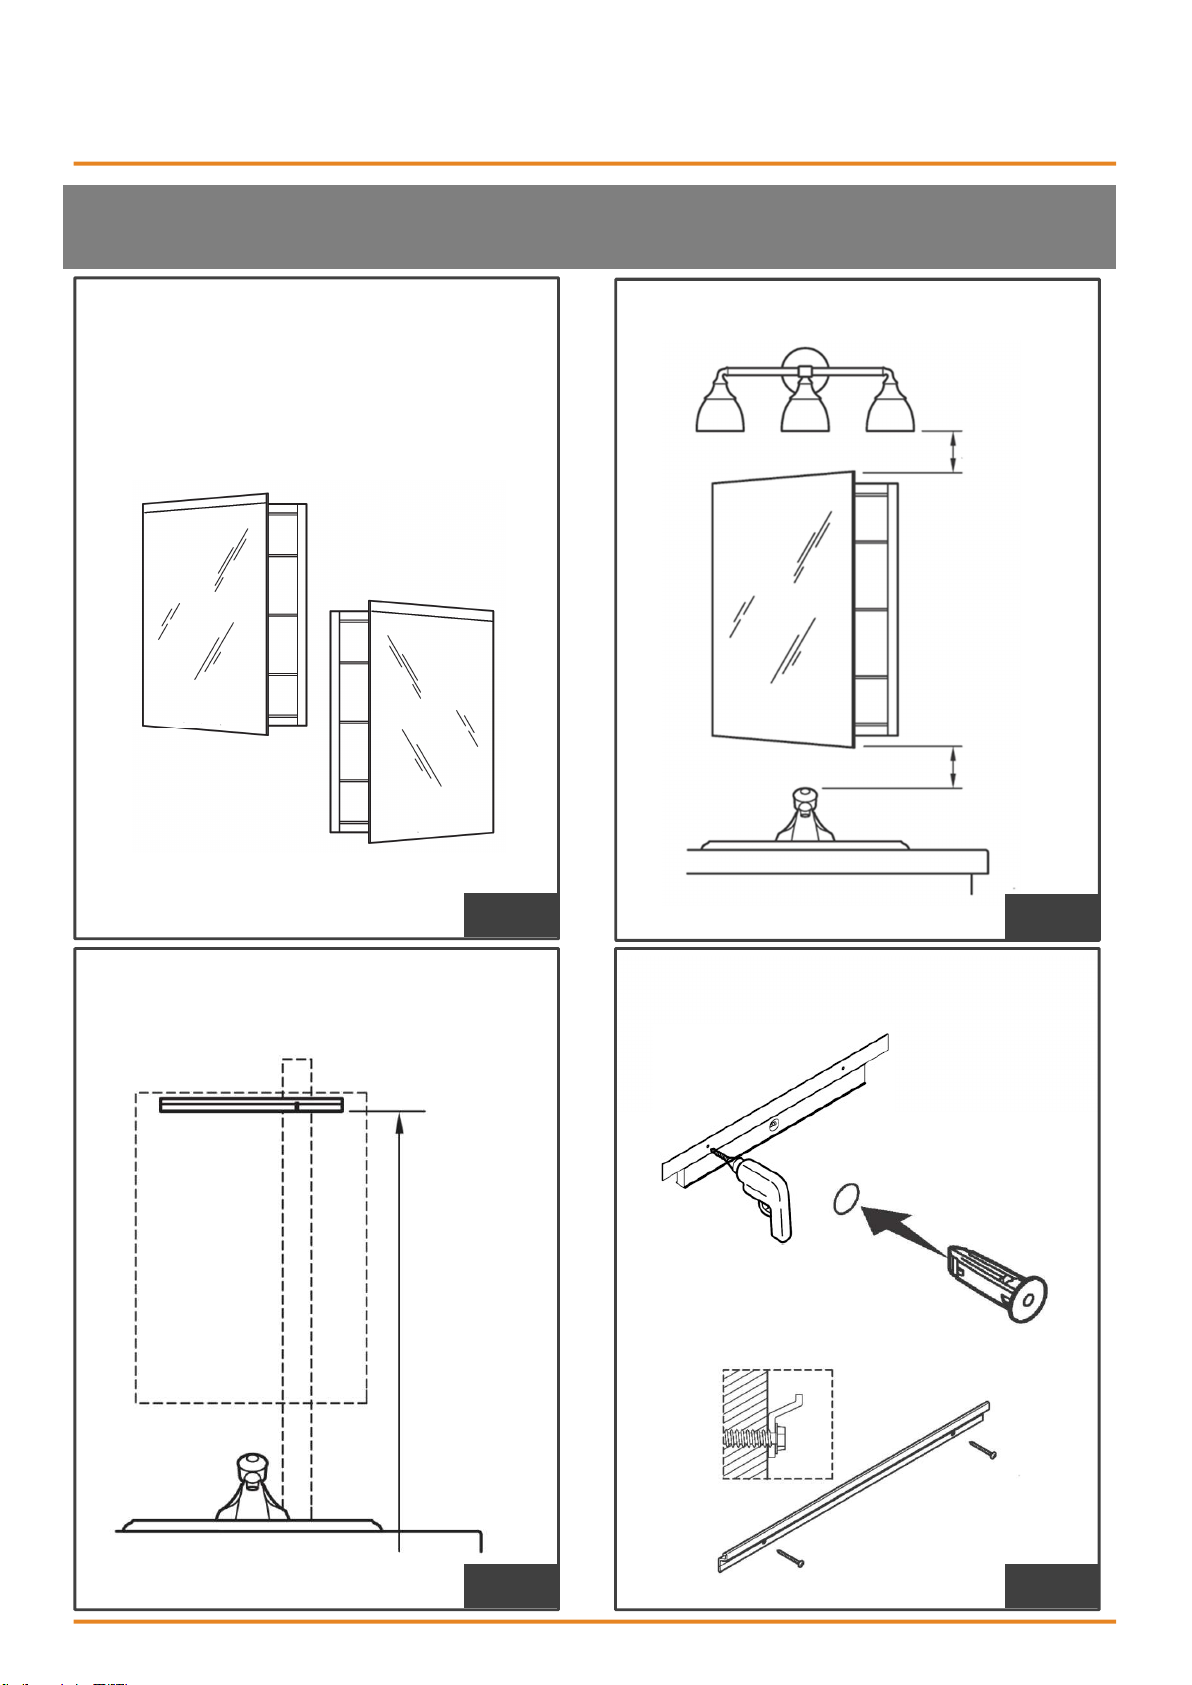
DHJSMC2030SKSXLDX and DHJSMC2030SKSXRDX
DHJSMC2430SKSXLDX and DHJSMC2430SKSXRDX
We separate left-open door and right-open
door for these models, they are not
interchangeable. Luminous area is on top of
the cabinet.
Make sure you are installing correct one.
Verify minimum clearances.
3"
3"
STEP 1
Place the Mounting Bar on wall and make
sure it is horizontal by level.
Suggest
75"
to floor
STEP 2
Drill holes. Insert anchors where needed.
Secure the mounting bar with screws.
STEP 3
STEP 4
Page 9
LED Lighted Medicine Cabin et
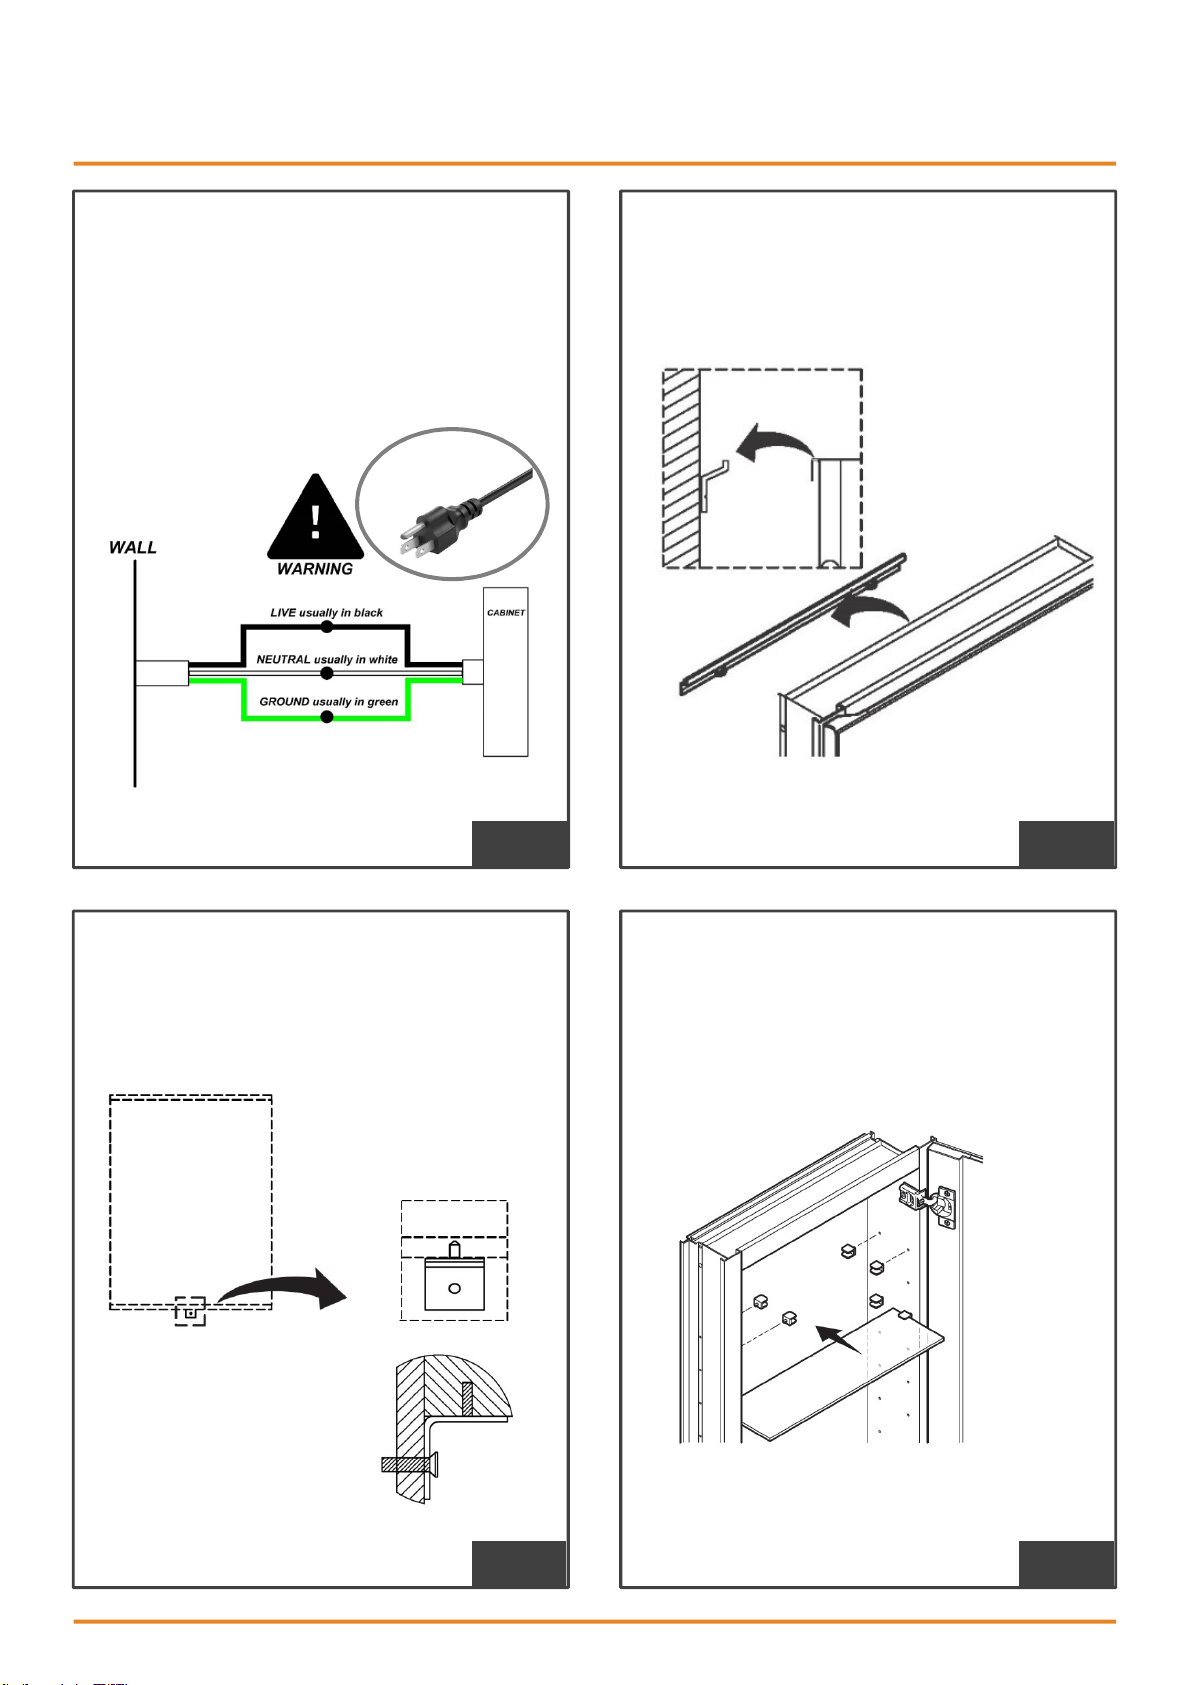
We provide plug along with cabinet.
Optional to cut the plug directly and connect
to electrical wiring if using a wall switch.
Lift the cabinet onto the mounting bar.
Ensure the hooks engage the bar.
STEP 5
Place the support angle on the bottom of
the cabinet. Mark hole location on wall.
Drill hole. Insert anchor where needed.
Fixed the support angle by screw.
STEP 6
Install the clips. Insert the shelves between
the clips.
STEP 7
STEP 8
Page 10
LED Lighted Medicine Cabin et
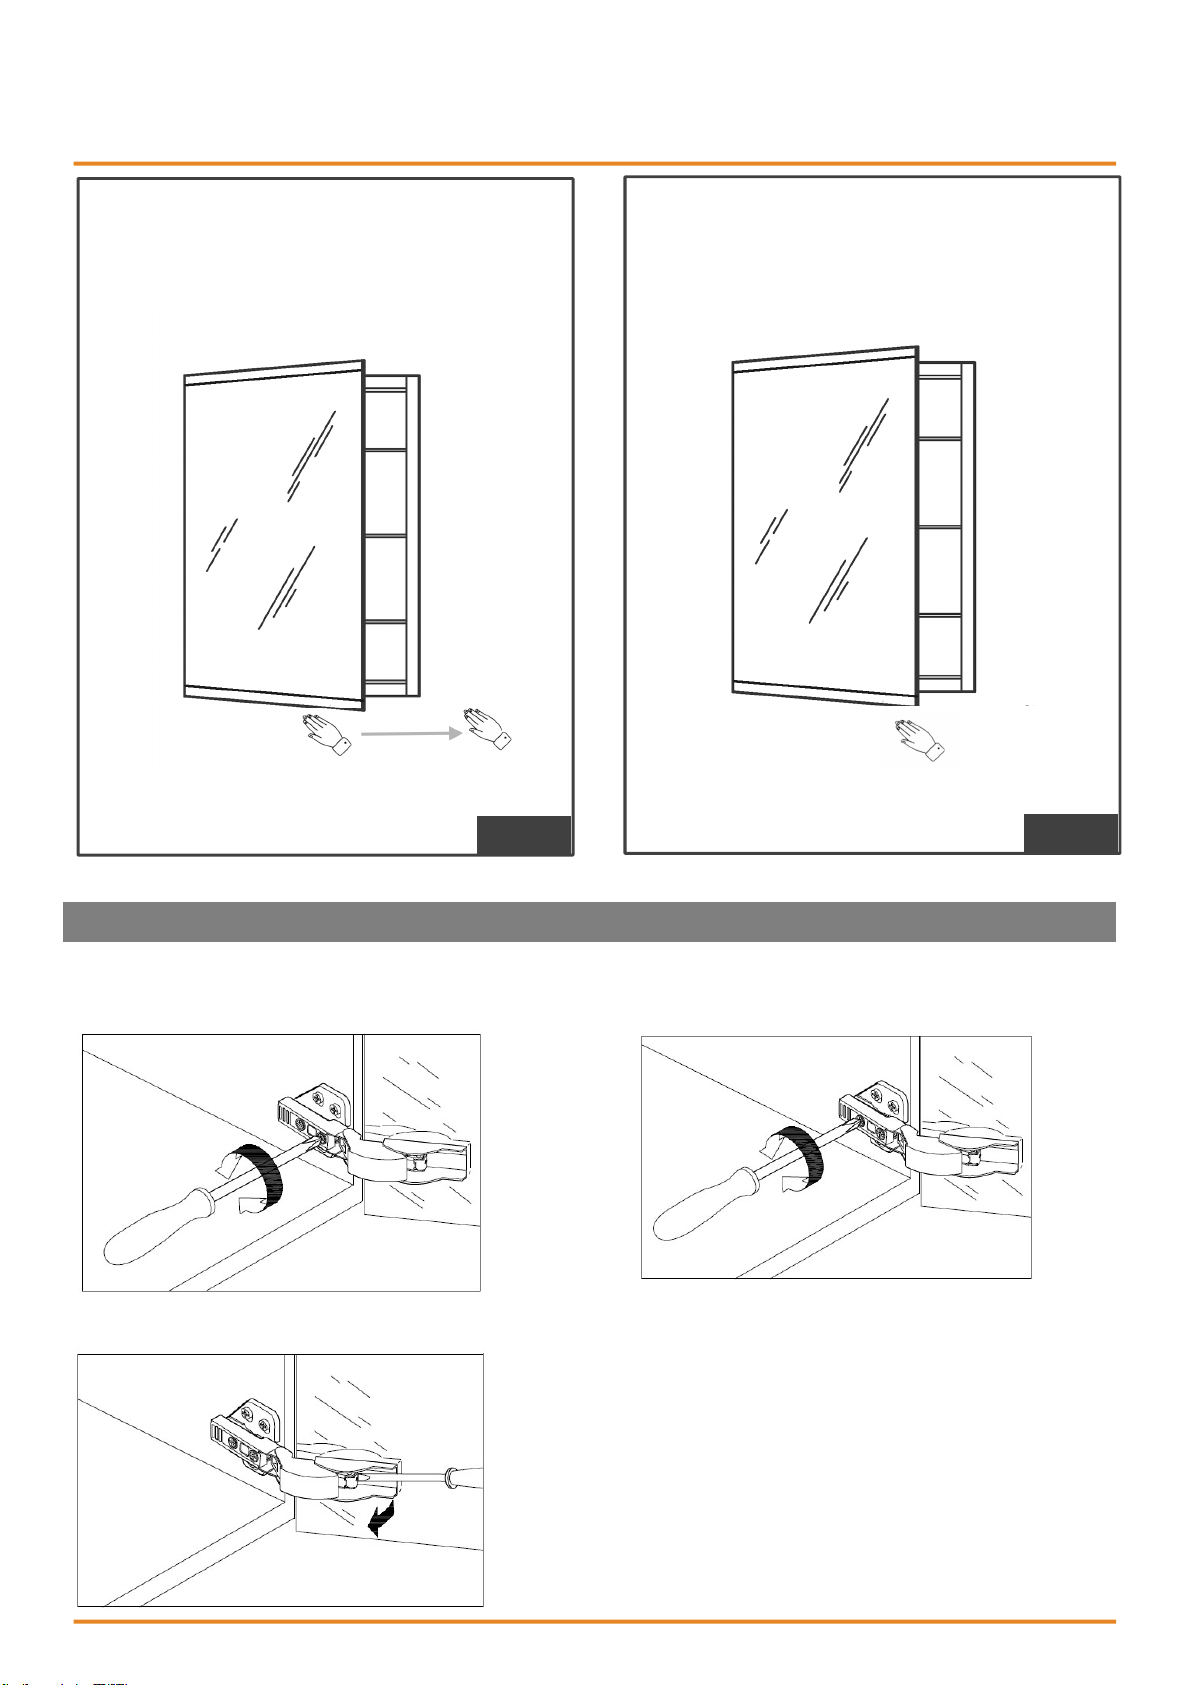
Turn on/off the light by waving your hand
underneath the cabinet or control by wall
swatch.
WAVE HERE
Dimming by placing your hand under the
sensor.
STAY HERE
STEP 9
STEP 10
DOOR ADJUSTMENT (IF NEEDED)
Adjust corresponding screws on the hinge to align the doors, ensure that gaps are even and the
doors open and close smoothly.
Adjust door gap
Adjust gap between door and
cabinet
Replace door mirror
 Loading...