

Page 1

Fixed Frame Series
User Manual
Page 2
Instrucons
To the Owner
Thank you for purchasing our FAVI Fixed Frame Projector Screen.
Please take a moment to read the installaon manual to avoid any
potenal issues.
Installaon Notes
1. Assembly requires two people and an open floor space greater than the size of the screen.
2. Make sure the workspace is clean and free of debris.
3. Keep screen fabric away from high temperature to avoid permanent material deformaon.
What’s in the box
1. Frame Rail s x 6 pcs
(4 top/boom frame pcs. +
2 side frame pcs)
2. Tension Rods x 6 pcs
(4 top/boom frame pcs. +
2 side frame pcs)
3. Screen Material x 1 pc
4. Center Joints x 2 pcs
5. L Joints x 4 pcs
6. L Brackets x 4 pcs
7. Screws x 20-30 pcs
8. Center Support Bar x 1 pc
9. Tensioner (depending on size)
10. Drywall Anchor x 2-4 pcs
11. Washer x 1 pc
12. User Guide x 1 pc
Note: Please make sure all parts
are included in your package before
proceeding to assemble your screen.
Page 3
Instrucons
Seng up
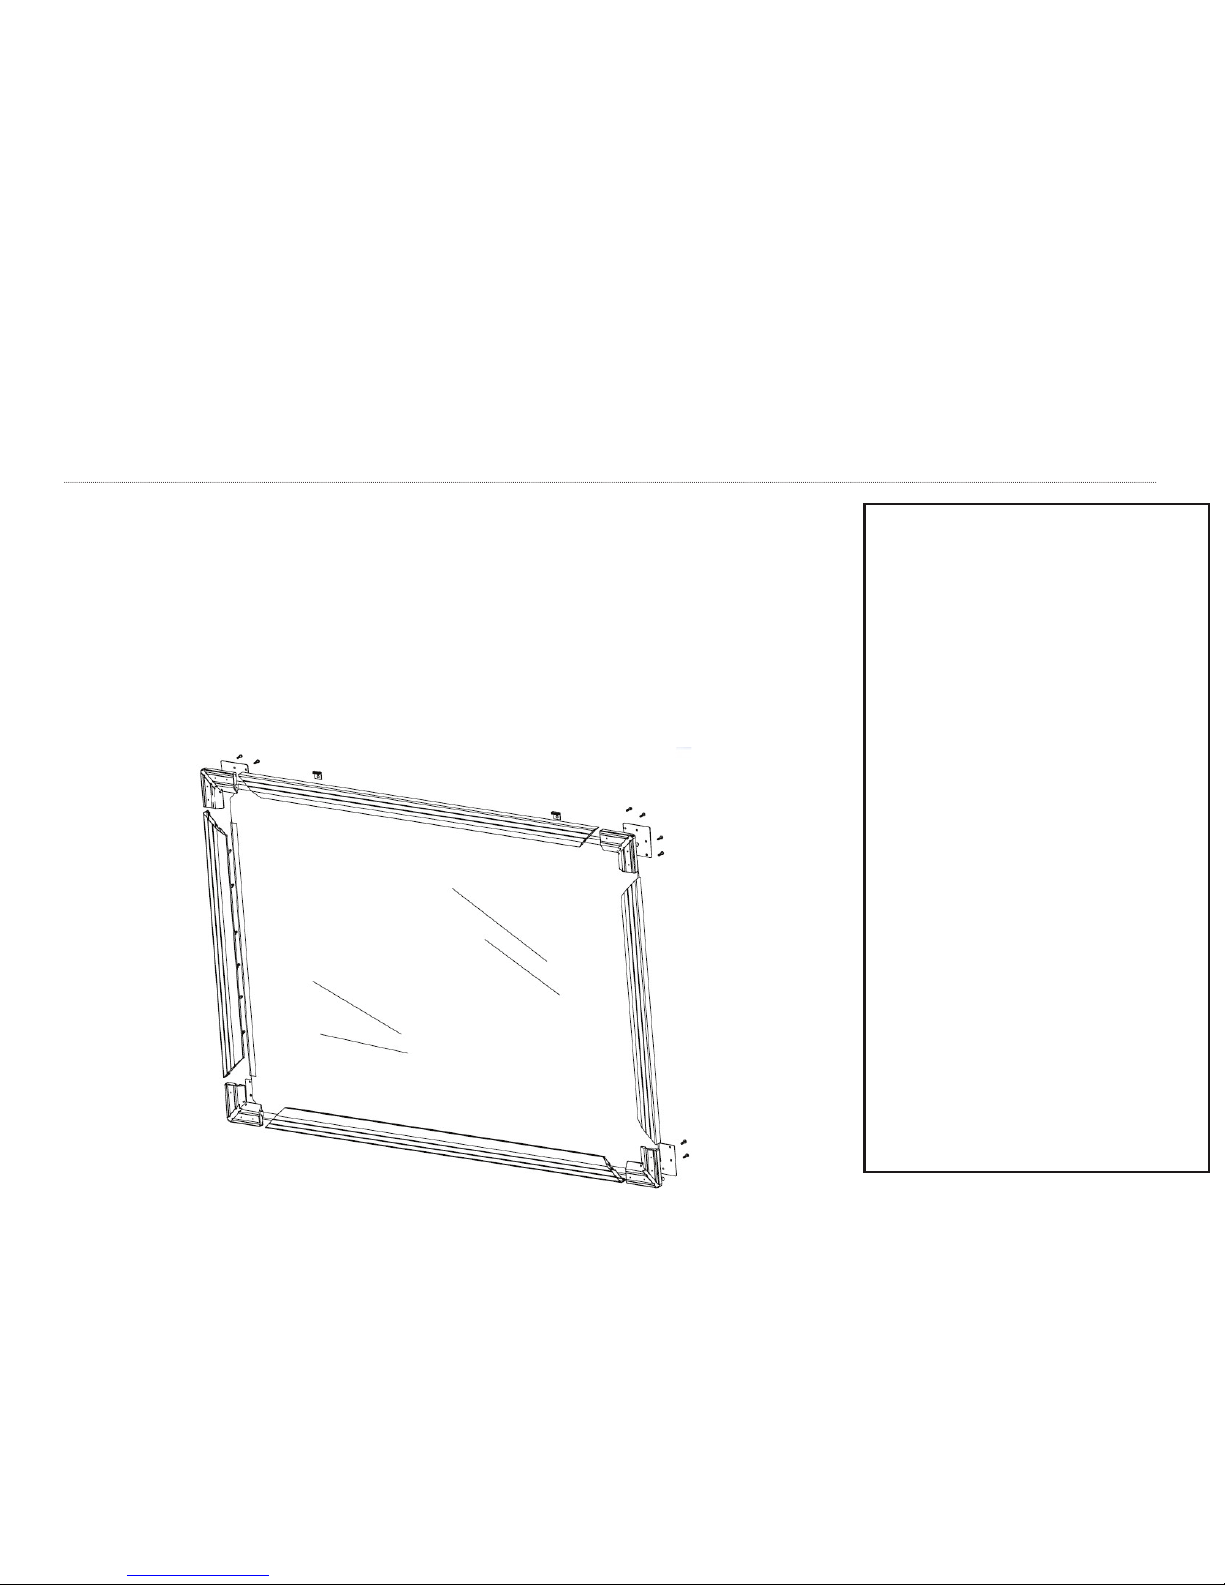
1. Unpack the screen and verify that all parts are presented.
2. Have two people available to assemble and install the screen.
3. Assembly requires a clean area with approximately two feet extra space of assembled screen on each side.
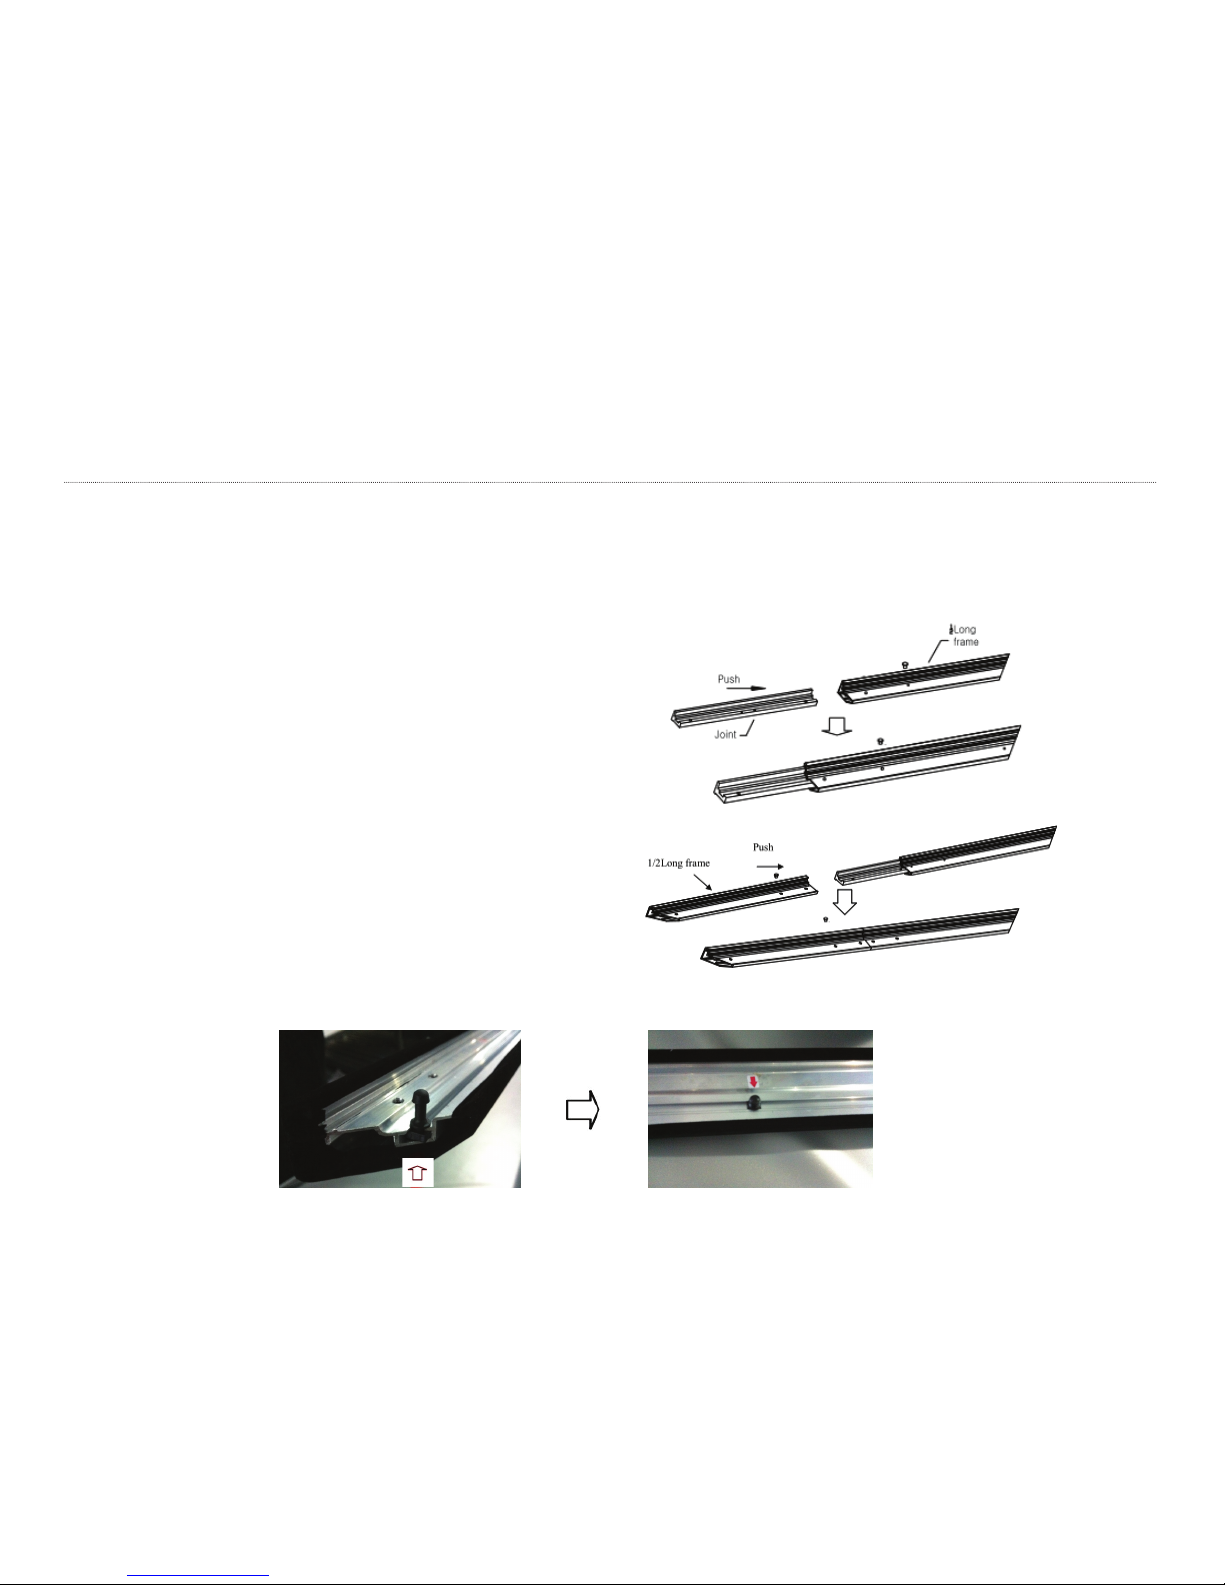
4. Insert the aluminum center joint connector into the horizontal
frame piece and then fasten it with a screw.
5. Insert the other horizontal frame piece to the center joint
connector and then fasten it with a screw.
6. Insert the tensioners into the frame rails according to the images below. Match the tensioners to the sckers on the frame rails.
Page 4

Instrucons
Seng up (connue)
7. Push the L joint into the end of the two frames (one short and one long).
Insert both L joint connectors into each end of the long horizontal frames.
8. Join all four-frame parts together following the steps shown
below. Please do not fasten the frames completely unl frames
are aligned properly.
9. Layout the screen and tension rods on a clean surface.
Carefully insert the tension rods through the sleeves
according to their corresponding lengths on each edge
of the screen.
1
2
3
Page 5

Instrucons
Seng up (connue)
10. Aach the screen material to the aluminum frame by pushing each tensioner through the corresponding hole in the fabric.
11. Slide the center support bar into the center of the screen.
This will provide addional stability to your frame.
Note: Aer assembly is complete, verify that the screen’s appearance is smooth. If there are any wrinkles, please adjust the
corresponding tensioners on the back unl the screen appears smooth.
12. Use the L bracket to cover the corner of the screen.
Locate the screw holes on the L joint and fasten the
four corners by using the L joint screws included.
Page 6

Instrucons
Installaon on Drywall
1. Locate your desired installaon locaon with a stud finder (recommended) and mark the drill-hole area of where the screen is
to be installed. Alternavely, use drywall anchors provided.
2. Drill a hole with the proper bit size to accommodate the included drywall anchors.
3. Line up the wall bracket with the drilled holes and screw into place using a screwdriver.
4. Posion the fixed frame screen onto the top wall brackets.
Page 7

Stateme nt
This manua l does not provide any warrant y or related declara ons. All infor maon in this manual incl uding
the product specifi caon, pictures and litera tures is just for refer ence, FAVI Entertainment reser ves
the right s to update contents of this manu al without prior n oce.
Copyr ight
This man ual is the co pyright of FAVI Entertainment. No part of this ma nual may be rev ised, copied or
transm ied in any way without wrien permiss ion from FAVI Entertainment.
RECYCLING
This product’s packaging materials are recyclable and can be reused. This
product and the accessories packed together packed together are the
applicable product to the WEEE direcve except baeries. Please dispose
of any materials in accordance with your local recycling regulaons. When
discarding the unit, comply with your local rules or regulaons. Baeries
should never be thrown away or incinerated but disposed of in accordance
with your local regulaons concerning chemical wastes.
Instrucon
CAUTION: Please follow this instrucon carefully to ensure proper maintenance and safety with your screen.
Maintaining Your Screen:
1. When hanging the screen up, please make sure that no other objects such as power switches, outlets, furniture, ladders,
windows, and others are occupying the space designated for your fixed frame wall screen.
2. Regardless if the screen is hung on or installed into the wall, make sure that the proper mounng anchors are used and that the
weight is supported appropriately by a strong and structurally sound surface just as any large and heavy picture frame would.
3. Frame parts are made of high quality velour-surfaced aluminum and should be handled with care.
4. When cleaning, use a damp so cloth with warm water to remove any marks on the frame or screen surface.
5. Never aempt to use any soluons, chemicals or abrasive cleaners on the screen surface.
 Loading...