

FAVI Fixed Frame Projection Screen User Manual
1.) Preparing to assemble your screen:
You will need a large floor area to assemble the screen. The floor should be clean
and covered by a soft material such as towels or blankets to keep the screen clean
and prevent damage.
2.) Assembly
Step 2: Select the frame piece that will become the top side of the screen. Insert four of the M5
FAVI Fixed Frame Projection Screen
User Guide
1
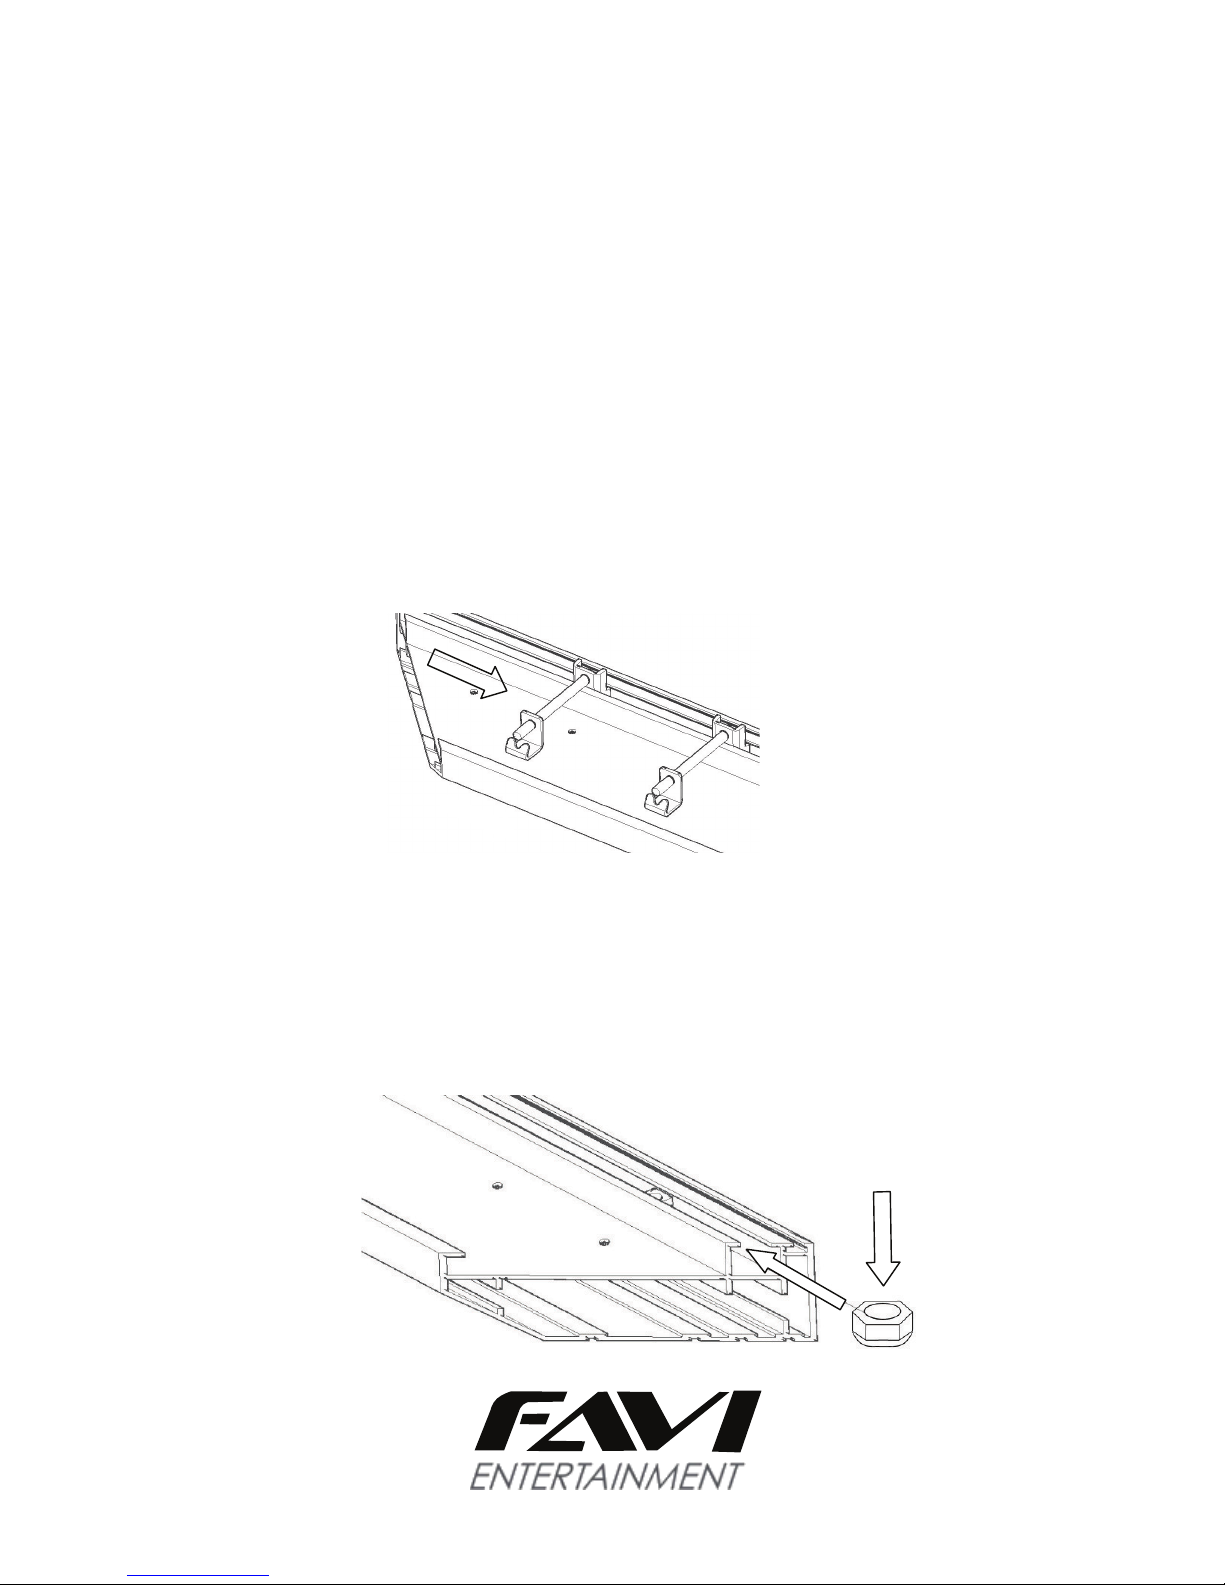
Step 1: Insert the screen tensioners into the frame. The tensioners should be spaced about 8 to
10 inches apart. The number of screen tensioners you have will depend on the size of the screen.
M5 lock nut
lock nuts into the ends of this frame piece with the nylon locking rings facing down towards the front
of the screen frame. Then insert two lock nuts into each side piece that will later join this top piece.
These lock nuts will be used later to attach the mounting brackets to the top corners of the screen.
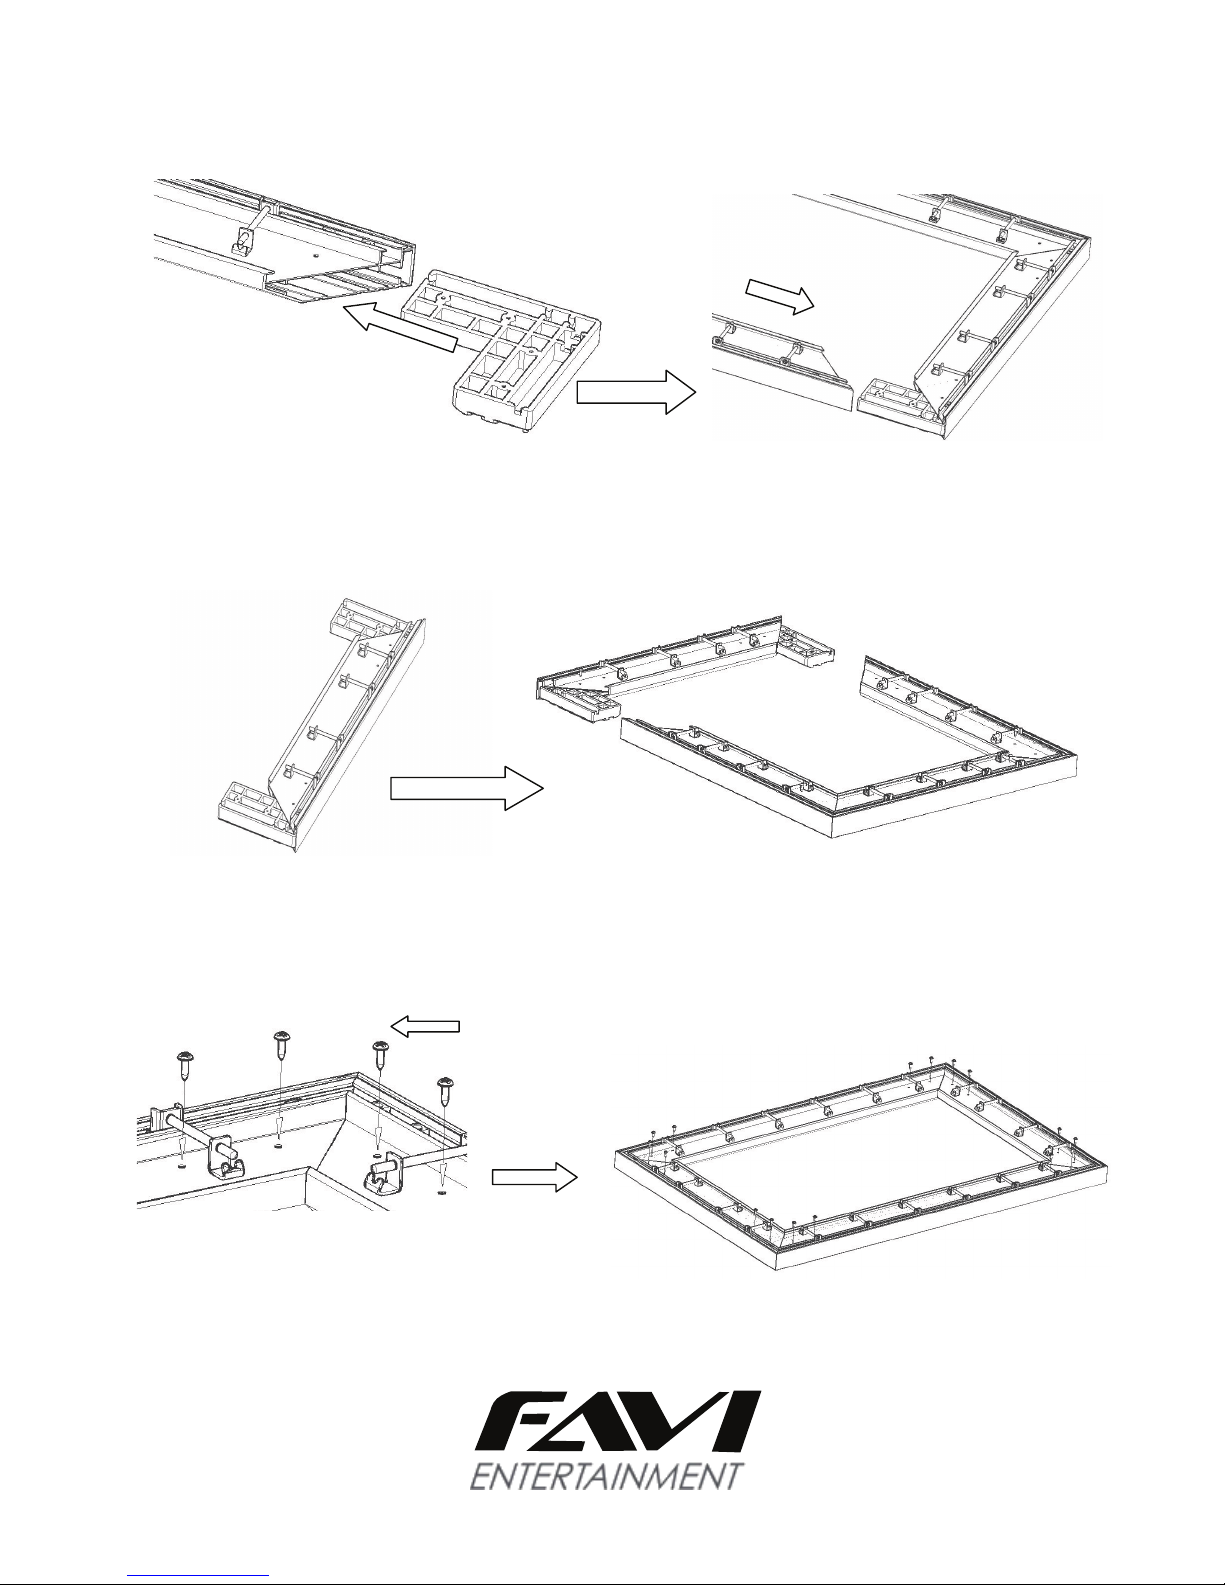
The last section of frame should have two of the corner pieces installed and inserted as shown
in the image below.
Step 3: Insert the four plastic corner pieces into the ends of the frame pieces.
Step 4: After the frame corners are installed, use the M3 screws to secure them into place.
You should have a total of 16 of these screws.
M3 screws
2
 Loading...