

FAVI FAVI’s premium electric projection screen Quick Installation Manual

Quick Installation Guide
Easy-Mounting Electric Screen
Thank you for purchasing FAVI’s premium electric projection screen. FAVI screens are your
ideal solution for home theatres, businesses and classrooms. This guide will walk you through
the screen basics and the easy installation process.
1. Screen components
•
Control panel is also the remote receiver.
How to distinguish between the IR and RF remote?
IR remote has 2 small LED lights on the front, while the RF has 1 LED light.
2. Screen features
• Premium quality electric screen
• Enhanced gain for ultimate image enhancement
• Stylish, heavy duty metal screen case
• Easy-mounting design (no professional installation required)
• Long lasting, fire-resistant screen case and fabric
• Remote control provides ultimate convenience
• Premium Duel Remote: RF remote for long range control while IR remote can be
integrated with a universal remote control with learning capability
• Advanced anti-static fabric processing prevents dust accumulation
• Washable screen surface
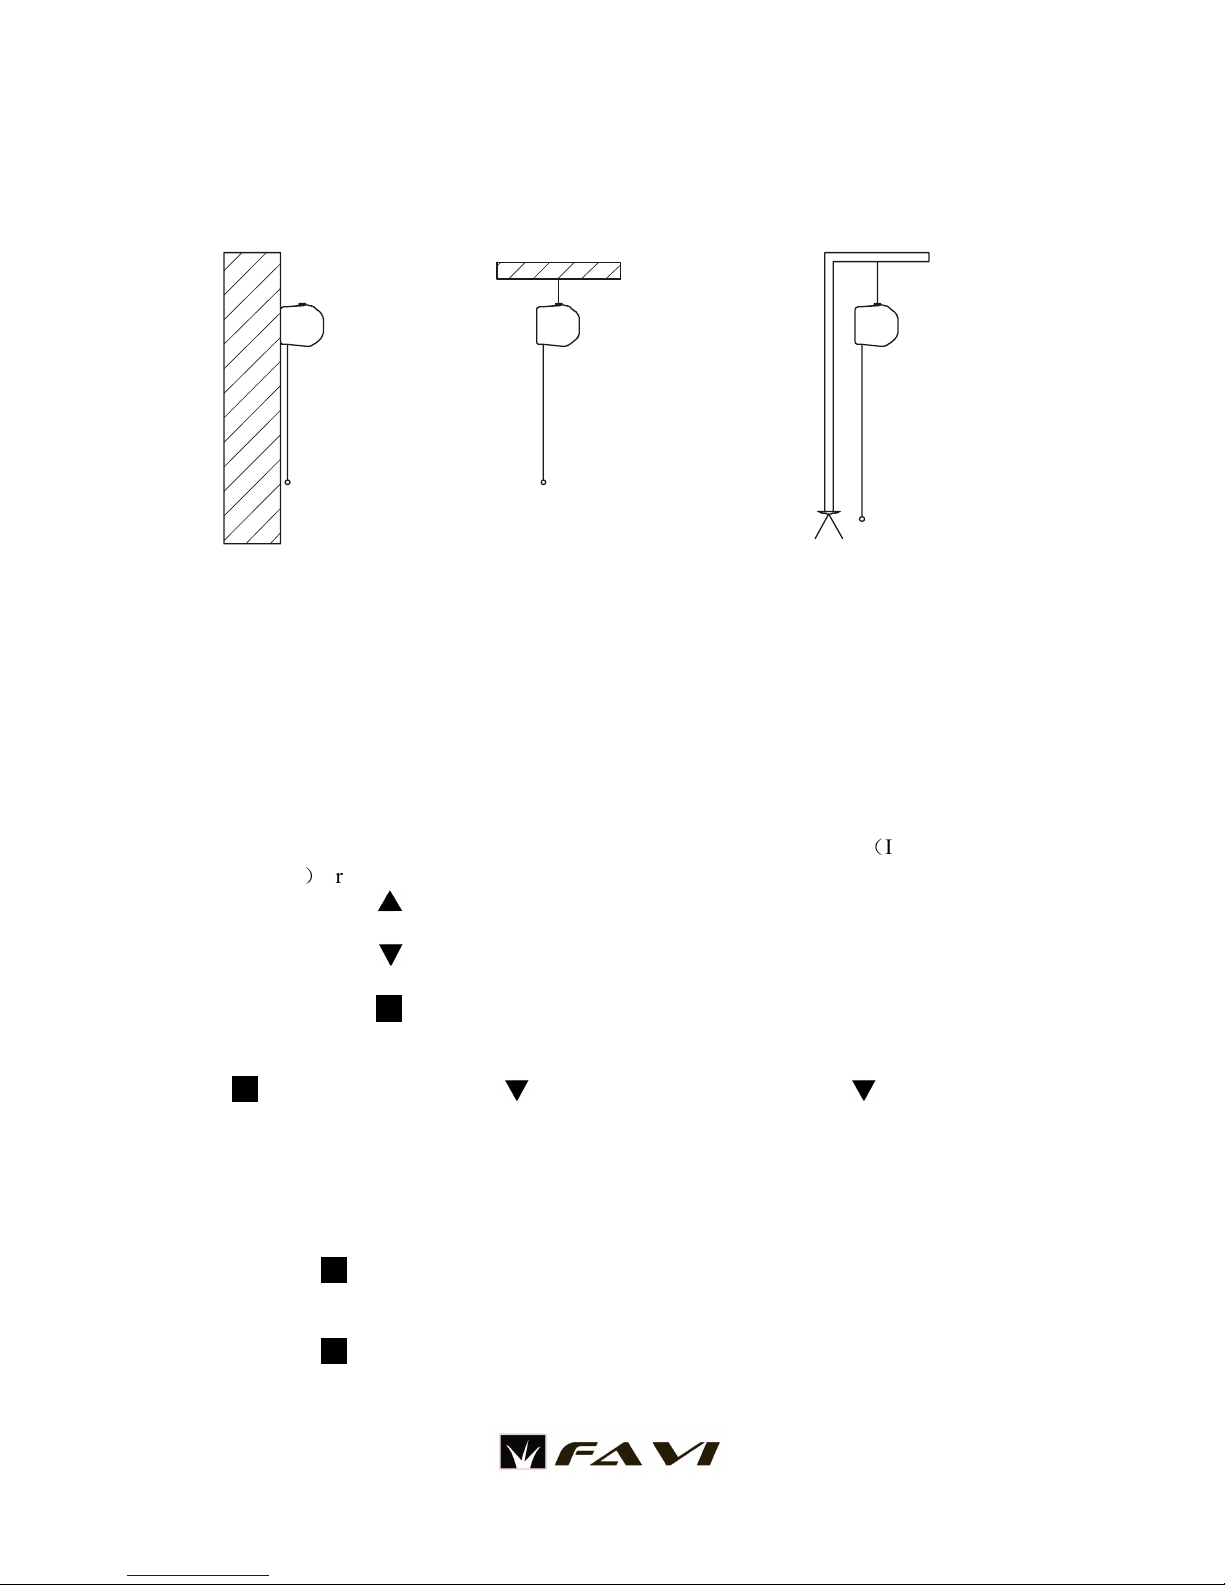
3. Screen installation
The screen can be installed in 3 different ways with common household tools.
a) Wall mounting a) Ceiling mounting
c) Rack mounting
• A bubble level is recommended for all installations.
• A stud-finder is recommended for wall and ceiling mounting.
4. Screen operations:
Warning: Operating the screen prior to properly mounting screen is prohibited. Such Operation
can cause permanent damage to screen and motor. Such damages are not covered by warranty.
1) Operation: Please make sure the screen is mounted properly before operation. You can now
easily operate your screen with the 3 buttons of the two remote controls(IR and RF dual
remotes)or the remote receiver/control panel.
a) Press the “ ” button to pull down the screen, the screen will stop automatically when
it is fully opened.
b) Press the “ ” button to roll back the screen, the screen will stop automatically when it
is fully closed.
c) Press the “ ” button to stop the screen at any position.
Note: When the screens is rolling back, if you want to pull it down again, you can press the
“ ” button and then press the“ ” button. Or you can also press the “ ”button twice.
2) Dual remote operation: Each of the projection screens can be controlled by the included
dual remote system (IR or RF). Both remotes can be used to control the screen.
a) Replacing/adding remote control: If a remote control needs replacement, or you
simply need to add one additional remote control, please first press and hold the stop
key “ ” on the remote receiver for 5 seconds, and then press any key on the new
remote control, the new remote can now be used to control all screen features.
b) Disable remote control: If you want disable all remote controls, press and hold the stop
key “ ” in the remote receiver for 15 seconds. Then no remote control can control
the projection screen. Use operation a) to enable remote control again.
 Loading...