

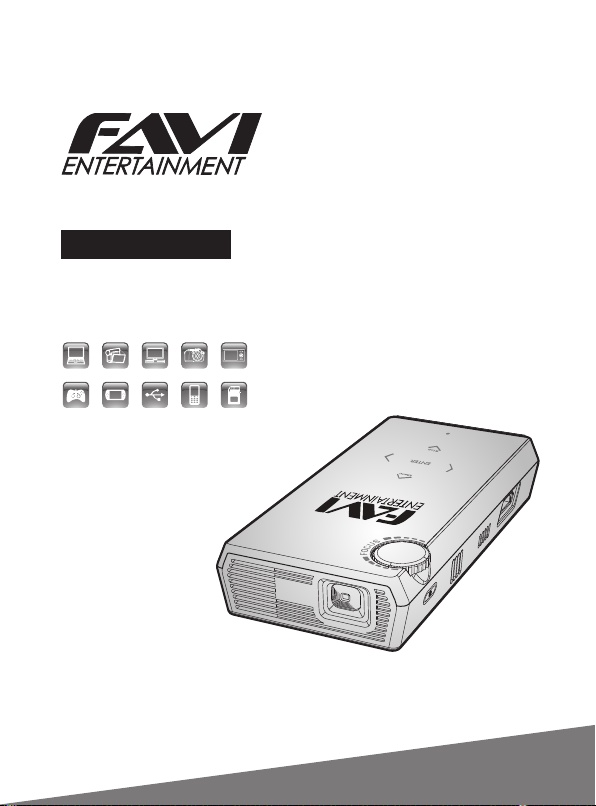
iShare+
E3-LED-PICO
User Manual
Laptop DV DVD
Game PSP USB Phone SD Card
MP4
DC

Contents
1 LED INDICATORS............................................................................................. 1
2 PACKAGE CONTENTS..................................................................................... 2
3 FEATURES OVERVIEW.................................................................................... 2
4 PRODUCT SPECIFICATIONS.......................................................................... 2
4.1 Specification................................................................................................ 2
4.2 File Formats Supported.............................................................................. 4
5 PRODUCT OVERVIEW..................................................................................... 4
5.1 Dimensions................................................................................................. 4
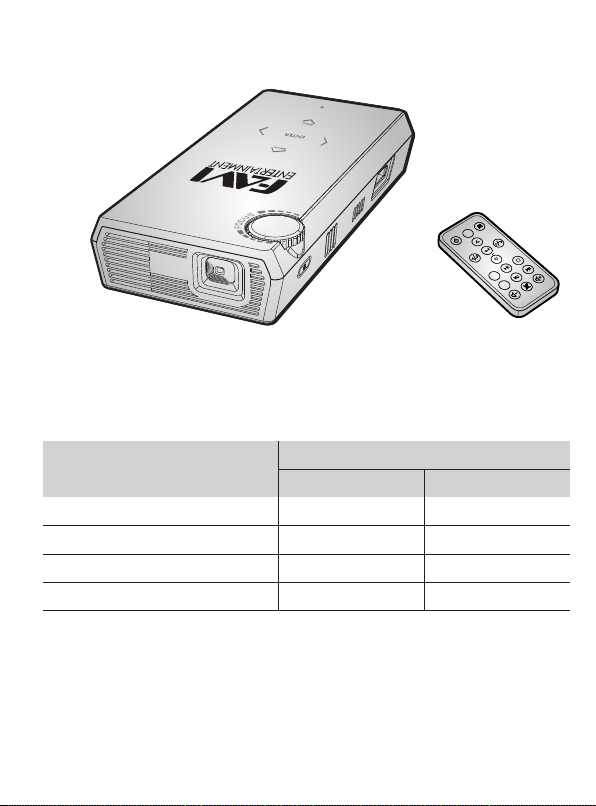
5.2 The Overview of Projector.......................................................................... 5
5.3 Control Buttons........................................................................................... 5
5.4 Remote Control........................................................................................... 6
6 USE AND CONNECTION................................................................................. 7
6.1 Connecting to a VGA Device..................................................................... 7
6.2 Connecting to an HDMI Device................................................................. 8
6.3 Connecting to an AV Device...................................................................... 9
6.4 Inserting micro-SD Card or USB Memory................................................... 9
6.5 Connecting to an External Speaker or Earphone................................... 10
7 BATTERY CHARGING, CONNECTING AND SAFETY.................................. 10
8 TROUBLESHOOTING..................................................................................... 11
1 LED INDICATORS
Menu
Source
UP
Power
Rotate-R
Enter
Rotate-L
Down
Stop
Skipf
Play/pause
Skipb
V+
Device
Mute
Display
V-
Status
Standby
Charging
Charge complete
Low battery / no battery
- 1 -
LED Indicator
Red
Off
On
Off
Off
Green
Off
Off
On
Blinking
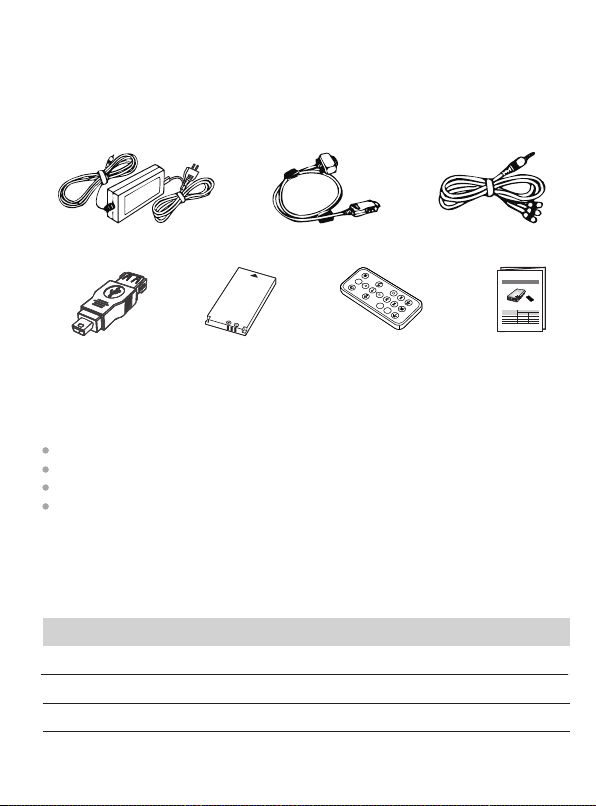
2 PACKAGE CONTENTS
Carefully unpack the product and confirm that all of the items listed under
contents have been included. If any items are missing, contact your dealer.
AC power adapter
USB adapter
VGA cable AV cable
Menu
Source
UP
Right/Rotate-R
Power
Enter
Down
Left/Rotate-L
Play/pause
Device
Battery
Remote control
3 FEATURES OVERVIEW
Supports video, music, picture and text.
Supports USB, micro-SD, VGA, HDMI and AV in.
Supports basic setups (display, language, AC adapter, etc.).
Supports remote control.
4 PRODUCT SPECIFICATIONS
4.1 Specification
General
Model
Brightness
Contrast ratio
E3-LED-PICO
50 Lumens
1000:1
- 2 -
User Manual
Stop
Skipf
V+
Skipb
Mute
Display
V-
Mini Projector
Menu
Source
Power
UP
Enter
Down
Stop
Skipf
Play/pause
Skipb
V+
Device
Mute
Display
V-
1 LED INDICATORS
LED Indicator
Status / Problems
Green
Red
Standby
OFF
OFF
Charging
ON
OFF
Charge complete
OFF
ON
Low battery / no battery
WINK
OFF
User manual

Uniformity
Displayable colors
Optical
Display system
Lens F/Number
Lamp
Electrical
Power supply
Power consumption
Size
Dimension (LxWxH)
Weight
Input source
HDMI
Computer
Composite video
USB-A
Micro-SD
Output source
Audio
Environmental requirements
Operating temperature
Operating relative humidity
Operating altitude
≥70%
120% NTSC
DLP single DMD chip
F = 2.4, f = 10.5mm
RGB LED
DC 5V
12W (AC mode), 6W (battery mode)
140mm x 73mm x 27mm
236g (with battery)
HDMI port (compatible with HDMI 1.3)
VGA (analog - D-sub)
Composite RCA jack
USB port
Supports music, video, photo and text
Micro-SD slot
Supports music, video, photo and text
3.5mm stereo mini-jack
0°C~40°C
35%~85% (without condensation)
0-1499m at 5°C~35°C
4A
- 3 -

4.2 File Formats Supported
File format
Item
TXT
Text
JPEG/BMP/PNG .jpg/.bmp/.png
Photo
MP3/WMA/
Music
WAV/M4A(AAC)
MPEG1
MPEG2
MPEG4
RM/RMVB
Video
MJPEG
DIVX
File extension
.txt
mp3/.wma
.wav/.m4a
.dat/.mpg/.mpeg
.mpg/.vob
.avi/.mp4
.rm/.rmvb
.avi
.divx/.avi
.asf
.flv
5 PRODUCT OVERVIEW
5.1 Dimensions: 140 x 73 x 27 mm
Internal Code
DIVX/XVID
RV8/RV9/RV10
MPEG/DIVX
/H264
VC1VC1
H264FLV
Maximum resolution
1920*1080 @ 30fps
1920*1080 @ 30fps
1920*1080 @ 30fps
1280*720 @ 30fps
640*480 @ 30fps
1920*1080 @ 30fps
1920*1080 @ 30fps
1920*1080 @ 30fps
140
USB T/F
73
27
- 4 -

5.2 The Overview of Projector
Ventilation
Lens
openings
Up arrow
Enter button
Left arrow
Down arrow
HDMI in
Speaker
Power button
Focus wheel
Right arrow
VGA
VGA in
Headphone out
5.3 Control Buttons
NO.
Key
1
Power button " "
Up arrow " "
2
Down arrow " "
3
Menu
TF
USB
A/v
DC
AV in
DC in
Micro-SD slot
USB port
Function Description (Remark)
Long press to turn the projector on and off
Long press to turn the Menu on and off
When in Menu, scroll the files up (Up)
When playing videos, fast forward (FastF)
Long press to pause and return to previous menu level
Stop
When in Menu, scroll the files down (Down)
When playing videos, rewind (FastR)
- 5 -

Long press to decrease the volume
4
Left arrow " "
When playing videos, move to previous file (Skipb)
When in Menu, move to previous file (Left)
When playing photos, rotate left 90 degress
Long press to increase the volume
Right arrow " "
5
When playing videos, move to next file (Skipf)
When in Menu, move to next file (Right)
When playing photos, rotate right 90 degress
When in Menu, confirm a selected function
Enter button " "
6
ENTER
When playing music/video, pause or play it (Pause/Play)
When playing files, option selection box pop up
Note: Touchpad backlight button (blue LED)
a. The backlight will blink when the power is turned on.
b. The backlight will turn on when any button is pressed.
c. The backlight will stay on for 3 seconds if no other button is pressed.
5.4 Remote Control
Power Menu
Left/Rotate-L Enter
Device
Display
V-
Play/pause
Source
Up
Right/Rotate-R
Down
Stop
Skipb
Skipf
V+
Mute
1
2
3
4
5
6
7
8
9
10
11
12
13
14
15
16
17
NO.
1
2
3
Key
Power
Source
Left/
Rotate-L
Function Description
Power on/off
Switch video source
Shift file selection left
Rotate photo left 90 degrees
- 6 -

4
5
6
7
8
9
10
11
12
13
14
15
16
17
Down
Device
Display
Skipb
Vol-
Menu
Up
Right/
Rotate-R
Enter
Stop
Play/Pause
Skipf
Vol+
Mute
Scroll the files down
Fast foward
Exit and return to the previous menu
Display file info (e.g. time, track, audio, etc.)
Move to previous file
Adjust the volume down
Turn the setup menu on and off
Scroll the files up
Rewind
Shift file selection right
Rotate photo right 90 degrees
Enter the selected option
Play the selected file
Pop up option selection box
Stop and return to the previous menu
Play/Pause
Move to next le
Adjust the volume up
Mute the volume
6 USE AND CONNECTION
Your portable projector works with USB flash disk, micro-SD card, earphone and a
variety of digital devices. These devices include PCs, laptops, TV set-up boxes,
DVD, game consoles, MP3/MP4, digital video cameras, PMP that output video
signals, smartphones, and audio equipment with audio-out jack. Please follow the
instructions for connection.
6.1 Connecting To A VGA Device
Connect the VGA cable to the PC/laptop and the VGA input on the projector.
- 7 -

NOTE
Please shift to VGA mode when connecting to a VGA device.
The highest supported resolution is 1280 x 1024, 60 Hz.
PC
Laptop
Connect to the VGA
port on the computer
VGA cable
VGA
VGA port
TF
USB
A/v
DC
6.2 Connecting To A HDMI Device
Connect an HDMI cable from the HD device to the HDMI side input on the projector.
NOTE
Please shift to HDMI mode when connecting to an HDMI device. The highest
supported resolution is 1080p.
Blu-ray DVD
HD media
HD digital video
camera
PC
HDMI port
HDMI
Connect to the
HDMI port on
HDMI cable
HDMI
the devices
Laptop
- 8 -

6.3 Connecting To An AV Device
Connect the AV cable to the device and the AV input on the projector.
DVD
Game
consoles
MP3/MP4
AV Out
TF
VGA
USB
A/v
DC
Digital
video
Cameras
TV set-up
boxes
Connection
type may vary
AV cable
AV input
Smartphones
6.4 Inserting micro-SD card or USB memory
6.4.1 Insert a micro-SD card into the micro-SD card slot on the projector.
6.4.2 Insert the USB flash drive with USB adapter into the USB port on the projector.
A smartphone with USB out is supported.
TF
USB
DC
A/v
VGA
USB port
Micro-SD card
Micro-SD slot
USB memory
MOLEX
Smartphone
- 9 -

NOTE
A smartphone with USB port is supported (USB drive software installation
is uneccessary). Select USB flash drive on the projector to play.
6.5 Connecting To An External Speaker or Earphone
Connect an audio cable from an external speaker system/earphone to the headphone
output on the projector.
Audio in cable
Audio out cable
TF
VGA
USB
A/v
DC
Speaker
Headphone out
Earphone
7 BATTERY CHARGING, CONNECTING AND SAFETY
When using the projector with a rechargeable lithium-ion battery, the battery should
be fully charged before using the projector, or connected to a power source using
the provided AC power adapter. The battery needs to be charged for approximately
four hours to be fully charged.
7.1 Refer to LED indicators for battery status.
7.2 Battery Installation: Align contacts on battery with the contacts on the projector.
Slide the battery into place then slide the battery cover onto the projector.
NOTE
When using the projector with a rechargeable lithium-ion battery, use only a FAVI
dedicated battery. For correct battery disposal please refer to local environmental
regulations.
- 10 -

Battery
Battery
cover
8 TROUBLESHOOTING
Symptoms
The projector
cannot be
turned on
The image is
not displayed
Images are
not clear
Remote
control
does not
respond
Reasons Check points
No power
Low battery
The source is not
turned on or
connected correctly
The input signal device
is not connected with
the projector correctly
The input signal isn't
selected correctly
The lens is not
focused correctly
The screen is not
aligned properly
Low battery
Obstacle between
remote control and
projector
Too far from projector
Ensure the AC power adapter is properly connected
Charge the battery
Turn the video source on and check that the signal is
connected correctly
Select the correct input signal again
Select the correct input signal
Adjust the focus
Adjust the position
Replace with new battery
Avoid the obstacle
Stand within 25 feet from the projector
- 11 -
 Loading...