

Page 1

Fastbind Presso
Thermal Press
Instruction Manual
Page 2
Declaration of Conformity
We, Maping Co, hereby declare that the following product:
The product fullfils the essential safety requirements for CE conformity
marking according to the Low Voltage Directive 2006/95/EC and EMC
Directive 2004/108/EC.
Machine name: Fastbind Presso
Type: Cover finishing machine
Applied standards:
Manufacturer: Maping Co
EN 60950 - 1:2001 (safety)
EN 61000 - 6-1:2001 (EMC immunity)
- IEC 61000-4-2 and IEC 61000-4-3
- IEC 61000-4-4 and IEC 61000-4-5
- IEC 61000-4-6
Kuusiniemi 10, FIN-02710 Espoo FINLAND
Tel. +358 9 562 6022 Fax: +358 9 562 6215
www.fastbind.com
Warranty
Maping Co warrants this product against defects in material or workmanship
as follows. For the period of twelve months from the date of purchase, repair
or replace free of charge, for the original purchaser,any part or parts found by
inspection to be defective by our factory authorized service outlet or by the
manufacturer at Espoo, Finland.All transportationchargesonpartssubmitted
for repair or replacement under this warranty shall be paid for by the
purchaser.
All service under this warranty will be furnished and performed by factory
authorized service stationsor by the manufacturer. Warrantyservice does not
extend the warranty period.
This warranty is limited to the value of the product and it does not cover
damage caused by:
- Transportation,
- Normal wear and tear,
- Neglected or improper maintenance,
- Misuse
The warranty willbevoided if machine’s type plate has been whollyorpartially
removed or erased. Maping Co is not responsible for any damages, including
but not limited to direct, indirect or consequential damages, loss of material,
profit or interruption of business. Maping Co may at any time discharge its
warranty by refunding the purchase price and taking back the product.
Fastbind Presso
Operating instructions
v.03 eng
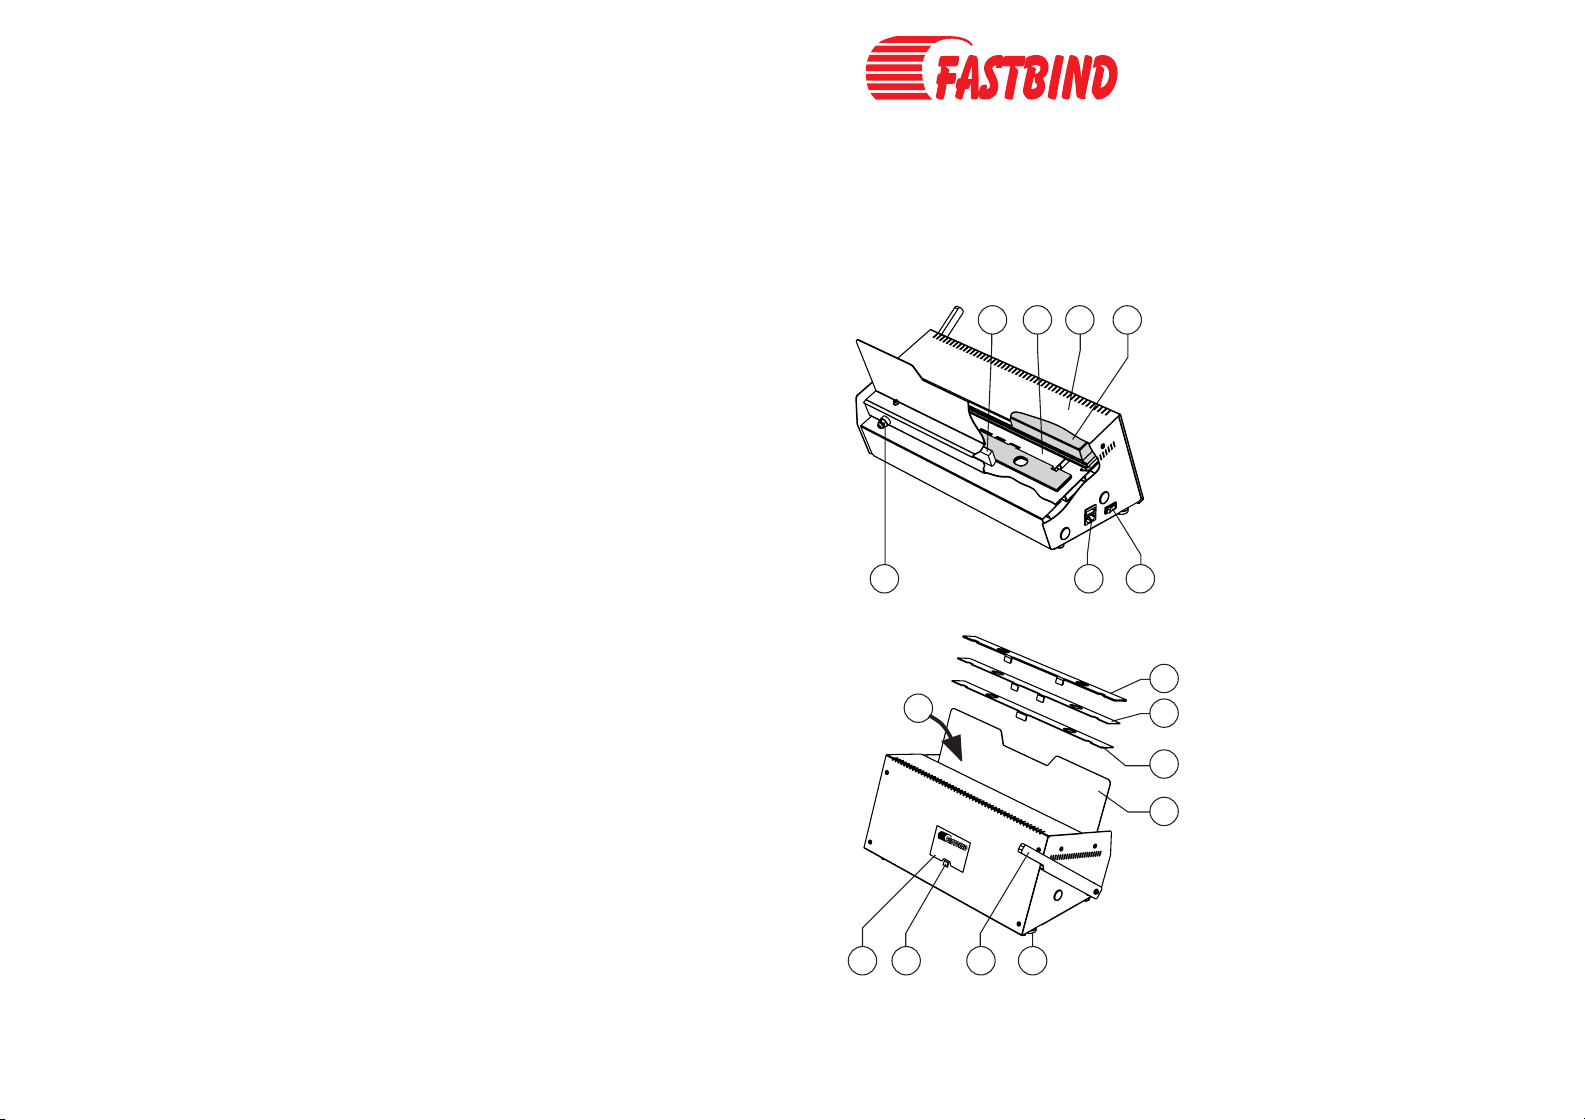
Main parts
123 4
5
16
67
15
14
13
12
1 Back support
2 Positioning deck
3 Housing
4 Pressing tool
5 Adjustment screw + locking nut
(back support)
6ACIN
7 Power switch
8 Control panel
9 Push button
10 Operating handle
11 Adjustable foot
12 Back rest
13, 14, 15 Spacer plates
16 Pressing cavity
© 2010 Copyright Maping Co. Reproduction, adaptation or translation without prior written permission is
prohibited, except asallowed under applicable copyright laws.The information contained hereinis subject to
change withoutnotice.
111098
Page 3
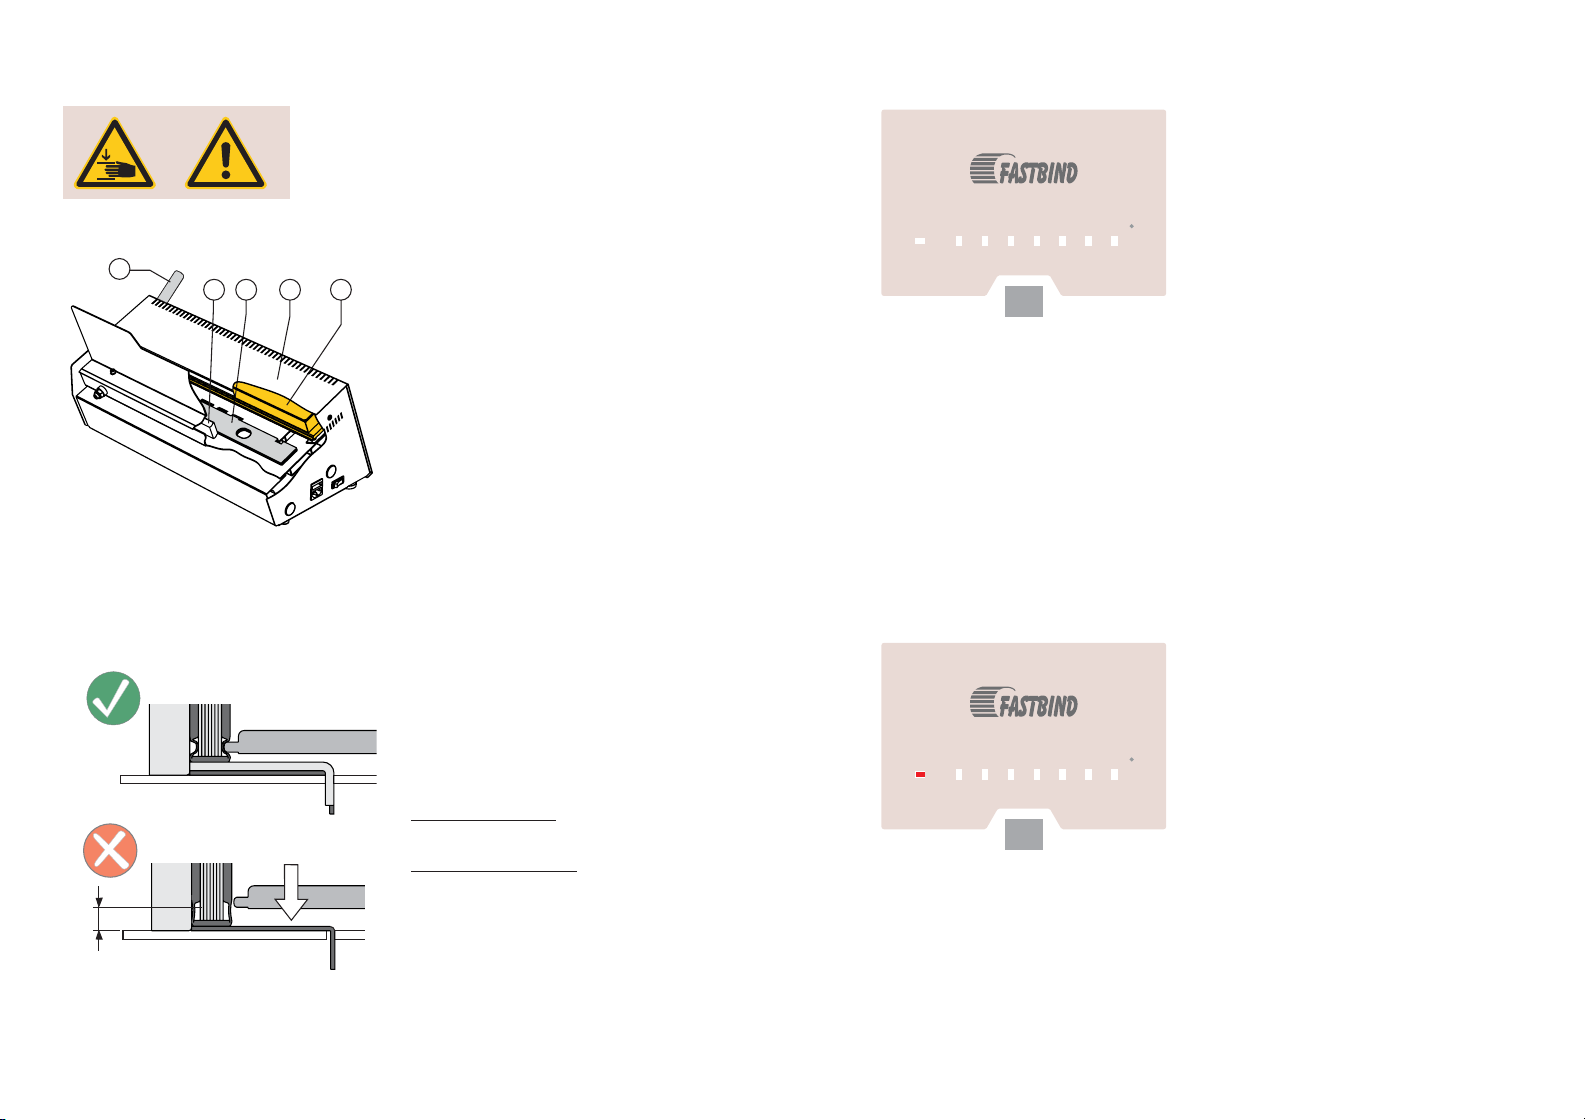
Warning !
Temperature setting
After turning the power on, use the push button
#13139A1
The surface of the press tool (5) is hot. Do not
touch it. Touching it may cause burn injury. Keep
hands clear from press tool when changing
spacer plates (3).
1
2
543
Press tool (5) moves towards back support (2)
when pressing from operating handle (1). Keep
hands clear!
STBY
707060
80809090100
160
140
175
110
120
190
210
230
250
on the control panel to select temperature. The
selected temperature LED blinks while heating
up and remains lit when ready.
Using too high temperature setting may damage
cover materials. To find a suitable temperature,
try first a low setting. Press operating handle for
five seconds and remove the book. Check if
groove is properly formed and how the cover
surface looks like. Increase temperature step by
step as needed until a suitable setting is found
for your cover material.
Adjusting pressing
point
Books may have different spine thickness. Add
or remove spacer plates to adjust pressing
point (= distance A). Optimal height for the
pressing point is in the center.
STBY
60
160
140
100
110
120CC
175
190
210
230
250FF
Stand by
If this equipment is not used for 60 minutes, it
automatically off the heater and turns
on the STBY LED light. Press the push button to
start heating.
switches
Adding spacer plates:
pressing point moves towards spine
Removing spacer plates:
pressing point moves away from spine
A
 Loading...