


™
RestoreIT!
Network V3.1
User’s Guide
Revision 3.1
August 2003

Copyright Notice
Copyright© 2000-2002 FarStone Tech Inc.
All Rights Reserved.
No part of this publication may be copied, transmitted, stored in a retrieval system, or translated into any language in any
form or by any means without the expressed written permission of Far Stone Technology Inc.
Far Stone grants you the right to use one copy of the enclosed software program "SOFTWARE" on a single computer. If
the SOFTWARE is installed on a network, or more than one user can run the SOFTWARE at the same time, you must
purchase an additional license for each additional user or computer.
Trademarks
RestoreIT!™ and RestoreIT! Network™ are trademarks of Far Stone Technology Inc.
Microsoft®, Windows® and MS-DOS® are registered trademarks of Microsoft Corporation.
Pentium is a registered trademark of Intel Corporation.
Other product names mentioned in this manual may be trademarks or registered trademarks
of their respective companies and are hereby acknowledged.
Printed in the United States of America.
Far Stone Technology Inc.
15550-B Rockfield Blvd., Suite 100,
Irvine, CA 92618
Tel: (949) 458-3666
Fax: (949) 458-3633
Technical support:
E-Mail: support@farstone.com
Please contact your reseller, or use our online support system at www.farstone.com
.
For Technical Support, follow the links to the support section:
http://www.farstone.com/home/en/shtml/contactus.shtml
Copyright © 2000-2002, Far Stone Technology Inc. All rights reserved.

Contents
Introduction................................................................................................................................ - 6 -
RestoreIT! Network (RITN) Edition........................................................................................................................................- 6 -
Features.....................................................................................................................................................................................- 6 -
Installation.................................................................................................................................. - 9 -
System Requirements..............................................................................................................................................................- 9 -
Installing the RITN Administrator..........................................................................................................................................- 10 -
Installing the RITN Client.......................................................................................................................................................- 12 -
Installation Trouble Shooting.................................................................................................................................................- 16 -
The RITN Administrator........................................................................................................... - 18 -
The RITN Administrator- Introdu ction..................................................................................................................................- 18 -
RITN Administrator toolbar buttons......................................................................................................................................- 18 -
Using the RITN Administrator................................................................................................. - 21 -
Opening the Remote Settings, Protection Policy and Enable/Disable Dialog...............................................................- 21 -
The Remote Settings page...............................................................................................................................................- 21 -
Changing a client side password to the RestoreIT! Manager (Real Mode) .............................................................................. - 22 -
Alternating RestoreIT! Server for the client side........................................................................................................................... - 22 -
Need confirmation when perform recovery.................................................................................................................................... - 22 -
The Protection Policies page – Overview...................................................................................................................................... - 23 -
Changing the Protection Policy........................................................................................................................................- 24 -
Enabling/Disabling RestoreIT!..........................................................................................................................................- 24 -
Manually Enable/Disable RestoreIT!.............................................................................................................................................. - 24 -
Automatically Enable/Disable RestoreIT!...........................................................................................................................- 25 -
Launching The Server-Side RestoreIT! Client Manager...................................................................................................- 25 -
Shutting Down & Restarting Clients.....................................................................................................................................- 26 -
Monitoring Client Screens.....................................................................................................................................................- 26 -
Using the Watch Client screen menu..............................................................................................................................- 27 -
Restoring from Full screen view.......................................................................................................................................- 27 -
Controlling Client Computer..................................................................................................................................................- 27 -
Using the Client Control screen menu............................................................................................................................- 28 -
Sending Messages to Clients...............................................................................................................................................- 28 -
Viewing client computer Log files.........................................................................................................................................- 29 -
The global Log file setup...................................................................................................................................................- 29 -
Changing the RITN Administrator password.......................................................................................................................- 30 -
Saving the client Password list.............................................................................................................................................- 30 -
Closing the RITN Admini strator............................................................................................................................................- 31 -
Server-Side Client Manager .................................................................................................... - 33 -
The RestoreIT! Client Manager - Introduction....................................................................................................................- 33 -
Opening the server side RestoreIT! Client Manager.........................................................................................................- 33 -
RestoreIT! Client Manager : Main buttons......................................................................................................................- 33 -
Viewing client side properties...........................................................................................................................................- 34 -
Changing the Protection Policy....................................................................................................................................................... - 35 -
Enabling/Disabling RestoreIT!......................................................................................................................................................... - 35 -
Managing client side Restore Points and Policies.............................................................................................................- 35 -
Viewing Restore Point properties....................................................................................................................................- 36 -
RestoreIT! Client Manager With Customized Protection..............................................................................................- 36 -
Description of Restore Point Icons ................................................................................................................................................. - 36 -
Adding Restore Points...................................................................................................................................................................... - 37 -
Creating new Incremental Restore Points................................................................................................................................ - 37 -
Renewing a Static Restore Point............................................................................................................................................... - 38 -
Deleting Restore Points.................................................................................................................................................................... - 40 -
Renaming a Restore Point............................................................................................................................................................... - 41 -
Reverting To Restore Points............................................................................................................................................................ - 41 -
Reverting to a Static Restore Point............................................................................................................................................ - 41 -
Reverting to a Incremental Restore Point................................................................................................................................. - 42 -

Client-Side RITN Manager....................................................................................................... - 45 -
RestoreIT! Manager (Real Mode)-Introduction...................................................................................................................- 45 -
Accessing the RestoreIT! Manager (Real Mode)...............................................................................................................- 45 -
Navigating in the RestoreIT! Manager (Real Mode) interface..........................................................................................- 45 -
Using Restore Points in Real Mode.....................................................................................................................................- 45 -
RestoreIT! Manager (Real Mode) - Settings..................................................................................................................- 46 -
Remove RestoreIT! .................................................................................................................. - 49 -
Uninstalling RIT Network Administrator...............................................................................................................................- 49 -
Uninstalling the client side RestoreIT! Manager.................................................................................................................- 49 -
RestoreIT! Rescue Disk.........................................................................................................................................................- 50 -
Function of Rescue Disk...................................................................................................................................................- 50 -
How to Use Your Rescue Disk.........................................................................................................................................- 50 -
FAQ............................................................................................................................................ - 53 -
Software License Agreement.................................................................................................. - 56 -
Appendix................................................................................................................................... - 59 -

1
Introduction

Chapter 1
Introduction
Instant recovery from system crash, virus attack, and accidental data deletion.
RestoreIT! Network (RITN) Edition
RestoreIT! Network (RITN) is a revolutionary real time HDD (Hard Disk Drive) recovery application that can be run over
any TCP/IP network. RITN allows the Network Administrator to control client computer backup strategies through the use
of our Network Manager program to provide full protection to the clients HDD. At the same time, RestoreIT! Network also
provides a range of Network monitoring tools giving the Network Administrator the ability to display network connections,
log client computer program usage, and view client screens in real-time
By using RITN Restore Points you are able to revert the entire contents of the hard disk to a previous point in time when
the computer was functioning correctly or with a desired configuration.
Features
• Reliable
365 days a year. RestoreIT! Network is a robust hard disk protection utility tool. Its unmatched design provides an
instant recovery solution for Client operating systems, applications or data files.
• Invulnerable
RestoreIT! Network will recover client computers from system crashes, virus attack, accidental data deletion, power
failure, failed software installations.
• Worry free downloading
If the system becomes infected with a virus from a downloaded file, restore to a point in time prior to the download to
easily recover.
• Virtually Unlimited Restore Points
RestoreIT! can setup unlimited incremental restore points. It is only limited by the HDD space available.
• Easy to Use
Now anyone can easily restore a computer back to working order without having to call tech support.
• Password Protection
The RestoreIT! password is self-contained, offering better security than your system BIOS or Windows.
• Personalize and Secure a Static Restore Point
Lock a Static Restore Point (effectively, a complete copy of your hard disk) and give it a Name to prevent accidental
deletion.
• Only a fraction of your HDD required
RestoreIT! uses a unique incremental data protection technology and uses only 5% - 10% of HDD capacity for backup.
You can restore the entire HDD in minutes.
• Intelligent Data Integrity Checking
RestoreIT! checks the data integrity of the latest Incremental Restore Point and marks it as “Not-trusted” if any
inconsistencies are found.

• Virtually Unlimited Restore Points
RestoreIT! can set up unlimited Incremental Restore Points. It is only limited by the hard disk space available.
• Network Management
The Network Administrator is able to remotely monitor Clients. This includes logging client application usage, sending
messages to the client, and performing remote shut-down and restarts.

2
Installation

Chapter 2
Installation
System Requirements
RestoreIT! Network (Server) Administrator:
To To use RestoreIT! Network Administrator, your computer must have one of the following Windows operating systems:
Windows 98, 98SE
Windows Me
Windows NT v4.0 Workstation operating system with Service Pack 5 or higher
Windows 2000 Professional Workstation with Service Pack 1 or higher
Windows XP Professional or Windows XP Home Edition
Your computer must also meet the following minimum requirements.
Windows 98/Me
Intel Pentium processor at 133 MHz
32 MB of RAM
15 MB the program;
TCP/IP protocol
Internet Explorer 4 or higher
CD-ROM or DVD-ROM drive
Windows NT 4.0 Server/Workstation
Service Pack 5 or higher
Intel Pentium processor at 133 MHz
32 MB of RAM
15 MB the program;
TCP/IP protocol
Internet Explorer 4 or higher
CD-ROM or DVD-ROM drive
Windows 2000 Professional Workstation
Service Pack 1 or higher
Intel Pentium processor at 133 MHz
64 MB of RAM
15 MB the program;
TCP/IP protocol
Internet Explorer 4 or higher
CD-ROM or DVD-ROM drive
Windows XP Home Edition/Professional
Intel Pentium processor at 300 MHz or higher
128 MB of RAM
15 MB the program;
TCP/IP protocol
Internet Explorer 4 higher
CD-ROM or DVD-ROM drive
RestoreIT! Network Client:
To To use RestoreIT! Network Client, your computer must have one of the following Windows operating systems:
Windows 98SE

Windows Me
Windows NT v4.0 Workstation operating system with Service Pack 6 or higher
Windows 2000 Professional Workstation with Service Pack 3 or higher
Windows XP Professional or Windows XP Home Edition with Service Pack 1 or higher
Your computer must also meet the following minimum requirements.
Windows 98/Me
Intel Pentium processor at 133 MHz
32 MB of RAM
15 MB the program and 5%-10% of total hard disk space for backup activities;
TCP/IP protocol
Internet Explorer 4 or higher
CD-ROM or DVD-ROM drive
Windows NT 4.0 Server/Workstation
Service Pack 5 or higher
Intel Pentium processor at 133 MHz
32 MB of RAM
15 MB the program and 5%-10% of total hard disk space for backup activities;
TCP/IP protocol
Internet Explorer 4 or higher
CD-ROM or DVD-ROM drive
Windows 2000 Professional Workstation
Service Pack 1 or higher
Intel Pentium processor at 133 MHz
64 MB of RAM
15 MB the program and 5%-10% of total hard disk space for backup activities;
TCP/IP protocol
Internet Explorer 4 or higher
CD-ROM or DVD-ROM drive
Windows XP Home Edition/Professional
Intel Pentium processor at 300 MHz or higher
128 MB of RAM
15 MB the program and 5%-10% of total hard disk space for backup activities;
TCP/IP protocol
Internet Explorer 4 higher
CD-ROM or DVD-ROM drive
Installing the RITN Administrator
The RestoreIT! Administrator program may be run on Windows 98/Me or NT.4.0(SP5) / 2000(SP1) / XP
1, Insert the RestoreIT! Network CD. The Setup program should start automatically.If the Auto-Run function doesn’t work,
please run the setup.exe file directly. This file is located on your RestoreIT! CD.
2, Click Continue when you see the RestoreIT! dialogue installation screen (shown below).

If you inserted the CD and nothing happened, Auto-Run may have been disabled on your machine.
Note:
To enable Auto-Run, click Start on the Windows taskbar. Select Settings, then Control Panel. In the Control Panel,
double click on the System icon. Click the Device Manager tab and double click the CD-ROM icon. Select your
CD-ROM drive and click on Properties, then Settings and ensure the Auto insert notification checkbox is
checked.
3, When the License Agreement screen appears, click I Accept to continue
4, Choose the Server installation and click Continue.
5, Enter the Serial Number. You can find the serial number in your original Disk packaging.
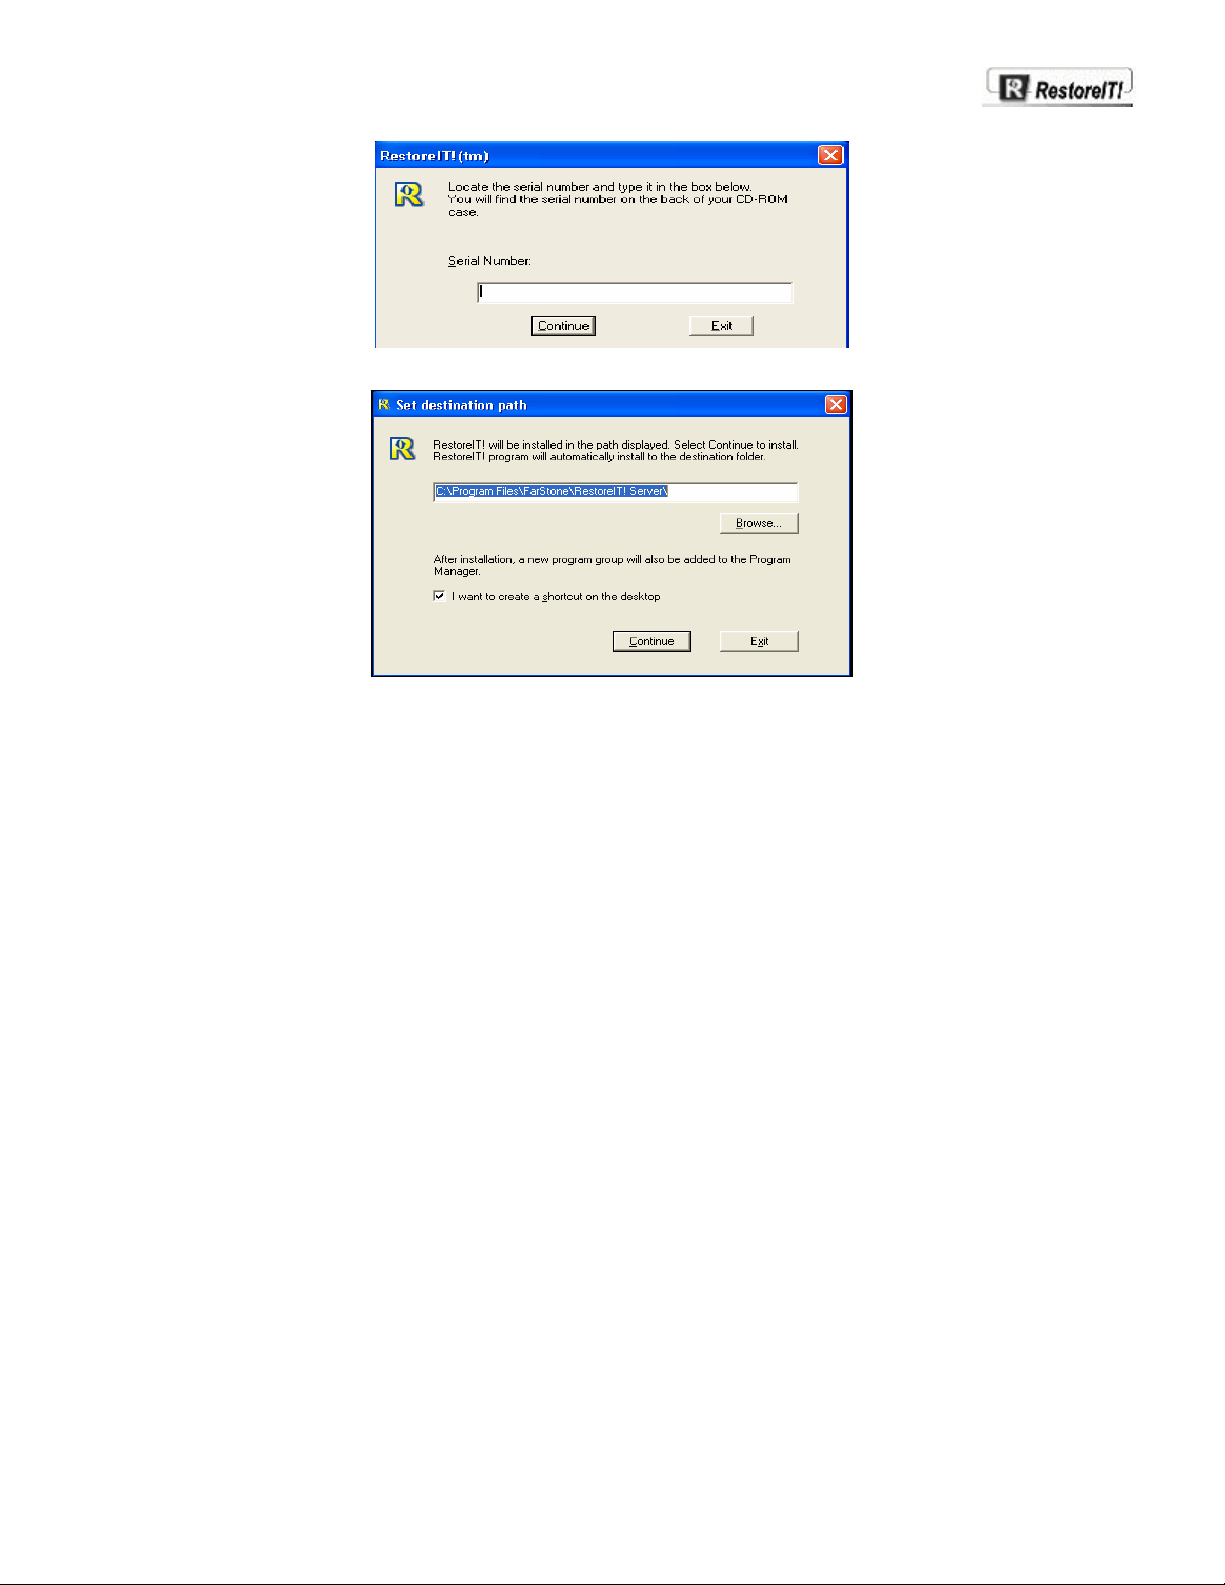
6, Enter the path to install RITN server program then click Continue to finish the installation.
Installing the RITN Client
Installation Environment
This version of RestoreIT! supports only the first drive in the system.
Pre-Installation Check
1. Disable any anti-virus checking including at the BIOS level.
2. Close all other applications before installing.
3. For optimal performance you should also do the following:
• Run Windows ScanDisk to ensure hard disk integrity.
• Run Windows Disk Defragmenter to combine the free space on your hard drive.
Pre-Installation
Before installing RestoreIT! V3.1, do the following:
1. Uninstall the previous version of RestoreIT!, if it is installed.
2. Run Windows Scandisk to check for hard disk errors.
3. Prepare a Windows startup disk to be used as a rescue disk if any problems arise.
4. Have the RestoreIT! serial number handy. (located in the software package)
RITN Client Installation
1. Run SETUP.EXE from the CD-ROM:
2. If you install RestoreIT! V3.1 without placing a CD-ROM into the CD-ROM drive, the installation program will ask you to
do so.
3. When installing RestoreIT! V3.1, you will need a valid serial number.
4. Please prepare a Windows startup disk.
5. RestoreIT! V3.1 does not support any UNIX and Linux.
6. If you installed Symantec Corp. Norton Utilities in Windows 98/Me, please first uninstall it and re-install after RestoreIT!
was installed.
Installation
Install RestoreIT! Network from the RestoreIT! CD.
1, Insert the RestoreIT! CD-ROM disk. The Setup program should start automatically. If not, run the file named
SETUP.EXE directly from the CD.
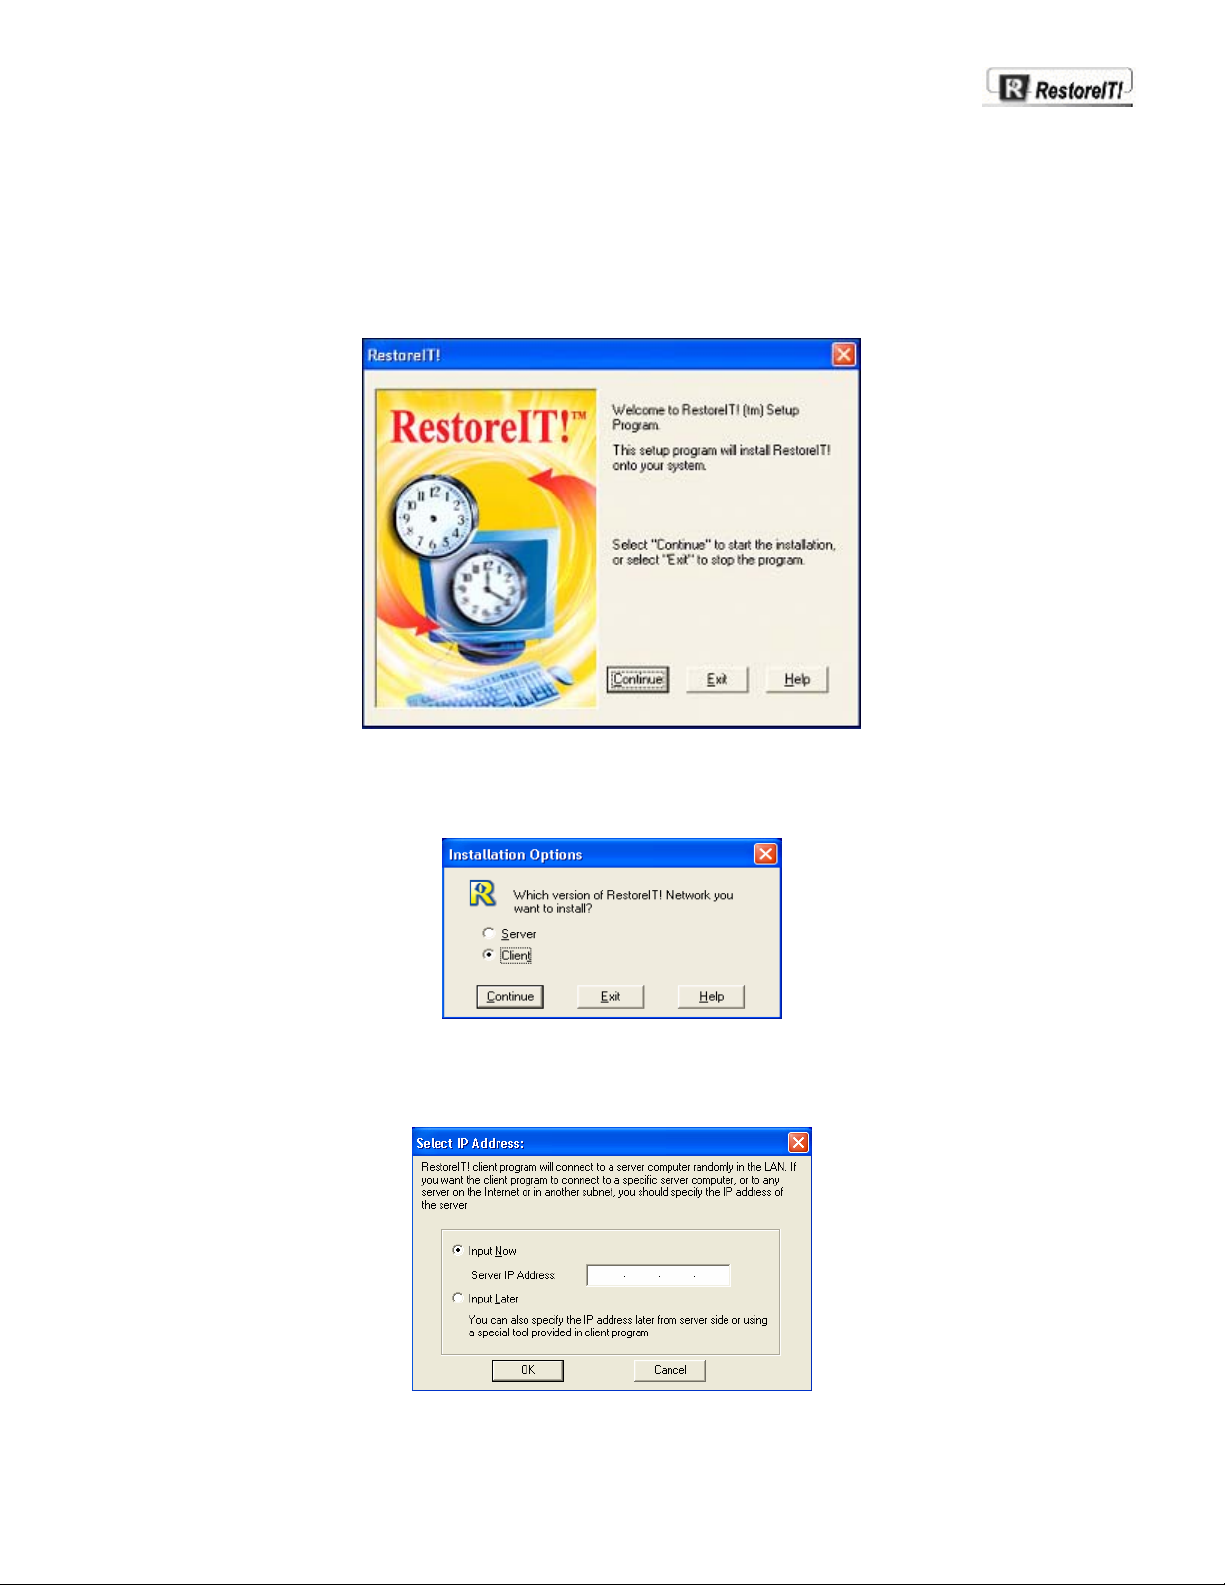
2, When the RestoreIT! install screen appears, select Continue to go to the next step
3, When the License Agreement screen appears, select I Accept to continue.
4, Choose the Client installation.
5, After the installation, the client program will randomly connect to a server computer in the LAN. If you want the client
program to connect to a specific server, or to any server on the Internet or in another subnet, you can specify the IP
address of the server computer for the client program.
If you do not want to input the IP address right now, you can also specify it later from server side or using a tool provided
in client program.
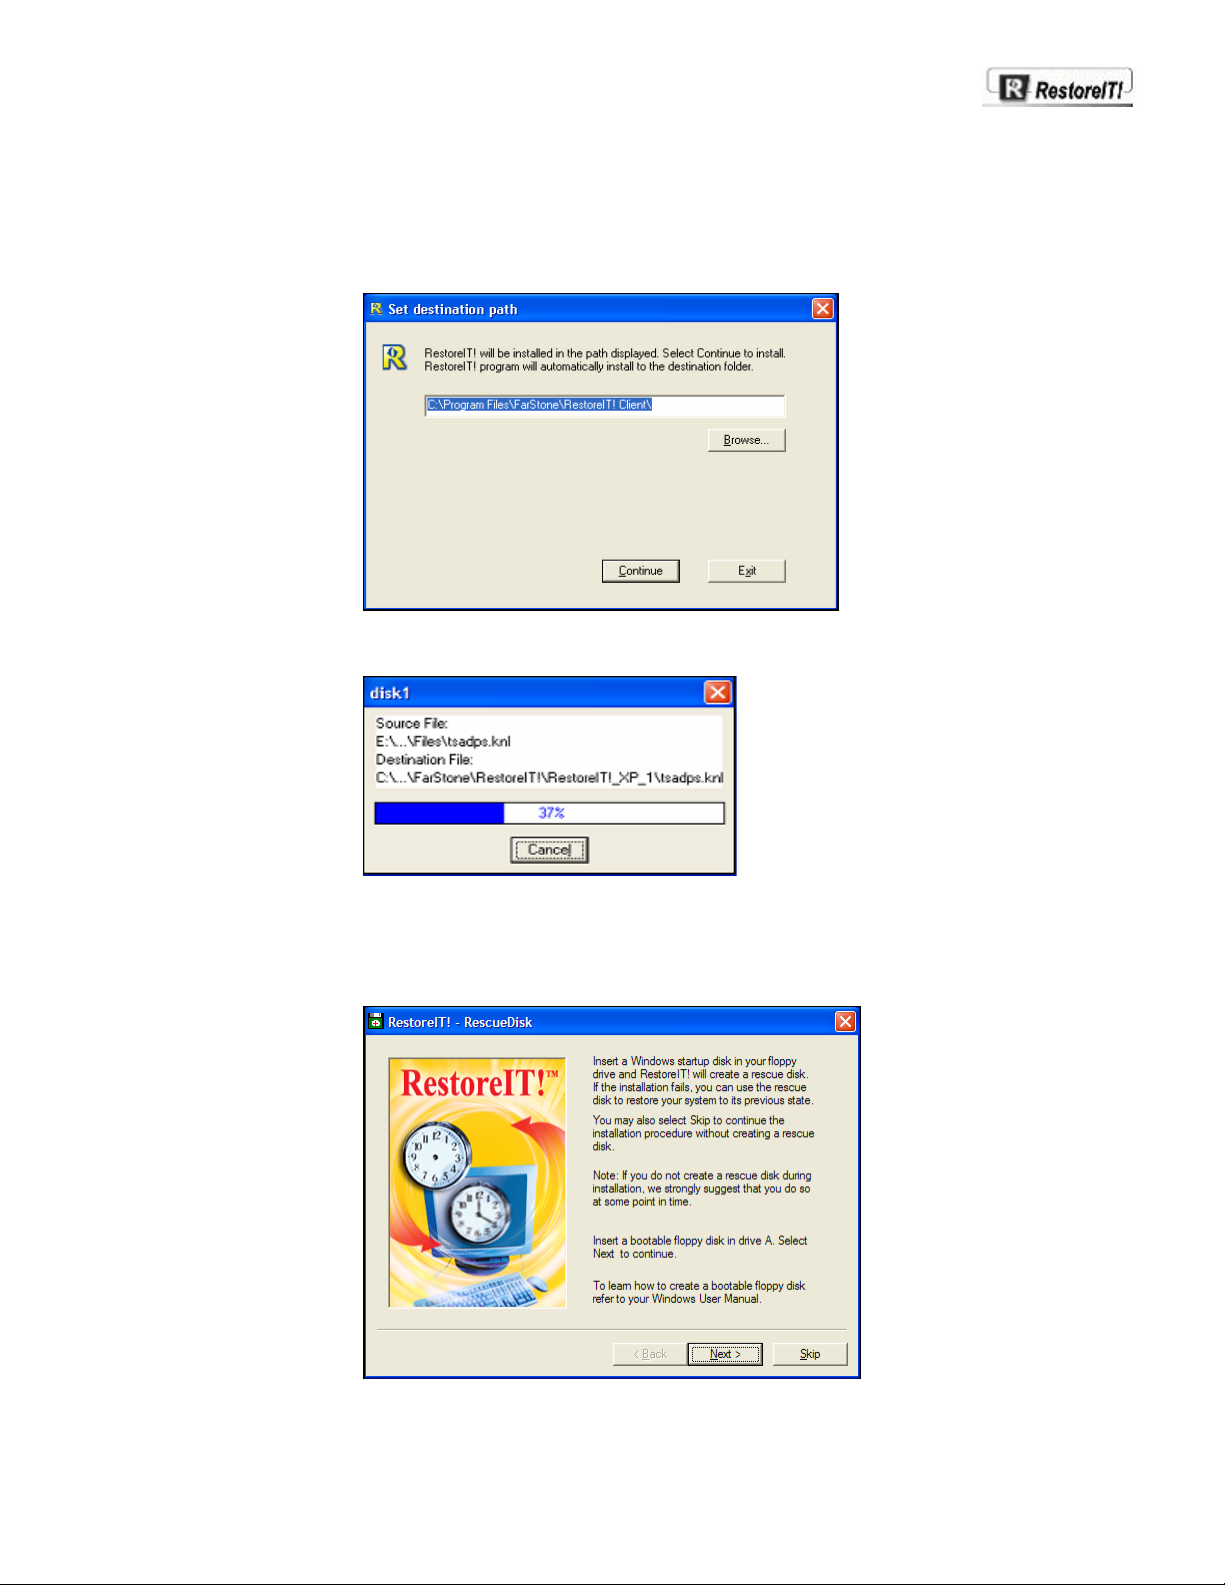
5, Read the Warning message and select Continue to proceed.
6, RestoreIT! will be installed in the path displayed. Select Continue to install.
7, RestoreIT! program will automatically install to the destination folder.
8, Insert a Windows startup disk in your floppy drive and RestoreIT! will create a rescue disk . If the installation fails, you
can use the rescue disk to restore your system to its previous state.
You may also select Skip to continue the installation procedure without creating a rescue disk.
Note: If you do not create a rescue disk during installation, we strongly suggest that you do so at some point in time.
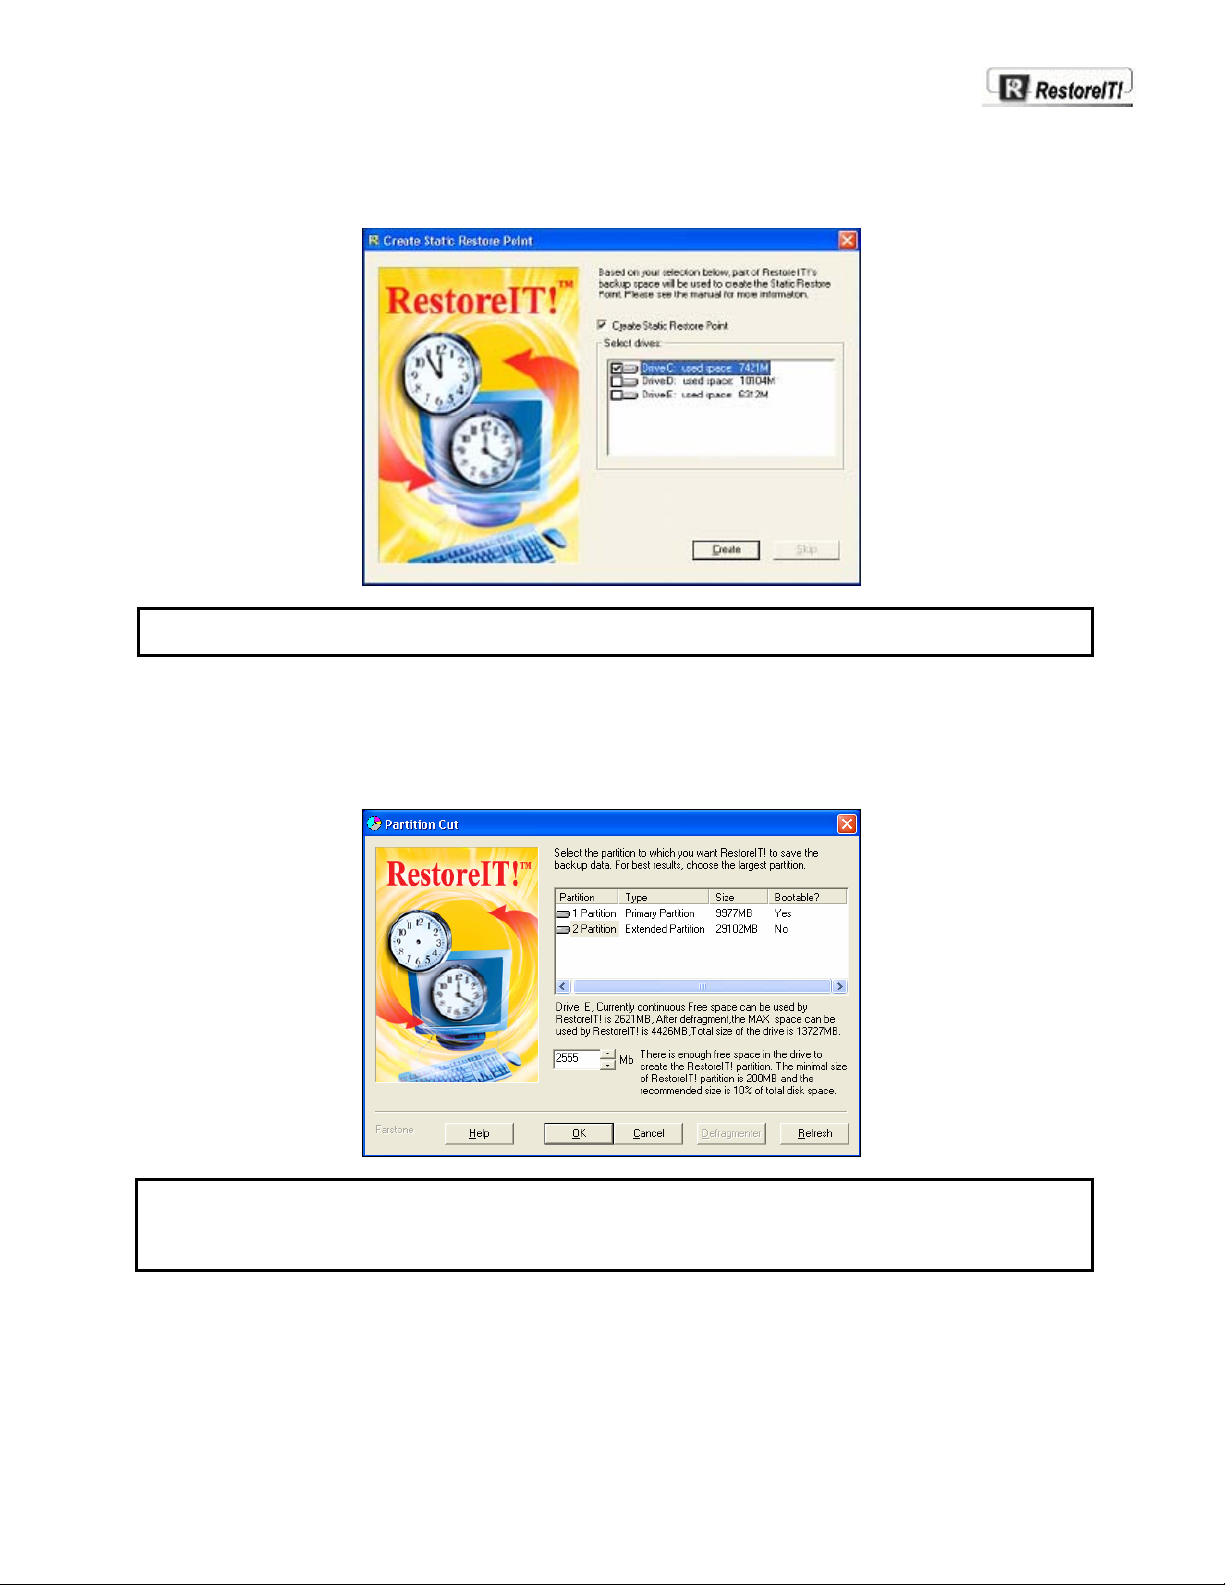
9, RestoreIT! installation will prompt you to create a Static Restore Point . This is an image file of all data stored on the
selected drives and is a complete backup.
Note: Although data compression is applied, Static Restore Points can require a significant amount of hard
drive space. We recommend that you create a Static Restore Point for your boot drive only.
10, Se lect the partition to which you want RestoreIT! to save the backup data. For best results, choose the extended
partition .
The installation program will check the partition size to determine if there is sufficient space.
Note: If the installation program detects multiple installations of Windows, you will receive a message stating
RestoreIT! has detected multiple Operating System; To ensure a full protection, please install
RestoreIT! on each of the installed Operating System.\nFor further assistance, please contact
support@farstone.com.
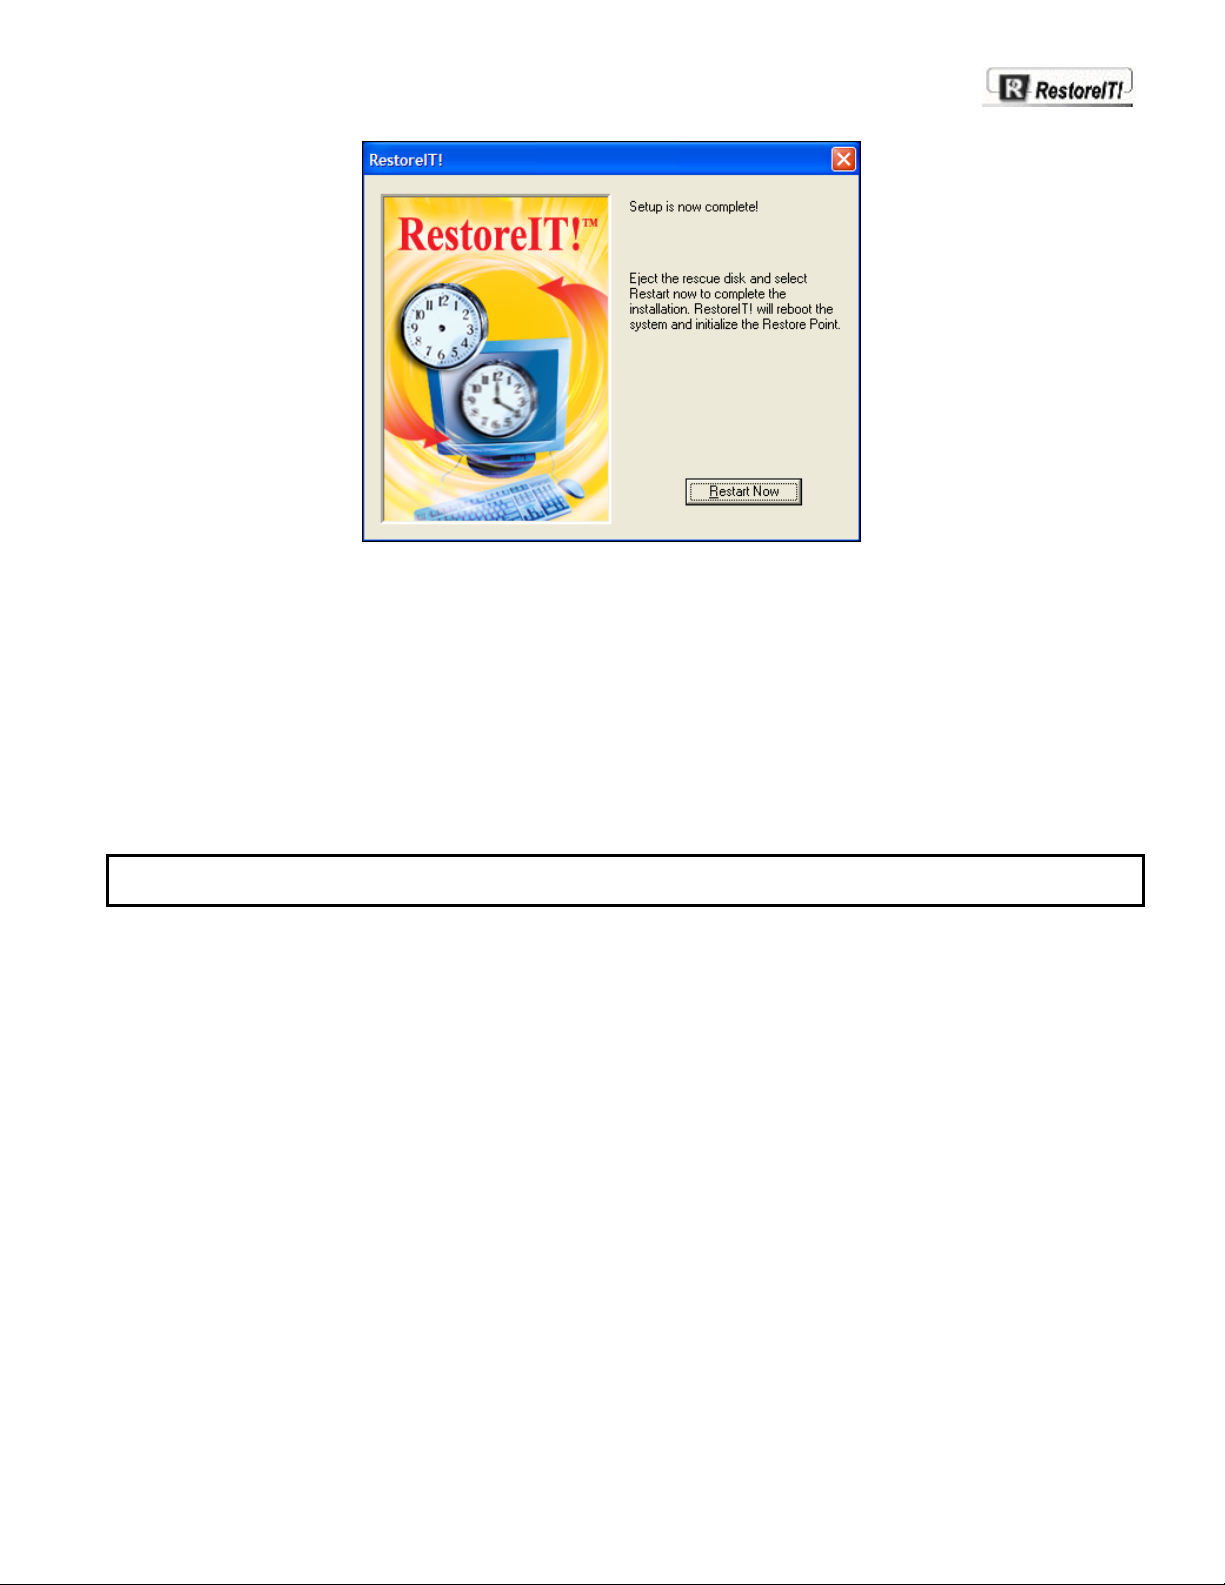
11, When the Setup has completed dialog box pops up, please eject the rescue disk and select Restart Now to
complete the installation. RestoreIT! will reboot the system and initialize the restore point.
12, After the system restarts, RestoreIT! will begin an initialization procedure.
Installation Trouble Shooting
Installation discontinued due to previously loaded VirtualBack Network V2.X Client.
• Before installing RITN V3.1 Client, please be sure previous versions have been uninstalled.
Installation discontinued due to not enough hard disk space.
• Remove unnecessary applications and files.In addition,run Windows Scandisk and Windows Defragmenter.
Anti-virus software found a virus in your system in installation.
• The type of changes RestoreIT! makes, will cause your anti-virus software to report a virus.
Note: After you have installed RestoreIT!, do not attempt to run any other software based recovery utility. Tape drives and
other physical devices are OK to use with RestoreIT!.
Multi-booting Windows
RestoreIT! 3.1 supports multi-boot for Microsoft Windows 98/Me/NT4/2000/XP.
Note: If System Commander is installed on your system, you may receive a warning message after installing RestoreIT!.
When System Commander presents the Possible Virus Warning dialog box, select update to allow normal use of
RestoreIT! with System Commander.

3
The RITN Administrator
Chapter 3
The RITN Administrator
The RITN Administrator- Introduction
The RITN Administrator provides a Windows interface to RestoreIT! client computers on the network. This part of the
application provides an overview of client computer Protection Policy settings, client monitoring tools as well as access to
the server side RestoreIT! Client Manager application.
Client Protection Policies may be set from within RITN Administrator, the RestoreIT! Client Manager or from within
RestoreIT! Manager (Real mode), which resides on the client computer
To launch the RITN Network Administrator program click Start on the Windows taskbar and select Programs then
RestoreIT! Network then RestoreIT! Administrator
If no password has been set, as is the 'default', the RestoreIT! Administrator application will open directly, otherwise the
password dialog box open and prompt for the administrator’s password.( The RITN default password setting is blank.)
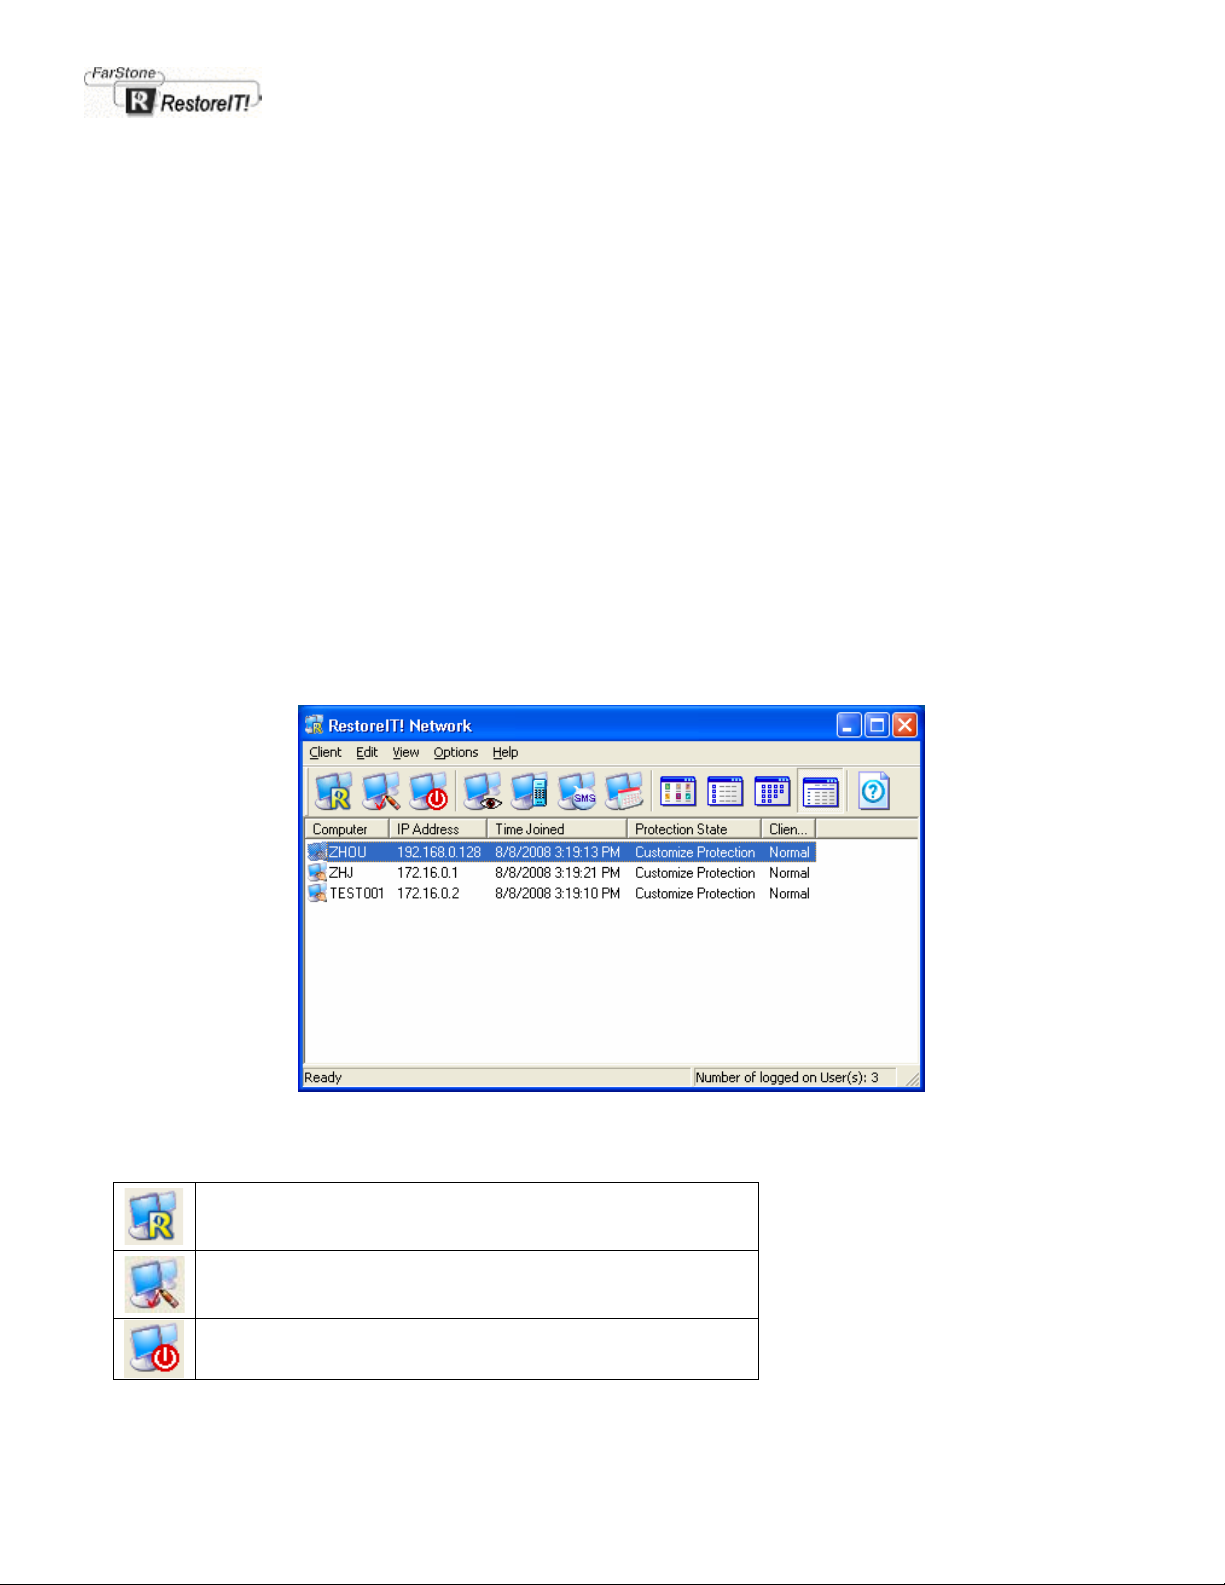
The main control window of the RestoreIT! Network Administrator interface gives details about RIT clients that are logged
on to the network. The information listed includes the computer name, IP address, logon time, protection policy and so on.
RITN Administrator toolbar buttons
Client Control
Launch the RestoreIT! Client Manager interface from the RITN
Administrator
Remote Settings/Protection Policy
Sets client side RITN password, system date and the Protection
Policy setup for the selected computer(s).
Remote shutdown
Shutdown or restart selected computers.
Main control window of the RITN Administrator

Watch Client
Watch a selected client computer screen.
Client Control
Remote control a selected client computer.
Message
Send a message to the selected computers.
Log
View the log files of the selected computers.
Large Icons
Show Restore Points as Large icons
Small Icons
Show Restore Points as Small icons
List
Show Restore Points as a List
Details
Show Restore Point Details
View Help file
Open Help Topics of RestoreIT!

4
Using the RITN
Administrator

Chapter 4
Using the RITN Administrator
Performing RITN admin functions first requires you to select one or more clients.
• To select a single client: Click the preferred computer in the Manager window.
• To select multiple clients: Press and hold the CTRL or SHIFT keys then click on each additional computer or
• click and drag the mouse to enclose multiple computers.
Opening the Remote Settings, Protection Policy and Enable/Disable Dialog
The Protection Policy dialog may be opened in 3 ways.
1. Click on the Remote Settings button
2. Select File from the RestoreIT! menu bar, then select Protection Policy from the drop menu.
3. Select the client computer(s) then with the mouse pointer over the highlighted computer name(s), right click and
select Protection Policy from the popup menu.
The Remote Settings page
The Remote Settings page (shown below) allows you to change the RestoreIT! Manager (Real Mode) password,
computer system date and server computer for connection. You can also set whether or not need confirmation before
recovering system here.
then select the Protection Policy page

Changing a client side password to the RestoreIT! Manager (Real Mode)
Clicking on the Change Password button will open the Password dialog box as shown below.
Passwords are not case sensitive and have a maximum length of 8 characters.
Note: The client computer must be rebooted for new password to take effect.
Alternating RestoreIT! Server for the client side
Users can specify another server to log on for the client from the server side.
To alternate RestoreIT! Server, Check Specify another server for connection box to make this function available, then
enter the IP address of the server that you want the client computer to log on.
Need confirmation when perform recovery

If Need confirmation when perform recovery box checked, client computer will receive a message
which ask for confirmation when administrator execute recovery from server side. If users do not check
this box, the client computer will be recovered without any warning message.
The Protection Policies page – Overview
There are 4 main options in the Protection Policy settings.
Full Protection
The clients HDD is completely recovered on boot up using the most recent Incremental Restore Point.
Protect System only
Only the C: drive is recovered on boot up. Other disk partitions i.e. logical drives or extended partitions, are not restored.
Customized Protection
Depending on your selection, RestoreIT! can be set to automatically create Incremental Restore Points according to your
needs.

For more information on how to do this see Chapter 5.-Managing client-side Restore Points and Policies.
Changing the Protection Policy
For new Protection Policy settings to take effect, the client computer(s) must be restarted.
When the Protection Policy is set to Full Protection or Protect system only, a new Restore Point is created when the
client computer boots up.
Thereafter, Full Protection and Protect System only will cause the RestoreIT! Manager (Real mode) to create a new
Restore Point each time the computer boots up.
With the Protection Policy set to Customize Protection, the client computer will use the most recently created Restore
Point, as determined by the custom settings, at boot up.
Enabling/Disabling RestoreIT!
Manually Enable/Disable RestoreIT!
The Enable RestoreIT! setting monitors the read and write information on the hard disk and the backup information. You
can also create, rename and delete all Restore Points.
When you need to defragment your hard disk or delete unneeded files, select Enable/Disable to display this page.

Select Manually Disable RestoreIT! and then Apply to execute this function. This will display the following warning: All
existing Incremental Restore Points will clear. Please make sure that you wish to do this.
Note: Disabling RestoreIT! will clear all Restore Points automatically.
Automatically Enable/Disable RestoreIT!
If you wish to Enable or Disable RestoreIT! automatically, select Automatically.
There are two options available:
• Automatically Enable/Disable Every Week
Select Every Week to schedule RestoreIT! to enable or disable automatically on any specified day of the week.
NOTE!
1. If the computer is running between the Disable Time and the Enable Time (e.g. the Disable Time is 9:00 AM
Saturday, and the Enable Time is 11:00 AM Sunday, and right now is10:00 PM on Saturday), your system will not be
protected.
2. If Reboot is checked, RestoreIT! will restart the computer when disabling or enabling RestoreIT!.
• Automatically Enable/Disable Every Day
Users can set a daily schedule as well as set a weekly schedule for enabling and disabling the protection. Select Day to
set the daily schedule.
Launching The Server-Side RestoreIT! Client Manager
To launch the RestoreIT! Client Manager interface from the RITN Administrator, select a client then either right click and
select Client Control from the popup menu or select File in the Administrator menu bar and choose Client Control.

The server side RestoreIT! Client Manager
Shutting Down & Restarting Clients
After selecting the client computers, click on the button or choose "Remote shutdown" in the "File" menu to open
the Remote Shutdown dialog box. (shown below)
Monitoring Client Screens
To monitor client screens, select the client computer name(s) then click on the Watch Client button.
The monitor client screen function may also be opened by selecting Watch Client from the File menu or right clicking the
highlighted client and selecting Watch Client.
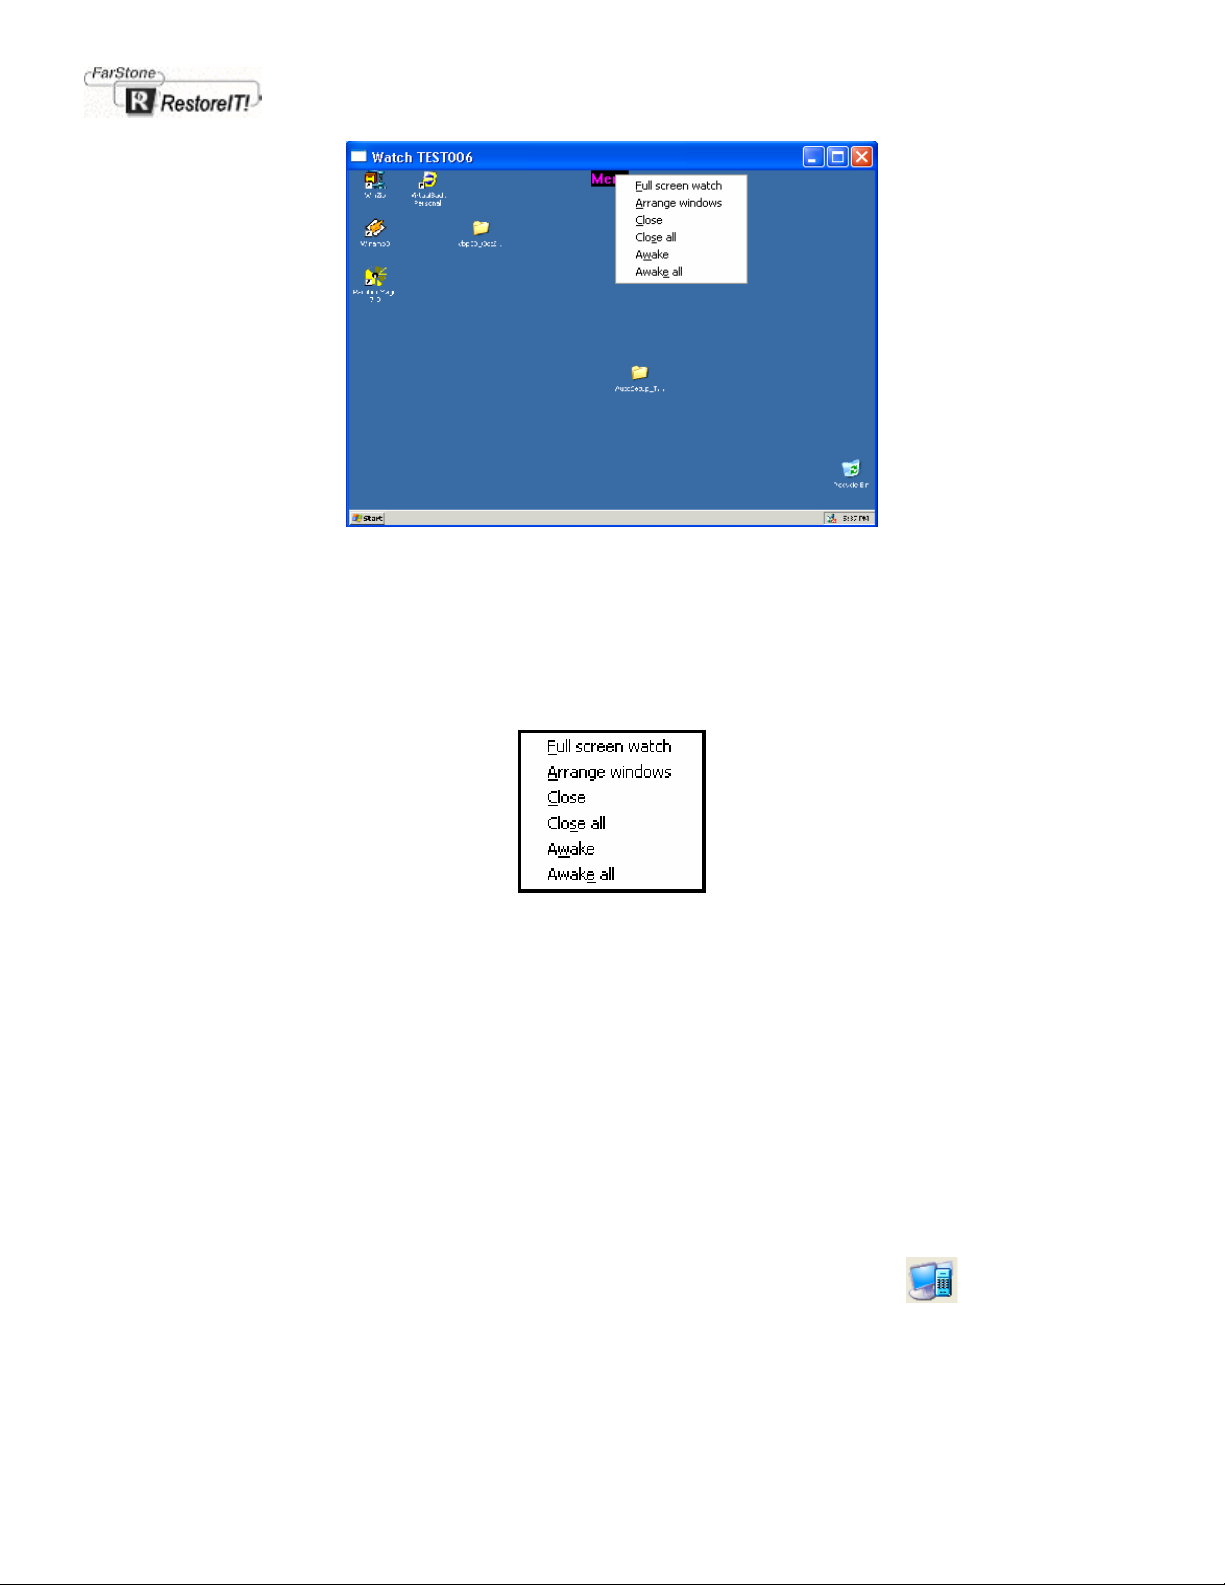
Shows a client screen being monitored with the drop MENU displayed.
The screens of the selected client computer(s) will be displayed as individual windows, on the RestoreIT! Administrator
screen.
Note: A maximum of 16 clients can be monitored at any one time.
Using the Watch Client screen menu.
Clicking the Menu at the top center of the monitor window will open the menu shown on the right hand side of the label
Watch Client screen functions are:
Full Screen Watch: Display the chosen window in full screen
Arrange windows: Arrange all the monitor windows
Close: Close the monitoring window
Close all: Close all the monitoring windows
Awake: Awake a client computer from the rest status
Awake all: Awake all monitored client computers
Restoring from Full screen view
Left click MENU in the center of the screen and select Restore Window.
Controlling Client Computer
To monitor client screens, select the client computer name(s) then click on the Client Control button.
The monitor client screen function may also be opened by selecting Client Control from the File menu or right clicking
the highlighted client and selecting Client Control.
Note: Only one client computer can be controled at any one time.

Using the Client Control screen menu.
Clicking the Menu at the top center of the monitor window will open the menu shown on the right hand side of the label
Client Control screen functions are:
Restore: Restoring full screen. This will disable Client Control and turn to Watch Client.
End Control: Close the controlling window
Awake: Awake the selected client computer from the rest status
Sending Messages to Clients
After choosing the client computer, click the Send Message button or choose Send message from the File menu.
The remote broadcast dialog box (shown below) will open.
Type in the message and click Send.
The message will be broadcast to the selected client computer(s) as shown left.

Viewing client computer Log files
After selecting a client computer, click or choose Logs from the menu bar File drop menu to open the text log
window (shown below).
If no log file exists you will be asked if you want to create a new file.
Click on Yes and a new log file will be created using the client computers name.
The global Log file setup
To open the global Log file setup, select Options on the menu bar then select Log Settings to open the Logging dialog
box (shown below).

The 'Log' file setup dialog box
Select Disable or Enable (default) logging of client computer
usage.
View a client operation log.
The maximum log file size of the client operation log. The log file
size may be in the range of 50-5000 Kbytes.
Note: More than one client log may be displayed by:
1. Selecting another computer from the main Administrator window then again clicking the Log button in the
main Administrator window.
2. Clicking View on the menu bar, selecting Log Option, then View in the Logging dialog box and selecting a
client log file from the Windows file manager.
Changing the RITN Administrator password
Select Options from the menu bar then Change Administrator Password from the drop menu to open the dialog box
(shown below).
Enter the new password in both fields and select OK .
Saving the client Password list
Selecting Save client Passwords from the Options drop menu will create a text file and record the client side RestoreIT!
Manager (Real Mode) passwords of all client computers currently logged onto the network.

Closing the RITN Administrator
You can close the RITN Administrator by choosing Exit from the File menu or clicking the close window button on the top
left corner of the window.
To exit the program completely, right-click on the RestoreIT! icon
menu.
from the system tray and select Exit from the popup

5
Server-Side Client
Manager

Chapter 5
Server-Side Client Manager
The RestoreIT! Client Manager - Introduction
The server side RestoreIT! Client Manager provides a Windows interface to individual client computers. As with the RITN
Administrator, Protection Policies and settings may be altered from within this application. In addition, the RestoreIT!
Client Manager provides detailed information about an individual computer's Restore Points and hard disk usage. When
the Protection Policy is set to Customized Protection, Restore Points can be created and deleted.
Opening the server side RestoreIT! Client Manager
To launch the RITN Client Manager from the RITN Administrator, select a client then right click and select Client Control
from the popup menu or select Client Control from the File menu on the Administrator menu bar.
The Server side Client Manager interface.
RestoreIT! Client Manager : Main buttons
The toolbar buttons and their functions are described below.
Create a New Restore Point
Revert to a selected Restore Point
Delete Restore Point(s)
Refresh the View
Display Restore Points as Large
icons

Display Restore Points as Small
icons
Display Restore Points as a list
Display Restore Point details
Open Help Topics of RestoreIT!
Viewing client side properties
The hard disk space available for use by RestoreIT! can be viewed by selecting View on the menu bar, then selecting
Options from the drop menu.
Alternatively, right-click in the lower frame of the RestoreIT! Client Manager Window and select Options from the popup
menu.
Client Side Options

The Options page displays the used and available disk space within the RestoreIT! partition and offers the option to
change the RestoreIT! Client (Real Mode) password .
Changing the Protection Policy
The current Protection Policy settings dialog box (shown below) may also be altered using the RestoreIT! Client Manager
and offers exactly the same settings as available in the RITN Administrator.
See Chapters 4, Opening the client Protection Policy and Remote Settings dialog and Overview of client Protection
Policies
Enabling/Disabling RestoreIT!
For more details about Enabling/Disabling RestoreIT!, please refer back to Chapters 4, Opening the client
Protection Policy and Remote Settings dialog and Enabling/Disabling RestoreIT!.
Managing client side Restore Points and Policies
Figure 5.5a below shows the RestoreIT! Client Manager view when the Protection Policy is set to Full Protection or
Protect System only. Under these protection states, it is only possible to view the RestoreIT!'s hard disk usage and
selected Restore Point properties. The Restore Point functions, New, Restore Rename and Delete are not available in
these protection modes.
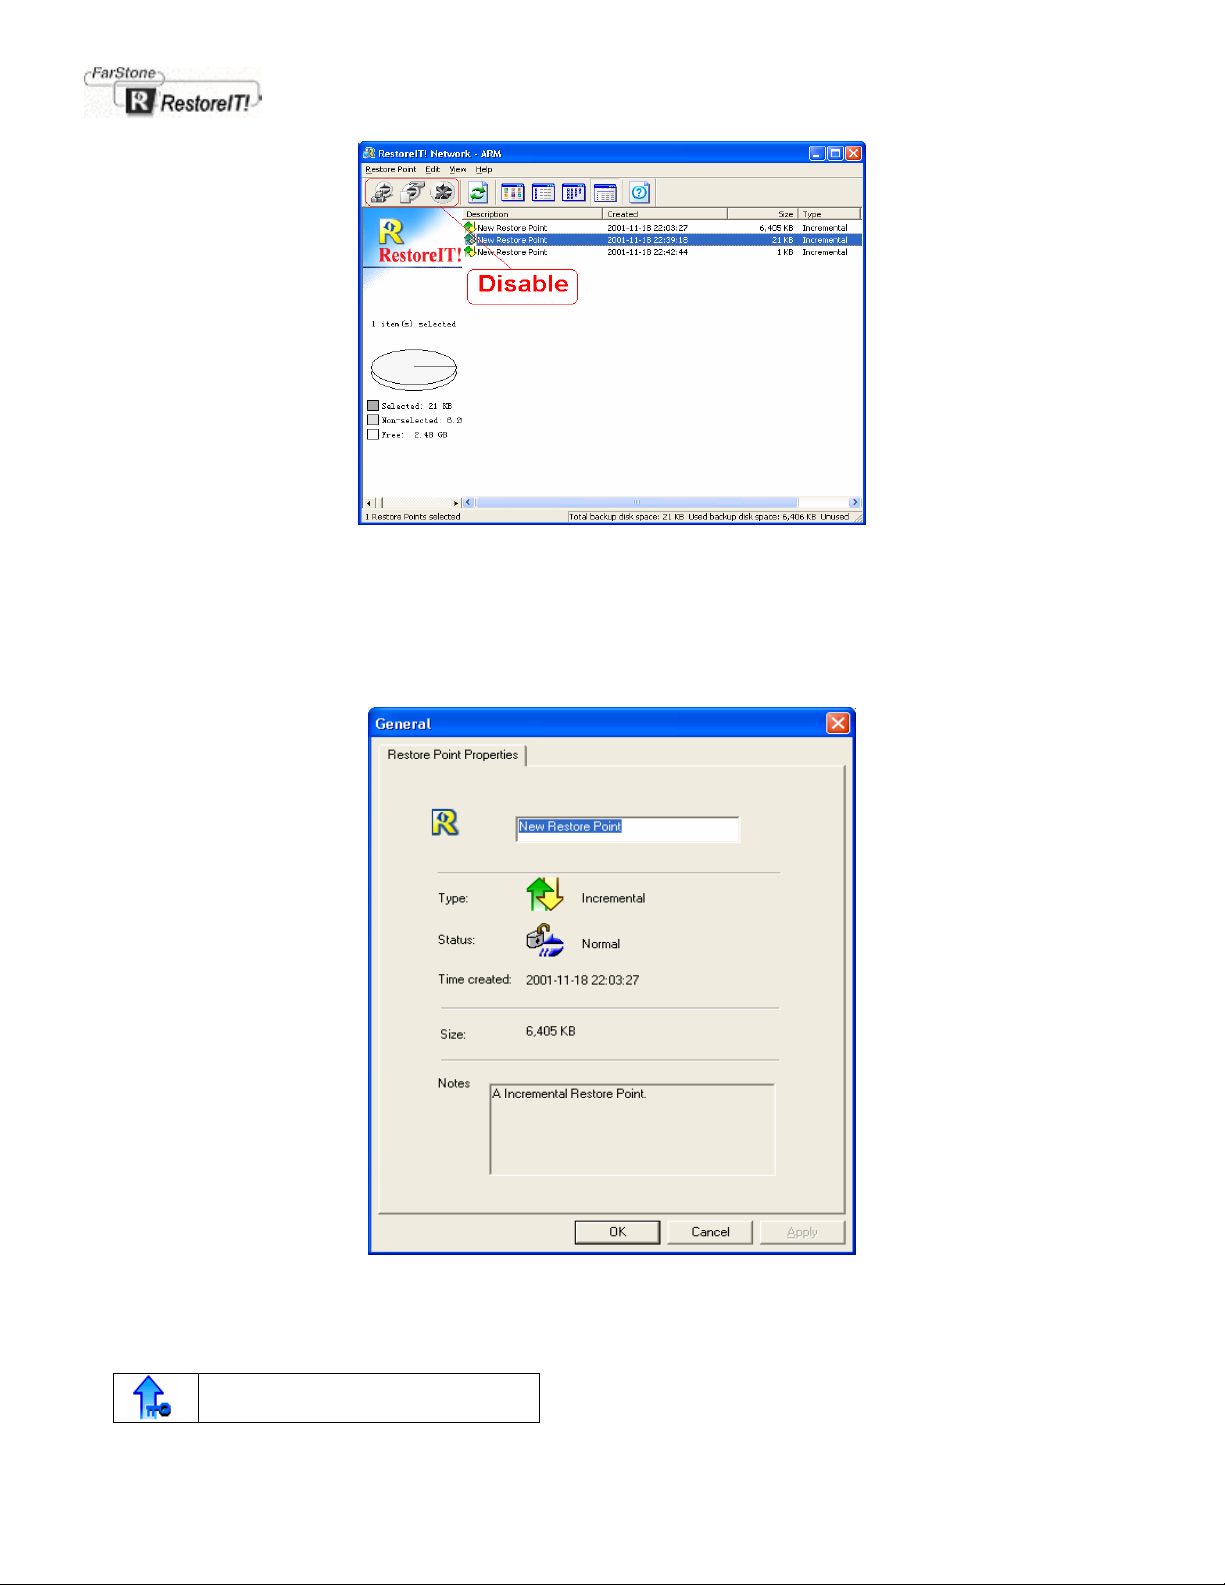
Figure 5.5a A view of the Client Manager when the Protection Policy is set to Full Protection'or Protect System only
Viewing Restore Point properties
The properties of individual Restore Points may be view by selecting the Restore Point the right clicking while the mouse
pointer is over the highlighted Restore Point and selecting Properties from the popup menu. Double clicking on the
Restore Point or selecting the Restore Point then clicking Restore Point on the menu bar and selecting Properties from
the drop menu also opens the properties window.
RestoreIT! Client Manager With Customized Protection
Description of Restore Point Icons
Static Restore Point - Locked

Static Restore Point - Unlocked
Normal Incremental Restore Point
Un-trusted Incremental Restore Point
Adding Restore Points
There are 2 kinds of Restore Points in RestoreIT! – Incremental and Static.
Incremental Restore Points: Restore Points which can be unlimited in number and setup manually.(The numbers of
Incremental Restore Points is subject to the hard drive space.)
Static Restore Points: Effectively an image file of all data stored on the selected drives.
There is a kind of specific Incremental Restore Points-Un-trusted Restore Point in RestoreIT! 3.1 . At system start up,
RestoreIT! checks the data integrity of the latest Incremental Restore Point and marked it as Un-trusted if RestoreIT!
finds any inconsistencies.
Note: Inconsistencies can happen if data is changed while RestoreIT! is not monitoring the hard disk drive. We do
not recommend restoring from an Un-trusted Incremental Restore Point.
Creating new Incremental Restore Points
Step 1: Start RestoreIT! program window.
Step 2: To add a new Restore Point either click on the New button or select Restore Points then New from the RestoreIT!
Menu bar to open the dialog box shown below. (Figure 5.6a)
To create a new Incremental Restore Point select Incremental, give the Restore Point a Name (or Leave the Default
Name i.e.New Restore Point as it is) then click on Next.
Figure 5.6a
Step 3: Now RestoreIT! will try to lock the hard drive. If any program is currently writing to the hard disk, RestoreIT! will
stop to create the restore point. Therefore, this step will take some time. If your computer locks-up during this
period, please restart it manually and try again at a later time.
Note: RestoreIT! won’t create new restore point if it is unable to lock your hard drive. Please close other
applications when you create a new restore point.

Figure 5.6b
Step 4: After the restore point has been created, click Close.
Figure 5.6c
Renewing a Static Restore Point
Step 1: Launch RestoreIT! Client Manager.
Step 2: Click Restore Point then New in the Menu Bar of RestoreIT! Manager or click the New button on the Toolbar.
The Dialog Box will appear as Figure 5.7a below. Select Static and create a name for this restore point then click
Next. (The previous name that RestoreIT! provides is Static Restore Point)

Figure 5.7a
Step 3: RestoreIT! will remind you that creating a new Static Restore Point will clear the current Static Restore Point and
all Incremental Restore Points as Figure 5.7b below. Please make sure you wish to create a new Static Restore
Point then click Next to continue.
Figure 5.7b
Step 4: Select the partition to which you want RestoreIT! to backup
Note: The file size of the new Static Restore Point cannot be larger than the initial backup partition.

Figure 5.7c
Step 5: RestoreIT! will ask you to restart your computer. The new Static Restore Point will be created when your
computer restarts. When the New Restore Point dialog box appears, click Next to continue or Cancel to quit.
Figure 5.7d
Deleting Restore Points
Delete an existing Restore Point by clicking on the Delete Restore Point button or selecting the Restore Point then right
clicking and selecting Delete. All Restore Points created previous to the selected Restore Point will be deleted.
A list of affected Restore Points will then be displayed for you to confirm the Deletion

Confirm the Deletion of existing Restore Points
Click on Next to confirm the Deletion of Restore Points.
Once the deletion is confirmed the client computer will automatically be restarted.
Note: If the Static Restore Point has been locked, RestoreIT! will launch the dialog box to warn that Please unlock it
firstand then delete it..
Renaming a Restore Point
This function is designed to support the end-user by giving a name to a restore point, thereby the end-user can easily
remember the name of the Restore Point. To do this, launch The server side RestoreIT! Client Manager. First. select the
restore point that you want to rename. Click Restore Point/Rename and then type the name that you want.(It can
support up to 255 characters) Or select the restore point that you want to rename and then click the right button of mouse.
Select Rename. Shown below Figure 5.9
Figure 5.9
Reverting To Restore Points
Reverting to a Static Restore Point
Step 1: Select a Restore Point to restore to then either click the Restore button or right click and select Restore from the
popup menu.
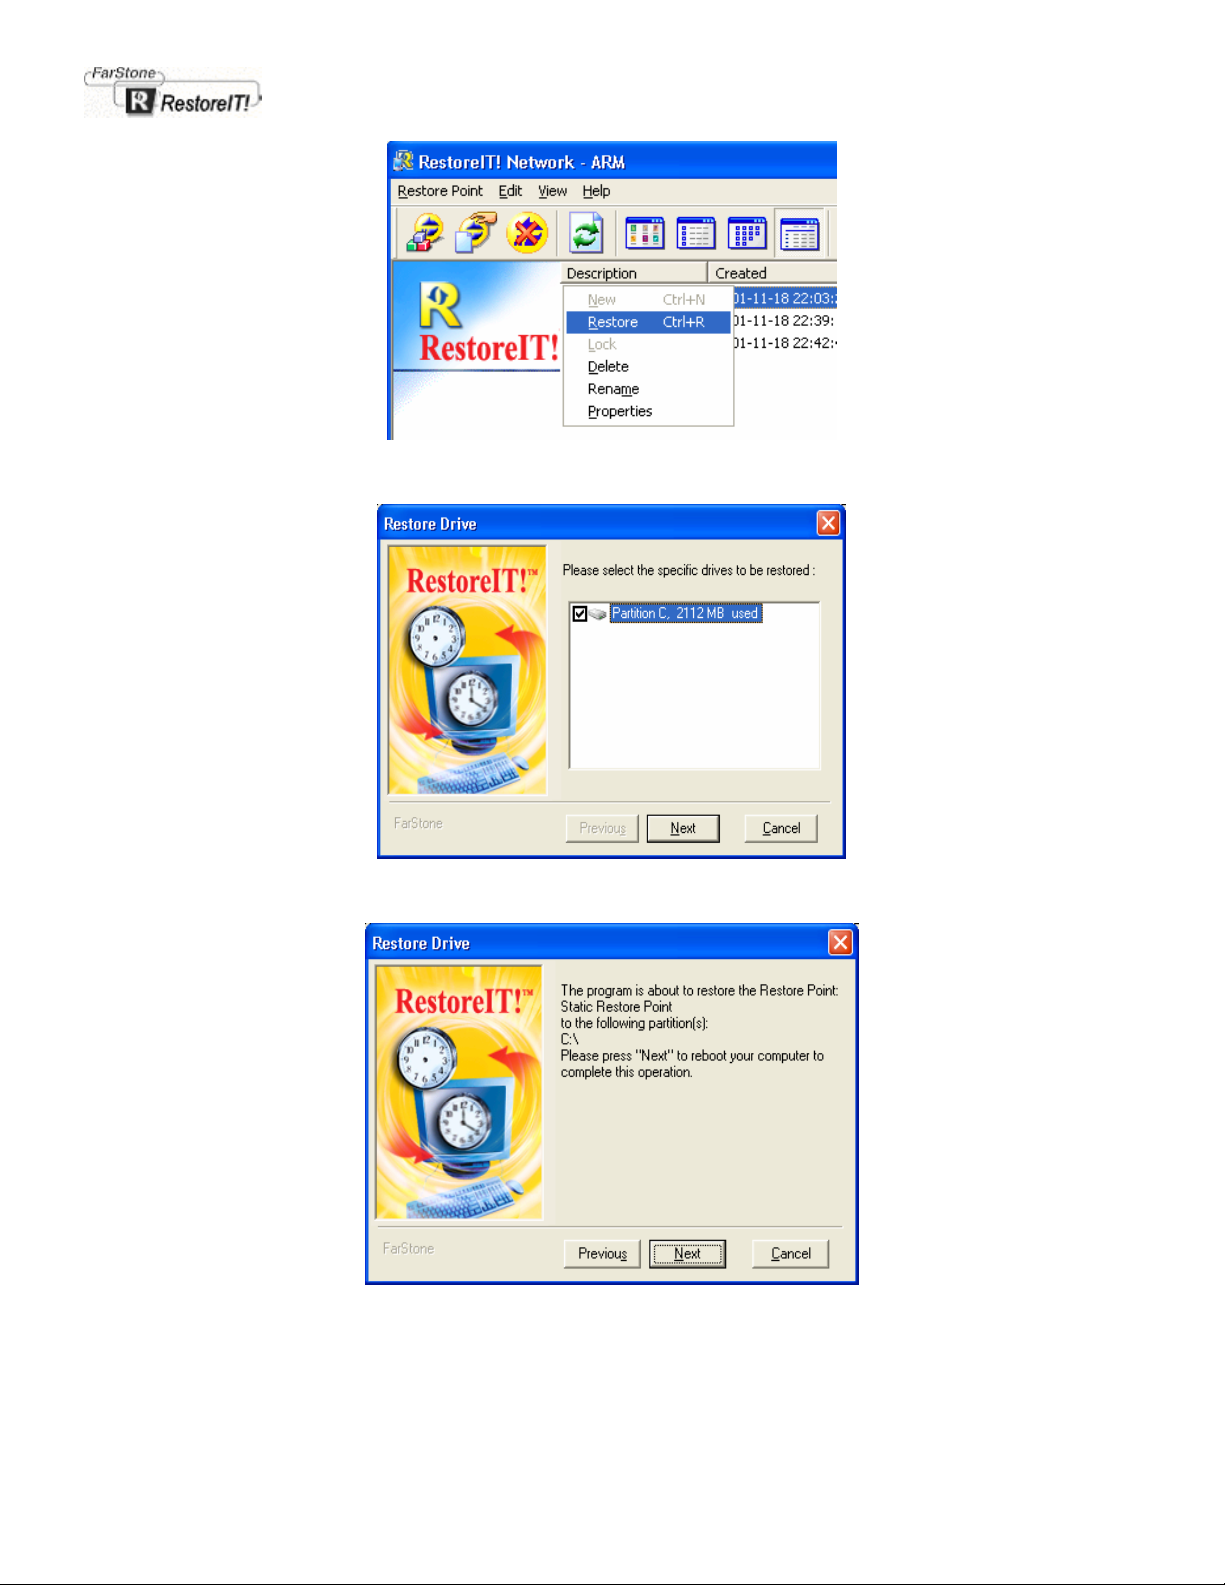
Step 2: Select the partitions to be restored and click Next.
Step 3: Click Next to begin the restore
Reverting to a Incremental Restore Point
Step 1: Select a Restore Point to restore to then either click the Restore button or right click and select Restore from the
popup menu.

Step 2. Choose to either Restore Drive C: only or the Entire Hard Disk.
Step 3: Click Next to automatically reboot to the selected Restore Point
Note: All existing Restore Points that were created after the selected Restore Point will be erased.

6
Client-Side RITN
Manager

Chapter 6
Client-Side RITN Manager
RestoreIT! Manager (Real Mode)-Introduction
The RestoreIT! Manager (Real Mode) resides on the client computers hard disk and is loaded prior to the operating
system at boot up. RestoreIT! Real Mode is the actual backup application and is accessed by the RITN Administrator and
the server side RestoreIT! Client Manager interfaces.
RestoreIT! Manager(Real Mode) physically manages the backup data and Restore Points according to its Protection
Policy settings.
The RestoreIT! Manager (Real Mode) is especially useful if the network is down and the client computer Protection Policy
was set to No Protection. Should a system problem occur, the hard disk may be recovered manually to a previously
created Restore Point, using the client side RITN Manager program.
Accessing the RestoreIT! Manager (Real Mode)
To access the RestoreIT! Manager (Real Mode) program, when prompted by RestoreIT!, press the SPACE BAR on the
client computer. This should happen after the system POST (Power On Self Test) but before Windows begins to load.
Enter your password (the default password as blank )and press the Enter key to access the main screen of RestoreIT!
Manager.
Navigating in the RestoreIT! Manager (Real Mode) interface
1. Use the Tab key to move through the screen selections. The selection that has the focus will be highlighted
2. Use the down arrow key to highlight a Restore Point
3. To make a selection, press the Enter key
The client side RIT Manager (Real Mode): Main screen
Using Restore Points in Real Mode

To manually restore a client computer, select either the Incremental Restore Points or Static Restore Point buttons to
open the Restore Points dialog box. The Incremental Restore Points dialog box will display a list of all available Restore
Points. The first available restore point will be the time at which RITN client was installed and or the time when RestoreIT!
was last disabled and subsequently re-enabled.
Real Mode Incremental Restore Point dialog box
Using the arrow key, move to an appropriate Restore Point and press the Enter key to complete the selection. Tab down
to OK and press Enter to activate the RestoreIT! restoration process. A complete restore can take from 20 seconds to 10
minutes, depending on the size of the Restore Point being used. Once the system has restarted, the computer will be
restored to the selected restore point. All file modifications and additions made after the Restore Point date/time will be
cleared (including any more recent Restore Points) and any files removed or damaged on your system that existed prior
the Restore Point will be restored.
To restore a computer to a Static Restore Point, highlight the Static Restore Point button and press Enter. Tab to the
Static Restore Point and press Enter then OK. The computer will automatically reboot and be restored.
Note: The Restore hard disk on boot up option found in the Settings dialog box must be disabled before manually
trying to restore to a selected Restore Point.
RestoreIT! Manager (Real Mode) - Settings
Figure 6.5a shows a view of the RestoreIT! Manager Settings dialog box. If the RITN Administrator program has the client
computer set to Protected mode, you can reset this at the client computer by unchecking the Restore hard disk on boot
and restarting the computer.
The Restore hard disk on boot option cannot be checked if you wish to manually select and activate a Restore Point for
the client computer.
Restore hard disk on boot up:
Figure 6.5a RestoreIT! Manager (Real Mode)-Settings dialog box

Enabling Restore hard disk on boot up will restore the client computer according to the settings in the RITN
Administrator protection policy where the protection policy is either Full Protection or Protect System only i.e. Drive c:
only. Disabling this function sets the Protection Policy to Customized Protection and uses the RITN Administrators
default settings.
Enable RestoreIT!:
Unchecking Enable RestoreIT! will set the client computer to Unprotected mode and delete all Incremental Restore
Points. Static Restore Points are not affected by disabling RestoreIT! and can only be removed by using the RestoreIT!
Administrator program in Windows mode.

7
Remove RestoreIT!

Chapter 7
Remove RestoreIT!
Uninstalling RIT Network Adm inistr ator
1, We strongly recommend that you make a Rescue Disk prior to uninstalling the RIT Network Administrator as the
Rescue Disk may be required for Uninstalling the RestoreIT! Manager(Real mode) should you encounter any
problems.
For Windows Me: Create a startup disk prior to creating the Rescue Disk. Insert the floppy disk into the A: drive then
select Start->Programs->RestoreIT! Network->Create a Rescue Diskette
2, Close the RestoreIT! Server program.
If the RestoreIT! Administrator icon is visible in the Windows taskbar, right click the icon and select Exit.
3, On the Start menu, select Programs ->RestoreIT! Network ->Uninstall RestoreIT! Network
4, Click OK to completely remove RITN Administrator.
Uninstalling the client side RestoreIT! Manager
Removing RestoreIT! Manager can be accomplished using three different techniques.
Method 1
Step 1: On the Windows taskbar select Start then Settings then Control Panel.
Step 2: Double click on the Add/Remove Programs icon to open the Add/Remove Properties Window.
Step 3: Select RestoreIT! Client and click on Add/Remove to uninstall the program.
Method 2

Reboot the computer. After the POST (Power On Self Test) and before Windows starts, press the Space key to switch to
the RestoreIT! Manager. Enter your password to open the RestoreIT! Manager main screen and then select Uninstall to
completely uninstall the RestoreIT! client side Manager program.
Method 3
Use this method only if problems were encountered removing RestoreIT! Manager (Real Mode).
Step 1: Insert a Rescue Disk into the floppy drive and reboot the computer. In this case, the Rescue disk can be one
created at installation or one created by the RITN Administrator program.
Step 2: Browse the files on the disk and run Rembr.exe to access the Uninstall program.
Step 3: Use the arrow keys to select Uninstall RestoreIT! and then press Enter to begin uninstalling.
Note: If you have more than one Windows operating system and installed RestoreIT! in each Windows, removing
RestoreIT! will resoult in the removal of RestoreIT! In all operating systems.
RestoreIT! Rescue Disk
The RestoreIT! rescue disk(VBTOOLS.EXE)runs in MS-DOS mode and is provided with the RestoreIT! setup disk. We
strongly recommend that you make a rescue disk during first RestoreIT! installation.
You can make the rescue disk by the following method Start/Programs/RestoreIT!/Create Rescue Diskette.
Function of Rescue Disk
• For creating a backup of the hard disk MBR(Master Boot Record) drive prior to RestoreIT! installation.
• To replace the current hard disk MBR with another MBR created using vbtools.exe.
• Removing your RestoreIT!.
How to Use Your Rescue Disk
For Windows Me/NT/2000/XP, boot your PC from the floppy drive to run VBTOOLS.EXE In Windows 98 VBTOOLS.EXE
can be run from MS-DOS mode or from the floppy drive.
Insert RestoreIT! rescue disk into the floppy drive and reboot your PC, then run A:> VBTOOLS.EXE.
The RestoreIT! Disk Tools will show four options , which may be selected using the Arrow or Tab keys
1. Backup the MBR(master boot record) to file :
Copies the current hard disk MBR(Master Boot Record) to serve as a backup file.
2. Restore the MBR from file
Replace the current hard disk MBR with a previous version created using the VBTOOLS.EXE program.
3. Multiple-boot support setting
Allows RestoreIT! to operate within multiple-boot Windows systems. If your PC is unable to boot into Windows
desktop after RestoreIT! installation, please run vbtools.exe and Enable the Multiple-boot support.
4. Uninstall RestoreIT!

If Uninstall was completed but failed to release the RestoreIT! non-dos partition. Normally you can completely
uninstall RestoreIT! via Uninstall RestoreIT! in Windows. However, in some situations, RestoreIT! may not release
non-dos partition on the hard disk drive,
You could use Arrow or Tab key to select among these four items.

8
FAQ

Chapter 8
FAQ
1. Can RestoreIT! really protect my PC from being destroyed by a virus?
A: When a virus has attacked your PC, common system files, applications, MS-Word documents or VB SCRIPT will be
infected. After using RestoreIT! to recover your system to the normalized status, all files in your hard disk will be
recovered to a previous status. Therefore all infected files will have been cleaned. Now, you should restart your PC,
then RestoreIT! will recover your PC to the selected restore point according to your original setup. All lost documents;
partitions infected by viruses, destroyed systems and so on will be recovered.
2. Does RestoreIT! take much Hard Drive space for backup?
A: RestoreIT! protects your Hard Drive both Real Time and Incremental, by monitoring your system while running the
MS-Windows Operating System. RestoreIT! only backs-up the files that you modified. It won't waste more hard disk
space to backup additional files. Therefore it takes only 5% to 10% of the whole hard drive.
3. Does RestoreIT! take a lot of time to recover files?
A: The automatic protect function of RestoreIT! will take about 20 seconds to 10 minutes (according to the data amount)
to restore your system.
4. Can RestoreIT! fix the system after your hard disk has been formatted?A: Files deleted, hard disk formatted or f-disk,
files lost, virus attack, Window’s system destroyed and so on, all this can be recovered by RestoreIT!.
5. Why can't I see the partition created by RestoreIT! in Windows Explorer when I start my PC via floppy disk, hard disk or
CDROM?
A: To protect your PC, RestoreIT! will use the secrecy function on the partition. This means you can't see the RestoreIT!
partition in Windows Explorer.
6. Why does my PC show the "Maybe virus found" dialog box when I install RestoreIT!?
A: If your PC's main board or network adapter has Trend’s ChipAwayVirus On Guard or McAfee’s ROMshield, they will
show RestoreIT! as a virus. Please disable Virus protection in BIOS setup and install RestoreIT! again.
7. Why does RestoreIT! show the Not enough room on your hard disk, please run Windows Defrag Utility first. message?
A: Because RestoreIT! needs a piece of continuous room on your hard drive and takes partial data at the end of your
hard drive, this message will be displayed. Please run Windows Defrag Utility first.
8. Why does my computer give me of a virus warning after I installed RestoreIT! or when I am installing RestoreIT!?
A: There may be several reasons for this. First, you should check to see if your network is functioning correctly. Second,
if your network is using Microsoft Proxy Server, close the Winsock Service. Finally, it may be that Windows has
loaded but no User has logged on to the client computer.
9. When I install RestoreIT!, I set up RestoreIT! partition on hard disk partition C. Then I created a new partition on
partition C with PQMAGIC. Why I can't remove RestoreIT!?
A: This is because your new partition is between partition C and the RestoreIT! partition and RestoreIT! can't return its
partition to hard disk partition C. Please delete your new hard disk partition, and return hard disk partition C to original
size, then remove RestoreIT!.

10. When selecting a Incremental Restore Point to revert, why are the Restore the Entire HardDrive option radio
disabled and only the Restore C: Drive Only available ?
A: If a Incremental Restore Point (ex. point A) is created after a restoration operation which is Restore C: Drive Only,
then all the Incremental Restore Points created before this Incremental Restore Point (point A) will be only available
to Restore C: Drive Only for hereafter restoration operation.

9
Software License Agreement

Chapter 9
Software License Agreement
FARSTONE TECHNOLOGY, INC. (FARSTONE) END USER LICENSE AGREEMENT FOR RestoreIT! Network,
HEREAFTER REFERRED TO AS THE "SOFTWARE"
PLEASE READ CAREFULLY: THE USE OF THIS "SOFTWARE" IS SUBJECT TO THE "SOFTWARE" LICENSE TERMS
OF FARSTONE AND OTHER LICENSORS WHOSE SOFTWARE MAY BE BUNDLED WITH THIS PRODUCT.
BY YOUR USE OF THE "SOFTWARE" INCLUDED WITH THIS PRODUCT YOU AGREE TO THE LICENSE TERMS
REQUIRED BY THE LICENSOR OF THE "SOFTWARE", AS SET FORTH BELOW. IF YOU DO NOT AGREE TO THE
LICENSE TERMS APPLICABLE TO THE "SOFTWARE", YOU MAY RETURN THE ENTIRE UNUSED PRODUCT FOR A
FULL REFUND.
LICENSE AND WARRANTY:
The software which accompanies this license (the "Software") is the property of FARSTONE or its licensors and is protected
by copyright law. While FARSTONE continues to own the Software, you will have certain rights to use the Software after your
acceptance of this license. Except as may be modified by a license addendum which accompanies this license, your rights
and obligations with respect to the use of this Software are as follows:
A. Single User License:
(a) use the "Software" on a single computer system or network, and only by a single user at a time. If you wish to use the
"Software" for more users, you will need an additional License for each user.
(b) make one copy of the "Software" in machine-readable form solely for back-up purposes, provided you reproduce
FarStone's copyright proprietary legends. Notwithstanding the foregoing, the "Software" may be used on the home, laptop or
other secondary computer of the principal user of the "Software", and an additional copy of the "Software" may be made to
support such use. As used in this License, the "Software" is "in use" when it is either loaded into RAM or installed on a hard
disk or other permanent memory device. The "Software" may be "in use" on only one computer at any given time. (Different
License terms and fees are applicable for networked or multiple user applications.) As a specific condition of this License,
you agree to use the "Software" in compliance with all applicable laws, including copyright laws, and that you will not copy,
transmit, perform or distribute any audio or other content using the "Software" without obtaining all necessary Licenses or
permissions from the owner of the content.
B. Multiple User License:
Make one copy of the "Software" in machine-readable form solely for back-up purposes, provided you reproduce FarStone's
copyright proprietary legends.
You must acquire and dedicate a License for each separate computer on which any part or portion of the "Software" is
installed or run As used in this License, the "Software" or any part or portion of the "Software" is "in use" when it is either
loaded into RAM or installed on a hard disk or other permanent memory device including any networked or shared
environment where either direct or indirect connections are made through software or hardware which pools or aggregates
connections.
As a specific condition of this License, you agree to use the "Software" in compliance with all applicable laws, including
copyright laws, and that you will not copy, transmit, perform or distribute any audio or other content using the "Software"
without obtaining all necessary Licenses or permissions from the owner of the content.

C. Restrictions: You may not distribute copies of the "Software" to others or electronically transfer the "Software" from one
computer to another over a network. You may not post or otherwise make available the "Software", or any portion thereof, in
any form, on the Internet. You may not use the "Software" in a computer service business, including in time-sharing
applications. The "Software" contains trade secrets and, in order to protect them, you may not decompile, reverse engineer,
disassemble, or otherwise reduce the "Software" to a human-perceivable form. YOU MAY NOT MODIFY, ADAPT,
TRANSLATE, RENT, LEASE, LOAN, RESELL FOR PROFIT, DISTRIBUTE, NETWORK OR CREATE DERIVATIVE
WORKS BASED UPON THE "SOFTWARE" OR ANY PART THEREOF.
D. Limited Warranty:
Farstone warrants that the media on which the Software is distributed will be free from defects for a period of thirty(30) days
from the date of delivery of the Software to you. Your sole remedy in the event of a breach of this warranty will be that
Farstone will, at its option, replace any defective media returned to Farstone within the warranty period or refund the money
you paid for the Software. Farstone does not warrant that the Software will meet your requirements or that operation of the
Software will be uninterrupted or that the Software will be error-free.
THE ABOVE WARRANTY IS EXCLUSIVE AND IN LIEU OF ALL OTHER WARRANTIES, WHETHER EXPRESS OR
IMPLIED, INCLUDING THE IMPLIED WARRANTIES OF MERCHANTABILITY, FITNESS FOR A PARTICULAR PURPOSE
AND NONINFRINGEMENT. THIS WARRANTY GIVES YOU SPECIFIC LEGAL RIGHTS. YOU M AY HAVE OTHER RIGHTS,
WHICH VARY FROM STATE TO STATE.
E. Limitation of Liability: IN NO EVENT WILL FARSTONE OR ITS LICENSORS BE LIABLE TO YOU FOR ANY
INCIDENTAL, CONSEQUENTIAL OR INDIRECT DAMAGES, INCLUDING ANY LOST PROFITS, LOST SAVINGS, OR
LOSS OF DATA, EVEN IF FARSTONE OR A LICENSOR HAS BEEN ADVISED OF THE POSSIBILITY OF SUCH
DAMAGES, OR FOR ANY CLAIM BY ANY OTHER PARTY. Some states do not allow the exclusion or limitation of special,
incidental, or consequential damages, so the above limitation or exclusion may not apply to you.
F. General: You acknowledge that you have read this Agreement, understand it, and that by using the "Software" you agree
to be bound by its terms and conditions. You further agree that it is the complete and exclusive statement of the agreement
between FarStone and you, and supersedes any proposal or prior agreement, oral or written, and any other communication
between FarStone and you relating to the subject matter of this Agreement. No additional or any different terms will be
enforceable against FarStone unless FarStone gives its express consent, including an express waiver of the terms of this
Agreement, in writing signed by an officer of FarStone. You assume full responsibility for the use of the "Software" and agree
to use the "Software" legally and responsibly.
Should any provision of this Agreement be declared unenforceable in any jurisdiction, then such provision shall be deemed
severable from this Agreement and shall not affect the remainder hereof. FarStone reserves all rights in the “Software” not
specifically granted in this Agreement.
Should you have any questions concerning this Agreement, you may contact FarStone by writing to:
FarStone Technology, Inc.
Legal Department
15550-B, Rockfield Blvd., Suite 100
Irvine, CA 92618

Appendix

Technical Support & Product Upgrades
Should you require additional information about RestoreIT!, please FAX or e-mail us at:
Homepage: www.farstone.com
For Technical Support, follow the links to the support section:
http://www.farstone.com/home/en/shtml/contactus.shtml
America Headquarters:
15550-B Rockfield Blvd., Suite 100,
Irvine, CA 92618
Tel: (949) 458-3666
Fax: (949) 458-3633
Taipei Headquarters:
6 F, 101 Chow Tze Street.
Taipei 114, Taiwan.
Tel: +886-2-2627-1234
Fax: +886-2-2627-1233
Appendix
 Loading...