

Page 1

DriveClone
TM
Version 2.0
User’s Guide
Page 2

Copyright Notice
No part of this publication may be copied, transmitted, stored in a retrieval
system, or translated into any language in any form or by any means without
the expressed written permission of FarStone Technology, Inc.
FarStone grants you the right to use one copy of the enclosed software
program ("SOFTWARE") on a single computer. If the SOFTWARE is installed
on a network, or more than one user can run the SOFTWARE at the same
time, you must purchase an additional license for each additional user or
computer.
Trademarks
FarStone™ and DriveClone™ are trademarks of FarStone Technology, Inc.
Microsoft®, Windows® and MS-DOS® are registered trademarks of
Microsoft Corporation. Other product names mentioned in this User’s Guide
may be trademarks or registered trademarks of their respective companies.
FarStone Technology, Inc.
Corporate and North American Headquarters
15 Hammond Dr., Suite 304
Irvine, CA 92618
Phone: (949) 458-3666
Fax: (949) 458-3633
Asia-Pacific Offices
10F-1B, No. 207, DunHua North Rd., Taipei, 105, Taiwan
Phone: 886-2-2546-9898
Fax: 886-2-2546-3838
Technical Support:
Please contact your retailer or use our online support system at
www.farstone.com
For your convenience, you will find answers to frequently asked questions on
our website at www.farstone.com
.
. Follow the links to the support section:
Page 3

http://www.farstone.com/home/en/shtml/contactus.shtml
Copyright©1998-2005 FarStone Technology, Inc. All rights reserved.
3
Page 4

Contents
CHAPTER 1 GLOSSARY............................................................5
CHAPTER 2 INTRODUCTION TO DRIVECLONE..........6
2.1 ABOUT DRIVECLONE ................................................................6
2.2 FEATURES AND BENEFITS.........................................................6
CHAPTER 3 INSTALLING/UNINSTALLING
DRIVECLONE.................................................................................8
3.1 SYSTEM REQUIREMENTS ..........................................................8
3.2 INSTALLING DRIVECLONE ........................................................8
3.3 UNINSTALLING DRIVECLONE .................................................10
CHAPTER 4 GETTING AROUND IN DRIVECLONE...11
4.1 LAUNCH DRIVECLONE ............................................................11
4.2 BACKUP AND RESTORE...........................................................11
4.2.1 Backup Drives............................................................................11
4.2.2 Restore Drives..........................................................................15
4.2.3 Recover CD/DVD...................................................................... 19
4.3 CLONE ......................................................................................22
4.3.1 Clone partition.......................................................................... 22
4.3.2 Clone Disk .................................................................................. 24
4.4 DRIVECLONE UTILITIES .........................................................28
4.4.1 Bootable Disc ............................................................................ 28
4.4.2 Erase Disc...................................................................................28
4.4.3 Image Integrity Check........................................................... 28
4.5 SETTINGS ................................................................................29
4.5.1 Set USB Standard.................................................................... 29
4.5.2 Network Settings..................................................................... 30
4.6 CREATE BOOTABLE DISC........................................................31
4.7 RESTORE FILE OR FOLDER .....................................................32
CHAPTER 5 APPENDIX..........................................................36
5.1 FAQ .........................................................................................36
5.2 LICENSE AGREEMENT .............................................................40
Page 5

Chapter 1 Glossary
DriveClone Image
A DriveClone image is the file that contains the contents of a computer’s hard
drive or partition(s). Using this image, you can copy the entire contents of
a hard drive to a portable medium such as a recordable CD/DVD, USB drive
or to another hard drive.
Recover CD/DVD
The Recover CD/DVD allows end users to start their systems by inserting this
disc into their CD-ROM drive. Once the system is booted up, the Recover
CD/DVD will restore the system automatically based on the content
contained on the Recover CD/DVD.
Restorable Image
When the size of the image is greater than the available space on the
external medium, the image will be divided into several volumes. Only the
first image of a series of images has the ability to restore the partition/disk
because it contains the initial data of the source partition/disk. We refer to
the first image as the restorable image.
Clone (Copy)
The term "cloning" refers to copying the exact information from one place to
another.
Page 6

Chapter 2 Introduction to DriveClone
2.1 About DriveClone
DriveClone is a hard drive utility that is used to backup or clone hard drives
or partitions. It creates a compressed archive file that contains all files,
partition information and security information stored on a hard drive or
CD/DVD. DriveClone can be used for many different purposes. PC users
can use DriveClone as a quick and easy way to back up and restore their
data in the event of a system crash. System administrators can use it to
dramatically reduce the time they spend restoring, reconfiguring or copying
data onto the hard drives of many computers. So, whether you need to back
up, recover, protect or upgrade PCs, DriveClone is an all-in-one solution.
2.2 Features and Benefits
• Copies the entire hard drive: Enables users to quickly back up,
replace or upgrade their hard drives.
• Auto-recover CD: Burn image files to a CD-RW to create a
startup/auto-recover CD. Just insert the CD into the CD drive and
the entire PC will be automatically restored to its previous condition.
• Saves time: Eases the time-consuming process of reinstalling
operating systems, programs and hardware drivers.
• Backup flexibility: Clone hard drives that are different in size,
format or brand. Copy a single partition or the entire hard drive.
• Easy to use: A Windows-similar interface loads prior to your
operating system, making DriveClone simple to use
• Optimizes operating speed: Supports UDMA1-5 to restore data in
sectors.
• Supports various partition formats: FAT16, FAT32, NTFS, Linux
and RestoreIT.
• Stores the image file to USB storage devices: Images can be
saved to USB storage devices such as a Removable USB hard drive
or burned on a CD/DVD disc through a USB recorder.
• Stores the image file on the network: Images can be saved to
a location on your LAN.
• Supports IDE and SATA Hard Drives: Can store to and restore
from both IDE, and SATA HDD port disk,
• Supports SCSI Hard Drives: Can store data to, restore from or
clone a SCSI hard drive.
• Supports RAID 0/1: Can store to, restore from or clone a RAID
6
Page 7

0/1 array.
7
Page 8

Chapter 3 Installing/Uninstalling DriveClone
3.1 System Requirements
Windows 2000/XP/Server 2003
Intel 486 (or compatible) processor or higher
VBE2.0 Display Card or higher
256 MB of RAM
130 MB free hard drive space for installing DriveClone2.0
IE5.0 or later
3.2 Installing DriveClone
To install DriveClone on your computer, please do the following:
Step 1 Insert the DriveClone setup CD into your CD drive. The Setup
program should start automatically. If it does not, run the file called
DClone.EXE directly from the CD.
Step 2 When the DriveClone install screen appears, select Next to go to the
next step.
Step 3 Carefully read the software license agreement. If you accept the
terms of the agreement, select I Accept the License Agreement, and
then click Next to continue.
Step 4 Enter your personal information and serial number. If you have not
purchased a serial number yet, simply click Next without entering the serial
number for a limited-time trial of DriveClone.
Note: Trial version of DriveClone does not support creating a Bootable Disc
or Recover CD/DVD.
8
Page 9

Step 5 Choose a location for installing DriveClone. DriveClone will be
installed in the path displayed by default. If you would like to store the
program files in a different location, click Browse to select a new installation
path.
Step 6 Click Next to start the installation.
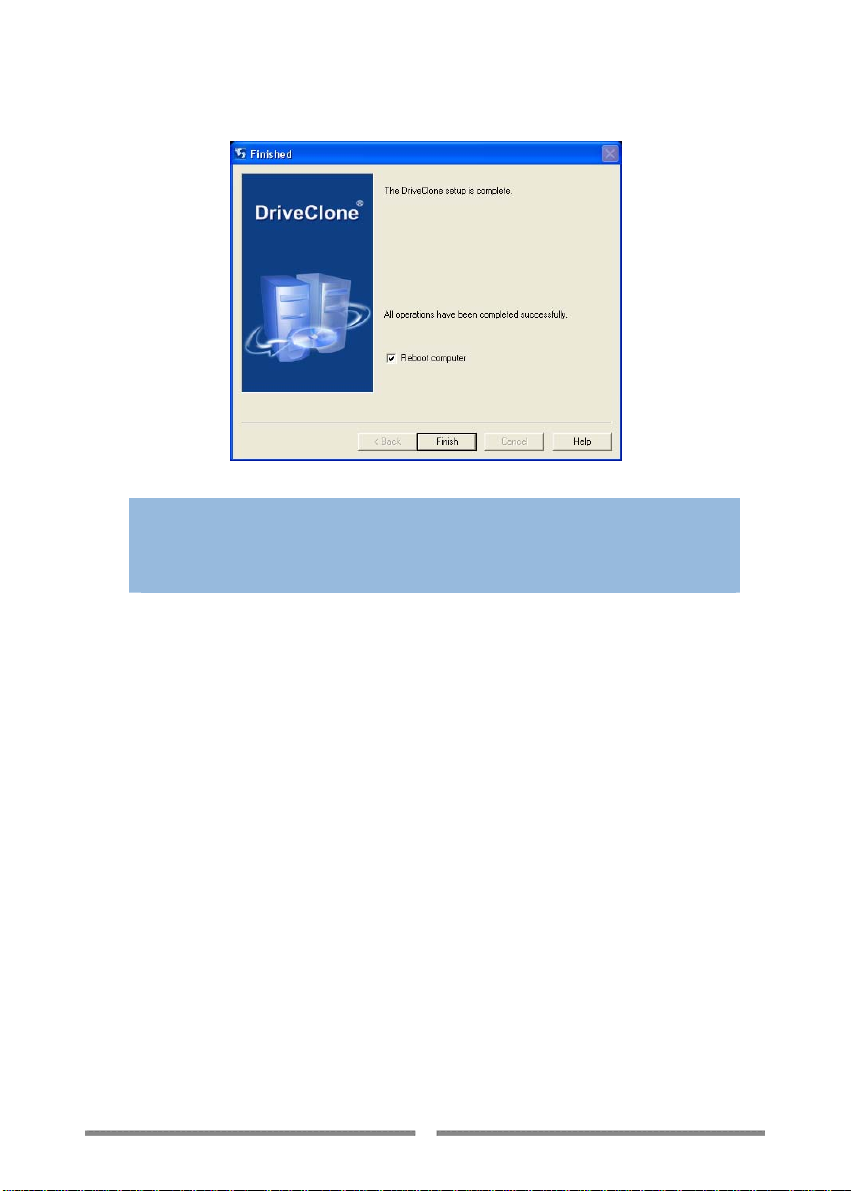
Step 7 Click Finish to restart your computer and complete the installation.
If you want to restart later, uncheck the box and click Finish.
9
Page 10
Note
ª
If you choose to restart the computer later, DriveClone is
functionally limited and you cannot perform the Mount Image
function until the computer is restarted.
3.3 Uninstalling DriveClone
If you would like to uninstall DriveClone, please follow the
steps below:
Step 1 Click Start from the Windows taskbar and then select Programs
->DriveClone ->Uninstall DriveClone.
Step 2 Click Yes to start uninstalling DriveClone from your computer.
Step 3 Click Yes to complete the removal of DriveClone.
10
Page 11
Chapter 4 Getting Around in DriveClone
4.1 Launch DriveClone
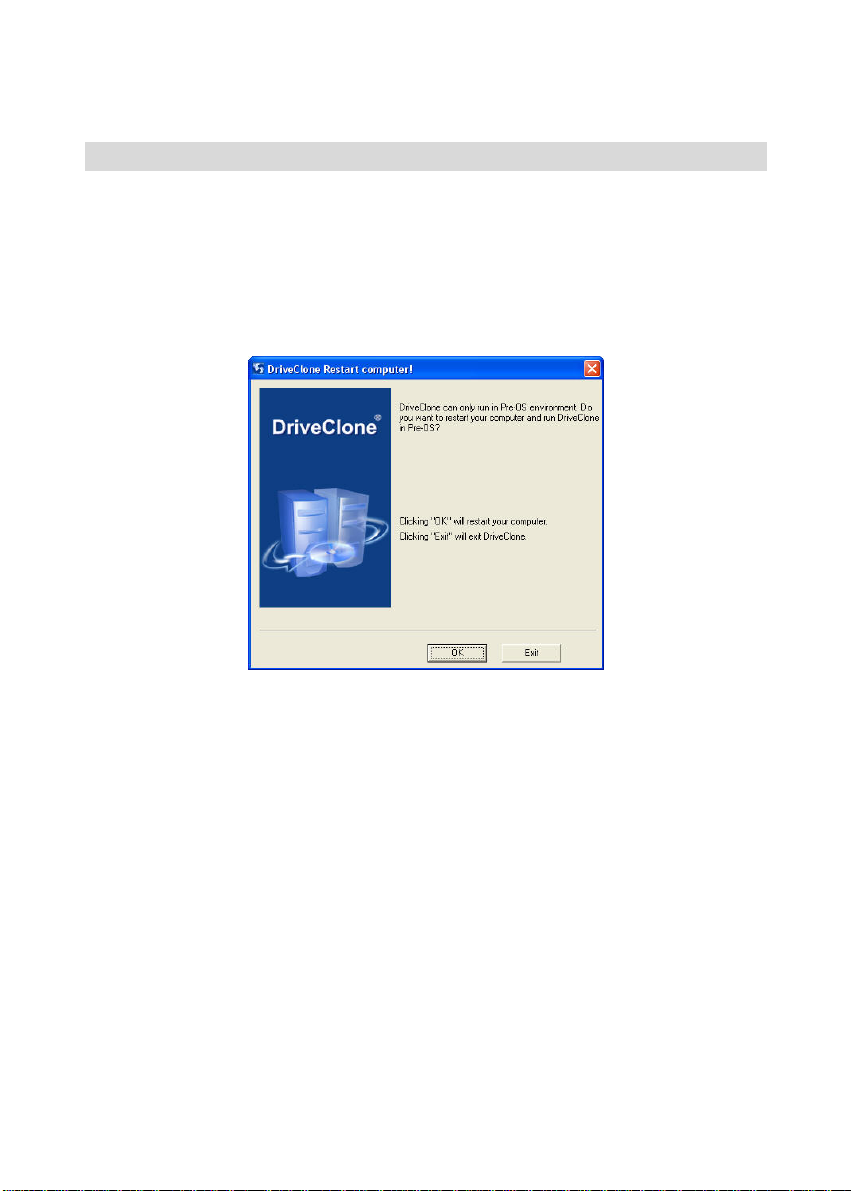
To launch DriveClone, double-click on the DriveClone icon on your desktop,
or select Start Æ All Programs Æ DriveClone Æ DriveClone. The
program will ask if you would like to restart the system to run DriveClone in
a Pre-Operating System environment. Select OK and your system will
restart and run DriveClone automatically.
4.2 Backup and Restore
DriveClone provides a flexible way to back up partitions or the entire hard
drive as an image file, which can be used to restore your system later. The
image file can be saved on a hard drive or it can be burned onto a blank
CD/DVD and made into a recover CD/DVD. It supports backing up various
file systems such as FAT16, FAT32, NTFS, Linux EXT2/3 and RestoreIT. The
DriveClone image also supports data compression (ripping at up to a 60%
compression rate).
4.2.1 Backup Drives
To back up data from a partition or the hard drive to an image file, please do
the following:
Step 1 Start the DriveClone program. Select Backup/Restore and then
Page 12
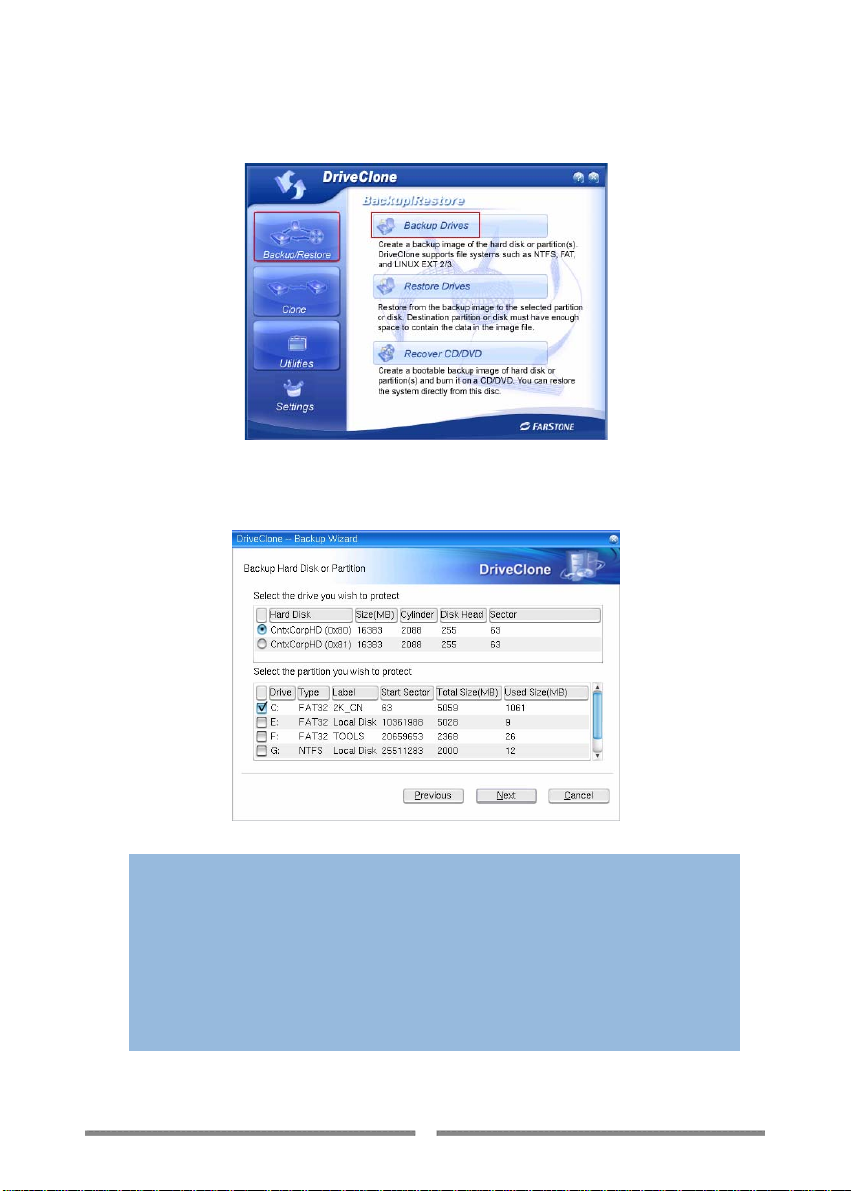
click Backup Drives (shown below).
Step 2 Select the Source Hard Drive, and then select Source Partition(s) to
be backed up.
Note
ª
1. Normally there is only one hard drive installed in a computer,
and you can skip to selecting the partition(s) you would like to
protect.
2. If there is more than one hard drive, you can choose only one
drive at a time.
3. You can select one or more partitions from a hard drive to back
up at the same time. If you want to back up an entire hard drive,
select all of the partitions on the drive.
12
Page 13
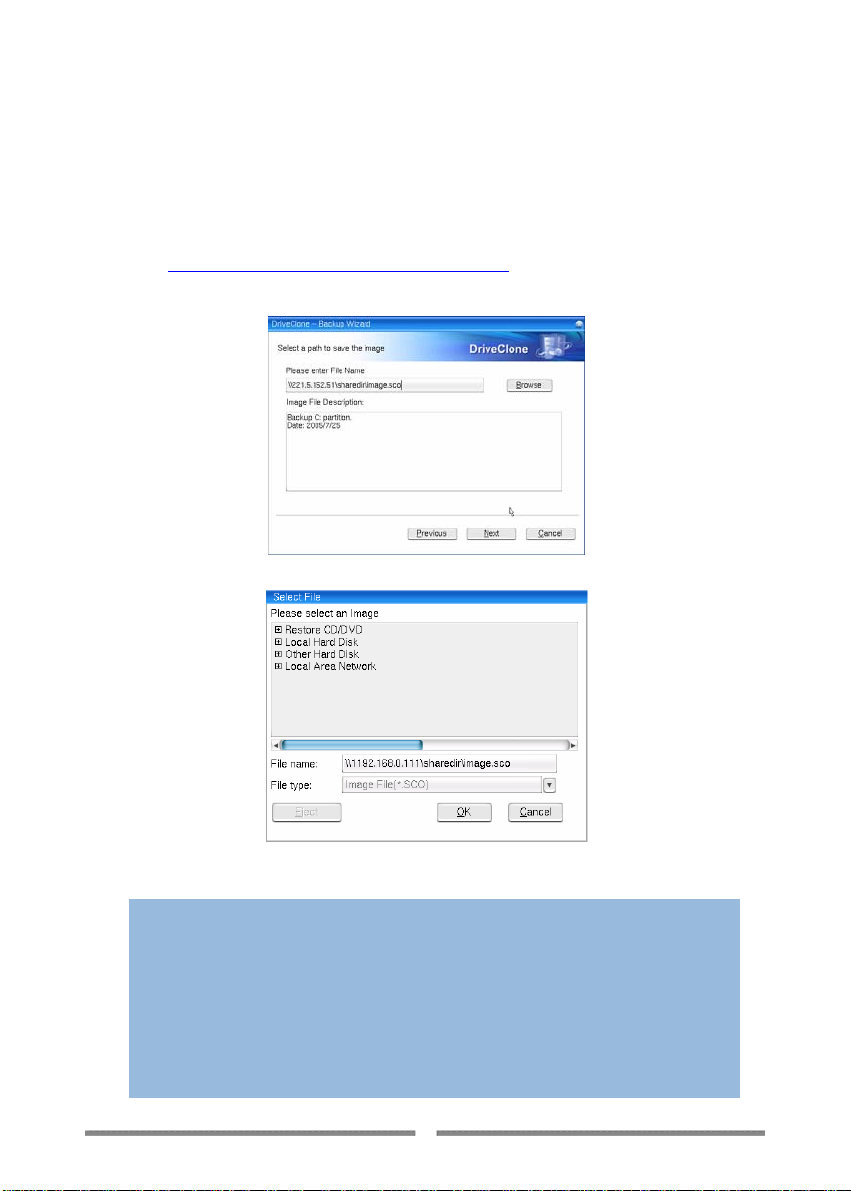
Step 3 Click Browse to select a location on a hard drive, USB storage
medium, or a network location, and enter a name for the image file.
Note: If you want to store the image on a network location, you can select
the location through Windows, My Network Places, directly enter the full
path and the file name (fig. a), or click Browse to select thefile(fig. b) (LAN
path eg: \\192.168.0.111\ShareDir\Image.sco
You can add comments in the Image File Description box below. Then click
Next to continue.
).
ª
Fig. a
Fig. b
Note
1. If you have a CD writer (USB recorders are supported),
you can also select to burn the image onto a blank CD/DVD.
The CD/DVD burned by DriveClone can be used as a
start-up disc. It is also known as a Recover CD/DVD.
2. If you select a network location on the LAN, you may be
prompted to provide the correct username and password to
access the network resource.
13
Page 14

3. If the system does not respond for a long time when you
try to save the image to a network location, please contact
your network administrator to check the connection status
and/or your network access privileges.
Step 4 Select a compression mode between Standard, Medium and High, if
desired.
(Optional) You can set a password for your image files. Once a password is
set, it will be required when you attempt to use the image file.
(Optional) If you want to verify whether the backup file is usable, you can
select the box “Check data integrity after backup operation finishes”.
In the Image Splitting option, select a file size for a single volume of the
splitted image. If you select automatically, Driveclone will automatically split
the image according to the file system type of the destination partition.
Note
ª
DriveClone will divide the image into several volumes and let you
save these images in different locations if:
1. The selected target location does not have enough space to
contain the image; or
2. The size of the image is more than 2 GB; (If backing up to a
NTFS partition, you do not have this limitation.) or
3. The image is saved to a network location.
Click Next to continue.
14
Page 15

Step 5 You can now review the information and settings that have been
specified. After reviewing your selections, click Start to begin copying data
into an image. You can also click Previous to modify your selections.
4.2.2 Restore Drives
DriveClone lets you quickly restore a partition or entire hard drive from an
image file. All data in the partition, including the files, directories and
registry settings, will be restored from the image.
Note
ª
There must be enough free disk space on the target partition to
contain the data restored from the image.
To restore a partition or the entire hard drive, please do the following:
Step 1 Start DriveClone p. Select Backup/Restore and then click
Restore Drives (shown below).
15
Page 16

Step 2 Click Browse to select a restorable image from either a hard drive,
network location , CD/DVD disc (the recover CD), or other movable storage
medium, and then click Next to continue.
Note: If you want to restore an image that is stored on a network location,
you can select the location through Windows, My Network Places, directly
enter the full path and the file name (figure below) or click Browse to select
the file (LAN path eg: \\192.168.0.111\ShareDir\Image.sco
Note
ª
If you want to select an image stored on the network, you may be
prompted to provide the correct username and password to access
the network resource.
Step 3 Select the Source Partition from the image file (box above) and then
).
16
Page 17

the Destination partition on the hard drive (box below).
Note
ª
An image file may contain backup data of more than one partition.
You can select and restore only one partition at a time.
If you want to restore the entire hard drive, click the drive entry only.
Step 4 (for the “Restore Hard drive” option only) Modify the size of each
partition according to your needs.
To modify a partition size, double click the Total Size field of the target drive
and change the size in the following dialog box. Click OK to return to the
previous window. The disk structure in the above window will be refreshed
immediately.
17
Page 18

After you have finished specifying the size, click Next to continue.
Step 5
Check the box to erase disk signature on the Destination Disk
if needed.
Note: In some cases, the system may fail to boot
Windows 2000/XP and hang on logging stage after disk
cloning or restoring from an image. This error is relevant
to Windows’ disk signature checking upon startup.
If you check this box, DriveClone will erase disk signature
and force Windows to allocate new drive letter. This will
prevent such a problem.
Please note that the drive letters on Destination Disk
may be different from Source Disk if this function is used.
18
Page 19

Step 6 After reviewing your selections, click Start to begint the restoration
process or click Previous to modify your selections.
Note
ª
To restore the partition from the Recover CD/DVD, you can also
start your computer with the Recover CD/DVD. Then you will be
prompted to restore your partition using the Recover
CD/DVD. Select OK to restore the source partition directly from
the image stored on the Recover CD/DVD.
4.2.3 Recover CD/DVD
A Recover CD/DVD is a bootable disc containing backup data and the
DriveClone program. It allows end users to restore the backed up partition(s)
or entire drive by simply inserting this disc into their CD/DVD drive and
booting the computer.
To create a Recover CD/DVD, please follow the steps below:
Step 1 Start DriveClone. Select Backup/Restore and then click Recover
CD/DVD(shown below).
Step 2 Select the Source Hard Drive, and then select the Source Partition(s)
to back up. Click Next to continue.
19
Page 20

Note
ª
1. Normally there is only one hard drive installed in a computer,
and you can skip the hard drive selection step and select your
partition(s).
2. If there is more than one hard drive installed, you can choose
only one drive at a time.
3. You can select one or more partitions from a hard drive to be
back up at a time. If you want to back up an entire hard drive,
select all of the partitions on the drive.
Step 3 You are now ready to create the Recover disc. Click Browse to locate
your CD/DVD writable drive with a blank CD/DVD disc inserted, and then
enter a name for the image. You can add comments in the Image File
Description box (shown below). Click Next to continue.
20
Page 21

Step 4 Select a compression mode between Standard, Medium and High, if
desired.
(Optional) You can set a password for the backup file. Once a password is set,
it will be required when you attempt to use the image file.
(Optional) If you want to verify whether the backup file is usable, you can
select the box “Check data integrity after backup operation finishes”.
In the Image Splitting option, select a file size for a single volume of the
splitted image. If you select automatically, Driveclone will automatically split
the image according to the file system type of the destination partition.
Step 5 After reviewing your selections, click Start to begin burning the
Recover CD/DVD, or you can click Previous to modify your selections.
Note
ª
If the size of the backup data exceeds the writable disc capacity,
DriveClone will automatically split the image into several volumes
and burn onto different discs. It will prompt you to insert another
disc when needed.
Restoring from a Recover CD/DVD
To restore the partition(s) from a Recover CD/DVD, simply insert the disc
21
Page 22

into the CD/DVD disc drive and restart your computer.
A message box should appear, asking for your confirmation of using the
Recover CD/DVD to restore the backup partition/hard drive.
Clicking Yes will start the auto-restoration process. Click OK to restart your
computer and complete the restoration.
Clicking No will cancel auto-restoration and run Restore Drives function of
DriveClone. You can manually select the backup image to restore. Please
refer to a detailed description in section 4.2.2 Restore Drives
Note
ª
If the partition size or file system of the backed up partition had
been changed after the backup, auto-restoration will be aborted
automatically. You can manually select another image file to
restore.
.
4.3 Clone
With DriveClone, you can clone (duplicate) a partition or hard drive to
another one without any lost or altered data.
4.3.1 Clone partition
With DriveClone, you can copy data from all sectors of the source partition
into the corresponding sectors of the destination partition.
To clone a partition, follow the steps below:
Step 1 Start DriveClone. Select Clone and then click Clone Partition
(shown below).
22
Page 23

Step 2 Select the Source Hard Drive, and then select a Source Partition.
Note
ª
1. Normally there is only one hard drive installed in a computer;
you can skip the drive selection step and proceed to selecting a
partition.
2. You can choose only one partition at a time.
3. The Source Partition and the Destination Partition cannot be the
same.
Step 3 Select the Destination Hard Drive, and then select Destination
Partition. You can alter the Destination Partition size by double-clicking the
Total Size number (green number in the figure bellow). Click Next to
continue.
23
Page 24

Note
ª
1. The selected target partition must have enough space to hold
the data in the source partition.
2. If the Source Partition is a non-recognizable file system, you
cannot resize it in this step. The Destination Partition size will be
the same as the Source Partition size.
Step 4 After confirming your selections, click Start to start the cloning
process or you can click Previous to change your settings.
4.3.2 Clone Disk
Clone Disk duplicates one hard drive to another. It eliminates the need to
install the operating system, drivers and applications, and enables you to
upgrade a new hard drive with only a few mouse clicks.
Note
ª
1. To use this function, there needs be at least two hard drives
connected to your computer
2. The Destination Disk size should be no less than the Source Disk
size.
Follow the steps below to clone hard drives:
Step 1 Start DriveClone. Select Clone and then click Clone Disk (shown
24
Page 25

below).
Step 2 Select the Source Disk (top pane) and then the Destination Disk
(bottom pane). Click Next to continue.
Step 3 View the Destination Disk structure.
25
Page 26

You can alter the Destination Partition size by double-clicking the Total Size
field (green number) and change the size in a popup dialog box (shown
below).
Click Next to continue.
Step 4
Check the box to erase disk signature on the Destination Disk
if needed.
26
Page 27

Note: In some cases, the system may fail to boot
Windows 2000/XP and hang on logging stage after disk
cloning or restoring from an image. This error is relevant
to Windows’ disk signature checking upon startup.
If you check this box, DriveClone will erase disk signature
and force Windows to allocate new drive letter. This will
prevent such a problem.
Please note that the drive letters on Destination Disk
may be different from Source Disk if this function is used.
Step 5 After confirming your selections, click Start to begin the cloning
process or you can click Previous to change your settings.
27
Page 28

4.4 DriveClone Utilities
DriveClone Utilities provides you with additional tools to maximize the
functionality of the program. With these tools, you can:
z Create a DriveClone Bootable Disc
z Erase a rewritable CD or DVD
z Check validity of an image file created by DriveClone
4.4.1 Bootable Disc
With DriveClone, you can create a bootable disc. Upon a system crash, you
can use this disc to boot you computer,run DriveClone and select an image
file to restore your system.
To create a Bootable Disc, insert a blank CD/DVD disc into the recorder and
click Utilities Æ Bootable Disc. DriveClone will start writing data onto the
disc. When the bootable disc has been created, click Finish to eject the disc.
4.4.2 Image Integrity Check
Use this function to check if an image file created by DriveClone is
restorable.
To check an image file, select Utilities Æ Image Integrity Check. Click
Browse to select an image from either the hard drive, CD/DVD disc,
network location or other movable storage medium, and then click Next to
check the image.
After the Image Integrity Check has completed, it will report the results in a
dialog box.
4.4.3 Erase Disc
You can use DriveClone Utilities to erase data from a re-writable disc,
providing your drive supports the use of re-writable media (i.e. CD-RW or
DVD±RW).
To erase a disc, insert the disc to be erased into the CD/DVD drive and select
Utilities Æ Erase Disc. Select an erase mode and click Next to begin
theprocess.
Two Erase Modes:
28
Page 29

z Quick Erase: Using this method, discs that are erased appear to be
empty but the data is not physically removed. Quick Erase will take a
short time to complete and will only erase the Table of Contents (TOC) of
the disc. The erased data can still be recovered using special tools.
z Full Erase: Full Erase will physically erase the entire disc. Compared to
Quick Erase, Full Erase will take a longer time to complete, but it is less
likely to run into a disc error when using a full erased disc to burn again.
4.5 Settings
You can set a standard for using the USB devices, and your local network
configurations.
4.5.1 Set USB Standard
DriveClone can back up to or restore from an image file that is on a USB
device. DriveClone supports USB 1.1 and USB 2.0 standards.
To set a defaultUSB standard for your device, click Settings (shown below),
choose a USB standard and click Apply.
Note
ª
If you select USB 2.0, please make sure all your USB devices, eg.
the USB storage medium, the port and the host adapter card, can
support USB 2.0. Otherwise, it will automatically revert to USB 1.1
speed.
29
Page 30

4.5.2 Network Settings
DriveClone can back up to, or restore from a network location. To
use this feature, you should first configure your network settings.
To configure your network settings, click Settings from the main DriveClone
interface and then click the Settings button in under Network.
There are two tabs in the Network Settings window:
¾ General:
The General tab is shown below.
You can setup your network adaptor, IP address, Subnet mask and Default
gateway from here.
If you have more than one network adaptor on your system, select the
adaptor to be used from the dropdown menu.
IP Settings:
z Obtain an IP address automatically: If your network supports
DHCP (Dynamic Host Configuration Protocol), choose this option to
obtain an IP address automatically from a DHCP server or a
Point-to-Point Protocol (PPP) dial-up network access server.
DriveClone uses DHCP as the default option and will obtain the IP
address of your computer automatically.
z IP address: Choose this option to manually specify IP address for
your network. This option can be used when automatically
obtaining IP address fails or the there is an IP address conflict.
¾ Advanced
The Advanced tab is shown as below.
30
Page 31

If your computer is on a Local Area Network (LAN), you can set the LAN
settings so that you can back up images to or restore from a network
location.
DNS settings:
z Obtaining DNS server address automatically: DNS (Domain Name
System) is an internet service that translates domain names into
IP addresses. It is a system for name resolution suitable for
network computers with fixed IP addresses. By default, DriveClone
uses this option to obtain the DNS sever address automatically
from the network.
z Use the following DNS server addresses: Choose this to manually
specify the DNS server addresses if needed.
WINS: Specify an IP address for a WINS server. Windows Internet Naming
Service (WINS) is a system that determines the IP address associated with
a particular network computer. It supports network client and server
computers running Windows and can provide name resolution for other
computers with special arrangements. It uses a distributed database that is
automatically updated with the names of computers currently available and
the IP address assigned to each one.
Gateway: Specify an IP address for a default gateway. A default gateway is
a local IP router that is used to forward packets to destinations beyond the
local network.
4.6 Create Bootable Disc
The DriveClone Bootable Disc is useful when your system crashes and the
computer cannot be booted. In such cases, insert the bootable disc into your
31
Page 32

disc drive and start your computer. The DriveClone program should
automatically start and you can select an image to restore your system.
To create a DriveClone Bootable Disc, follow the steps below:
1. Select start Æ All Programs Æ DriveClone Æ Create Bootable Disc.
2. You will be prompted to restart your computer to create the bootable
disc. Insert a blank disc into your disc drive and click Restart. The disc
will be created automatically.
4.7 Restoring a File or Folder
When you need an individual file or folder from the backed up partition or
drive (the image file), DriveClone provides you a quick way to restore a file
or folder without restoring the whole partition ordrive. Just mount the image
file as a temporary partition and copy the file or folder as needed.
To restore an individual file or folder:
1. Select Start Æ All Programs Æ DriveClone Æ Restore File or
32
Page 33

Folder.
2. Select Mount an image as a partition. Click Next.
3. Select the image file.
4. Select the partition containing the file or folder you wish to restore, and
select a drive to mount. Click Next to start mounting the temporary
partition.
33
Page 34

5. Click OK after the partition is successfully mounted. You can now see the
mounted drive in Windows Explorer. (Drive U: in the example below)
You can now browse the drive and copy the desired file or folder on your hard
drive.
After you have finished restoring an individual file or folder, you can
dismount the temporary partition.
Following the steps below to remove the mounted drive:
1. Select Start Æ All Programs Æ DriveClone Æ Restore File or
Folder.
2. Select Dismount all partitions and click Next to begin the process.
3. Click OK to finish.
34
Page 35

35
Page 36

Chapter 5 Appendix
5.1 FAQ
Q1. How long does it ta ke to backup/restore a system using Drive Clone?
A: It depends on the amount of data on your system. However, DriveClone’s
unique technology minimizes the amount of time it takes to backup the
system.
Q2. I launched DriveClone in Windows, but a message indicates that I
must restart my computer in order to run DriveClone?
A: DriveClone is a program that can only run in a Pre-Operating System
environment. It cannot function on Windows or Windows-DOS. Therefore,
you must restart your computer to run DriveClone.
Q3. I used a recover CD to restore a partitio n and got an error message
saying “The information in Destination Partition has been altered.
Auto-recover is aborted.” What can I do?
A: The recover CD restores the partition from which it was created. If the source
partition no longer exists or its size was reduced, the partition cannot be
restored from the recover CD.
Q4. When I restored a partition from an image file, it prompted me
“There is not enough space on the Destination Partition.” But I’m sure
the free space on the Destination Partition is larger than the used space
in the Source Partition, why?
A: If the data on the end of the Source Partition cannot be moved, DriveClone
will prompt you with this notice. Even if the free space on Destination
Partition is larger than used space in the Source Partition. The same error
may occur in Partition/Disk Clone.
Q5. If the source partitio n is a bootable partitio n (e.g. C:\) but the ta rget
partition is not, can the t arget partition be used t o boot the system after
restoration?
A: Yes. Please do the following:
1. Modify your boot.ini file.
a. If you are in DOS, enter the boot partition (C:\) and type “edit
boot.ini” to modify this file.
b. If you are in Windows, the file boot.ini might be hidden. Select
Show hidden files and folder from tools->folder options
from the menu bar to show boot.ini, then open it (the default
path to the boot.ini file is C:\boot.ini).
2. Add the following to boot.ini:
multi(0)disk(0)rdisk(X)partition(Y)\Folder=" Description "
X: is the HDD (hard drive) number, generally defined as 0 – 3. Number
0 is the primary master, 1 is the primary slave, 2 is the secondary
primary and 3 is the secondary slave;
Y: is the partition ID, generally defined as 0-25, 0 is for the first
Page 37

partition.
Folder: is the place storing the boot file (this is not the boot.ini file). If
your system is Windows NT/2000, it should be defined as WINNT.
If your system is Windows XP, it should be Windows.
Description is for adding comments for the options listed on the splash
screen at system startup.
Q6. I installed DriveClone on two operating systems (Windows 2000 and
XP) on my computer. After I removed DriveClone from Windows 2000,
why is the program on Windows XP unusable?
A: Uninstalling DriveClone from one operating system will result in the removal
of the program in the other operating systems also.
Q.7 I cloned a hard drive using the Clone Disk function. Why can I not
boot from the cloned drive?
A: This may happen if Norton GoBack is installed on your computer. Please
uninstall Norton GoBack before cloning the drive.
Q8. I have connected a USB hard drive or a USB CD/DVD recorder to the
system, why is it not recognized by DriveClone or will not work with
DriveClone?
A: If you cannot see the USB device in DriveClone, there are two possible
reasons:
(1) DriveClone does not support plug-and-play. If the USB device is plugged
in after you launch DriveClone, you will not see the device. In this case,
you can connect the USB device before launching DriveClone
(2) The settings of the USB Controller on the motherboards BIOS may also
influence the use of DriveClone. Please try the following two methods to
resolve this issue:
●disable the USB 2.0 Controller;
●set USB to “Hi Speed” in the BIOS USB settings.
Q9. I created an image for Drive C: on two CD-R discs. Why can the disc
not be used to mount a temporary partition?
A: Mounting a partition requires all the backup data of the drive. If you use one
of two discs, it cannot provide the complete information. To solve this
problem, you can first copy the image files from the two discs to the hard
drive and then use it to mount a temporary partition. This problem cannot
be overcome by using multiple CD drives.
Q10. When I created a Recover CD/DVD, it failed and prompted an error
message “Move Data Error”. Why?
A: This error may occur if the quality of the recordable CD/DVD media is not
good, or the disc is incompatible with the recorder. To solve this problem,
please replace the media with a higher quality disc or upgrade your CD/DVD
37
Page 38

recorder.
Q11. Why can I not use an image created by DriveClone1.0 to mount as
a temporary partition? My current DriveClone version is 2.0
A: It is true that an image file created in DriveClone 1.0 cannot be used to
mount as a temporary partition in DriveClone 2.0. You can use the
DriveClone 1.0 image to restore your partition(s) or drive(s) in DriveClone
2.0 DriveClone 1.5 images can be mounted as a temporary partition in
DriveClone 2.0.
Q12. After DriveClone is installed , it auto m atically enters DriveClone
each time I start my computer. How can I get back to booting
Windows at system startup?
A: Please follow the steps below to resolve this issue:
(1) Right click a My Computer icon and select Properties Æ click the
Advanced tab Æ look under Startup and Recovery and click
Settings.
(2) The Startup and Recovery settings window should open. In the Default
operating system box, select Windows operating system that you are
using.
38
Page 39

(3) Click OK to apply the change.
(4) Under Startup & Recovery click the Settings button again to
re-enter the Startup and Recovery settings window. Click the Edit button
(in the picture above) to edit the startup options file manually (boot.ini).
(5) In the boot.ini file, delete the line C:\Farsboot.bin=”FarStone
DriveClone”. Save and close the file.
(6) Click OK to complete and close the Startup & Recovery window and click
OK to close the System Properties window.
Q13. How can I create an image to a shared folder on a local network
location?
A: First you must make sure the local network setting are correctly configured
and you have the appropriate permissions access the shared folder you want
to backup to. In the Select Image Locat ion box, click Browse to select the
location through Windows My Network Places interface, or directly enter the
full path and the file name into the Path field. The path should be a full
network path including the name of the image file. A sample network path
would look like this: \\192.168.0.111\ShareDir\Image.sco
Please refer to chapter 4.2.1 Backup Drives
Q14. Are there any limitations when I restore from an image over the
network?
A: DriveClone can restore an image file sized below 2GB when restoring from a
network location. When backing up an image to a network locatoin,
DriveClone can automatically split the file into several volumes with a
maximum size of 2GB each. You can select the first volume of the image to
be restored. But, if you share an image stored in an NTFS partition that is
ov er 2G B, you cannot restore from it on another computer ov er th e n et work ;
this file must be copied back to the local computer to perform a successful
restore
Q15.Why can Windows XP/2000 not boot and a blue screen error occur
after I disk cloning or restoring from an image . How can I resolve
this issue?
A: You can checke “Earse disk signature” when performing Disk Clone or
Restore Drives. This option can help avoid such error. If this error still occurs
with this option checked, please try this method: running “sysprep” tool
before you perform Disk Clone or Restore Drives task, then restart the
system with DriveClone Bootable Disc and perform your task.
Note: You can get the “sysprep” tool by extracting sysprep.exe from
SUPPORT\TOOLS\DEPLOY.CAB on the install disc. On how to use this tool,
please refer to deploy.chm (for Windows XP users)/deptool.chm (for
Windows 2k users) lacted in the same directory.
for more information.
.
39
Page 40

5.2 License Agreement
FARSTONE TECHNOLOGIES INC. (FARSTONE) END USER LICENSE AGREEMENT
FOR DRIVECLONE, HEREAFTER REFERRED TO AS THE "SOFTWARE"
PLEASE READ CAREFULLY: THE USE OF THIS "SOFTWARE" IS SUBJECT TO THE
"SOFTWARE" LICENSE TERMS OF FARSTONE AND OTHER LICENSORS WHOSE
SOFTWARE MAY BE BUNDLED WITH THIS PRODUCT.
BY YOUR USE OF THE "SOFTWARE" INCLUDED WITH THIS PRODUCT YOU AGREE
TO THE LICENSE TERMS REQUIRED BY THE LICENSOR OF THE "SOFTWARE", AS
SET FORTH BELOW. IF YOU DO NOT AGREE TO THE LICENSE TERMS
APPLICABLE TO THE "SOFTWARE", YOU MAY RETURN THE ENTIRE UNUSED
PRODUCT FOR A FULL REFUND.
LICENSE AND WARRANTY:
The software which accompanies this license (the "Software") is the property of
FARSTONE or its licensors and is protected by copyright law. While FARSTONE
continues to own the Software, you will have certain rights to use the Software
after your acceptance of this license. Except as may be modified by a license
addendum which accompanies this license, your rights and obligations with
respect to the use of this Software are as follows:
A. User License:
(a) The "Software" can be used on a single computer and only by a single user at
a time.
(b) You can make one copy of the "Software" in machine-readable form, solely for
back-up purposes, provided you reproduce FarStone's copyright proprietary
legends. Notwithstanding the foregoing, the "Software" may be used on the
home, laptop or other secondary computer of the principal user of the "Software",
and an additional copy of the "Software" may be made to support such use. As
used in this License, the "Software" is "in use" when it is either loaded into RAM
or installed on a hard drive or other permanent memory device. The "Software"
may be "in use" on only one computer at any given time. As a specific condition
of this License, you agree to use the "Software" in compliance with all applicable
laws, including copyright laws, and that you will not copy, transmit, perform or
distribute any audio or other content using the "Software" without obtaining all
necessary Licenses or permissions from the owner of the content.
C. Restrictions: You may not distribute copies of the "Software" to others or
electronically transfer the "Software" from one computer to another over a
network. You may not post or otherwise make available the "Software", or any
portion thereof, in any form, on the Internet. You may not use the "Software" in
a computer service business, including in time-sharing applications. The
"Software" contains trade secrets and, in order to protect them, you may not
40
Page 41

decompile, reverse engineer, disassemble, or otherwise reduce the "Software" to
a human-perceivable form. YOU MAY NOT MODIFY, ADAPT, TRANSLATE, RENT,
LEASE, LOAN, RESELL FOR PROFIT, DISTRIBUTE, NETWORK OR CREATE
DERIVATIVE WORKS BASED UPON THE "SOFTWARE" OR ANY PART THEREOF.
D. Limited Warranty:
Farstone warrants that the media on which the Software is distributed will be free
from defects for a period of thirty (30) days from the date of delivery of the
Software to you. Your sole remedy in the event of a breach of this warranty will be
that Farstone will, at its option, replace any defective media returned to Farstone
within the warranty period or refund the money you paid for the Software.
Farstone does not warrant that the Software will meet your requirements or that
operation of the Software will be uninterrupted or that the Software will be
error-free.
THE ABOVE WARRANTY IS EXCLUSIVE AND IN LIEU OF ALL OTHER WARRANTIES,
WHETHER EXPRESS OR IMPLIED, INCLUDING THE IMPLIED WARRANTIES OF
MERCHANTABILITY, FITNESS FOR A PARTICULAR PURPOSE AND
NONINFRINGEMENT. THIS WARRANTY GIVES YOU SPECIFIC LEGAL RIGHTS.
YOU MAY HAVE OTHER RIGHTS, WHICH VARY FROM STATE TO STATE.
E. Limitation of Liability: IN NO EVENT WILL FARSTONE OR ITS LICENSORS BE
LIABLE TO YOU FOR ANY INCIDENTAL, CONSEQUENTIAL OR INDIRECT
DAMAGES, INCLUDING ANY LOST PROFITS, LOST SAVINGS, OR LOSS OF DATA,
EVEN IF FARSTONE OR A LICENSOR HAS BEEN ADVISED OF THE POSSIBILITY OF
SUCH DAMAGES, OR FOR ANY CLAIM BY ANY OTHER PARTY. Some states do not
allow the exclusion or limitation of special, incidental, or consequential damages,
so the above limitation or exclusion may not apply to you.
F. General: You acknowledge that you have read this Agreement, understand it,
and that by using the "Software" you agree to be bound by its terms and
conditions. You further agree that it is the complete and exclusive statement of
the agreement between FarStone and you, and supersedes any proposal or prior
agreement, oral or written, and any other communication between FarStone and
you relating to the subject matter of this Agreement. No additional or any
different terms will be enforceable against FarStone unless FarStone gives its
express consent, including an express waiver of the terms of this Agreement, in
writing signed by an officer of FarStone. You assume full responsibility for the use
of the "Software" and agree to use the "Software" legally and responsibly.
Should any provision of this Agreement be declared unenforceable in any
jurisdiction, then such provision shall be deemed severable from this Agreement
and shall not affect the remainder hereof. FarStone reserves all rights in the
“Software” not specifically granted in this Agreement.
41
Page 42

 Loading...