

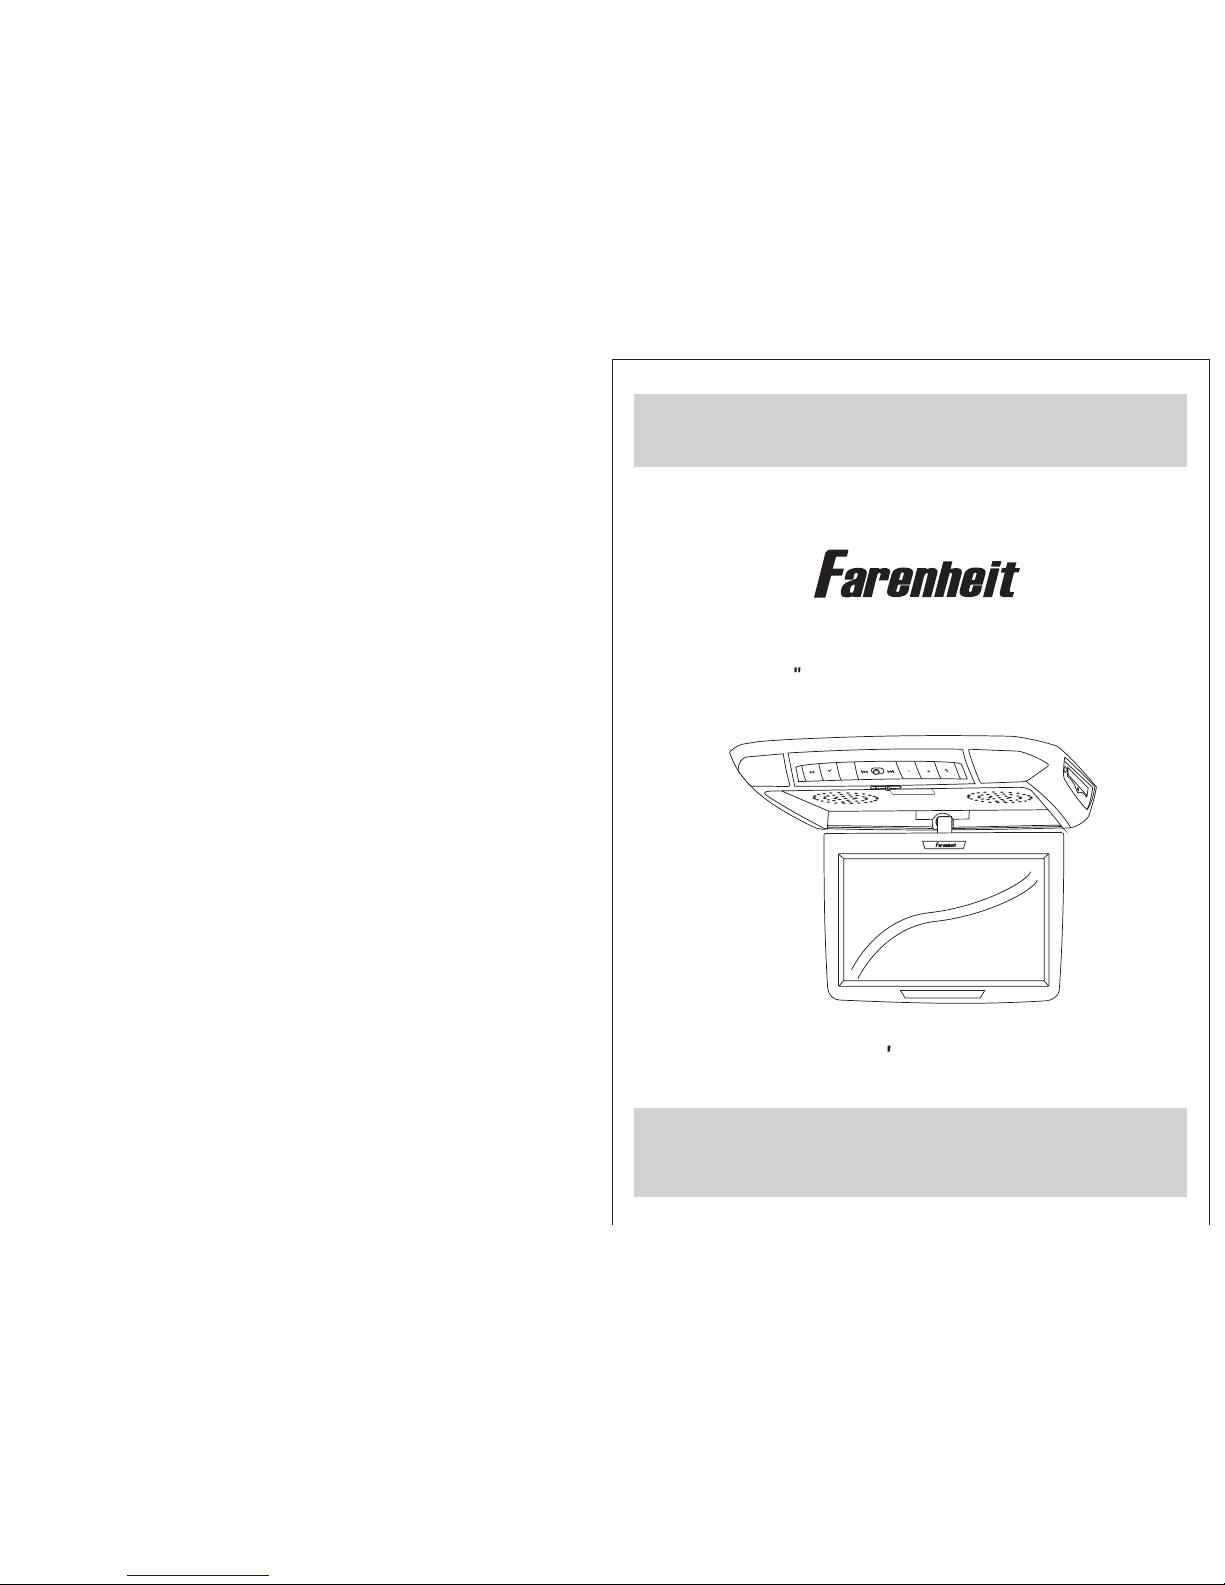
OWNER S MANUAL
11.2 TFT-LCD DVD/SD/USB
COMBO MONITOR
M
PLAY
AV
MENU
POWER
MD-1120CMX

Contents
3
Caution
Features andControls
Power andMode Selection
Releasing The Monitor
Mute Function
Picture Control
Contrast/Brightness/Color/FM
DVD Setup
Setup Menu
General Setup
TV Aspect Ratio
Angle Viewing
OSD Language
Screen Saver
Audio Setup
Dolby DigitalSetup
Equalizer Settings
Video Setup
Quality
Preferences Setup
TV Type
PBC
Audio
Subtitle
Disc Menu
Parental
Default
Password Setup
Password Mode
Password Change
4
6
8
10
12
13
14
16
21
22
23
6
12
18
21
21
21
21
22
22
23
23
DVD Functions
Eject
Vol+/Vol-
Mute
Play orPause
Audio
Stop
Arrows
Setup
Menu
Display
Number Buttons
Subtitle
Title
Slow
Fast ReverseSearching
Fast ForwardSearching
Previous
Next
Repeat A-B
Repeat
NTSC/PAL
Angle
PBC
Zoom
GO TO
Connection Diagram
Installation
Disc Information
Troubleshooting
Specifications
24
24
24
24
25
26
27
27
28
29
30
31
24
24
25
25
25
26
27
28
29
29
30
30
31
31
34
35
36
37
10
10
10
Turning on The Monitor
11
AV mode
13
14
14
15
15
16
18
Remote Control
Monitor/DVD Player
14
33
SD/USB Functions
32
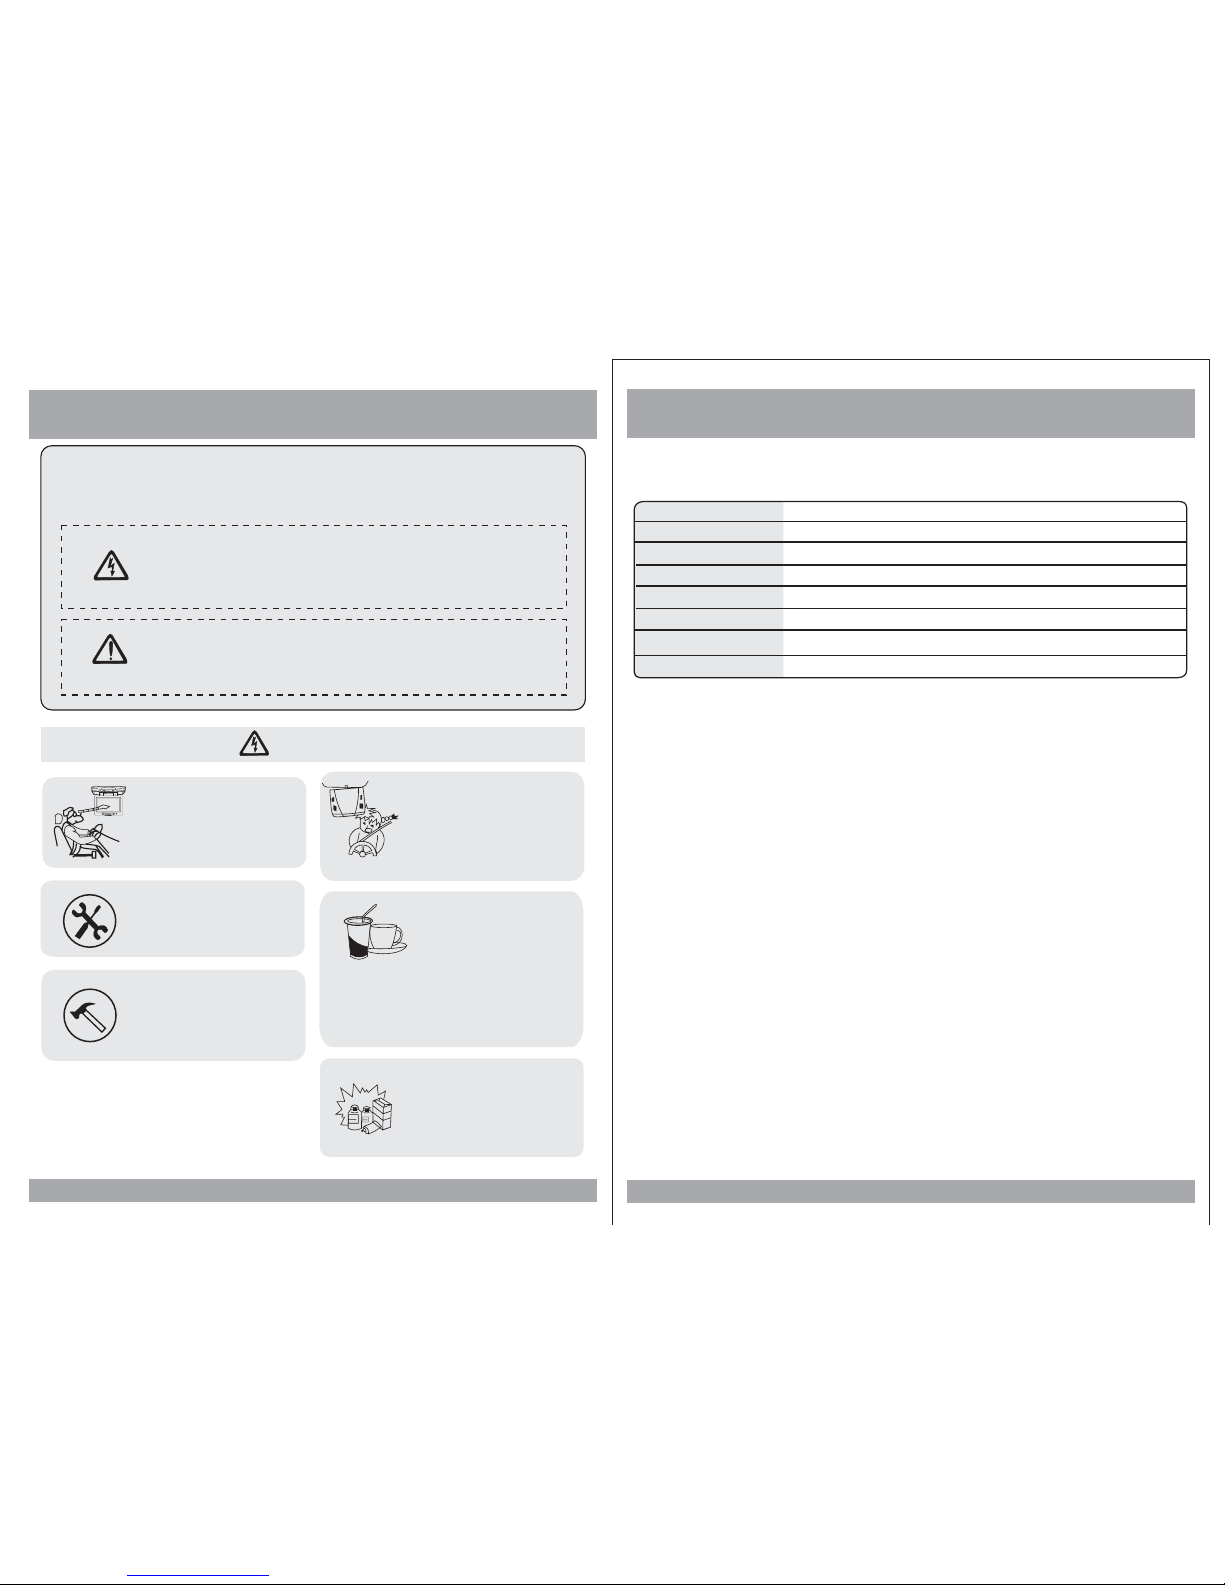
Caution
Please read and observe all warnings and instructions in this manual
and those marked on the unit. Retain this booklet for future reference.
There are two kinds of alarm symbols as follows:
WARNING
WARNING
CAUTION
The lightningbolt with arrowheadinside in anequilateral
triangle isintended to alertthe user tothe presence of
dangerous voltage within theproduct s enclosurethat may be
of sufficientmagnitude to constitutea risk ofelectric shock to
people.
""
The exclamationpoint inside anequilateral triangle isintended
to alertthe user tothe presence ofimportant operating and
maintenance (servicing)instructions in theliterature accompanying
the product.
Installation ofall TV monitors
must beout of thedriver s
field ofvision.
Do nottry and servicethese
products yourself, a
qualified servicecenter or
factory servicecenter for all
repairs.
locale
Be carefulnot to dropor
apply underpressure to the
front panelof your video
monitor. Ifthe screen cracks
due tomisuse, your warranty
will bevoid!
Do notmount the productwhere
it willobstruct the deploymentof
the airbagor in anarea where it
would affectthe driver sability
to controlthe vehicle. Also be
careful toavoid mounting the
product whereit can become
hazardous duringsudden stops
or inthe event ofan accident.
Use extracaution with anyliquids
in yourcar. If you or your child
spills anyliquid on theseproducts,
pull yourvehicle to theroadside
and turnthe key offto disconnect
or wipethe products witha towel. Donot
operate theequipment until allliquids have
either evaporatedor you havehad the monitor
inspected ata service centerby a qualified
technician. Severeharm or dangercan result.
Use onlya damp clothto clean
the screenand use onlypurified
water onthe cloth. wringout all
excess waterprior to wipingthe
screen. Donot use anycleaners
or chemicalsto clean thescreen.
In mostcases a drycloth will do!
P
O
W
E
R
A
V
MEN
U
,
4
’
,
37
DC 12V
16:9
2400x480
NTSC/PALAuto Select
DVD-AV1-AV2
1EA
With shroud:14.6(L)X12.6(W)X3.3(H)inches
Power
Screen Format
Resolution Pixel
Color System
A/V Input
A/V Output
Dimension
Note: This equipment has been tested and has been found to comply
with the limits for a Class A digital device, pursuant to part 15 of the
FCC Rules. These limits are designed to provide reasonable protection
against harmful interference when the equipment is operated in a
commercial environment. This equipment generates, uses, and can
radiate radio frequency energy and, if not installed and used in
accordance with the instruction manual, may cause harmful interference
to radio communications. Operation of this equipment in a residential
area is likely to cause harmful interference. In some cases, the user will
be required to correct the interference at his own expense.
SPECIFICATIONS
Without shroud:14.3(L)X12.4(W)X2.4(H)inches
Dimension
5
Troubleshooting
Symptom
Items to Check
Actions to be Taken
Remote controldoes
not workproperly.
Is thepower turned on?
Is theaudio which isconnected with
the audiocable set toreceive
the DVDsignal output?
Is audiocable connected securely?
Is themonitor which isconnected
with theaudio cable turnedon?
Is theaudio output set
in thecorrect position?
Is theremote control facing
the remotesensor?
Is thedistance too far?
Is thereany obstacle inthe middle?
Is thebattery weak?
Check thecar battery capacity.
Select thecorrect input modefor the audioreceiver.
Connect theaudio cable intothe jacks securely.
Turn onthe monitor connectedwith the audiocable.
Set theAudio Output tothe correct position,
and thenturn on theDVD player againby pressing
the POWERbutton.
Point theremote control towardthe remote sensorof
the product.
Use theremote control within15 feet.
Remove theobstacle.
Replace withnew battery.
Buttons donot work.
No sound
When adisc is broughtfrom a coldenvironment to a warm one, there may be moisture
on thethe disc, orcondensation on thepickup lens. It will affect disc playback.
1. Removethe disc fromthe DVD player.
2. Turn on the powerand leave iton for an hour to vaporize the condensation.
36
Moisture or condensation on lens
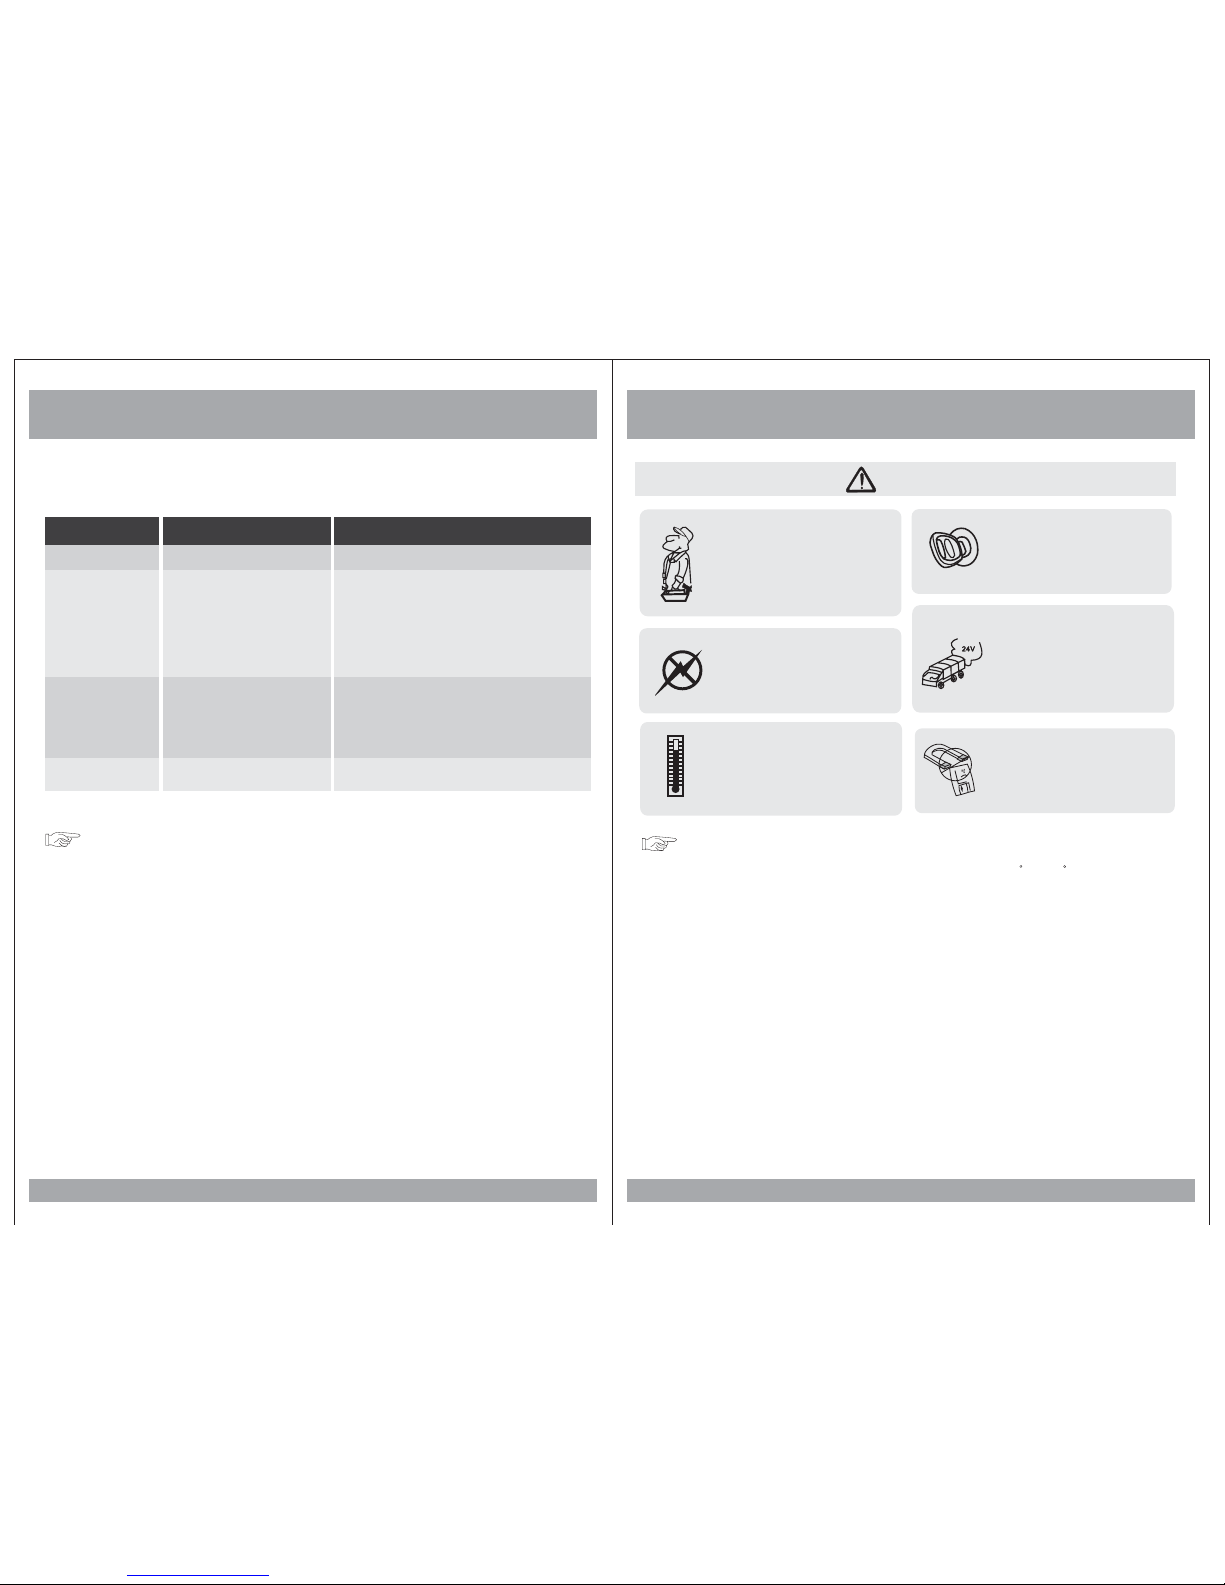
Quality installationsare best
performed byqualified and
certified installers.
Don ttouch the unitif there is
a flashof lightning. You may
receive anelectric shock.
Do notcover or stopup heater
ducts orvents. It maycause a
fire orreceive an electricshock.
Watching the monitor foran
extended periodof time
without theengine running
may depletethe vehicle s
battery charge.
This productis designed for
operation witha 12 Volt DC,
negative groundvehicle. It
is notsuitable for operation
under otherconditions or
voltages.
CAUTION
Operating Notes
,
,
Do notbring magnetic devices
such ascredit card ormagnetic
card nearthe magnets.
1. The operating temperature of this product is limited to 14 ~+140 F.
2. If your vehicle is extremely hot or cold you must allow time for your air
conditioner or heater to cool or heat the vehicle until operating temperatures
have returned to normal operating ranges.
3. Optimal picture quality is achieved when viewed from directly front of the
monitor (+/-30degrees).
4. Do not open the housing and attempt to make any repairs yourself. Refer
servicing to qualified personnel.
5. DVD Players use an invisible laser beam which can cause hazardous radiation
exposure. Be sure to operate the unit correctly as instructed.
6. Do not cut the car power supply off while a disc is playing. It can cause
damage to the DVD Player.
7. If the buttons get stuck, please try to press the up of buttons, it will get back.
It won't impact using normal.
8. If you cann't find the files name in list when playing, please reset units or
turn off/on over again.
9. If the unit cann't be change mode when playing some special files which the unit
didn't support, please reset units or turn off/on over again.
Caution

Features and Controls
6
Disc Information
DVD features
DVD discs provide high-resolution images with high-quality sound. This DVD player
can play not only DVD discs of various versions, but also S-VCD, VCD, audio CD and
MP3 discs.
Discs that cannot be played
DVD-RW, DVD-REM, CD-ROM, CD-EXTRA discs cannot be played on this unit. In
addition, a CD or a CD-RW which was recorded on special software cannot be played.
Region code
Your DVD player is designed and manufactured to region management information
that is recorded on a DVD disc. Please check the region code.
1: North America 2: Japan 3: Korea and Southeast Asia
4: Australia, Mid & South America 5: Russia 6: China
How to handle the disc
Don t touch the shiny side of the disc (the side with the embedded information).
Don t stick a label or a glue-based note on either side of the disc.
Don t use discs that have glue or a damaged label with exposed adhesive residue.
It might result in damage to your DVD player.
Don t put discs in the sunshine.
Park your car in the shade.
How to handle the discs
Only use round discs. Discs with other shapes like a star, a heart, etc. may cause
damage to the player. If a disc is dirty, wipe softly with a wet cloth and then with a dry
one. Before playback, wipe the disc outward from the center with a clean cloth. Do not
use any type of solvent such as thinner, benzene, commercially available cleaners or
antistatic spray. To avoid damaging your DVD player, don t use a scratched disc.
35
,
,
,
,
,
M
PLAY
AV
MENU
POWER
Remote Control
Wireless Headphones
(Not Included)
Monitor/DVD Player
MONITOR
Vol+
Vol-
Monitor/DVD Player

Features and Controls
7
Installation
34
M
PLAY
AV
MENU
POWER
Caution
Do not bring magnetic devices
such as credit cards or magnetic
cards near the monitor.
.
.
.
.
X
POWER Button
MENU Button
PLAY/PAUSE Button
1. Open the package and check that these items are presents.
INSTALLATION PLATE
UNIT
SCREW A SCREW B
2. Connect the external compoments to the RCA cable or AV output.
(Refer to the connection diagram on page 33)
3. Match the position of installation bracket and
installation plate with screw A.
4. Tighten the unit with the supplied
screw B.
EJECT Button
Disc loadingslot
Audio Video
AV2INP UTS
RESET
M
PLAY
AV
MENU
POWER
AV Select Button
+/- Buttons
Dome LightButton
Skip Forward/BackButton
ON DOOR OFF
SD Input USB Input
SD
USB

8
33
Connection Diagram
Features and Controls
CAMCORDER
GAME
White AUDIO(L)
Red AUDIO(R)
Yellow VIDEO
CAMCORDER
GAME
White AUDIO(L)
Red AUDIO(R)
Yellow VIDEO
AV Input
(AV 2)
(AV 1)
White AUDIO(L)
Red AUDIO(R)
Yellow VIDEO
AV
Output
AMP
MENU
POWER
VOL-
VOL+
AV
MONITOR
AV Input
YELLOW
ACC
BLACK
RED
+ 12V DC Battery
Chassis Ground
Door Trigger
WHITE
FM ANTENNA
+Door Trigger-
MONITOR
iPOD
Vol+
Vol-
Remote Control
Turns the DVD Player/Monitoron or off.
(not functionin this unit)
DVD AV1 AV2
AV SELECT
P/N
This buttonpermits you tochoose
among Multi,PAL andNTSC.
Use tomove to thedesired menu.
DISPLAY
Press toshow elapsed orremaining
time ofa chapter ora title.
NUMERIC button
Use whenmaking a selectionon the
menu screen.
MODE
DVDSDUSB
POWER
1
2
MUTE
Press thisbutton to switchoff the
audio duringplayback. Press again
to restorethe audio.
3
VOL-/VOL+ (notfunction in thisunit)
MENU (OSDon monitor)
Press thisbutton to openthe onscreen menusystem to setupand
control variousparameters of the
monitor andDVD player.
UP/DOWN
MENU (DVDmenu)
This buttonpermits you toview the
menu onthe DVD.
SUBTITLE
Use thisbutton to selectthe menu
for choosinga subtitle language.
TITLE (Title menu)
When aDVD is playing,press this
button toview the Title Menu.
PBC (Video CD only)
Press thisbutton to accessthe special
Playback Controlfunctions for VCD
2.0 formatVideo CD S.
Use thisbutton to switchbetween
three modes
Tostart playback ofiPOD, press
this button.Press again topause
the playback.If playback ispaused,
press thisbutton to resume
playback.
RIGHT( )/LEFT( ) ARROWS
(not functionin this unit)
Use toincease or decrease
volume level.
Use thesebuttons(press once)
to skipto the nextor last track,
chapter orfile on theiPOD in
the player. But if you use these
buttons (presscontinuous) to
select eitherfast forward orfast
reverse playback.
MONITOR
Vol+
Vol-
Remote Control
P/N
This buttonpermits you tochoose
among Multi,PAL andNTSC.
Use tomove to thedesired menu.
DISPLAY
Press toshow elapsed orremaining
time ofa chapter ora title.
NUMERIC button
Use whenmaking a selectionon the
menu screen.
MODE
DVDSDUSB
POWER
1
2
MUTE
Press thisbutton to switchoff the
audio duringplayback. Press again
to restorethe audio.
3
VOL-/VOL+ (notfunction in thisunit)
MENU (OSDon monitor)
Press thisbutton to openthe onscreen menusystem to setupand
control variousparameters of the
monitor andDVD player.
UP/DOWN
MENU (DVDmenu)
This buttonpermits you toview the
menu onthe DVD.
SUBTITLE
Use thisbutton to selectthe menu
for choosinga subtitle language.
TITLE (Title menu)
When aDVD is playing,press this
button toview the Title Menu.
PBC (Video CD only)
Press thisbutton to accessthe special
Playback Controlfunctions for VCD
2.0 formatVideo CD S.
Use thisbutton to switchbetween
three modes
Tostart playback ofiPOD, press
this button.Press again topause
the playback.If playback ispaused,
press thisbutton to resume
playback.
RIGHT( )/LEFT( ) ARROWS
(not functionin this unit)
Use toincease or decrease
volume level.
Use thesebuttons(press once)
to skipto the nextor last track,
chapter orfile on theiPOD in
the player. But if you use these
buttons (presscontinuous) to
select eitherfast forward orfast
reverse playback.

9
Features And Controls
32
SD/USB Functions
A-B (repeatfrom Ato B)
VOL-/+ button
AUDIO
ENTER
ZOOM
UP/DOWN/RIGHT/LEFT ARROWS
PLAY/PAUSE
GO TO
STOP
SKIP FORWARD/BACK
FAST FORWARD/REVERSEPLAY
Use thesebuttons to selecteither fast
forward orfast reverse playback.
Use thisbutton to selectthe beginning
and endof a trackwhich you wish to have
repeat inplayback.
Use toincease or decreasevolume level.
Use thisbutton to selectone of the
audio soundtracksprogrammed on a
DVD disc.It is alseused to selectthe
audio outputmode for theDVD
playback.
Press thisbutton to confirmthe item
you havefound and highlightedusing
the arrowbuttons. Usually thisis done
to confirma selection oritem to be
played onthe DVD.
If yourDVD disc supportszooming in
to seethe program differently, pressing
this buttonwill enable youto change
the amountof zoom.
Use thesbuttons to navigatethe
various menusand screens forthe
monitor andDVD systems.
Tostart playback ofa disc, pressthis
button. Pressagain to pausethe
playback. Ifplayback is paused,press
this buttonto resume playback.
Use tosearch for atitle or achapter on
your DVDdisc.
Press thisbutton to stopthe playback
of thecurrent disc.
Use thesebuttons to skipto the next
or lasttrack, chapter orfile on the
disc inthe player.
RETURN
SETUP
Press thisbutton to displaythe Setup
menu. The Setupmenu enables you
to enterthe settings requiredfor the
unit towork properly.
REPEAT
Press thisbutton to changethe playback
mode torepeat.
Press thisbutton to returnto the rootmenu
1. When USB or SD is inputed, the monitor will be displayed as shown below. But when
you input USB that the function can not change into SD state (only the SD is
moving). And you can select the desired menu by
2.
“” ’
pressing the MODE button on the
remote control of monitor.
Use the (arrow and ENTER) buttons to select and set desired settings.
00:00
000/003
00:00 kbps
S
\
..
..

Power and Mode Selection
10
DVD Functions
PBC
[DVD]/[AUDIO]/[MP3]
[VCD]
You can turn the PBC (Play Back Control) function on or off by pressing this button.
When PBC is loaded, the PBC function is enabled automatically. This function is
similar to selection of DVD title. Please note that this function does not work with
MP3 dics.
Zoom
[DVD]
Some DVDs are programmed to allow you to zoom into
the image, magnifying it. Pressing the ZOOM button
does this in steps, according to the chart to the right.
[VCD]/[AUDIO]/[MP3]
GO TO
The GOTO function allows you tobegin playback at a specific location on the disc. To
do this,press GO TO and navigatethe screen whichfollows to select this playback
location.
Title
Move tothe desired title.
Chapter
Move tothe desired chapter.
Audio
Selects thedesired audio output.
Subtitle
Select thedesired subtitle.
Angle
Watch the different view angle.
TT Time
Totaltime.
CH Time
Chapter time.
Repeat
Sets therepeat play.
Time Display
Watch play time.
31
OSD
2X
3X
4X
1/2
1/3
1/4
ZOOM X2
CONDITION
ZOOM X3
ZOOM X4
ZOOM X1 / 2
ZOOM X1 / 3
ZOOM X1 / 4
Off
Menu
Title
Chapter
Audio
Subtitle
01/0201 / 02
06/6106 / 61
5.1CH Chinese5.1CH Chinese
OFF
Bitrate 31Bitrate 31
Title Elapsed0:20:02Title Elapsed 0:20:02
This button does not function in PBC mode.
This button does not function in this mode.
Mute Function
1. Press the button on the remote control to mute the audio.MUTE
2. Press the button again on the remote control to return to theMUTE
previous volume level.
Releasing The Monitor
Push the release button (located on the front edge of the screen housing) and
lower the monitor. You can also adjust the swivel angle.
Turning on The Monitor
POWER
UNIT
REMOTE CONTROLLER
Make thisarrow in DOWN
direction only.
1. Connect the monitor to external devices.
2. Press the POWER button on either the remote control or the unit once to turn
the power on.
Press the same POWER button to turn the power off.
3. Power on the external devices and play.
PULL BUTTON
M
PLAY
AV
MENU
POWER
POWER

Power and Mode Selection
11
DVD Functions
Repeat
Pressing REPEAT button changes
the play mode as follows:
[DVD]
OSD CONDITION
Chapter
Title
All
Repeat chapter
Repeat title
All
Repeat off
[VCD]
The REPEAT button does not function
when a VCD disc is being played.
Pressing REPEAT button changes
the play mode as follows:
[AUDIO]
OSD CONDITION
Track
All
Repeat single
All
Repeat off
[MP3]
Pressing REPEAT button changes
the play mode as follows:
OSD CONDITION
Repeat One
Repeat Folder
Folder
Single
Repeat folder
All
Random play
Shuffle
Random
Single
Repeat folderone time
Single play
NTSC/PAL
This button is used to select the video standard for the DVD mode between NTSC
and PAL formats.
Angle
Some DVD s are recorded with additional footage which allows you to view a scene
from a different camera angle. If theANGLE feature is enabled in the Setup Menu
(see page 14) and the disc has this option,an angle mark will be displayed on
the screen. When that occurs, press theANGLE button to see these alternate viewing
angles.
“”
30
,
Selecting an AV mode
1. Turn the power ON on the unit and on the external devices.
2. Select the DVD, AV1 or AV2 mode by pressing theAV Select button on
the unit or on the remote control.
3. Play the external device.

Picture Control
12
DVD Functions
Prev( )
Press this button to advance the player from the current chapter.to the previous
chapter
[DVD]/[VCD]
[AUDIO]/[MP3]
Press this button to move to the previous track.
Next( )
Press this button to advance the player from the current chapter .to the next chapter
[DVD]/[VCD]
[AUDIO]/[MP3]
Press this button to move from the current track .to the next track
Repeat(A-B)
You can set the player to repeat a segment over and over until you cancel it.To do
this, you mark the beginning of the desired segment (A) and the end of segment (B).
The selected segment will be
repeated automatically until canceled.
[DVD]/[VCD]/[AUDIO]
29
OSD CONDITION
A
AB
Start pointof repeat
Ending pointrepeat function
To adjust CONTRAST, BRIGHTNESS, COLOR or FM press the MENU button until
you arrive at the screen for that item. Use the arrow buttons to adjust the value.
Press the MENU button to make another adjustment or leave the MENU system.
Contrast/Brightness/Color/FM
CONTRAST
BRIGHTNESS
COLOR
50
50
50
1. Bring up the on-screen function menu by pressing the MENU button on the unit
or the remote control.
2. Press the MENU button on the unit or the remote control of monitor until you see
the item you wish to adjust.
3. Use the arrow buttons to adjust the value.
4. Press the MENU button to make another adjustment or leave the MENU system.
FM
87.7
(FM function added 87.7 87.9 88.1 88.3 88.5
88.7 88.9 89.1MHz)

DVD Setup
Setup Menu-Main Page
When the button is pressed, the setup menu will be displayed as shown
below. Select the menu category and make changes according to your preferences.
SETUP
1. Press the button if the disc is playing.STOP
2. Press the button to display setup menu.SETUP
3. Use the (arrow and ENTER) buttons to select and set desired settings.
4. Press the button again to turn off the setup menu.SETUP
13
TV DisplayTV Display
Angle MarkAngle Mark
OSD LangOSD Lang
Screen SaverScreen Saver
PS
On
ENG
On
Go To General Setup PageGo To General Setup Page
General Setup PageGeneral Setup Page
DVD Functions
Fast Reverse Searching( )
Pressing FR button repeatedly changes
the play mode as follow:
[DVD]
OSD CONDITION
FR 2X
FR 4X
FR 8X
2X rewindsearch
4X rewindsearch
Pressing FR button
changes the play mode as follow:
repeatedly
[AUDIO]
[MP3]
Pressing FR button
changes the play mode as follows:
repeatedly
FR 16X
FR 32X
PLAY
8X rewindsearch
16X rewindsearch
32X rewindsearch
Play
OSD CONDITION
FR 2X
FR 4X
FR 8X
2X rewindsearch
4X rewindsearch
FR 16X
FR 32X
PLAY
8X rewindsearch
16X rewindsearch
32X rewindsearch
Play
OSD CONDITION
FR 2X
FR 4X
FR 8X
2X rewindsearch
4X rewindsearch
FR 16X
FR 32X
PLAY
8X rewindsearch
16X rewindsearch
32X rewindsearch
Play
Fast Forward Searching( )
Pressing FF button changes
the play mode as follow:
repeatedly
[DVD]
OSD CONDITION
FF 2X
FF 4X
FF 8X
2X forwardsearch
4X searchforward
Pressing FF button
changes the play mode as follow:
repeatedly
[AUDIO]/[VCD]
[MP3]
Pressing FF button
changes the play mode as follows:
repeatedly
FF 16X
FF 32X
PLAY
8X searchforward
16X searchforward
32X searchforward
Play
OSD CONDITION
FF 2X
FF 4X
FF 8X
2X forwardsearch
4X searchforward
FF 16X
FF 32X
PLAY
8X searchforward
16X searchforward
32X searchforward
Play
OSD CONDITION
FF 2X
FF 4X
FF 8X
2X forwardsearch
4X searchforward
FF 16X
8X searchforward
16X searchforward
28
FF 32X
PLAY
32X searchforward
Play

DVD Setup
General Setup
1. TV Aspect Ratio
In theSetup function calledTV Display, you set the player to output the video signal at the
same aspectratio as yourmonitor. If the monitor is widescreen format, select WIDE.
If itis as normal screen (4:3), choose NORMAL/PS (Pan and Scan) or NORMAL L/B
(Letterbox).
“”
“”
Normal/PS4:3PANSCAN
Choose thissetting if youwant the movieto fill the entire screen.
(This mightmean that theleft and rightedges won t be seen)
Normal/LB4:3
Choose thissetting if youwant to seethe movie in its original aspect ratio.
(The moviemight appear withblack bars atthe top and bottom of the screen.)
Wide 16:9WIDE SCREEN
Choose thissetting if yourDVD Player isconnected to a widescreenTV.
(This opitionis available onlyif the dischas a 16:9 display aspect ratio.)
2. Angle Viewing
Some DVDdiscs contain programmingwhich allows you
to viewa scene froma few different camera angles.You
can tellwhen a sceneis so recordedwhen an Angle Mark
is displayedon the screen.This mark will onlyappear if you
have enabledthe Angle Mark feature
in theDVD Setup menu.
“”
On: Whenselected, the screenwill be shown with
angle mark.
Off: When selected,no angle markis shown on
the screen.
3. OSD Language
Use thisoption to setthe OSD language.
When selected,change to setthe on-screen display
language.
14
Angle MarkAngle Mark
OSD LangOSD Lang
Screen SaverScreenSaver
On
ENG
On
Set TVDisplay ModeSet TVDisplay Mode
General SetupPageGeneral SetupPage
Normal/LB
Wide
TV DisplayTV Display PS Normal/PS
OSD LangOSD Lang
Screen SaverScreenSaver
ENG
On
Set AngleMarkSet AngleMark
General SetupPageGeneral SetupPage
Off
TV DisplayTV Display PS
Angle MarkAngle Mark On On
Screen SaverScreenSaver On
Set OSDLanguageSet OSDLanguage
General SetupPageGeneral SetupPage
TV DisplayTV Display PS
Angle MarkAngle Mark On
OSD LangOSD Lang ENG
English
Korean
French
German
Italian
Spanish
Portuguese
Dutch
English
Korean
French
German
Italian
Spanish
Portuguese
Dutch
DVD Functions
Subtitle(SUB-T)
This button is used to select the language for the on-screen display system.
(This title menu may vary, depending on the particular DVD.)
[DVD]
OSD
1/2
Title
Slow( )
27
Used to display the title menu of the loaded DVD disc.
This function is only present on discs which support it.
[DVD]
[DVD]/[VCD]
CONDITION
1/4
1/8
2X slowforward
4X slowforward
8X slowforward
,
Use this button to play a disc in slow-forward or
slow-reverse. Slow playback can be done at five
different speeds. Pressing this button repeatedly
decreases the speed in steps. Pressing a sixth
time returns playback to the normal speed.
1/16
1/2
1/4
1/8
1/16
Play
16X slowforward
2X slowrewind
4X slowrewind
8X slowrewind
16X slowrewind
Play
1/32
32X slowforward
1/32
32X slowrewind

DVD Setup
Audio Setup
4. Screen Saver
The screensaver is usefulto prevent yourdisplay
from becomingdamaged. The screen saverpicture
appears whenyou leave theDVD player instop mode
for abouttwo minutes.
15
Angle MarkAngle Mark
OSD LangOSD LangOnENG
Screen SaverScreenSaver
General SetupPageGeneral Setup Page
TV DisplayTV Display PS
Go To Speaker Setup PageGo To Speaker Setup Page
Audio Setup PageAudio Setup Page
Speaker Setup
SPDIF Setup
Dolby Digital Setup
Channel Delay
Equalizer
3D Processing
Speaker
Setup
SPDIF
Setup
Dolby
Digital Setup
Channel
Delay
Equalizer
3D
Processing
Off
Screen SaverScreenSaver On
On
DVD Functions
Display
Pressing the DISPLAY on the
remote control changes the play mode as
follows:
button
[DVD]
OSD
CONDITION
Title Elapsed
Title Remain
Chapter Elapsed
Display theTitle Elapsed
Display theTitle Remain
Display theChapter Elapsed
[VCD]
Whenever press the button,title chapter
will be displayed as follows:
Pressing the display button displays
information about the current CD on the
screen as follows:
[AUDIO]
OSD CONDITION
Single Elapsed
Single Remain
Display thesingle elapsed
Display thesingle remain
Display thetotal elapsed
[MP3]
Your DVD player will display the counter
automatically when you play the MP3 disc.
Number Buttons
The 0through 9 numberbuttons are usedto enter thenumber of the track, the number
of theDVD chapter, the time, the date, etc.
26
OSD CONDITION
Single Elapsed
Single Remain
Display time
Left displaytime
No sign
Chapter Remain
Display Off
Display theChapter Remaining
No sign
Display Off
TotalElapsed
TotalRemain
Display thetotal remaining
[DVD]
Select atrack by pressingthe
corresponding numberbutton.
[AUDIO]
You can select a track in thefolder by
pressing thecorresponding number button.
[DVD]
OSD CONDITION
Select Track:__ Select trackno
OSD CONDITION
__:__ Select trackno

Dual Mono
Use this function to set the input audio
signal to match your speaker setup.
Dynamic
Use this function to change the setting
from the factory.
Set DRCOffSet DRCOff
Dual MonoDual Mono STR
Dynamic
Dolby DigitalSetupDolbyDigital Setup
L-Mono
R-Mono
Dual MonoDual Mono Stereo
Mix-Mono
Dolby DigitalSetupDolbyDigital Setup
Dynamic
FULL
3/4
1/2
1/4
OFF
1. Dolby Digital Setup
Dynamic
Dual Mono(1 + 1)SetupDual Mono(1 + 1) Setup
Dolby DigitalSetupDolbyDigital Setup
L-Mono
R-Mono
Dual MonoDual Mono STR Stereo
Mix-Mono
DVD Setup
Show below are two examples of Audio Setups.
Go ToDolby Digital SetupGoTo Dolby Digital Setup
Audio SetupPageAudio SetupPage
Speaker Setup
SPDIF Setup
Dolby DigitalSetup
Channel Delay
Equalizer
3D Processing
Speaker
Setup
SPDIF
Setup
Dolby
Digital Setup
Channel
Delay
Equalizer
3D
Processing
Set StereoSetupSet Stereo Setup
STR
16
Go ToEqualizer PageGo To EqualizerPage
Audio SetupPageAudio SetupPage
Speaker Setup
Spdif Setup
Dolby DigitalSetup
Channel Delay
Equalizer
3D Processing
Speaker
Setup
Spdif
Setup
Dolby
Digital Setup
Channel
Delay
Equalizer
3D
Processing
2. Equalizer Settings
Bass BoostBass Boost
Super BassSuper Bass
Treble BoostTrebleBoost
Off
Off
Off
Select EqualizerTypeSelect EqualizerTyp e
Equalizer PageEqualizerPage
Rock
Pop
Live
Dance
Techno
Classic
Soft
EQ TypeEQ Type None None
DVD Functions
Stop( )
In DVDmode, Press STOP to stop playback.
Toresume playback, pressPLAY/PAUSE. If
you pressSTOP and then PLAY/PAUSE twice,
the playerwill begin playbackat the first
scene ofthe movie.
[DVD]/[AUDIO]
In MP3mode, Pressing STOP will stop
audio playback.Press PLAY/PAUSE to begin
playback ofthe first titleon the disc.
the
[MP3]
Menu
Pressing theSETUP brings up theDVD disc menu.The content of this menu varies,
depending onthe programming ofthe disc.
25
[DVD]
OSD CONDITION
1 Time PressPlay Key ToContinue
Stop
OSD CONDITION
1 Time Stop Stop
Arrows( / / / )
In additionto navigating thevarious menus, youcan use thearrow buttons to define the area
of thescreen you wantto enlarge inZOOM mode.
[DVD]
After pressingSTOP button, select the desiredfolder and set the condition by pressing
ENTER button.
Disc Stop
2Time
Setup
Pressing theSETUP button opens theSetup Menu, whereyou can make and adjust DVD
settings tosuit your equipmentand preferences.
[MP3]

DVD Setup
EQ Equalizer Type
In this menu you can choose the desired preset
equalizer mode.
(Choose from Rock, Pop, Live, Dance,Techno,
ClassicorSoft)
Bass Boost
The Bass Boost function increases the volume
level of the bass frequencies.
Super Bass
Super Bass Boost further increases the volume
level of the bass frequencies.
Treble Boost
Treble Boost increases the volume level of the upper
frequencies.
17
Bass BoostBass Boost
Super BassSuperBass
Treble BoostTreble Boost
Off
Off
Off
Select EqualizerTypeSelectEqualizer Type
Equalizer PageEqualizer Page
Rock
Pop
Live
Dance
Techno
Classic
Soft
EQ TypeEQ Type None None
Super BassSuperBass
Treble BoostTreble Boost
Off
Off
Boss BoostBoss Boost
Equalizer PageEqualizer Page
EQ TypeEQ Type None
Off
Bass BoostBass Boost Off On
Treble BoostTreble Boost Off
Super BassSuperBass
Equalizer PageEqualizer Page
EQ TypeEQ Type None
Off
Bass BoostBass Boost Off
On
Super BassSuperBass Off
Treble BoostTreble Boost
Equalizer PageEqualizer Page
EQ TypeEQ Type None
Off
Bass BoostBass Boost Off
On
Super BassSuperBass Off
Treble BoostTreble Boost Off
DVD Functions
Eject
Audio
Change theaudio output format.
(A the discsupports available audio
type.)
vailable onlyif
24
[DVD]
Changes theaudio output format.
(Available only ofthe disc supportsavailable audio
type.)
[VCD]/[AUDIO]
OSD CONDITION
Mute
Mute
Mute off
Mute off
Vol+/Vol-
Use thesebuttons to adjustthe audio output level of the speaker from 0 to 100.
Mute
Press MUTEto turn off the audiopart of the
currently playingprogram. Press itagain to
return theaudio volume tothe level atwhich
you werelast listening.
OSD CONDITION
Play Disc
Pause
Play or Pause( )
When thisbutton is pressed,the disc isejected. When thisbutton is pressed for more
than 3seconds, the discis unconditionally ejected.Use this function if you encounter
difficultly ejecting adisc.
An invalidbutton press.
[MP3]
OSD
CONDITION
2 Channel
5.1 Channel
1/2:Ac32CHEnglish
2/2:Ac35.1CHEnglish
OSD
CONDITION
Stereo
Mono Left
Stereo
Mono Left
Mono Right
Mix Mono
Mono Right
Mix Mono
Whenever thisbutton is pressed,the mode
switches frompause to playor play topause.

DVD Setup
Video Setup
Sharpness can be adjusted by highlighting it in the menu and then using the
UP/DOWN arrow buttons to increase or decrease the sharpness.
In the Video Setup, you can make adjustments to various elements of the picture quality.
18
Brightness
Contrast
Gamma
00
00
None
Color
Video QualitySetupVideo QualitySetup
Medium
Low
Color MID High
Hue
Saturation
Luma DelayLuma Delay
00
00
1T1 T
Picture Quality
Video SetupPageVideo SetupPage
Component YUV
Quality
Divx VOD
Component YUV
Quality
Divx
VOD
Go TOVideo Quality SetupPageGo TOVideo Quality SetupPage
DVD Setup
Password Setup
1. Password Mode
In the Password setup, you must first enter the current 6-digit passcode, and
then you have the opportunity to change it. The factory default passcode is .
Once you have changed and confirmed the password, press the ENTER button.
136900
2. Password Change
23
Password
Password ModePassword Mode
Password Setup PagePassword Setup Page
Off
Password ModeOnPassword ModeOn On
Change PasswordChange Password
Password Setup PagePassword Setup Page
Password ModeOnPassword ModeOn On
Password Change
Old Password
New Password
Confirm PWD
OK
Password Setup, which is required for using the Parental Controls settings,
is divided into two modules: Turning on the Password function, and setting
a Password. The first step is to turn it on in the Password Mode setting.
Brightness
Contrast
Gamma
00
00
None
Color
Video QualitySetupVideo QualitySetup
Medium
Low
Color MID High
Hue
Saturation
Luma DelayLuma Delay
00
00
1T1 T
Brightness
Use this option to adjust the display brightness. When you reach desired
brightness level, use the / buttons and press the ENTER button.
Video QualitySetupVideo QualitySetup
Hue
Saturation
Luma DelayLuma Delay
00
00
1T1 T
Brightness
Brightness
0
Brightness
Contrast
Gamma
00
00
None
Color MID
Brightness
Please EnterOld PasswordPlease EnterOld Password

Contrast
Use this option to adjust the contrast level.
Use the / buttons and press the ENTER button, when you reach the
desired contrast level. The contrast control increases or decreases the ratio of
bright and dark screen sections.
Brightness
Gamma00None
Contrast
Video QualitySetupVideo QualitySetup
Color MID
Hue
Saturation
Luma DelayLuma Delay
00
00
1T1 T
Contrast 00
Contrast
Contrast
0
DVD Setup
19
DVD Setup
Use the Disc Menu option to select the display
language for a DVD s disc menu display language.
(not the same as the players menu)
1. Press the SETUP button during stop mode.
2. Press the / buttons to move to Preference.
3. Press the / buttons to move to Disc Menu.
4. Press the ENTER button.
5. Press the / buttons to select Disc Menu.
5. Disc Menu
The Parental Control settings limit the player to only play content at or below a certain
movie rating. The ratings systems in different countries vary. In the USA, the Motion
Picture Association of America(MPAA) rates movies as G, PG, PG-13, etc.
In this menu item, you can set what is the highest level of rating you wish to allow the
unit to play.
1. Press the SETUP button when stop mode.
2. Press the / buttons to move to Preference.
3. Press the / buttons to move to Parental.
4. Press the ENTER button.
5. Press the / buttons to select desired
parental level.
6. Parental
If you select RESET when in the DEFAULT settings
mode, all the settings of the Setup Menu will be
returned to the factory defaut settings, except for
Parental Level, Region and Password values.
1. Press the SETUP button when stop mode.
2. Press the / buttons to move to Preference.
3. Press the / buttons to move to Default.
4. Press the ENTER button to select Reset.
7. Default
22
PBC
Audio
Subtitle
On
ENG
Preferred MenuLanguagePreferred Menu Language
Preference PagePreference Page
French
Spanish
TV TypeTVTyp e
Ntsc
English
Parental
Default
Japanese
Korean
Chinese
Thai
Russian
Disc MenuDisc Menu
ENG
PBC
Audio
Subtitle
On
ENG
Load FactorySettingLoad Factory Setting
Preference PagePreference Page
TV TypeTVTyp e
Ntsc
Disc MenuDisc Menu
ENG
Parental
Reset
Default
PBC
Audio
Subtitle
On
ENG
Set ParentalControlSet Parental Control
Preference PagePreference Page
TV TypeTVTyp e
Ntsc
1KIDSAF
2G
3PG
4PG13
5PGR
6R
7 NC17
8ADULT
1
KID SAF
2
G
3
PG
4
PG 13
5
PGR
6
R
7
NC17
8
ADULT
Parental
Default
Disc MenuDisc Menu
ENG
,
Gamma
Hue
Select screen hue level using the direction / buttons and press the ENTER button.
Brightness
Contrast0000
Gamma
Video QualitySetupVideo QualitySetup
Medium
Low
Color MID
Hue
Saturation
Luma DelayLuma Delay
00
00
1T1 T
None
Gamma None
High
Brightness
Contrast0000
Hue
Video QualitySetupVideo Quality Setup
Color MID
Saturation
Luma DelayLuma Delay001T1 T
Gamma None
Hue 00
Hue
Hue
0
In some systems, you might experience a loss in the strength of the dark sections of
the displayed picture. This can be helped by changing the Gamma setting, which
boosts the dark level but leaves the other levels unchanged.

DVD Setup
Saturation
Select screen saturation level using the direction / buttons and press the
ENTER button.
Luma Delay
Select the Luma Delay menu and select the preferred video image quality.
20
Brightness
Contrast0000
Saturation
Video QualitySetupVideo QualitySetup
Color MID
Luma DelayLuma Delay 1T1 T
Gamma None
Hue 00
Saturation 00
Saturation
Saturation
0
Brightness
Contrast0000
Luma DelayLuma Delay
Video QualitySetupVideo QualitySetup
Color MID
Gamma None
Hue 00
Saturation 00
Luma DelayLuma Delay 1T1 T
DVD Setup
Preference
1. TV Type
Choose the proper TV format appropriate to the
monitor you have connected to the player from
the following: NTSC, PAL or Multi type.
1. Press the SETUP button during stop mode.
2. Press the / buttons to move to Preference.
3. Press the / buttons to move to TV Type.
4. Press the ENTER button.
5. Press the / buttons to select TV Type.
2. PBC (Play Back Control)
This feature is only available when a SVCD disc
is loaded. It allows you to disable or enable the
PBC (Play Back Control) menu of VCD discs.
1. Press the SETUP button during stop mode.
2. Press the / buttons to move to Preference.
3. Press the / buttons to move to PBC.
4. Press the ENTER button.
5. Press the / buttons to select TV TypeOn/Off.
3. Audio
Use the audio language menu to select the subtitle
language that you prefer. If the disc you are playing
has that language available, it will display subtitles
in that language.
1. Press the SETUP button during stop mode.
2. Press the / buttons to move to Preference.
3. Press the / buttons to move to Audio.
4. Press the ENTER button.
5. Press the / buttons to select desired
audio language.
4. Subtitle
In the Subtitle menu, you can select a subtitle
language. Please note that subtitle will only
appear in this language if the disc programming
has included it.
1. Press the SETUP button during stop mode.
2. Press the / buttons to move to Preference.
3. Press the / buttons to move to Subtitle.
4. Press the ENTER button.
5. Press the / buttons to select desired
subtitle.
21
PBC
Subtitle
On
Preferred AudioLanguagePreferred AudioLanguage
Preference PagePreference Page
French
Spanish
TV TypeTVTyp e
Ntsc
English
Parental
Default
Japanese
Korean
Chinese
Thai
Russian
Disc MenuDisc Menu
ENG
Audio
ENG
PBC
Audio
On
ENG
Preferred SubtitleLanguagePreferred SubtitleLanguage
Preference PagePreference Page
French
Spanish
TV TypeTVTyp e
Ntsc
Parental
Default
Japanese
Korean
Chinese
Russian
Disc MenuDisc Menu
ENG
Subtitle
Thai
Others
Thai
Others
Audio
Subtitle
ENG
Set PBCStateSet PBCState
Preference PagePreference Page
TV TypeTVTyp e
Ntsc
On
Parental
Default
Disc MenuDisc Menu
ENG
Off
PBC
On
PBC
Audio
Subtitle
On
ENG
Set TVStandardSet TVStandard
Preference PagePreference Page
Parental
Default
Disc MenuDisc Menu
ENG
PAL
Multi
NTSC
TV TypeTVTyp e
Ntsc
0T
1T1 T
 Loading...