

Fanvil X7, X7C, X210, X210i User Manual
User Manual
Software Version: 1.0.2
Release Date˖2019/02/25
X7&X7C

I
Directory
Directory ......................................................................................................................................................... I
1 Picture ................................................................................................................................................ VI
2 Table .................................................................................................................................................... X
3 Safety Instruction ................................................................................................................................ 1
4 Overview .............................................................................................................................................. 2
4.1 Overview..................................................................................................................................... 2
4.2 Packing Contents ........................................................................................................................ 3
4.2.1 X7 Packing Contents ....................................................................................................... 3
4.2.2 X7C Packing Contents .................................................................................................... 4
5 Install Guide ........................................................................................................................................ 5
5.1 Use PoE or external Power Adapter ........................................................................................... 5
5.2 Desktop Installation .................................................................................................................... 6
5.2.1 X7&X7C Desktop I nstallation ........................................................................................ 6
6 Appendix Table ................................................................................................................................... 8
6.1 Appendix I - Icon ........................................................................................................................ 8
6.2 Appendix II –Keyboard character query table .......................................................................... 11
6.3 Appendix III –LED Definition ................................................................................................. 14
7 Introduction to the User ................................................................................................................... 16
7.1 Instruction of Keypad ............................................................................................................... 16
7.1.1 Instruction of the X7 Keypad ........................................................................................ 16
7.1.2 Instruction of the X7C Keypad ...................................................................................... 18
7.2
Using Handset / Hands-free Speaker / Headphone ................................................................... 19
7.3 Idle Screen ................................................................................................................................ 20
7.4 Phone Status.............................................................................................................................. 22
7.5 Web Management ..................................................................................................................... 24
7.6 Network Configurations ........................................................................................................... 24
7.7 SIP Configurations .................................................................................................................... 25
8 Basic Function ................................................................................................................................... 28
8.1 Making Phone Calls .................................................................................................................. 28
8.2 Answering Calls ........................................................................................................................ 30
8.2.1 Talking .......................................................................................................................... 31
8.2.2 Make / Receive Second Call .......................................................................................... 32
8.3 End of the Call .......................................................................................................................... 33
8.4 Redial ........................................................................................................................................ 33

II
8.5 Dial-up Query ........................................................................................................................... 34
8.6 Auto-Answering ....................................................................................................................... 34
8.7 Call Back .................................................................................................................................. 36
8.8 Mute .......................................................................................................................................... 37
8.8.1 Mute the Call ................................................................................................................. 37
8.8.2 Ringing Mute ................................................................................................................. 38
8.9 Call Hold/Resume ..................................................................................................................... 39
8.10 DND .......................................................................................................................................... 39
8.11 Call Forward ............................................................................................................................. 43
8.12 Call Transfer ............................................................................................................................. 45
8.12.1 Blind transfer ............................................................................................................... 45
8.12.2 Semi-Attended transfer .............................................................................................. 46
8.12.3 Attended transfer ........................................................................................................ 46
8.13 Call Waiting .............................................................................................................................. 47
8.14 Conference ................................................................................................................................ 49
8.14.1 Local Conference .......................................................................................................... 49
8.14.2 Network Conference ...................................................................................................... 50
8.15 Call Park ................................................................................................................................... 51
8.16 Pick Up ..................................................................................................................................... 52
8.17 Anonymous Call ....................................................................................................................... 54
8.17.1
Anonymous Call ............................................................................................................ 54
8.17.2 Ban Anonymous Call .................................................................................................... 55
8.18 Hotline ...................................................................................................................................... 56
8.19 Emergency Call ........................................................................................................................ 57
9 Advance Function ............................................................................................................................. 59
9.1 BLF (Busy Lamp Field) ............................................................................................................ 59
9.1.1 Configure the BLF Functionality .................................................................................. 59
9.1.2 Use the BLF Function ................................................................................................... 61
9.2 BLF List .................................................................................................................................... 61
9.3 Record ....................................................................................................................................... 62
9.3.1 Local Record˄USB flash disk˅ ................................................................................. 63
9.3.2 Server Record ................................................................................................................ 64
9.3.3 SIP INFO Record .......................................................................................................... 64
9.4 Agent ........................................................................................................................................ 65
9.5 Intercom .................................................................................................................................... 67
9.6 MCAST..................................................................................................................................... 68
9.7 SCA˄Shared Call Appearance˅ ............................................................................................ 69
9.8 Message .................................................................................................................................... 72

III
9.8.1 SMS ............................................................................................................................... 72
9.8.2 MWI˄Message Waiting Indicator˅ ........................................................................... 74
9.9 SIP Hotspot ............................................................................................................................... 75
10 Phone Settings ................................................................................................................................... 79
10.1 Basic Settings ............................................................................................................................ 79
10.1.1 Language ....................................................................................................................... 79
10.1.2 Time & Date .................................................................................................................. 80
10.1.3 Screen ............................................................................................................................ 81
10.1.4 Ring ............................................................................................................................... 83
10.1.5 Voice Volume................................................................................................................ 83
10.1.6 Greeting Words ............................................................................................................. 84
10.1.7 Reboot ........................................................................................................................... 84
10.2 Phone book ............................................................................................................................... 84
10.2.1 Local contact ................................................................................................................. 84
10.2.2 Black list ........................................................................................................................ 88
10.2.3 Cloud Phone Book ......................................................................................................... 89
10.3 Call Log .................................................................................................................................... 90
10.4 Function Key ............................................................................................................................ 92
10.5 Wi-Fi ......................................................................................................................................... 95
10.6 Headset ..................................................................................................................................... 95
10.6.1
Wired Headset ............................................................................................................... 95
10.6.2 Bluetooth Headset ......................................................................................................... 96
10.6.3 EHS Headset.................................................................................................................. 97
10.7 Advanced .................................................................................................................................. 98
10.7.1 Line Configurations ....................................................................................................... 98
10.7.2 Network Settings ........................................................................................................... 99
10.7.3 Set The Secret Key ...................................................................................................... 104
10.7.4 Maintenance ................................................................................................................ 107
10.7.5 Firmware Upgrade ....................................................................................................... 110
10.7.6 Factory Reset ............................................................................................................... 113
11 Web Configurations ........................................................................................................................ 114
11.1 Web Page Authentication ....................................................................................................... 114
11.2 System >> Information ........................................................................................................... 114
11.3 System >> Account................................................................................................................. 114
11.4 System >> Configurations ...................................................................................................... 114
11.5 System >> Upgrade ................................................................................................................ 115
11.6 System >> Auto Provision ...................................................................................................... 115
11.7 System >> Tools ..................................................................................................................... 115

IV
11.8 System >> Reboot Phone ........................................................................................................ 115
12 Network >> Basic ............................................................................................................................ 116
12.1 Network >> Service Port ........................................................................................................ 116
12.2 Network >> VPN .................................................................................................................... 117
12.3 Network >> Advanced ............................................................................................................ 117
12.4 Line >> SIP ............................................................................................................................. 117
12.5 Line >> SIP Hotspot ............................................................................................................... 123
12.6 Line >> Dial Plan.................................................................................................................... 123
12.7 Line >> Action Plan ................................................................................................................ 126
12.8 Line >> Basic Settings ............................................................................................................ 127
12.9 Line >> RTCP-XR .................................................................................................................. 127
12.10 Phone settings >> Features ..................................................................................................... 128
12.11 Phone settings >> Media Settings ........................................................................................... 133
12.12 Phone settings >> MCAST ..................................................................................................... 134
12.13 Phone settings >> Action ........................................................................................................ 134
12.14 Phone settings >> Time/Date .................................................................................................. 135
12.15 Phone settings >> Tone .......................................................................................................... 136
12.16 Phone settings >> Advanced................................................................................................... 136
12.17 Phonebook >> Contact ........................................................................................................... 137
12.18 Phonebook >> Cloud phonebook ........................................................................................... 137
12.19
Phonebook >> Call List .......................................................................................................... 139
12.20 Phonebook >> Web Dial ........................................................................................................ 139
12.21 Phonebook >> Advanced ........................................................................................................ 139
12.22 Call Logs ................................................................................................................................. 139
12.23 Function Key >> Function Key .............................................................................................. 140
12.24 Function Key >> Side Key ..................................................................................................... 141
12.25 Function Key >> Softkey ........................................................................................................ 141
12.26 Function Key >> Advanced .................................................................................................... 142
12.27 Application >> Manage Recording ......................................................................................... 143
12.28 Security >> Web Filter ........................................................................................................... 143
12.29 Security >> Trust Certificates ................................................................................................. 144
12.30 Security >> Device Certificates .............................................................................................. 144
12.31 Security >> Firewall ............................................................................................................... 145
12.32 Device Log >> Device Log .................................................................................................... 147
13 Trouble Shooting ............................................................................................................................. 148
13.1 Get Device System Information ............................................................................................. 148
13.2 Reboot Device ........................................................................................................................ 148
13.3 Reset Device to Factory Default ............................................................................................. 148

V
13.4 Screenshot ............................................................................................................................... 148
13.5 Network Packets Capture ........................................................................................................ 149
13.6 Get Log Information ............................................................................................................... 150
13.7 Common Trouble Cases.......................................................................................................... 150

VI
1 Picture
Picture 1 - Desktop phone installation ................................................................................................ 6
Picture 2 - Connecting to the Device .................................................................................................. 7
Picture 3 - Instruction of Keypad ..................................................................................................... 16
Picture 4 - Instruction of Keypad ..................................................................................................... 18
Picture 5 - X7 default home screen .................................................................................................. 20
Picture 6 - X7C default home screen ................................................................................................ 21
Picture 7 - Scroll icon ....................................................................................................................... 22
Picture 8 - The Phone status ............................................................................................................. 23
Picture 9 - WEB phone status ........................................................................................................... 23
Picture 10 - Landing page ................................................................................................................ 24
Picture 11 - Phone line SIP address and account information .......................................................... 26
Picture 12 - Phone display name and port ........................................................................................ 26
Picture 13 - Web SIP registration ..................................................................................................... 27
Picture 14 - Default line ................................................................................................................... 28
Picture 15 - Enable voice channel dialing ........................................................................................ 29
Picture 16 - Open the voice channel and dial the number ................................................................ 29
Picture 17 - Call number .................................................................................................................. 30
Picture 18 - Answ ering call s ............................................................................................................. 30
Picture 19 - Talking interface ........................................................................................................... 31
Picture 20 - The second call interface .............................................................................................. 32
Picture 21 - Two way calling ............................................................................................................ 33
Picture 22 - Redial set ...................................................................................................................... 34
Picture 23 - Line 1 enables auto-answering...................................................................................... 35
Picture 24 - The line has enabled auto-answering ............................................................................ 35
Picture 25 - Web page to start auto-answering ................................................................................. 36
Picture 26 - Set the callback key on the phone ................................................................................. 37
Picture 27 - Set the callback key on the web page ........................................................................... 37
Picture 28 - Mute the call ................................................................................................................. 38
Picture 29 - Ringing mute ................................................................................................................ 38
Picture 30 - Call hold interface ......................................................................................................... 39
Picture 31 - X7C Enable DND ......................................................................................................... 40
Picture 32 - X7 Enable DND ............................................................................................................ 40
Picture 33 - DND setting interface ................................................................................................... 41
Picture 34 - DND timer .................................................................................................................... 41
Picture 35 - DND Settings ................................................................................................................ 42
Picture 36 - Line DND ..................................................................................................................... 42

VII
Picture 37 - Select the line to set up call forwarding ........................................................................ 43
Picture 38 - Select call forward type ................................................................................................ 44
Picture 39 - Enable call forwarding and configure the call forwarding number .............................. 44
Picture 40 - Set call forward ............................................................................................................. 45
Picture 41 - Transfer interface .......................................................................................................... 46
Picture 42 - Semi-Attended transfer ................................................................................................. 46
Picture 43 - Attended trans fer ........................................................................................................... 47
Picture 44 - Call waiting setting ....................................................................................................... 48
Picture 45 - Web call waiting setting ................................................................................................ 48
Picture 46 - Web call waiting tone setting ........................................................................................ 49
Picture 47 - Local conference setting ............................................................................................... 50
Picture 48 - Local conference˄1˅ ................................................................................................. 50
Picture 49 - Local conference˄2˅ ................................................................................................. 50
Picture 50 - Network conference ...................................................................................................... 51
Picture 51 - Phone set call park ........................................................................................................ 52
Picture 52 - WEB set call park ......................................................................................................... 52
Picture 53 - Phone pick up setting .................................................................................................... 53
Picture 54 - WEB pick up setting ..................................................................................................... 54
Picture 55 - Enable anonymous call ................................................................................................. 54
Picture 56 - Enable Anonymous web page call ................................................................................ 54
Picture 57 - Anonymous call log ...................................................................................................... 55
Picture 58 - Anonymous calls are not allowed on the phone ............................................................ 55
Picture 59 - Page Settings blocking anonymous call ........................................................................ 56
Picture 60 - Phone hotline setting interface ...................................................................................... 56
Picture 61 - Hotline set up on webpage ............................................................................................ 57
Picture 62 - Set up an emergency call number ................................................................................. 58
Picture 63 - Dial the emergency number .......................................................................................... 58
Picture 64 - Web page configuration BLF function key ................................................................... 59
Picture 65 - Phone configuration BLF function key ......................................................................... 60
Picture 66 - Configure the BLF List functionality ........................................................................... 62
Picture 67 - BLF List number display ............................................................................................ 62
Picture 68 - WEB local recording..................................................................................................... 63
Picture 69 - Web server recording .................................................................................................... 64
Picture 70 - Web SIP info recording ................................................................................................. 65
Picture 71 - Configure the agent account in normal mode ............................................................... 65
Picture 72 - Configure the proxy account-hotel Guest mode ........................................................... 66
Picture 73 - Agent logon page .......................................................................................................... 67
Picture 74 - Web Intercom configure................................................................................................ 67

VIII
Picture 75 - Multicast Settings Page ................................................................................................. 68
Picture 76 - Register BroadSoft account .......................................................................................... 70
Picture 77 - Set BroadSoft server ..................................................................................................... 70
Picture 78 - Enable SCA .................................................................................................................. 71
Picture 79 - Set Private Hold Function Key ..................................................................................... 71
Picture 80 - SMS icon ...................................................................................................................... 73
Picture 81 - New Voice Message Notification .................................................................................. 74
Picture 82 - Voice message interface ................................................................................................ 75
Picture 83 - Configure voicemail number ........................................................................................ 75
Picture 84 - Register SIP account ..................................................................................................... 76
Picture 85 - SIP hotspot server configuration ................................................................................... 77
Picture 86 - SIP hotspot client configuration .................................................................................... 77
Picture 87 - Phone language setting ................................................................................................. 79
Picture 88 - Language setting on Web page ..................................................................................... 79
Picture 89 - Set time & date on phone .............................................................................................. 80
Picture 90 - Set time & date on webpage ......................................................................................... 80
Picture 91 - Set screen parameters on phone .................................................................................... 82
Picture 92 - Page screen Settings...................................................................................................... 82
Picture 93 - Phone screen saver ........................................................................................................ 83
Picture 94 - Phone book screen ........................................................................................................ 85
Picture 95 - Local Phone book ....................................................................................................... 85
Picture 96 - Add New Cont act .......................................................................................................... 86
Picture 97 - Group List ..................................................................................................................... 87
Picture 98 - Browsing Contacts in a Group ...................................................................................... 87
Picture 99 - Add Contacts in a Group ............................................................................................... 88
Picture 100 - Ad d Blacklist .............................................................................................................. 88
Picture 101 - Web Blacklist .............................................................................................................. 89
Picture 102 - Cloud phone book list ................................................................................................. 90
Picture 103 - Browsing Contacts in Cloud Phone book ................................................................... 90
Picture 104 - CallLog ....................................................................................................................... 91
Picture 105 - Filter call record types ................................................................................................ 92
Picture 106 - DSS LCD key Page Configuration Screen ................................................................. 93
Picture 107 - DSS LCD Screen Configuration ................................................................................. 94
Picture 108 - DSS settings ................................................................................................................ 94
Picture 109 - WIFI settings............................................................................................................... 95
Picture 110 - Headset function settings ............................................................................................ 96
Picture 111 - Bluetooth Settings Screen ........................................................................................... 96
Picture 112 - EHS Headset setting ................................................................................................... 97

IX
Picture 113 - SIP address and account information .......................................................................... 98
Picture 114 - Configure Advanced Line Options ........................................................................... 98
Picture 115 - Network mode Settings ............................................................................................... 99
Picture 116 - DHCP network mode ................................................................................................ 100
Picture 117 - PPPoE network mode ............................................................................................... 100
Picture 118 - Static IP network mode ............................................................................................. 101
Picture 119 - IPv6 Static IP network mode ..................................................................................... 101
Picture 120 - The phone configures the web server type ................................................................ 104
Picture 121 - Menu password and Settings .................................................................................... 105
Picture 122 - Keypad lock password .............................................................................................. 105
Picture 123 - Set the keypad lock password ................................................................................. 106
Picture 124 - Phone keypad lock password input interface ............................................................ 106
Picture 125 - Web keyboard lock password Settings ...................................................................... 107
Picture 126 - Page auto provision Settings ..................................................................................... 107
Picture 127 - Phone auto provision settings ................................................................................... 108
Picture 128 - Web page firmware upgrade ..................................................................................... 110
Picture 129 - Firmware upgrade information display ..................................................................... 111
Picture 130 - Firmware upgrade ..................................................................................................... 112
Picture 131 - Reset to default ......................................................................................................... 113
Picture 132 - Service Port Settings ................................................................................................. 116
Picture 133 - Dial plan settings ...................................................................................................... 123
Picture 134 - Custom setting of dial - up rules ............................................................................... 124
Picture 135 - Dial rules table (1) .................................................................................................... 126
Picture 136 - Dial rules table (2) .................................................................................................... 126
Picture 137 - Tone settings on the web ........................................................................................... 136
Picture 138 - Web cloud phone book Settings ................................................................................ 138
Picture 139 - IP Camera List .......................................................................................................... 143
Picture 140 - Web Filter settings .................................................................................................... 143
Picture 141 - Web Filter Table ........................................................................................................ 143
Picture 142 - Certificate of settings ................................................................................................ 144
Picture 143 - Device certificate setting .......................................................................................... 145
Picture 144 - Network firewall Settings ......................................................................................... 145
Picture 145 - Firewall Input rule table ............................................................................................ 146
Picture 146 - Delete firewall rules .................................................................................................. 147
Picture 147 - Screenshot ................................................................................................................. 149
Picture 148 - Web capture .................................................................................................... .......... 150

X
2 Table
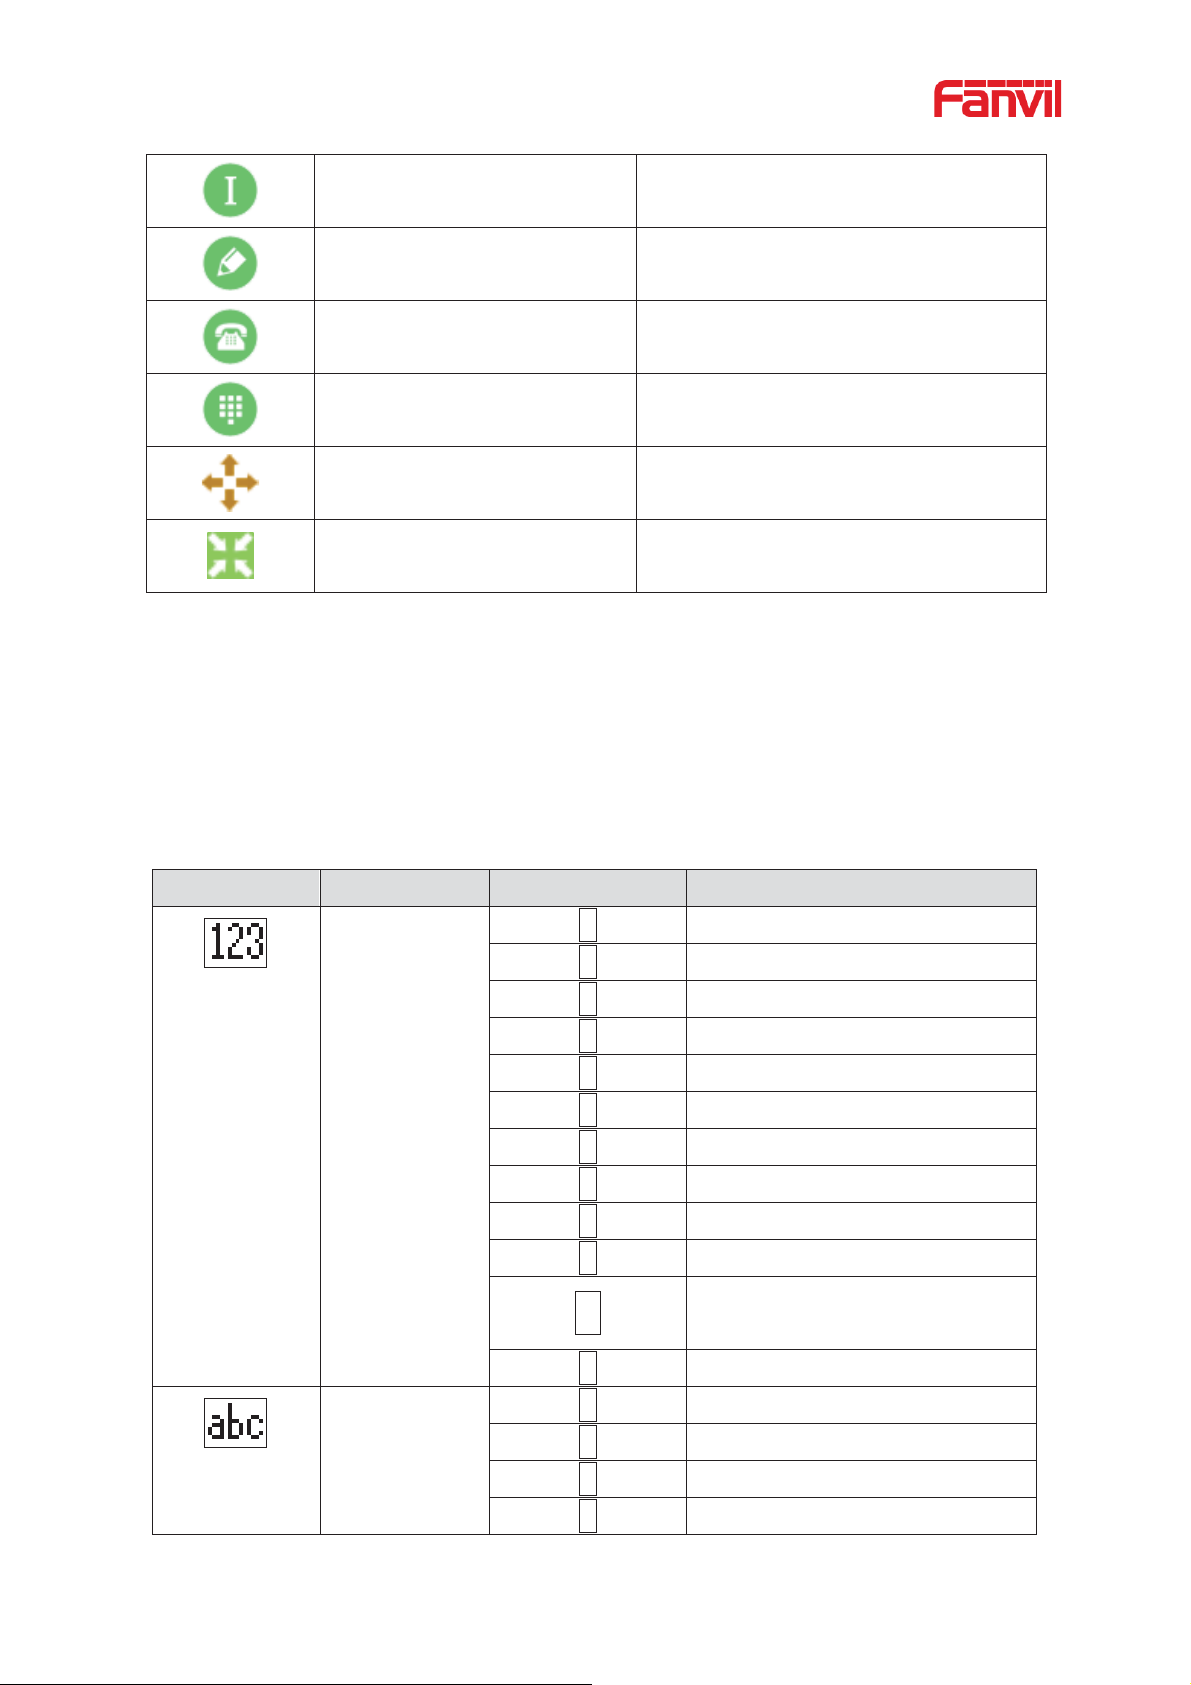
Table 1 - Keypad Icons ....................................................................................................................... 8
Table 2 - Status Prompt and Notification Icons .................................................................................. 8
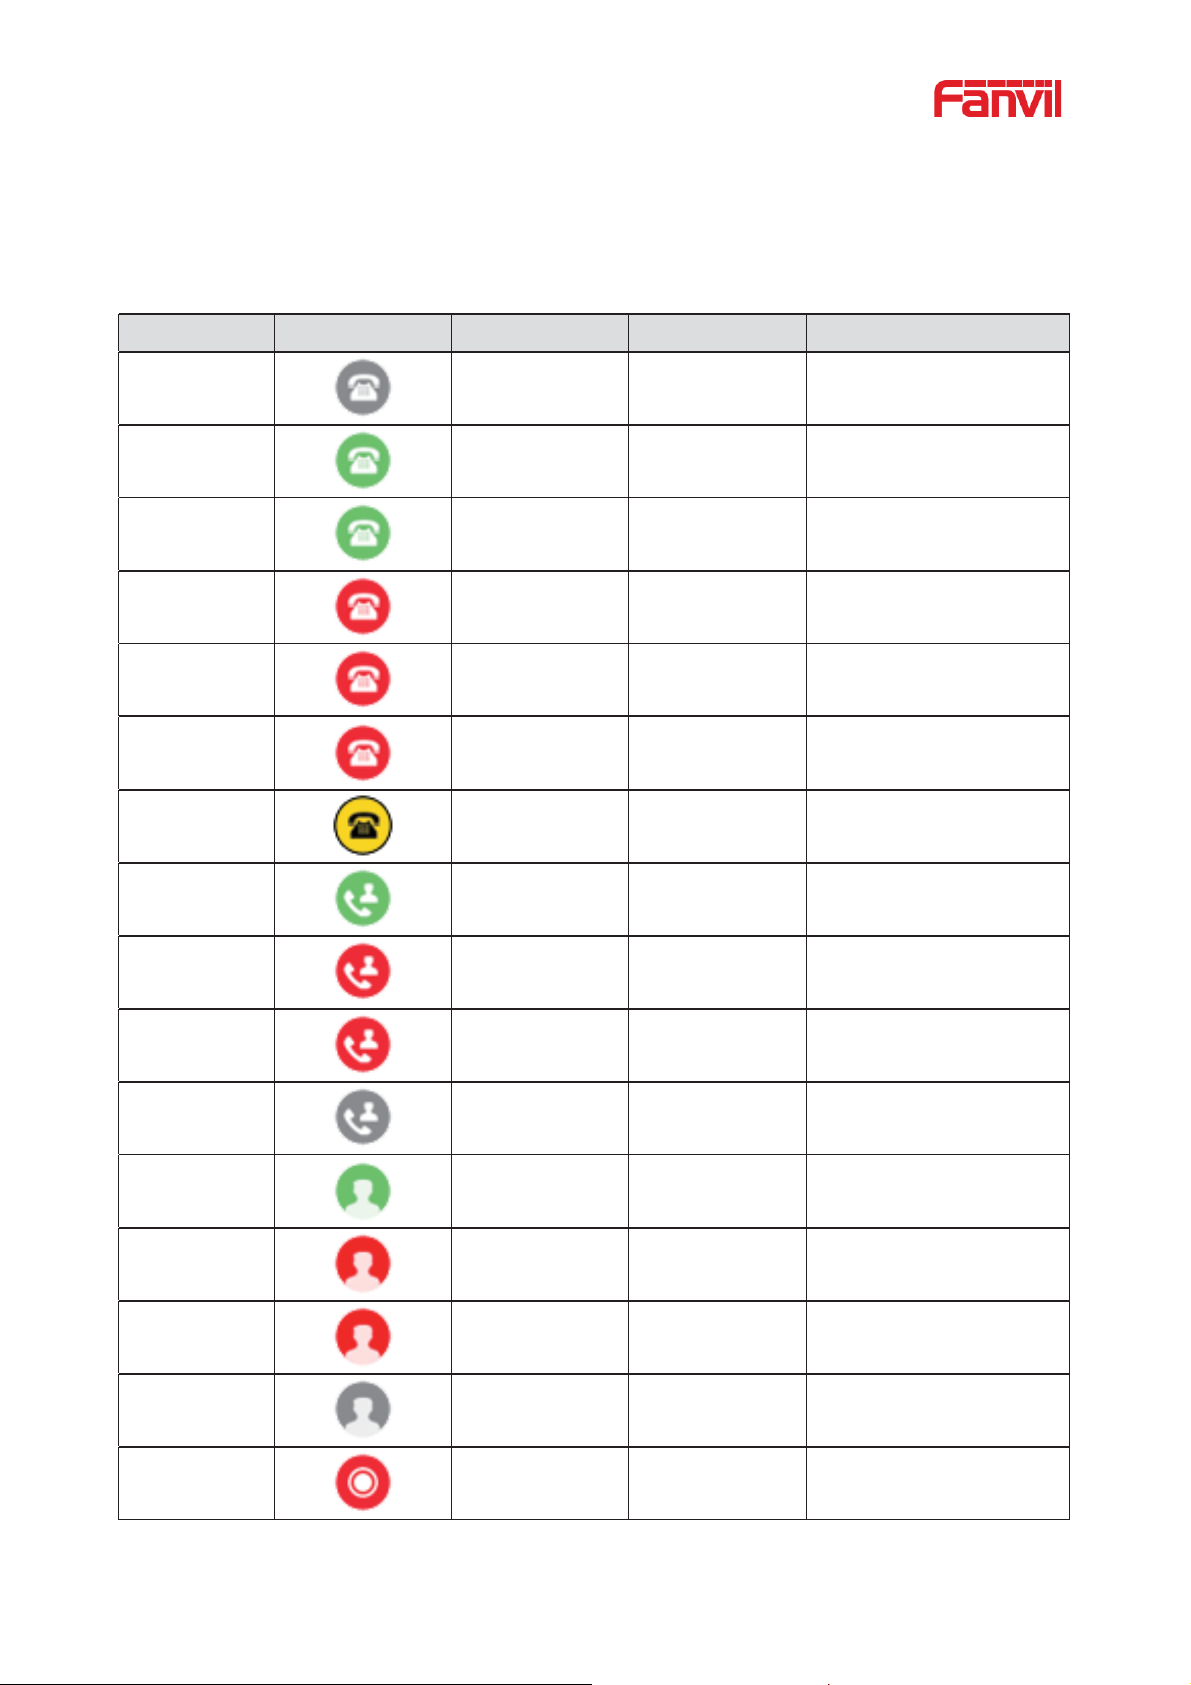
Table 3 - DSSkey Icons .................................................................................................................... 10
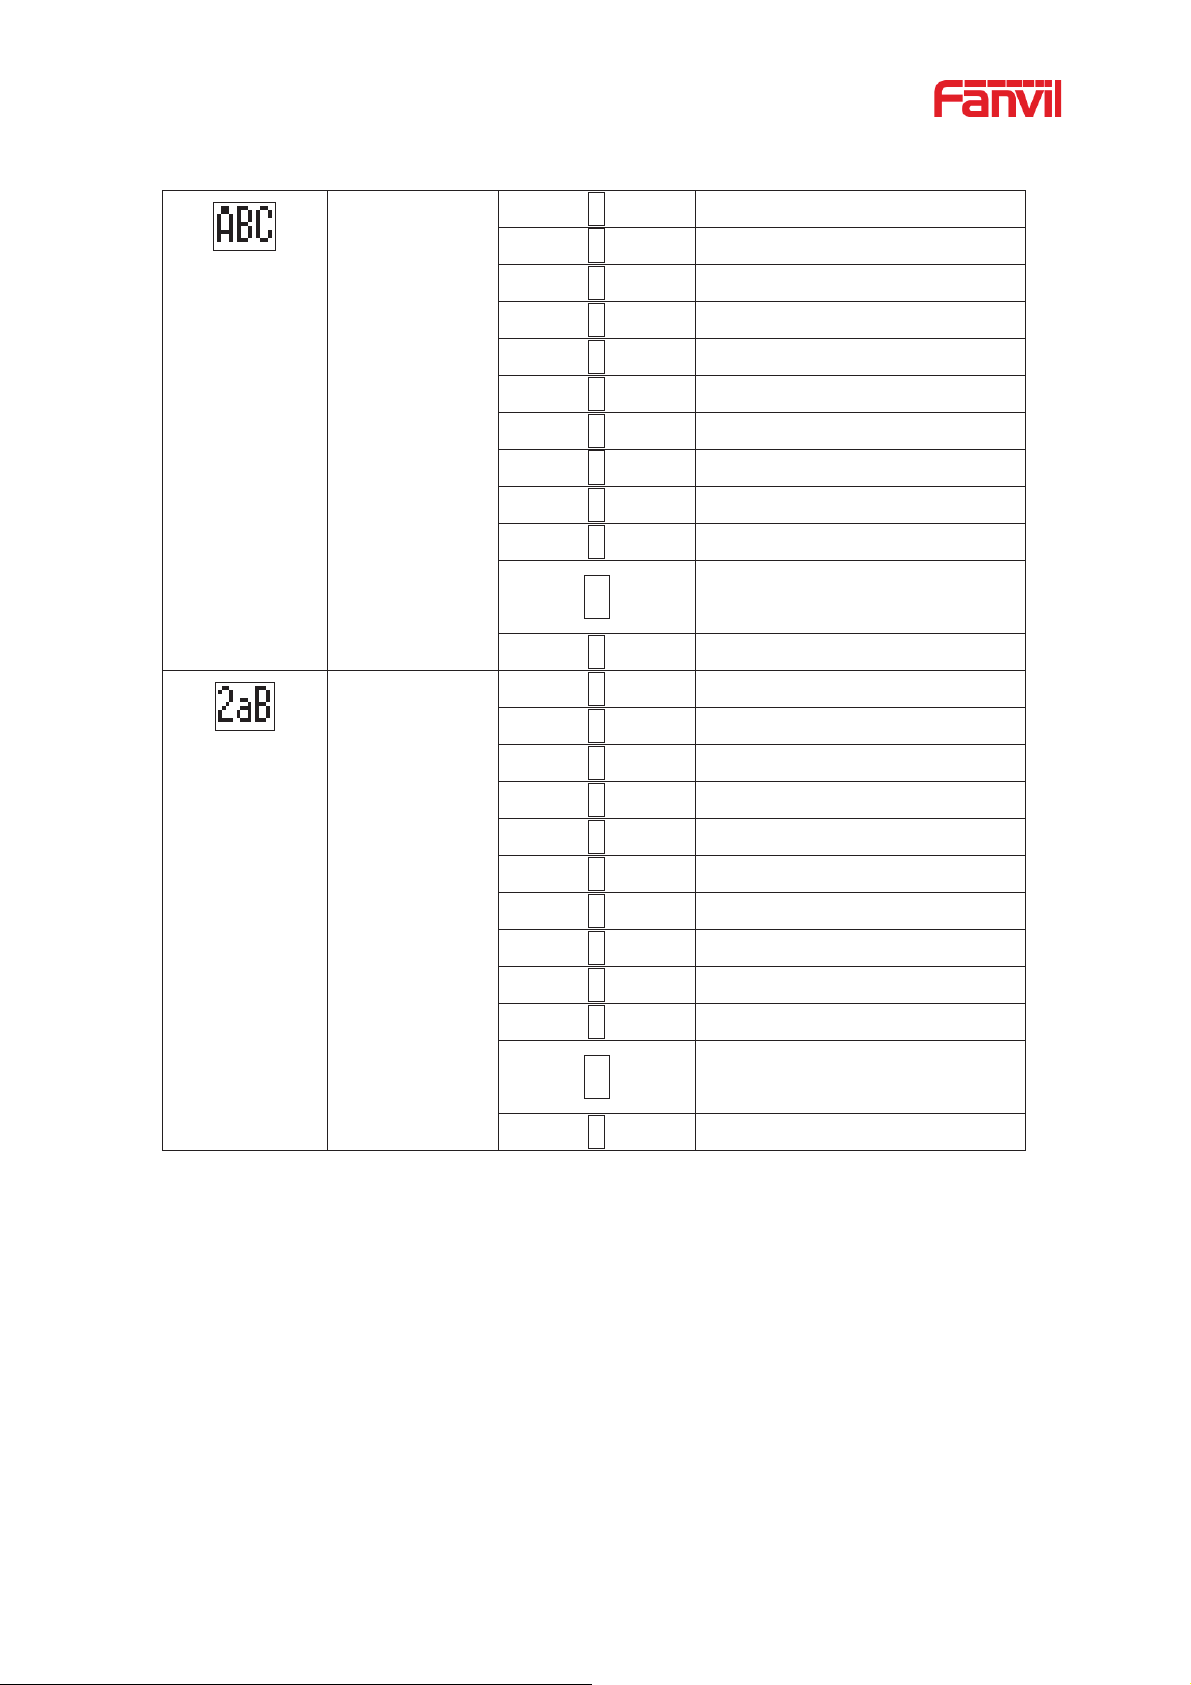
Table 4 - Look-up Table of Characters ............................................................................................. 11
Table 5 - DSS KEY LED State ......................................................................................................... 14
Table 6 - Instruction of Keypad ........................................................................................................ 16
Table 7 - Instruction of Keypad ........................................................................................................ 18
Table 8 - Talking mode ..................................................................................................................... 31
Table 9 - BLF Function key subtype parameter list ......................................................................... 60
Table 10 - Agency mode ................................................................................................................... 66
T able 11 - Intercom configure .......................................................................................................... 67
Table 12 - MCAST Parameters on Web ........................................................................................... 68
Table 13 - LED Status of SCA ......................................................................................................... 71
Table 14 - SIP hotspot Parameters .................................................................................................... 76
Table 15 - Time Settings Parameters ................................................................................................ 81
Table 16 - QoS & VLAN ................................................................................................................ 102
Table 17 - Auto Provision ............................................................................................................... 108
Table 18 - Firmware upgrade ......................................................................................................... 11 1
Table 19 - Service port ................................................................................................................... 116
Table 20 - Line configuration on the web page .............................................................................. 117
Table 21 - Phone 7 dialing methods ............................................................................................... 124
Table 22 - Dial - up rule configuration table .................................................................................. 125
Table 23 - IP camera ....................................................................................................................... 126
Table 24 - Set the line global configuration on the web page......................................................... 127
Table 25 - VQ RTCP-XR Settings .................................................................................................. 127
Table 26 - General function Settings .......................................................................................... 128
Table 27 - Voice settings ................................................................................................................. 133
Table 28 - Multicast parameters ..................................................................................................... 134
Table 29 - Time&Date settings ....................................................................................................... 135
Table 30 - Function Key configuration .......................................................................................... 140
Table 31 - Softkey configuration .................................................................................................... 141
Table 32 - Network Firewall........................................................................................................... 146
Table 33 - Trouble Cases ................................................................................................................ 150

1
3 Safety Instruction
Please read the following safety notices before installing or using this unit. They are crucial for the
safe and reliable operation of the dev ice.
z Please use the external power supply that is included in the package. Other power supply may
cause damage to the phone and af f ect t he behavior or induce noise.
z Before using the external power supply in the package, please check the home power voltage.
Inaccurate power voltage may cause fire an d damage.
z Please do not damage the power cord. I f power cord or plu g is imp aired, do not use it because it
may cause fire or electric shock.
z Do not drop, knock or shake the phone. Rough handling can break internal circuit boards.
z This phone is design for indoor use. Do not install the device in places where there is direct
sunlight. Also do not put the device on carpets or cushions. It may cause fire or breakdown.
z Avoid exposure the phone to high temperature or below 0ȭ or high humidity.
z Avoid wetting the unit with any liquid.
z Do not attempt to open it. Non-expert handling of the device could damage it. Consult your
authorized dealer for help, or else it may cause fire, electr ic shock and breakdown.
z Do not use harsh chemicals, cleaning solvents, or strong detergents to clean it. Wipe it with a
soft cloth that has been slightly dampened in a mild soap and water solution.
z When lightning, do not touch power plug, it may cau se an electric shock.
z Do not install this phone in an ill-ventilated place. You are in a situation that could cause bodily
injury. Before you work on any equipment, be aware of the hazards involved with electrical
circuitry and be familiar with standard practices for preventing accidents.

2
4 Overview
4.1 Overview
The new Fanvil X7&X7C IP Phone is a high-end enterprise desktop phone which comes with an
intelligent DSS K e y-mapping LCD to increase enterprise users’ productivity at a cost-effective price.
The new DSS key design with dy namic intell igent co lor disp lay can replace the traditional e xp ans ion
board function.X7C smart display can dynamically display 5 pages, each page can display 12 Side
Key Settings, a total of 60 user-defined DSS Key mapping; The page turning shortcut allows users
to quickly switch to the specified page. Each DSS key displays green, red, and yellow LED
indicators to reflect the current state of the key. X7 touch screen can display 4 pages dynamically
each page can display 29 DSS keys and 1 expa ns ion key; There are also 11 config urable Si de DSS
keys in standby, a total of 127 user-defined DSS key mappings. The icon for each DSS key maps
the current state of the phone line.
Evolved from Fanvil’s X6 enterprise IP phones, X7&X7C pushes its high-end cost-effective
enterprise IP phone to another level. X7&X7C inherits all enterprise features from Fanvil’s X-Series
enterprise phones, such as HD voice in handset, headset, and full-duplex speakerphone modes,
PoE, Fast/Gigabit Ethernet, QoS, secure transmission, auto-provisioning, and more.
X7&X7C is a great office productivity appliance for enterprise users. The old DSS key label is
inconvenient and not environmental friendly. X7&X7C’s intelligent DSS Key-mapping LCD provides
users the flexibility to change DSS key definit ion and display throug h easy configuration. Meanwh ile,
with its intelligent design of the DSS key/LCD, it can be multiplied as expansion modules to save
space and cost. X7&X7C will provide the best user experience to advance enterprise users.”
In order to help some users who are interested to read every detail of the product, this user manual
is provided as a user’s reference guide. Still, the document might not be up to date with the newly
release software, so please kindly download updated user manual from Fanvil website, or contact
with Fanvil support if you have any question using X7&X7C.
3
4.2 Packing Contents
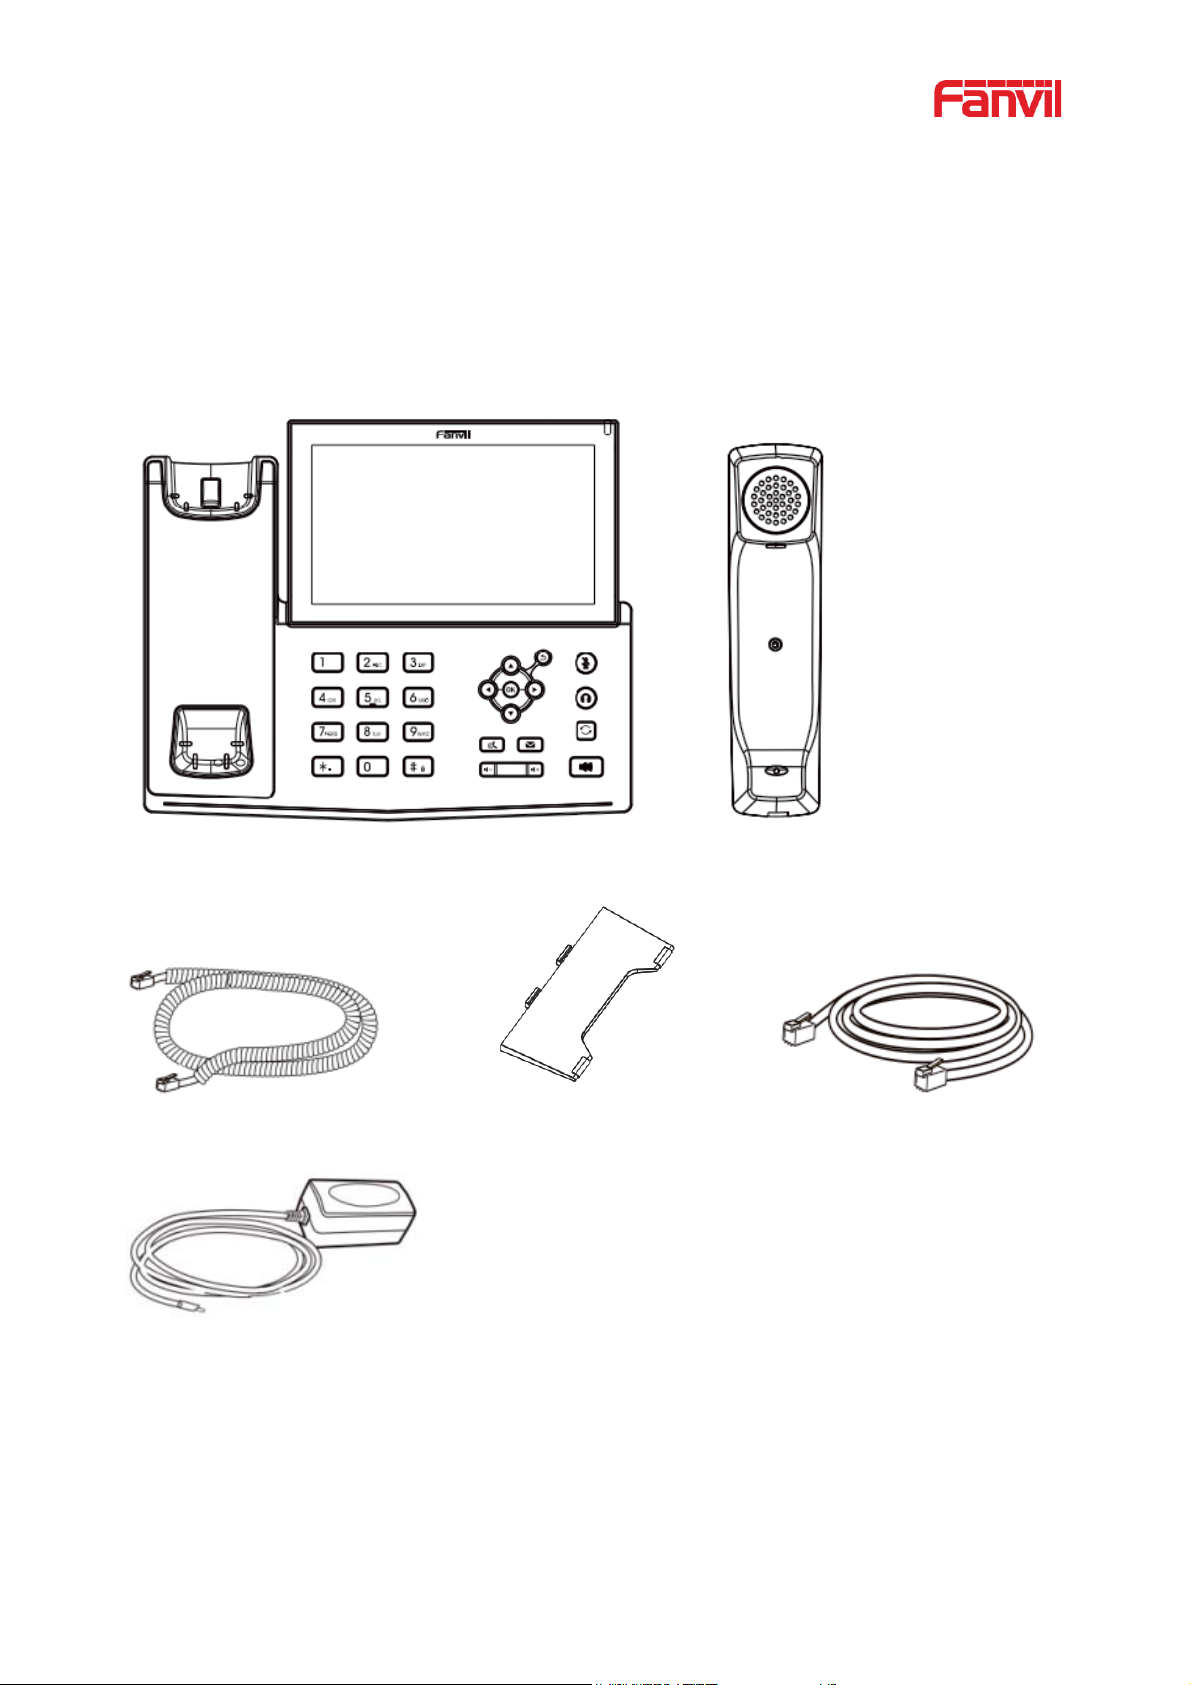
4.2.1 X7 Packing Contents
Phone Handset
Receiver cable Stand Network cable
Power adapter (Optional)
4
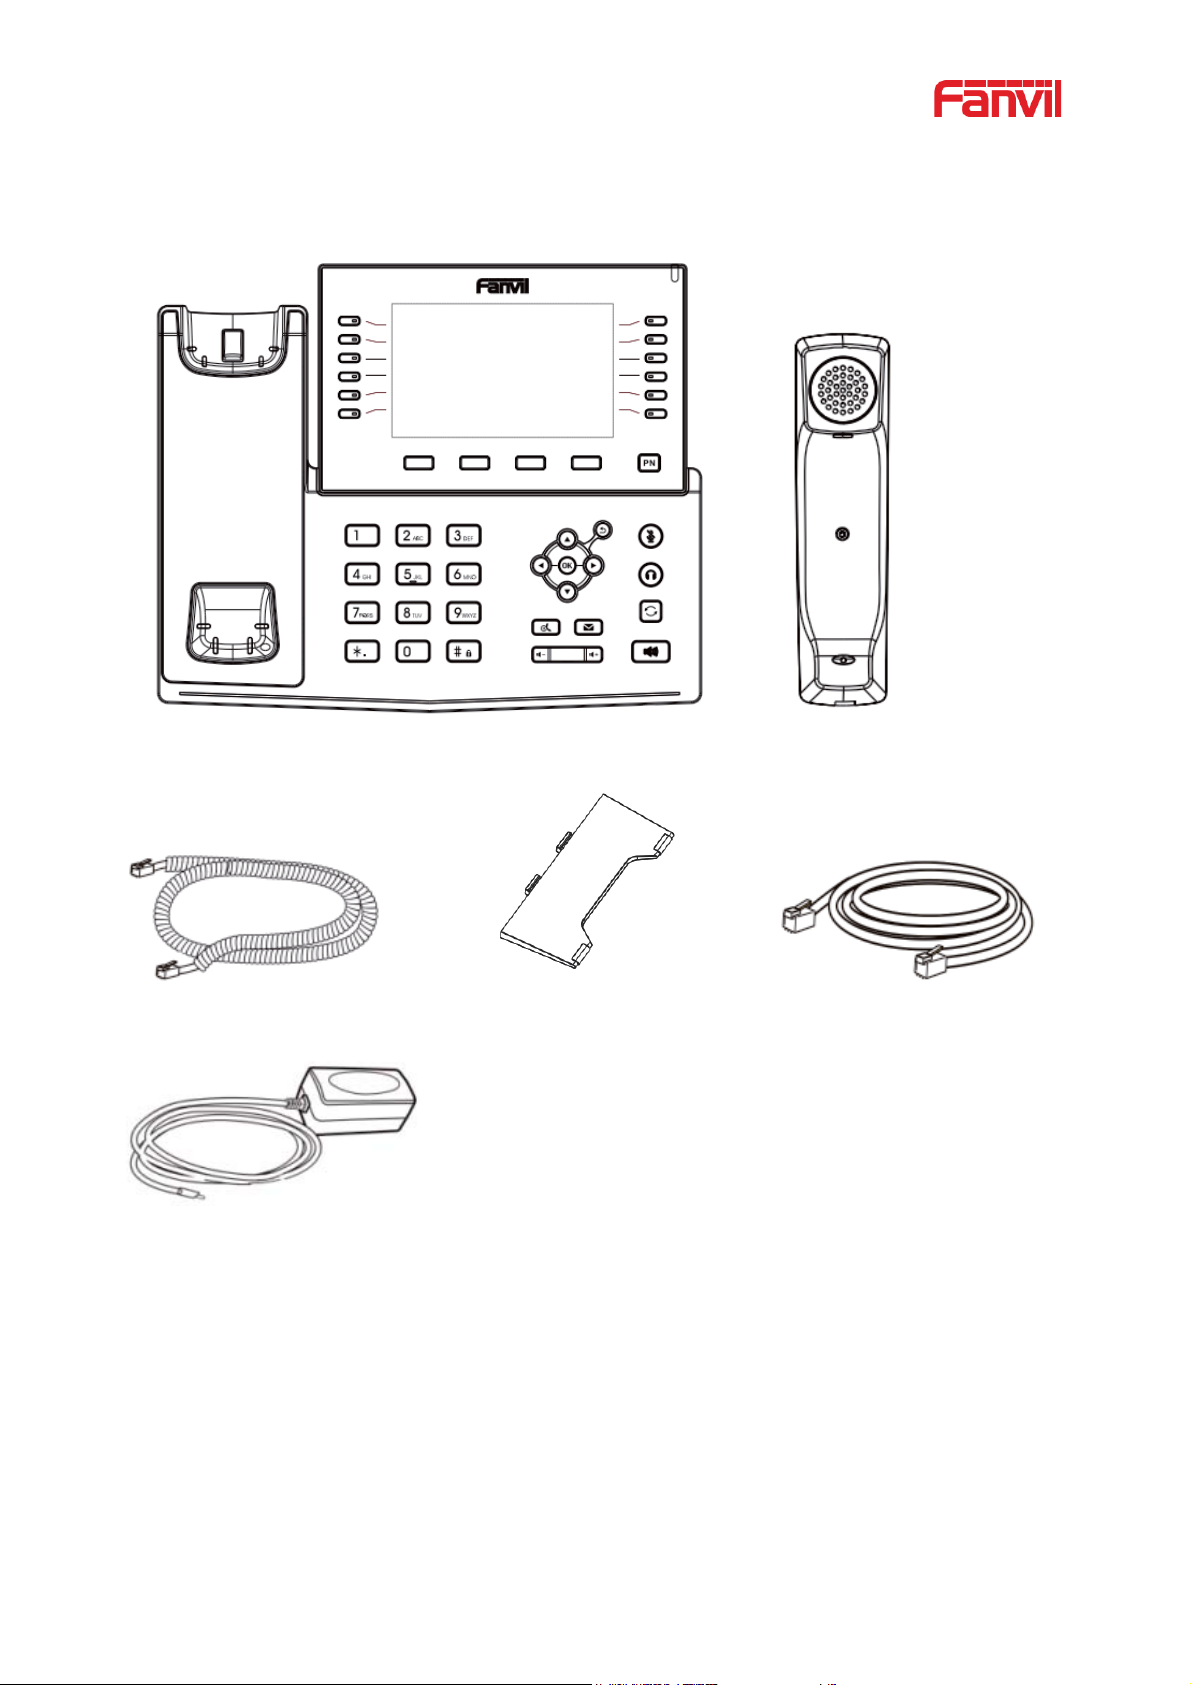
4.2.2 X7C Packing Contents
Phone Handset
Receiver cable Stand Network cable
Power adapter (Optional)

5
5 Install Guide
5.1 Use PoE or external Power Adapter
X7&X7C, called as ‘the device’ hereafter, supports two power supply modes, power supply from
external power adapter or over Ethernet (PoE) complie d sw itch.
PoE power supply saves the space and cost of providing the device additional power outlet. With a
PoE switch, the device can be powered through a single Ethernet cable which is also used for data
transmission. By attaching UPS system to PoE sw itc h, the device c an keep wo rking at power out age
just like traditional PSTN telephone w hich is powered by the telephone line.
For users who do not have PoE equipment, the traditional power adaptor should be used. If the
device is connected to a PoE switch and power ad apt er at t he same time, t he pow er adapt er will be
used in priority and will switch to Po E power supply once it fails.
Please use the power adapter supplied by Fanvil and the PoE switch met the specifications to
ensure the device work properly.
6
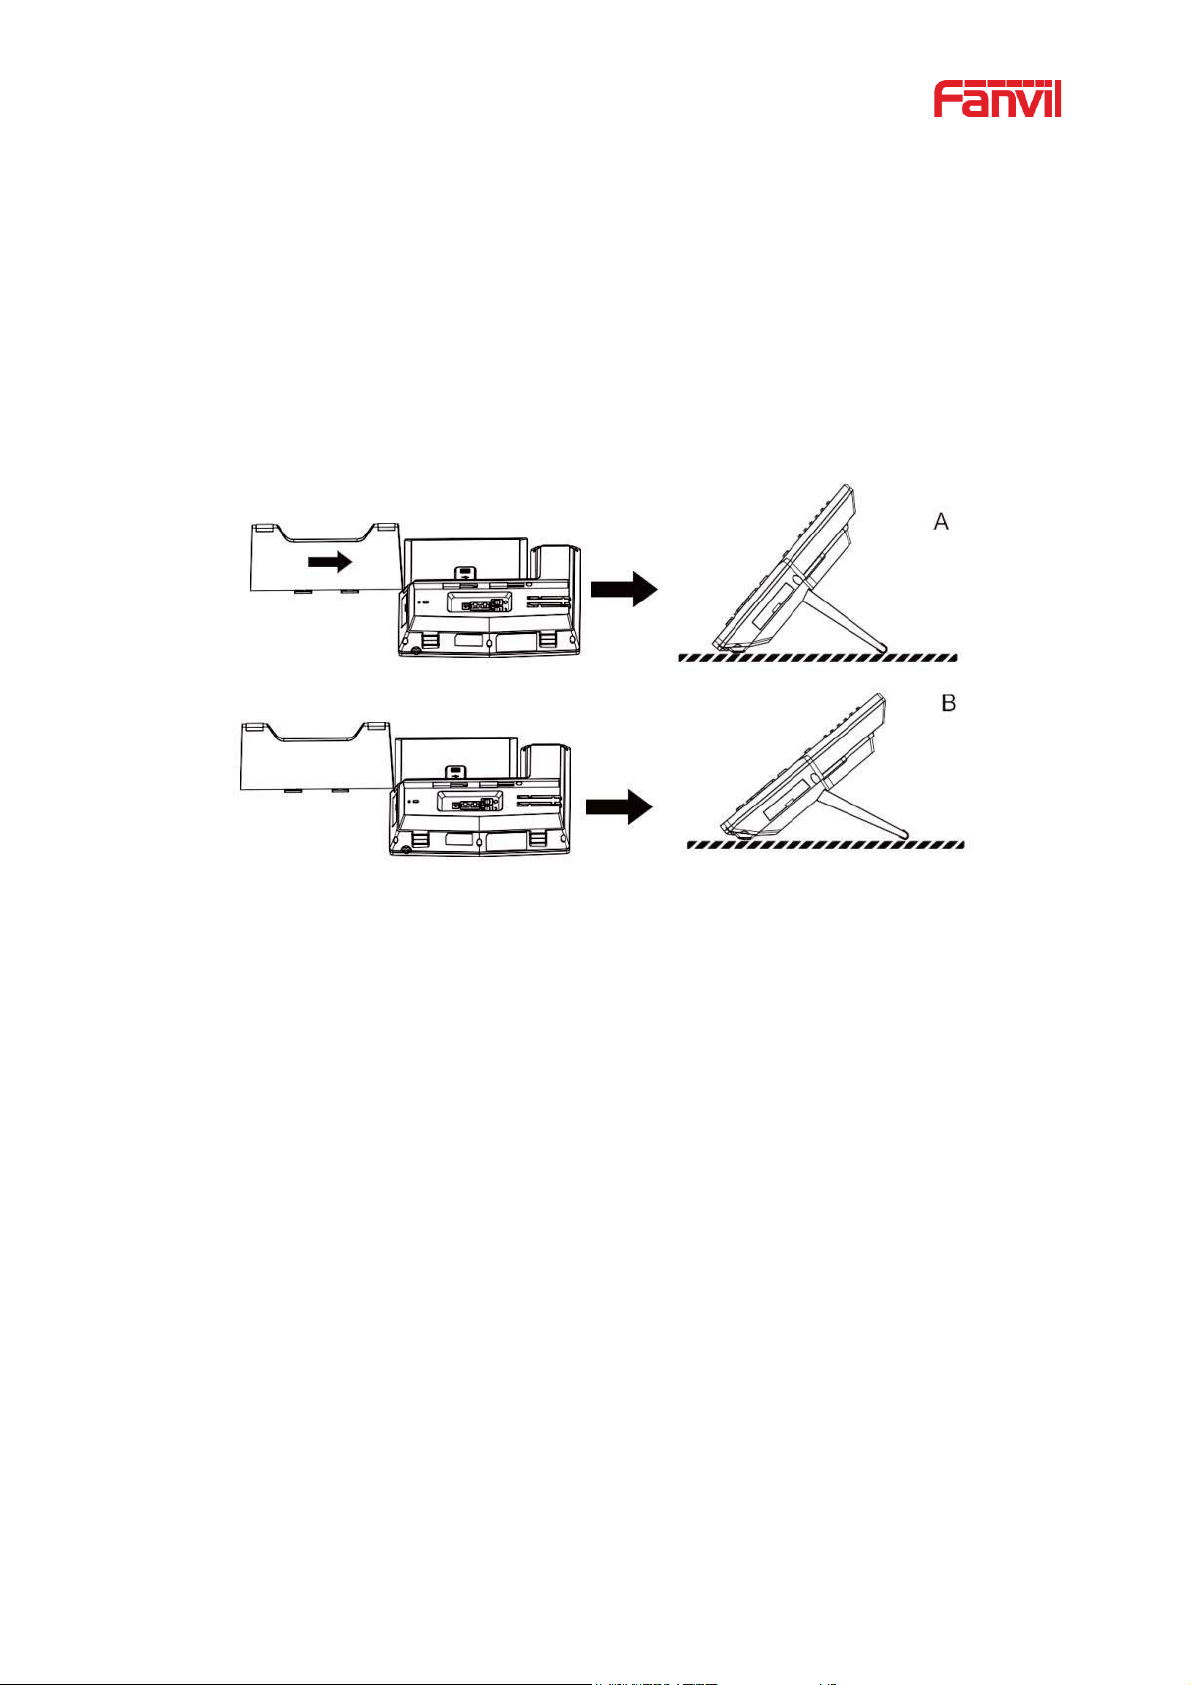
5.2 Desktop Installation
5.2.1 X7&X7C Desktop Installation
The device supports desktop use. If the phone is placed on the desktop, please follow the
instructions in the picture below to install the phone.
Picture 1 - Desktop phone installation
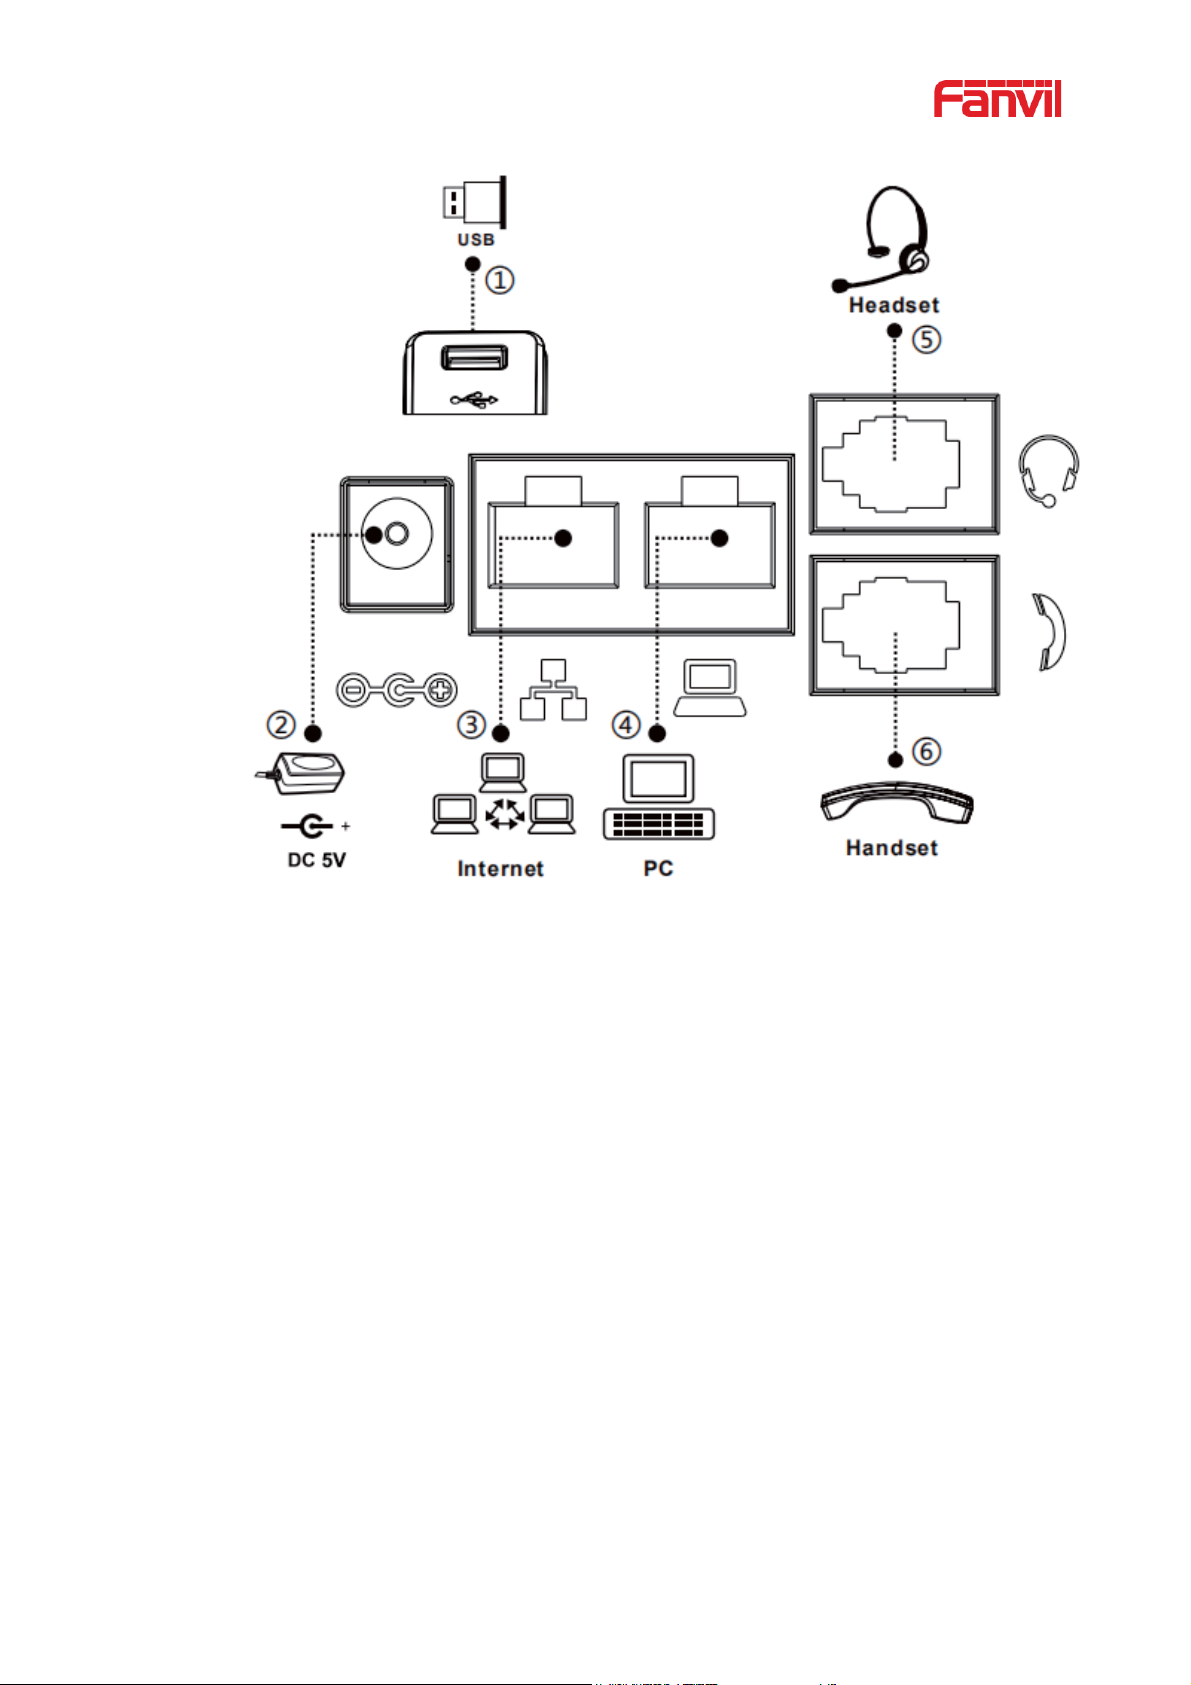
Please connect power adapter , netw ork, PC, handset, and headpho ne to the correspond ing port s as
described in below picture.
7
Picture 2 - Connecting to the Device
8
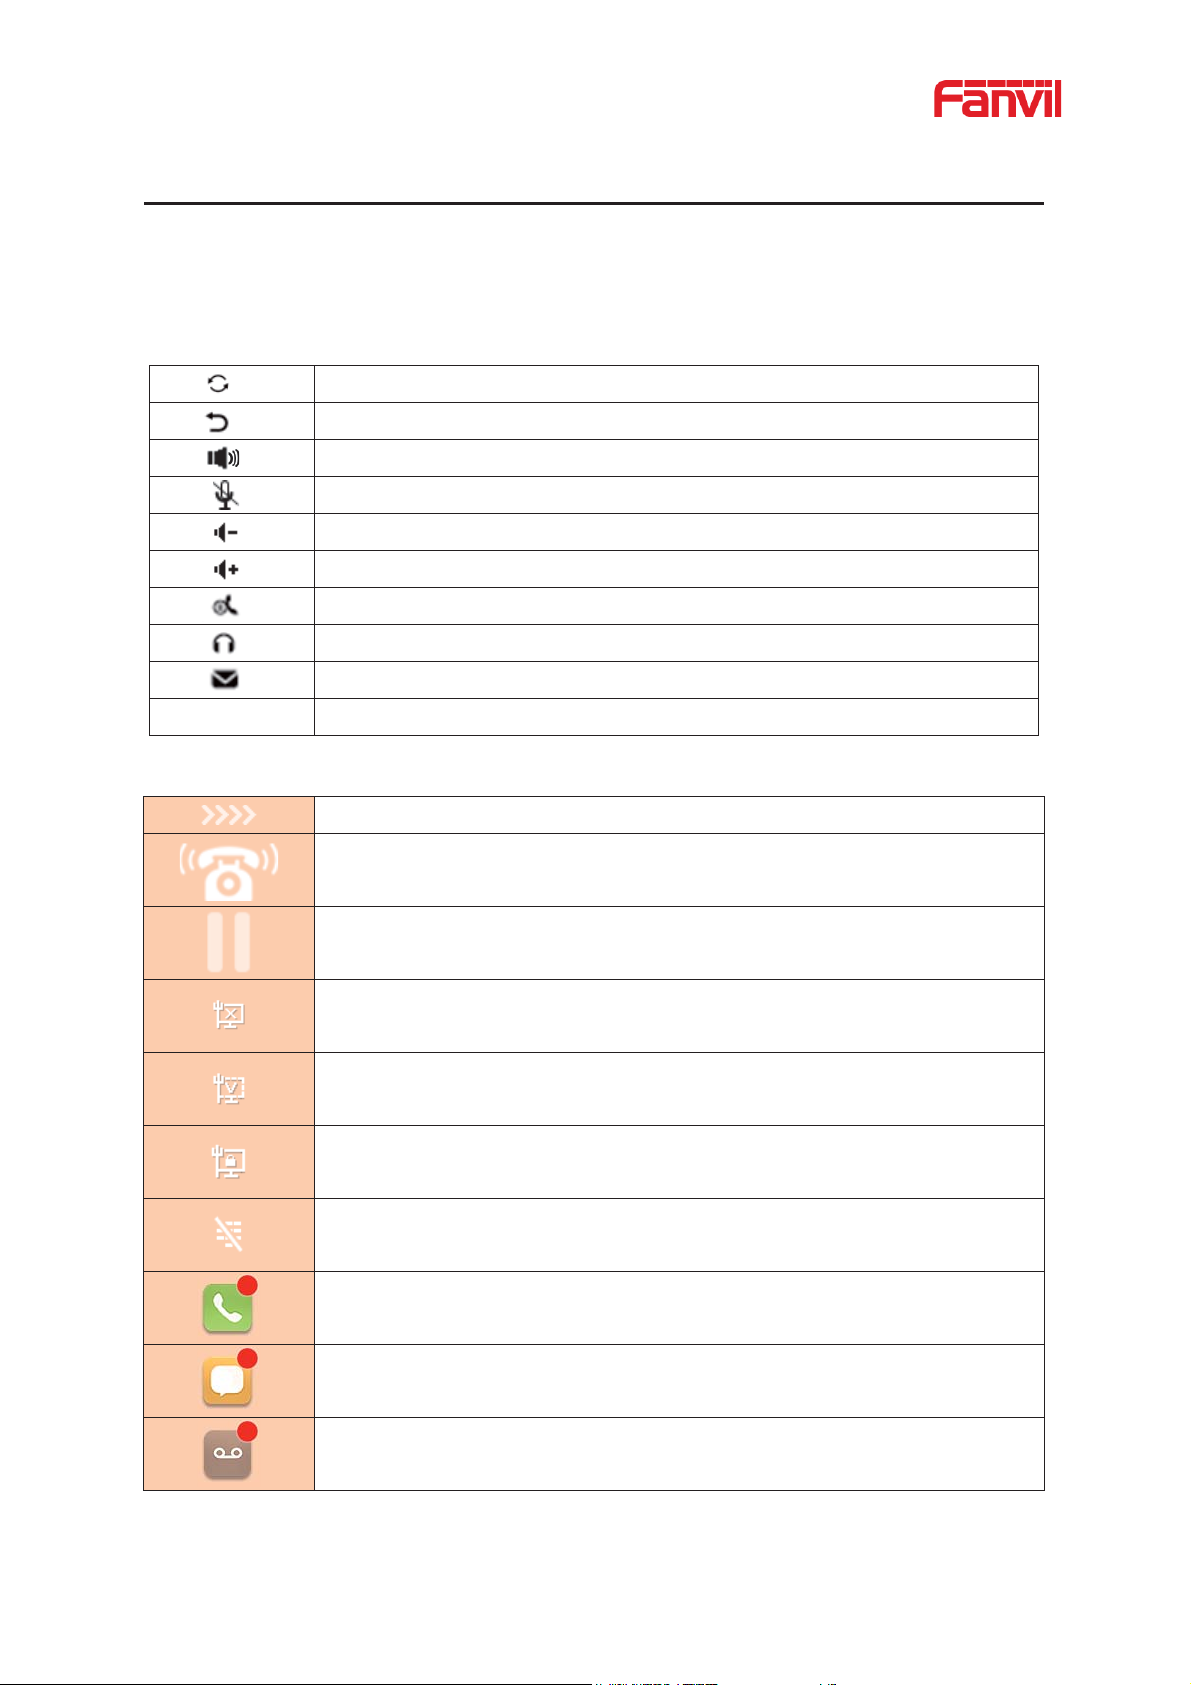
Redial
Return
Hands-free (HF) speaker
Mute Microphone (During Call)
Volume down
Volume up
Hold
Handset
MWI
PN
Page turning key (only supported by X7C)
Call out
Call in
Call Hold
Network Disconnected
Open
VLAN
Open
VPN
Keypad
Missed
SMS (only supported by X7C)
New
6 Appendix Table
6.1 Appendix I - Icon
Table 1 - Keypad Icons
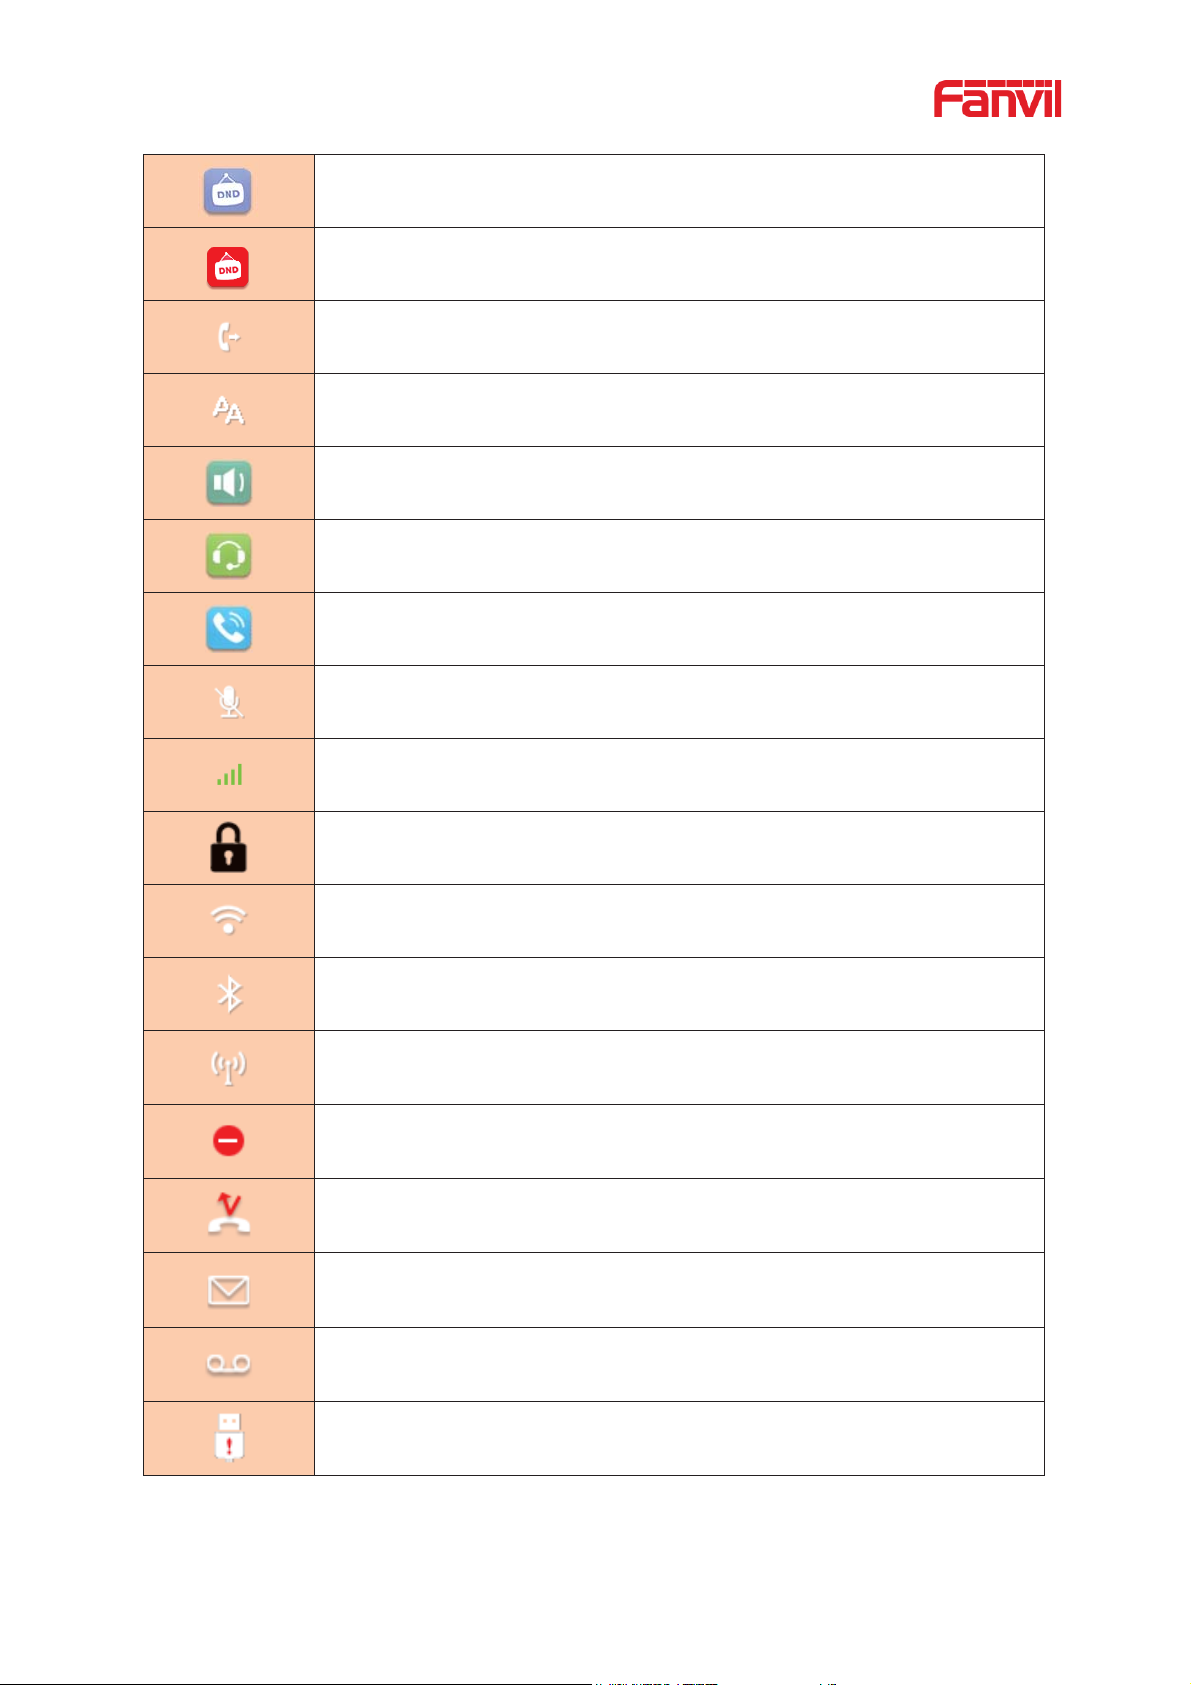
Table 2 - Status Prompt and Notification Icons
Locked
calls (only supported by X7C)
voice message waiting (only supported by X7C)
9
Do
Do
-Not-Disturb inactivated on Phone (only supported by X7C)
Call forward
activated
Auto
-answering activated
Hands-free (HF) Mode
Headphone (HP) Mode
Handset (HS) M
Mute Microphone
T
The V oice encryption of calling
Connecting WIFI
Open Bluetooth
Open
SIP Hotline
Open DND
Missed
Unread messages
Unread voice message
USB overload prompt
-Not-Disturb activated on Phone
ode
he V oice quality of calling
calls
10
USB ins
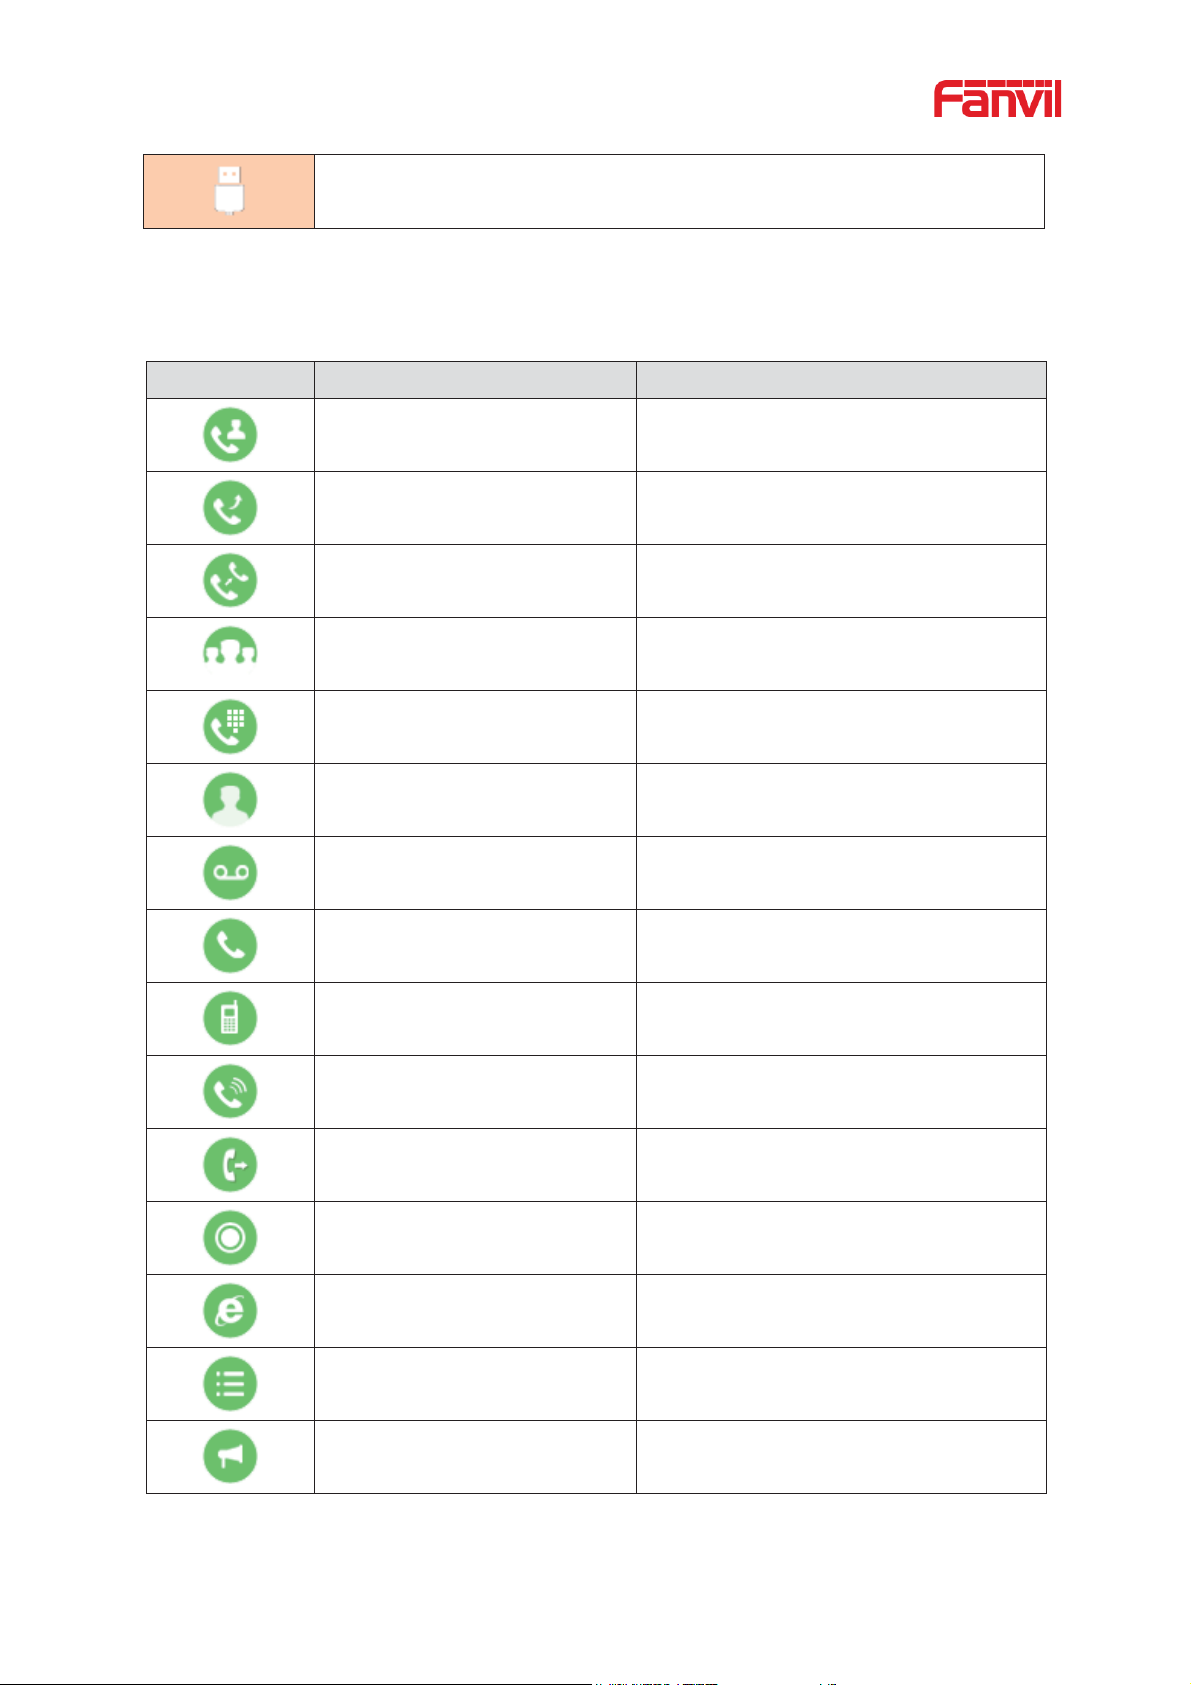
Icon
Tran slate
Instruction
BLF/NEW CALL
The new call
BLF/BXFER
Bl
ind transfer
BLF/AXFER
Attend transfer
BLF/CONF
Conference
BLF/DTMF
BLF/DTMF
Presence
Presence
MWI
Voice messag
e
Speed Dial
Speed Dial
Intercom
Intercom
Call Park
Call Park
Call forward
Call forward
Key Event
Function key
URL/Action URL
Network function key
BLF List
BLF List
Multicast
Multicast
ert tips
Table 3 - DSSkey Icons
11
Memory Key None
Memory Key subtype None
N
Undefined DSS function key
Line SIP Line
DTMF
DTMF
More
More
Hide
Hide
Mode Icon
Text Mode
Key Button
Characters Of Each Press
Numeric
1 1 2 2 3 3 4 4 5
5
6
6
7
7
8
8
9
9 0 0
*
#
#
Lower Case
Alphabets
1
@:;()<>
2
a b c
3
d e f
4
g h i
one
(only supported by X7)
6.2 Appendix II
(only supported by X7)
Keyboard character query table
Table 4 - Look-up Table of Characters
᧦

12
5
j k l
6
m n o
7
p q r s
8
t u v
9
w x y z
0
(space)
.,*/+-:_=
#
# ^!&$%
᧦
13
Upper Case
Alphabets
1
@:;()<>
2
A B C
3
D E F
4
G H I
5
J K L
6
M N O
7
P Q R S
8
T U V
9
WZYX
0
(space)
.,*/+-:_=
#
# ^!&$%
Mixed type input
1
1
2
2 a b c A B C
3
3 d e f D E F
4
4 g h I G H I
5
5 j k l J K L
6
6 m n o M N O
7
7 p q r s P Q R S
8
8 t u v T U V
9
9 w z y x W Z Y X
0
0
.,*/+-:_=
#
# ^!&$%
᧦
᧦
14
Type
X7 LED Icons
X7 LED State
X7C LED Light
X7C LED State
Line Key
Gray
Off Line inactive
Green On
Green O
n
Line ready (Registered)
Green Blinking
Green Blinking
Ringing
Red
Red
Blinking
Line is trying to register
Red
Red Blinking
Line error (Registration
failure)
Red
Red On
Dialing/Line in use (Talking)
Yellow Blinking
Yellow Blinking
Call holdin g
BLF
Green On
Green On
Subscription number is idle.
Red On
Red On
Subscription number is
busy.
Red On
Red
On
Subscription number is
dialing.
Gray
Off
Subscription number is
unavailable.
Presence
Green
Gr
een On
Subscription number is idle.
Red On
Red On
Subscription number is
busy.
Red On
Red
On
Subscription number is
dialing.
Gray
Off
Subscription number is
unavailable.
DND
Red On
Red On
Enable DND
6.3 Appendix III –LED Definition
Table 5 - DSS KEY LED State
Blinking
Blinking
On
On

15
Type
X7 LED Icons
X7 LED State
X7C LED Light
X7C LED State
Gray
Off Disable DND
MWI
Green Blinking
Green Blinking
New voice message waiting
Gray
Off No new voice message
16
Number
The keypad
names
Instruction
7 Introduction to the User
7.1 Instruction of Keypad
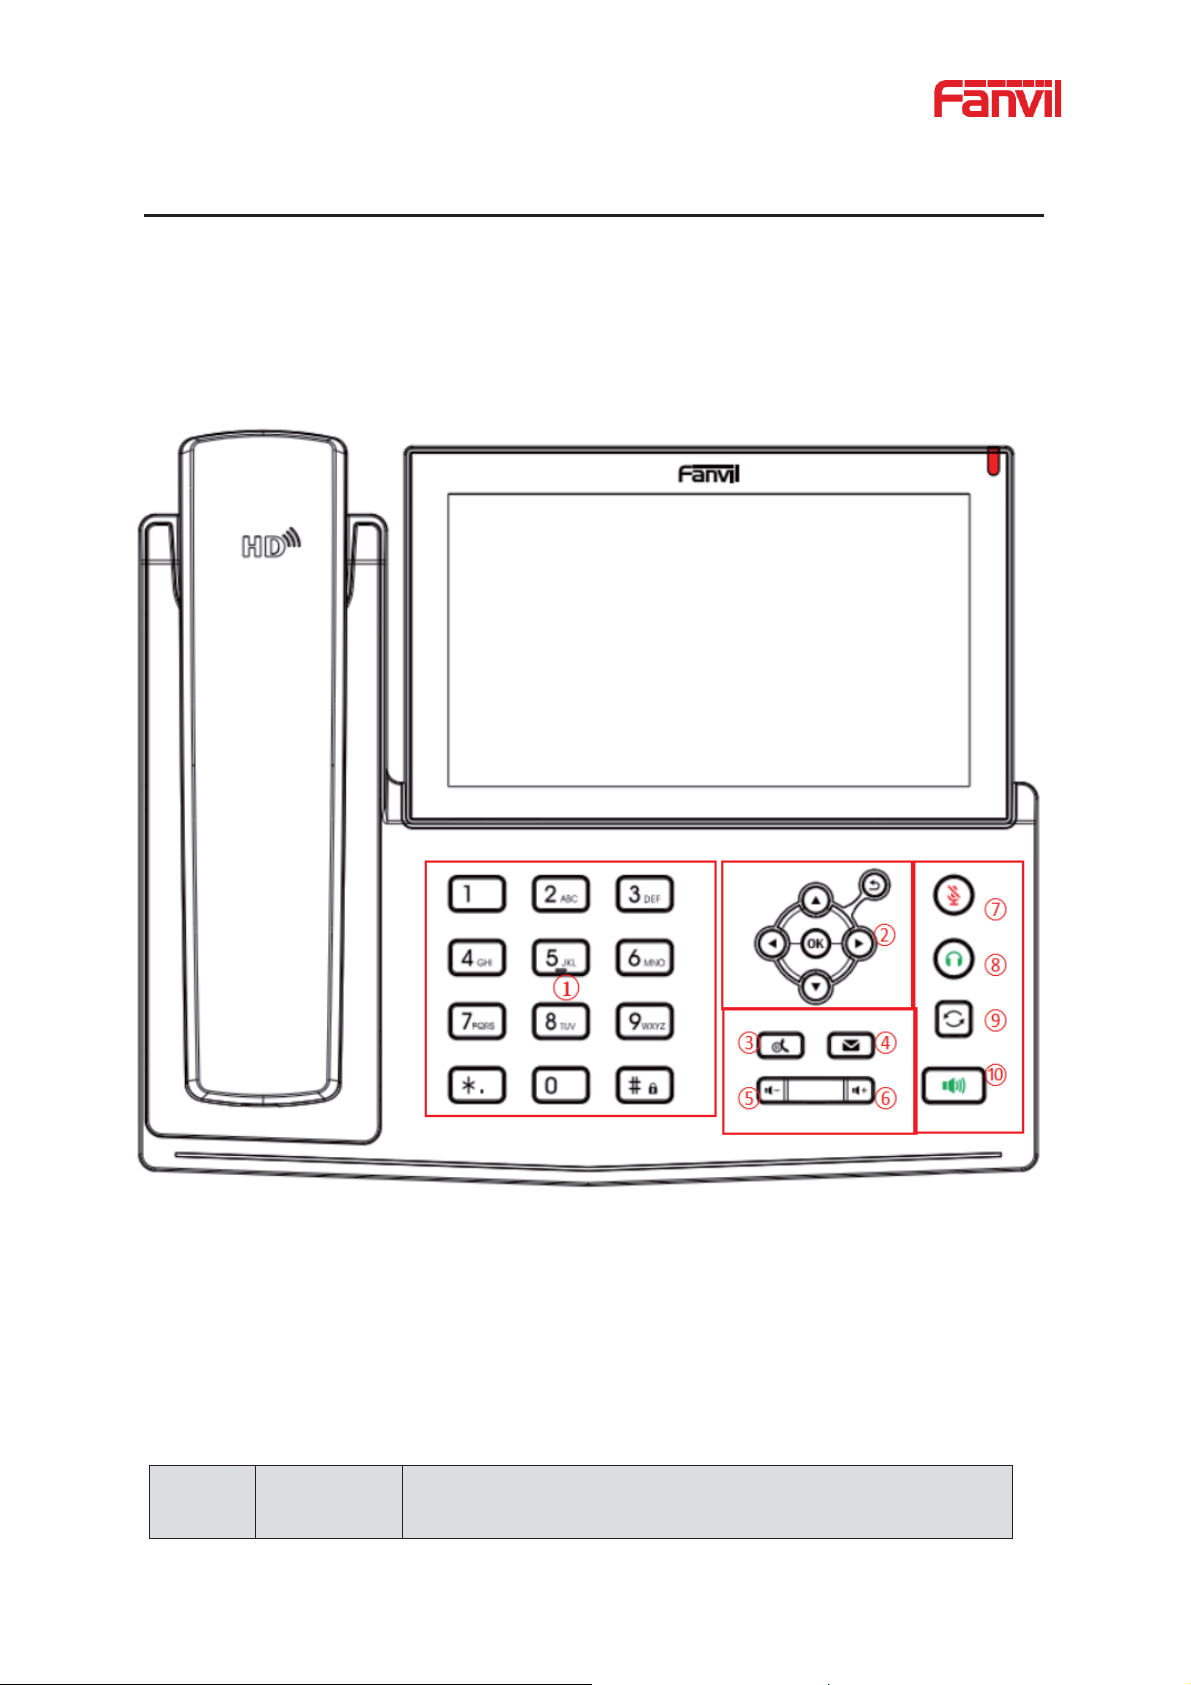
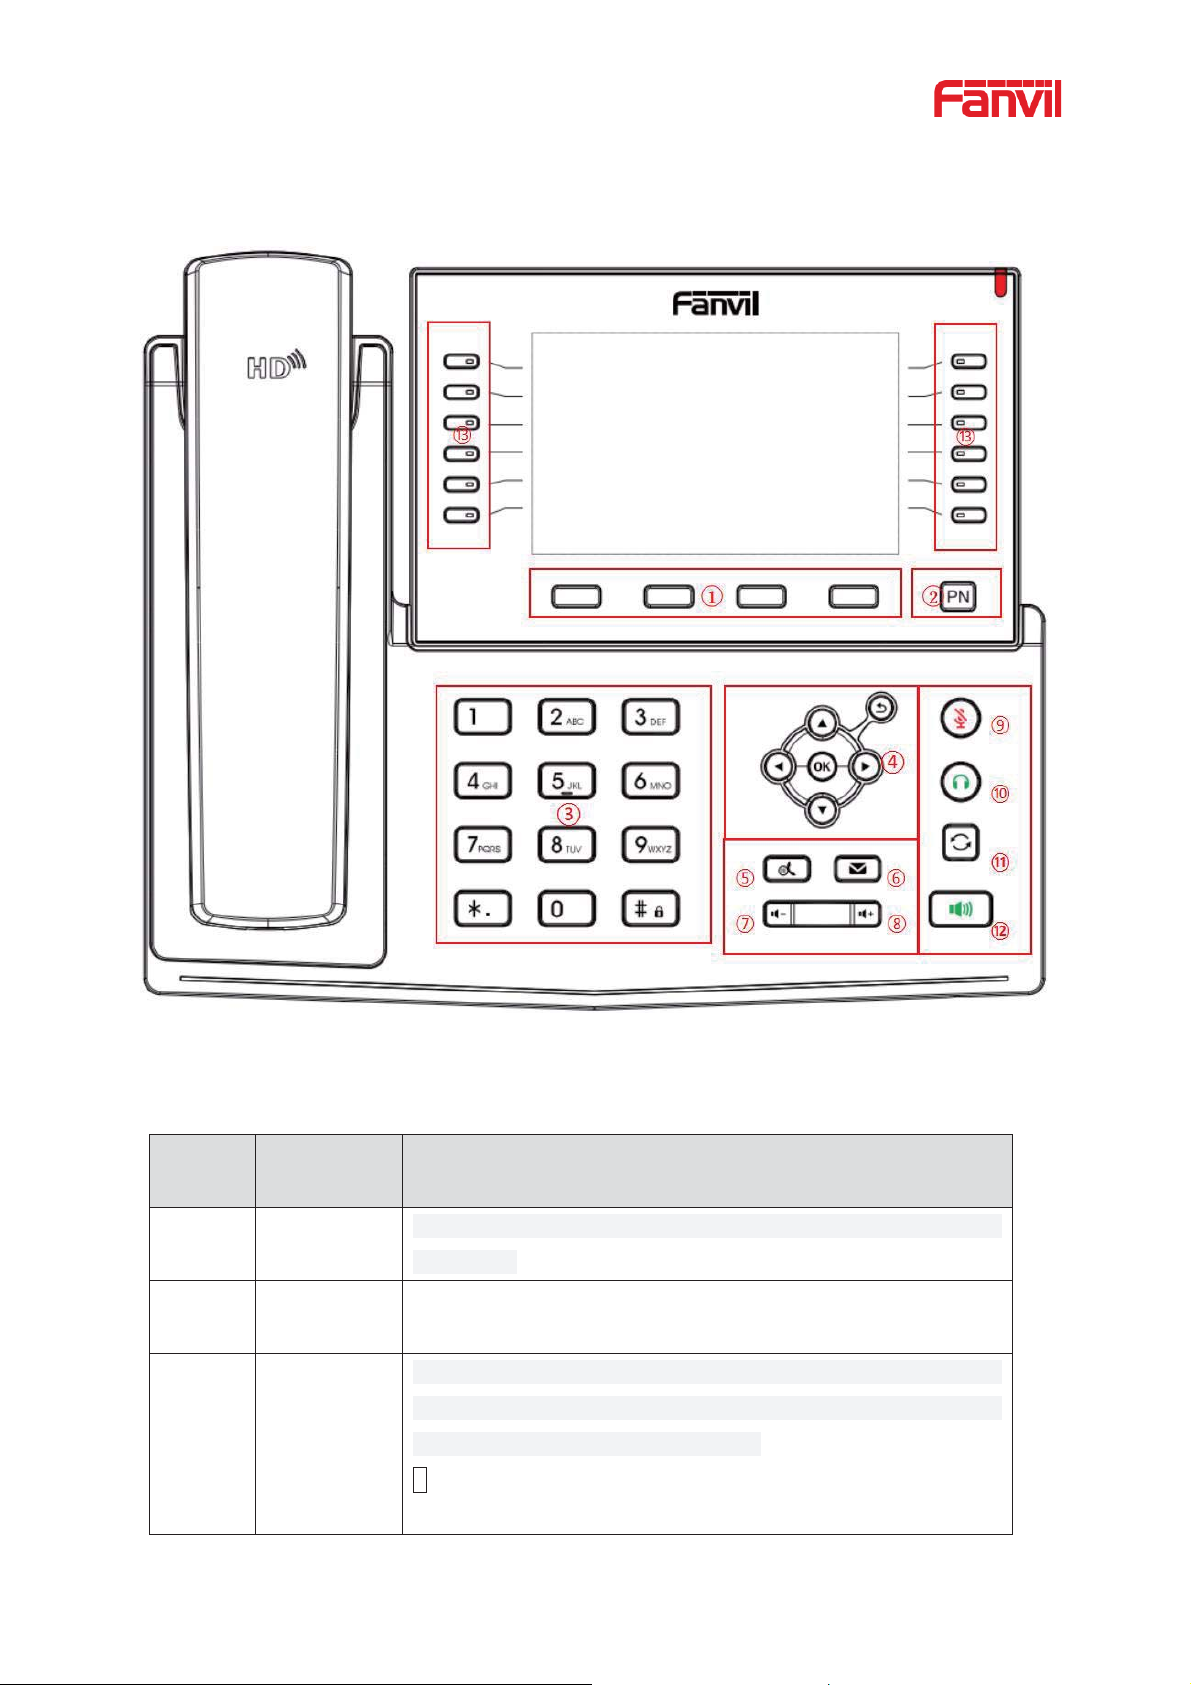
7.1.1 Instruction of the X7 Keypad
Picture 3 - Instruction of Keypad
The above picture shows the keypad layout of the device. Each key provides its own specific
function. User should refer to the illustration in this section about the usage of each key and the
description in this document about each fu ncti on.
Table 6 - Instruction of Keypad

17
DTMF Key
These 12 standard phone keys provide standard phone button
functionality. At the same time, certain long key presses can be
triggered to provide special functions.
#- Long presses this key to open the keyboard lock
configuration.
2
Navigate/OK
/Return Keys
The user can press the up/down navigation key to change the
line or move the cursor in the screen list.
On some Settings and
text editing pages, the user can press the left/right navigation
key to change options or move the
cursor in the screen list to
the left/right.
OK key: Default is equivalent to soft button confirmation, user
can customize the function.
Return key: it will return to the upper menu under any interface,
and it can be used to reject or hang up when making a phone
call or making a call.
3
Hold Key
Press the "Hold" key during the call, the user can hold the call,
and press it again to cancel the holding and restore the normal
call state.
4
Voice Mail
Key
Press the "voice mail" button, and the user enters the interface
of SMS and voice mail list.
5
Volume
Down Key
In the standby state, ring and ring configuration interface, press
this button to reduce the ring volume; Press this button to lower
the volume on the call or volume adjustment screen.
6
Volume Up
Key
In the standby state, ring and ring configuration interface, press
this button to increase the ring volume; Press this button to
increase the volume on the call or volu me a djustment screen.
7
Mute Key
During a call, the user can press this key to mute the
microphone.
8
H
Key
Users can press this key to open the head
9
Redial Key
Press the Redial key to redial the last number d ia led
10
Hands-free
Key
The user can press this key to open the audio channel of the
speakerphone.
ƻ
ƻ
ƻ
ƻ
ƻ
ƻ
ƻ
ƻ
ƻ
ƻ
eadset
set channel
18
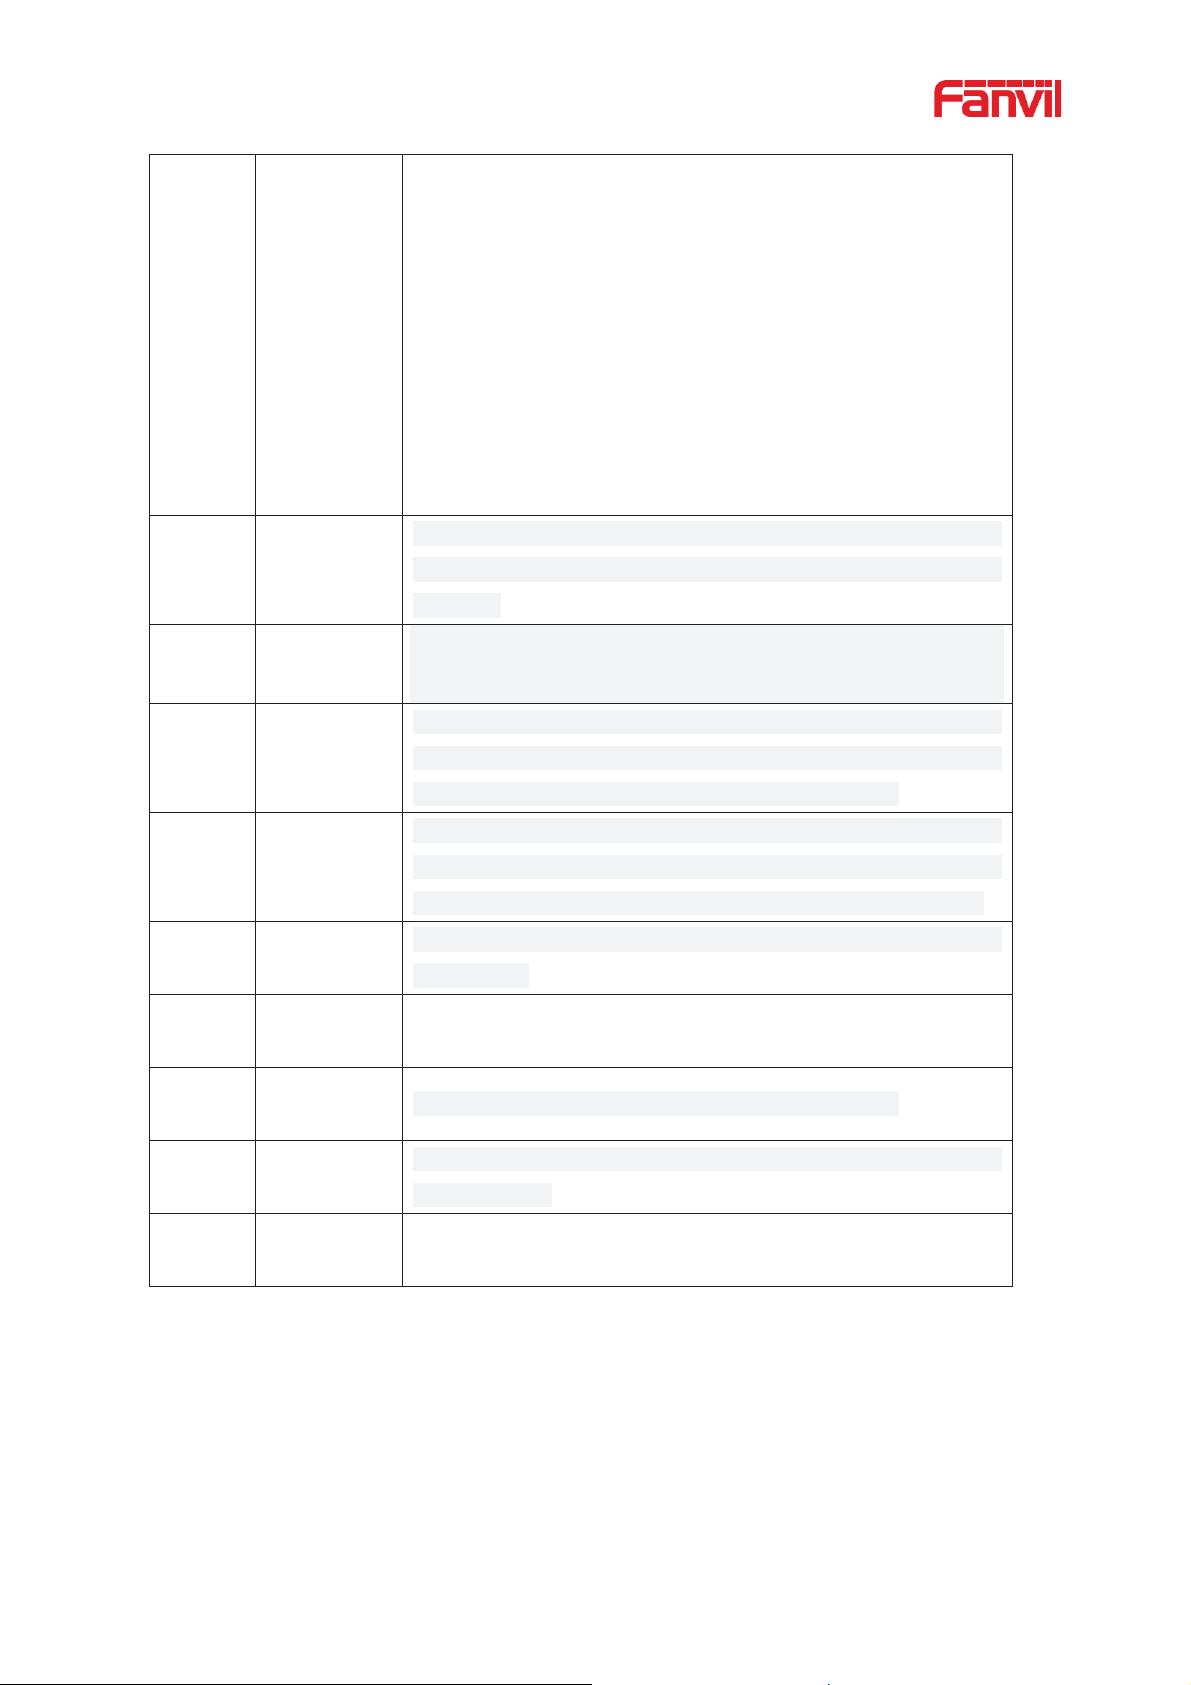
Number
The keypad
names
Instructi
Function
Menu Key
These four keys provide the corresponding menu function on
the screen.
2
Page Switch
Key
Press the "page switch"
, the user can switch to the first,
second and third screen function key page.
3
DTMF Key
These 12 standard phone keys provide standard phone button
functionality. At the same time, certain long key presses can be
triggered to provide special functions.
#- Long presses this key to open the keyboard lock
configuration.
7.1.2 Instruction of the X7C Keypad
Picture 4 - Instruction of Keypad
Table 7 - Instruction of Keypad
on
ƻ
ƻ
ƻ
key
19
4
N
OK
/Return Keys
The user can press the up/down navigation key to change the
line or move the cursor in the screen list.
On some Settings and
text editing pages, the user can press the left/right navigation
key to change options or move the cursor in the screen list to
the left/right.
OK key: Default is equivalent to soft button confirmation, user
can customize the function.
Return key: it will return to the upper menu under any interface,
and it can be used to reject or hang up when making a phone
call or making a call.
5
Hold Key
Press the "Hold" key during the call, the user can hold the call,
and press it again to cancel the holding and restore the normal
call state.
6
Voice Mail
Key
Press the "voice mail" button, and the user enters the interface
of SMS and voice mail list.
7
Volume
Down Key
In the standby state, ring and ring configuration interface, press
this button to reduce the ring volume; Press this button to lower
the volume on the call or volume adjustme nt screen.
8
Volume Up
Key
In the standby state, ring and ring configuration interface, press
this button to increase the ring volume; Press this button to
increase the volume on the call or volu me a djustment screen.
9
Mute Key
During a call, the user can press this key to mute the
microphone.
10
H
eadset
Key
Users can press this key to open the head
11
Redial Key
Press the Redial key to redial the last number d ia led
12
Hands-free
Key
The user can press this key to open the audio channel of the
speakerphone.
13
DSS
Shortcut Key
Long press the DSS shortcut key to enter the setting interface
and set the required functions
avigate/
ƻ
ƻ
ƻ
ƻ
ƻ
ƻ
ƻ
ƻ
ƻ
ƻ
7.2 Using Hands et / Hands-free Speaker / Headphone
Using Handset
To talk over handset, user should lift the handset off the device and dial the number, or dial the
set channel
 Loading...