

Fanvil i23S User Manual

SIP Audio Door Phone i23S
USER
MANUAL
V1.0
www.fanvil.com

Document
Firmware
Explanation Time
VER
V1.0 2.1.1.3445 Initial issue 20180208
VER

Safety Notices
1. Please use the specified power adapter. If you need to use the power adapter provided by
other manufacturers under special circumstances, please make sure that the voltage and
current provided is in accordance with the requirements of this product, meanwhile, please use
the safety certificated products, otherwise may cause fire or get an electric shock.
2. When using this product, please do not damage the power cord either by forcefully twist it,
stretch pull, banding or put it under heavy pressure or between items, otherwise it may cause
damage to the power cord, lead to fire or get an electric shock.
3. Before using, please confirm that the temperature and environment is humidity suitable for the
product to work. (Move the product from air conditioning room to natural temperature, which
may cause this product surface or internal components produce condense water vapor, please
open power use it after waiting for this product is natural drying).
4. Please do not let non-technical staff to remove or repair. Improper repair may cause electric
shock, fire, malfunction, etc. It will lead to injury accident or cause damage to your product.
5. Do not use fingers, pins, wire, other metal objects or foreign body into the vents and gaps. It
may cause current through the metal or foreign body, which may even cause electric shock or
injury accident. If any foreign body or objection falls into the product please stop using.
6. Please do not discard the packing bags or store in places where children could reach, if
children trap his head with it, may cause nose and mouth blocked, and even lead to
suffocation.
7. Please use this product with normal usage and operating, in bad posture for a long time to use
this product may affect your health.
8. Please read the abo ve safety notice s before installing or u sing this ph one. They are crucia l for
the safe and reliable operation of the device.

Directory
A Product introduction ..................................................................................................................................6
1. Appearance of the product................................................................................................................. 6
2. Description ........................................................................................................................................... 6
B Start Using................................................................................................................................................... 7
1. Confirm the connection ...................................................................................................................... 7
1)Power, Electric Lock, Indoor switch port .......................................................................................... 7
2)Driving mode of electric-lock(Default in Passive mode) ................................................................. 7
3)Wiring instructions............................................................................................................................... 8
2. Quick Setting........................................................................................................................................ 9
C Basic operation........................................................................................................................................... 9
1. Answer a call........................................................................................................................................9
2. Call......................................................................................................................................................... 9
3. End call ............................................................................................................................................... 10
4. Open the door operation................................................................................................................... 10
E Page settings.............................................................................................................................................11
1. Browser configuration ...................................................................................................................... 11
2. Password Configuration ................................................................................................................... 11
3. Configuration via WEB...................................................................................................................... 12
(1)System................................................................................................................................................ 12
a)Information...............................................................................................................12
b)Account....................................................................................................................12
c)Configurations..........................................................................................................13
d)Upgrade...................................................................................................................14
e)Auto Provision............................................................................................................................14
f)FDMS............................................................................................................................................17
g)Tools.............................................................................................................................................18
(2)Network...............................................................................................................................................20
a)Basic............................................................................................................................................20
b)Advanced.................................................................................................................21
c)VPN..............................................................................................................................................23
(3)Line .....................................................................................................................................................24
a)SIP................................................................................................................................................24
b)Basic Settings..........................................................................................................29
c)Dial Peer ..................................................................................................................30
(4)EGS Setting................................................................................................................. .......................32
a)Features......................................................................................................................................32
b)Audio............................................................................................................................................35

c)Video........................................................................................................................36
d)MCAST........................................................................................................................................37
e)Action URL.................................................................................................................................40
f)Time/Date....................................................................................................................................40
(5)EGS Access ....................................................................................................................................... 41
(6)EGS Logs............................................................................................................................................ 44
(7)Door Lock................................................................................................................... ........................44
(8)Function Key...................................................................................................................................... 45
(9)Alert..................................................................................................................................................... 47
E Appendix.................................................................................................................................................... 48
1. Technical parameters........................................................................................................................ 48
2. Basic functions.................................................................................................................................. 49
3. Schematic diagram............................................................................................................................ 50
F Other instructions.....................................................................................................................................50
1. Open door modes .............................................................................................................................. 50
2. Management of card.......................................................................................................................... 50
A.Product introduction
i23S SIP door phone is a full digital network door phone, with its core part adopts mature
VoIP solution (Broadcom chip), stable and reliable performance, hands-free adopting
digital full-duplex mode, voice loud and clear, generous appearance, solid durable, easy for
installation, comfortable keypad and low power consumption.
i23S SIP door phone supports entrance guard control, voice intercom, RFID/IC card and
keypad remote to open the door.
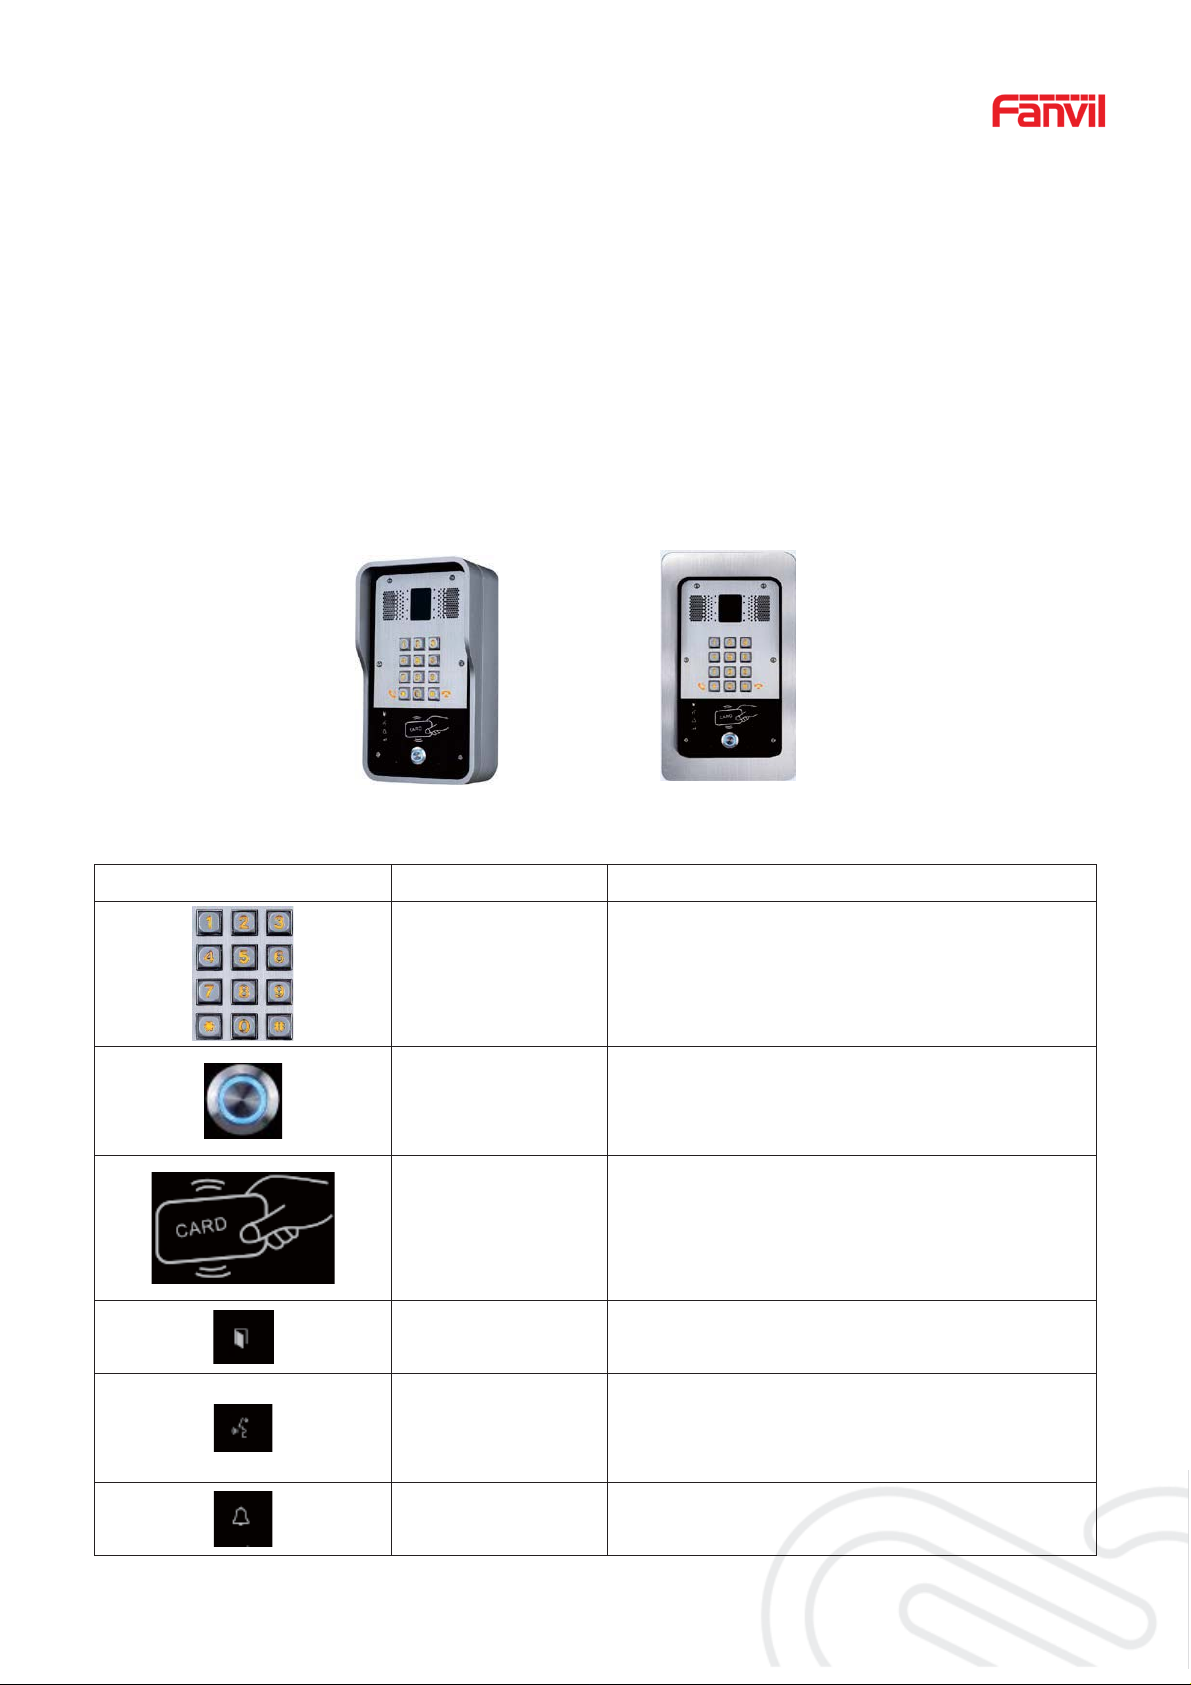
1. Appearance of the product
2. Description
Buttons and icons Description Function
Numeric
keyboard
Programmable
key
Card reader area Use RFID/IC Cards to open the door
Lock Status
Input password to open the door or to call.
Can be set to a variety of functions, in order
to meet the needs of different occasions
Door unlocking: On
Door locking: Off
www.fanvil.com
Call status
Ring status
Standby: Off
Call Holding: Blink with 1s
Calls: On
Standby: Off
Ringing: On
6/52
Network error: Blink with 1s
Ǐ
Network/SIP
Registration
Network running: Off
Registration failed: Blink with 3s
Registration succeeded: On
B.Start Using
Before you start to use the equipment, please make the following installation.
1. Confirm the connection
Confirm whether the equipment of the power cord, network cable, electric lock control line
connection and the boot-up is normal. (Check the network state of light)
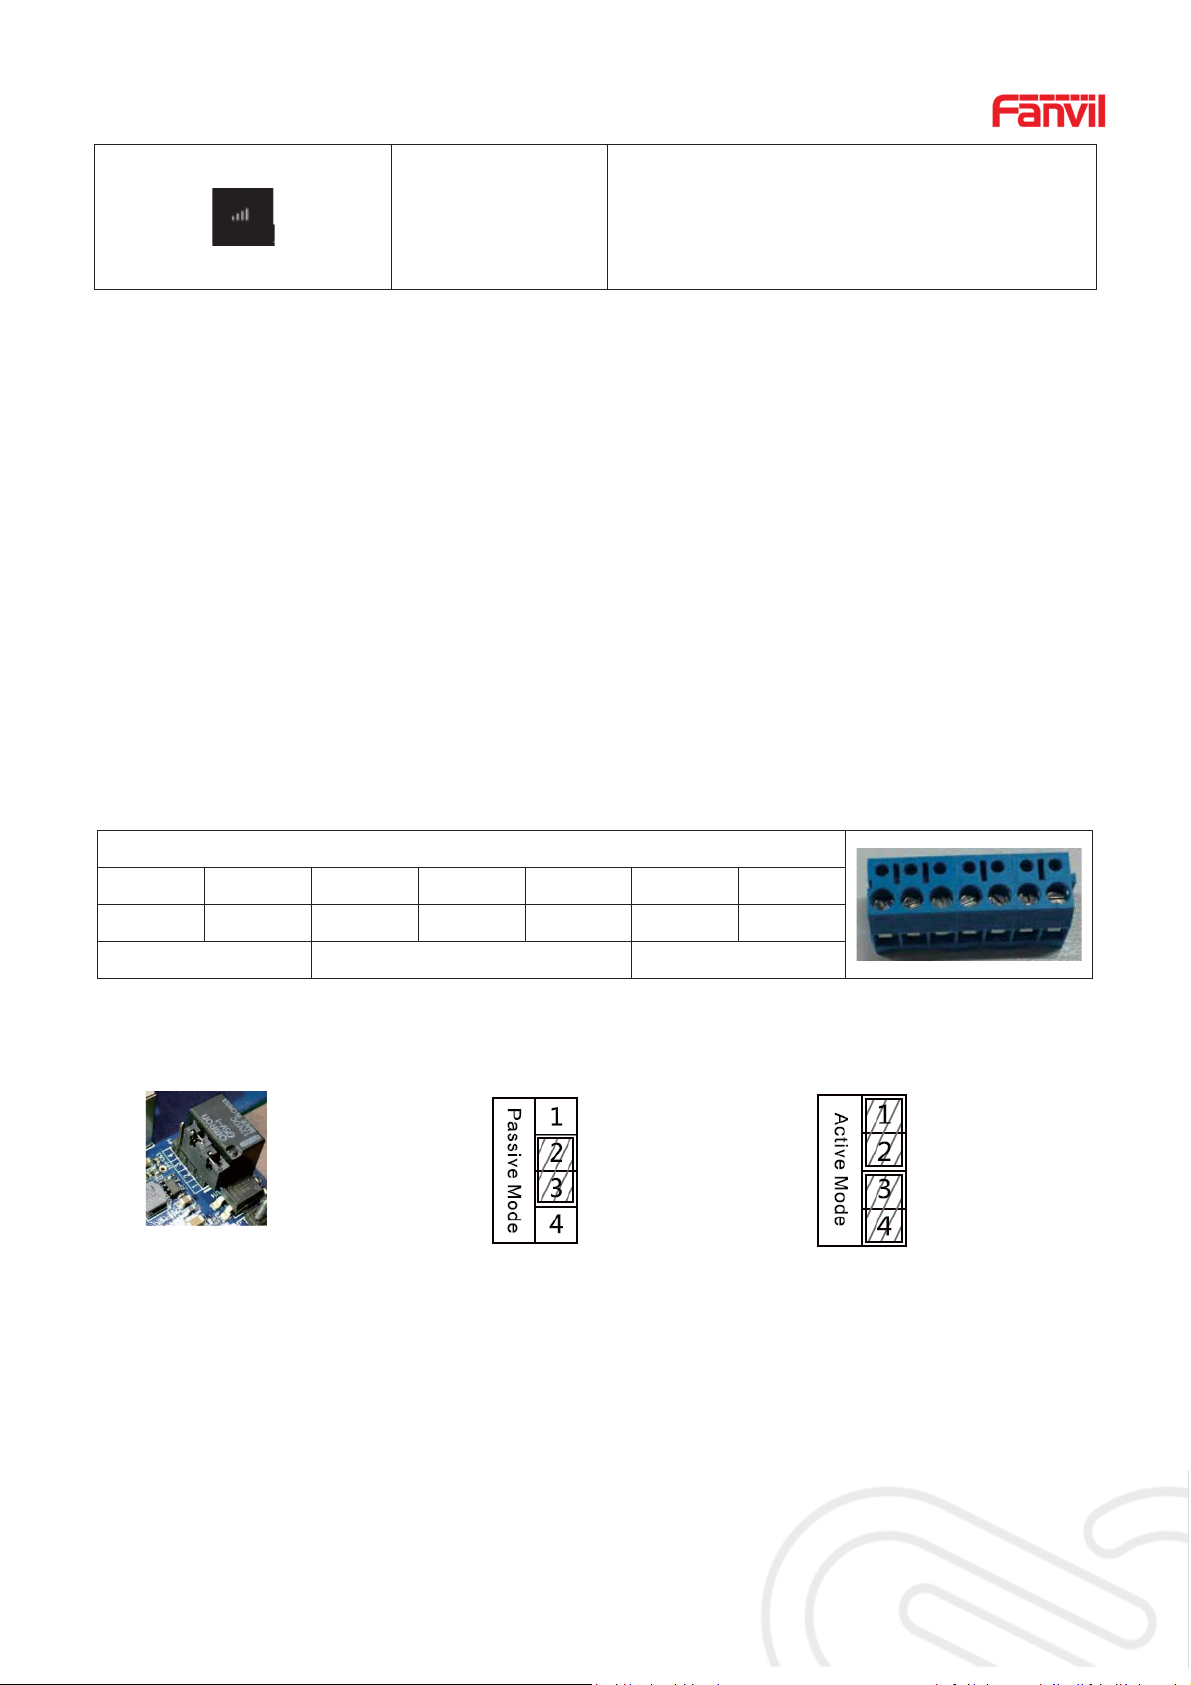
Power, Electric Lock, Indoor switch port
There are 2 power supply options: 12V/DC or POE (Powered By Ethernet). PIN 1 (+12V)
and PIN 2 (VSS) connected to the power supply. PIN3/4/5 used to connect the electric lock, only
2 of them (NC and COM, or NO and COM) will be connected usually, depending on the type of
electric lock. PIN6/7 used to connect indoor switch which control the open/lock of electric lock.
CN7
1234567
+12V VSS NC COM NO S_IN S_OUT
12V 1A/DC Electric-lock switch Indoor switch
Driving mode of electric-lock(Default in Passive mode)
Jumper in passive mode
Driving mode of electric-lock decides whether the electric-lock use an independent power supply.
The independent power supply will be required in passive mode, while electric-lock will be
powered by i31S in active mode.
NoteǐWhen the device is in active mode, it can drive 12V/650mA switch output maximum, to
Jumper in active mode
which a standard electric-lock or another compatible electrical appliance can be connected.
z When using t he active mode, it is 12V DC in output.
z When using the passive mode, output is short control (normally open mode or normally close
mode).
www.fanvil.com
7/52

Wiring instructions
I23S use a relay to con trol the s tat e of electr ic -lock, be fore th at, the el ectric- lock must be po wer ed
correctly. There are 3 contacts of the relay:
z NO: Normally Open Contact.
z COM: Common Contact.
z NC: Normally Close Contact.
Driving Mode Electric lock
ActivePassiv
No
electricity
e
when open
¥¥
¥¥
When the
power to
open
Jumper
port
Connections
¥¥
¥¥
¥¥
www.fanvil.com
8/52

2. Quick Setting
The product provides a completed function and parameter settings. To understand all
meaning of parameters well, it is better for users to have knowledge of network and SIP
protocol. In order to make users enjoy the high-quality voice service and low-cost advantage
immediately, here we list some basic but compulsory setting options in this section. Users can
use it without understanding such complex SIP protocols.
In prior to this step, please make sure your broadband Internet online can be normally
operated and complete the connection of the network hardware. The product factory network
mode is DHCP. Thus, only the equipment is connected with DHCP network en vironment that
network can be automatically connected.
¾ Press and hold “#” ke y for 3 seconds and the door phone will report the IP address by voice.
Or use the "iDoorPhoneNetworkScanner.exe" software to find the IP address of the device.
(Download address http://download.fanvil.com/tool/iDoorPhoneNetworkScanner.exe )
¾ Note: Waiting for 30s to run the device when it is power on.
¾ Log in to the WEB device configuration.
¾ In a Line page configuration service account, user name, parameters that are required for
server address register.
¾ You can set DSS key in the Function key page.
¾ You can set Door Phone parameters in the Webpage (EGS Setting-> Features).
C.Basic operation
1. Answer a call
By default, the incoming call will be answered automatically without any ringing. User MAY
want to hear ring before answer the incoming call. This could be configured under EGS
setting -> Features -> Basic Settings -> Auto Answer timeout. This parameter is the ringing
time. Auto answered could be disabled under EGS setting -> Features -> Basic settings ->
Enable auto Answer.
2. Call
There are 2 options to place a call:
1) Press * to enter dialingmode, then type in the number and press * to send the call
www.fanvil.com
9/52

immediately.
Here the feature of “pressing * to send the call” could be disabled by the option “press * to send”
under EGS setting -> Features -> Basic Settings
Another 2 important options are “dial Fixed Length to Send” and “send Length”. When user is
typing in the number under dialing mode on keypad, device will check the length of number after
every new digit was typed. Once the length matches the parameter “send Length”, the number
will be called immediately. If this feature is disabled, user will need to wait “auto dial out time”
seconds before the call is sending out.
2) By pressing the DSS key, the preconfigu red number will be called. The option is unde r
Function Key -> Function Key settings. The type is hot key, subtype is Speed dial. There are
2 numbers available here, the number 1 will be called first, if number 1 is not answered, the
call will be transferred to number2.
3. End call
The key “#” is used to end the active call. There are another 2 important features:
1) Release the processing call
2) Reject the incoming call when it’s ringing
4. Open the door operation
There are seven options to open the door:
1)In idle state, Input “local password” on the keyboard to open the door, it could be configured
under EGS Setting -> Feature -> Local Password.
2) Open with remote password. Make a call to the owner, the owner enters the remote password
to open the door. “remote password” could be configured under EGS setting -> Feature ->
Remote Password.
3) Open with Access code. The owner makes a call to the access control, the access control will
answer the call automatically. Then owner en ter th e “access code” on his keypad to open t he door.
The owner’s number and access code are configured under EGS Access -> Access Table & Add
Access rule.
4) Swipe the RFID/IC cards to open the door. Before user can use the card, it must be added
under EGS Access -> Access Table.
5) By pressing the indoor switch to open the door. The indoor switch must be connected correctly
according to the section 1.
6) Private access code to open the door.
The private access code could be configured under EGS Access -> Access Table & Add
Access Rule. To open door with private access code, user enter “location code” + “*” +
“Access Code”. For example, the location code is 1, and Access code is 123, User enter
“1*123#” to open the door.
NOTE: ended with “#” to send the code immediately.
7) Active URL control command to open the door.
www.fanvil.com
10 / 52
URL is
“http://user:pwd@host/cgi-bin/ConfigManApp.com?key=F_LOCK&code=openCode”
a. User and pwd is Web the user name and password.
b. “openCode” is the remote-control code to open the door.
Example: “http://admin:admin@172.18.3.25/cgi-bin/ConfigManApp.com?key=*”
If access code is input correctly, the device will play sirens sound to prompt access control
and the remote user, while user input the incorrect code, the device will play low-frequency short
chirp.
If password is input successfully, then high-frequency sirens sound will follow by. If password is
input incorrectly, high-frequency short chirp will follow by.
When door is open , the device will play sirens sound to prompt.
D.Page settings
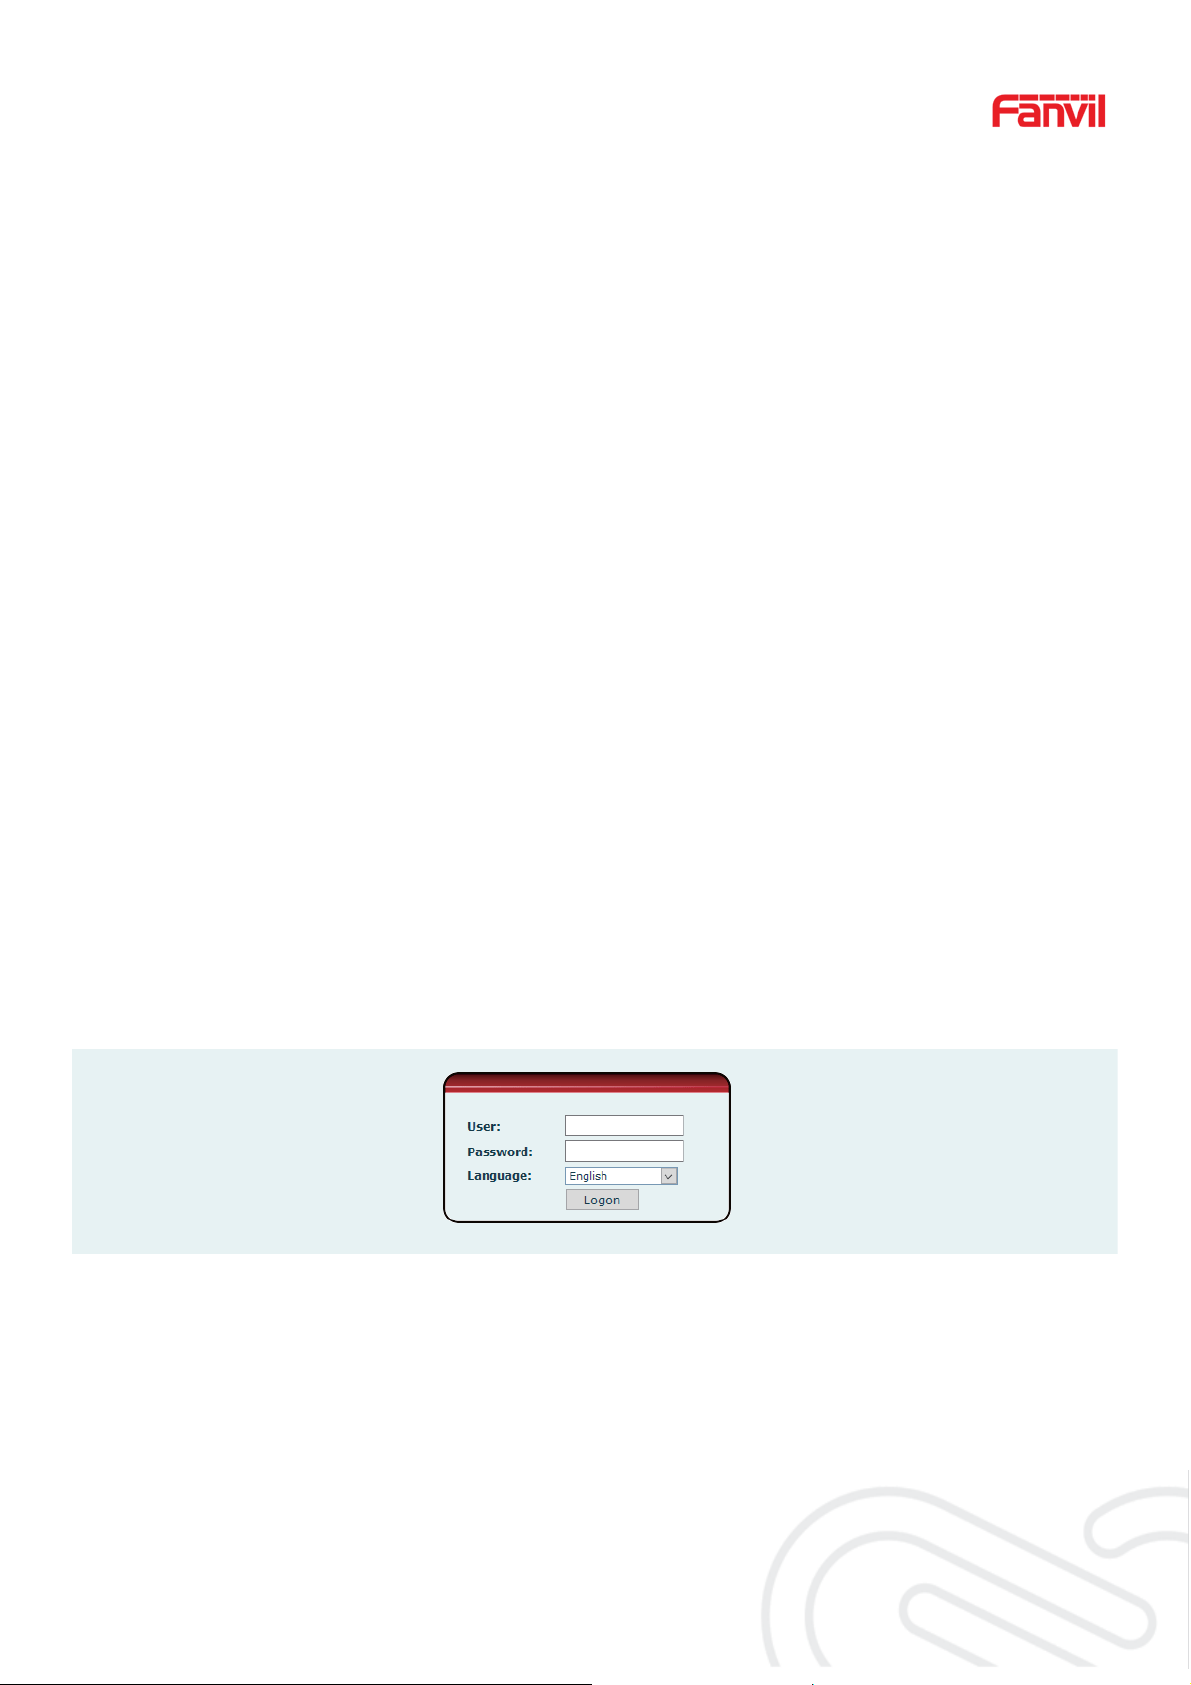
1. Browser configuration
When the device and your computer are successfully connected to the network, enter the
IP address of the device on the browser as http://xxx.xxx.xxx.xxx/ and you can see the login
interface of the web page management.
Enter the user name and password and click the [logon] button to enter the settings
screen.
2. Password Configuration
There are two levels of access: root level and general level. A user with root level access
can browse and set all configuration parameters, while a user with general level can set all
configuration parameters except server parameters for SIP.
z Default user with general level: The default is not set, are free to add.
z Default user with root level:
User name: admin
Password: admin
www.fanvil.com
11 / 52
3. Configuration via WEB
(1)System
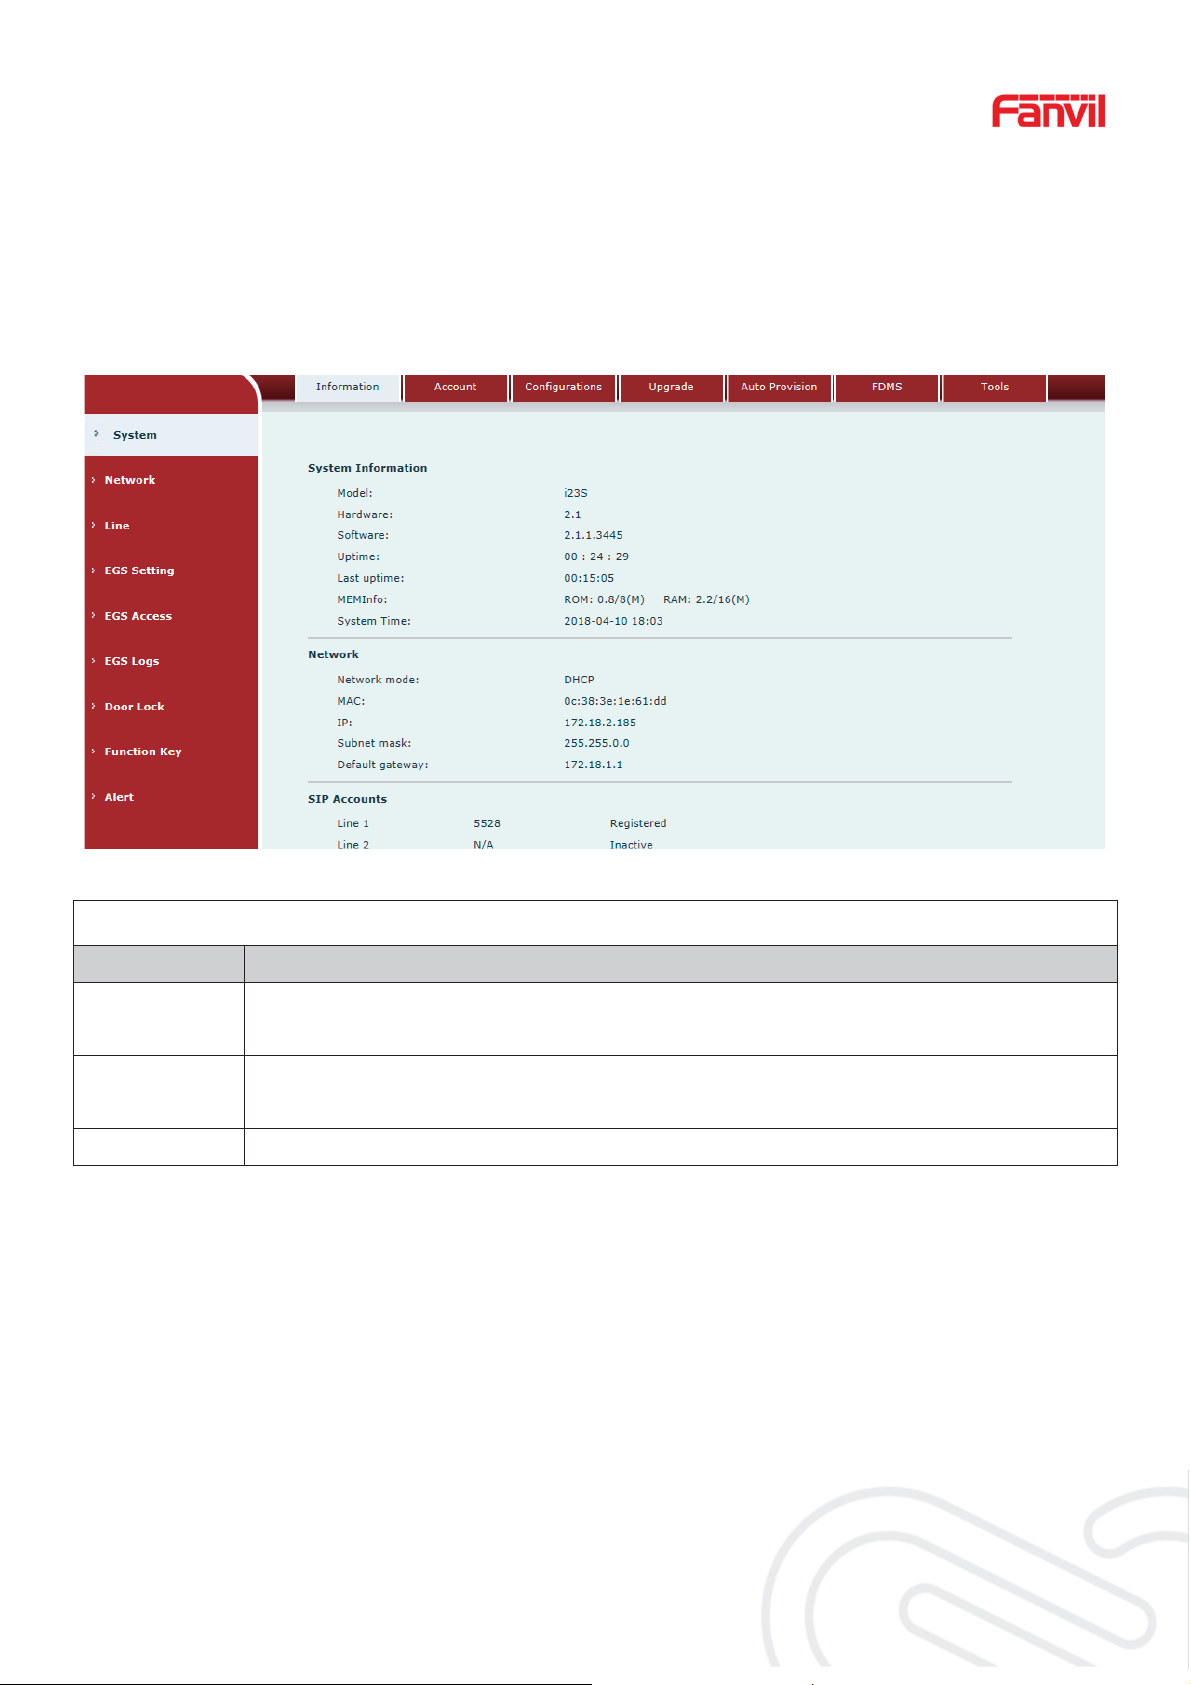
a) Information
Information
Field Name Explanation
System
Information
Network
SIP Accounts Shows the phone numbers and registration status for the 2 SIP LINES.
Display equipment model, hardware version, software version, uptime, Last
uptime and MEMinfo.
Shows the configuration information for WAN port, including connection mode of
WAN port (Static, DHCP, PPPoE), MAC address, IP address of WAN port.
b) Account
www.fanvil.com
12 / 52
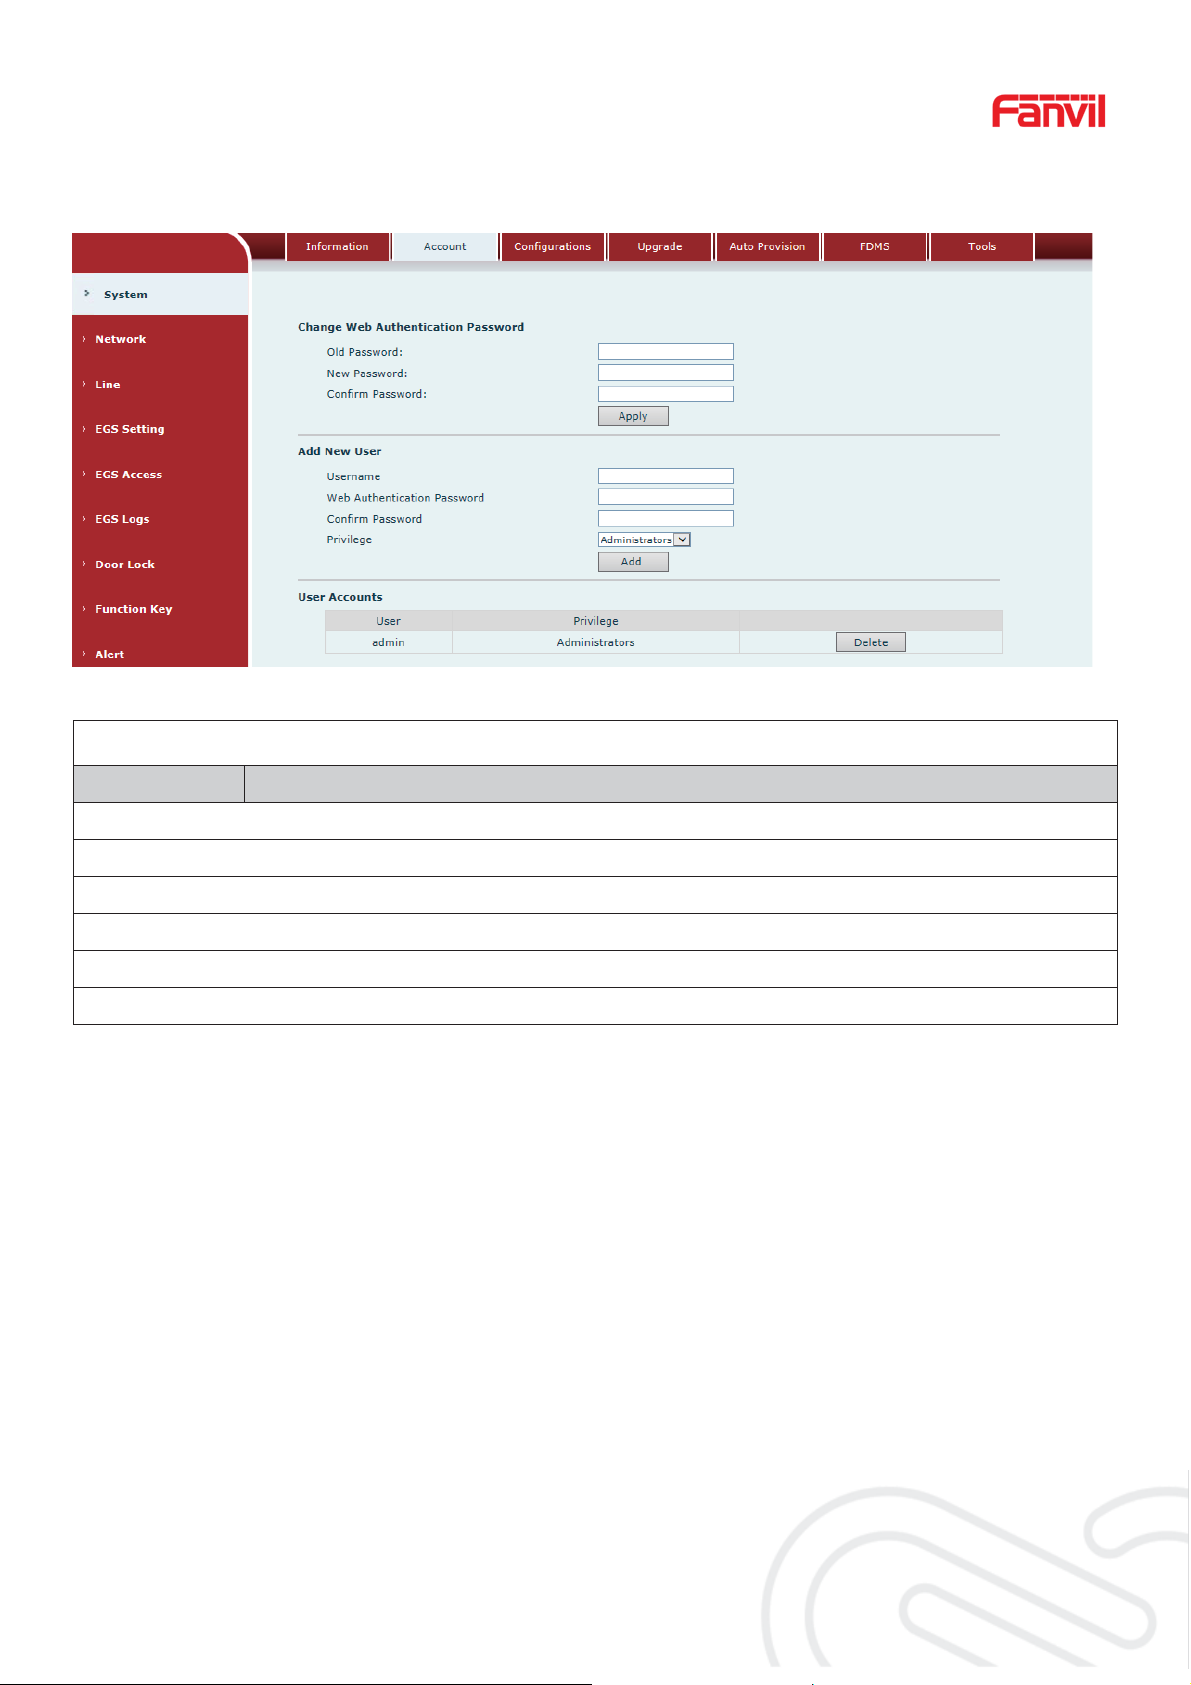
Through this page, user can add or remove users depends on their needs and can modify
existing user permission.
Account
Field Name Explanation
Change Web Authentication Password
You Can modify the login password to the account
Add New User
You can add new user
User Accounts
Show the existing user information
c) Configurations
www.fanvil.com
13 / 52
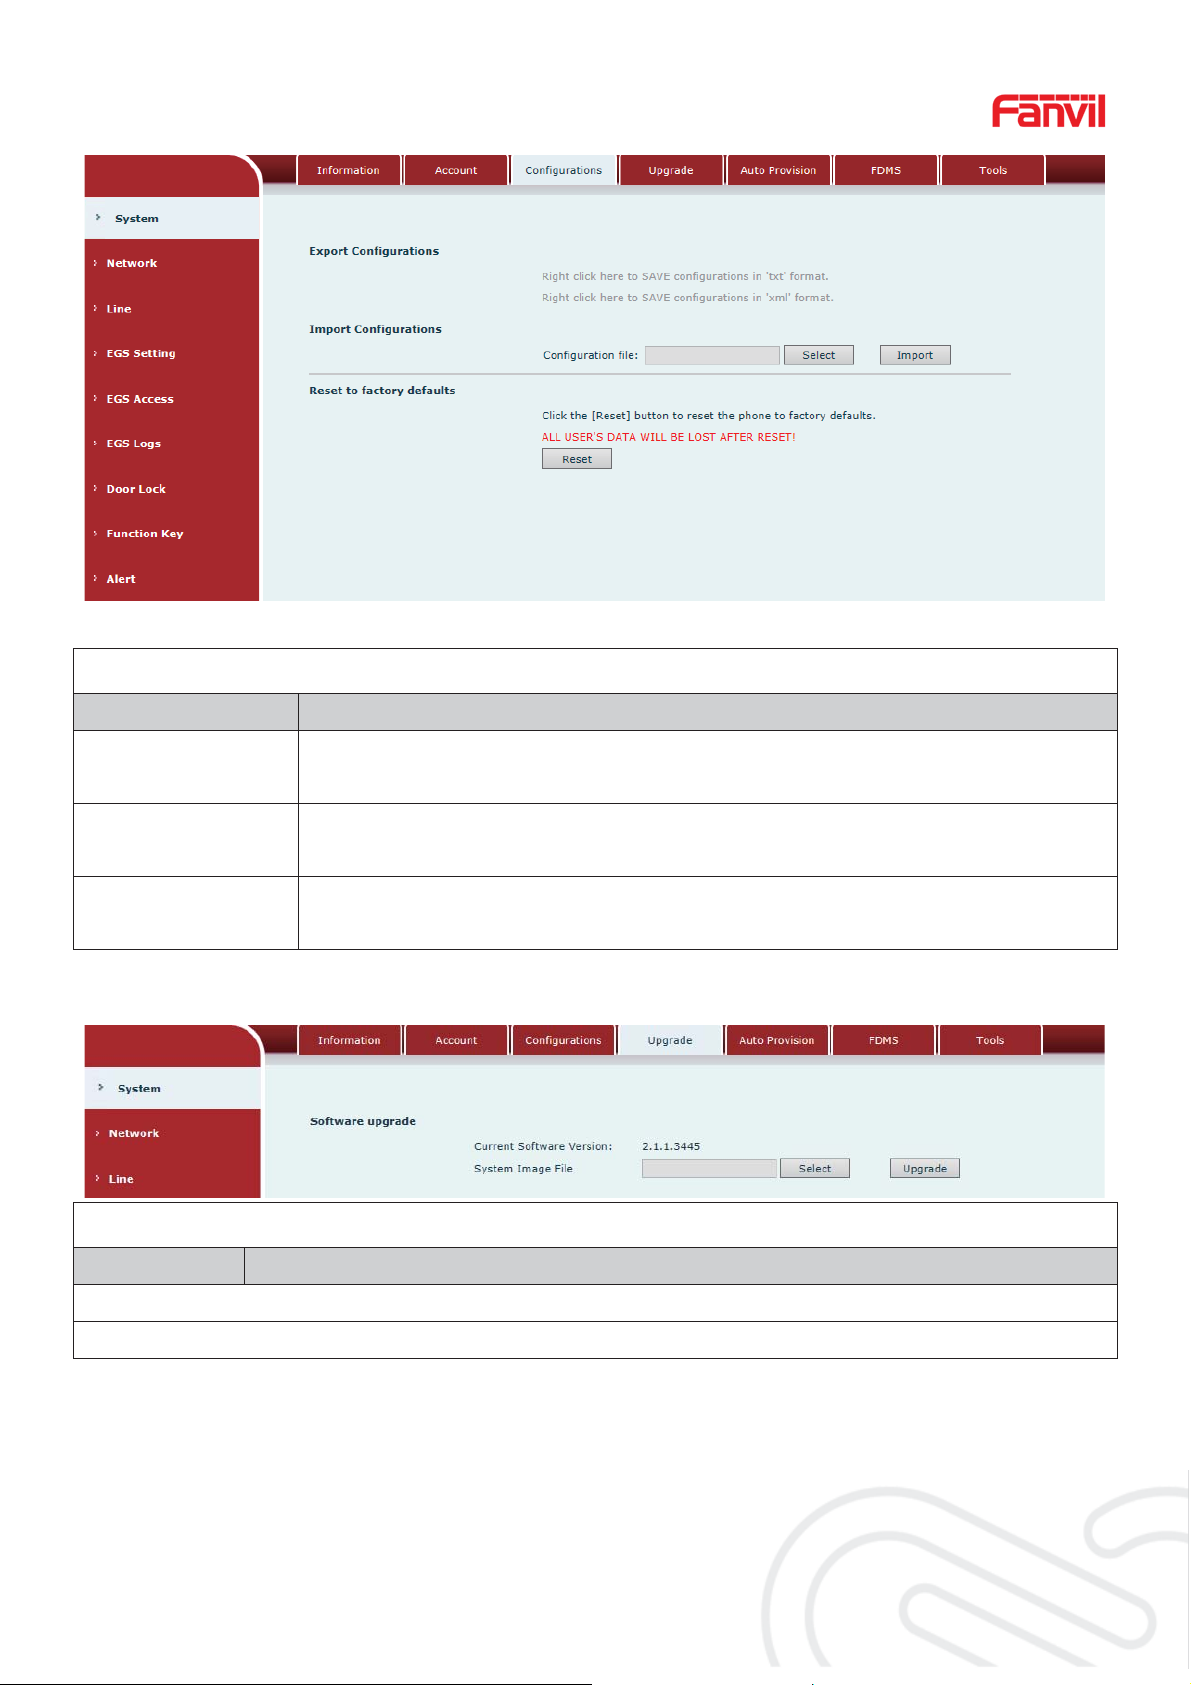
Configurations
Field Name Explanation
Export
Configurations
Import
Configurations
Reset to facto ry
defaults
Save the equipment configuration to a txt or xml file. Please note to Right
click on the choice and then choose “Save Link As.”
Browse to the config file, and press Update to load it to the equipment.
This will restore factory default and remove all configuration information.
d) Upgrade
Upgrade
Field Name Explanation
Software upgrade
Browse to the firmware, and press Update to load it to the equipment.
e) Auto Provision
www.fanvil.com
14 / 52
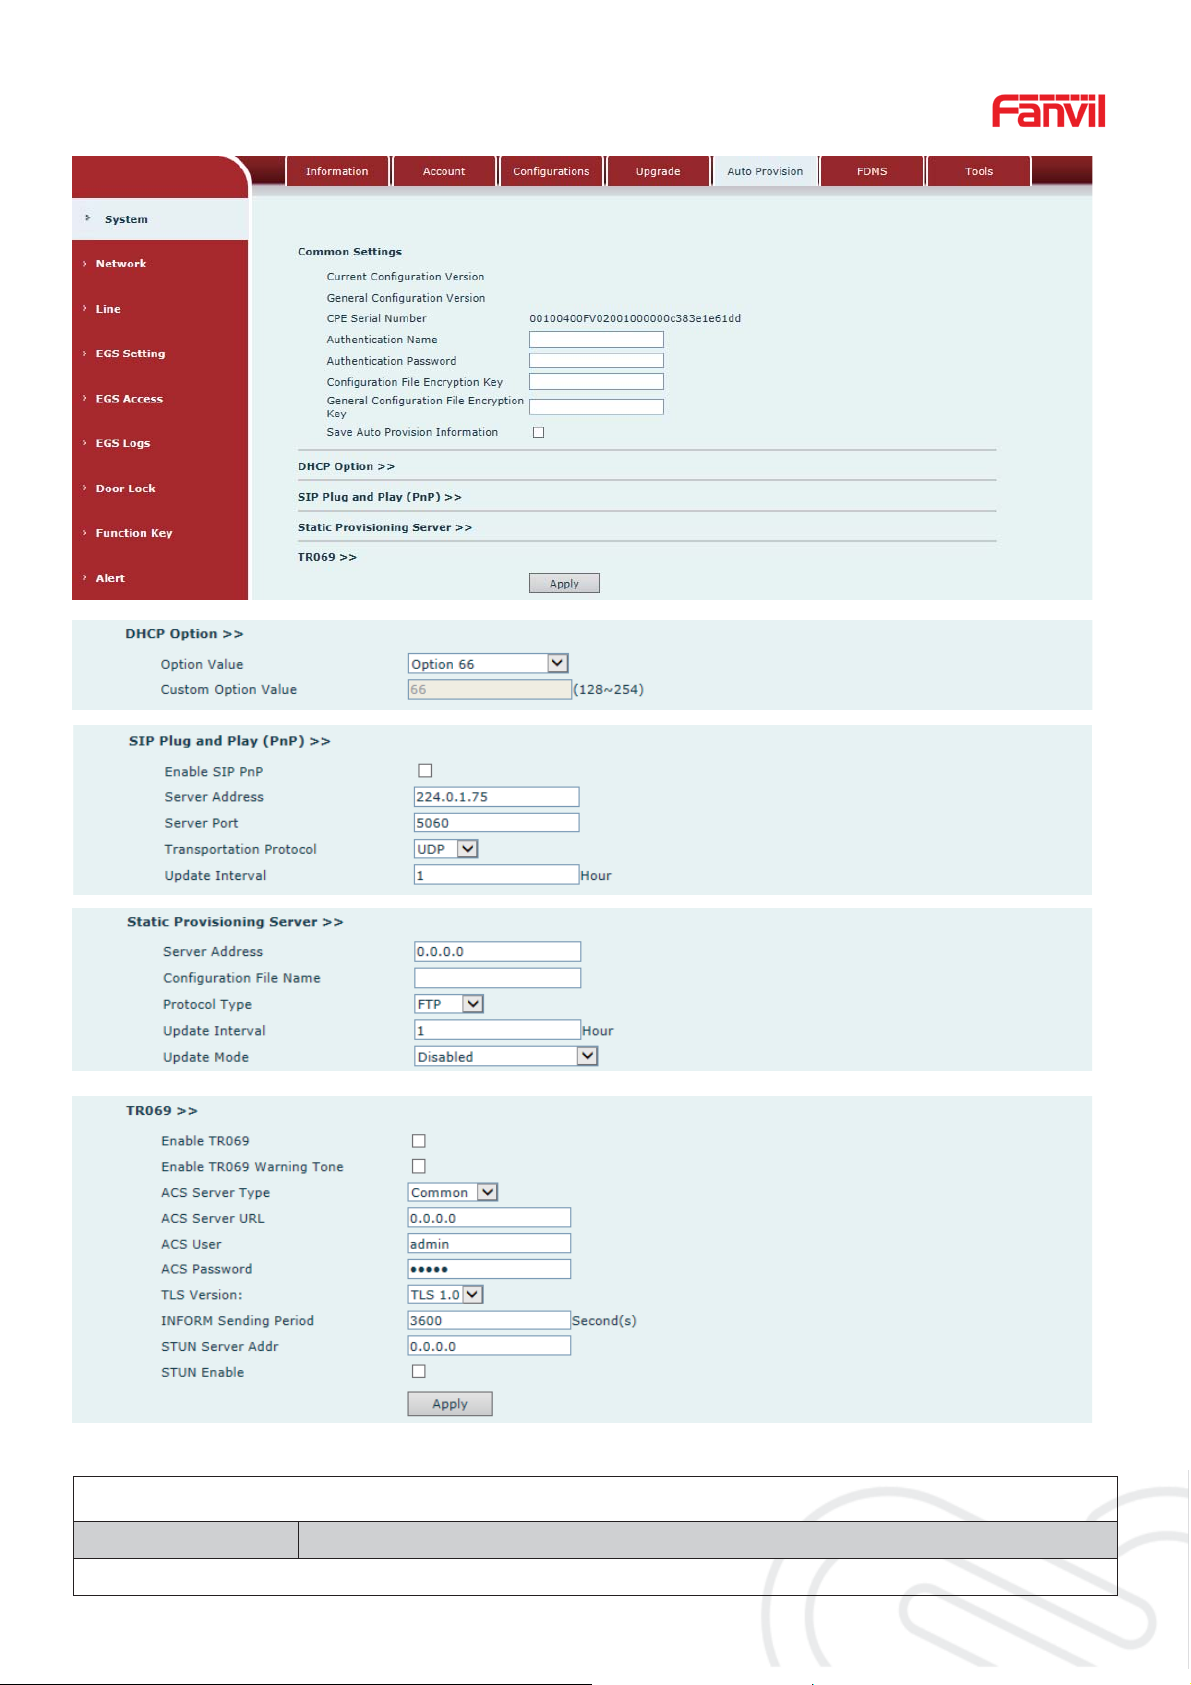
Auto Provision
Field Name Explanation
Common Settings
www.fanvil.com
15 / 52

Show the current config file’s version. If the version of configuration
Current
Configuration
Version
General
Configuration
Version
CPE Serial
Number
Authentication
Name
Authentication
Password
Configuration File
Encryption Key
downloaded is higher than this, the configuration will be upgraded. If the
endpoints confirm the configuration by the Digest method, the
configuration will not be upgraded unless it differs from the current
configuration
Show the common config file’s version. If the configuration downloaded
and this configuration is the same, the auto provision will stop. If the
endpoints confirm the configuration by the Digest method, the
configuration will not be upgraded unless it differs from the current
configuration.
Serial number of the equipment
Username for configuration server. Used for FTP/HTTP/HTTPS. If this is
blank the phone will use anonymous
Password for configuration server. Used for FTP/HTTP/HTTPS.
Encryption key for the configuration file
General
Configuration File
Encryption key for common configuration file
Encryption Key
Save Auto
Save the auto provision username and password in the phone until the
Provision
server url changes
Information
DHCP Option
The equipment supports configuration from Option 43, Option 66, or a
Option Value
Custom DHCP option. It may also be disabled.
Custom Option
Custom option number. Must be from 128 to 254.
Value
SIP Plug and Play (PnP)
If this is enabled, the equipment will send SIP SUBSCRIBE messages to a
multicast address when it boots up. Any SIP server understanding that
Enable SIP PnP
message will reply with a SIP NOTIFY message containing the Auto
Provisioning Server URL where the phones can request their configuration.
Server Address PnP Server Address
Server Port PnP Server Port
Transportation
PnP Transfer protocol – UDP or TCP
Protocol
Update Interval Interval time for querying PnP server. Default is 1 hour.
www.fanvil.com
16 / 52
 Loading...