

Fanvil D800 User Manual
Proolin VoIP User Manual
Multimedia Video Phone
Model: D800
http://www.proolin.com
sales@proolin.com

Contents
INTRODUCTION...........................................................................5
MULTIMEDIA VIDEO PHONE OVERVIEW ....................................................................5
WITH ATTACHMENT.................................................................................................5
PHONE COMPONENT DESCRIPTIONS...........................................................................6
INTERFACE INTRODUCTION.......................................................................................9
TOUCH SCREEN DESCRIPTION ................................................................................11
AUTO PROVISION ...................................................................................................12
BASIC FUNCTION.......................................................................13
SCREEN KEYBOARD...............................................................................................13
STATUS BAR ..........................................................................................................13
NOTIFICATION PANEL.............................................................................................14
MAIN SCREEN .......................................................................................................16
THE APPLICATION OF MULTIMEDIA VIDEO PHONE FUNCTION .................................17
DESKTOP WIDGETS ................................................................................................20
PHONE SET................................................................................22
SYSTEM.................................................................................................................22
NETWORK .............................................................................................................24
Network................................................................................................................................24
PPPoE dial..............................................................................................................................25
QoS........................................................................................................................................26
Port........................................................................................................................................27
Stun.......................................................................................................................................27
ACCOUNT..............................................................................................................28
CALL.....................................................................................................................32
Phone....................................................................................................................................32
Dial........................................................................................................................................33
Service...................................................................................................................................34
DISPLAY SETTINGS .................................................................................................35
Screen...................................................................................................................................36
Hibernate..............................................................................................................................36
Display...................................................................................................................................37

SOUND ..................................................................................................................38
Tone.......................................................................................................................................38
Volume..................................................................................................................................39
LANGUAGE............................................................................................................39
DATE TIME.............................................................................................................40
MAINTAIN .............................................................................................................41
Auto provision.......................................................................................................................41
Reset factory.........................................................................................................................43
Reboot...................................................................................................................................44
AUDIO...................................................................................................................44
Audio.....................................................................................................................................44
Audio param..........................................................................................................................45
VIDEO ...................................................................................................................46
Video param..........................................................................................................................46
Bandwidth.............................................................................................................................47
CALL FIREWALL .....................................................................................................48
PHONE APPLICATION.................................................................51
PHONE ..................................................................................................................51
CONTACTS.............................................................................................................54
CALL LOG..............................................................................................................57
MEMORY KEY .......................................................................................................59
NETWORK PHONEBOOK .........................................................................................61
CONTACTS GROUP .................................................................................................62
MWI.....................................................................................................................63
OTHER APPLICATION.................................................................64
EMAIL ...................................................................................................................64
CALCULATOR ........................................................................................................65
NOTE PAD..............................................................................................................67
BROWSER ..............................................................................................................68
RECORDER ............................................................................................................68
DIGITAL CLOCK .....................................................................................................69
ALARM CLOCK......................................................................................................70
GALLERY ..............................................................................................................70
FILE MANAGER .....................................................................................................71
CAMERA................................................................................................................73
WIZARD ................................................................................................................74
MUSIC...................................................................................................................74
ANDROID SYSTEM SETTING.......................................................77
BASIC SETTINGS ....................................................................................................77

WAN......................................................................................................................................77
Sound & display....................................................................................................................78
Configuration management..................................................................................................80
Language & keyboard............................................................................................................81
Date & time...........................................................................................................................82
VOIP SETTINGS .....................................................................................................82
CALL SETTINGS......................................................................................................86
ADVANCED SETTINGS.............................................................................................89
Location & security...............................................................................................................89
Privacy...................................................................................................................................89
Applications...........................................................................................................................90
Accounts & sync....................................................................................................................90
SD card and memory.............................................................................................................90
Search....................................................................................................................................91
ABOUT PHONE .......................................................................................................91
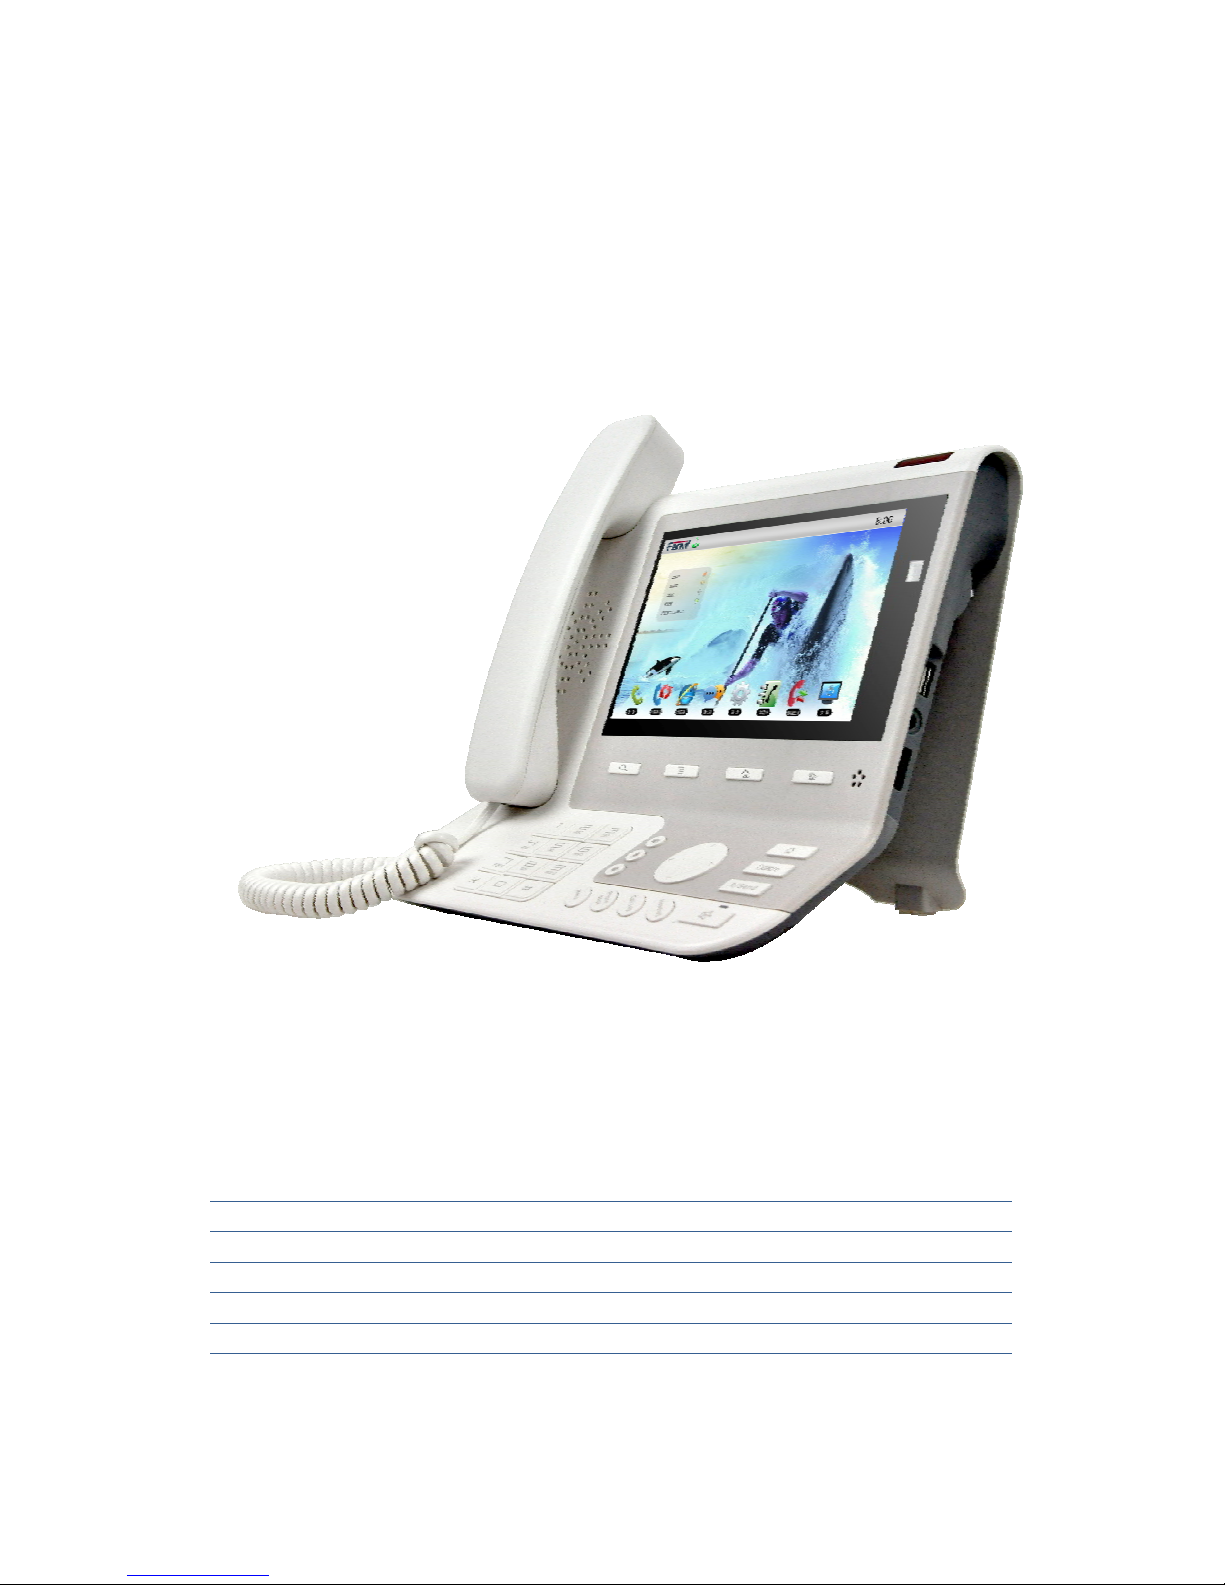
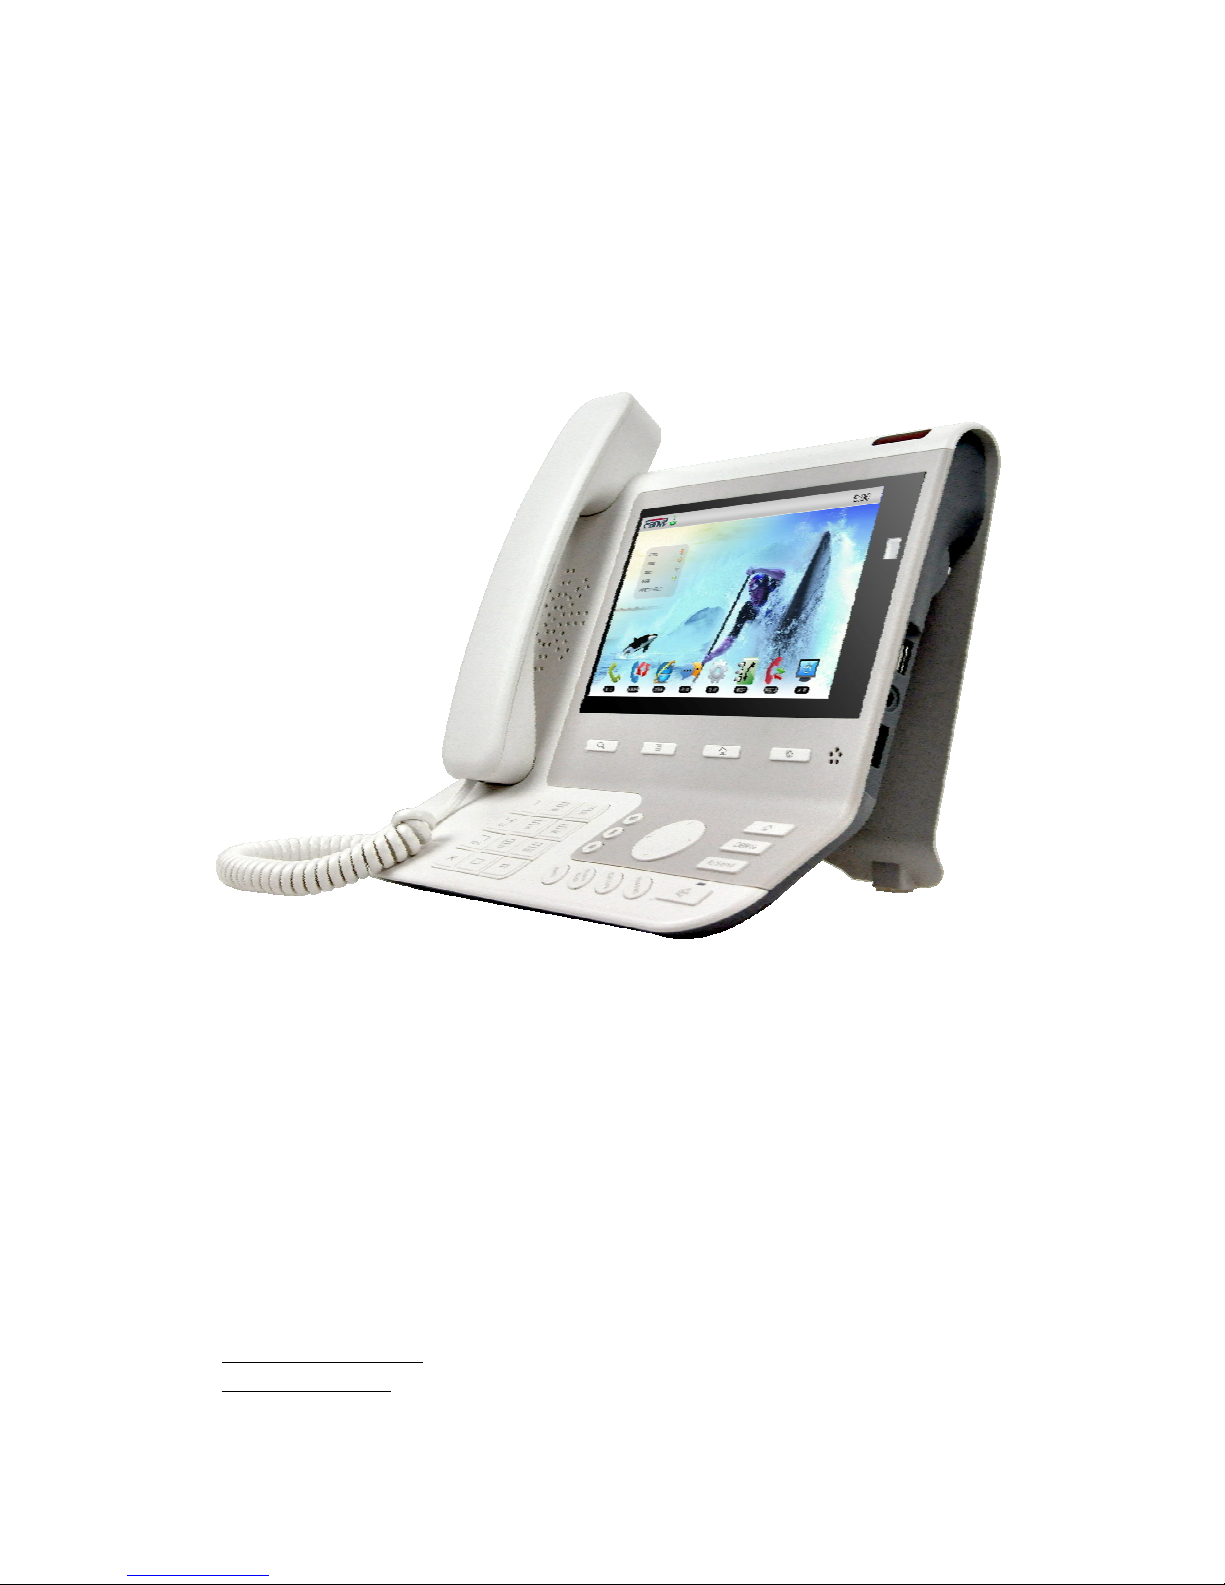
Introduction
Multimedia Video Phone Overview
With Attachment
Item Function
Power Adapter
Power supply for telephone.
Network Cable
Used to access network for the phone.
Handle
Make phone calls with the phone’s basic functions.
Handle Line
Connected with the handle and the phone.
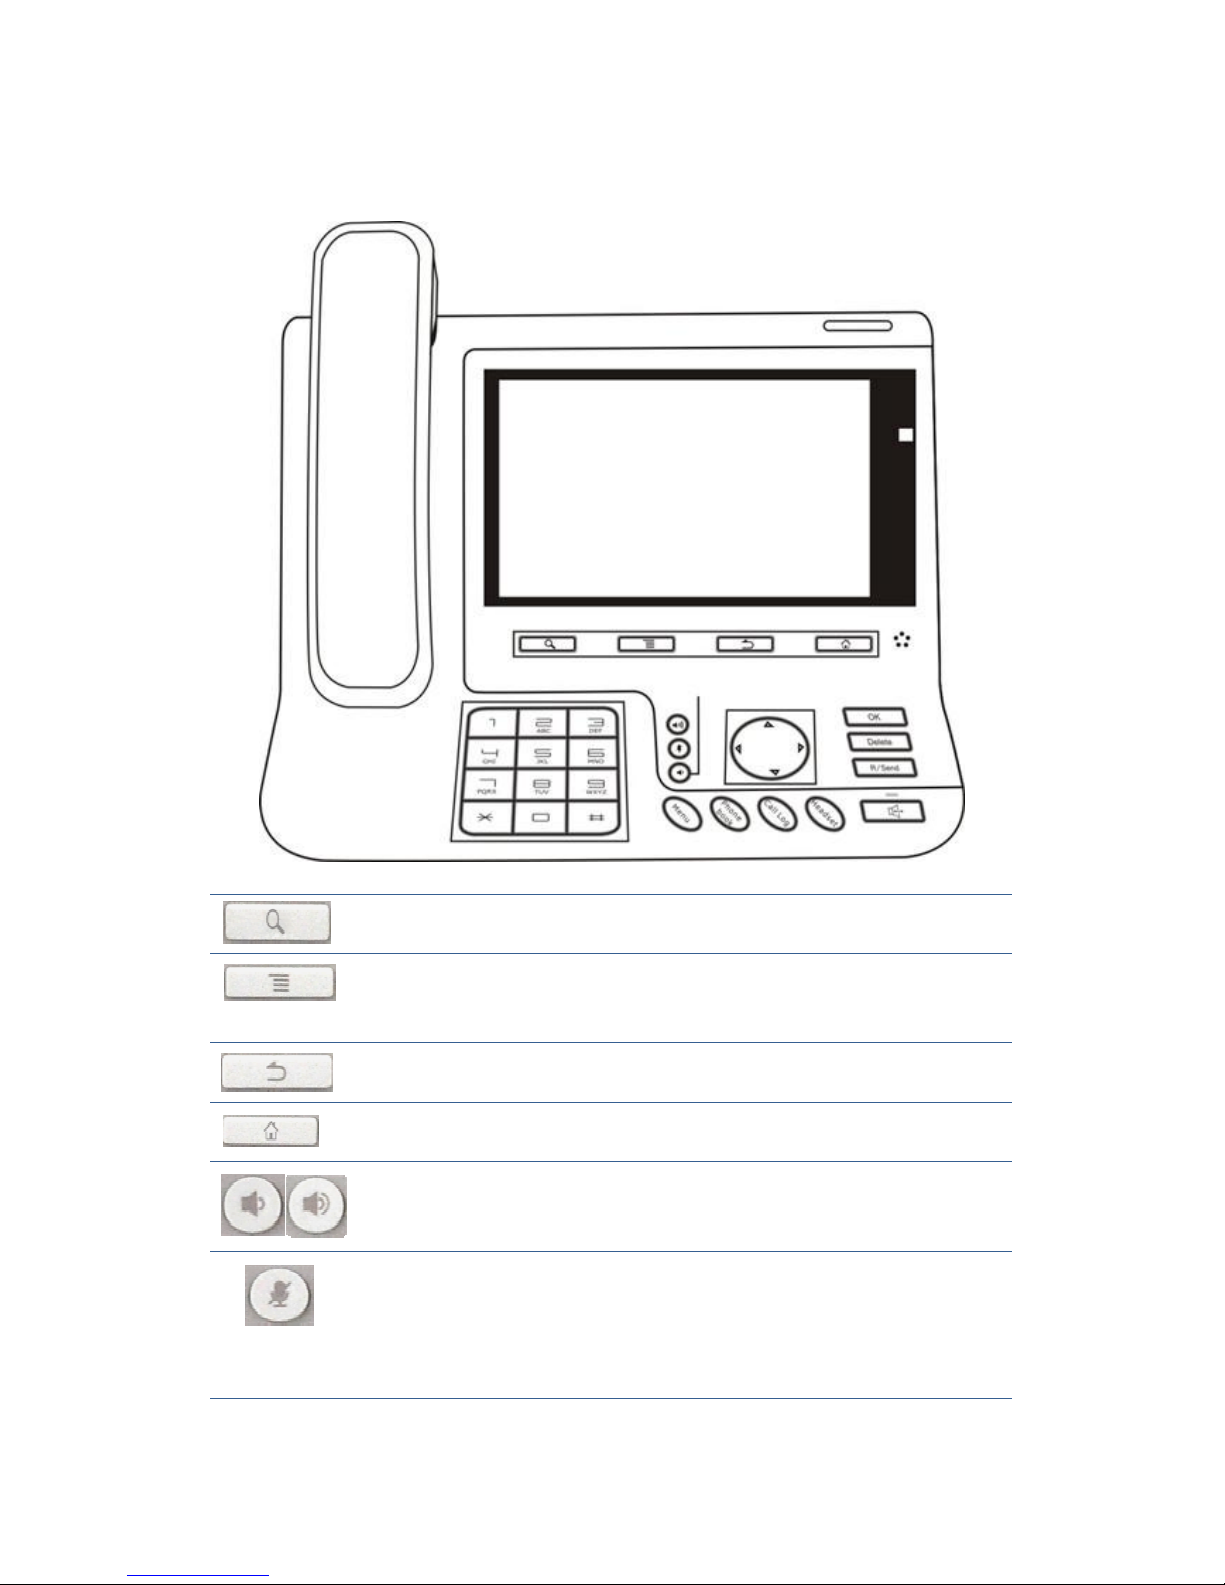
Phone component descriptions
Search key. Tap the key you can enter into the search
interface.
Entering the function menu. You can browse through the
menu all functions of the system are applied, and the
execution of the application.
Return key. Click on this button will jump out the current
window.
Home key. Return to the idle interface.
Volume control key. You can be in the player program or
call ringing using this key to adjust the volume size.
Mute key. In the call mode, press this button you can
hear other's voices, but the others cannot hear your
voice; press this button again to leave this mode. In
the call state, you can press this button to turn off
the ring tips.

Confirm key.
Delete key.
Resend key. The phone will automatically dial the last
outgoing call.
Navigation key.
Menu key.
Phone book. Tap to enter into the contacts interface.
Call log. Tap to see the call log.
Headset key.
Digital keyboard.
The hands-free key.

Installation backplane
Ÿ set the phone in horizontal
The back plate is horizontally placed in the telephone at the bottom,
and four feet back of the bottom of the phone into the corresponding groove,
pressed down firmly until the feet with the phone closed, Right now its steady
level placed on the desktop.
Ÿ vertical hang
The back plate is upright placed in the telephone at the bottom,
and four feet back of the bottom of the phone into the corresponding groove,
pressed down firmly until the feet With the phone closed, Right now its steady
vertical placed on the desktop or hang on the wall.
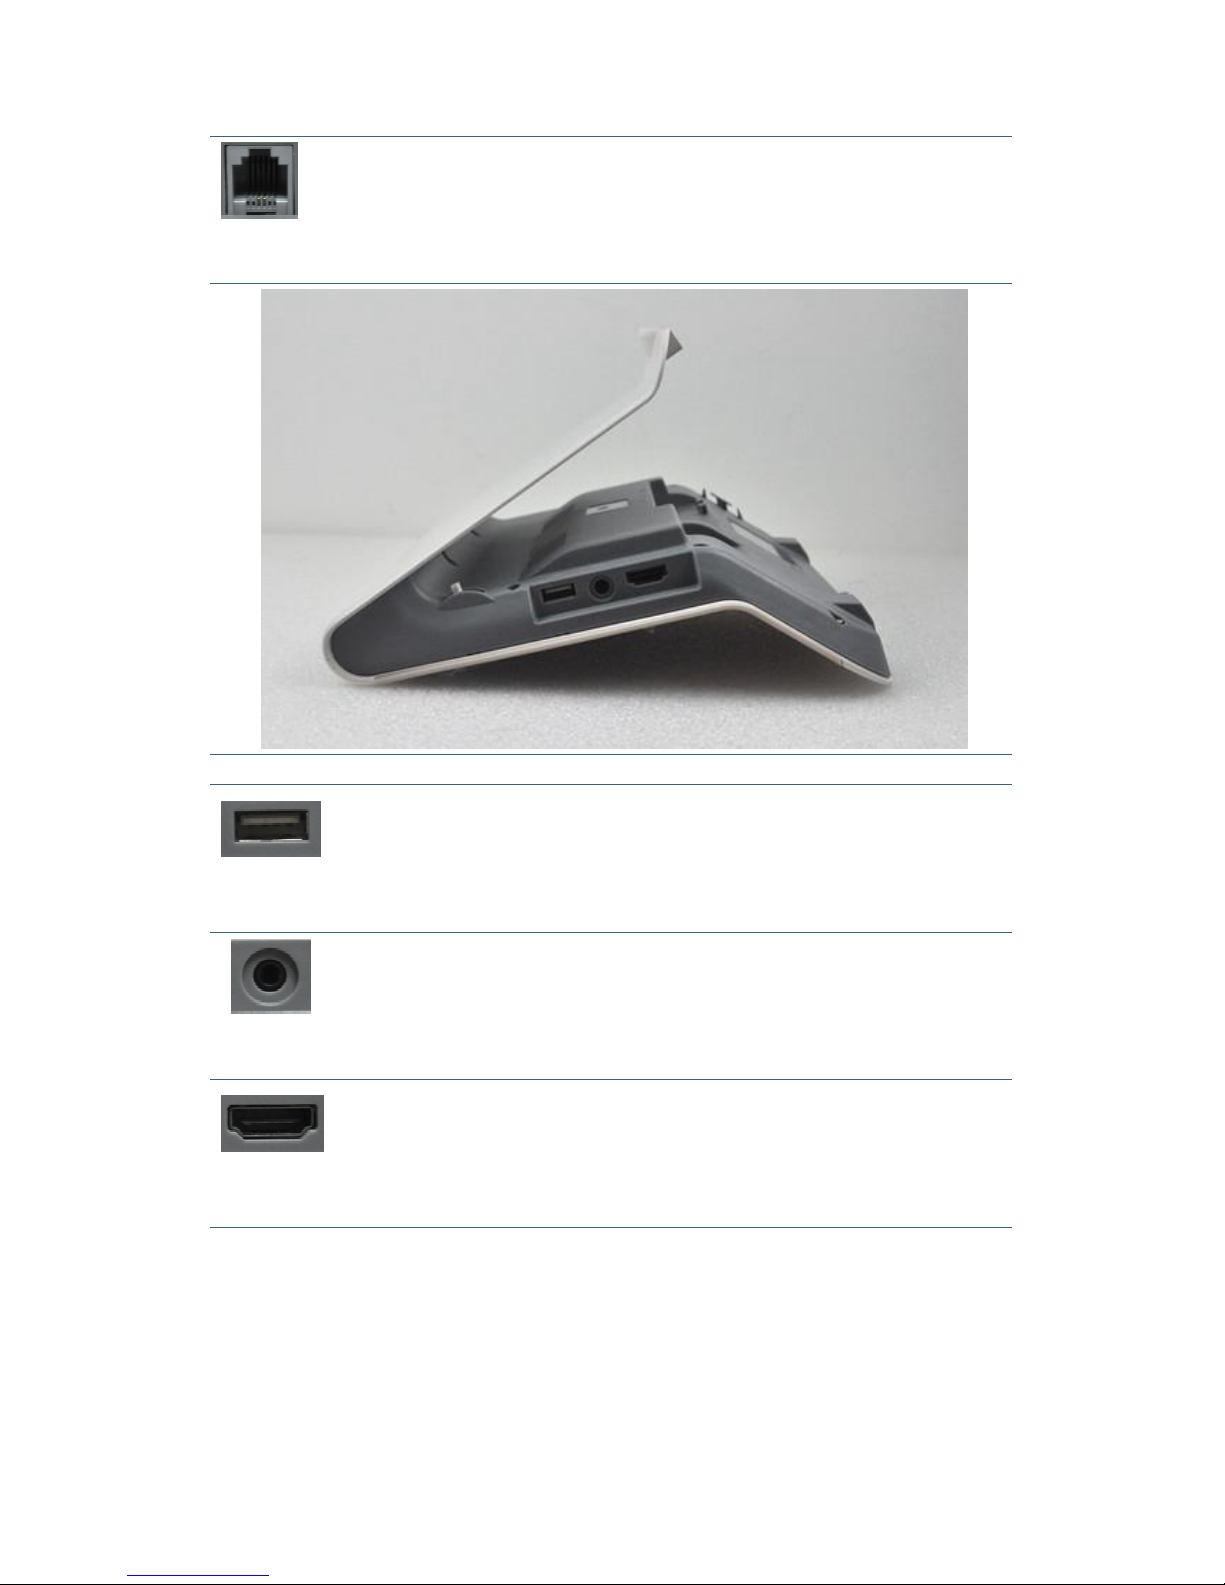
Interface introduction
name meaning
(Left one)
SD Card interface Connect SD Card for saving
dates.
(Left second)
DC Power Interface Input: 220V AC
Output: 12V DC
(Left third)
LAN Network interface Specification RJ45, connect
computer.
(Right third)
WAN Internet interface
Specification RJ45, connect
internet.
(Right second)
PSTN Normal phone
interface
Specification RJ11, connect the
general public telephone
network(SE780 has no PSTN
interface function)
(Right first)
Handle interface
Specification RJ9, Used to
connect the handle when
calling
名称 含义
(Right first)
USB interface.
Connect USB disk.
(Center)
Hand-set interface.
Connect hand-set.
(Right first)
HDMI interface.
HDMI interface for
high-definition audio and video
Ÿ Note:
1 the phone line into the handle interface, corresponding to the right place in
the interface.
2 will unit back in line with the above two methods of either way, installed in

the bottom of the phone.
3 will power adapter unit of DC corresponding to the mouth, the left one
location of the interface, and the other end into the power socket.
4 use RJ45 string will end into the unit LAN mouth (corresponding to the left
three interface), and the other end into the and external network connected
network equipment, if the network connection standby desktop still show
for , please check the network configuration is correct, please check the
equipment such as Internet is normal or not. If unit connection string, standby
desktop to connect to the network state display that network is connected to
normal, at this time the phone can be related to the Internet, such as Internet
phone related operations.
5 if this time with the other end of the telephone to take root cable bridge
interface, and the other end at the computer, the computer can through the
telephone at bridge function access network, please check the network
configuration is correct, please check the equipment such as Internet is normal
or not. If unit connection shows for , standby desktop to connect to the
network state display that network is connected to normal, at this time the
phone can be related to the Internet, such as Internet phone related operations.
Touch Screen Description
The controls of multimedia touch screen will changed dynamically, it depends
on your executing task.
Open Applications: Click icon “Application”.
Scroll: Drag up or down to scroll screen. In some screens (such as webpage),
you can scroll from one side to the other side.
Drag your finger to scroll will not choose or activate anything on the screen.
Rapid sliding finger to scroll the screen:
You can wait for rolling stop, or you also can tap or touch any position on the
screen to stop it. Tap or touch to stop scrolling does not choose or activate
anything on the screen.
Auto provision
Please contact service provider for the new version upgrade.
Auto provision: Phone to register and configure automatic
updates server address, the phone will at intervals of to the server to check for
updates and upgrades. See the specific automatically upgrade instructions.
Switch to Auto provision
USB auto provision:
It has two update methods:
1. Create a directory named implinux in the USB disk, and copy the update file
to this directory, and then insert the USB into the phone.
Phone reboot will automatically compare the update version number in the U
disc and telephone own version number, if not the
same version and higher than the existing version, the phone will
automatically upgrade. (Upgrade all system).
2. Create a directory named named impinstall in the USB disk, and copy the
update file to this directory, and then insert the USB into the phone.
Phone reboot will automatically compare the update version number in the U

disc and telephone own version number, if not the
same version and higher than the existing version, the phone will
automatically upgrade. (Upgrade where needs to be
Basic Function
Screen Keyboard
If the Android in some places needs to input, click on the input box will
automatically pop-up screen keyboard ( Installed input method with the
on-screen keyboard, different input method is not the same), such as
Finished entering text, you can press the return key to close the
screen keyboard.
Input Text
1 Tap the text field.
2 Tap the screen keys on the keyboard.
Type in capital letters
Shift key, tap shift key can switch the uppercase
lowercase.
Delete character
Delete character, tab key to delete a character, if
you want to delete many characters, tap the icon
for a long time.
Type in digital,
punctuation and symbols
Tap key, as this time will switch to digital,
punctuation and symbols input interface.
Space
Space symbol.
Enter
Enter symbol, tap this key can switch to next line.
Status Bar
The status bar on the right standby desktop is given information about
Multimedia Video Phone:
Status bar Meaning
Network status (normal)
Displays the network connection is
normal.
Tap the icon
directly into
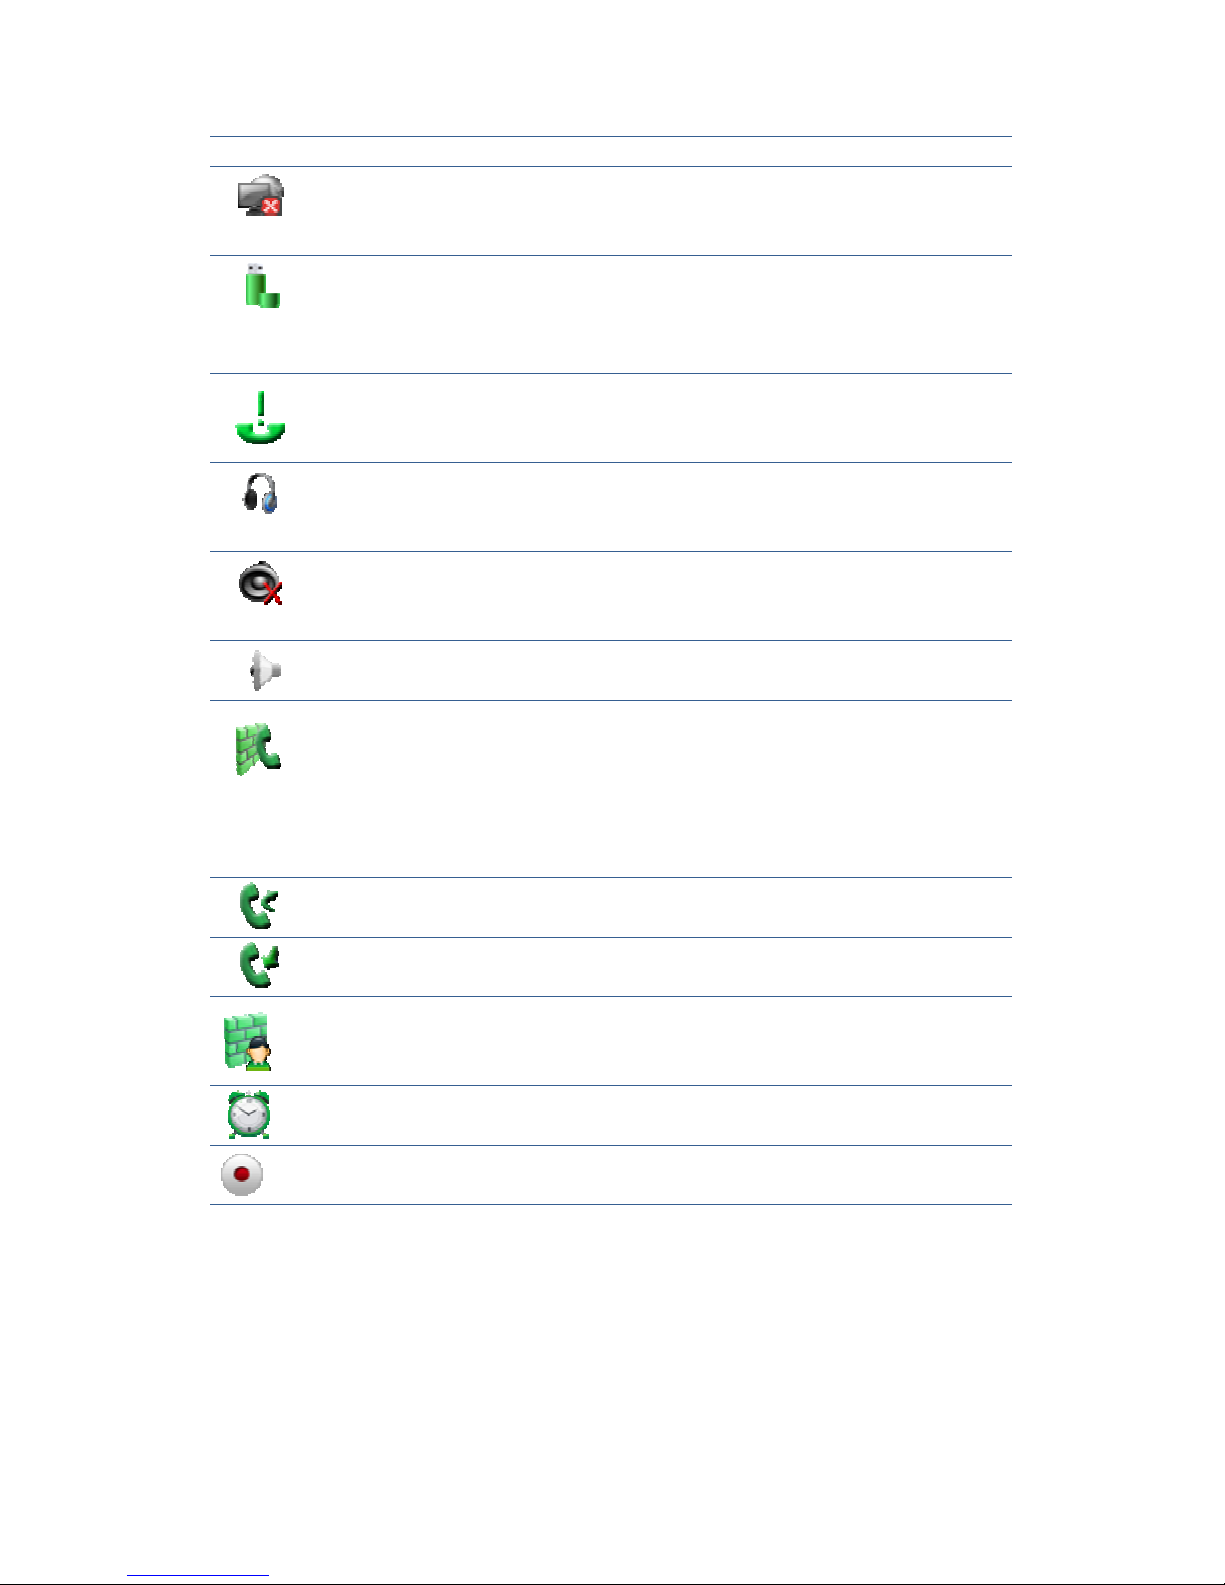
the network settings.
Network status (failure)
Shows no network connection. Need to
check the network settings
and connections are correct.
USB
Display phone successful recognition of
USB equipment. You can tap the icon
directly to switch into the USB
application wizard.
Missed calls
Show that there are missed calls. You
can click on the icon directly to switch
into the call record.
Headset mode
Show that into the headset mode. You can
tap the icon directly to switch into the
dialing mode.
Silent mode
Show that station is silent mode; in the
standby interface directly click the mute
button to cancel the mute.
Hands-free mode
Show that phone is in hands-free status.
Open the DND
Show that the phone on Do Not Disturb
feature, when there is an incoming call
screen displayed without ringing, and
there is also a call on DND state, it will
have a missed call icon appeared in the
status bar.
Call forward
Show that opened the call forward
function.
Auto answer
Show that opened the auto answer
function
Black list
If a contact is added to the blacklist, then
open the blacklist function, this phone
call will do not come in contact.
Alarm clock
If it sets alarm clock, on the status bar
will display the alarm clock icon.
New record
Show that phone has new unread
recordings.
Notification Panel
Notification panel which shows the default content was that the network
connection status, click the drop-down panel can view network status; when
there is a new call, notification panel will display to view the current call, you
can tap to enter the call interface; if there is a missed call, it will display missed

call icon, you can click the icon to view the details; or you can choose to clear
all things at the notification panel; when there has unread recordings, the
unread recordings will display at the panel,(Added a few unread recordings?),
tap to enter the detail interface.
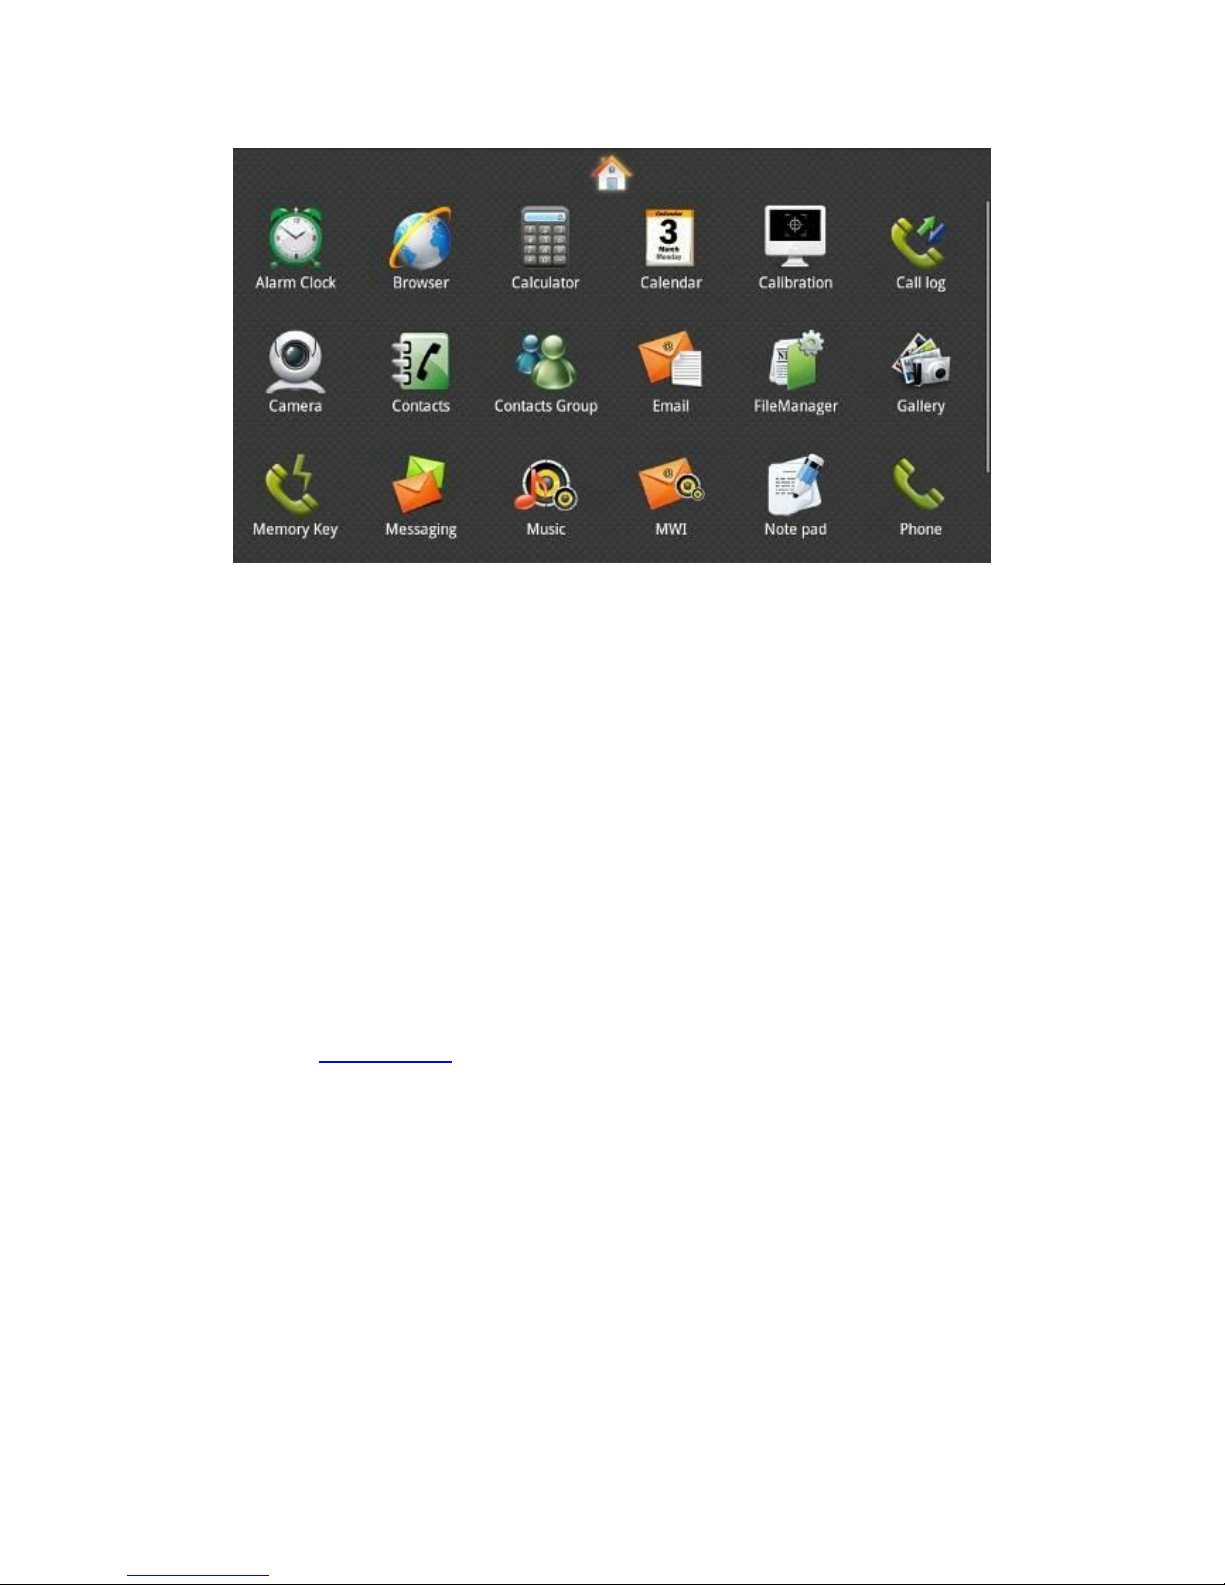
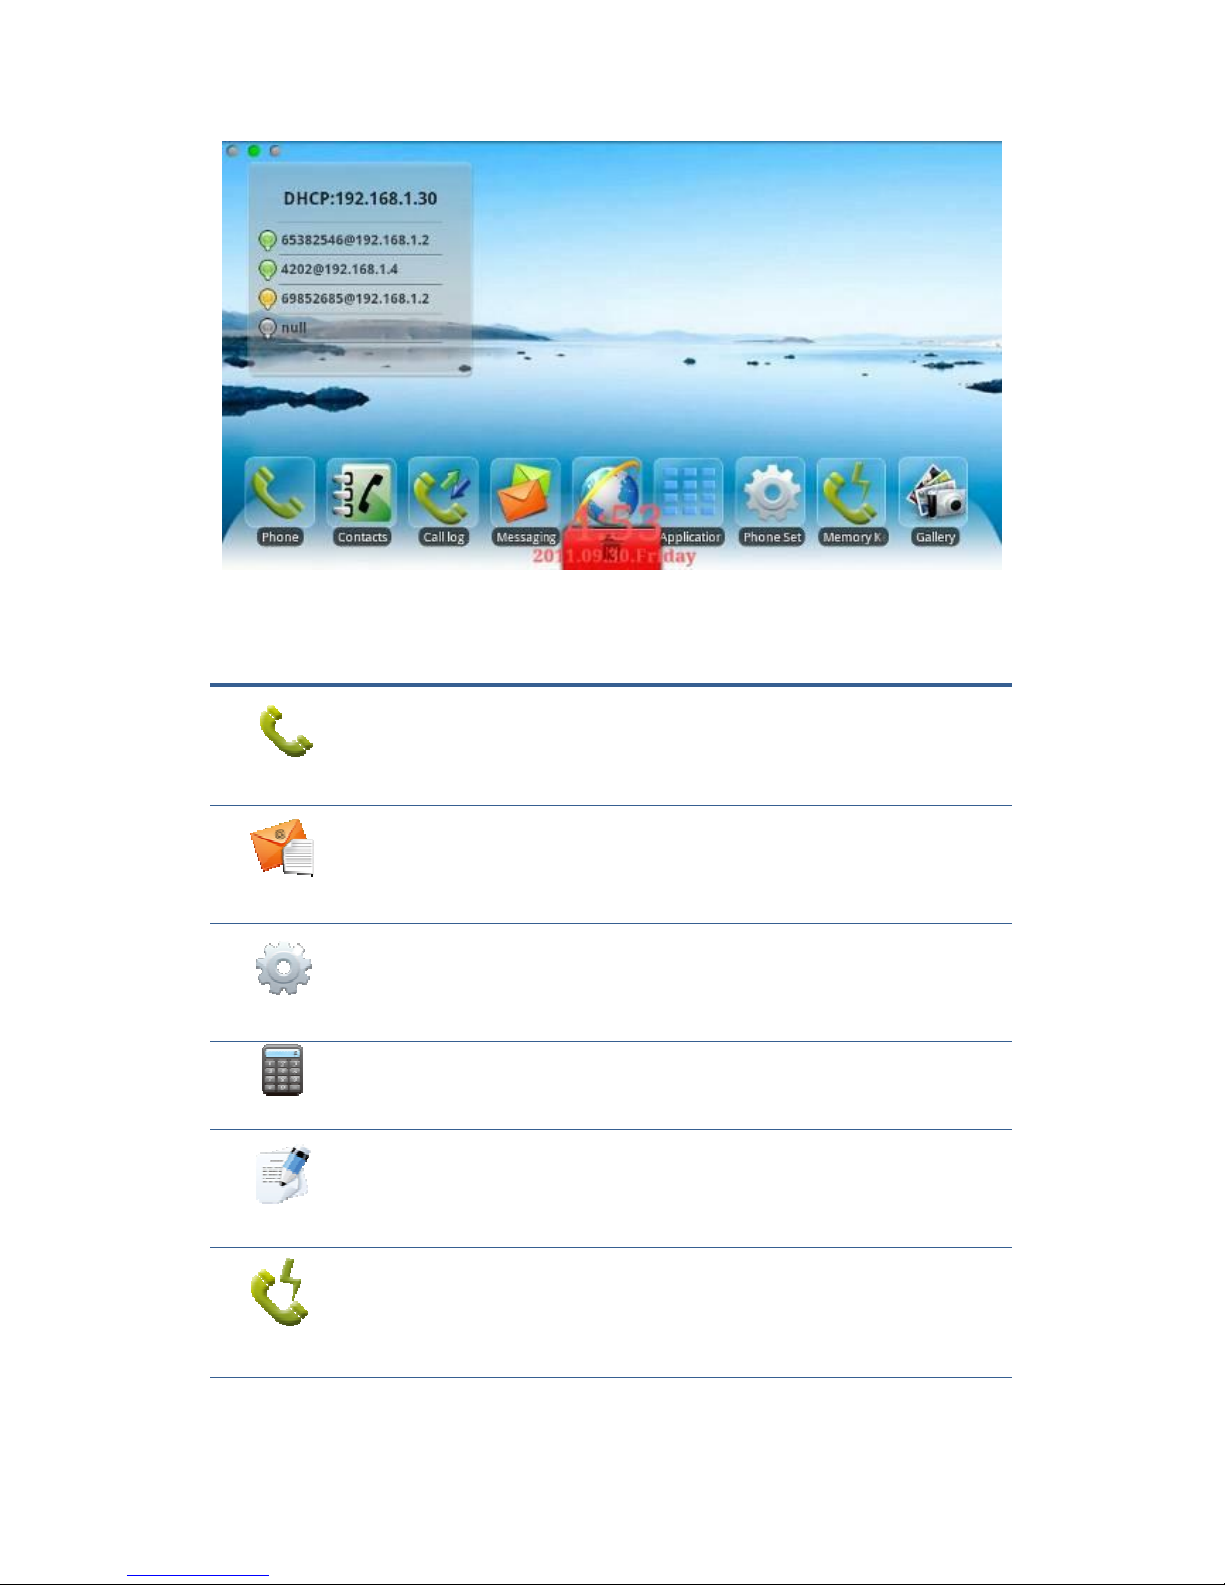
Main Screen
Multimedia Video Phones will go directly to the main screen after startup.
It will display the application’s shortcut and it has three screens, you can tap
to slide the screen from left to right to switch the different screens.
Default Screen:
Click the application icon will jump to the following diagram interface, Touch
the boards will review the applications:
You can enter to different applications.
If there are extra or unwanted application shortcuts, you can long press the
shortcut, and then the trash icon appears at the bottom of the screen, so we can
remove the application icon in the dustbin. Please see the following figure:
The Application of Multimedia Video Phone Function
Phone
You can dial a phone call, hotline on call, also can through the
digital keyboard for manual dialing
Email
With e-mail functions, set the account contact will automatically
synchronize to a mailbox account, you can view the message
directly on the phone.
Phone set
It contains the phone settings, network settings, screen settings
and so on, you can be in the corresponding menu corresponding
set.
Calculator
With simple calculation operations such as add, subtract,
multiply, divide and advanced operations function of
the calculator.
Note pad
Recorded a number of important events, or during a call you can
press the “Note pad” to record information such as phone
number and so on.
Memory Key
You can go through the rapid predefined contact button for
a speed dial.
Contacts
The phone book can through system to synchronize with the PC
such as Outlook address books and so on. Support search, add,
remove, and edit functions.
Contacts
Group
You can manage contacts, and contacts can be grouped, and you
also can easier to find a contact.
Browser
Through the connection of computer network, you can browse
any website.
Recorder
Provide call recording, message, and the machine recording. You
can easier to make voice records and notes.
Alarm Clock
Customized to display the time around the world.
Settings
It contains the phone settings, network settings, screen settings
and so on, you can be in the corresponding menu corresponding
set.(Android system settings)
Gallery
View photos stored on the phone, or through the USB storage
device storing photos or images, you can enter the photo gallery
for dynamic playing.
File Manager
You can easily manage the files.
Camera
Through the camera you can take High-definition pictures and
make other operations.
Wizard
You can set up a network connection through the wizard mode,
change faster and more convenient.
Message
Like the mobile phone, with messages to write, read and send
function.
Music
Song music player. You can be using other applications while
using the music player.
MWI
When the phone is enabled the auto answer function to switch to
the voice mail, calls will automatically turn to voice mail.
Screen
calibration
Calibrate the screen to guarantee the correct of the screen.
Calendar
Enter into the calendar you can view the “year, month, day and
the day of the week”.
Call log
Enter the call log you can view all call records.
Including “Incoming Calls”, “Outgoing Calls” and “Missed
Calls” records.
PingBox
PingBox is a system of built-in network testing tools, through
which it can check the network traffic.
Desktop Widgets
Operation steps:
Long press the desktop, pop-up "Add to Home Screen" list, tap the
“Widgets”,tap the widgets you want to display on the desktop, the desktop
will show you the required widgets. This easy to operate and quick, which
saves the time and look beautiful.
Analog clock:
Analog clock with a dial in the form displayed on the desktop,
can be placed on the desktop of any space position, it is
convenient to check the time.
Desktop display:
Digital clock:
Digital clock displayed with white fonts, “time, year, month,
day, day of the week”; On the desktop, you can move to any
empty place.
Desktop display:
Search:
The default search bar is the Google’s Quick Search Box, You
can enter any content you want to search to find.
Desktop display:
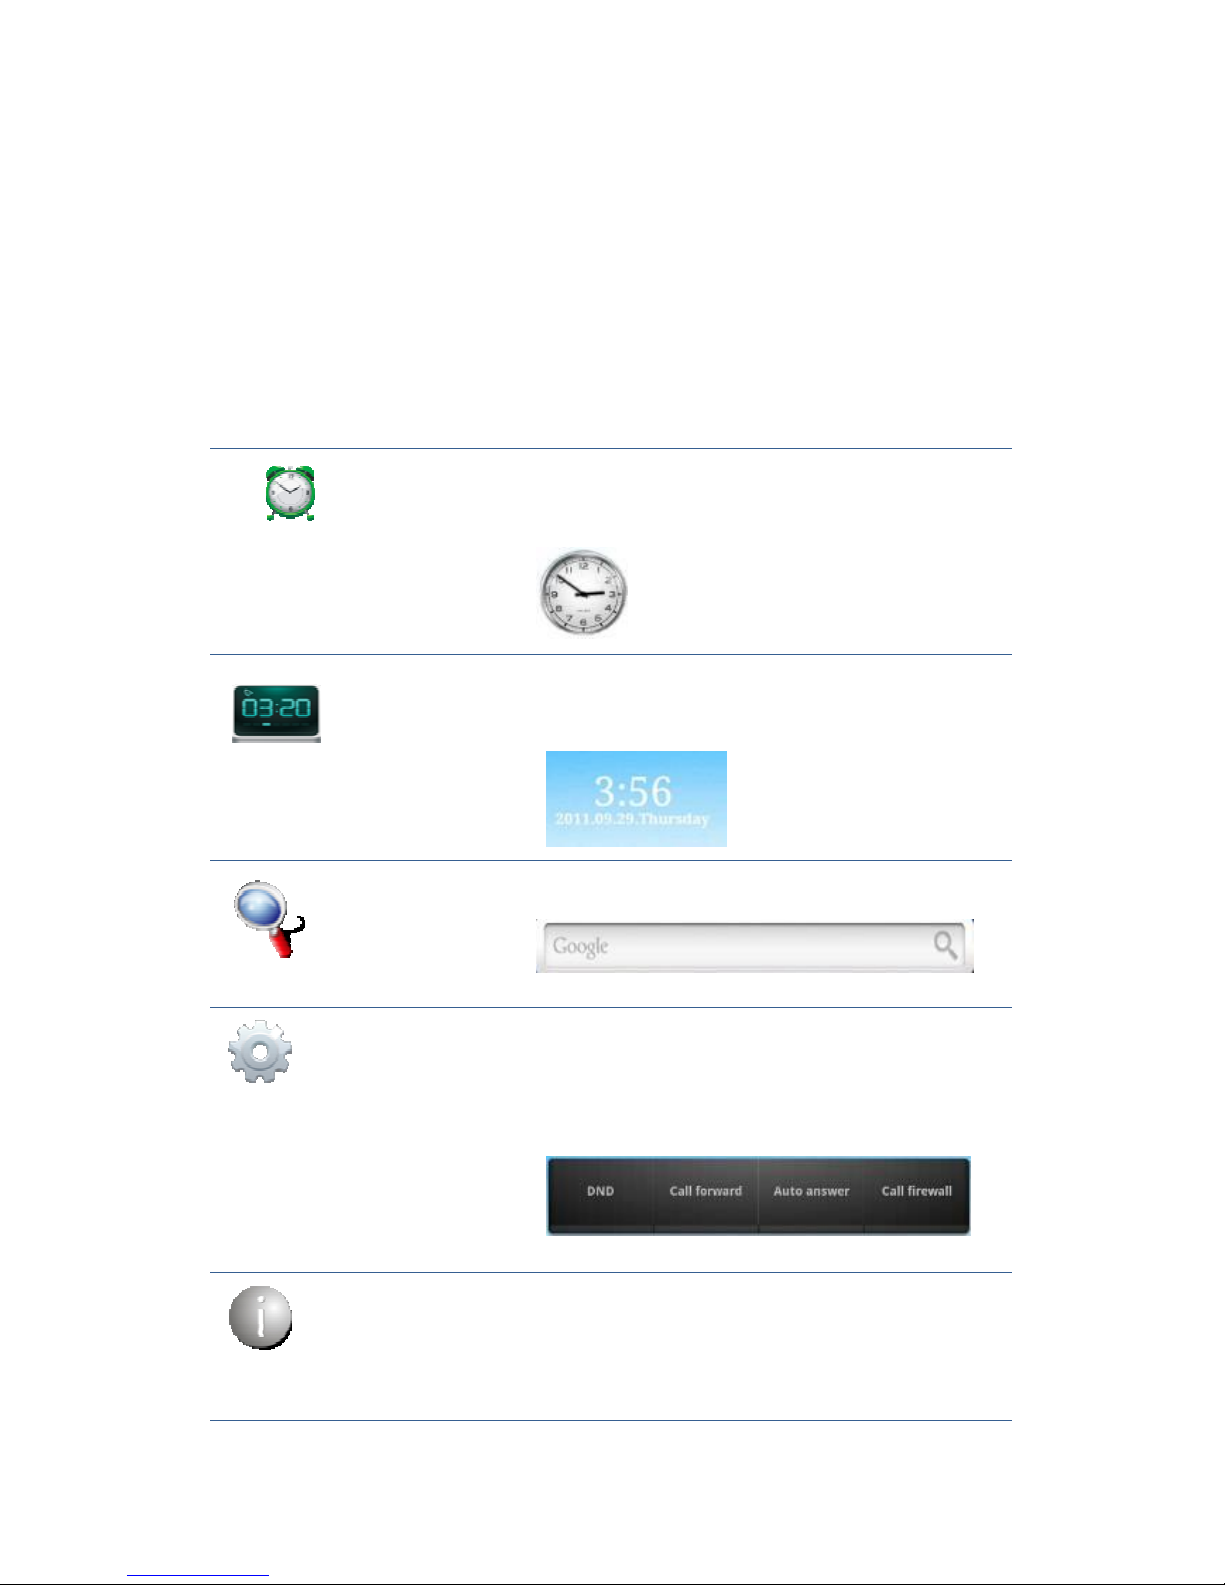
Call set:
You can through Call set widget to set the phone, click the
DND can directly enable the DND mode; Click the Call
forward will jump to the incoming call forward interface; click
the Auto answer will open the auto answer function; click on
the Call firewall will jump into the call firewall interface.
Desktop display:
Phone status:
Phone status widget displays the phone's registration
information,
it contains IP information, which is DHCP mode or Manual
mode;
Telephone registration form: if not registered lines showed that
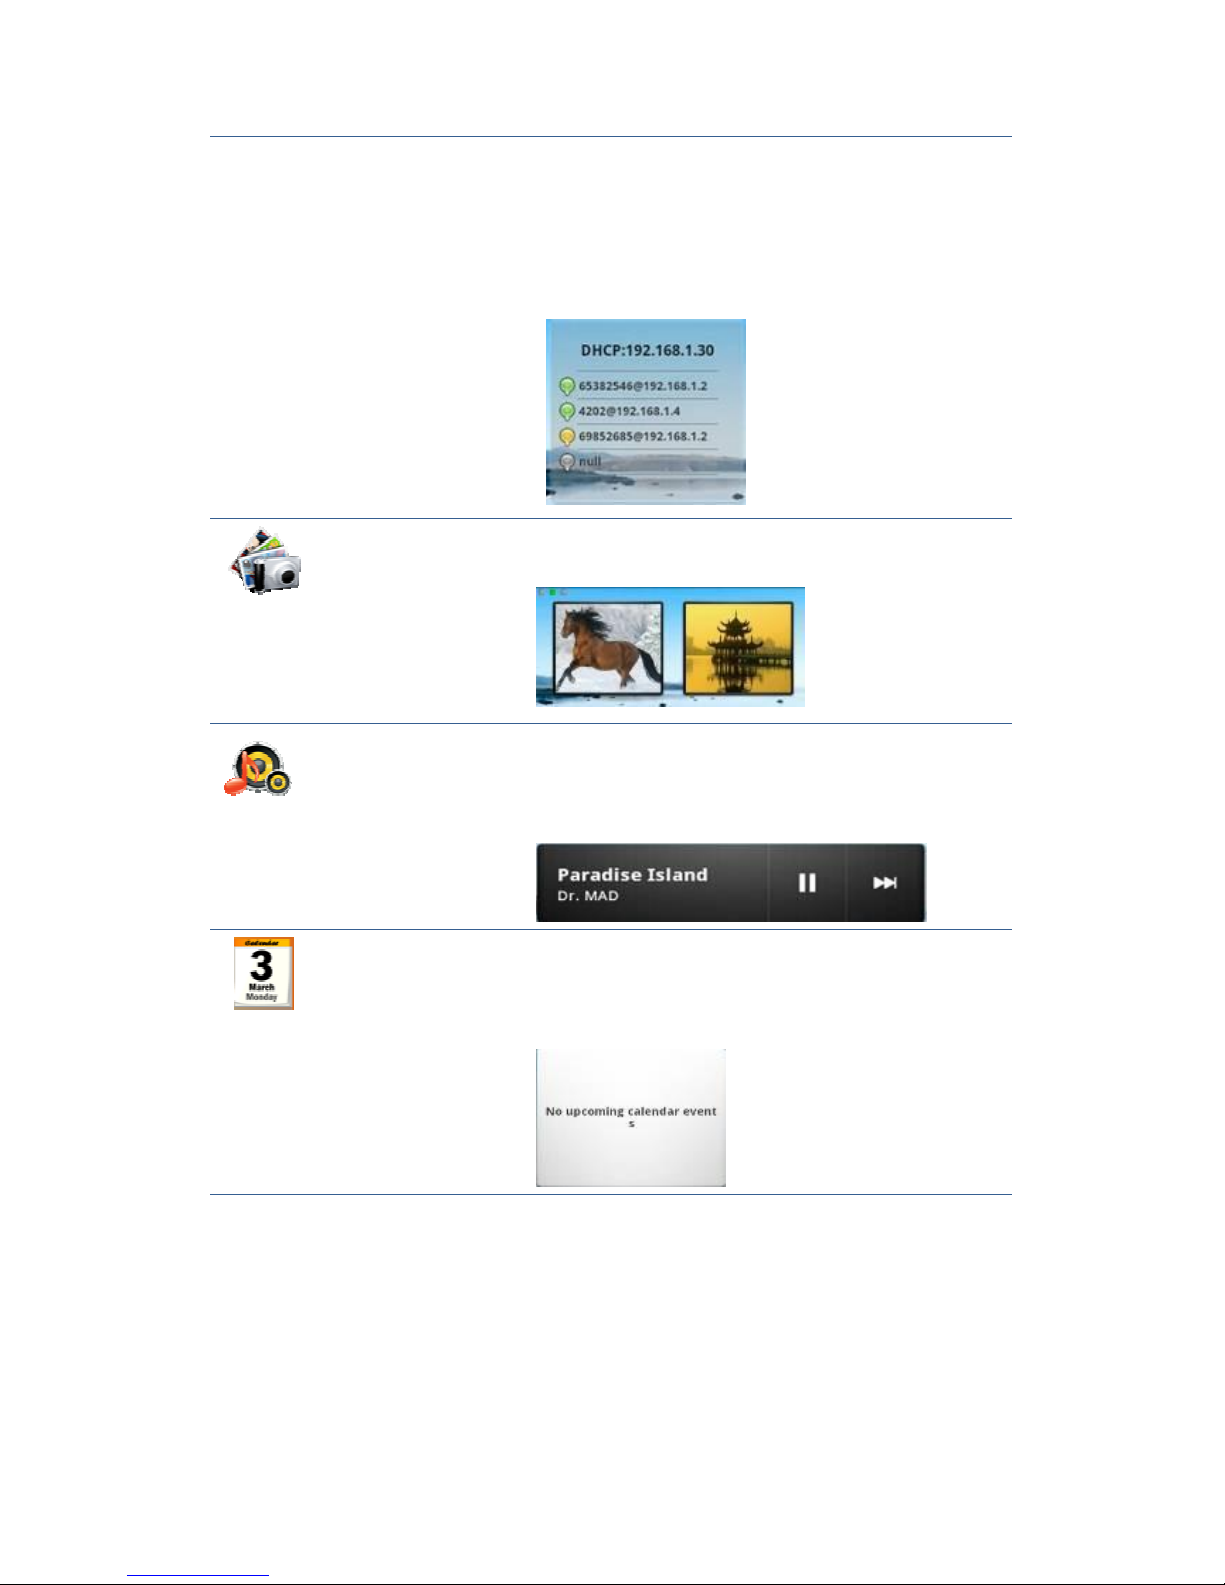
grey lamp;
If primary server registered successfully showed that "green
light, telephone number and the main server" address;
If backup server registered successfully showed that "yellow
light, phone number and backup server" address.
Desktop display:
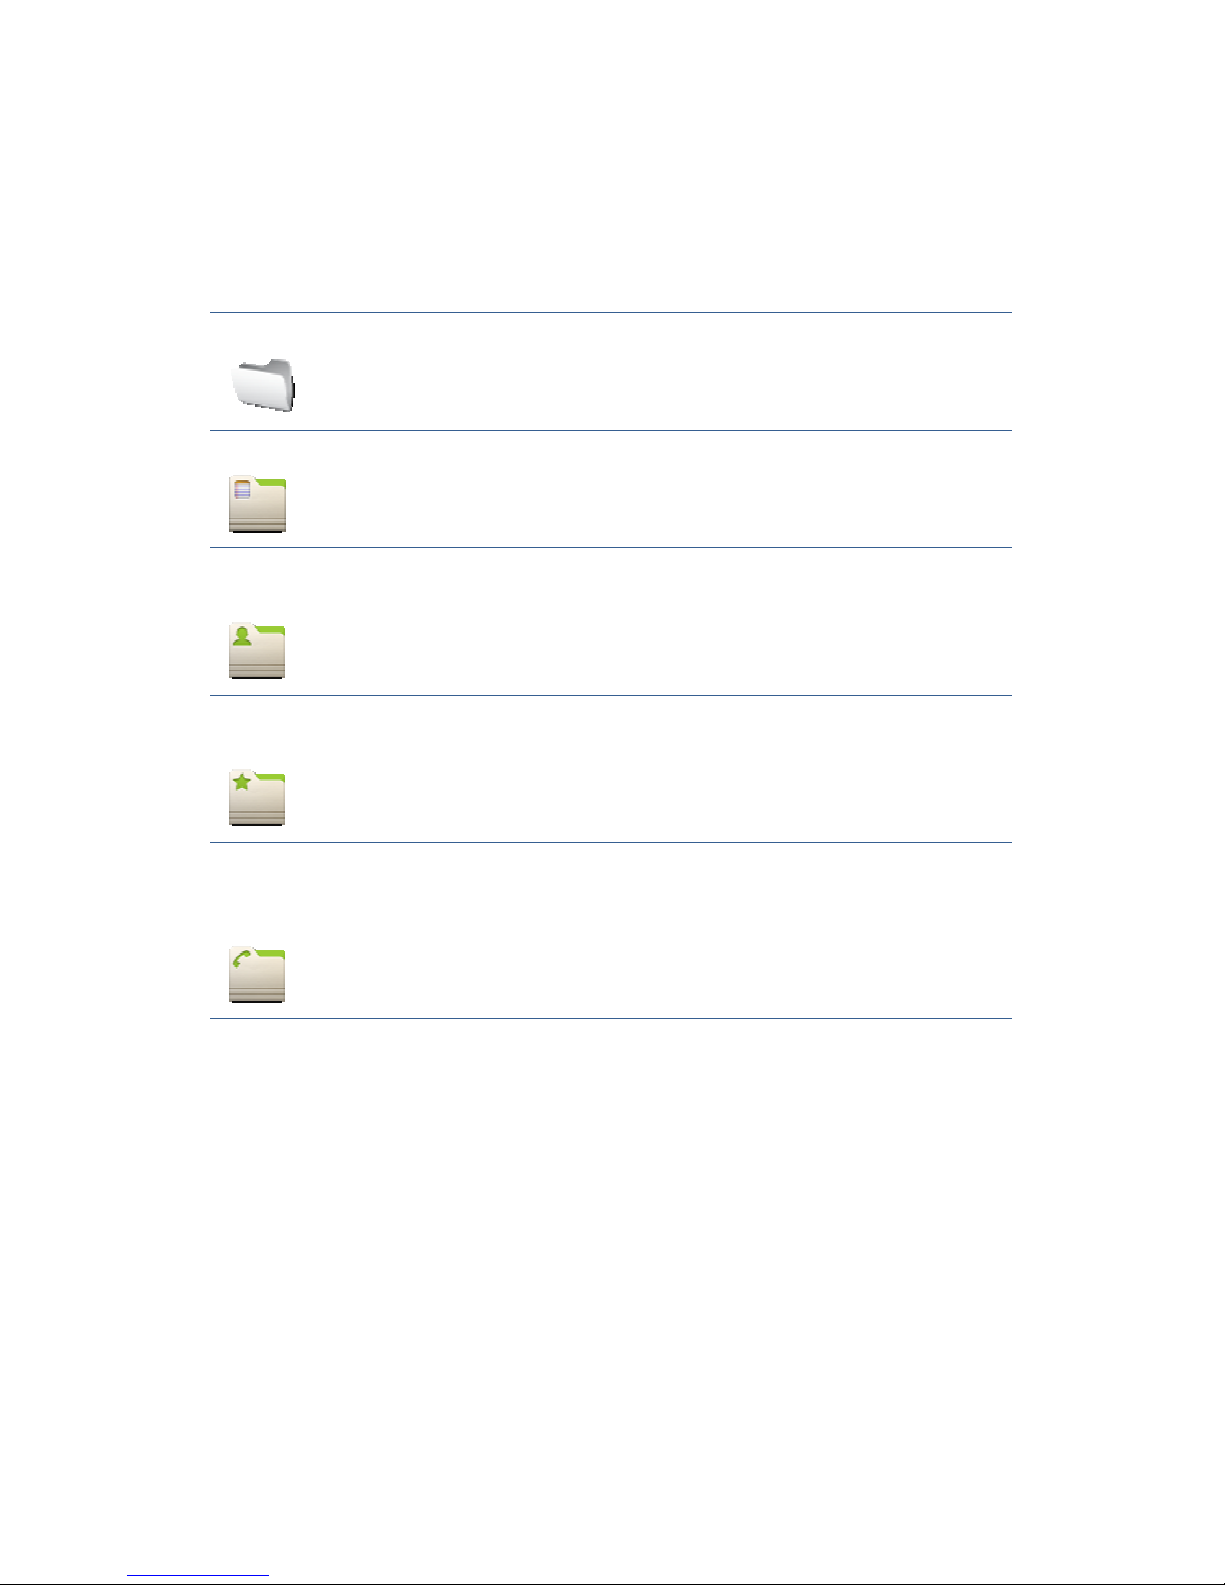
Picture frame:
In the photo album can be put the picture that you like, that
seems to be good.
Desktop display:
Music:
If the telephone music stored inside the music, it can directly
use the desktop widget to play music.
At any time to enjoy the fun of music. You can also choose to
suspend or jump to the next song.
Desktop display:
Calendar:
Enter into the calendar you can view the “year, month, day
and the day of the week”.
Desktop display:
Long press the desktop, pop-up "Add to Home Screen" list, tap ”Folders”
and enter to the “Select folder” list, select the appropriate file to add to the
desktop:
New folder:
You can move the application shortcuts on the desktop to the
new folder.
Notes:
It will show recently added content's title, tap the title to view
the detailed information.
All contacts:
Show all contacts in it.
Starred
contacts:
Show favorites contacts in it, tap a contact to view detailed
information.
Contacts
with phone
numbers:
It will show the contact which has the number and do not show
the contact which has no phone number.
Phone set
System
Tap“Phone set”can directly enter into the default window “System”. It
displays the current system information state.
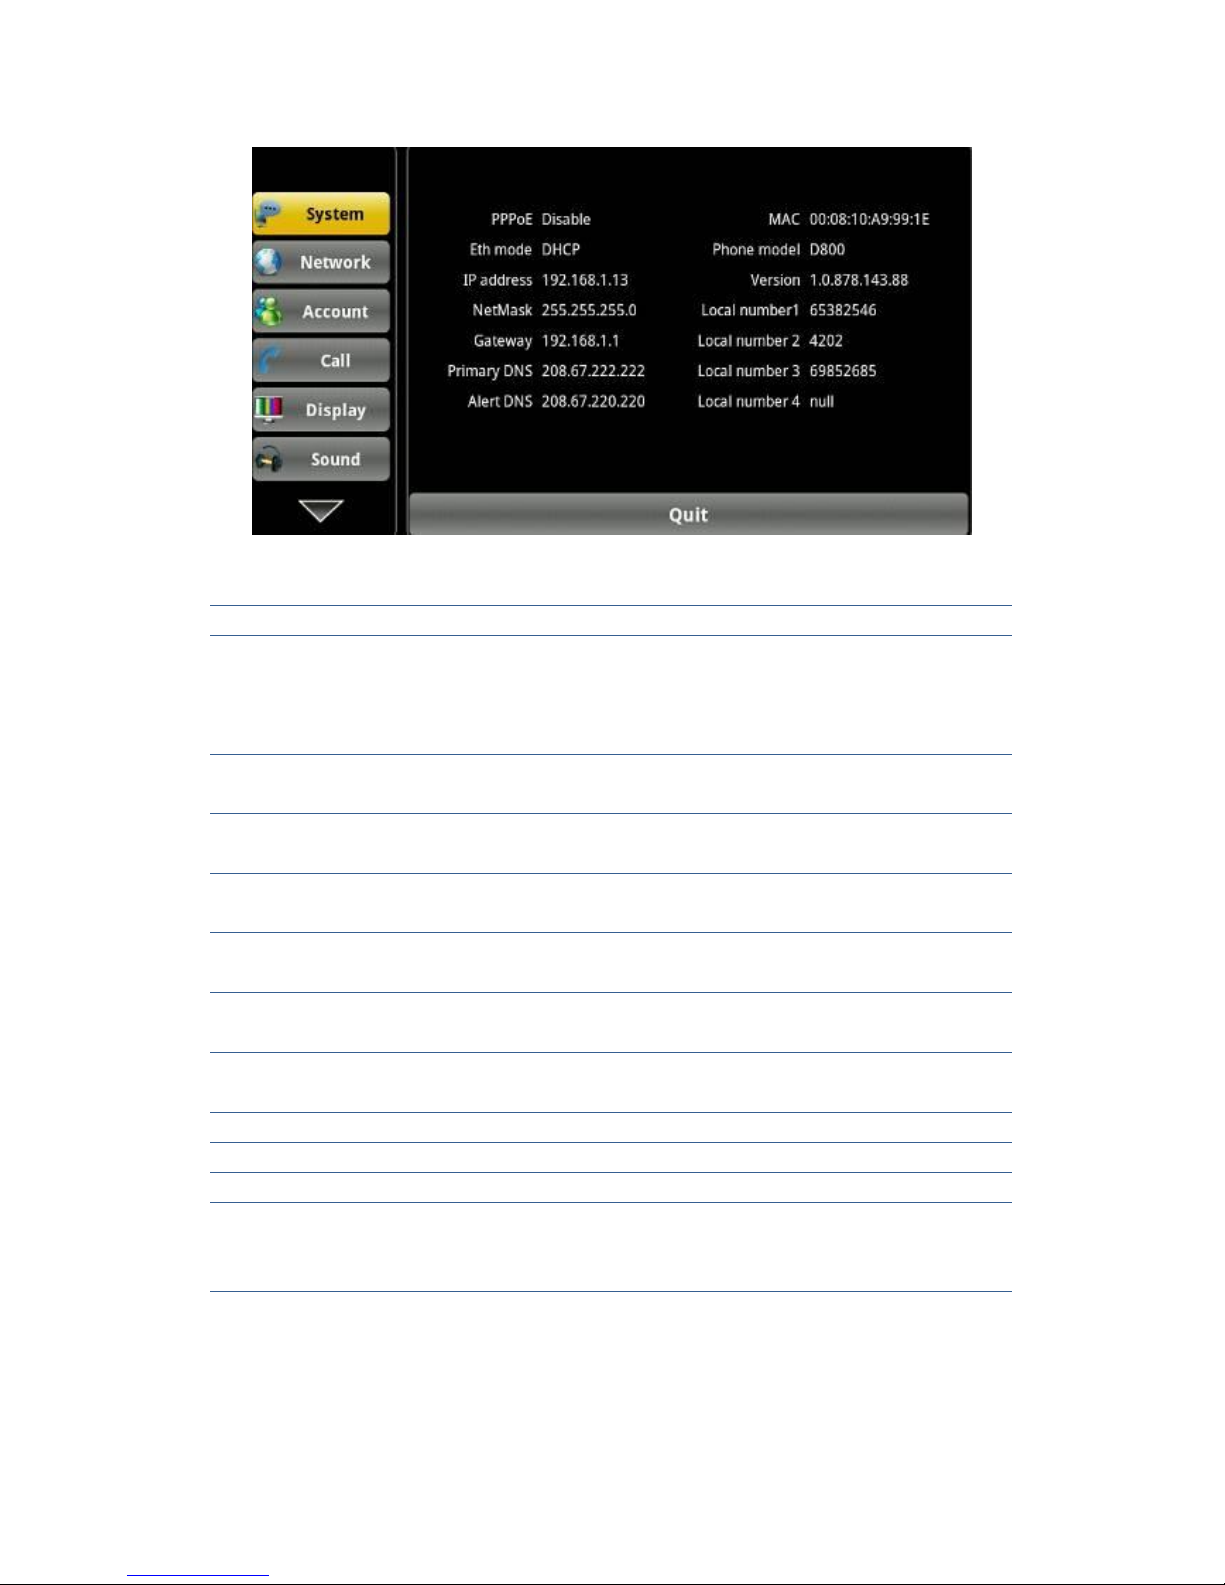
System interface
Configuration item Meaning
PPPoE
Display connection status of the PPPoE, there are
three display state: Disable、connection and the IP
address.
Eth mode
Display the selected network mode, dynamic mode
or static mode.
IP address
Displays the current network model used by the IP
address.
NetMask
Displays the current network model used by the
subnet mask.
Gateway
Displays the current network model used in the
default gateway.
Primary DNS
Displays the current network model used in the
primary server address.
Alert DNS
Displays the current use of the network model of
secondary server addresses.
MAC
Displays the current MAC address to use.
Phone model
Display the current phone models.
Version
Displays the current version number of the phone.
Local number
Display the current configuration of the local
number, in the desktop widget display detailed
information.
Network
Network
Tap “Network”, enter into “Network” interface, default interface is “DHCP”:
At each interface configuration completed click the "save" button to save the
success, and will pop up" saved successfully" tips box.
DHCP interface
Manual interface
Configuration Meaning
DHCP
You can select whether to use DHCP assigned DNS
server to connect network.
Manual
IP: Input your assigned IP address.
NetMask: Input your assigned subnet mask.
Gateway: Input your assigned gateway.
Primary DNS: Input your assigned DNS address.
Backup DNS: Input your assigned backup DNS
address.
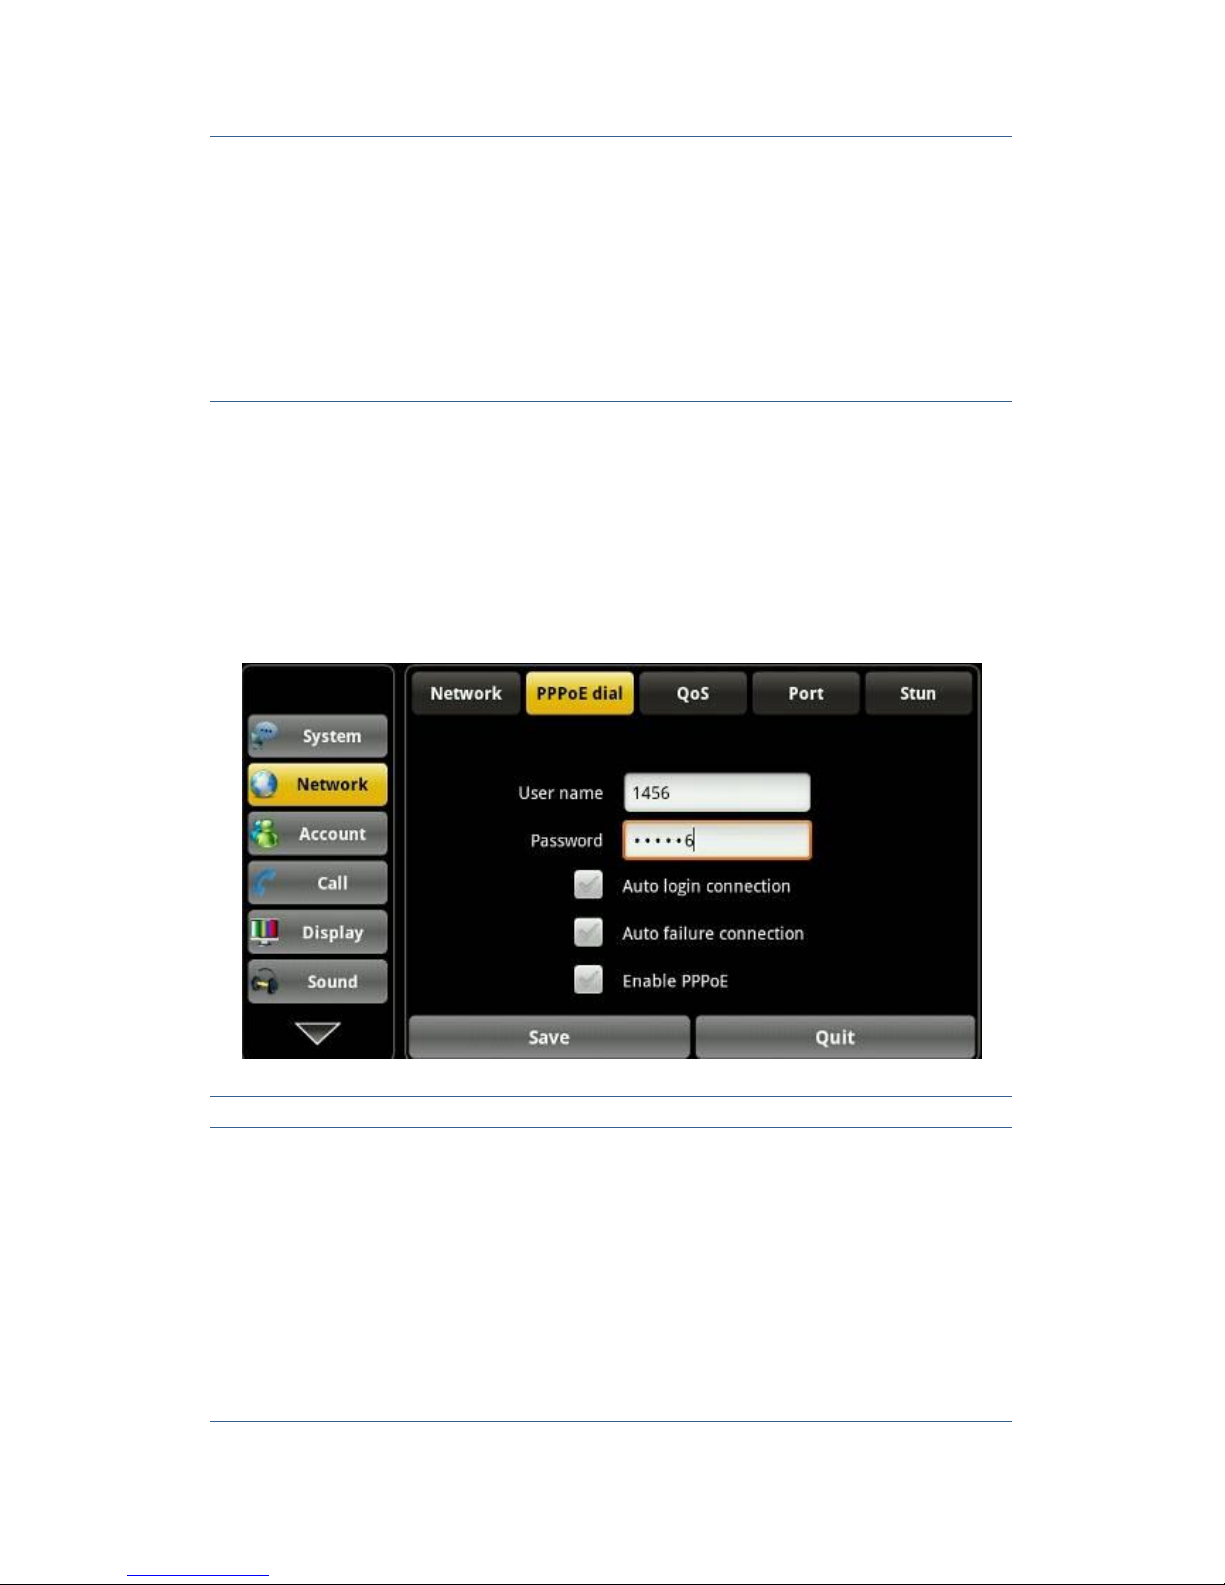
PPPoE dial
Tap “Network”, enter into “PPPoE” interface, after configuration completed
click the "save" button to save the success, and will pop up" saved
successfully" tips box.
PPPoE interface
Configuration Meaning
PPPoE dial
username: Input your assigned PPPoE account
name .
password: Input your assigned PPPoE password .
Connect when Boot complete: Whether PPPoE
connection is turned on automatically when boot.
Connect when Boot complete: Whether PPPoE
connection is on automatically when failed.
Enabled PPPoE: whether to enable PPPoE.
After the configuration parameters, if you click
“Connect” button, if can connect to the network
using PPPoE mode at once;if you click “ok” button,
it will only save the configuration parameters; if you
click “cancel” button, the parameters you have been
set will not be saved.
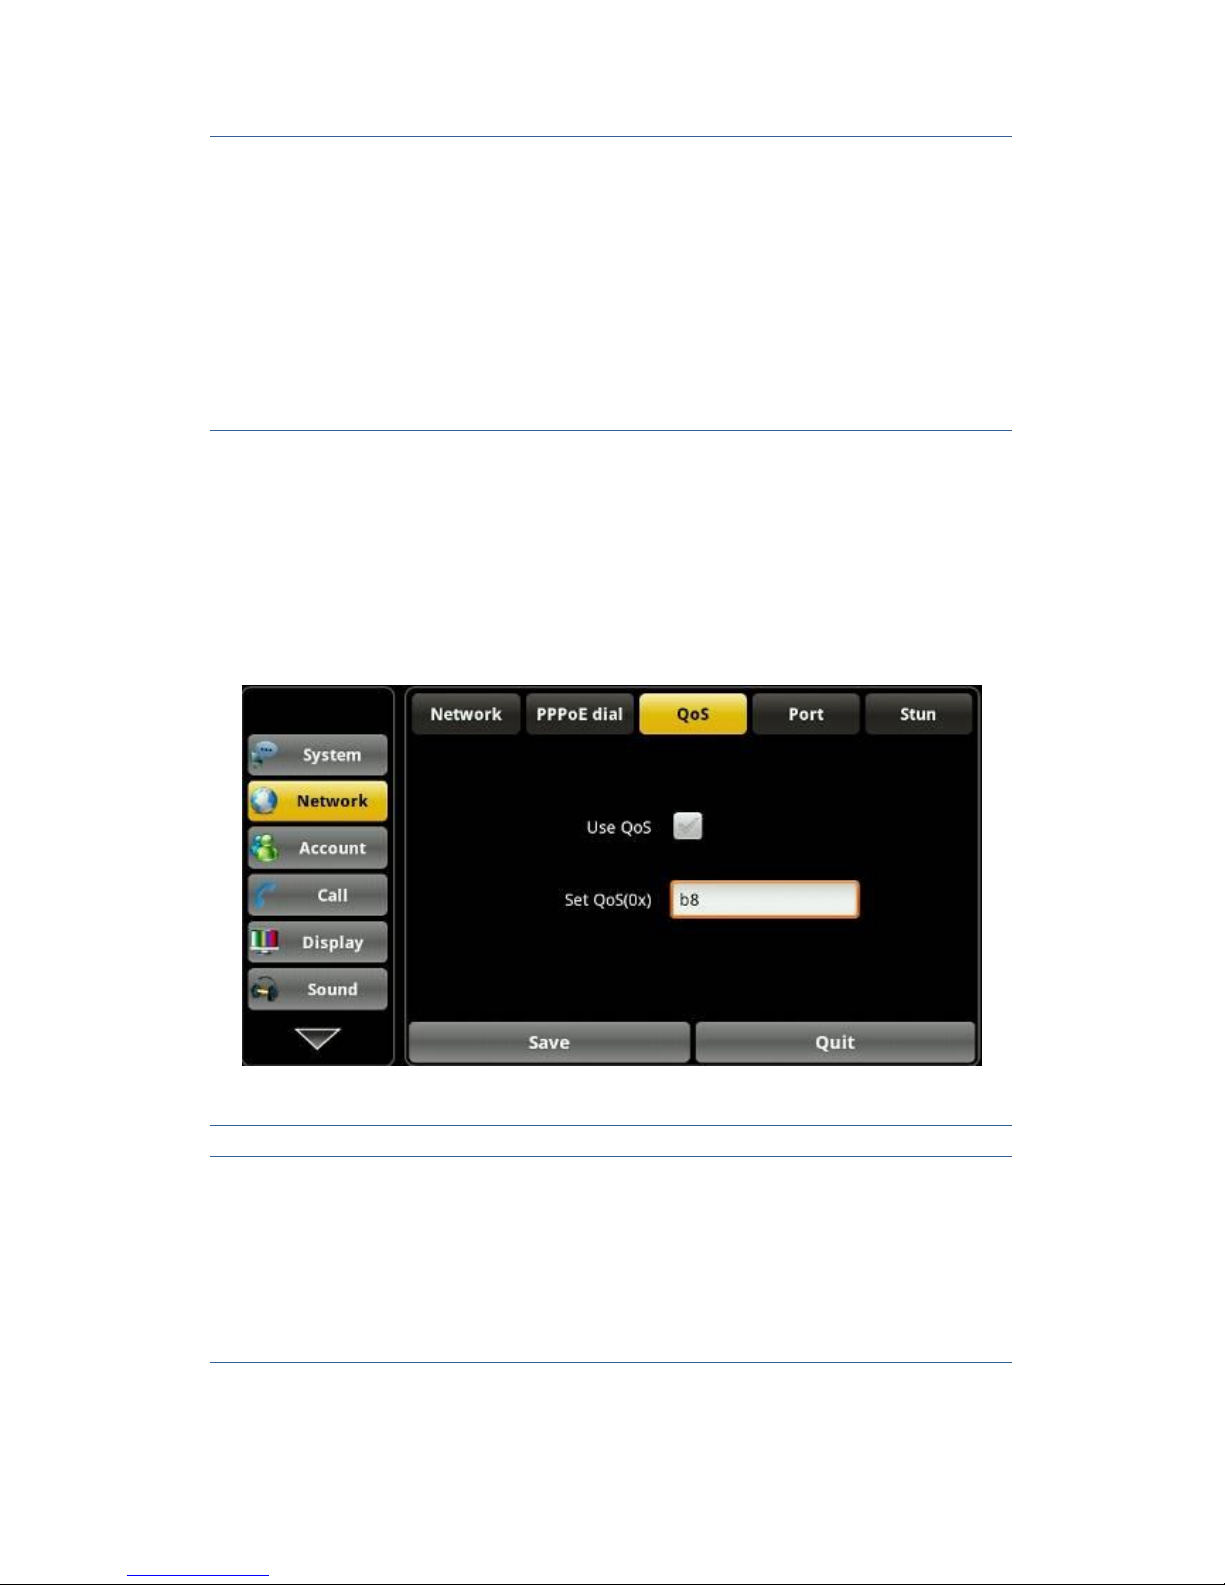
QoS
Touch “Network”--> “QoS”, Select or modify the default settings and click
interface, complete the bottom of the "Save" successful configuration
information.
QoS Settings
Configuration item Meaning
QoS
DiffServ enable: Set whether to enable Differentiated
Services.
DiffServ value: Set Differentiated Services
configuration parameter values, if you set normal
level, the value are 0x00.

Port
Touch “Network” --> “Port”, Select or modify the default settings and click
interface, complete the bottom of the "Save" successful configuration
information.
Port Settings
Configuration item Meaning
Port Media initial port(10000-60000):
Set the phone to open media initial port, this port
assignment is dynamic allocation.
(Size 10000--60000)
Media port quantial:
Set the maximum number of allocated RTP port,
default value is 200.
Stun
Tap “Network” ——> “Stun” to configure info, after configuration click
“Save” button to save successfully.
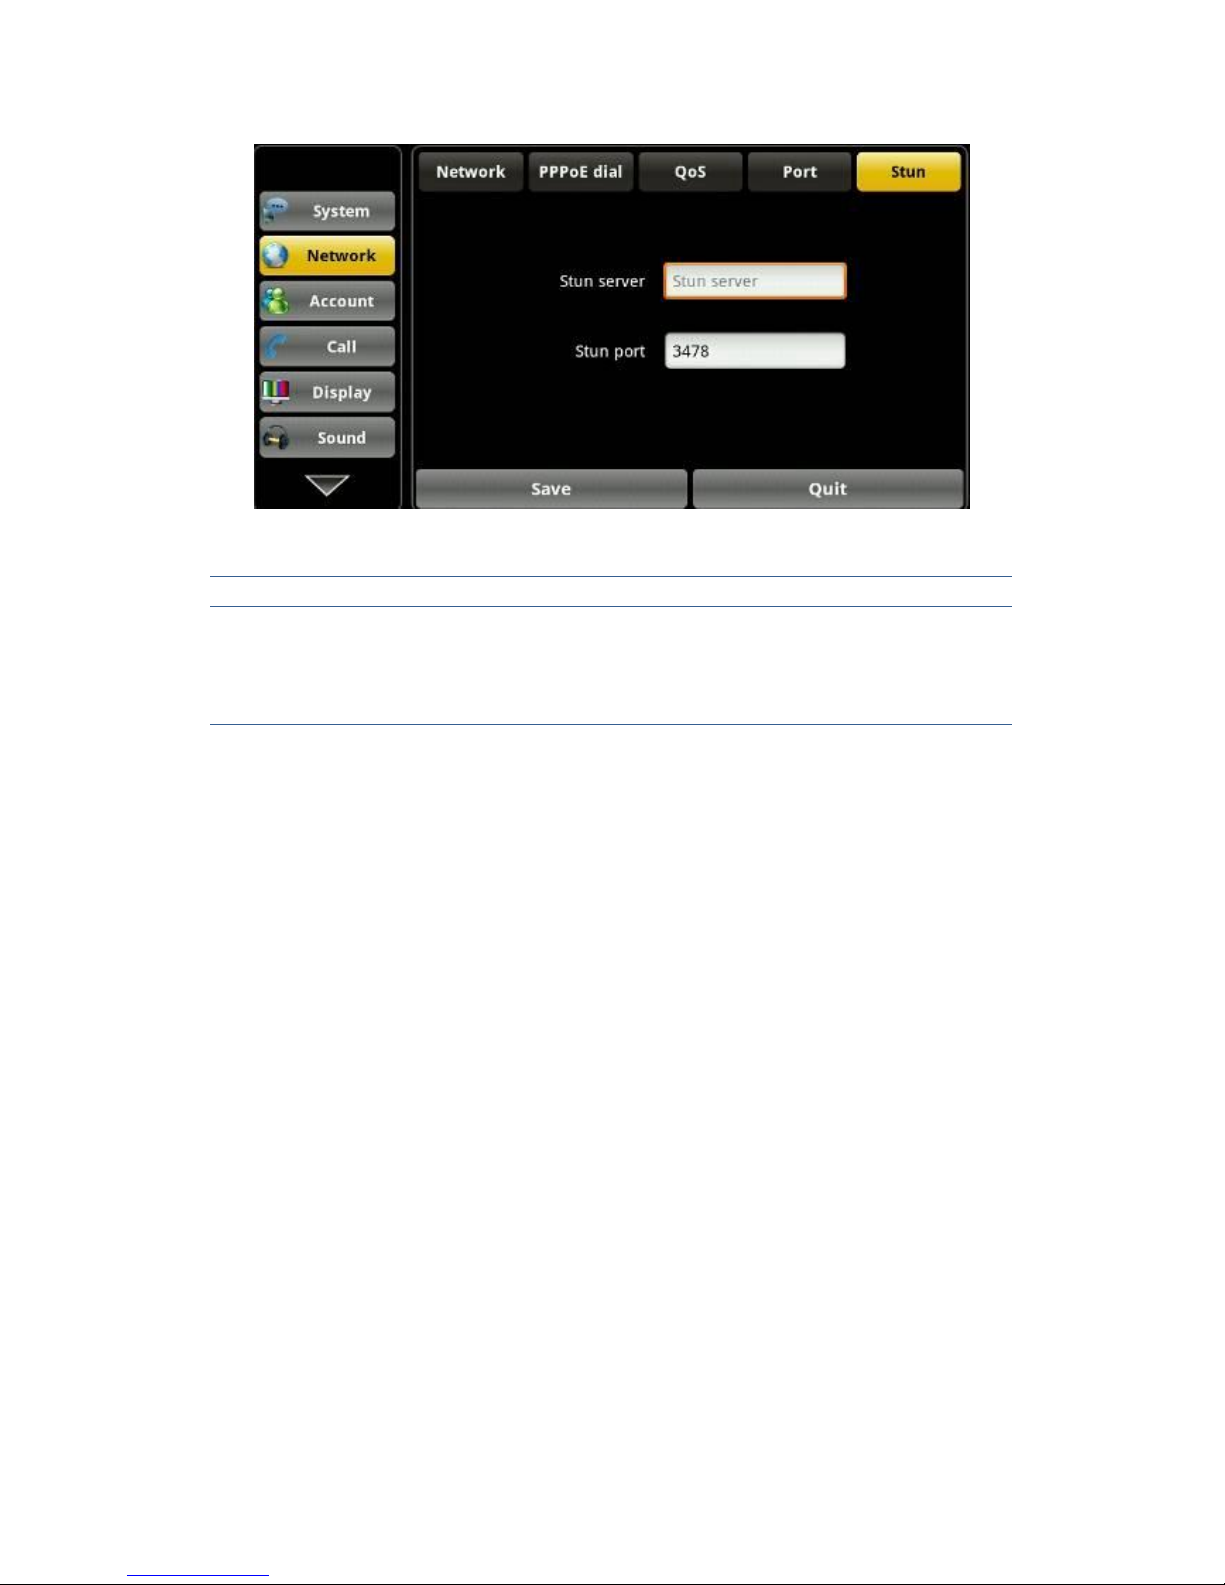
Stun interface
Configuration item Meaning
Stun
Stun server: input Stun server address.
Stun port: input Stun port.
Account
On the “Account” settings screen, you will see“Account1”screen, and on the
right there is a "Advanced Settings" button, the first page of the configuration
is done you can click on the "Advanced Settings" jump to the second page,
then click Next Jump three, and so on, a total of five, and each page has a
"Basic settings" button, you can always return to the first page. After the entire
configuration interface at the bottom click the "Save" to save configuration
information. You can also save individual pages.
(Note: 1,2,3,4 configurations is the same account, will not repeat it here.)
 Loading...