

Page 1
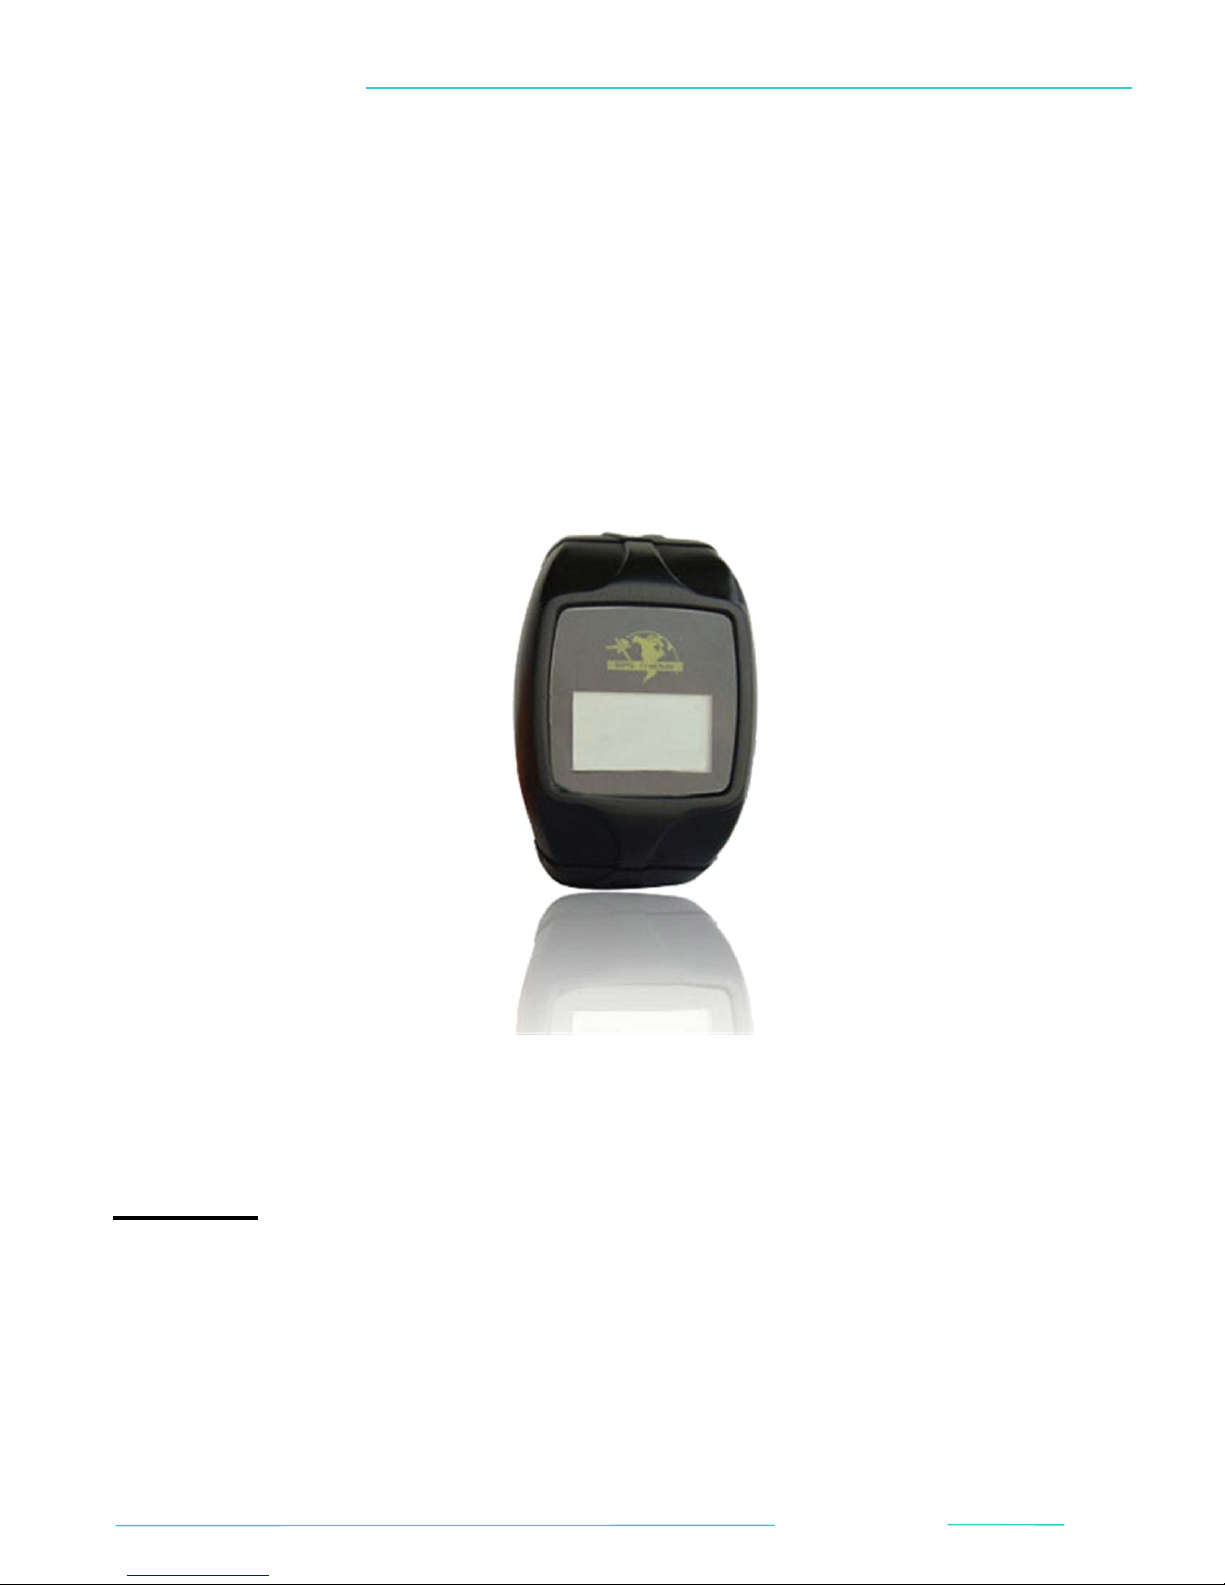
GPS / GSM / GPRS TRACKER
GPS/
GSM/GPRS
USER MANUAL
TRACKER
Preface
Thank you for purchasing the G P S Tracker. This manual shows how to operate the device
smoothly and correctly. Make sure to read this manual carefully before using
this product.Please note that specification and information are subject
to changes without prior notice in this manual.Any change will be integrated in the latest
release. The manufacturer assumes no responsibility for any errors or omissions in this
document
(BACK TO TOP)
1
Page 2

GPS / GSM / GPRS TRACKER
1. SUMMARY
2. APPLICATION
3. HARDWARE
4. SPECIFICATION
5. USAGE
5.1. STARTUP
5.2. INITIALIZATION
5.3. PASSWORD
5.4. AUTHORIZATION
5.5. REAL-TIME POLLING
5.6. AUTO TRACK
5.7. VOICE SURVEILLANCE
5.8. SOS
CONTENT
(CLICK THE TITL E AND JUMP TO THE CO NTE N T )
5.9. GEO-FENCE
5.10. MOVEMENT ALARM
5.11. OVERSPEED ALARM
5.12. LOW BATTERY
5.13. HOME
5.14. SMS CENTER
5.15. IMEI
5.16. BELT-OPEN ALARM
5.16. GPRS SETTING
6. HOME MONITORING
7. CAUTIONS
8. FAULTS & SOLUTIONS
(BACK TO TOP)
2
Page 3
GPS / GSM / GPRS TRACKER
1. SUMMARY
Working Based on existing GSM/GPRS network and GPS satellites, this product can
locate and monitor any remote targets by SMS or GPRS.
2. APPLICATION
Vehicle rental / Fleet management etc.
Protecting child / the old/ the disabled / pet etc.
Provide peace-of-mind for businessmen.
Tracking criminals secretly.
3. HARDWARE
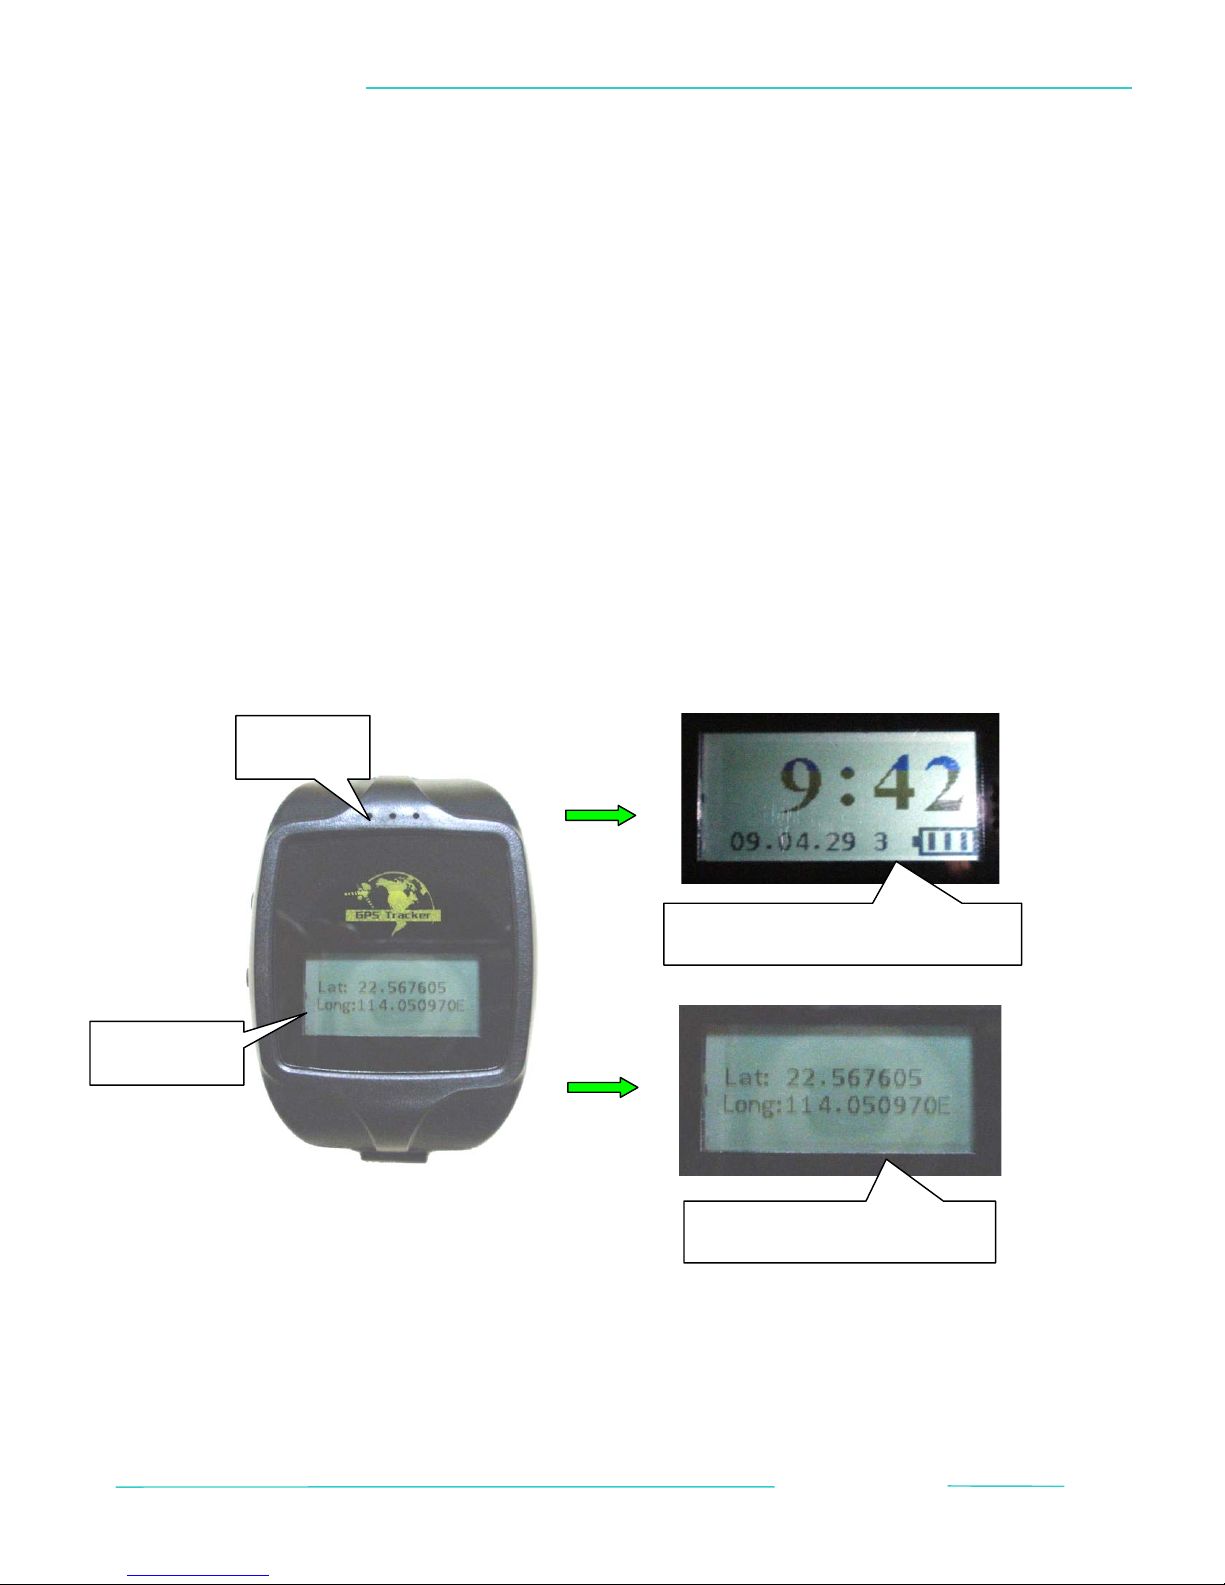
3.1 Front face
DISPLAY -->
SPEAKER
Time, Date, Day and Battery
Latitude and Longitude
(BACK TO TOP)
3
Page 4
GPS / GSM / GPRS TRACKER
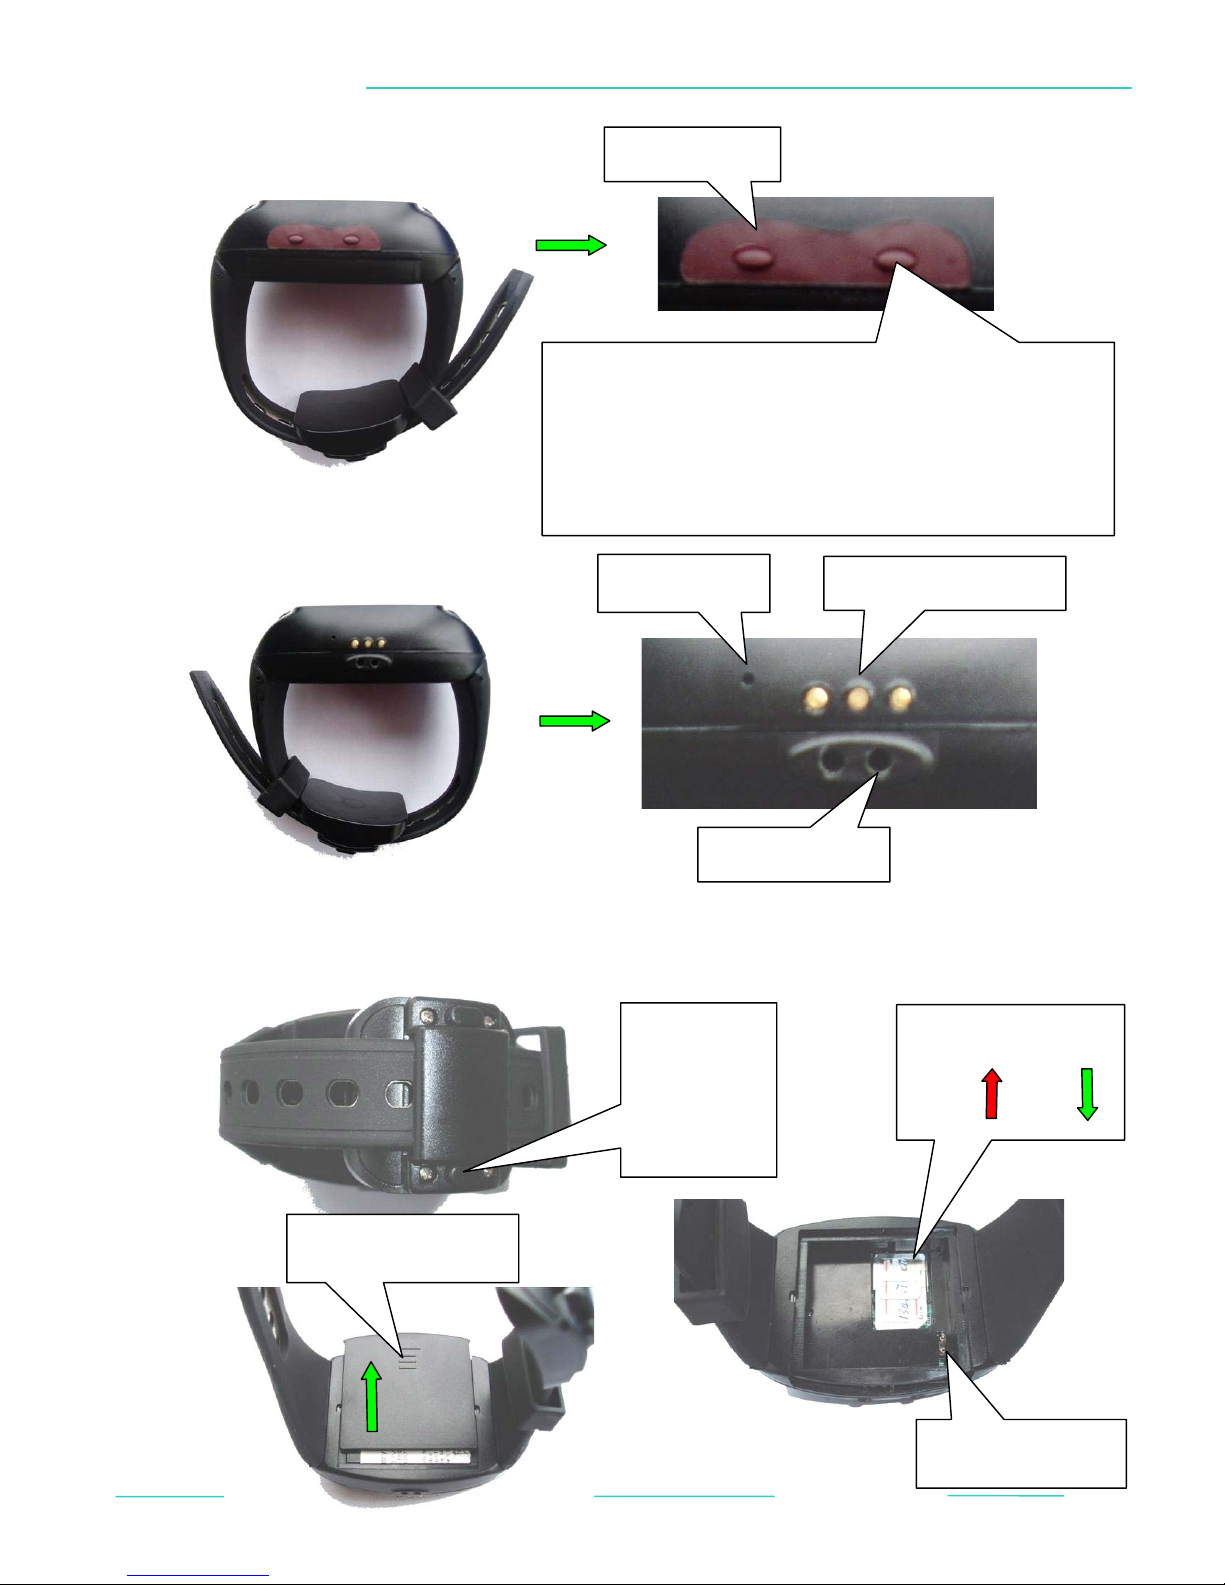
3.2
Side
3.3Rear
Open the back cover
SOS BUTTON
ON/OFF BUTTON
Keep pressing for 3 seconds is for ON/OFF.
Keep pressing for 1 second is for switching the display
(time or coordinates), coordinates' display will
automatically turn to the time display 30 seconds later.
Microphone
Press these
two
buttons to
take off
the belt.
Charging connector
Fixer of charger
SIM card holder
CLOSE OPEN
Battery connector
(BACK TO TOP)
4
Page 5

GPS / GSM / GPRS TRACKER
g
p
y
y
(
)
;
(
)
=>
)
(
)
=>
)
y
y
Op
y
g
4. SPECIFICATION
CONTENT
Dimension
Weight
Network
Band
Protocol
GPS chi
GSM module
Solution
GPS sensitivit
GPS accurac
Time to
first fix
Wall charger
Car charger
73mm*54mm*23mm
SPE
120
GSM /
850/1800/1900 or 900/1800/1900 or 850/900/1800/1900
TCP or
SIRF III
Simcom SIM300/SIM340
ARM7
Cold status = 45s
5m
Input
20m after satellite drift
110~220V
Input
-159
Warm status = 35s;
Output
9~24V
Output
(5V
Hot status = 1s
(5V
Batter
Battery
Storage temp.
Humidit
5. USAGE
5.1 STRARUP
indicator is on.
life
eration temp.
Chargeable changeable 3.7V 850mAh Li-ion batter
80
-40 °C ~ +85
-20 °C ~ +55
5% ~ 95% non-condensin
Put the SIM card and battery in place.
Turn on the tracker outdoors by pressing the "ON/OFF" button until the
(The tracker can also startup automatically when the battery / external power is
connected.It's decided by the firmware of the tracker)
For
the
first use, please initialize the unit to make it as default setting.
In 10 or 40 seconds, the tracker will begin to work and acquire the GSM signal,
as well as the GPS signal. The indicator will keep flashing once every 4 seconds
when the tracker gets valid signals.
(BACK TO TOP)
5
Page 6

GPS / GSM / GPRS TRACKER
After that, you can do all the settings as below.
5.2 INITIALIZATION
Send SMS command "
begin+password" to
initialize all the settings, for example
"begin123456". You will receive a reply as "begin ok!" if the setting is successful.
(
123456 is the default password).
5.3 PASSWORD
Send SMS command "
change the password, for example "password123456 790307".
Notice:
Be sure to keep the new password in mind, you have to upload the software to
restore the original setting in case of losing the new password.
Make sure the new password is in 6 digits, or else the the setting can't be
successful.
5.4 AUTHORIZATION
password+old password+space+new password" to
You can authorize total 5 numbers as authorized number. These numbers own the
rights to receive geo-info and alarm messages. Please do followings regarding the
authorization.
Call the tracker or send SMS to the tracker, if you can get 10 replies from the
tracker, your number will be regarded as authorized number automatically.
Send SMS command "
authorized
number, for example "admin123456 13751187524". You will receive a
reply as "admin ok!" if the setting is successful.
To delete an authorized number, send SMS command
admin+password+space+cell phone number" to
"noadmin+password+space+ cell phone number", for example "noadmin123456
13751187524".
For roaming purpose, you have to add your country code ahead of the phone
set up an
number.(Before setting the authorized number, all the numbers can get reply from
the tracker by calling or SMS command; after setting, only the authorized numbers
own the rights.If an un-authorized number call the unit, there will be no response
from the tracker.If an un-authorized number know the password, then it can set the
tracker. Since it can't set the authorized number, but it can send "begin123456" to
initialize the tracker, then all authorized number will be removed. So take care of
your password.)
BACK TO TOP)
6
Page 7
GPS / GSM / GPRS TRACKER
5.5 REAL-TIME POLLING
When an authorized number call the tracker (suppose there're authorized
numbers), the tracker will hang up the call and reply a message with real-time
geo-info.
5.6 AUTO TRACKER
Do following settings, then tracker will send geo-info to you for certain times with
certain interval. For example "t030s005n123456" means sending total 5 messages
with the interval 30 seconds.(s:
value of the 3 digits is 255
second, m: minute, h: hour, and the maximum
) For heaps of geo-info messages, use command as
t030s***n123456".
5.7 VOICE SURVEILLANCE (two-way communication)
Send SMS command "
monitor+password" to
switch to the voice surveillance
mode, for example "monitor123456". You will receive reply as "monitor ok!" if the
setting is successful. Under this mode, when you call the tracker, the tracker will
pick up the call, then you can communicate with the tracker.
Send SMS command "
You will receive reply as "tracker ok!" if the setting is successful.
5.8 SOS
Press the SOS button for 3 seconds, it will send "help me! + Geo-info" to all the
authorized numbers. The alarm system can be chosen:
Keep sending the alarm once every 3 minutes until get reply from the
authorized.
Send only once.
5.9 GEO-FENCE
Send SMS command "
define a restricted area. When the tracker moves out of the area, there will be
the alarm as
"stockade! + Geo-info".
tracker+password" to
switch back to default mode.
stockade+password+space+long1,l a t1;l ong2,lat2" to
The command is as , "stockade123456 113.000000e,22.700000n;113.200000e,22.500000n
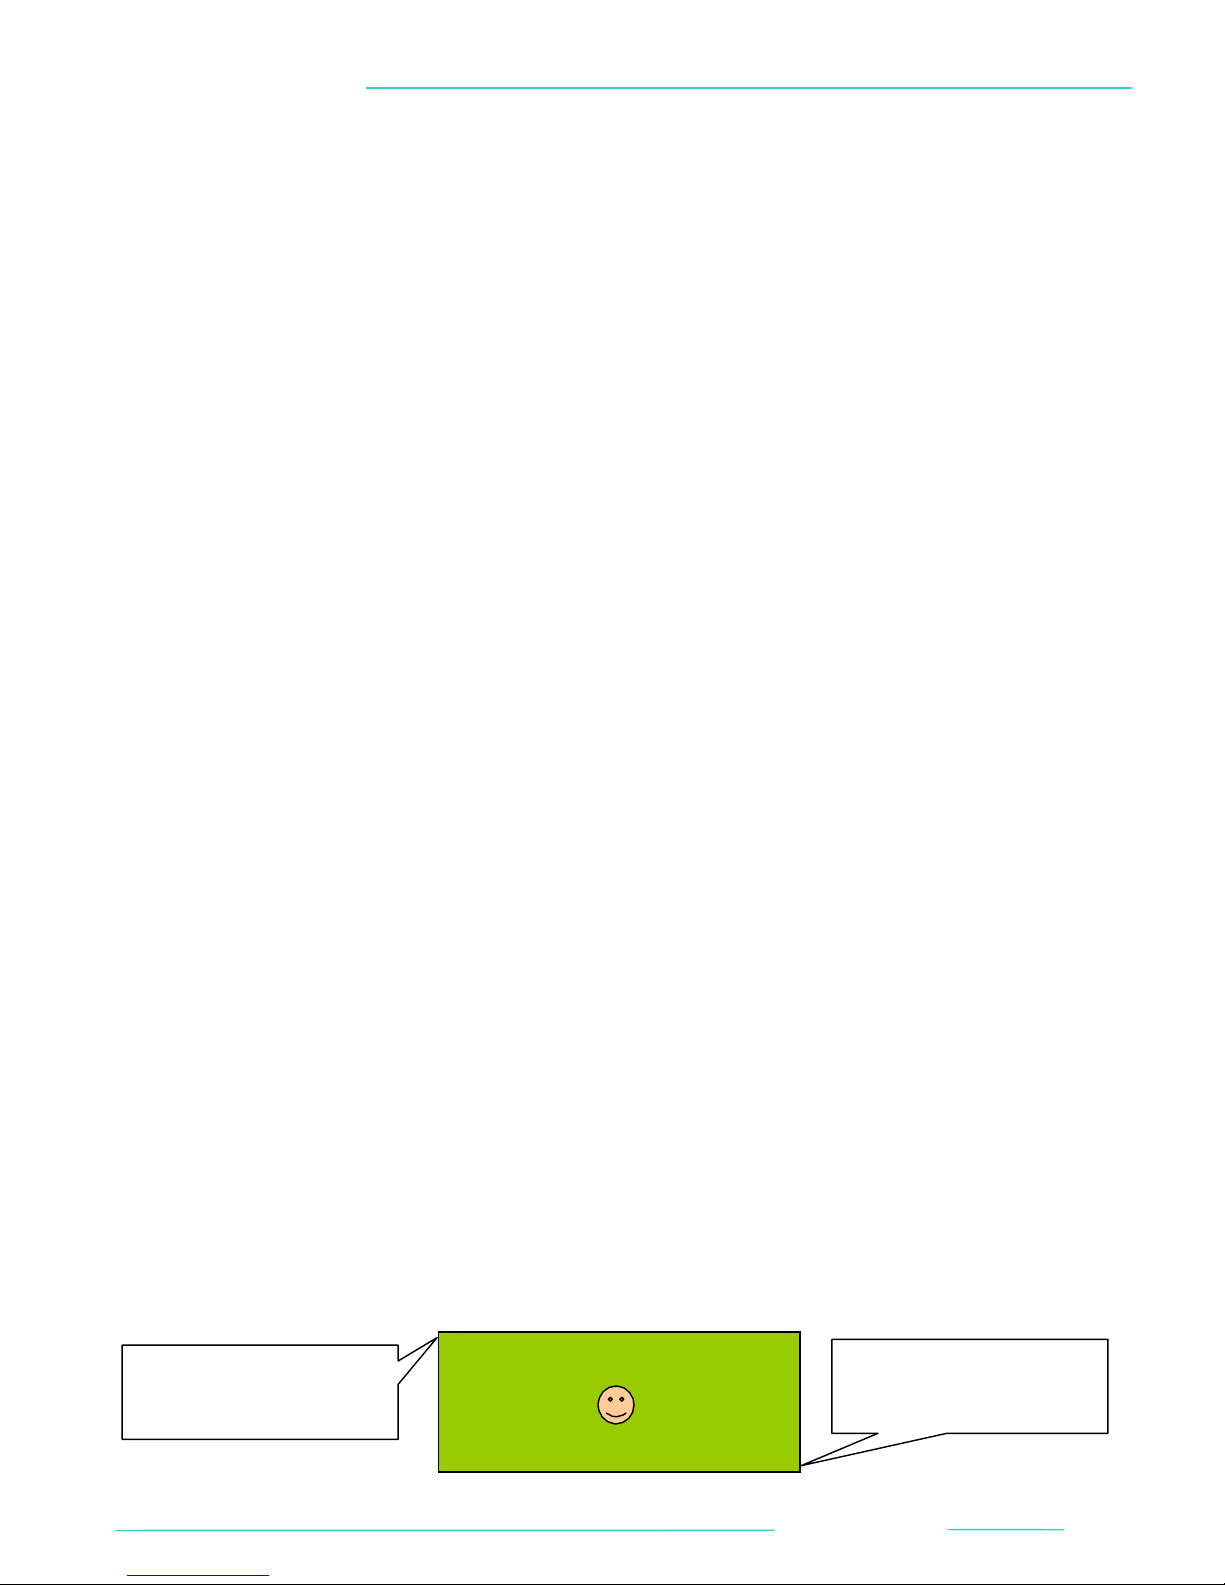
Point one with the
coordinates: long1,
lat1
Point two with the
coordinates: long2, lat2
(BACK TO TOP)
".
7
Page 8

GPS / GSM / GPRS TRACKER
Send SMS command "nostockade+password" to cancel the geo-fence.
5.10 MOVEMENT ALARM
Send SMS command "
center
of the circle is the position of the tracker when it received the command), for example
"move123456". You will receive reply as "move ok!" if the setting is successful.
move+password" to
define a circle (the radius is 500 meters, and the
When the tracker moves out of the area, there will be the alarm as "move! + Geoinfo".
Send SMS command "nomove+password" to cancel the movement alarm.
5.11 OVERSPEED ALARM
Send SMS command "
speed+password+space+speed" to
define a speed limit, for example
"speed123456 080" (suppose the speed limit is 80km/h). You will receive reply as "speed
ok!" if
the setting is successful. When the tracker moves exceeding 80km/h, there will
be the alarm as "speed+080! + Geo-info". It will alarm once for each setting.
Send SMS command "nospeed+password" to cancel the movement alarm.
(Notice: It's recommended that the speed limit is set at no less than 50km/h, because the
GPS signal may be influenced by clouds etc. So as default we use some kind of speed filter, if
the speed is less than 30km/h, we regard it as zero.)
5.12 LOW BATTERY
When the voltage of battery is low than 3.7V, there will be the low battery alarm, the SMS
format is
"low battery + Geo-info", and the message sending interval is 30 minutes.
5.13 HOME
Send SMS command "
from the tracker, for example "home123456 gps" then the "gps" will display in all geo-info
home+password+space+content" to
insert a content in the message
from tracker.Usually, we use this function for some advertisement purpose. You can set the
content as the name of your company. You can also set the content as the user's name, for
example if you set "home123456 Becky Li" then you will see from the message that the
tracker's user is Becky Li. Send SMS command "home+password+space+space" to make the
content empty.
(BACK TO TOP)
8
Page 9

GPS / GSM / GPRS TRACKER
5.14 IMEI
Send SMS command "imei+password" to check the IMEI number of the tracker. The IMEI
number is
the identify number of the GSM module, and it's also the identify number of the tracker.
5.15 SMS CENTER
Send SMS command "
center, for example "adminsms123456 13751187524". Once this center is set, if the
authorized numbers ask
for the Geo-info, all the Geo-info will be sent to the SMS center.
The format of the message will be "authorized number + Geo-info".
(This function is mostly used for SMS control center.)
Send SMS command "noadminsms+password" to cancel the SMS center.
5.16 BELT-OPEN ALARM
Send SMS command "
adminsms+password+space+cell phone number" to
openwatch+password" to
set the belt-open alarm. You will receive
set the SMS
reply as "openwatch ok!" if the setting is successful.Then if you open the belt or the belt is
broken, 3 minutes later there will be an alarm sent to authorized number.
Send SMS command "noopenwatch+password" to disable the belt-open alarm function.
5.17 GPRS SETTING
Because of high speed and low cost, GPRS is mostly used for managing lots of GPS trackers.
In order to use the GPRS function, first you need to own a tracking server (control center),
which is used for receive GPRS data and show the data on certain map. Then we need to do
following settings.
Set APN
APN means access point name, it's decided by the SIM provider, you can check this with the
telephone company. If you want to use thei r network for GPRS communication, you must
set this.Send SMS command "apn+password+space+apn content", for example "apn123456
internet". You will receive reply as "apn ok!" if the setting is successful.In
some cases,
there's also APN user and APN password. If so, you need to set them also.
Send
SMS command "
Send SMS command "
apnuser+password+space+content" to
set the APN username.
apnpasswd+password+space+content" to
set the APN password.
(BACK TO TOP)
9
Page 10
GPS / GSM / GPRS TRACKER
Set IP and Port
The IP is the address of your network, and the Port is related to certain computer. After you
set this,all data from the tracker will be sent to this address. That means there will be now
SMS geo-info any more. You can say, IP has more priority then authorized number.
Send SMS command "
the IP and Port, for example "adminip 211.154.139.227 9001".
adminip+passwo rd+space+ip content+space+port content" to
set
(For ARM7 solution, tracker can also accept GPRS commands, the format of the commands
via GPRS are the same as SMS commands mentioned above.)
6. HOME MONITORING
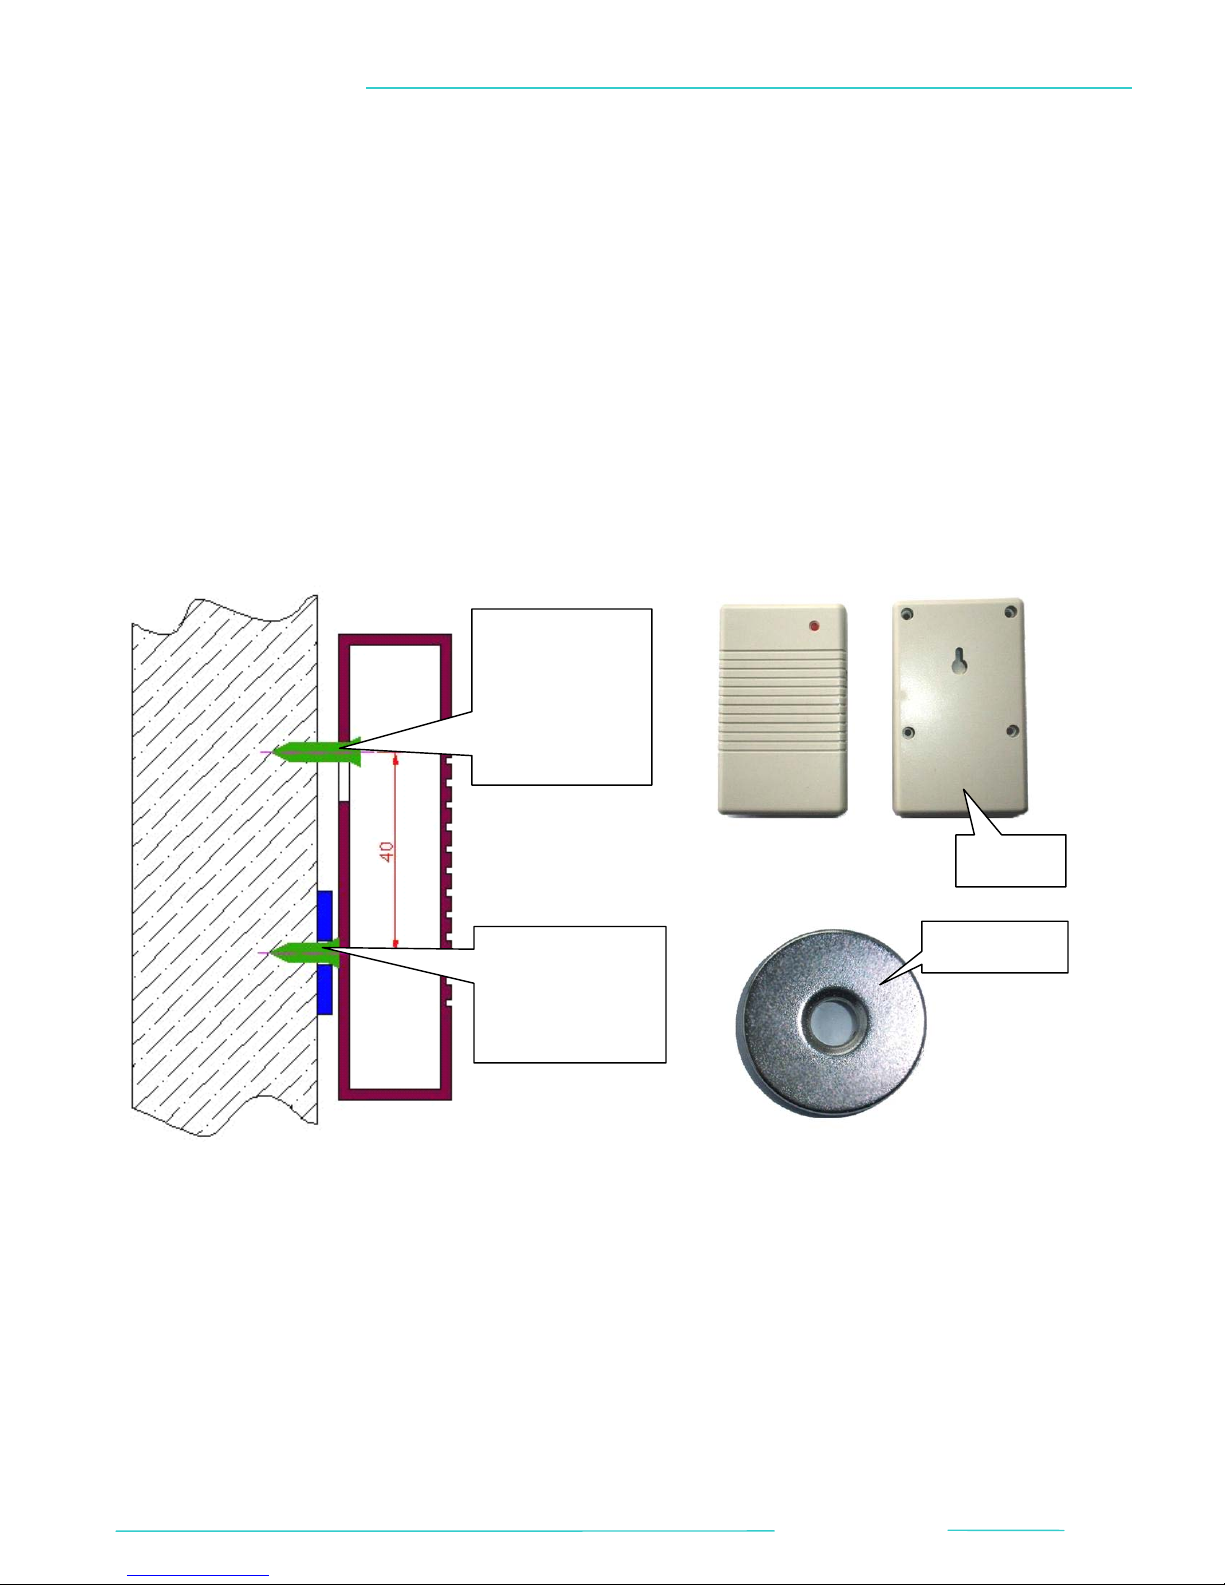
6.1 ASSEMBLE THE HOST
Fix a screw
in
the wall and
hang the
host on it.
Fix the
HOST
MEGNET
6.2 SET THE HOME MONITORING
First insert the battery to the host and connect the host to the power supply. The
indicator of the host will light which means working normally.
Send SMS command "
openhome+pa ssword" to
reply as "openhome ok!" if the setting is successful.
Then if you call the tracker, it will give you indication as power off. When the tracker leave
away the host for 20~30 meters, the tracker's display will flash blue light, meantime the
tracker will
magnet to the
wall with a
screw.
enable the home minitoring. You will receive
(BACK TO TOP)
10
Page 11

GPS / GSM / GPRS TRACKER
M
r
is
,
or
f
sig
automatically run its GSM module and send alarm to the authorized number. (The distance is
based on various kinds of conditions.)
Send SMS command "noopenhome+password" to disable the home mornitoring. You will
r
eceive reply as "noopenhome ok!" if the setting is successful. (The initialization command
"begin" can also cancel this function.)
6.3 ALARM FOR TAKE HOST AWAY
When the home monitoring function is ON, if you take the host away from the fixed magnet,
there will be an alarm sent to authorized number 3 minutes later.
7. CAUTIONS
Keep the nit dry. Any liquid, such as rain, moisture may destroy or damage in inside
circuit.
Don't use & store the unit in dusty places.
Don't put the unit in overheated or overcooled places.
Handle carefully, don't vibrate or shake it violently.
Clear the unit with dry cloth, don't clean in chemicals, detergent.
Don't disassemble or refit the unit.
Please use the battery and charger provided by manufacturer, using other batteries or
chargers may cause unwanted situation.
Don't dismount the antenna randomly, or use other antenna. This may
interfere the transmission and increase the radiation as well.
8. FAULTS & SOLUTIONS
FAULT SOLUTION
Startup fail
Check the battery and see if it's fully charged or correctly
installed. Check if the SIM card is correctly installed.
Hangup fail
onitor fail
Location report in
zeros
Check if
Check if
the number is authorized number.
the authorized numbe
Don't use the tracker in place without GPS coverage, especially
when start it up.
set
in the coverage o
(BACK TO TOP)
nal.
11
 Loading...