

Falcon WiNG-AIR Series, WiNG-AIR3, WiNG-AIR4, WiNG-AIR10 Quick Start Manual
WiNG-AIR Quick Start Guide
Thank you for purchasing a WiNG‑AIR wireless sensor. Before you install
your device, consult rletech.com to ensure you’re working with the most
recent version of documentation available. If you need further assistance,
please contact RLE Technologies at support@rletech.com.
v10.19
© Raymond & Lae Engineering, Inc. 2011. All rights reserved. RLE® is a registered trademark and Seahawk™, Falcon™, and Raptor™ are trademarks
of Raymond & Lae Engineering, Inc. The products sold by RLE Technologies, 104 Racquette Dr., Fort Collins, CO 80524 are subject to the limited
warranty, limited liability, and other terms and conditions of sale set forth at https://www.rletech.com.
Supplies for Installation
Included with the WiNG Sensor
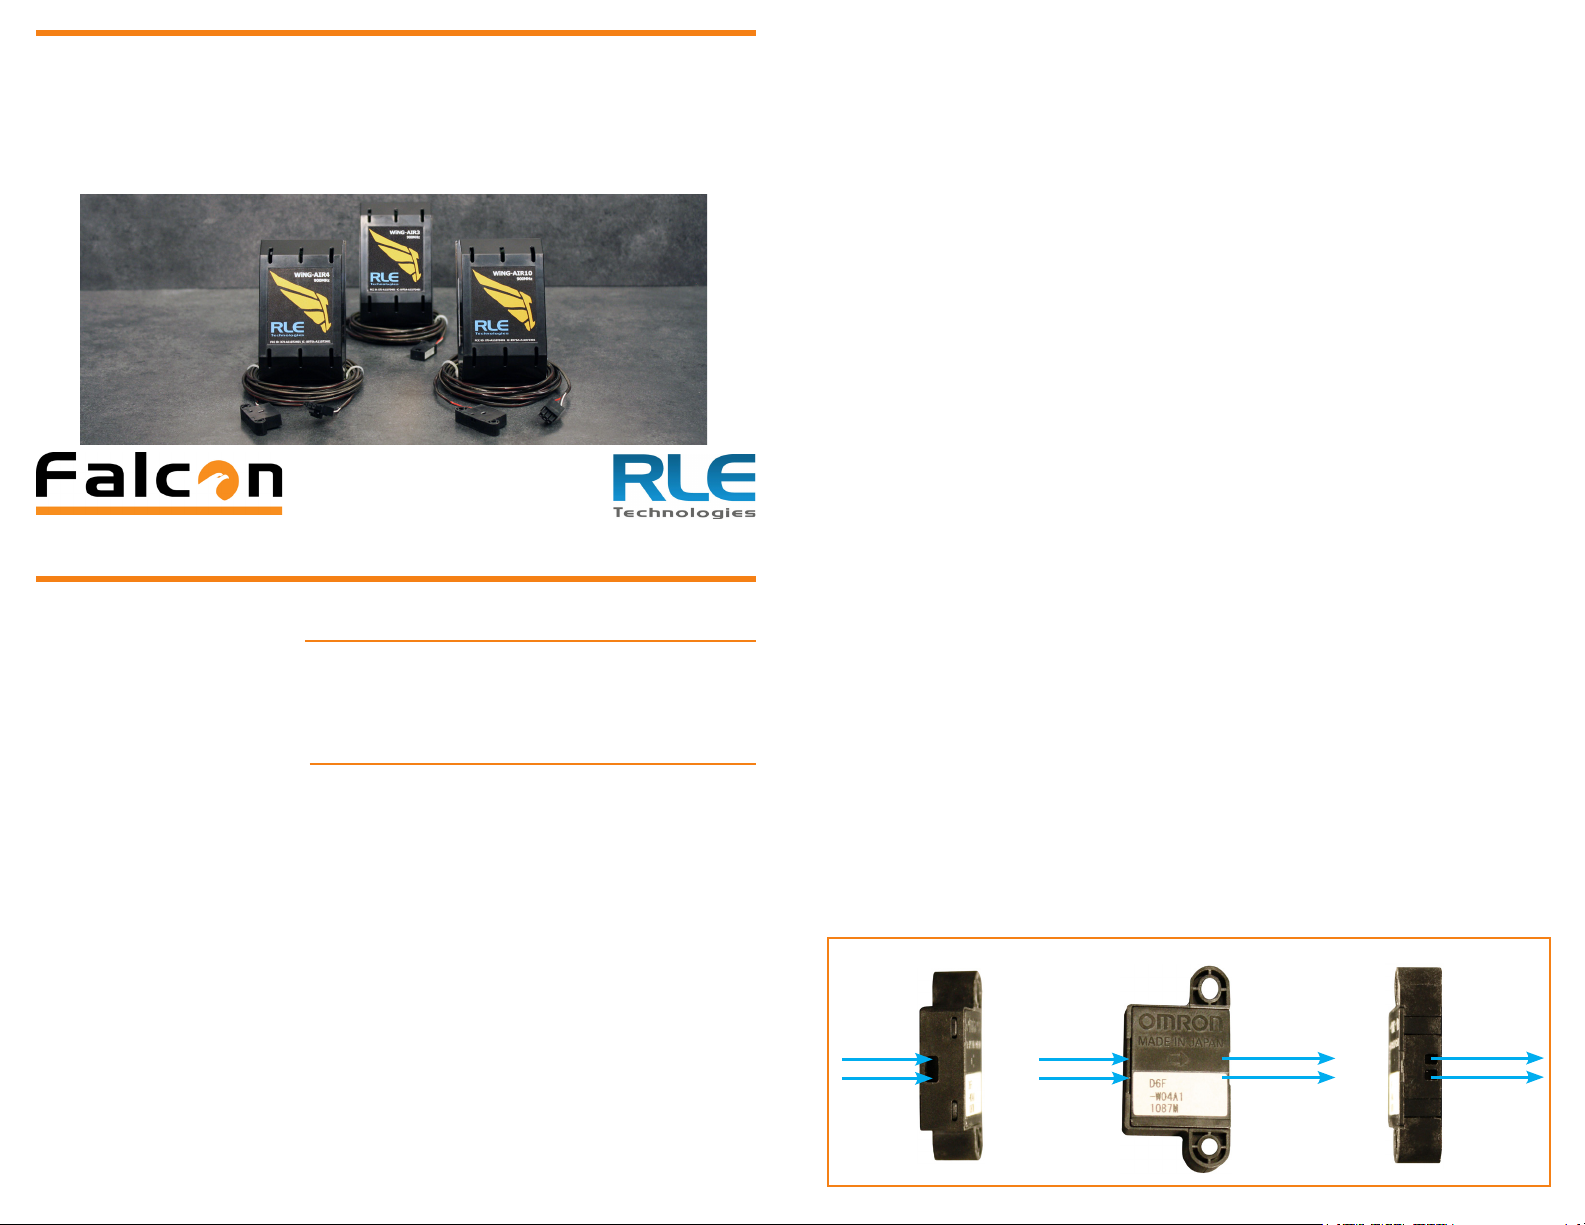
WiNG-AIR transmitter
Air velocity sensor
Installation Instructions
1. WiNG-AIR sensors can only be seen by an RLE controller - either a
WiNG‑MGR running rmware version 3.3.2 or newer or a BMS‑WiNG. If
your WiNG‑MGR rmware is older than version 3.3.2, download the latest
rmware from the RLE website (rletech.com) and update your WiNG‑MGR.
2. Remove the lid from the sensor enclosure. The lid has one large tab at the
top and two small tabs at the bottom that secure it to the sensor base.
Squeeze the top of the lid to release the large tab. Pivot the top of lid out
from the base and gently separate the two bottom tabs from the base.
holds the board in place. Angle the board up and then pull it to the right to
remove it from the base. Move the board slowly and gently to get it out of
the base without damaging any circuitry.
5. Secure the base in the desired location. Select a location for the transmitter,
keeping the following in mind:
• You will connect the airow sensor to the transmitter. The sensor has a
leader cable. Make sure your transmitter location is compatible with the
site where you will need to place the sensor.
• For best reception, mount the enclosure base as high o the oor as you
can with the most direct/clear line of sight to the controller.
• Do not mount the transmitter behind metal objects.
6. Put the circuit board back into the enclosure. Angle the board in under the
lip of the L brackets and as far down as it will go against the plastic pegs at
the bottom of the enclosure. Guide the board so it is parallel with the base.
Pull the circuit board clip out and push the board down until the board clip
securely snaps into place. The board is a very tight t in the enclosure. Work
slowly and gently so the board isn’t damaged.
7. Remove the clear pull tab to engage the battery. Verify the LED is blinking
blue. The LED blinks at random intervals of 10-20 seconds.
8. Check the WiNG‑MGR web interface or BMS and verify the sensor appears
in the list of sensors connected to it. You may need to click the Sensor
Discovery button in the WiNG‑MGR web interface to allow the unit to nd
this new sensor.
9. Connect the included airow sensor to the transmitter. The sensor’s leader
cable clips directly into the terminal block on the transmitter’s circuit board.
All DIP switches should be factory congured for the appropriate sensor
input. Verify the DIP switch settings:
• WING‑AIR3: Attach a 3m/s sensor; verify DIP3 is OFF (down).
• WiNG‑AIR4: Attach a 4m/s sensor; verify DIP3 is ON (up).
• WiNG‑AIR10: Attach a 10m/s sensor; verify DIP3 is OFF (down).
10. Mount the airow sensor. The sensor is directional so make sure the airow
input and output face the correct directions:
WiNG-AIR4 and WiNG-AIR10
NOTE: The serial number is printed on a white label on the outside of the
sensor lid. The serial number is unique to each sensor and you will need to
refer to this number throughout the life span of the device.
3. Remove the circuit board from the base to expose the mounting holes.
Before you take it apart examine how the board ts into the base. You’ll have
to put it back into the base so make sure you have a clear understanding of
how it was assembled before you remove it.
4. To remove the board pull the circuit board clip out to relieve the tension that
AIR IN
AIR IN
AIR OUT
AIR OUT
WiNG-AIR3
Antenna Guides
AIR IN
AIR IN
AIR OUT
AIR OUT
11. Check the WiNG‑MGR web interface or BMS to make sure the sensor status
reports accurately.
12. Use DIP1 and DIP2 to set the read frequency for the sensor. The read
frequency is the amount of time that passes between when each sensor
reading is reported to the WiNG‑MGR or BMS‑WiNG. The shorter the read
frequency, the more frequently the sensor data will be reported to and
updated in the controller. The shorter the read frequency, the shorter the
battery life of the sensor.
WiNG-AIR3 Sensors
DIP1 DIP2 Read Frequency Battery Life
On (Up) On (Up) 20‑40 seconds (~30 seconds) 5.5 years
O (Down) On (Up) 40‑80 seconds (~60 seconds) 8 years
On (Up) O (Down) 60‑120 seconds (~90 seconds) 9.5 years
O (Down) O (Down)
80‑160 seconds (~120 seconds)* 11 years*
L Brackets
Antenna
Channel
Selection
Button
LED
3.6V
Lithium
Battery
SW2
DIP
Switches
Circuit
Board
Clip
WiNG-AIR4 and WiNG-AIR10 Sensors
DIP1 DIP2 Read Frequency Battery Life
On (Up) On (Up) 40‑80 seconds (~60 seconds) 2.25 years
O (Down) On (Up) 80‑160 seconds (~120 seconds) 4 years
On (Up) O (Down) 120‑240 seconds (~180 seconds) 5 years
O (Down) O (Down)
160‑320 seconds (~240 seconds)* 7 years*
*Default setting
13. Replace the lid, ensuring that the antenna is held in place by the antenna
guides and feeds out the vent hole in the side of the enclosure. Do not pinch
the antenna between the lid and the case.
Plastic
Pegs
Airow
Sensor
Connection
Airow Sensor
Leader Cable
 Loading...