

Page 1
Full-Color Inkjet Printer
RJ-8000
Rev.
RJ80E-A-00
User's Guide
Read This Manual Before Using The
Equipment.
Page 2
May 2002
RJ80E-A-00c 1 MUTOH INDUSTRIES LTD.
Some contents of the Operation Manual are changed.
Make sure the following list shown below.
Page Item Descriptions
p.3-10
Modify the table of Step
5 in “3.5 Installing ink
cartridges”
Refer to sheet 2
p.3-26
Modify Step2 in “3.6.4
Setting media type”
Refer to sheet 3
p.3-36
Add
CAUTION
to
Step 4 in “3.8.4
Connecting the network
interface”
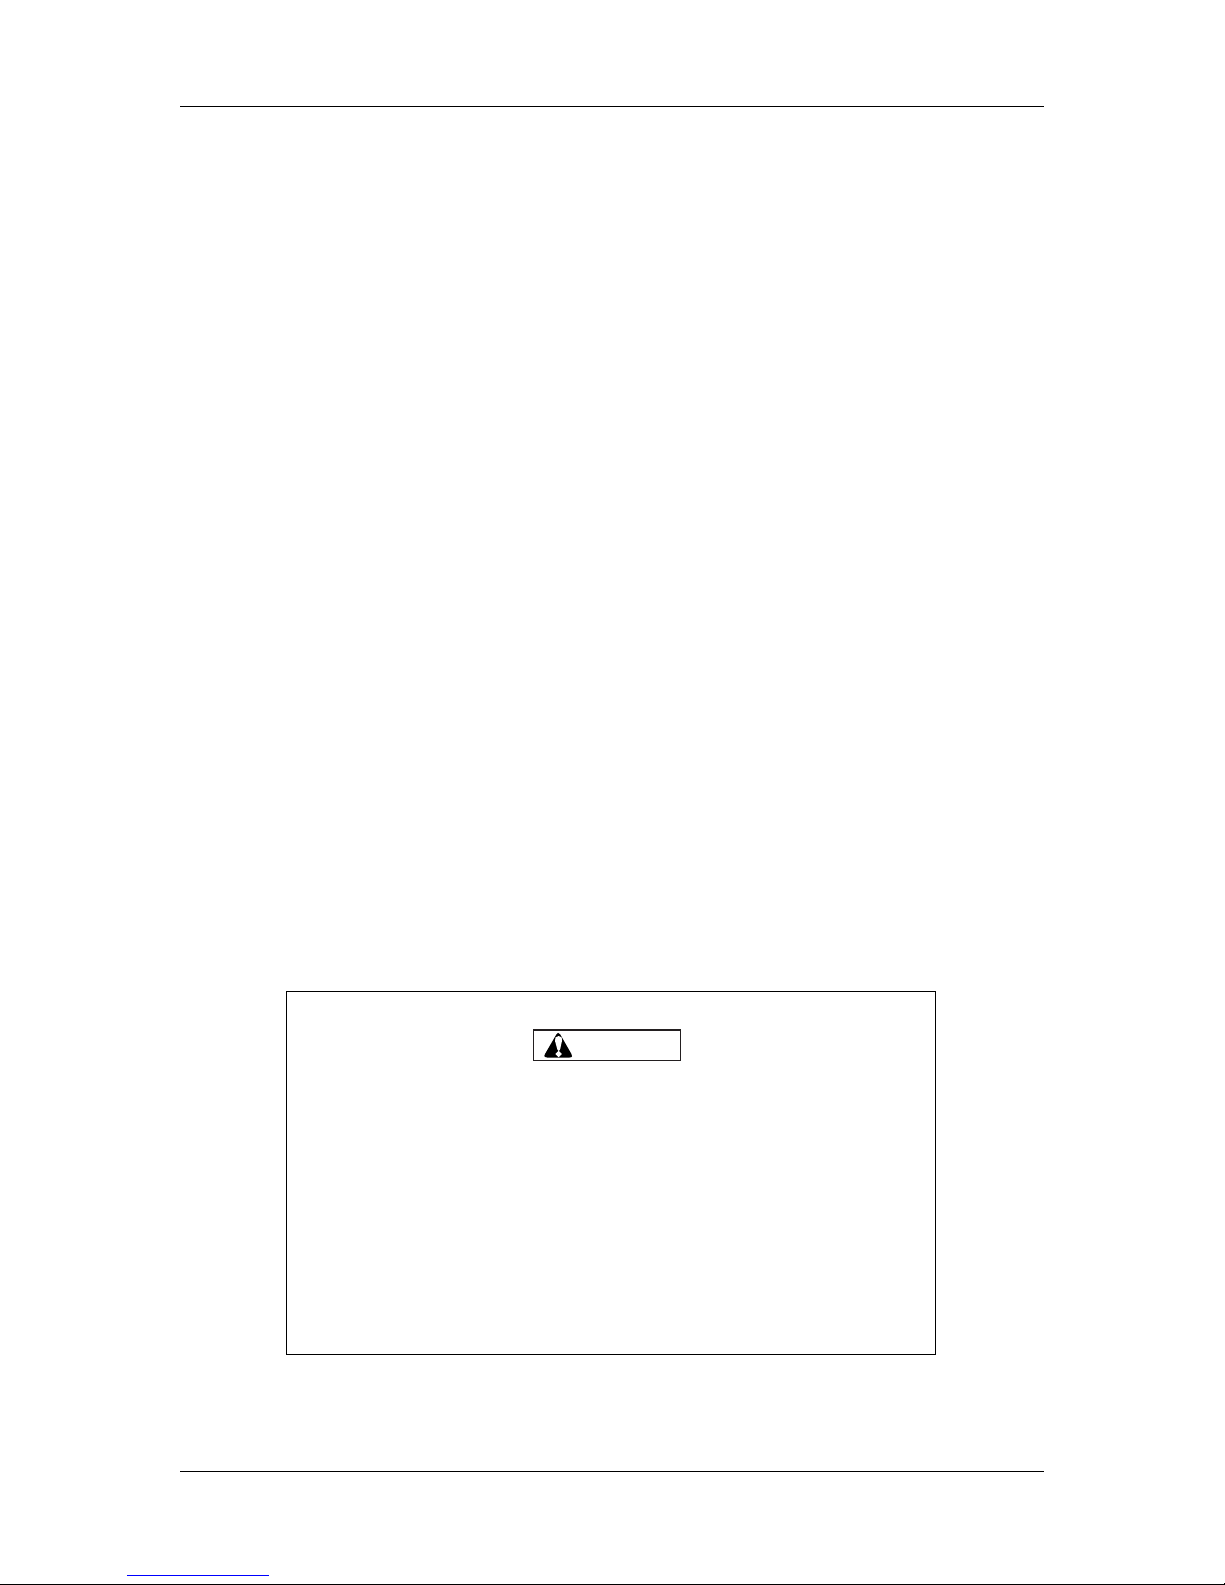
CAUTION
Follow the instructions below when connecting the
network int erf ace c able . Ot herw ise, elec tr ic al shoc k or
fire may occur.
Do not touch the connector.
Do not connec t t he net work int erf ace boar d and the
termi nal on the cable t hose shapes are not exactl y
appropriate for each other.
p.4-8
-
p.4-10
Modify the following items
in “4.4.2 Items in the
setup menu”
・Descriptions of “(1)
Setup menu (1/6)”
Refer to sheet 4 to 5
p.4-12
・Descriptions of “(2)
Setup menu (2/6)”
Refer to sheet 5
p.5-15
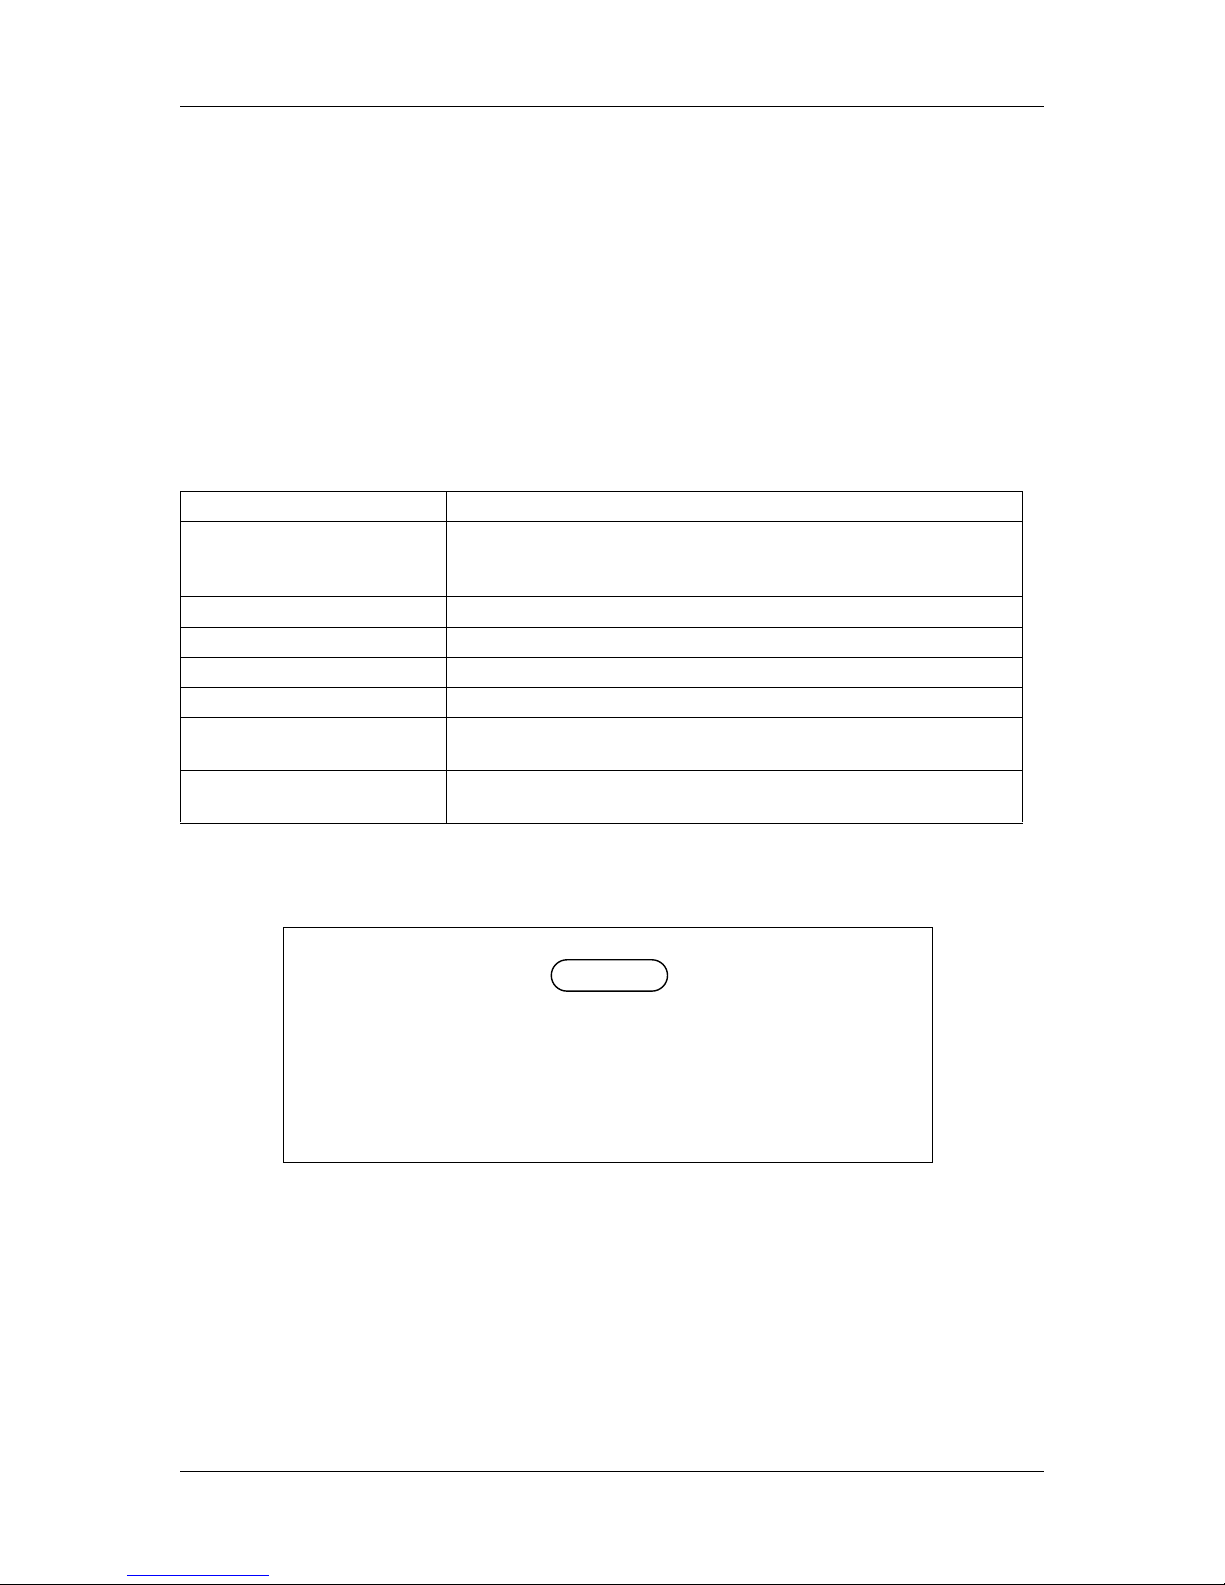
Add
CAUTION
to
Step 4 in “5.2.4
Replacement the waste
liquid tank”
CAUTION
Do not be nd or pull the w aste fluid tube. Doing so may
cause that the waste fluid will leak out and malfunction
in the product.
p.7-1 Modify the following
items in “7.2 Product
specifications”:
・Modify “Max. print
length”
False: 7m (23ft.)
↓
True: 13m (43ft.)
p.7-2 ・Add “Mass” ・RJ-8000-50 (50 in.): 170kg (375Lbs.)
・RJ-8000-64 (64 in.): 195kg (431Lbs.)
・RJ-8000-87 (87 in.): 215kg (475Lbs.)
RJ-8000
OPERATION MANUAL ERRATA
Page 3
RJ-8000 OPERATION MANUAL ERRATA
May 2002
RJ80E-A-00c 2 MUTOH INDUSTRIES LTD.
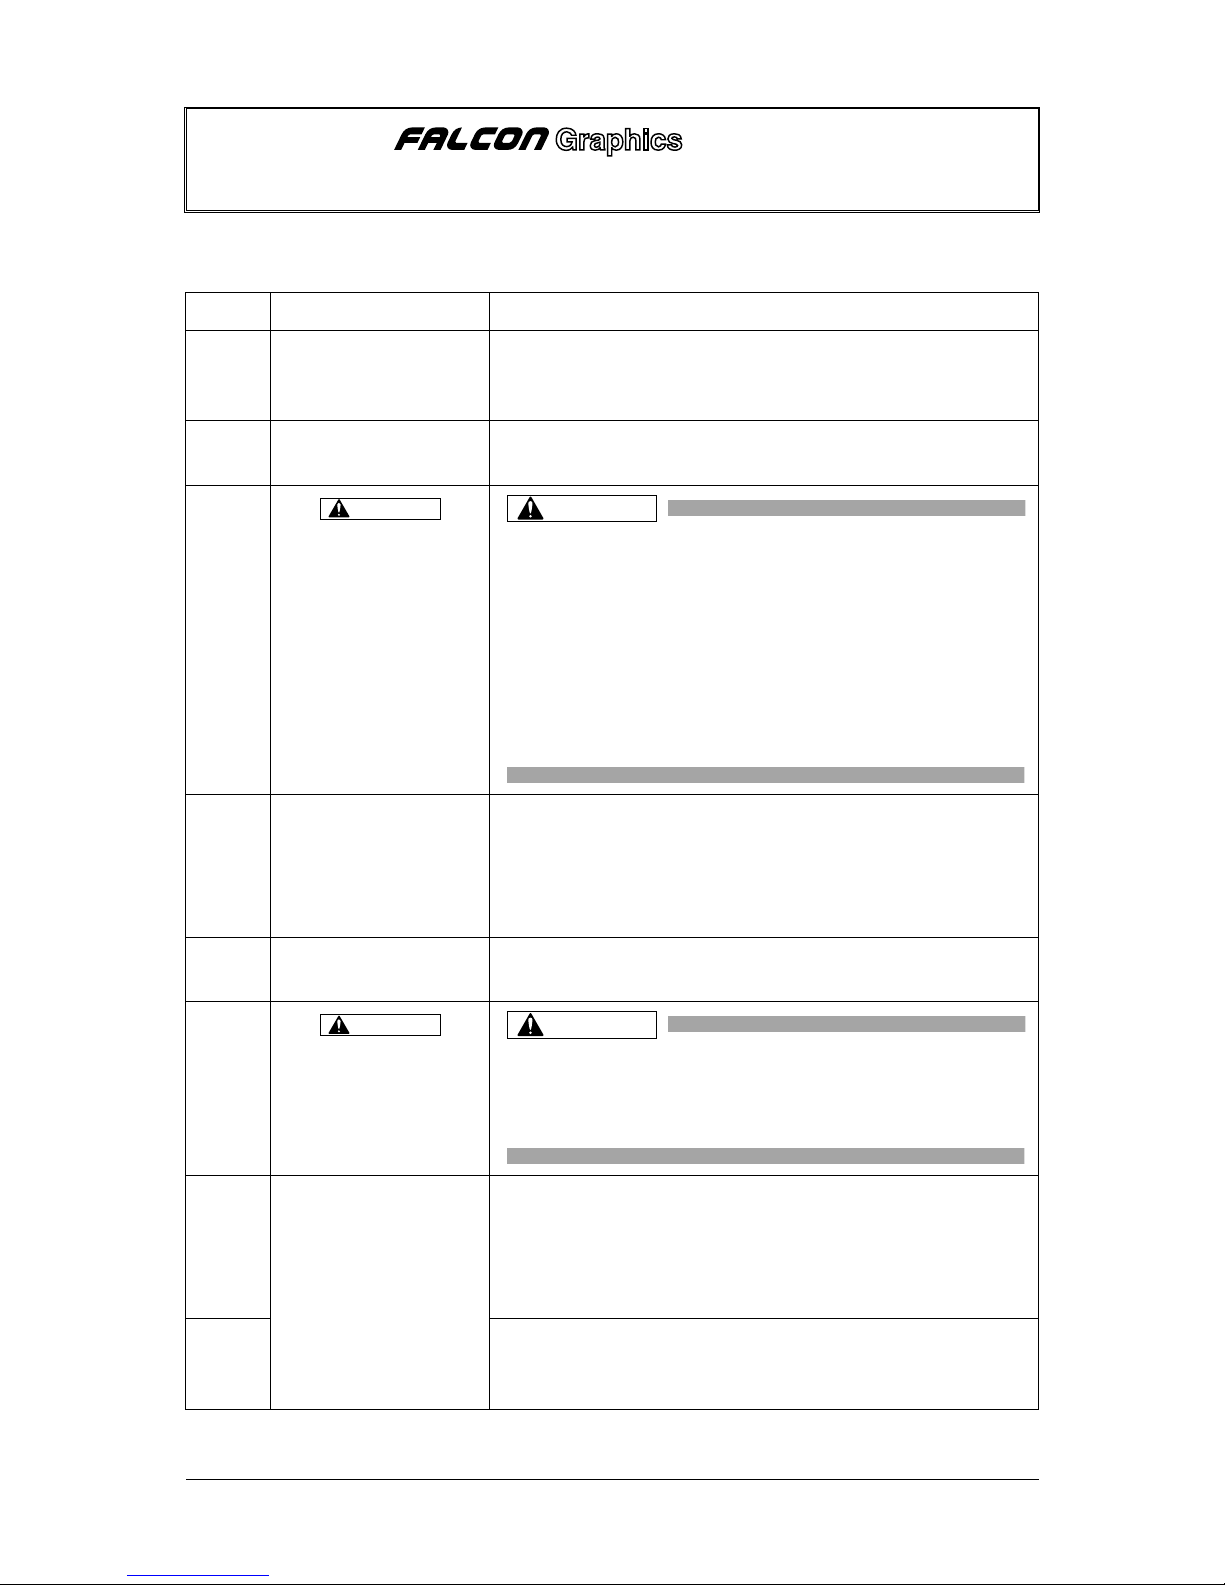
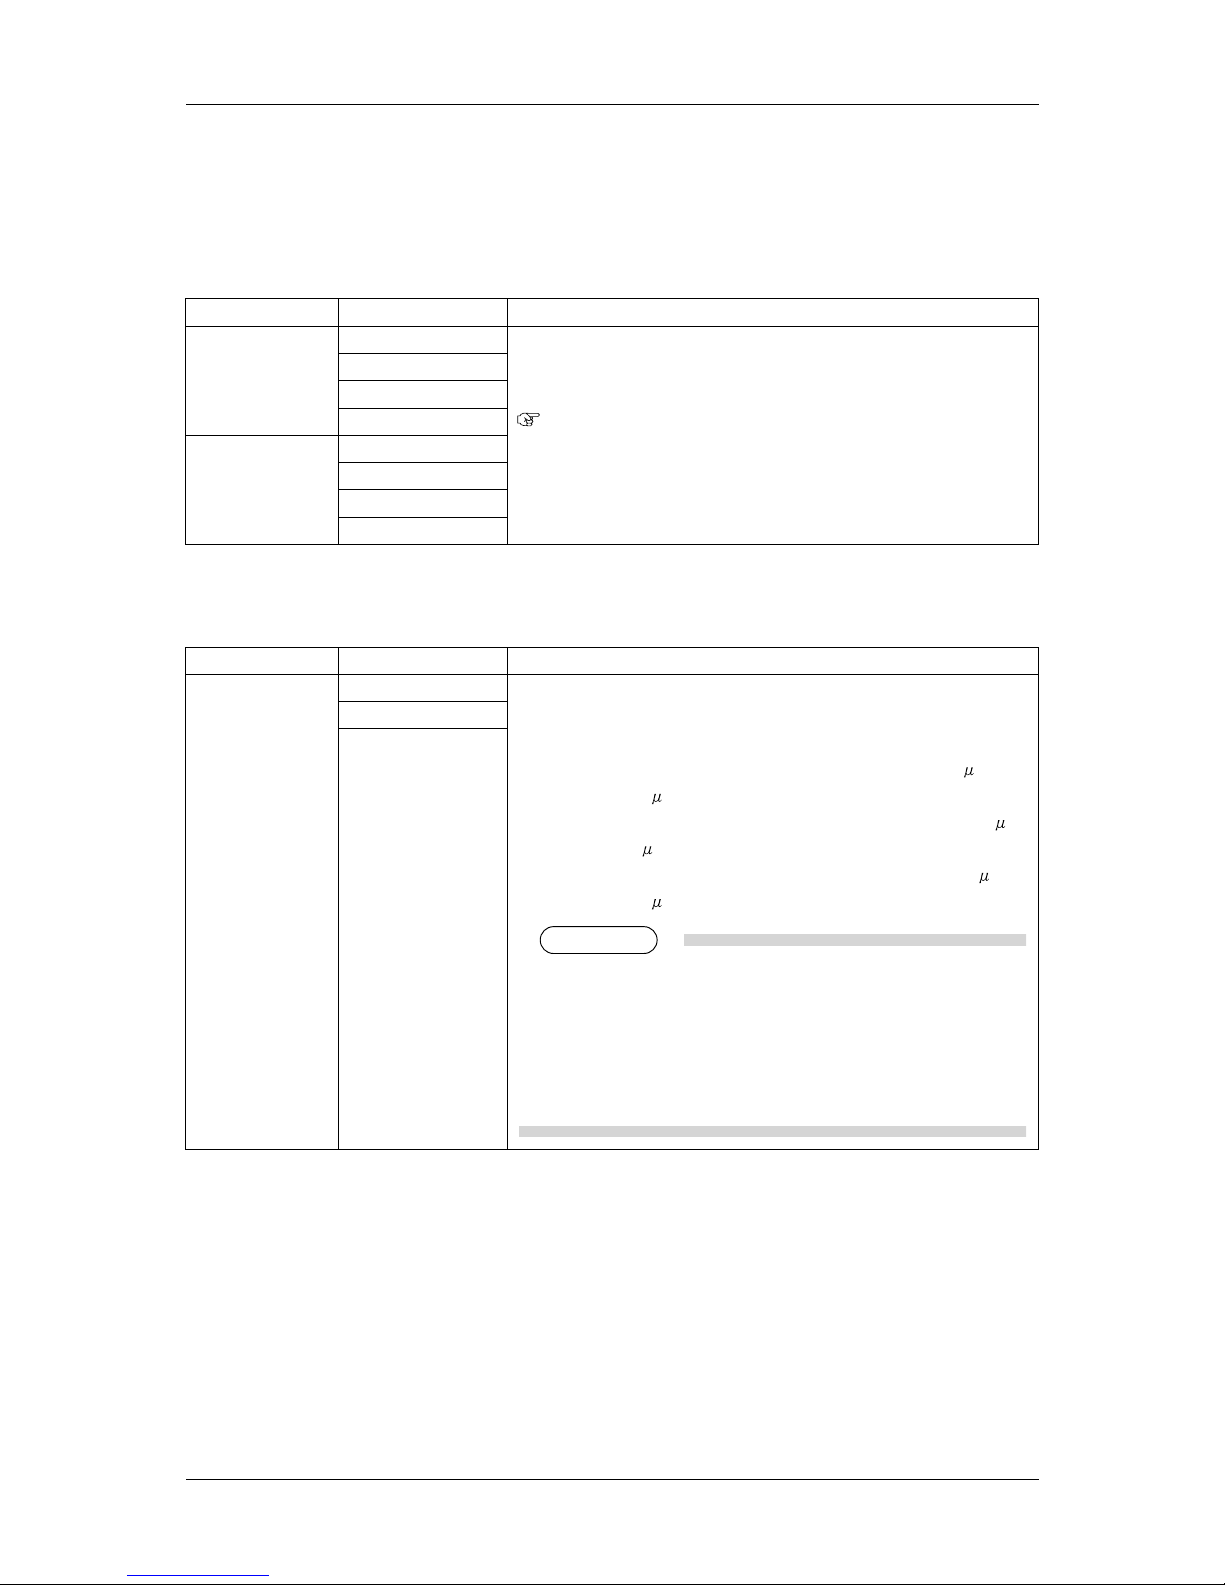
3.5 Instal l i ng i nk cartridges
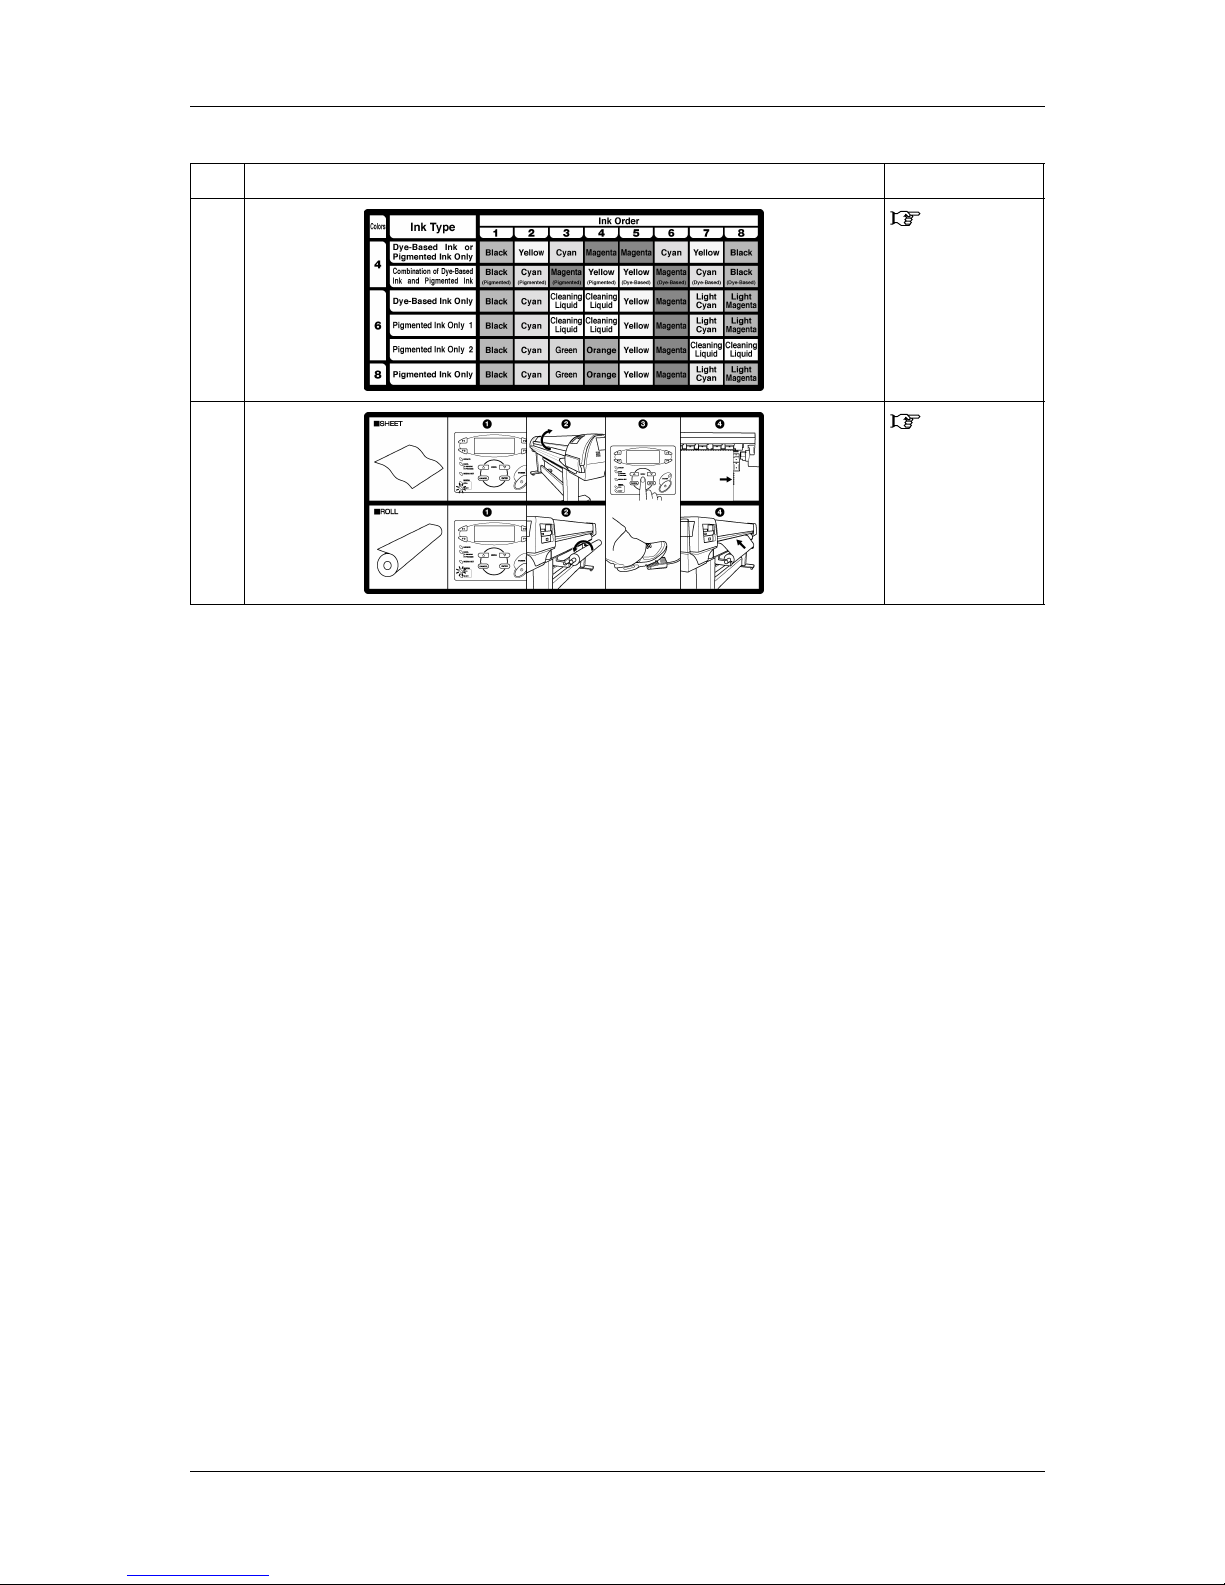
p.3-10: Modify the table of “b. 87-inch specification printers” in Step 5 as follows:
False:
Slot Number of Ink Cartridge Number of
the colors
Ink Type
1 2 3 4 5 6 7 8
4 Dye only/
Pigment only
Black Cyan Magenta Yellow Black Cyan Magenta Black
True:
Slot Number of Ink Cartridge Number of
the colors
Ink Type
1 2 3 4 5 6 7 8
4 Dye only/
Pigment only
Black Cyan Magenta Yellow Black Cyan Magenta Yellow
Page 4
RJ-8000 OPERATION MANUAL ERRATA
May 2002
RJ80E-A-00c 3 MUTOH INDUSTRIES LTD.
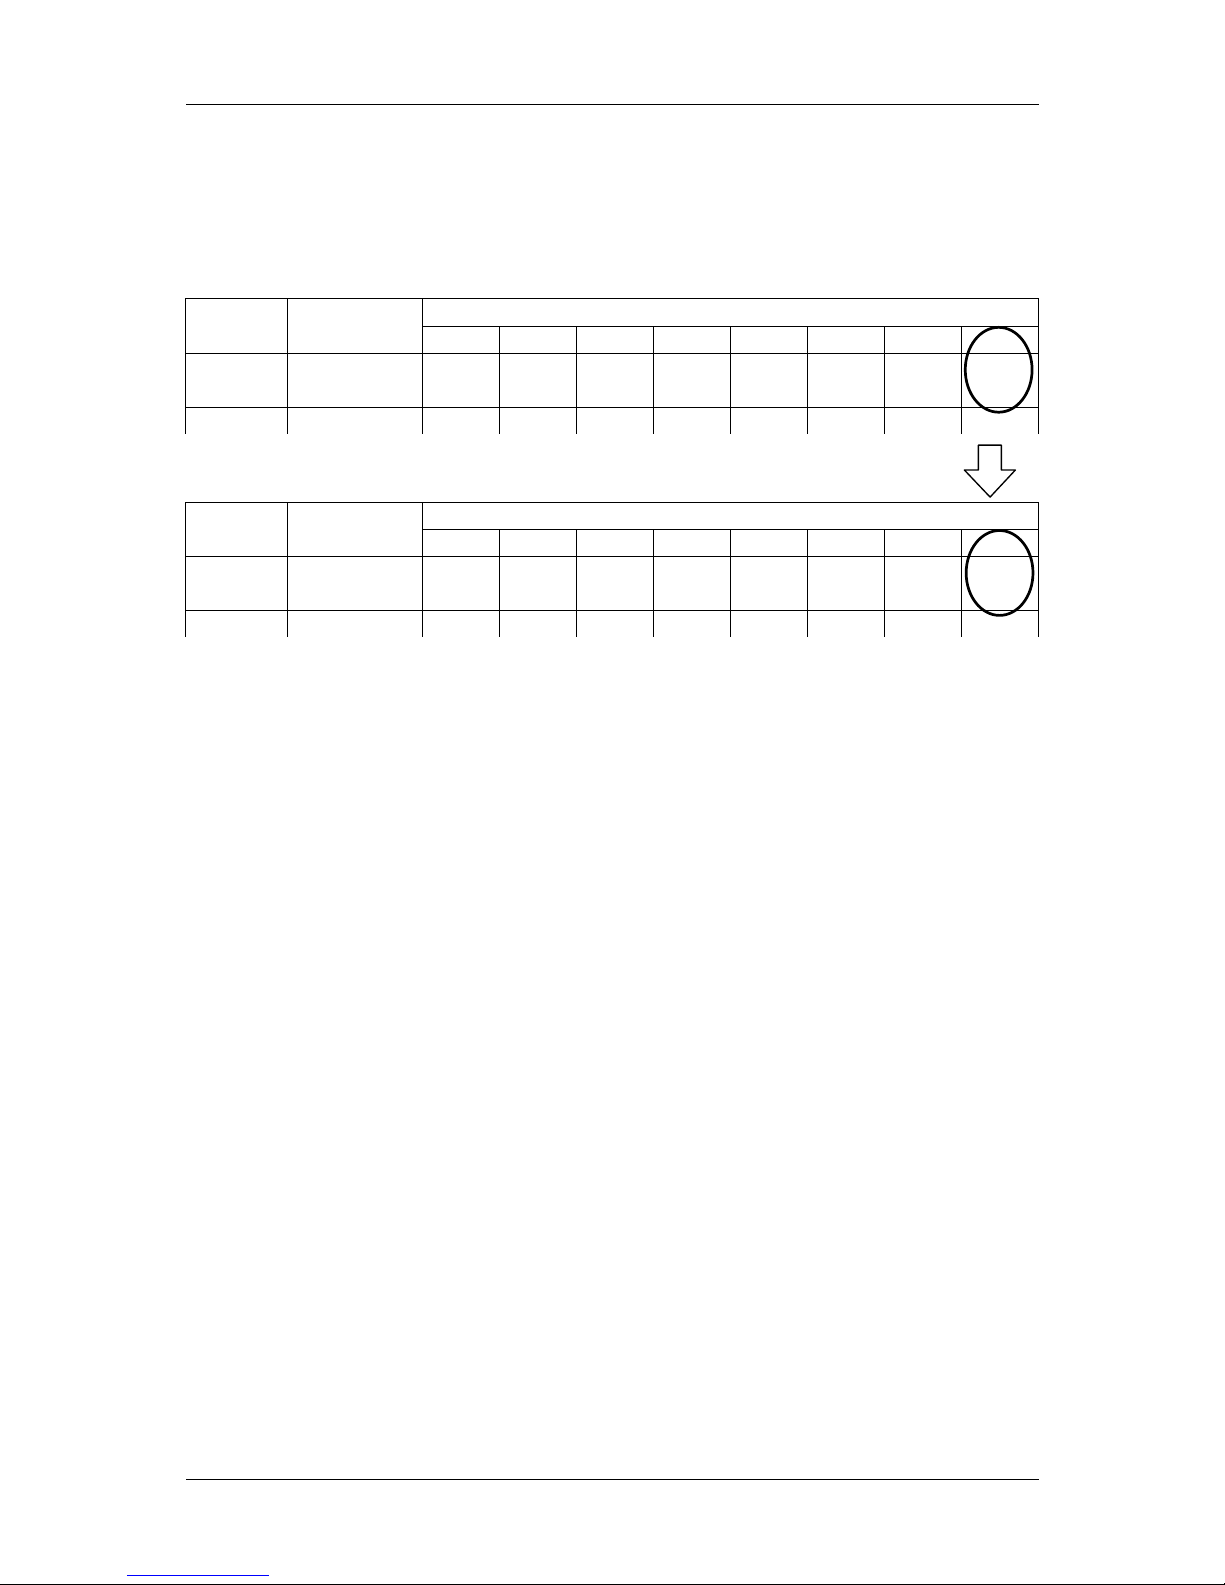
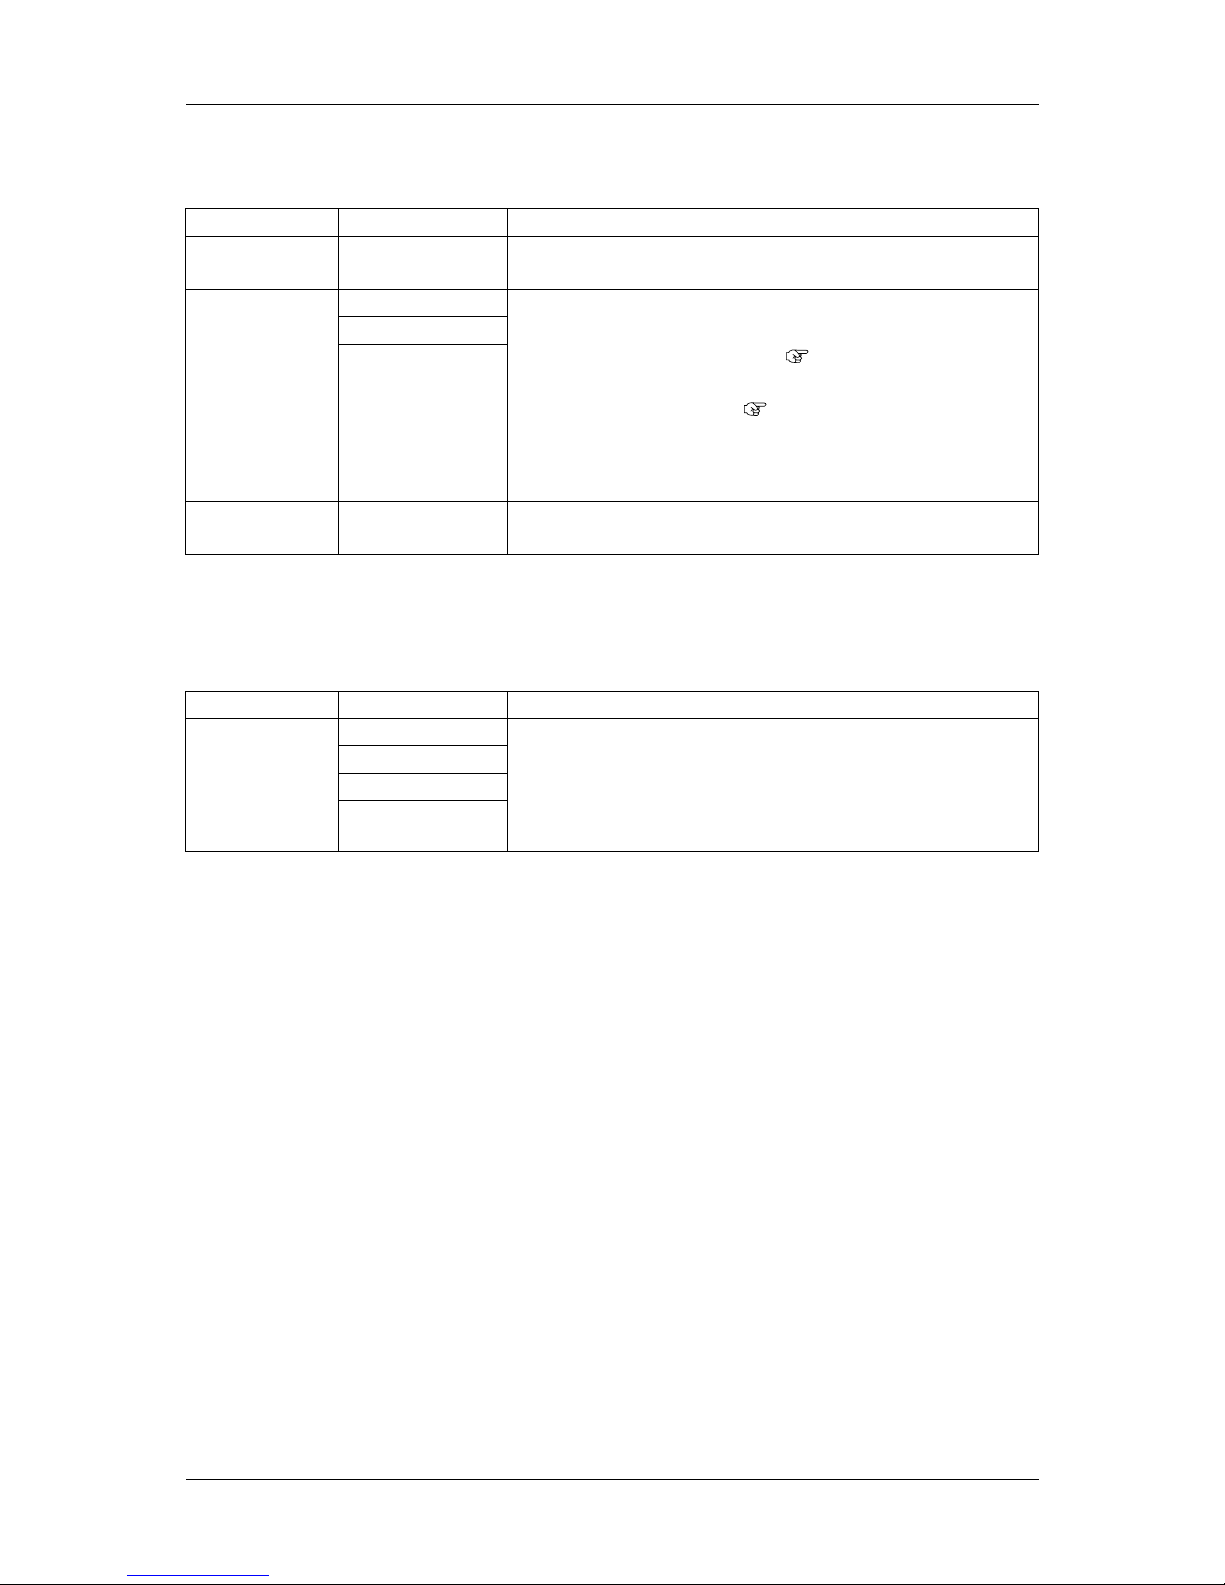
3.6.4 Setting media type
p.3-26: Modify Step 2 as follows:
2. Press either of the following keys on the operation panel, and current media type.
When alternating the roll/sheet media selection: [F2] key
When changing from media loading: [F3] key
When changing media type: [F4] key
Setup Items Key
Name
Parameters Descriptions
Roll Media type F2
Sheet
Alternate the media selection:
Roll: Set when loading the roll media.
Sheet: Set when loading the sheet media.
Lever Up Lever Up/Down F3
Lever Down
Switches between up and down motion of the
pressurizing lever. Use this when starting over from
the media setup.
User 1
User 2
User 3
User 4
User 5
User 6
User 7
Media type F4
User 8
Set media type for printing.
For setup values of printing operation, eight settings
of "user 1-8" can be set.
4.4 Menu setup on the operation panel
Page 5
RJ-8000 OPERATION MANUAL ERRATA
May 2002
RJ80E-A-00c 4 MUTOH INDUSTRIES LTD.
4.4.2 Items in the setup menu
(1) Setup menu (1/6)
a. Media type menu
p.4-8: Modify the descriptions as follows:
Setup items Parameters Descriptions
Type (1/2) User 1
User 2
User 3
User 4
Type (2/2) User 5
User 6
User 7
User 8
Set media type for printing.
For setup values of printing operation, eight settings of "User 1-8"
can be set.
b. User define media setup menu
b. User define media setup menu
p.4-9: Modify the descriptions as follows:
Setup items Parameters Descriptions
<Low>
Middle
Head height
High
Makes the setting for the distance between the print head surface
and the media (head height), depending on the thickness of the
media:
Low: Set when the thickness of the media is within 80
m
(0.08mm) - 300
m (0.3mm).
Middle: Set when the thickness of the media is within 300
m
(0.3mm) - 700
m (0.7mm).
High: Set when the thickness of the media is within 700
m
(0.7mm) - 1000
m (1.0mm).
NOTE
NOTE
Set the head height according to the thickness of the media.
If “High” is selected and a thinner media is used, poor
quality printing will result.
If “Low” is selected and a thicker media is used, the product
may break down when the media comes into contact with
the print head.
Page 6
RJ-8000 OPERATION MANUAL ERRATA
May 2002
RJ80E-A-00c 5 MUTOH INDUSTRIES LTD.
c. Media setup menu
p.4-10: Modify the descriptions as follows:
Setup items Parameters Descriptions
Top feed <0mm> - 400mm Feeds media amount at the start of printing. Set when printing on
roll media.
<Auto>
Manual
Cut media
Off
Sets up how to cut the media after printing.
Auto: After printing, the media is transferred to the cutting
position and cut automatically.(
4.6.1 Cutting roll media)
Manual: After printing, the media is transferred to the cutting
position and cut manually. (
4.6.2 Roll media cutting procedure)
Off: Media is not transferred after printing.
When Setting “ALL” in this item, proceed to Shortest Cut Paper
setup item.
Shortest Cut
Paper
<100mm> - 700mm Set the shortest length of the media when cutting.
(2) Setup menu (2/6)
a. Print setup menu
p.4-12: Modify the descriptions as follows:
Setup items Parameters Descriptions
1pass
1pass Few
2pass
Interlace method
4pass
Select an overwrite method (interlace method) for printing.
1 pass: Overwrite will not be performed.
1 pass few: Only gaps between lines are overwritten.
2 pass: Overwrite process is performed twice per 1 line.
4 pass: Overwrite process is performed 4 times per 1 line.
Page 7

RJ-8000 OPERATION MANUAL ERRATA
May 2002
RJ80E-A-00c 6 MUTOH INDUSTRIES LTD.
<MEMO>
Page 8

Page 9
Important Notice
(1)
Important Notice
This product has been tested and found to comply with the limits for a Class A digital device, pursuant
to Part 15 of FCC Rules. These limits are designed to provide reasonable protection against harmful
interference when the product is operated in a commercial environment.
This product generates, uses, and can radiate radio frequency energy and if not installed and used in
accordance with the this manual, may cause harmful interference to radio communications. Operation of
this product in a residential area is likely to cause harmful interference in which case the user will be
required to correct the interference at his own expense.
1. Radio interfere
Product generates weak radio signals and may interfere with television reception and utilities. If a
product does interfere with radio or TV reception, try following:
• Change the direction of your radio and TV reception antenna or feeder.
• Change the direction of the product
• Move either the product or the receiving antenna so there is more distance between them.
• Be sure the product and the receiving antenna are on separate power lines.
2. Copyrights
• MUTOH, Falcon Graphics, RJ-8000, MH-GL, MH-GL2, MH-RTL are registard trademarks or
product names of MUTOH INDUSTRIES LTD.
• Centronics and Bitronics are registard trademarks or product names of Centronics Data Computer
Corporation.
• Windows95, Windows98, Windows NT4.0, Windows2000, and MS-DOS are registard trademarks
or product names of Microsoft Corporation.
• DOS/V is registered trademark and product name of International Business Machine Corporation
(IBM).
• Other company and product names may be registered trademarks or product names.
CAUTION
• No part of this product or publication may be reproduced, copied,
or transmitted in any form or by any means, except for personal
use, without the permission of MUTOH INDUSTRIES LTD.
• The product and the contents of this publication may be changed
without prior notification.
• MUTOH INDUSTRIES LTD. has made the best efforts to keep this
publication free from error, but if you find any uncertainties or
misprints, please call us or the shop where you bought this
equipment.
• MUTOH INDUSTRIES LTD. shall not be liable for any damages or
troubles resulting from the use of this equipment or this manual.
Page 10

Warranty Limitations
(2)
Warranty Limitations
1. MUTOH INDUSTRIES LTD. warrants part repair or replacement as a sole measure only if a failure
is found in the system or in the materials and workmanship of the product the seller produced.
However, if the cause of failure is uncertain, decide the action after due mutual consultation.
2. The warranty shall not apply to any direct or indirect loss, or compensation for the loss due to the
product that has been subject to misuse, neglect, or improper alternation.
Page 11
About This Manual
(3)
About This Manual
1. Purpose and target readers
This manual explains the preparation before use and operation procedures of the full-color inkjet
printer (RJ-8000) made by MUTOH INDUSTRIES LTD.
This manual is prepared for the owners and operators of this printer.
Before using this printer, first understand the contents and directions in this manual.
2. Manual configuration
Section Contents
1 Safety Instructions Explains the meaning of safety terms for personnel who operate this
equipment, important safety instructions, and the positions of the warning
labels.
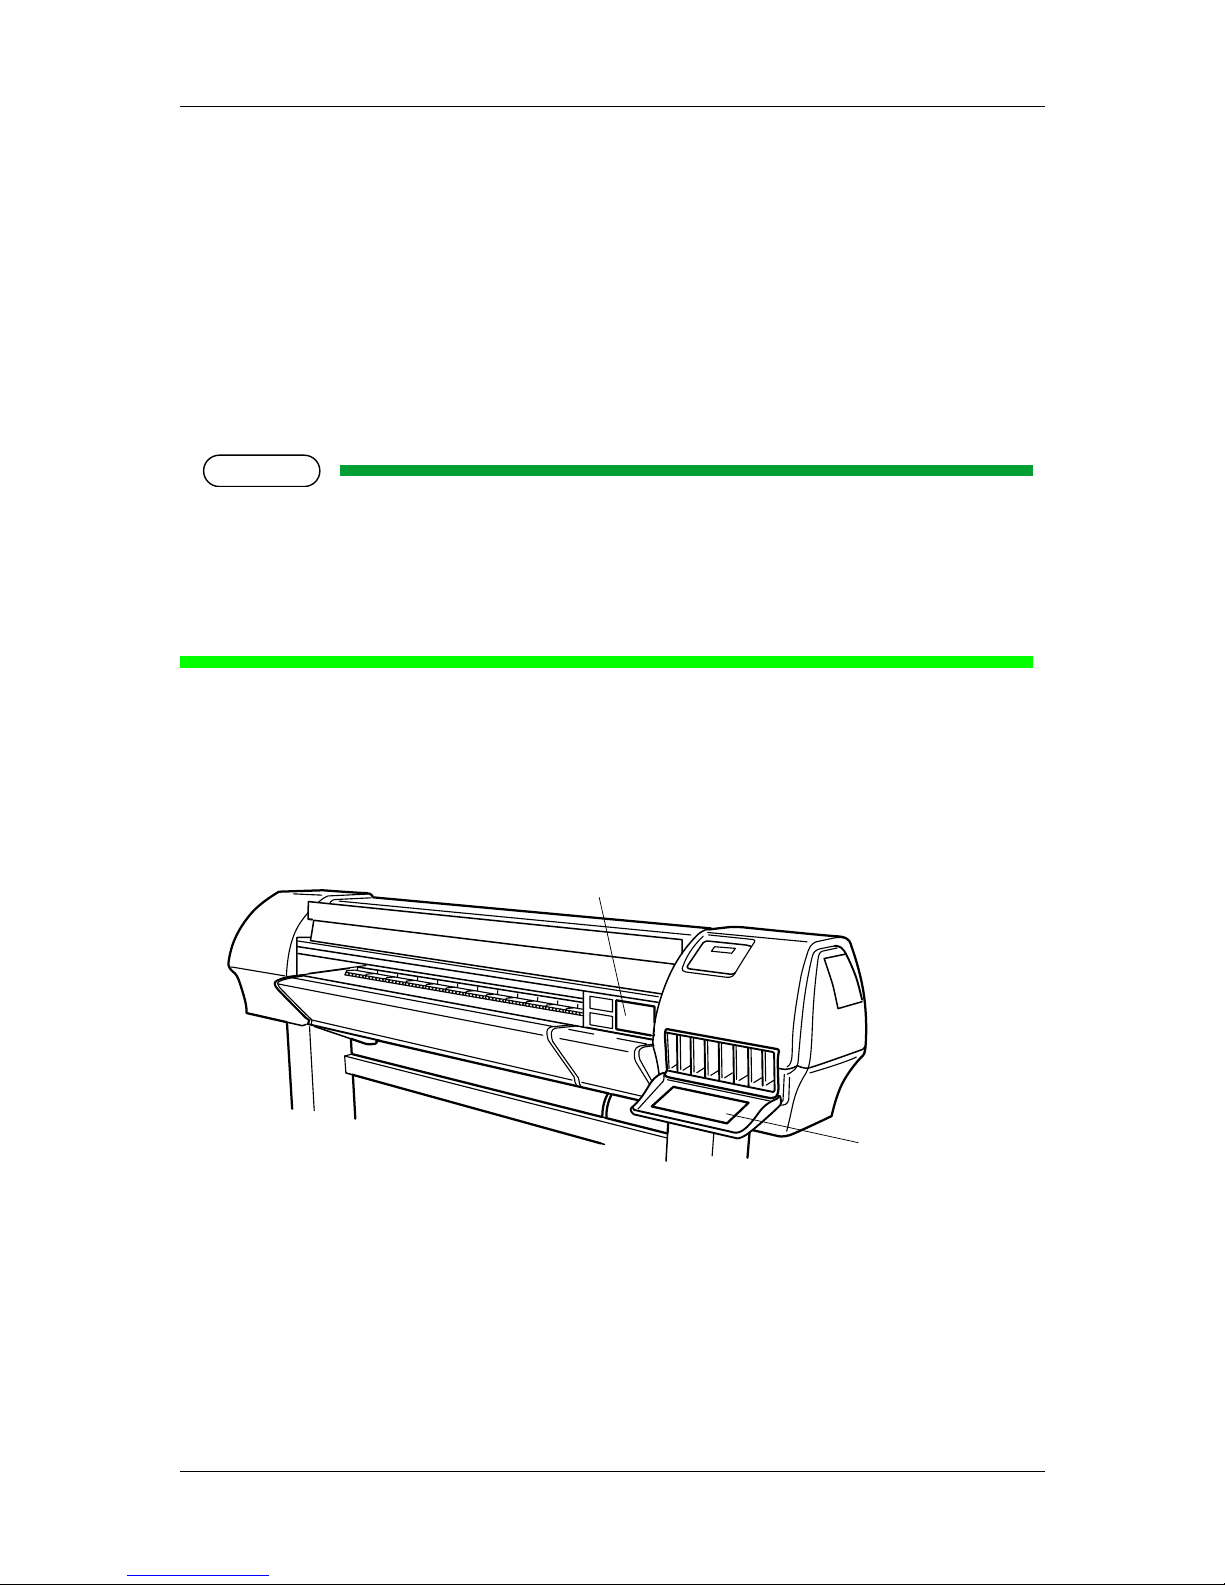
2 Product Overview Explains the features, part names, and functions of the printer.
3 Basic Installation Explains the procedures needed before using the printer.
4 Handling the printer Explains how to handle the printer.
5 Maintenance Explains daily maintenance of the printer.
6 Troubleshooting Explains troubles that may occur when using the printer and how to solve
them.
7 Appendix Explains the specifications, optional parts and supplies, installation
procedures for optional parts, and user support for this printer.
NOTE
NOTE
・ "1 Safety Instructions" through "3 Basic Installation" must be read before
using the printer.
・Read "4 Handling the printer" through "7 Appendix" as necessary.
Page 12
About This Manual
(4)
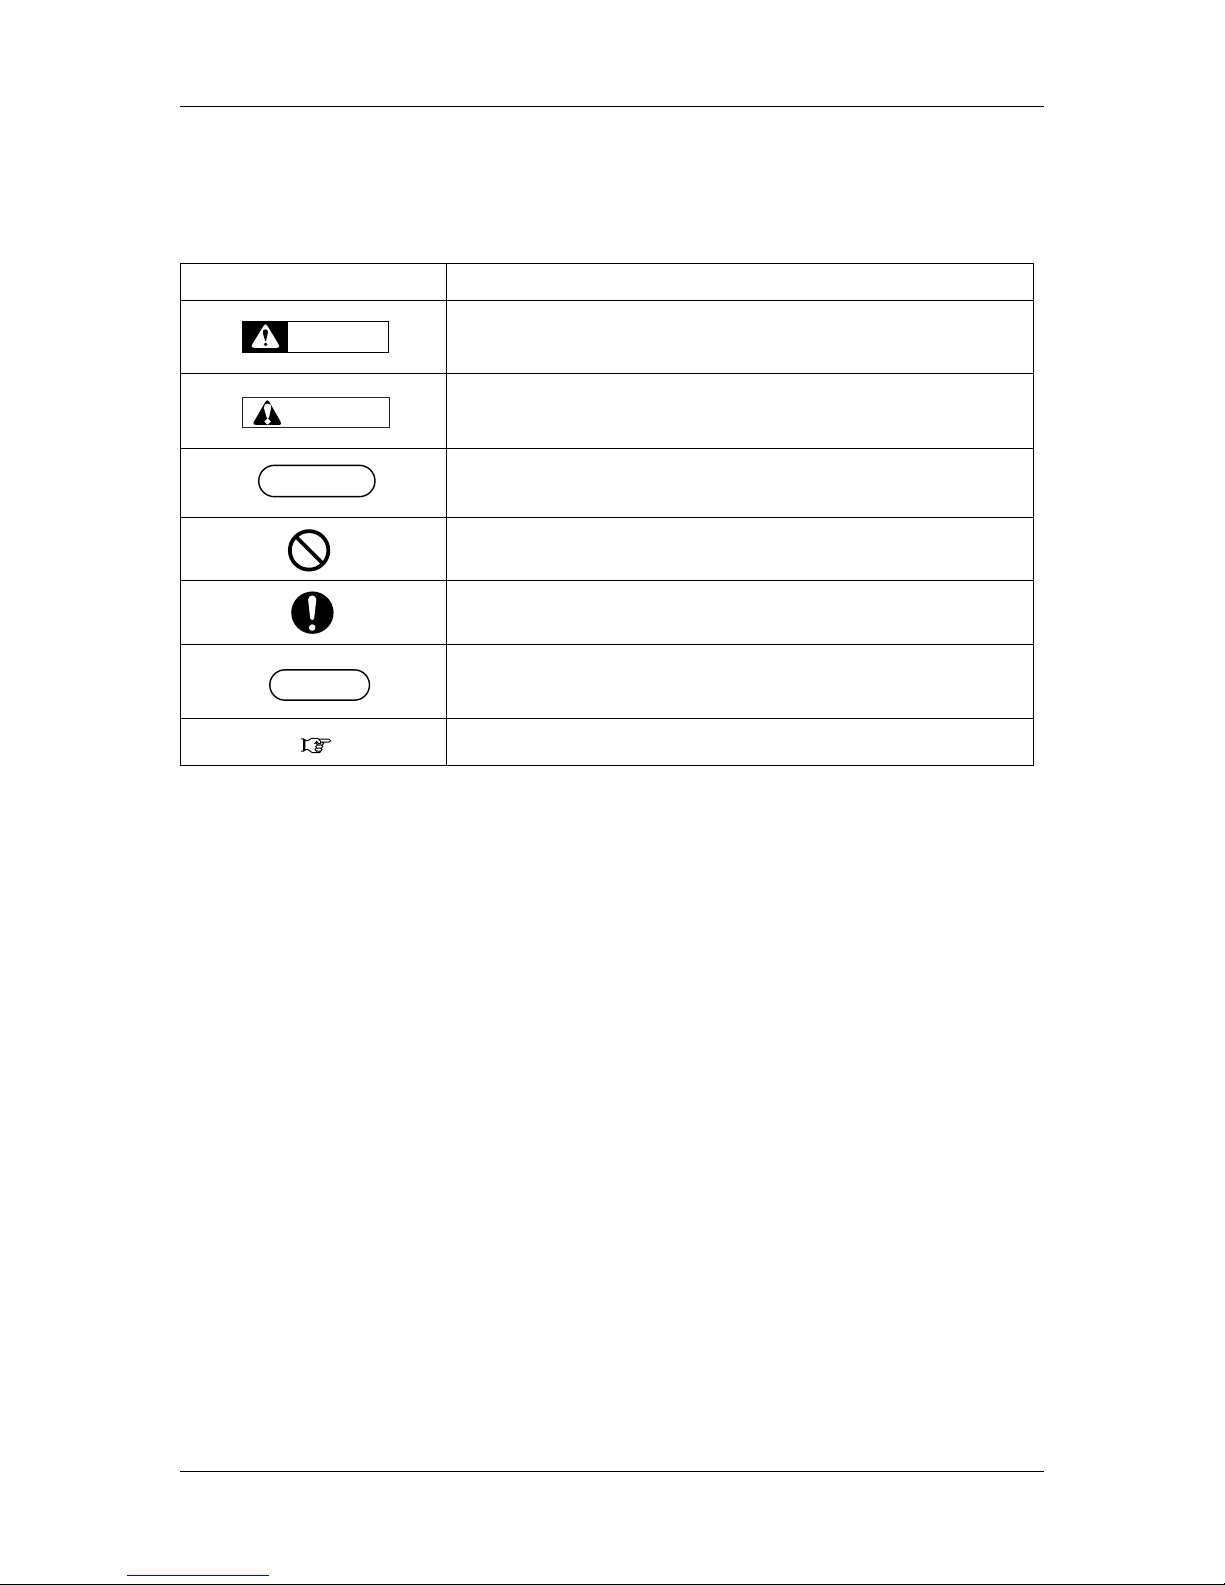
3. Manual notation
The following symbols are used in this manual for easier understanding of the information.
Symbol Meaning
Must be followed carefully to avoid death or serious injury
Must be observed to avoid injury or damage to your equipment
Contains important information and useful tips on the operation of
your printer
Indicates “prohibited“ operations
Indicates required operations
Indicates useful tips for operating or understanding the printer
Indicates referrence pages in this manual
WARNING
CAUTION
NOTE
NOTE
TIPTIP
Page 13

RJ-8000 OPERATION MANUAL
(5)
GENERAL TABLE OF CONTENTS
1 Safety Instructions
1.1 Introduction. . . . . . . . . . . . . . . . . . . . . . . . . . . . . . . . . . . . . . . . . . . . . . . . . 1-1
1.2 Warnings, Cautions, and Notes . . . . . . . . . . . . . . . . . . . . . . . . . . . . . . . . 1-1
1.3 Important safety instructions. . . . . . . . . . . . . . . . . . . . . . . . . . . . . . . . . . . 1-2
1.4 Warning labels. . . . . . . . . . . . . . . . . . . . . . . . . . . . . . . . . . . . . . . . . . . . . . . 1-5
1.4.1 Handling the warning labels . . . . . . . . . . . . . . . . . . . . . . . . . . . . . . . . . . . . . . . 1-5
1.4.2 Locations and types of war ning labels . . . . . . . . . . . . . . . . . . . . . . . . . . . . . . . 1-5
1.5 Operation procedure labels . . . . . . . . . . . . . . . . . . . . . . . . . . . . . . . . . . . . 1-8
1.5.1 Handling the operation procedure labels . . . . . . . . . . . . . . . . . . . . . . . . . . . . . 1-8
1.5.2 Locations and types of operation procedure labels . . . . . . . . . . . . . . . . . . . . . 1-8
2 Product Overview
2.1 Introduction. . . . . . . . . . . . . . . . . . . . . . . . . . . . . . . . . . . . . . . . . . . . . . . . . 2-1
2.2 Features. . . . . . . . . . . . . . . . . . . . . . . . . . . . . . . . . . . . . . . . . . . . . . . . . . . . 2-1
2.3 Part names and functions . . . . . . . . . . . . . . . . . . . . . . . . . . . . . . . . . . . . . 2-2
2.3.1 Front . . . . . . . . . . . . . . . . . . . . . . . . . . . . . . . . . . . . . . . . . . . . . . . . . . . . . . . . . 2-2
2.3.2 Back . . . . . . . . . . . . . . . . . . . . . . . . . . . . . . . . . . . . . . . . . . . . . . . . . . . . . . . . . 2-3
2.3.3 Operation panel . . . . . . . . . . . . . . . . . . . . . . . . . . . . . . . . . . . . . . . . . . . . . . . . 2-4
2.4 Printer status. . . . . . . . . . . . . . . . . . . . . . . . . . . . . . . . . . . . . . . . . . . . . . . . 2-7
2.4.1 Normal . . . . . . . . . . . . . . . . . . . . . . . . . . . . . . . . . . . . . . . . . . . . . . . . . . . . . . . 2-7
2.4.2 Setting menu display . . . . . . . . . . . . . . . . . . . . . . . . . . . . . . . . . . . . . . . . . . . . 2-7
2.4.3 Changing the printer status. . . . . . . . . . . . . . . . . . . . . . . . . . . . . . . . . . . . . . . . 2-8
3 Basic Installatison
3.1 Introduction. . . . . . . . . . . . . . . . . . . . . . . . . . . . . . . . . . . . . . . . . . . . . . . . . 3-1
3.2 Connecting the power cable . . . . . . . . . . . . . . . . . . . . . . . . . . . . . . . . . . . 3-2
3.3 Connecting the foot switch . . . . . . . . . . . . . . . . . . . . . . . . . . . . . . . . . . . . 3-5
3.4 Turning the power ON/OFF . . . . . . . . . . . . . . . . . . . . . . . . . . . . . . . . . . . . 3-7
3.4.1 Turning the power ON . . . . . . . . . . . . . . . . . . . . . . . . . . . . . . . . . . . . . . . . . . . 3-7
3.4.2 Turning the power OFF. . . . . . . . . . . . . . . . . . . . . . . . . . . . . . . . . . . . . . . . . . . 3-7
3.5 Installing ink cartridges . . . . . . . . . . . . . . . . . . . . . . . . . . . . . . . . . . . . . . . 3-9
Page 14

RJ-8000 OPERATION MANUAL
(6)
3.6 Media handling . . . . . . . . . . . . . . . . . . . . . . . . . . . . . . . . . . . . . . . . . . . . . 3-13
3.6.1 Attaching roll media . . . . . . . . . . . . . . . . . . . . . . . . . . . . . . . . . . . . . . . . . . . . 3-13
3.6.2 Loading roll media . . . . . . . . . . . . . . . . . . . . . . . . . . . . . . . . . . . . . . . . . . . . . 3-16
3.6.3 Loading sheet media . . . . . . . . . . . . . . . . . . . . . . . . . . . . . . . . . . . . . . . . . . . 3-21
3.6.4 Setting media type . . . . . . . . . . . . . . . . . . . . . . . . . . . . . . . . . . . . . . . . . . . . . 3-25
3.7 Testprinting. . . . . . . . . . . . . . . . . . . . . . . . . . . . . . . . . . . . . . . . . . . . . . . . 3-27
3.7.1 Setup List . . . . . . . . . . . . . . . . . . . . . . . . . . . . . . . . . . . . . . . . . . . . . . . . . . . . 3-28
3.7.2 NozzleCheck . . . . . . . . . . . . . . . . . . . . . . . . . . . . . . . . . . . . . . . . . . . . . . . . . 3-29
3.7.3 Alignment . . . . . . . . . . . . . . . . . . . . . . . . . . . . . . . . . . . . . . . . . . . . . . . . . . . . 3-30
3.7.4 Color palette . . . . . . . . . . . . . . . . . . . . . . . . . . . . . . . . . . . . . . . . . . . . . . . . . . 3-31
3.7.5 Maintenance record . . . . . . . . . . . . . . . . . . . . . . . . . . . . . . . . . . . . . . . . . . . . 3-32
3.8 Connecting the printer to your PC . . . . . . . . . . . . . . . . . . . . . . . . . . . . . 3-34
3.8.1 System requirements . . . . . . . . . . . . . . . . . . . . . . . . . . . . . . . . . . . . . . . . . . . 3-34
3.8.2 Selecting cables . . . . . . . . . . . . . . . . . . . . . . . . . . . . . . . . . . . . . . . . . . . . . . . 3-34
3.8.3 Connecting the centronics interface. . . . . . . . . . . . . . . . . . . . . . . . . . . . . . . . 3-35
3.8.4 Connecting the network inte rface. . . . . . . . . . . . . . . . . . . . . . . . . . . . . . . . . . 3-36
3.9 Installing the printer driver . . . . . . . . . . . . . . . . . . . . . . . . . . . . . . . . . . . 3-37
3.9.1 Installing the dri ver for Windows 95/98. . . . . . . . . . . . . . . . . . . . . . . . . . . . . . 3-37
3.9.2 Installing the dri ver for Windows NT4/2000 . . . . . . . . . . . . . . . . . . . . . . . . . . 3-40
4 Handling the printer
4.1 Introduction. . . . . . . . . . . . . . . . . . . . . . . . . . . . . . . . . . . . . . . . . . . . . . . . . 4-1
4.2 Drawing flow . . . . . . . . . . . . . . . . . . . . . . . . . . . . . . . . . . . . . . . . . . . . . . . . 4-1
4.3 Using media. . . . . . . . . . . . . . . . . . . . . . . . . . . . . . . . . . . . . . . . . . . . . . . . . 4-2
4.3.1 Media type . . . . . . . . . . . . . . . . . . . . . . . . . . . . . . . . . . . . . . . . . . . . . . . . . . . . 4-2
4.3.2 Cautions on handling media. . . . . . . . . . . . . . . . . . . . . . . . . . . . . . . . . . . . . . . 4-2
4.3.3 Precaution on stori ng medi a. . . . . . . . . . . . . . . . . . . . . . . . . . . . . . . . . . . . . . . 4-3
4.3.4 The printing area . . . . . . . . . . . . . . . . . . . . . . . . . . . . . . . . . . . . . . . . . . . . . . . 4-3
4.4 Menu setup on the operation panel . . . . . . . . . . . . . . . . . . . . . . . . . . . . . 4-4
4.4.1 Setting the Menu . . . . . . . . . . . . . . . . . . . . . . . . . . . . . . . . . . . . . . . . . . . . . . . 4-4
4.4.2 Items in the setup menu . . . . . . . . . . . . . . . . . . . . . . . . . . . . . . . . . . . . . . . . . . 4-6
4.5 Operating from the operation panel . . . . . . . . . . . . . . . . . . . . . . . . . . . . 4-22
4.5.1 To stop printing operation. . . . . . . . . . . . . . . . . . . . . . . . . . . . . . . . . . . . . . . . 4-22
4.5.2 Operating the pressurizing roller . . . . . . . . . . . . . . . . . . . . . . . . . . . . . . . . . . 4-22
4.6 Operations after printing . . . . . . . . . . . . . . . . . . . . . . . . . . . . . . . . . . . . . 4-23
4.6.1 Cutting roll media . . . . . . . . . . . . . . . . . . . . . . . . . . . . . . . . . . . . . . . . . . . . . . 4-23
4.6.2 Roll media cutting procedure . . . . . . . . . . . . . . . . . . . . . . . . . . . . . . . . . . . . . 4-24
5 Maintenance
5.1 Introduction. . . . . . . . . . . . . . . . . . . . . . . . . . . . . . . . . . . . . . . . . . . . . . . . . 5-1
Page 15

RJ-8000 OPERATION MANUAL
(7)
5.2 Replacing consumables. . . . . . . . . . . . . . . . . . . . . . . . . . . . . . . . . . . . . . . 5-1
5.2.1 Replacing in k cartridges . . . . . . . . . . . . . . . . . . . . . . . . . . . . . . . . . . . . . . . . . . 5-1
5.2.2 Replacing roll media . . . . . . . . . . . . . . . . . . . . . . . . . . . . . . . . . . . . . . . . . . . . . 5-4
5.2.3 Replacing the cu tting blade . . . . . . . . . . . . . . . . . . . . . . . . . . . . . . . . . . . . . . . 5-9
5.2.4 Replacing the waste liquid tank . . . . . . . . . . . . . . . . . . . . . . . . . . . . . . . . . . . 5-14
5.3 Cleaning. . . . . . . . . . . . . . . . . . . . . . . . . . . . . . . . . . . . . . . . . . . . . . . . . . . 5-17
5.3.1 Cleaning the outer case . . . . . . . . . . . . . . . . . . . . . . . . . . . . . . . . . . . . . . . . . 5-17
5.3.2 Cleaning inside the printer . . . . . . . . . . . . . . . . . . . . . . . . . . . . . . . . . . . . . . . 5-18
5.3.3 Head cleaning. . . . . . . . . . . . . . . . . . . . . . . . . . . . . . . . . . . . . . . . . . . . . . . . . 5-19
5.3.4 Cleaning the cleaning wiper . . . . . . . . . . . . . . . . . . . . . . . . . . . . . . . . . . . . . . 5-22
5.4 Changing Ink Types . . . . . . . . . . . . . . . . . . . . . . . . . . . . . . . . . . . . . . . . . 5-25
5.5 Transfer and transportation. . . . . . . . . . . . . . . . . . . . . . . . . . . . . . . . . . . 5-29
5.5.1 Transferring the printer . . . . . . . . . . . . . . . . . . . . . . . . . . . . . . . . . . . . . . . . . . 5-29
5.5.2 Transporting the printer . . . . . . . . . . . . . . . . . . . . . . . . . . . . . . . . . . . . . . . . . 5-31
6 Troubleshooting
6.1 Introduction. . . . . . . . . . . . . . . . . . . . . . . . . . . . . . . . . . . . . . . . . . . . . . . . . 6-1
6.2 Failures and malfunctions of the printer . . . . . . . . . . . . . . . . . . . . . . . . . 6-1
6.3 Error messages. . . . . . . . . . . . . . . . . . . . . . . . . . . . . . . . . . . . . . . . . . . . . . 6-8
6.3.1 Status messages . . . . . . . . . . . . . . . . . . . . . . . . . . . . . . . . . . . . . . . . . . . . . . . 6-8
6.3.2 Message type error display and solutions . . . . . . . . . . . . . . . . . . . . . . . . . . . . 6-9
6.3.3 Data error display and solutions. . . . . . . . . . . . . . . . . . . . . . . . . . . . . . . . . . . 6-11
6.3.4 Command error display and solutions . . . . . . . . . . . . . . . . . . . . . . . . . . . . . . 6-11
6.3.5 Error requir ing a restart. . . . . . . . . . . . . . . . . . . . . . . . . . . . . . . . . . . . . . . . . . 6-12
6.4 When media jams occur. . . . . . . . . . . . . . . . . . . . . . . . . . . . . . . . . . . . . . 6-14
6.4.1 How to remove a piece of media (roll media) . . . . . . . . . . . . . . . . . . . . . . . . . 6-14
6.4.2 How to remove a piece of media (cut media). . . . . . . . . . . . . . . . . . . . . . . . . 6-15
7 Appendix
7.1 Introduction. . . . . . . . . . . . . . . . . . . . . . . . . . . . . . . . . . . . . . . . . . . . . . . . . 7-1
7.2 Product Specifications. . . . . . . . . . . . . . . . . . . . . . . . . . . . . . . . . . . . . . . . 7-1
7.3 Interface Specifications . . . . . . . . . . . . . . . . . . . . . . . . . . . . . . . . . . . . . . . 7-3
7.3.1 Centronics Bidirection Parallel Interface:IEEE1284) Specifications. . . . . . . . . 7-3
7.3.2 Network Interface (Optional) Specifications . . . . . . . . . . . . . . . . . . . . . . . . . . . 7-4
7.4 Options/Supply list . . . . . . . . . . . . . . . . . . . . . . . . . . . . . . . . . . . . . . . . . . . 7-5
7.4.1 Options . . . . . . . . . . . . . . . . . . . . . . . . . . . . . . . . . . . . . . . . . . . . . . . . . . . . . . . 7-5
7.4.2 Supply. . . . . . . . . . . . . . . . . . . . . . . . . . . . . . . . . . . . . . . . . . . . . . . . . . . . . . . . 7-5
7.5 Installing Options. . . . . . . . . . . . . . . . . . . . . . . . . . . . . . . . . . . . . . . . . . . . 7-7
7.5.1 Installing expansion memory . . . . . . . . . . . . . . . . . . . . . . . . . . . . . . . . . . . . . . 7-7
Page 16

RJ-8000 OPERATION MANUAL
(8)
7.5.2 How to use the winding unit . . . . . . . . . . . . . . . . . . . . . . . . . . . . . . . . . . . . . . . 7-9
7.5.3 Installation of the hard disk. . . . . . . . . . . . . . . . . . . . . . . . . . . . . . . . . . . . . . . . 7-9
7.5.4 How to use the scroller (optional). . . . . . . . . . . . . . . . . . . . . . . . . . . . . . . . . . 7-11
7.5.5 Using scroller stocker. . . . . . . . . . . . . . . . . . . . . . . . . . . . . . . . . . . . . . . . . . . 7-13
7.6 Glossary . . . . . . . . . . . . . . . . . . . . . . . . . . . . . . . . . . . . . . . . . . . . . . . . . . 7-16
Page 17

1 SAFETY INSTRUCTIONS
1.1 Introduction . . . . . . . . . . . . . . . . . . . . . . . . . . . . . . . . 1-1
1.2 Warnings, Cautions, and Notes . . . . . . . . . . . . . . . 1-1
1.3 Important safety instructions. . . . . . . . . . . . . . . . . . 1-2
1.4 Warning labels. . . . . . . . . . . . . . . . . . . . . . . . . . . . . . 1-5
1.4.1 Handling the warning labels . . . . . . . . . . . . . . . . . . . . 1-5
1.4.2 Locations and types of warning labels. . . . . . . . . . . . . 1-5
1.5 Operation procedure labels . . . . . . . . . . . . . . . . . . . 1-8
1.5.1 Handling the operation procedur e labels. . . . . . . . . . . 1-8
1.5.2 Locations and types of operation procedure label s. . . 1-8
Page 18

<Memo>
Page 19
RJ-8000 OPERATION MANUAL 1 Safety Instructions
1-1
1 Safety Instructions
1.1 Introduction
This chapter explains the me aning of safety ter ms for personnel who oper ates this equip ment, import ant
safety instructions, and the positions of the warning labels.
WARNING
Be sure to follow all instructions and warnings on this manual when using the
equipment.
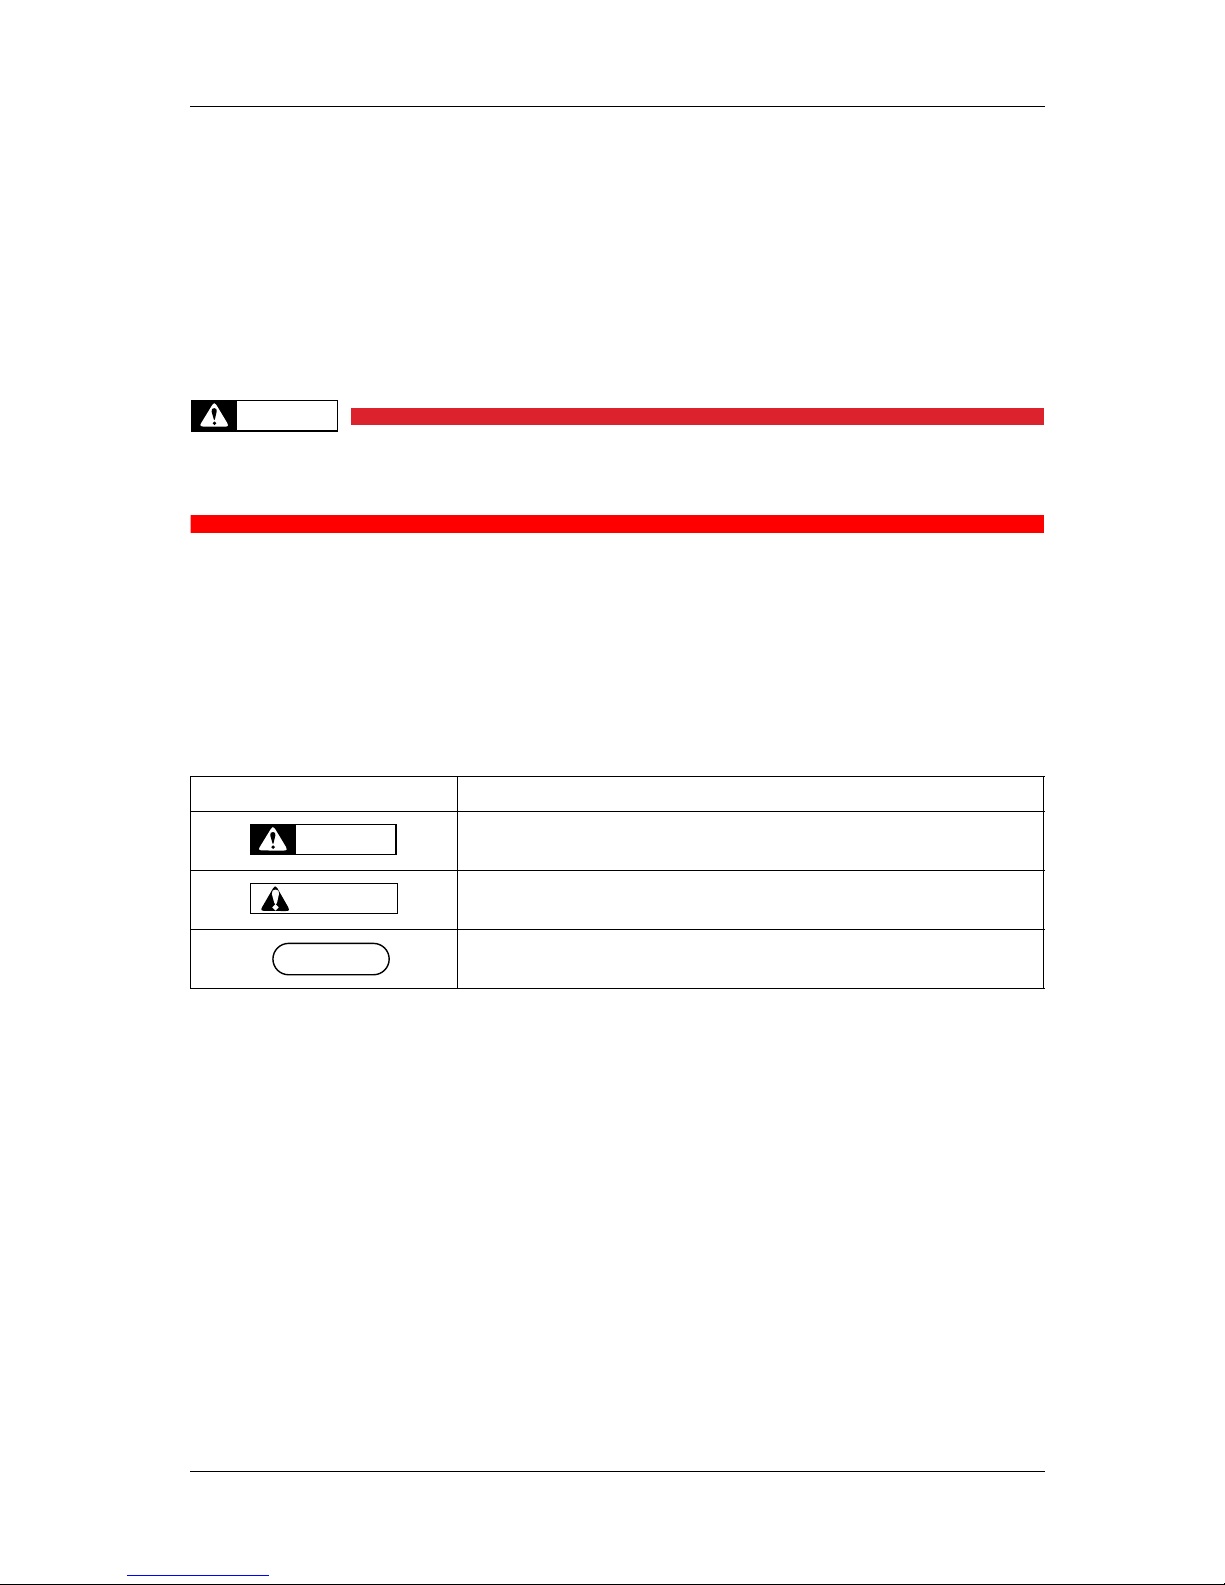
1.2 Warn in gs, Cautions, an d Notes
Safety terms in th is manual and the c ontents of warni ng labels atta ched to the pr inter are cat egorized into
the following three types depending on the degree of risk (or the scale of accident).
Read the following explanations carefully, and follow the instructions in this manual.
Safety terms Details
Must be followed carefully to avoid death or serious bodily injury
Must be observed to avoid bodily injury (moderately or lightly) or damag e to your
equipment
Contains important information and useful tips on the operation of your printer
WARNING
CAUTION
NOTE
Page 20

1 Safety Instructions RJ-8000 OPERATION MANUAL
1-2
1.3 Important safety instructions
General safety instructions that must be observed to use the equipment safely are explained below.
Do not place the printer in the following areas. Doing so may result in the printer tipping or
falling over and causing injury.
• Unstable surfaces
• Angled place
• Areas subject to vibration by other equipment
Do not stand on or place heavy objects on your printer. Doing so may result in the printer
tipping or falling over and causing injury.
Do not cover the ventilation hole of your printer with cloth, such as a blanket or table cloth.
Doing so could obstruct ventilation and cause fire.
Do not place the printer away from humid and dusty areas. Doing so may result in electrical
shock or fi re.
Do not use a damaged power cable. Doing so may result in electrical shock.
Do not attempt to plug in electrical plugs with wet hands. Doing so may result in electrical
shock.
Do not connect earth cables in the following areas.
• Gas pipes
Doing so may cause fire or an explosion.
• Earth terminals for telephone line or lightening rod
Doing so may cause a large flow of voltage if lightening occurs.
• Water pipes or faucets
If there is a plastic part in the pipe, the earth will not work properly.
Do not insert or drop metal or inflammable object s into open ing s, such as venti lation out le ts.
Doing so may result in electrical shock and fire.
Stop using your prin ter if a liqui d is spilled into it. This may cause electrical shock or fire. Turn
the printer off as soon as possible, unplug the power cord, contact MUTOH local dealer.
Be sure to use the attached cable. Otherwise, electrical shock or fire may occur.
Be sure to use the specified voltage (AC 100 V to 120V, or AC220V to 240V). Otherwise,
electrical shock or fire may occur.
Use electricity directly fr om a power outlet (AC 100 V to 120V, or AC220V to 240V). Do not
put many loads on one electrical output. Otherwise, heat may be generated and cause fire.
WARNING
Page 21

RJ-8000 OPERATION MANUAL 1 Safety Instructions
1-3
Be sure to use an outlet with an earth terminal and use the terminal corectly. Otherwise,
electrical shock or fire may occur.
Follow the instructions below when handling the power cable.
• Do not modify the cable
• Do not put heavy objects on the cable
• Do not bend, twist, or pull the cord
• Do not wire the cable near equipment that generates heat
Follow the instructions below when handling the power plug. Otherwise, fire may occur.
• Wipe away dust and any other residue before inserting the plug.
• Ensure that the plug is firmly inserted as far as it will go.
When handling the foot switch, be wary of the following:
• Do not place anything heavy on the foot switch.
• Do not bend the cable of the foot switch with force, and do not pull.
• Do not place the foot switch near thermal devices.
When handling ink cartridges, be careful that ink does not get in your eyes or on your skin.
However, if this happens, flush the are immediately with water. Otherwise, your eyes may
become congested or inflamed slightly. If you feel discomfort, consult a doctor immediately.
Do not disassemble ink cartridges. Otherwise, ink may get in your eyes or on your skin.
Be careful not to pinch your fingers when opening and closing the cover of the ink
compartment.
Be careful not to pinch your fingers when opening and closing the front cover.
When cutting the r oll media, be c areful of the following. Inco rrect handling c an result in i njury
to the hands and fingers from the razor blade.
• When holding the media, do not place fingers over the media cut groove.
• Move the razor blade slowly along the media cut groove.
Do not use thinner, Benzene, alcoh ol or other active age nts. Doing so may result i n damage or
paint peeling from the casing.
Be careful not to spill water inside the printer. Doing so may result in a short circuit.
Never open the covers fixed with screws. Doing so may result in electrical shock or a
malfunction in the printer.
Do not touch the cutter blade. Doing so may result in bodily injury.
CAUTION
Page 22

1 Safety Instructions RJ-8000 OPERATION MANUAL
1-4
Do not cut hard objects or drop the cutter. Doing so may damage or chip the cutter blade.
Do not touch the cleaning wiper or t he head cap unit while cleani ng the cleaning wiper . Doing
so may result in poor head cleaning because of oil on your hands.
Do not tilt the printer, sta nd i t a gai nst a wall, or turn it upside d own. Doi ng s o may cause ink
to leak inside the printer. Also, movement after transport is not covered by the warranty.
When installing options, do not touch the elements on the circuit board. The elements on the
boards can be very hot, and can cause burns.
Have four or more people unpack and assemble the printer.
When lifting the printer out of the packing box, be sure to remove the vinyl cover first, then
grab the holding grips on the sides of the printer . lifting the printer wit h the vinyl cover on may
cause your hands to slip and drop or damage the printer.
Have two or more people transport the printer.
Ensure that the pl ug has been disconnecte d from the power socket when it i s not to b e used for
a long time.
Earth wires must be connected to wires or terminals that fulfill the conditions below.
• Earth terminals of power sockets
• Earth wires with copper morsel that is at least 650 mm under the ground
Earth wires must be connected to wires or terminals that fulfill the conditions below.
When setting roll medi a, place it on top of a de sk or other fl at surfa ce. Sett ing roll media with
the scroller standing up may damage them.
Keep the printer horizontal during transportation.
Be sure to do the following before attaching options.
• Turn the printer off
• Unplug the power cord from the socket
• Unplug cables connected to the printer.
Otherwise, damage to the printer or your computer may occur.
• Remove electrostatic charge form your clothes and body by to uching the metal parts of the
printer.
Electronic components such as the memory may malfunction if exposed to an electrostatic
charge.
Page 23

RJ-8000 OPERATION MANUAL 1 Safety Instructions
1-5
1.4 Warning labels
The handling, attachment locations, and types of warning labels are explained below.
Warning labels are attached to areas where care should be paid. Read and understand the posi t ions and
contents thoroughly before performing your work.
1.4.1 Handling the warning labels
Be sure to no te the following w hen handling th e labels.
NOTE
• Make sure that all labels can be recognized. If text o r illu stra tions c anno t be se en clearly , e ither cle a n or repla ce
the label.
• When cleaning label s , use a cloth with water or neutra l detergent. Do not use a solvent or gasoline.
• If a warning label is damaged, lost, or cannot be recognized, replace the l abel.
When replacing warning labels, contact MUTOH local dealer.
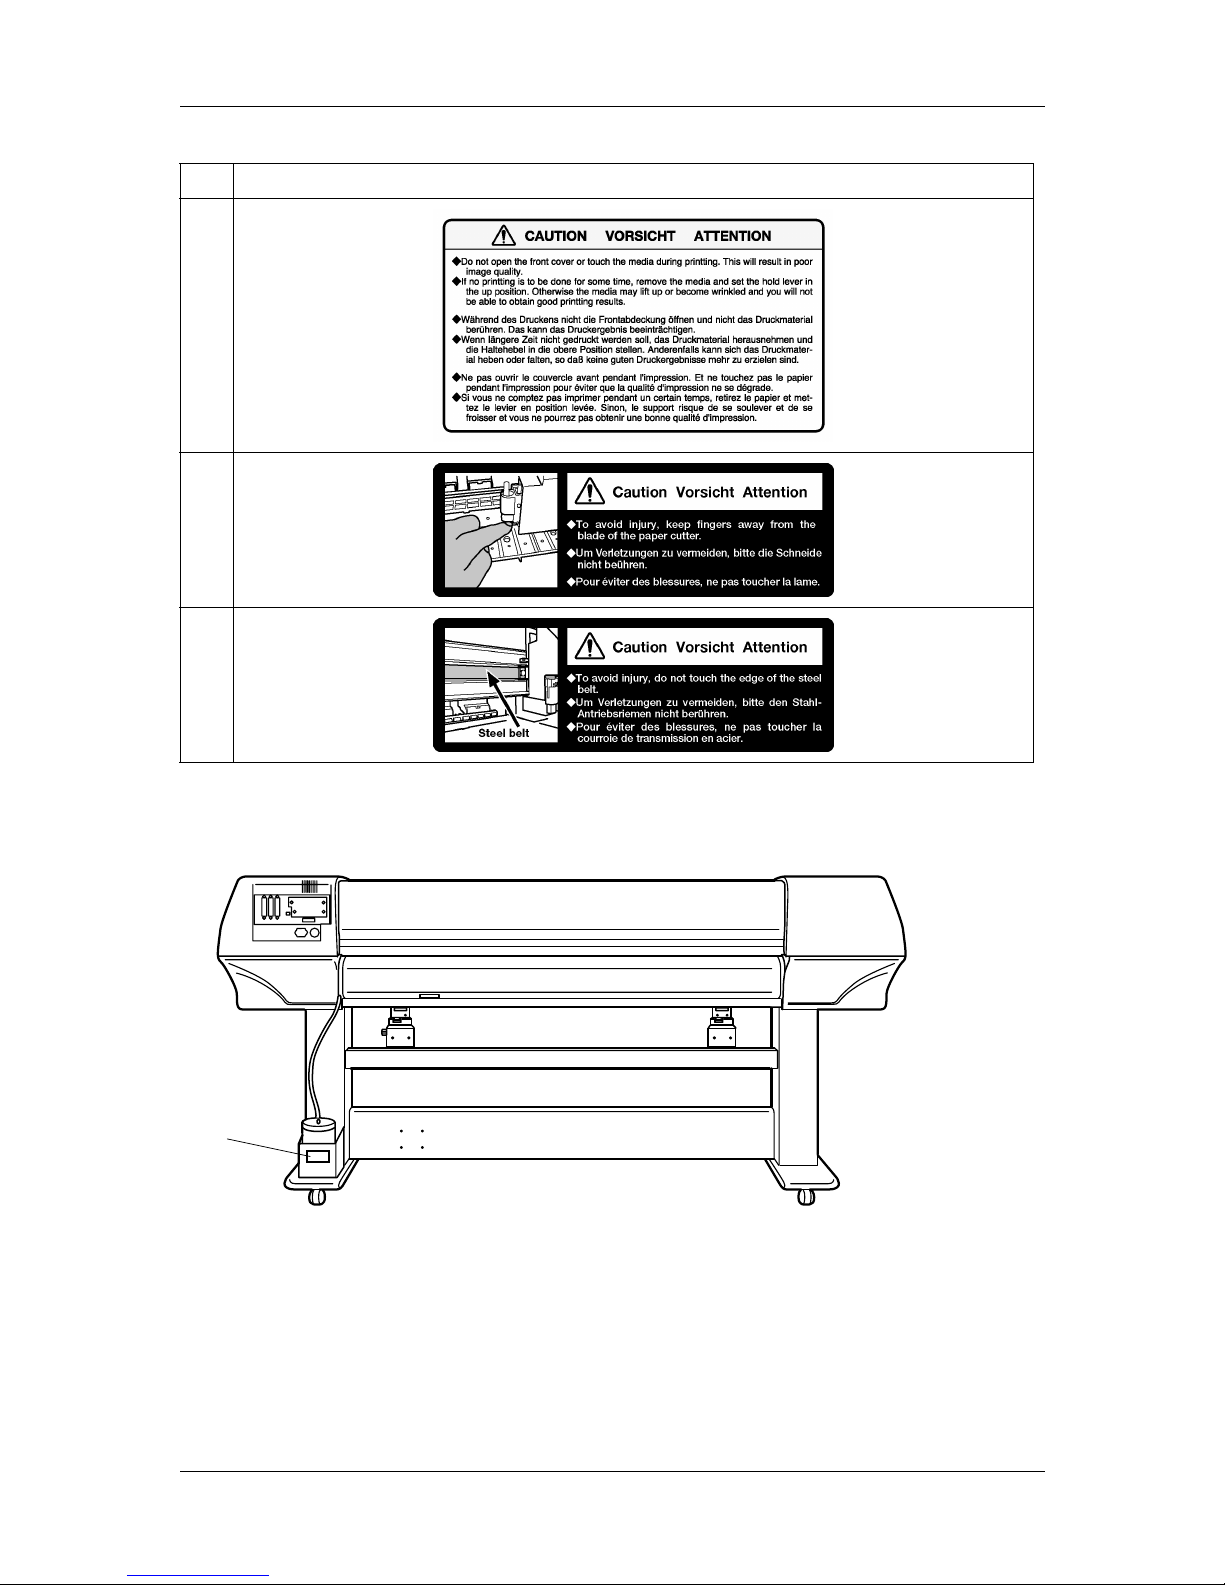
1.4.2 Locations and types of warning labels
The locations of warning labels are shown below.
(1) Front Part
1
3
2
Page 24
1 Safety Instructions RJ-8000 OPERATION MANUAL
1-6
(2) Back Part
No. Type
1
2
3
4
Page 25
RJ-8000 OPERATION MANUAL 1 Safety Instructions
1-7
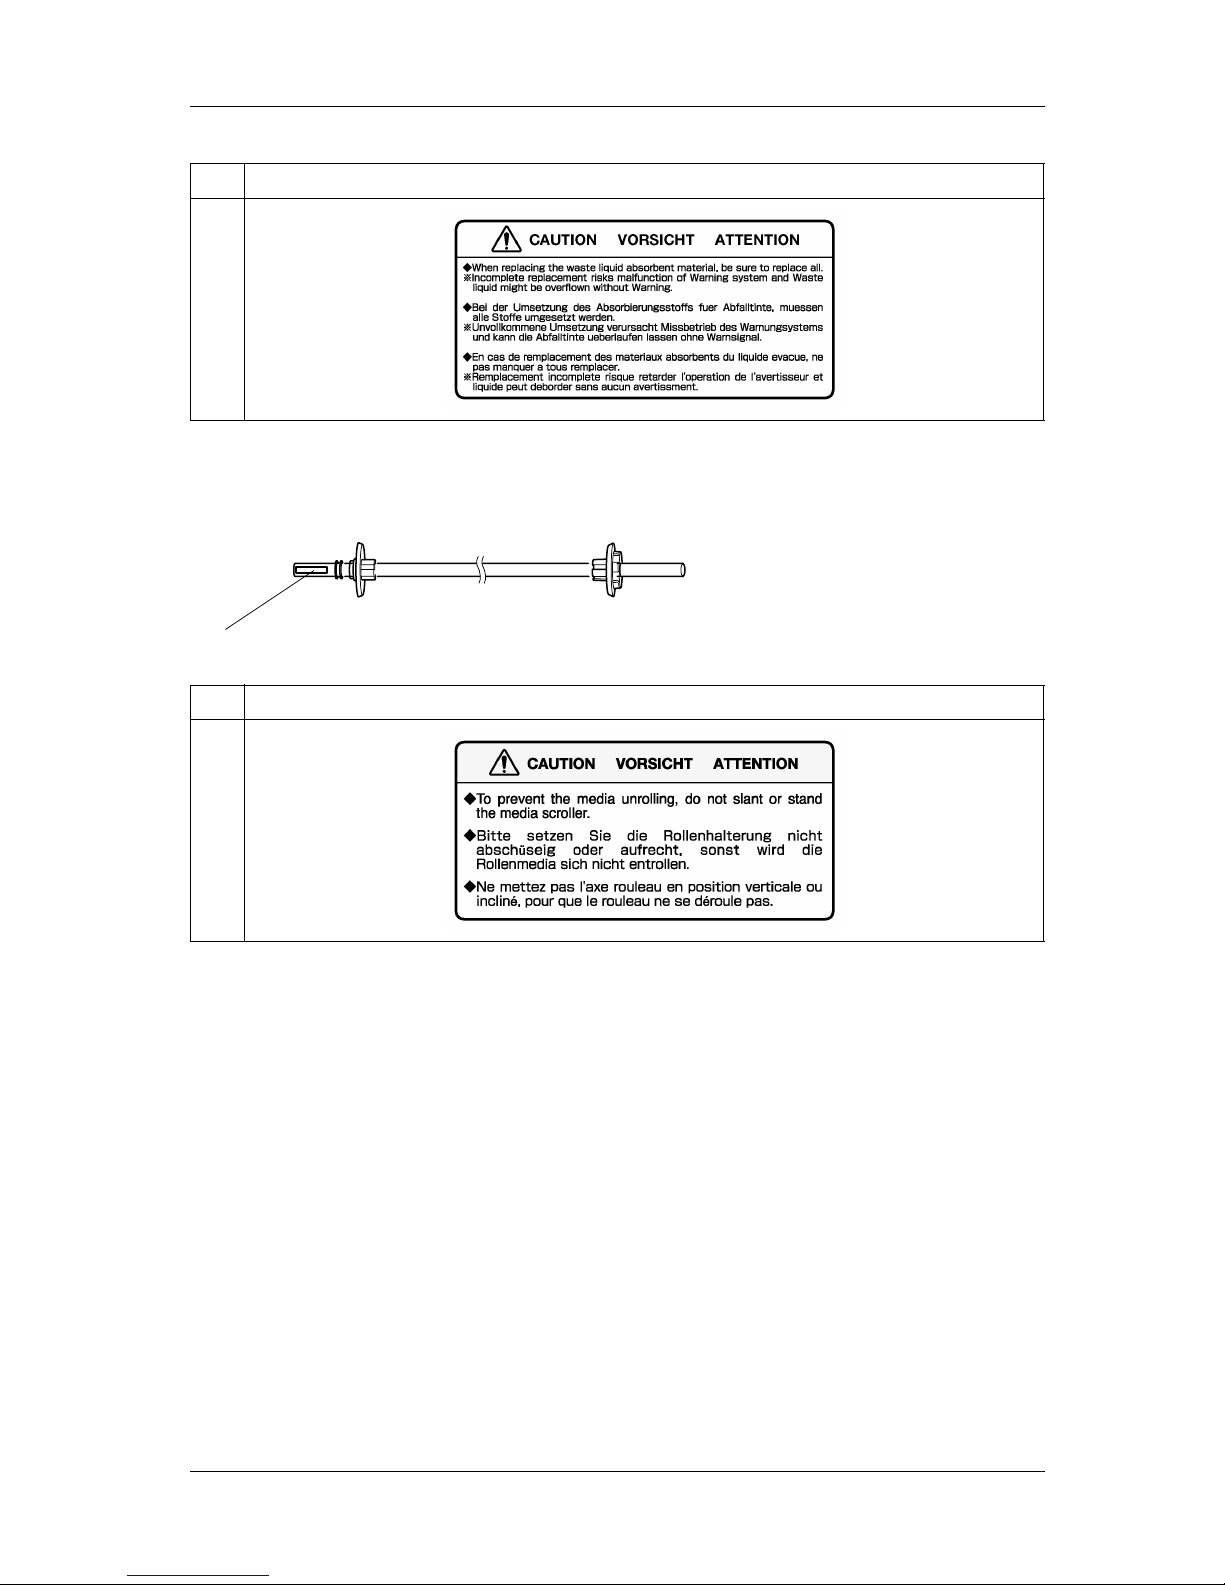
(3) Scroller
No. Type
4
No. Type
5
5
Page 26
1 Safety Instructions RJ-8000 OPERATION MANUAL
1-8
1.5 Operation procedure labels
The handling, attachment locations, and types of operation procedure labels are explained below.
Your printer has labels t hat give simple ex planations of operations tha t require parti cular care. Read an d
understand the locations and contents of these labels thoroughly before performing your work.
1.5.1 Handling the operation procedure labels
Be sure to note the following when handling operation procedure labels.
NOTE
• Make sure that all the labels can be recognized. If text or illustrations cannot be seen clearly, either clean or
replace the label.
• When cleaning labels, use a cloth with water or neutral detergent. Do not use a solvent or gasoline.
• If a warning label is damaged, lost, or cannot be recognized, replace the la bel.
When replacing warning labels, contact MUTOH local dealer.
1.5.2 Locations and types of operation procedure labels
The locations of operation procedure labels are shown below.
1
2
Page 27
RJ-8000 OPERATION MANUAL 1 Safety Instructions
1-9
No. Type R efer to
1
3.5 Installing ink
cartridges
2
3.6 Media
handling
Page 28

1 Safety Instructions RJ-8000 OPERATION MANUAL
1-10
Page 29

2 PRODUCT OVERVIEW
2.1 Introduction . . . . . . . . . . . . . . . . . . . . . . . . . . . . . . . . 2-1
2.2 Features. . . . . . . . . . . . . . . . . . . . . . . . . . . . . . . . . . . 2-1
2.3 Part names and functions . . . . . . . . . . . . . . . . . . . . 2-2
2.3.1 Front . . . . . . . . . . . . . . . . . . . . . . . . . . . . . . . . . . . . . . 2-2
2.3.2 Back. . . . . . . . . . . . . . . . . . . . . . . . . . . . . . . . . . . . . . . 2-3
2.3.3 Operation panel. . . . . . . . . . . . . . . . . . . . . . . . . . . . . . 2-4
2.4 Printer status. . . . . . . . . . . . . . . . . . . . . . . . . . . . . . . 2-7
2.4.1 Normal . . . . . . . . . . . . . . . . . . . . . . . . . . . . . . . . . . . . . 2-7
2.4.2 Setting menu display . . . . . . . . . . . . . . . . . . . . . . . . . . 2-7
2.4.3 Changing the printer status . . . . . . . . . . . . . . . . . . . . . 2-8
Page 30

<Memo>
Page 31

RJ-8000 OPERATION MANUAL 2 Product Overview
2-1
2 Product Overview
2.1 Introduction
This chapter explains the features, part names, and functions of the printer.
2.2 Features
The features of the printer are explained below.
(1) High speed output
Both models feature new print heads and achieve high speed printing.
They also offer printing width up to 1263 mm in 50-inch, 1641mm in 64-inch and 2230mm in 87-inch
spec possible.
(2) Wide variety of compatible media
Adjustable head height can adapt to various media thickness from 0.08 up to 1.0mm.
(3) Vibrant Color Reproduction
To reproduce sharp and vivid color, 4, 6 and 8 ink colors are used for prin ting. 220ml of large capacity
ink tank is equipped with an IC chip, which can automati cally detect the ink quantity, signif icantly
improving productivi ty.
(4) Effective usage of media
A JOG feature is provided to allow setting of the printing position as re quir ed. Because printing can be
performed on media that has already been printed on, excess space can be used effectively.
(5) RIP
Soft ware RI P server is ava ilable as an o ption.
Page 32

2 Product Overview RJ-8000 OPERATION MANUAL
2-2
2.3 Part names and functions
Part names and functions are explained below.
2.3.1 Front
No. Name Function
1 Operation panel This panel is used to set operational conditions, the status of the printer, and other
functions.
2 Ink compartment This is the place for installing ink cartridges.
3 Front cover This cover keeps the operator safe from the drive parts of the pr inter while i t is
operating. Open and/or close the cover only when performing the following
operations.
•
Media setting and replac ement
•
Cutter blade replacement
•
Clearing clean in g w ip e r
•
media jamming
4 Pressurizing roller This rol ler is used to press the media from abov e and keep it flat when printing.
5 Maintenance cover This pro tects us ers from electr ic shock ca used by t ouchi ng the int ernal electri cal part s.
The cover is opene d when expa nsi on memo ry ( optio nal ) is in st alle d, and is cl ose d fo r
normal use.
6 Stand This stand is used to install the printer on a surface flat floor.
The follow ing options are available for installation.
•
winding unit : 7.5.2 How to use the winding unit
•
scroller stocker : 7.5.4 How to us e the scrolle r (optional)
3
1
5
2
9
6
4
8
10
7
Page 33

RJ-8000 OPERATION MANUAL 2 Product Overview
2-3
2.3.2 Back
7 media guide This is used to feed th e m e dia smoothly when setting the media and when printing.
There is a ink drying device bu ilt in.
8 Media cut groove
Used to cut the media straight w hen it is cu t manually: 4.6.2 Roll media cutting
procedure
9 Carridge cover This is a cover to protect the user from the internal com ponents of the unit. This is
opened during the followi ng conditions :
•
When cleaning the cleaning wiper : 5.3.4 Cleaning the cleaning wiper
10 Foot switch This switch is used to raise and lower the pressurizing roller.
TIP
•
The footswitch is attached for 64-inch and 87-inch spec.
No. Name Function
1 AC inlet This is the inl et interface to which the power plug is connected.
2 Interfac e connecto r This is the connector to which the interface cabl e is connected.
No. Name Function
1
3
8
7
2
5
4
4
6
9
10
Page 34

2 Product Overview RJ-8000 OPERATION MANUAL
2-4
2.3.3 Operation panel
The operation panel is used to set operational conditions, display the status of the printer, and set other
functions.
The names and functions of the operation keys and status lamps are explained below.
TIP
•
See the sections below for using the opera tion panel.
•
When setting menus using the operation panel: 4.4 Menu setup on the operation panel
•
When setting functions using the operation panel: 4.5 Operating from the operation panel
3 Foot switch con nector This is t he connector to which the fo ot switch cable is attached.
TIP
•
The footswi tch is attached for 64-in ch and 87-inch spec.
4 Scroller receiver The scroller is se t w hen roll medi a is used.
5 I ns e rtion slot This is the slo t fo r in se rting media w h en se tting it.
6 Drain tank This is the storage tank for used ink.
7 Interface slo t 1 The network interface board attaches here.
8 Interface slot 2 This is not used for this print er.
Close it wit h the cover.
9 Interfa c e slot 3
10 Hard disk slot The hard di sk (optional ) attaches he re. When not using a hard disk, keep the cover
closed.
No. Name Function
Page 35

RJ-8000 OPERATION MANUAL 2 Product Overview
2-5
(1) Operation keys
NOTE
•
Some keys have multi ple functions and nam es depending on the printer stat us (normal or setting m enu display).
See "2.4 Pr in te r st atus" for mo re det ai ls .
No. Name Normal setup menu display
1 [POWER] key Turns the printer on an d off. Turns the printer on and off.
2 [F1] key Executes the function assigned to F1. Executes the function assigned to F1.
3 [F2] key Executes the function assigned to F2. Executes the function assigned to F2.
4 [F3] key Executes the function assigned to F3. Executes the function assigned to F3.
5 [F4] key Executes the function assigned to F4. Executes the function assigned to F4.
6
[MENU ] key
Changes the LCD monitor display to setup
menu status.
Changes the menu in reverse order.
7
[MENU ] key
Changes the LCD monitor display to setup
menu status.
Chang es the menu i n for w ard order .
8 [ENTER] key - Determine s the new parameter value and
changes the LCD monitor display to the
next menu. Sets the parameter value and
changes the LCD monitor display to the
next menu.
9 [CANCEL] key - Cancels the new parameter value and
changes the LCD monitor display to the
next menu. Clears the parameter value and
changes the LCD monitor display to the
next menu.
F 1
2
4
6
12
13
14
9
15
16
F 3
F 2
F 4
ERROR
DATA
MEDIA SET
CANCEL ENTER
POWER
MENU
RECEIVE
PROCESS
ROLL
SHEET
MEDIA
3
10
5
1
11
7
8
Page 36

2 Product Overview RJ-8000 OPERATION MANUAL
2-6
(2) LCD monitor and status lamps
No. Name Color Status Function
10 LCD m on it or - - This mo nitor disp l ays the ope ra tion stat us and error me ss a ge s o f the
printer.
11 POWER la m p Red On The pr in te r is on.
Off The printer is off.
12 ERROR lamp Red Flashing An error has occurred. The contents will be displayed on the LCD
monitor.
Off Eith e r th er e is no err or in th e p rin ter or the powe r is off.
13 DATA la m p Green On The printer is rec ei vi n g pr in t da ta .
Flashing The printer is analyzing received data.
Off The pr in te r is waiting to rec ei v e print data.
14 MEDIA SET
lamp
Green On
•
The pressurizing roller is in the release position.
•
Media is n o t set.
Off
•
The pressurizing roller is in the secured position.
•
The media is set.
15 ROLL lamp Green On Th e media type is set to roll media.
Off The media type is set to sheet media.
16 SHEET lamp Green On Th e media type is set to sheet media.
Off The media type is set to roll media.
Page 37

RJ-8000 OPERATION MANUAL 2 Product Overview
2-7
2.4 Printer status
The status of the printer is explained below.
2.4.1 Normal
Indicates that the printer can draw print data when media is loaded.
You can also make settings concerning printing using the operation panel.
The contents displayed on the LCD monitor of the control panel are as follows.
2.4.2 Setting menu display
Indicates that you can make settings concerning printing using the operation panel.
Operation regarding printing is possible on the operation panel .
The contents displayed on the LCD monitor of the control panel are as follows.
No. Position Description
1 1st line Displays the current status of the printer. Depending on the status, the contents may
be displayed in the 2nd to 4th lines.
2 Left of 2nd line Displays the function assigned to [F1] key.
3 Right of 2nd line Displays the function assigned to [F2] key.
4 Left of 3rd line Displays the function assigned to [F3] key.
5 Right of 3rd line Displays the function assigned to [F4] key.
6 Left of 4th line Displays the currently set media type.
7 Right of 4th line Displays the approximate amount of the remaining roll paper t hat is curren tly set.
(Units : m )
However, the am ou nt is di play ed on ly whe n eith er "Roll me dia 1", " Roll m edia 2" , or
"Roll media 3" is selected in the Roll media setting menu. 4.4.2 Items in the setup
menu
Ready to Plot
Cancel LeverUp
CutRoll Cleaning
User1 43m
1
2
4
6
3
5
7
*SetupMenu*
InkStatus OriginSet
TestPrint MediaSet
(1/6)
1
2
4
3
5
6
Page 38

2 Product Overview RJ-8000 OPERATION MANUAL
2-8
2.4.3 Changing the printer status
To change the printer status, follow the steps below.
(1) Changing the status from normal to the setting menu display
Press either [MENU ] or [MENU ] on the control panel when the printer is in normal status.
• The display of the control panel changes to the Setting menu display.
NOTE
•
See "4.4.2 I tems in the setup menu" for details of the setting menu.
(2) Changing the status from the setting menu display to normal
Take one of the follo wing ac tion s when the pr inter i s i n t he settin g m enu dis play to chan ge the op era tion
panel display to normal one.
• Press the [CANCEL] key on the operation panel.
• Leave the printer as it is for 3 minutes when the status is in the setting menu display.
No. Position Description
1 1st line Di splays the setting menu na m e set current ly.
2 Left of 2nd line Displays the funct ion assigned to [F1] key.
3 Right of 2nd line Displays the funct ion assigned to [F2] key.
4 Left of 3rd line Displays the function assig ned to [F3] key.
5 Right of 3rd line Disp lays the function assigned to [F4] key.
64th line
•
Displays the currentl y available functions of [F1] key to [F4] key.
•
Display s the page stat us if th ere are m ultip le pag es for th e curr ently di spla yed set ting
menu.
Page 39

RJ-8000 OPERATION MANUAL 2 Product Overview
2-9
NOTE
•
See "6.3.1 St at u s m es sa g es" for detail s of dis playing th e p rin t er status.
Pllot
Canc e
llCu tRo
Men u
Menu
Se t up
atusInkSt
rintTestP
nSetOr i g i
SetMed i a
/6
)(
1
Us e r 1
UpLever
ingClean
43M
OK
Normal
[
Leave the printer as it is
for 3 minutes
Setting Menu Display
] Canc[el ]
Menu[ ]
Page 40

2 Product Overview RJ-8000 OPERATION MANUAL
2-10
Page 41

3 BASIC INSTALLATION
3.1 Introduction . . . . . . . . . . . . . . . . . . . . . . . . . . . . . . . . 3-1
3.2 C onnecting the power cable . . . . . . . . . . . . . . . . . . 3-2
3.3 C onnecting the foot switch . . . . . . . . . . . . . . . . . . . 3-5
3.4 Turning the power ON/OFF . . . . . . . . . . . . . . . . . . . 3-7
3.4.1 Turning the power ON . . . . . . . . . . . . . . . . . . . . . . . . . 3-7
3.4.2 Turning the power OFF . . . . . . . . . . . . . . . . . . . . . . . . 3-7
3.5 Installing ink cartridges . . . . . . . . . . . . . . . . . . . . . . 3-9
3.6 Media handling . . . . . . . . . . . . . . . . . . . . . . . . . . . . 3-13
3.6.1 Attaching roll media. . . . . . . . . . . . . . . . . . . . . . . . . . 3-13
3.6.2 Loading roll media . . . . . . . . . . . . . . . . . . . . . . . . . . . 3-16
3.6.3 Loading sheet media . . . . . . . . . . . . . . . . . . . . . . . . . 3-21
3.6.4 Setting media type. . . . . . . . . . . . . . . . . . . . . . . . . . . 3-25
3.7 Testprinting . . . . . . . . . . . . . . . . . . . . . . . . . . . . . . . 3-27
3.7.1 Setup List. . . . . . . . . . . . . . . . . . . . . . . . . . . . . . . . . . 3-28
3.7.2 NozzleCheck . . . . . . . . . . . . . . . . . . . . . . . . . . . . . . . 3-29
3.7.3 Alignment. . . . . . . . . . . . . . . . . . . . . . . . . . . . . . . . . . 3-30
3.7.4 Color palette . . . . . . . . . . . . . . . . . . . . . . . . . . . . . . . 3-31
3.7.5 Maintenance record. . . . . . . . . . . . . . . . . . . . . . . . . . 3-32
3.8 C onnecting the printer to your PC . . . . . . . . . . . . 3-34
3.8.1 System requirements. . . . . . . . . . . . . . . . . . . . . . . . . 3-34
3.8.2 Selecting cables . . . . . . . . . . . . . . . . . . . . . . . . . . . . 3-34
3.8.3 Connecting the centronics interface . . . . . . . . . . . . . 3-35
3.8.4 Connecting the network interface . . . . . . . . . . . . . . . 3-36
3.9 Installing the printer driver. . . . . . . . . . . . . . . . . . . 3-37
3.9.1 Installing the driver for Windows 95/98 . . . . . . . . . . . 3-37
3.9.2 Installing the driver for Windows NT4/2000. . . . . . . . 3-40
Page 42

<Memo>
Page 43

RJ-8000 OPERATION MANUAL 3 Basic Installation
3-1
3 Basic Installation
3.1 Introduction
The procedures needed before using the printer are explained below.
Page 44

3 Basic Installation RJ-8000 OPERATION MANUAL
3-2
3.2 Connecting the powe r ca ble
The connection procedure for the power cable is explained below.
WARNING
• Make sure that the distributed power cable is used. Use of a differnt cable may
result in electric shock or fire.
• Do not use a damaged power cable. Doing so may result in electric shock or
fire.
CAUTION
Be careful of the following when handling the power cable.
• Do not make any modifications to the power cable.
• Do not place anything heavy on the power cable.
• Do not bend, twist, or pull the cable.
• Do not wire the cable near equipment that generates heat.
NOTE
If the power cable is damaged, contact one of the following locations.
• The shop where you bought your MUTOH printer
• Nearest MUTOH local dealer
To connect the power cable, follow the steps below.
1. Make sure that the printer is off.
F 1
F 3
F 2
F 4
ERROR
DATA
MEDIA SET
CANCEL ENTER
POWER
MENU
RECEIVE
PROCESS
ROLL
SHEET
MEDIA
Page 45

RJ-8000 OPERATION MANUAL 3 Basic Installation
3-3
NOTE
When the control panel is in the following condition, the power is ON.
Press the key again to turn the power OFF.
• The power lamp is lit (red).
2. Plug the power cable to the AC inlet on the back of the printer.
3. Plug the cable to the outlet correctly.
WARNING
• Do not attempt to plug in electrical plugs with wet hands. Doing so may result in
electrical shock.
• Be sure to use the specified voltage (AC 100V-120V/220V-240V). Otherwise,
electrical shock or fire may occur.
• Use electricity directly form a power outlet (AC 100V-120V/220V-240V). Do not put
many loads on one electrical output. Otherwise, heat may be generated and cause
fire.
• Be sure to use an outlet with an earth terminal, and use the terminal correctly.
Otherwise, electrical shock or fire may occur.
• Do not connect earth cables in the following areas.
• Gas pipes
Doing so may cause fire or an explosion.
• Earth terminals for telephone lines or lightening rods
Doing so may cause a large flow of voltage if lightening occurs.
• Water pipes or faucets
If there is a plastic part in the pipe, the earth will not work correctly.
No. Name
1AC inlet
2 Power cable
1
2
Page 46

3 Basic Installation RJ-8000 OPERATION MANUAL
3-4
CAUTION
• Follow the instructions below when handli ng the power plug. Otherwise, fi re may
occur.
• Wipe away dust and any other residue before inserting the plug.
• Ensure that the plug is firmly inserted as far as it will go.
• Ensure that the plug has been disconnected from the power socket when it is not
to be used for a long time.
• Earth wires must be connected to wires or terminals that fulfill the conditions
below.
• Earth terminals of power socket
• Earth wires with copper morsel that is at least 650 mm under ground
NOTE
• If you cannot use ear th terminals or find any of th em, contact the shop where you bought your printer.
• Do not unplug the power cable when the printer is on.
If power cable is unplugged, leave the printer for at least 1 minute before plugging the cable in again.
No. Name
1 Power cable
AC100〜120V
or
AC220〜240V
1
Page 47

RJ-8000 OPERATION MANUAL 3 Basic Installation
3-5
3.3 Connecting the foot switch
The connection procedure for the foot switch is described below.
If the pressure roller needs to be raised or lowered, it is possi ble to control this motion from the foot
switch, instead doing so at the control panel.
CAUTION
• When handling the foot switch, be wary of the following:
• Do not place anything heavy on the foot switch.
• Do not bend the cable of the foot switch with force, and do not pull.
• Do not place the foot switch near thermal devices.
Install the foot switch according to the following procedure.
1. Make sure that the power of the unit is OFF.
NOTE
• The power is ON if the control panel displays the following conditions:
• The [POWER] key is in the pushed in condition
• The POWER lamp is lit (red).
Press the [POWER] key again to turn the power OFF.
2. Connect the foot switch cab le connect or to the foot switch connector on the rear face of the unit, and
fix into place with a screw.
No. Name
1 Foot switch connector
2 Foot switch cable
1
2
Page 48

3 Basic Installation RJ-8000 OPERATION MANUAL
3-6
3. Place the foot switch on the floor under the stand.
1
No.
1 Foot switch
Name
1
Page 49

RJ-8000 OPERATION MANUAL 3 Basic Installation
3-7
3.4 Turning the power ON/OFF
The method to turn the power ON or OFF are described below.
3.4.1 Turning the power ON
Turn the power of the unit ON according to the following procedure.
1. Press the [POWER] key of the control panel, to turn the unit ON.
• The POWER lamp of the control panel will light (red).
2. The unit will initial startup operations.
3. After finishing initial startup operations, the unit will enter the normal operating condition.
NOTE
• If there are any problems du ring the in itial startu p oper ation, the un it will disp lay a m essage on the con trol pan el, and
the operation may stop.
If the operation stops, refer to "6. Troubleshooting", and take the appropriate measures.
3.4.2 Turning the power OFF
Turn the power of the unit OFF according to the following procedure.
1. Verify the following regarding the operational condition of the unit.
• There is no printing operation being performed.
• The Control panel is in a normal status.
2. Push the [POWER] key of the control panel, to turn the unit OFF.
F 1
F 3
F 2
F 4
ERROR
DATA
MEDIA SET
CANCEL ENTER
POWER
MENU
RECEIVE
PROCESS
ROLL
SHEET
MEDIA
Page 50

3 Basic Installation RJ-8000 OPERATION MANUAL
3-8
NOTE
• The power is ON if the control panel displays the following conditions:
• The [Power] key is in the pushed in condition.
• The power lamp is lit (red).
Press the [Power] key again to turn the power OFF.
3. The product will perform the power OFF operation.
• When the power OFF operation is complete, the power lamp of the control panel will turn off.
• The product will automatically turn the power OFF.
F 1
F 3
F 2
F 4
ERROR
DATA
MEDIA SET
CANCEL ENTER
POWER
MENU
RECEIVE
PROCESS
ROLL
SHEET
MEDIA
Page 51

RJ-8000 OPERATION MANUAL 3 Basic Installation
3-9
3.5 Installing ink cartridges
The installation of ink cartridges is explained below.
CAUTION
• When handling ink cartridges, be careful that ink does not get in your eyes or
on your skin. However, if this happens, flush the area immediately with water .
Otherwise, your eyes may become congested or inflamed slightly. If you feel
discomfort, consult a doctor immediately.
• Do not disassemble ink cartridge s. Otherwi se, ink may get in your ey es or on
your skin.
NOTE
• Use genuine products when filling ink cartridges with ink.
This product ha s been tuned for the use of genuine ink cartridges. If other manufacturer's products are used,
• drawing results become faint or ink ends are not pr operly detected, and
• the warranty will not cover (repairs will require a fee) any resultant breakdown.
• Refer to the following for the types and details of ink cartridges.
7.4 Options/Supply list
• Do not shake ink cartridges strongly. Otherwise, ink may leak.
• Do not disassemble ink cartridges. You cannot use disassembled cartridges.
To install ink cartridges, fo llow the steps below.
1. Turn the printer on.
2. The printer starts the initialize operation.
• The following message is displayed on the operation panel.
3. Open the ink compartment cover.
CAUTION
Be careful not to pinch your fingers whe n opening and closing the i nk compartment
cover.
InkStatus
No Filled [ALL]
Page 52

3 Basic Installation RJ-8000 OPERATION MANUAL
3-10
4. Remove the replacement ink cartridge from its package.
5. Attach the ink cartridge to the ink cartridge slot.
• The ink cartridge must be at tached to a sp ecific sl ot acco rdi ng to the type and co lor use d. Refer t o
the following table to match the ink color and number labeled in front of the slot.
a. For 50-inch specification and 64-inch specification printers
b. 87-inch specification printers
No. Name
1 Ink compartment
Number of
the colors
Ink Type
Slot Number of Ink Cartridge
12345678
4Dye only/
Pigment only
Black Yellow Cyan Magenta Magenta Cyan Yellow Black
4 Alternate
Dye/Pigment
Black
(Pigment)
Cyan
(Pigment)
Magenta
(Pigment)
Yellow
(Pigment)
Yellow
(Dye)
Magenta
(Dye)
Cyan
(Dye)
Black
(Dye)
6Dye only/
Pigment only
1
Black Cyan Cleaning
Fluid
Cleaning
Fluid
Yellow Magenta Light
Cyan
Light
Magenta
6 Pigment only 2Black Cyan Green Orange Yellow Magenta Cleaning
Fluid
Cleaning
Fluid
8 Pigment only Black Cyan Green Orange Yellow Magenta Light
Cyan
Light
Magenta
Number of
the colors
Ink Type
Slot Number of Ink Cartridge
12345678
4Dye only/
Pigment only
Black Cyan Magenta Yellow Black Cyan Magenta Black
4 Alternate
Dye/Pigment
Black
(Pigment)
Cyan
(Pigment)
Black
(Dye)
Cyan
(Dye)
Magenta
(Dye)
Yellow
(Dye)
Magenta
(Pigment)
Yellow
(Pigment)
6Dye only/
Pigment only
1
Black Cyan Cleaning
Fluid
Cleaning
Fluid
Yellow Magenta Light
Cyan
Light
Magenta
1
Page 53

RJ-8000 OPERATION MANUAL 3 Basic Installation
3-11
• Insert the cartridge with the arrow mark face-up and pointing to the rear of the printer.
• Insert the cartridge as far as it will go.
6. Close the ink compartment cover after installing all ink cartridges.
• Push the cover firmly until it latches.
7. The printer starts ink replenishment.
• During replenishment, the printer executes ink replenishment and inaction alternately.
6 Pigment only 2Black Cyan Green Orange Yellow Magenta Cleaning
Fluid
Cleaning
Fluid
8 Pigment only Black Cyan Green Orange Yellow Magenta Light
Cyan
Light
Magenta
No. Name
1 Ink cartridge slot
2 Ink cartridge
No. Name
1 Ink compartm ent
Number of
the colors
Ink Type
Slot Number of Ink Cartridge
12345678
1
2
1
Page 54

3 Basic Installation RJ-8000 OPERATION MANUAL
3-12
NOTE
During ink replenishment, note the following.
• Do not turn the printer off.
• Do not unplug the power cable.
• Do not open the front cover.
8. When the ink repl enishment is compl eted, the foll owing message is displayed on the operation panel.
NOTE
Printing the first time after ink replenishment may lead to the following phenomena.
• Printed line grazes
• White lines
If any of there occurs, perform the head cleaning 2 or 3 times and check the printing result.
If the printing result does not improve after the head cleaning, wait at least one hour, and perform the head cleaning again
then check the printing result.
If you still want to make improvements, contact MUTOH local dealer.
Ink Refill
Wait for a while
Paper End
Cancel LeverUp
CutRoll Cleaning
User1 43m
Page 55

RJ-8000 OPERATION MANUAL 3 Basic Installation
3-13
3.6 Media handling
Media handling, attaching media, and setting media type are explained below.
NOTE
Refer to the following for details such as how to handle the media.
4.3 Using media
3.6.1 Attaching roll media
The procedure for attaching roll media to the printer is explained below.
To attach roll media, use the scroller that comes with your printer.
NOTE
• You can attach roll media with a 2 inch (outer diameter: 103 mm or smaller) or 3 inch media tube (outer diameter:
150 mm or smaller) to your printer.
To attach roll media, follow the steps below.
CAUTION
• When setting roll media, place it on top of a desk or other flat surface.
Setting roll media with the scroller standing up may damage them.
1. Slide and remove the movable flange from the scroller.
2. When using a roll media with a media tube di ameter of 2 inche s, remo ve the mov able media stopper
and the fixed flange adapter.
No. Name
1Scroller
2 Movable flange
1
2
Page 56

3 Basic Installation RJ-8000 OPERATION MANUAL
3-14
3. Insert the fixed flange into the roll media. Note that the media end is on the left side of the media
when viewed from the flange side.
4. Insert the flange until the right end meets the media tube of the roll media.
5. Attach the movable flange to the other end of the media to fix the media firmly.
No. Name
1 Movable media stopper
2fixed flange
3Adapter
No. Name
1Fixed flange
2Roll media
No. Name
1Fixed flange
2Roll media
1
221
1
2
1
2
Page 57

RJ-8000 OPERATION MANUAL 3 Basic Installation
3-15
6. Tighten the screw of the movable flange to fix the roll media to the scroller.
7. Hold the scroller so the fixed fl ange is on the left side, and set both en ds of the scr oller to the scroller
receivers on the printer.
NOTE
• Set the scroller onto the printer correctly by referring to the figure below.
If the scroller direction is wrong, the printer cannot feed the media correctly.
No. Name
1 Movable flange
2 Roll media
No. Name
1 Movable flange
2Scroller
2
1
2
1
Page 58

3 Basic Installation RJ-8000 OPERATION MANUAL
3-16
3.6.2 Loading roll media
The procedure for loading roll media is explained below.
To load roll media, follow the steps below.
1. Turn the printer on.
2. The printer starts the initializing operation.
• The following message is displayed on the operation panel.
No. Name
1 Scroller receiver
2Scroller
1
2
1
Paper End
Cancel LeverUp
CutRoll Cleaning
User1 43m
Page 59

RJ-8000 OPERATION MANUAL 3 Basic Installation
3-17
NOTE
• In the following case, follow "4.4.2 Items in the setup menu" and set the items.
• To use the winding unit : Set to "ON" in the winding unit setup item.
• To not use the media detection at the media initialization: Set to "OFF" in the media detection setup item.
3. Verify that the sheet lamp on the control panel is unlit.
4. Press [F2] key to raise the pressurizing roller.
• MEDIA SET lamp is lit. (green)
•The following message is displayed on the operation panel.
NOTE
• When raising or lowering the pressurizing roller, you can use the foot switch instead of the control panel.
• The footswitch is attached for 64-inch and 87-inch spec.
5. Open the front cover.
CAUTION
• Be careful not to pinch your fingers when opening and closing the front cover.
No. Name
1 Foot switch
Please set paper
Cancel LeverUp
CutRoll Cleaning
User1 43m
1
Page 60

3 Basic Installation RJ-8000 OPERATION MANUAL
3-18
6. Load the roll media into t he insertion slot on the back of the printer.
NOTE
• If there is a part not wounded tightly on the end of the roll media, wind it tightly again, then load it.
7. Pull the roll media out about 1m from the front media feed slot which is located inside of the front
cover.
No. Name
1 Front cover
No. Name
1Roll media
2 Insertion slot
1
2
1
Page 61

RJ-8000 OPERATION MANUAL 3 Basic Installation
3-19
8. While holding down the end of the media, hold the scro ll er and rol l out a bit of the media. Remove
slack and skewness, then align the right edge of the roll media parallel with the media loading
position.
NOTE
• The media loading position is a guide for setting up the media.
• If the right edge of the roll media is 5 mm or more from the media setting position side to side, a media set error may
result if the media is not detected.
Make sure to set the right edge of the roll media within 5 mm of the media setting position.
• If it is not possible to set the right edge of t he rol l media within 5 mm of th e media setting position, refer to the figure
below and set the scroller position.
• If the right edge of roll m edia is not in l ine with the M edia loading po sition,adjust the scroller position as sh own below.
No. Name
1 Insertion slot
2 Roll media
No. Name
1Scroller
2 Media loading position
1
2
1
2
5mm
Page 62

3 Basic Installation RJ-8000 OPERATION MANUAL
3-20
• When moving the roll media to the left
Rotate the scroller adjustment screw counterclockwise.
• When moving the roll media to the right
Rotate the scroller adjustment screw counterclockwise.
TIP
• When using the winding unit, follow the instruc tions under "7.5. 2 How to use the winding un it" to set the roll sheet to
the winding unit.
No. Name
1 Scroller adjustment screw
2Scroller
3Roll media
4 Media loading position
No. Name
1 Scroller adjustment screw
2Scroller
3Roll media
4 Media loading position
1
2
3
4
1
2
3
4
Page 63

RJ-8000 OPERATION MANUAL 3 Basic Installation
3-21
9. Press the [F2] key on the control panel to lower the pressurizing roller.
• The MEDIA SET lamp will turn off.
10. Close the front cover.
CAUTION
• Be careful not to pinch your fingers when opening and closing the front cover.
NOTE
• If you load a new tube of roll media, th e media end may not be straight. If so, cut the end of the roll media. See the
"4.6.1 Cutting roll media" to cut the roll media.
11. The media initial menu is displayed on the control panel.
TIP
• To change the media type, follow the directions in "3.6.4 Setting media type" to set the media type.
3.6.3 Loading sheet media
The procedure for loading sheet media is explained below.
No. Name
1Front cover
1
*PaperInitialMenu*
Roll
LeverUp Photo
F2,F4−>ENTER or F3
F2
F3
F4
Page 64

3 Basic Installation RJ-8000 OPERATION MANUAL
3-22
You can use the following sheet media with your printer.
To load sheet media, follow the steps below.
NOTE
• If roll media is attached to the printer, wind the media up and then load the sheet media.
1. Turn the printer on.
2. The printer starts the initialize operation.
• The following message is displayed on the operation panel.
NOTE
• In the following case, follow "4.4.2 Items in the setup menu" and set the items.
• To not use the media detection at the media initialization: Set to "OFF" in the media detection setup item.
3. Verify that the sheet lamp on the control panel is unlit.
4. Press [F2] key on the control panel to lower the pressurizing roller.
• The MEDIA SET lamp will light (green).
• The following message is displayed on the operation panel.
50-inch spec 64-inch spec 87-inch spec
Width A4 to 1273 mm max. A4 to 1651 mm max. A4 to 2240 mm max.
Length 1300 mm max.
Paper End
Cancel LeverUp
CutRoll Cleaning
User1 43m
Please set paper
Cancel LeverUp
CutRoll Cleaning
User1 43m
Page 65

RJ-8000 OPERATION MANUAL 3 Basic Installation
3-23
NOTE
• When raising or lowering the pressurizing roller, you can use the foot switch instead of the control panel.
• The footswitch is attached for 64-inch and 87-inch spec.
5. Open the front cover.
CAUTION
• Be careful not to pinch your fingers when opening and closing the front cover.
6. Load the sheet media int o the insertion slot in the front of the pritner.
No. Name
1 Foot switch
No. Name
1Front cover
1
1
Page 66

3 Basic Installation RJ-8000 OPERATION MANUAL
3-24
7. Set the ri ght edge of the m edia so that it is parallel with the media setting position.
NOTE
• The media set position is a guide for setting up the media.
• If the right edge of the she et media is 5 m m or more from the me dia setting p osition side to side, a media set erro r may
result if the media is not detected. Make sure to set the right edge of the sheet media within 5 mm of the media setting
position.
8. Press [F2] key on the control panel to lower the pressurizing roller.
• The MEDIA SET lamp will turn off.
9. Close the front cover.
No. Name
1 Sheet media
2 Insertion slot
No. Name
1 Sheet media
2 Media loading position
2
1
1
2
2
5mm
Page 67

RJ-8000 OPERATION MANUAL 3 Basic Installation
3-25
NOTE
• Be careful not to pinch your fingers when opening and closing the front cove r.
10. The media initial menu is displayed on the control panel.
TIP
• To change the media type, follow the directions in "3.6.4 Setting media type".
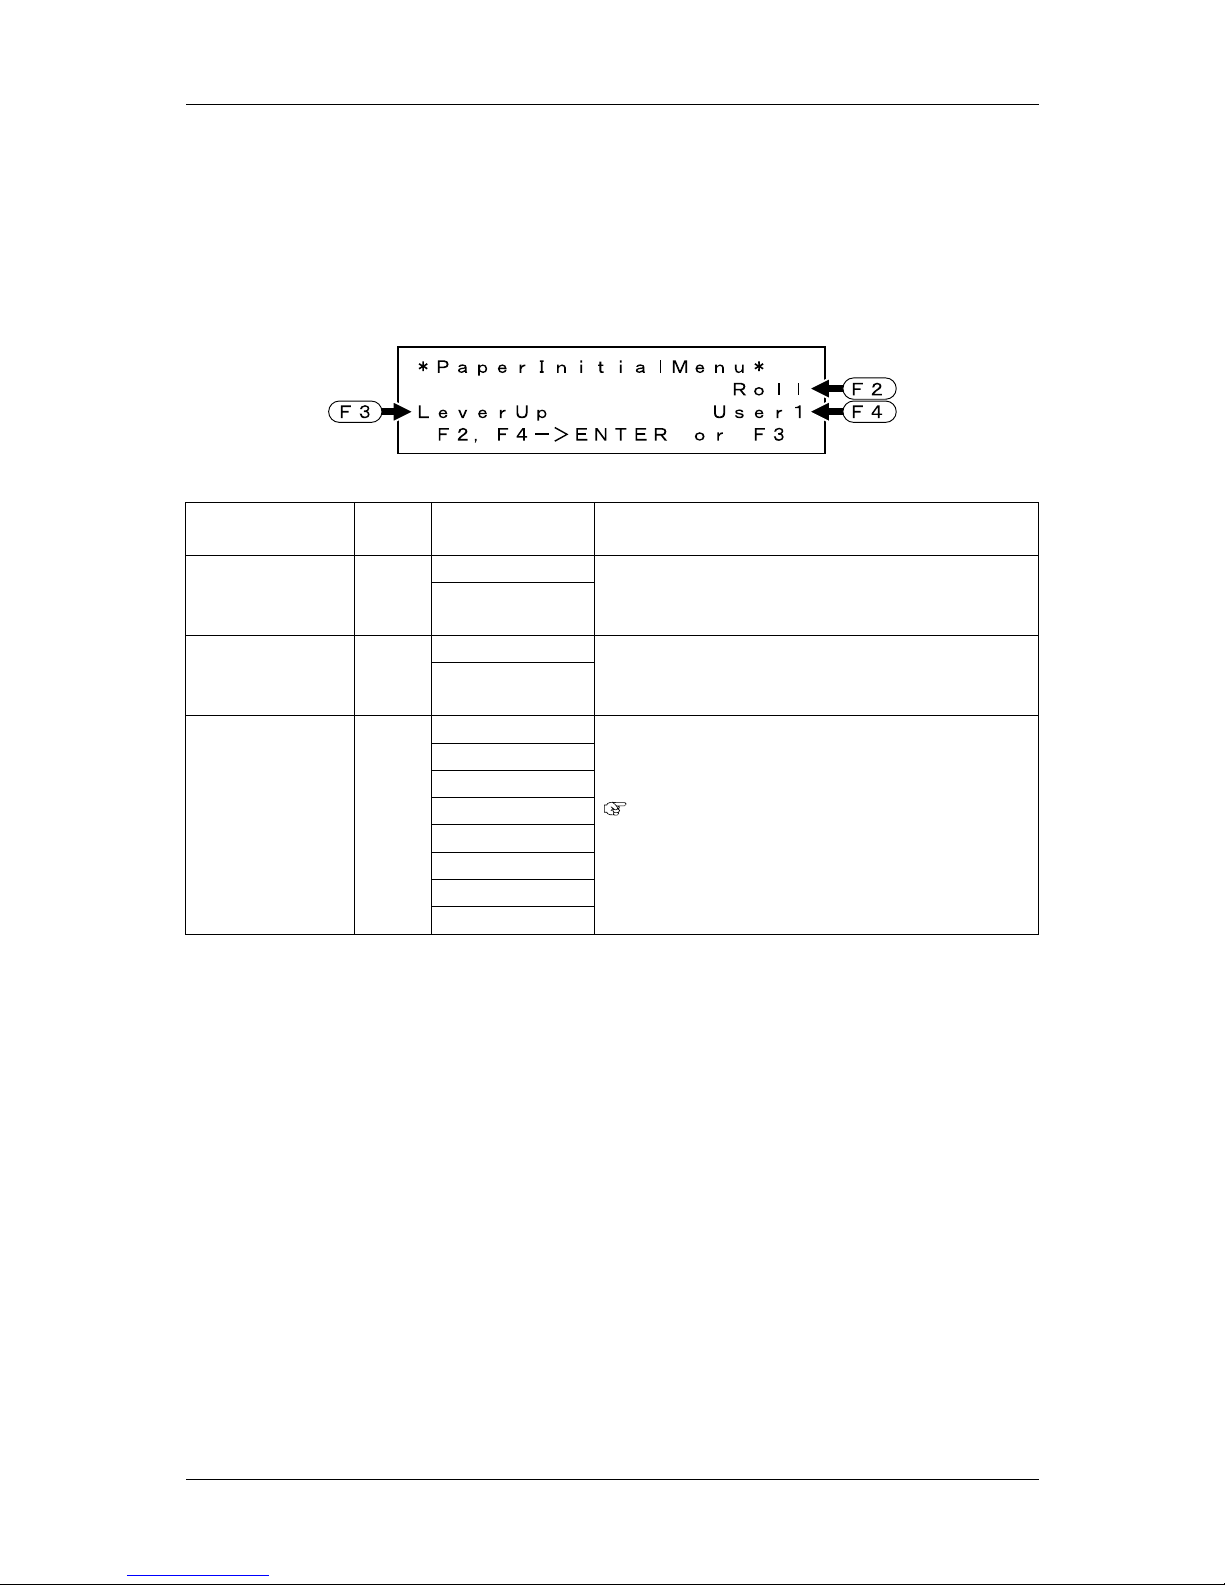
3.6.4 Setting media type
The procedure for setting media type is explained below.
To set the media type, follow the steps below.
1. Turn the printer on and load the media.
• Once the media is set, the media initial menu will be displayed.
TIP
See the following sections to load media.
3.6.2 Loading roll media
3.6.3 Loading shee t media
No. Name
1Front cover
1
*PaperInitialMenu*
Roll
LeverUp Photo
F2,F4−>ENTER or F3
F2
F3
F4
Page 68

3 Basic Installation RJ-8000 OPERATION MANUAL
3-26
2. Press either of the following keys on the control panel, and select the current media type.
• When alternating the roll/sheet media selection: [F2]
• When changing from media loading: [F3]
• When changing media type: [F4]
3. Press the [Enter] key on the operation panel.
• The media t ype is set.
• "Media Initial" is displayed o n the LCD, and the printer starts th e media initial op eration.
NOTE
The printer starts the media initial operation when you perform the following at media type setup menu.
• Pressing the [CANCEL] key on the operation panel
• Leaving the printer for 10 seconds without doing anything
Setup items
Key
name
Parameters Descriptions
Media type F2 Roll media Alternates the roll media type.
ÅERoll media : Set when loading the roll media.
ÅESheet media : Set when loading the sheet
media.
Sheet media
Lever Up/Down F3 Lever Up Switches between up and down motion of the
pressurizing lever.
Use this wh en starting over from the me dia setup.
Lever Down
Media type F4 Photo media Select the type of use among recommended media
.
If using other media than recommended media, set
to "User media 1 to 8".
TIP
• When the recommended media is used,
the quality related settings are made
according to the media type.
• When user media is used, the quality
related settings are made arbitrarily.
4.4Menu setup on the operation
panel
Poster media
Synthetic media
Fire-proof cloth
Backlight film
User 1
User 2
User 3
User 4
User 5
User 6
User 7
User 8
*PaperInitialMenu*
Roll
LeverUp Photo
F2,F4−>ENTER or F3
F2
F3
F4
Page 69

RJ-8000 OPERATION MANUAL 3 Basic Installation
3-27
4. When the media initial operation finishes, the printer moves to nomal status.
• The setting media loading procedure is completed.
3.7 Testprinting
Follow the steps below to do a testprinting and confirm that your printer operates correctly.
1. Turn the power of the unit ON, and set the media.
2. Make sure that your printer is in normal status.
3. Press either the [MENU ] key or [MENU ] key on the control panel.
• The setup menu is diplayed.
4. Press [F3] key on the control panel.
• "TestPrint: SetupPrint" is displayed on the LCD.
Paper Initial
Photo
Ready to Plot
Cancel LeverUp
CutRoll Cleaning
User1 43m
*SetupMenu*
InkStatus OriginSet
TestPrint MediaSet
(1/6)
F3
*TestPrint*
Setup NozzleCheck
Adj.Uni−D Adj.Bi−D
(1/2)
F1
F2
F3
F4
*TestPrint*
Palette Mainte.
(2/2)
F1
F2
Page 70

3 Basic Installation RJ-8000 OPERATION MANUAL
3-28
5. Select an item among the following and press the appropriate key, from [F1] key to [F4] key.
6. Print the information on the selected item.
7. After printing, the printer returns to the normal status.
3.7.1 Setup List
Use this function to check the current status of the printer.
NOTE
Please attach the SetupP rin t data on this page.
TIP
For printing, refer to the following.
3.7 Testprinting
Setup items
Key
name
Parameters Descriptions
Test Prin t (1/2) F1 Setup Perform Setup Llist.
3.7.1 Setup List
F2 Nozzle check Perform Nozzle check.
3.7.2 NozzleCheck
F3 Adj.Uni-D Perform Alignment fot the uni-direction printing.
3.7.3 Alignment
F4 Adj.Bi-D Perform Alignment fot the bi-direction printing.
3.7.3 Alignment
Test Print (2/2) F1 Palete Perform Color Palette.
3.7.4 Color palette
F2 Mainte. Perform Maintenance record.
3.7.5 Mainte nance record
Ready to Plot
Cancel LeverUp
CutRoll Cleaning
User1 43m
Page 71

RJ-8000 OPERATION MANUAL 3 Basic Installation
3-29
3.7.2 NozzleCheck
Use this function to check if there is any clogging of nozzles, missing dots, or faint printing.
NOTE
If printing quality declines, or if missing dots are evident after the NozzleCheck, the print heads need to be cleaned.
See "5.3.3 Head cleaning" to perform head cleaning.
After finishing the head cleaning, perform the NozzleCh eck again.
TIP
For printing, refer to the following.
3.7 Testprinting
Set Up List
Panel
Media Setup
Command Setup
Layout Setup
Function Setup
Roll/Cut = Cut
Media = Matte Yupo
Ink Dry Timer = 0 sec
Thick = 114 um
Thin Out
Model
PROM
NVRAM
Opt, Memory
Ink Status Information
K : P 92% C : P 85%
M
: P 90% Y : P 90%
O
: P 86% G : P 85%
C : P 74%
m
: P 77%
=
=
=
=
RJ–8000
V 0.05
V 1.00
256MB
Serial No. = None
Temp. 27˚C
! Error !
0 : None [ ]
1 : None [ ]
2 : None [ ]
3 : None [ ]
4 : None [ ]
5 : None [ ]
1 : 100%
3 : 100%
5 : 100%
7 : 100%
2 : 100%
4 : 100%
6 : 100%
8 : 100%
Dist. Adj
Data X
Real X
Head Height
Stiffness
Cut Sheet Size
Top Feed
Command
Step
Position
Terminator
Image Reso.
Online Timer
Layout Method
Joint
Cut Pos.
Media Cut
RTL Pass
0.025mm
P1
Special
360dpi
30 sec
Command
OFF
Data
Auto
(Page Size
(Margin
(Blank Pos.
auto )
Normal )
Normal )
1000.00
1000.00
low
Normal
Vertical
OFF
=
=
=
=
=
=
=
=
=
=
=
=
=
=
=
=
CMYÐ>BLACK
Scale
Mirror
Yes
100.0%
OFF
=
=
=
=
=
=
Merge
Halftoning
( Origin
(Position Offset X
(Position Offset X
Last
Speed
Center )
0mm)
0mm)
=
=
=
=
=
Print Mode
Centronics
Print Mode 1
Color Mode
Condition
Inter Lace
Direction
Repeat Prn
Count
Int. Time
8 Color
360
×360
OFF
Bi Dir
1
0.0 sec
=
=
=
=
=
=
Mode
Roll Set
Disable
Bi Centro
=
Utility
Menu Display
Error Display
Power On Cleaning
Normal
OFF
OFF
=
=
Print Mode 3
Color Mode
Condition
Inter Lace
Direction
Repeat Prn
Count
Int. Time
8 Color
540
×540
OFF
Direction
1
0.0 sec
=
=
=
=
=
=
Print Mode 2
Color Mode
Condition
Inter Lace
Direction
Repeat Prn
Count
Int. Time
8 Color
540
×540
OFF
Uni Dir
1
0.0 sec
=
=
=
=
=
=
Print Mode 4
Color Mode
Condition
Inter Lace
Direction
Repeat Prn
Count
Int. Time
8 Color
540
×540
OFF
Direction
1
0.0 sec
=
=
=
=
=
=
Page 72

3 Basic Installation RJ-8000 OPERATION MANUAL
3-30
3.7.3 Alignment
Use this func tion to adjust the print quality for best results.
NOTE
The print quality of your printer is pre-adjusted when it is shipped.
When the installation enviro nment o f the pr inter or m edia ty pe hav e bee n change d and p rint qu ality de clines, use thi s
function.
To do the Alignment, follow the steps below.
1. Turn the power of the unit ON, and set the media.
2. Perform an accuracy adjustment printing for alignment according to "3.7 Testprinting".
• When performing uni-directional printing: Alignment (for the uni-direction printing)
• When performing bi-directional printing: Alignment (for the uni-direction printing and the bi-
direction printing)
3. From the printing sample "Pattern A", select a number in which the straight lin e appears with the
least blur.
Page 73

RJ-8000 OPERATION MANUAL 3 Basic Installation
3-31
4. Press either the [F2] key or [F4] key t o select the number for the l ine you choose i n the previous step.
5. Or Press the [Enter] key on the operation panel to register the setting value of the "Pattern A".
6. Repeat the steps from 3 to 5 to register all settings followed the "Pattern B".
3.7.4 Color palette
Use this function to compare the pen color settings of computer with the print color of the printe r.
TIP
For printing, refer to the following.
3.7 Testprinting
AlignmentUniーD
★★★★
PatternA
1)
2)
3)
4)
5)
6)
7)
PatternA(Uni−D)
1〜7 +
4 −
F2,F4 ―> ENTER
F2
F4
Page 74

3 Basic Installation RJ-8000 OPERATION MANUAL
3-32
3.7.5 Maintenance record
Use this function to check the life cycles of the parts of the printer.
TIP
• A part's life cycle is shown by the amount of the mark.
When a part's life cycle comes to an end, the mark reduces.
• For printing, refer to the following.
3.7 Testprinting
Page 75

RJ-8000 OPERATION MANUAL 3 Basic Installation
3-33
======== Maintenance Record ========
Version
Ink Cart. 1
Ink Cart. 2
Ink Cart. 3
Ink Cart. 4
Ink Cart. 5
Ink Cart. 6
Ink Cart. 7
Ink Cart. 8
Cutter Life
Page Count
Waste Tank
CR Motor Life
PF Motor Life
Wiper Life
:
:
:
:
:
:
:
:
:
:
:
:
:
:
:
1.00
E
★★★★★
F
E
★★★★★
F
E
★★★★★
F
E
★★★★★
F
E
★★★★★
F
E
★★★★★
F
E
★★★★★
F
E
★★★★★
F
E
★★★★★
F
1785
E
★★★★★
F
E
★★★★★
F
E
★★★★★
F
E
★★★F
Page 76

3 Basic Installation RJ-8000 OPERATION MANUAL
3-34
3.8 Connecting the printer to your PC
How to connect the printer to your PC.
3.8.1 System requirements
To use your printer with the driver, you need a PC that fulfills the following system requirements.
NOTE
• The memory requireme nts ma y var y dep e nd ing on the t yp e of ap plications you are us in g an d the co mplexity of
the document you want to print.
• MUTOH recommends you us e as large a hard disk and bulk memory as possible.
3.8.2 Selecting cables
This printer loads with the following interface to connect to the computer.
• Centronics interface
• Network interface
The following cables are necessary to connect the printer to the computer. Prepare appropriate cables
according to the computer to be connected and the purpose.
• Centronics interface: Centronics interface cable
• Network interface: 10BASE-T/100BASE -TX Ethernet cable that is compatible with both. (Category 5)
TIP
• See below for the connection procedure.
3.8.3 Connecting the centronics interface
3.8.4 Connecting the network interface
• See "7.3 Interface Specificatio ns" for the connection procedure.
System OS Windows2000 Professional
CPU PentiumIII 600 MHz or higher
Memory (RAM) 256 MB or more
Hard disk space 6 GB or more
Page 77

RJ-8000 OPERATION MANUAL 3 Basic Installation
3-35
3.8.3 Connecting the centronics interface
The procedure for connecting the centronics interface is explained below.
To connect the printer to your computer, follow the steps below.
1. Turn the printer and your computer off.
2. Plug the cable conne ctor of th e interfac e cable int o the inte rface conne ctor on the back of the printer.
Squeeze the wire clips together until they lock into place.
3. Plug the other end of the cable into the computer's port.
TIP
• See your computer's manual for the procedure for connecting to the comput er.
No. Name
1 Centronics interface connector
2 Interface cable
1
2
Page 78

3 Basic Installation RJ-8000 OPERATION MANUAL
3-36
3.8.4 Connecting the network interface
The procedure for connecting the network interface is explained below.
To connect the printer to the network environment, follow the steps below.
1. Turn the printer off.
2. Plug the connect or of the Ethernet cable into th e connector of t he network interf ace board on th e back
of the printer.
3. Connect the other end of the Ethernet cable to the network.
TIP
• Refer to "Network interface board operati on manual" for the usage of the network interface board.
No. Name
1 Network interface connector
2 Interface cable
1
2
Page 79

RJ-8000 OPERATION MANUAL 3 Basic Installation
3-37
3.9 Installing the printer driver
The procedure for installing the printer driver is explained below.
Install the printer driver after connecting the printer to your computer.
This printer has a floppy disk drive tha t can read floppy di sks made by the following o perating systems.
• Windows 95/98
• Windows NT4/2000
See one of the following sections, depending on the OS of your computer.
• Windows 95/98: 3.9.1 Installing the driver for Windows 95/98
• Windows NT4/2000: 3.9.2 Installing the driver for Windows NT4/2000
TIP
• See the following files in the floppy disk for informa tion about the func tions and restriction s of the printer driv er.
• Online help
• Readme file
• The latest version of the printer driver can be d ownloaded from our home page.
3.9.1 Installing the driver for Windows 95/98
Follow the s teps below to install the printer driver to your comp uter.
1. Turn the printer on.
2. Turn your computer on.
3. After checking that your computer has started
normally, insert the floppy disk labeled "RJ8000 Printer Driver for Windows 95/98" into
the floppy disk drive of your computer.
4. Double click the My Computer icon, Printers,
then Add Printer.
• Add Printer Wizard starts.
5. Click Next.
• The next setting window appears.
Page 80

3 Basic Installation RJ-8000 OPERATION MANUAL
3-38
6. When you are asked "How is this prin ter
attached to your computer?", select either
Local Printer or Networ k Printer depen ding on
your purpose, then click Next.
• The next setting window appears.
7. When you are asked to "Click the
manufacturer and model of your printer", cli ck
Have Disk.
• The next setting window appears.
8. Specify the floppy di sk dri ve volume letter (If
you are using a DOS/V compatible computer,
specify "A:/".) in the command box of "Copy
manufacturer's files from:", then click OK.
• The window goes back to the one that shows
selection lists of "Manufacturers" and
"Printers".
9. Make sure that one of th e foll owin g choice s is
selected when you see the "Click the
manufacturer and model of your printer"
window again, then click Next.
• For 50-inch spec: RJ-8000-50
• For 64-inch spec: RJ-8000-64
• For 87-inch spec: RJ-8000-87
• The next setting window appears.
Page 81

RJ-8000 OPERATION MANUAL 3 Basic Installation
3-39
10. Select the port where your prin ter is conne cted
and click Next when you are asked "Click the
port you want to use with this printer."
• For connections using a centronics interfac e:
LPT1: ECP Printer Port
• For connections using a network
The path where your printer is connected.
11. Set the following and click Next.
a) Enter any name as your printer's name.
b) Select either Yes or No when you ar e aske d
"Do you want your Windows-based programs
to use this printer as the default printer?"
TIP
You do not have to change the printer name.
12. Select Yes (recommended) or No when you
are asked "Would you like to print a test
page?", then click Finish.
• If you selected Yes (recommended):
The printer executes TestPrint after the
installation of the printer driver.
• If you selected No:
The printer does not execute TestPrint after the
installation of the printer driver.
NOTE
If you want the printer to execute the T estPrint function,
you have to prepare the following on your printer.
• Turning on your pri nter
• Media setting
• Online setting
13. If TestPrint finishes normally, click Yes when
you are asked "Did the test page print
correctly?"
14. This completes the installation of your printer
driver.
Page 82

3 Basic Installation RJ-8000 OPERATION MANUAL
3-40
3.9.2 Installing the driver for Windows NT4/2000
Follow the steps below to install the printer driver on your computer.
NOTE
• The following steps are f or Windows NT4.0.
For Windows 2000, see the notes for each step.
• Make sure that you are logged in as an Administrator when you install the printer driver.
1. Turn the printer on.
2. Turn your computer on.
3. After checking that your computer has started
normally, insert the floppy disk labeled "RJ8000 Printer Driver for Windows NT4/2000"
into the floppy disk drive of your computer.
4. Double click the My Computer icon, Printers,
then Add Printer.
• The Add Printer Wizard starts.
5. Select My Computer as the management
method of your printer, then click Next.
• The next setting window appears.
NOTE
Follow the steps below to install the printer driver for
Windows 2000.
• If you select Local on the Local or Network Printer
dialog box:
Uncheck the "Automatically detect and install my Plug
and Play printer" box.
• If you find "Digital Signature Not Found" during
installation:
Continue installation by clicking Yes.
Page 83

RJ-8000 OPERATION MANUAL 3 Basic Installation
3-41
6. Select the port wher e your prin ter is conne cted
from Available Ports and click Next.
• The next setting window appears.
7. When you are asked to "Click the
manufacturer and model o f your printer", c lick
Have Disk.
• The next setting window appears.
8. Specify the flopp y di sk d ri ve volume letter (If
you are using DOS/V compatible computer,
specify "A:/".) to the command box of "Copy
manufacturer's files from:", then click OK.
• The window goes back to the one that s hows
the selection lists of "Manufacturers" and
"Printers".
9. Select one of the following choices when you
see the "Click the manufacturer and model of
your printer" window, then click Next.
• For 50-inch spec: RJ-8000-50
• For 64-inch spec: RJ-8000-64
• For 87-inch spec: RJ-8000-87
• The next setting window appears.
Page 84

3 Basic Installation RJ-8000 OPERATION MANUAL
3-42
10. Set the followings and click Next.
a) Enter any name as your printer's name.
b) Select either Yes o r No when yo u are asked
"Do you want your Windows-based pro gra ms
to use this printer as the default printer?"
TIP
You do not have to change the printer name.
11. Make the setting on whether the printer is use d
on a network or not. Select either Shared or
Not shared.
12. If you selected Shared, make the following
settings.
a) Enter the printer's Shared Name.
b) Select the operating systems of all
computers that will be print ing to this printer .
NOTE
See the manuals of Windows NT4/2000 for th e setting of
a shared name.
13. When the necessary settings are complete,
click Next.
• The next setting window appears.
Page 85

RJ-8000 OPERATION MANUAL 3 Basic Installation
3-43
14. Select Yes (recommended) or No when you
are asked "Would you like to print a test
page?", then click Finish.
• If you selected Yes (recommended):
The printer executes TestPrint after the
installation of the printer driver.
• If you selected No:
The printer does not execute TestPrint after the
installation of the printer driver.
NOTE
If you want the printer to execute the T estPrint function,
you have to prepare the following on your printer.
• Turning on the printer
• Media settings
• Online setting
15. If TestPrint finishes normally, click Yes when
you are asked "Did the test page print
correctly?"
16. This completes the installation of your printer
driver.
Page 86

3 Basic Installation RJ-8000 OPERATION MANUAL
3-44
Page 87

4 HANDLING THE
PRINTER
4.1 Introduction . . . . . . . . . . . . . . . . . . . . . . . . . . . . . . . . 4-1
4.2 Drawing flow . . . . . . . . . . . . . . . . . . . . . . . . . . . . . . . 4-1
4.3 Using media. . . . . . . . . . . . . . . . . . . . . . . . . . . . . . . . 4-2
4.3.1 Media type. . . . . . . . . . . . . . . . . . . . . . . . . . . . . . . . . . 4-2
4.3.2 Cautions on handling media . . . . . . . . . . . . . . . . . . . . 4-2
4.3.3 Precaution on storing media . . . . . . . . . . . . . . . . . . . . 4-3
4.3.4 The printing area . . . . . . . . . . . . . . . . . . . . . . . . . . . . . 4-3
4.4 Menu setup on the operation panel. . . . . . . . . . . . . 4-4
4.4.1 Setting the Menu . . . . . . . . . . . . . . . . . . . . . . . . . . . . . 4-4
4.4.2 Items in the setup menu . . . . . . . . . . . . . . . . . . . . . . . 4-6
4.5 Operating from the operation panel . . . . . . . . . . . 4-22
4.5.1 To stop printing operation . . . . . . . . . . . . . . . . . . . . . 4-22
4.5.2 Operating the pressurizing roller . . . . . . . . . . . . . . . . 4-22
4.6 Operations after printing . . . . . . . . . . . . . . . . . . . . 4-23
4.6.1 Cutting roll media. . . . . . . . . . . . . . . . . . . . . . . . . . . . 4-23
4.6.2 Roll media cutting procedure. . . . . . . . . . . . . . . . . . . 4-24
Page 88

<Memo>
Page 89

RJ-8000 OPERATION MANUAL 4 Handling the printer
4-1
4 Handling the printer
4.1 Introduction
This chapter explains how to handle the printer.
4.2 Drawing flow
The following flow chart illustrates the procedure for drawing with the printer.
Refer to each item as necessary.
NOTE
Do not open the front cover during printing. Doing so may stop drawing with the printer.
Though the printer resumes printing after you close the front cover, the quality of printing cannot be guaranteed.
Page 90

4 Handling the printer RJ-8000 OPERATION MANUAL
4-2
4.3 Using media
This section describes details on media available for the printer.
4.3.1 Media type
The type and qualities of media greatly much effect the results of drawing. Understand the description
below fully and use the appropriate media for your purpose.
The following are th e recommended media f or the printe r. Select the appropriate media f or your purp ose.
NOTE
• For more information about the recommended media, contact MUTOH local dealer.
• Problems that occur due to usage of media other than those recommended are not guaranteed.
TIP
• When using the recommended media, the setting values for the printing quality is set for each media type.
For the details of the settings, see "7.4 Options/Supply list".
• When printing on media o ther tha n th ose speci fied, in formatio n reg arding prope r setting s for t he media type and
settings for the product should be found on the instructions for the media, or contact the retailer of the media.
4.3.2 Cautions on handling media
When you handle media, pay attention to the following.
Page 91

RJ-8000 OPERATION MANUAL 4 Handling the printer
4-3
NOTE
• Use recommended media in an approp riate environment.
Following are the temper at ure and humidity ranges appropriate for printing.
Temperature Humidity
The range covered by warr anty for printing accurac y 15 °C to 25°C 40% to 60%
Rate of change Within 2°C in an hour Within 5% in an hour
• Do not use creased, damaged, torn, curled, or wrapped media.
• The size of the recommended sheets can change at a fixed ratio according to the temperature changes of the
working environment. Before u sing the she et, place the sheet in the wo rking envi ronment for a t least 30 m inutes,
to have it match the temperature of the working area.
• printing before medi a adju sts to the pr inting e nviro nment may c ause m edia ja ms du e to slippa ge or creases. Th is
also adversely effects the quality of printing.
• Media has a printable side and a non-printable side. If you print on a not printable side, blurring or slight touching
may occur.
• Do not touch the printable side of media. Moisture or oil from hands effects the printing quality.
• Do not leave the printer for a long time with media loaded. The media may curl resulting in misalignment of
media, media jams, or decreased printing quality. In particular, avoid this in wi nter, dry seasons, or during final
printing.
• Do not lose the bo x or rapping bag for stori ng media.
4.3.3 Precaution on storing media
When storing media, pay attention to the following.
NOTE
• Store media away from high temperature, high humidity, or direct sunlight.
• Store sheet media in the original bag after unpacking.
• Unused roll media must be removed from the scroller, rewound tightly, and stored in the original wrapping bag
and the box.
• Do not wet media.
4.3.4 The printing area
printing areas of each media with the printer are as shown below.
Page 92

4 Handling the printer RJ-8000 OPERATION MANUAL
4-4
(1) Roll media
(2) Sheet media
4.4 Menu setup on the operation panel
This section describes how to make the Menu settings on the operation panel, and setup items.
4.4.1 Setting the Menu
Follow the steps below to make the Menu settings.
1. Make sure that the operation panel is normal.
2. Press th e [MENU ] key or [MENU ] key on the operation pane l.
• The screen shows the Menu.
3. Press one of the keys between [F1] key and [F4] key to enter the setting item.
• If there is any sub-menu in the setting item, move to the next hierarchy.
Page 93

RJ-8000 OPERATION MANUAL 4 Handling the printer
4-5
TIP
• If the page numb er in the setup menu is displayed on the operation p a ne l, yo u c a n s ele c t t he d es ired item by pres si ng
the [MENU ] key or [MENU ] key .
• For more information on each setup item, refer to "4.4.2 Items in the setup menu".
4. When selecting the parameter from the setup menu, press a key between [F1] key and [F4] key on
the operation panel to change the parameter.
• The parameter is saved, and the menu returns to the previous hierarchy.
5. When entering the parameter in numbers and letters
a) Press a key between [F1] key and [F4] key on the operation panel to change the parameter.
• The parameter is saved and the menu to the previous hierarchy
b) To save th e changed par ameter, press the [ENTER] ke y on the operation panel.
• The parameter is saved and the display returns to the setup menu one higher on the hierarchy.
NOTE
• If you do not press the [ENTER] key after you changed parameters, and then press the [CANCEL] key and one of keys
between [F1] key and [F4] key, the changed parameter is not saved.
6. Press the [CANCEL] key on the operation panel to end making settings.
• The display returns to the setup menu one higher on the hierarchy.
• If the main menu is displayed, the display returns to normal.
*SetupMenu*
InkStatus OriginSet
TestPrint MediaSet
(1/6)
F1
F2
F3
F4
CurrentSetupMenu
*Media*
Photo Poster
MatteYupo Fire.Cloth
−Photo− (1/4)
F1
F2
F3
F4
CurrentSetupMenu
CurrentParameter
*Media*
Photo Poster
MatteYupo Fire.Cloth
−Photo− (1/4)
F1
F2
F3
F4
CurrentSetupMenu
CurrentParameter
Page 94

4 Handling the printer RJ-8000 OPERATION MANUAL
4-6
4.4.2 Items in the setup menu
This section describes each setup menu of the printer.
There are the following setup items.
NOTE
• The network set ting menu is displayed if y ou installed a network int e rface board.
• The file management setting menu is displayed only when a hard disc (optional) is installed.
TIP
• < > in each table shows the parameters set at the factory (initial settings).
Setup item Descriptions References
Ink status Displays information on the ink cartridge installed in the ink
cartridge slot.
(1) Setup menu
(1/6)
Origin setting Makes setting on the print head position at the start of print ing.
Test print Performs test printing.
Media setting Makes various media settings.
Print mode setting Makes various print mode settings.
(2) Setup menu
(2/6)
Command setting Makes various printer commands settings.
Layout setting Mak es various layout function sett ings.
Function setting Makes various processing printing data settings.
Roll media setting Makes various roll media settings.
(3) Setup menu
(3/6)
Centronics setting Makes various Centronics interface settings.
Network setting Makes various network interface settings.
Utility setting Makes various advanced function settings.
(4) Setup menu
(4/6)
File management setting Makes various settings for the processing method of the
printing data sent from a com puter to the insta lled hard disk in
the printer.
Initialize setting Returns the parameters to the value set at the factory.
Data dump Prepares for the dump printing checking on on-line function.
(5) Setup menu
(5/6)
Ink replacement Performs ink replacement
Head cleaning Performs head cl eaning.
CutterExchange Performs cutting blade replacement.
(6) Setup menu
(6/6)
Wiper cleaning Performs wiper cleaning
Tank replacement Performs replacement of the Ta nk for the waste liquid.
Page 95

RJ-8000 OPERATION MANUAL 4 Handling the printer
4-7
(1) Setup menu(1/6)
Makes the following settings.
Setup items Parameters Descriptions
Ink status • Color:
K/C/M/Y/c/m/O/G
• Types: D/P
• Capacity: 0 to 100%
Displays information on the ink cartridges installed in ink
cartridge slots 1 t o 8.
The following symbols indicate ink status as shown below.
• Color
K: Black, C: Cyan, M: Magenta, Y: Yellow
c: Light cyan, m: Light magenta, O: Orange
G: Green
• Types
D: Dye, P: Pigment
• Capacity
Amount of ink remaining in each ink cartridge
Origin setting • L: Media feed value
• W: Print head movement
value (Unit: mm)
Sets the plotting start position (origin)of the plotting data.
Press a key between [F1] key and [F4] key on the operation
panel to change the position of the print head and the media
feeding length.
• [F1] key: Feeds media forward.
• [F2] key: Moves the print head to the left.
• [F3] key: Feeds media backward.
• [F4] key: Moves the print head to the right.
• [ENTER] key: Determines the setup values then retur n to the
previous hierarchical menu.
TIP
• The origin setup menu automatically ends after none
of keys are pressed for a certain period, to avoid
drying the print head.
Test print (1/2) SetupPrint
Performs setup printing. 3.7.1 Setup List
NozzleCheck
Performs nozzle check printing. 3.7.2 NozzleCheck
AdjustPrint (UniDir) Performs accuracy adjustment printin g i n one direction.
3.7.3Alignment
AdjustPrint (BiDir) Performs accuracy adjustment printing in two direct io ns.
3.7.3Alignment
WX0
Y
L
Media feeding direction
Drawing start point
Page 96

4 Handling the printer RJ-8000 OPERATION MANUAL
4-8
a. Media type menu
Makes various media setting.
b. User define media setup menu
The user media setup menu can store 8 parameters in "User media 1 - 8" as the following shows.
Test print (2/2) Pallet printing
Performs pallet printing. 3.7.4 Color palette
Maintenance Performs maintenance status printing.
3.7.5 Maintenance record
Media setting Types(1/4 to 4/4) Makes setting for media type used for test printing.
a. Media type menu
Sheet media Sets the method of the media size detection when loading the
sheet media.
c. Media setup menu
Top feed Feeds the media when printing starts. Set when printing the
roll media.
c. Media setup menu
Media cut Sets the method of the media cutting after printing.
c. Media setup menu
Setup items Parameters Descriptions
Types (1/4) Photo Sets the media type of recommended media to be used.
TIP
• When using recommended media, note that the
parameters relating to the print quality are set
depending on the media type.
Set to User 1 to 8 when you u se media other than
recommended media.
Proceed to user defi ne media setup items (1/2 to 2/2).
b. User define media setup menu
Poster media
Composite media
Flame proof cloth
Types (2/4) Back light film
User1
User2
Types (3/4) User3
User4
User5
User6
Types (4/4) User7
User8
Setup items Parameters Descriptions
Page 97

RJ-8000 OPERATION MANUAL 4 Handling the printer
4-9
NOTE
• If you use media other than that recommended by Mutoh, the following proble ms may occur.
• Media detection error
• Obliqued, torn, and creased media
• media jams
• Decrease in print quality due to blurring, missing, or smudging of ink
• End detection e rror of roll media
Problems caused by use of the user's media will not be covered by warranty (repairs will require a fee).
For more information, contact MUTOH local dealer.
c.Media setup menu
Sets media related setting.
Setup items Parameters Descriptions
User
define
media
setup
(1/2)
ThinOut 50% to <100%> Adjusts the ink disch a r ge amount during print ing depending
on the time the media requires for printing.
InkDryTime 0 to <30 sec. > to
270 sec. to 60 min.
Makes the setting for the waiting time for ink dryin g from the
end of printing to cutting the roll media.
HeadHeight <Low> Makes the setting for the distance between the head surface
and the media, depen ding on the thickness of the media.
Middle
High
Stiff <Normal> Makes the setting for the absorbing power of the media to the
printing board depending on the hardness of the media.
• Normal: Setting for normal media
• Soft: Setting for soft media where media feeding errors and
media jams may occur
Soft
User
define
media
setup
(2/2)
Thickness 50µm to <100µm> to
1500µm
Makes the setting on the width of the media to be used.
Dist.Adj Clear Inputs the length and realized distance on the data as a
parameter according to the drawing actually drawn.
• Confirm: Confirms th e distance adjustment values.
• Clear: Returns the parameter to the value set at the factory.
• Change: Changes the distance ad justment values.
Confirm
Change
Setup items Parameters Descriptions
Types Types (1/4 to 4/4) Makes setting for media type used for test printing.
a. Media type menu
Page 98

4 Handling the printer RJ-8000 OPERATION MANUAL
4-10
NOTE
• In the following cases, media cutting items are always set to "off" regardless of the details of the settings.
• When "Take-up mechanism" is selected in media detection items.
• When using the following media, select "Manual cut" for media cutting items
When set to "Auto", the following trouble may occur:
• Cloth: Cloth fabric is not cut completely.
• Glued media: Glue sticks to the blad e of the cutter and cut quality is affected.
(2) Setup menu (2/6)
Makes settings on the following.
CutSize Auto Makes setting for detecting media size when loading sheet
media.
• Auto: Detects the length and width of sheet media
automatically.
• Length: Setting for loading sheet media vertically into the
printer.
• Width: Setting for lo ading she et med ia horiz ontally into the
printer.
TIP
• If you use sheet media ot her than recommended
media, set as "Length" or "Wid th".
• The following sheet media can be used for the
printer.
• ISO system (A0, A1, A2, A3, A4)
• JIS system (B1, B2, B3, B4)
• ARCH system (A,B,C,D)
<Length>
Width
TopFeed On Feeds media at the start of printing. Set when printing on roll
media.
• On: Feeds media forward by 10 mm when starting printing.
• Off: Starts printing immediately without feeding media.
<Off>
Cut Media <Auto> Sets up how to cut the media after printing.
• Auto: After printing, the media is transferred to the cutting
position and cut automatically. 4.6.2 Roll media cutting
procedure
• Manual: After printing, the media is transferred to the
cutting position and cut manually.
• Off: Media is not transferred after printing.
Manual
Off
Setup items Parameters Descriptions
Page 99

RJ-8000 OPERATION MANUAL 4 Handling the printer
4-11
a. Print setup menu
Makes setting on print mode.
The following parameters can be saved as Print mode 1 to 4 in the print setup menu.
Setup items Parameters Descriptions
Print mode setup Print mode 1 Makes various settings for print mode.
a. Print mode setup menu
Print mode 2
Print mode 3
Print mode 4
Command Command setup Makes various settings for printer commands.
b. Command setup menu
Step
Position
Terminat
Image Resolu
Online Timer
Overwrite
Tone
Layout setup Layout method Makes various settings for layout features.
c. Layout setup menu
Stitch
Cut position
Function setup CMY→K Makes settings for the processing of print data.
d. Function setup menu
Scale
Mirror
Setup items Parameters Descriptions
Color mode 4 color normal Sets when 4 colors of ink cartridges of 4 colors (dye only /
pigment only) are loaded for the 87-inch specific ation prin ter.
• 4color normal : 4 pr int heads are used when printing.
• 4color high speed : 4 pr int heads are used when printing.
4 color high speed
4 color dye Sets when the cartridges of the 4 colors (alternate dye /
pigment) are loaded.
• 4 colors of KCMY(dye) are used when printing.
• 4 colors of KCMY(pigme nt) are used when printing.
4 color pigment
6 color LcLm Sets when the cartridges of 6 colors(dye only / pigment only)
or 8 colors (pigment only) are loaded.
• 6 color LcLm: 6 colors of KCMYLcLm are used when
printing.
• 6 color OG : 6 colors of KCMYOG are used when printing.
• 8 color OG : 8 colors of KCMYOGLcLm are used when
printing.
6 color OG
8 color
Page 100

4 Handling the printer RJ-8000 OPERATION MANUAL
4-12
b. Command setup menu
Makes various settings on printer commands.
Quality (1/5) 360×360dpi Makes settings for print quality.
The display changes to interlace setu p items after the print
quality items settings are finished.
720×360dpi
360×720dpi
diagonal 720dpi
Quality (2/5) 720×720dpi
1080×1080dpi
1440×720dpi
720×1440dpi
Quality (3/5) diagonal 1440dpi
1440×1440dpi
2160×1080dpi
1080×2160dpi
Quality (4/5) diagonal 2160dpi
2160×2160dpi
2880×1440dpi
1440×2880dpi
Quality (5/5) diagonal 2880dpi
2880×2880dpi
Interlace method (1/2) Off Makes settings for the interlace method while printing.
• Off: Interlace function is not used.
• 2-path: Ink is discharged two times per line.
• 2-path variable: Ink is discharged two times per line,
changing the discha rging amount dependin g on the printing
data.
• 4-path: Ink is discharged four times per line.
• 4-path variable: Ink is discharged four times per line,
changing the discha rging amount dependin g on the printing
data.
2-path
2-path variable
Interlace method (2/2) 4-path
4-path variable
Direction UniDir Makes settings for the operation direction of the head during
printing.
• UniDir: Prints in one direction.
• BiDir: Prints bi-directionally.
BiDir
Repea
t
Times <Once> to 99 times Makes settings for the number of print repeat on a print data.
Interval <0.0 sec.> to 0.1 to 5.0 sec. Makes settings for the end of printing to the start of printing.
Setup items Parameters Descriptions
Command MH-GL,GL2 Makes preference settings for the printer com mand sent from
a computer to the printer.
MH-GL2
<RTL-PASS>
Setup items Parameters Descriptions
 Loading...