

Page 1
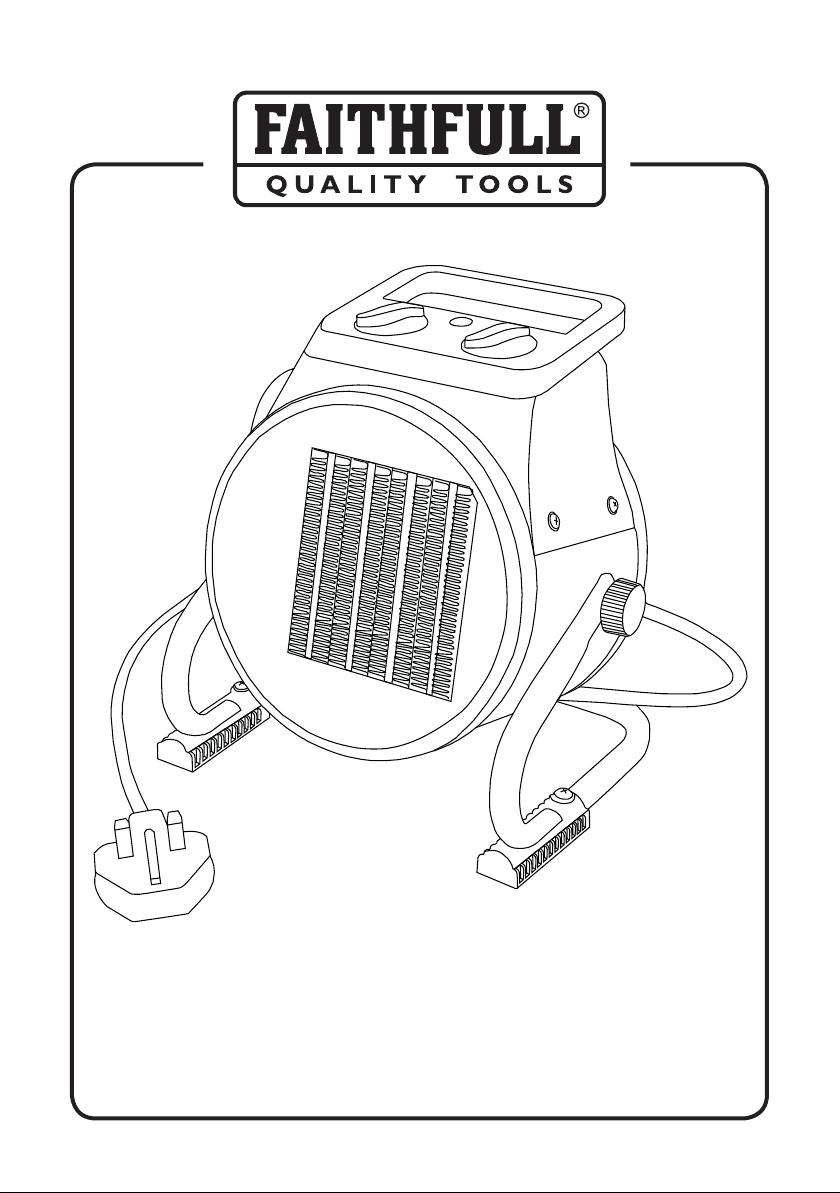
FPP HEAT2KWC
User Instructions
IMPORTANT: Read these instructions fully before using
the fan heater. Retain these instructions for future reference.
Page 2

Ceramic
Precautions Prior to Use
Fan Heater
This fan heater is designed for use
in homes, garages, warehouses
or workshops and incorporates an
adjustable thermostat which allows the
user to select the required temperature
for the room in use.
Once set the internal thermostat will
monitor the surrounding air temperature
and controls the heating elements
ensuring the heater maintains the desired
room temperature. The self-resetting
thermal cut-out will switch o the heater to
ensure safety in the event of overheating.
When using the heater for the rst time,
you may notice an odor and some minor
fumes. This is quite normal and will cease
after a short time.
Specications
Product Code: FPPHEAT2KWC
Waterproof of Class: IP20
Voltage: 220-240V ~
Power: 2000 Watts
Current: 8.3-9.1A
Required Fuse: 13A
Settings: 1-2KW
Self-resetting
Thermostat: 65°C
Product Dimensions: 160x210x221
N.W (KG): 1.7
This fan heater is not suitable for use
outdoors, in bathrooms, shower rooms,
near swimming pools or in other damp
environments.
This heater will become very hot and
should be placed at a safe distance from
any ammable objects or anything that
could interfere with or cover the fan.
The heater must not be used in rooms
where ammable liquids or gases are in
use or stored.
This heater must not be located
immediately below a socket or other
electrical outlet that may prevent access
to it.
Always connect the fan heater directly to
a socket when possible, if an extension
lead must be used it should be as short
as possible, fully unwound and capable of
carrying the load required.
Do not use an external timer to operate
this heater.
You should not connect other appliances
to the same socket as the fan heater
unless you are condent you are not
exceeding the load capacity.
Make sure heater is never left unattended
and away from children and animals.
Do not place the heater on moving
vehicles or any surface where the unit
could tip over or be accidently disturbed.
NOTE:
This product is only suitable for well insulated spaces or occasional use.
Page 3
Operating Instructions
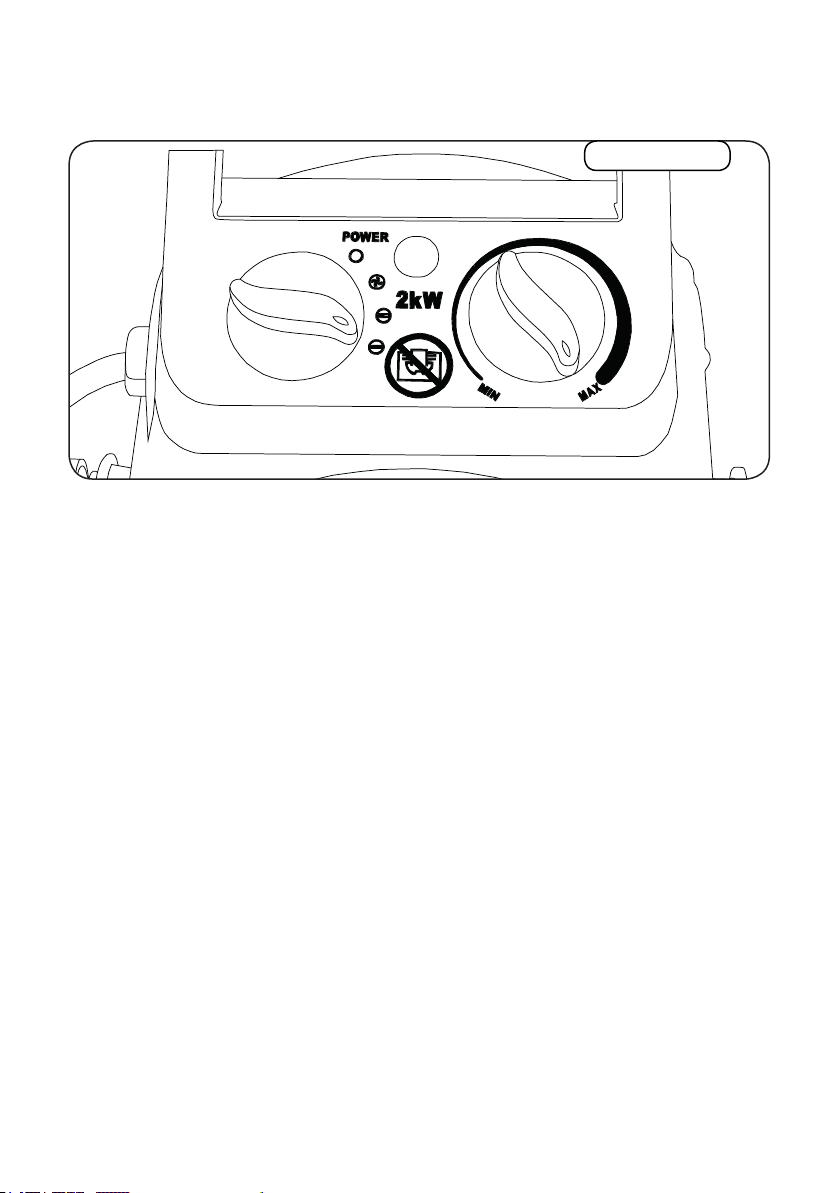
Control Panel
Left Control:
Clockwise: O / Fan Only / Heat (1-2KW)
Position the fan heater so that it stands
upright on a rm surface and at a safe
distance from all ammable objects.
Ensure the heater is set to the o position
and then connect to the mains outlet.
Switch on the mains supply.
Set the thermostat knob to the MAX and
then select required output power mode.
(FAN-1KW-2KW
Right Control:
Clockwise: Thermostat Dial Low / High
The fan heater will switch on, when the
room reaches the required temperature
turn down the thermostat until the heating
element stops working. Once the thermostat has been set it will regulate the
room temperature, as the temperature
decreases the heating element will restart
ensuring a constant room temperature.
The fan and heater will now start and stop
automatically.
Before switching o the heater, please
turn the thermostat to MIN position and
turn the selector to the fan position, let the
appliance cool down for two minutes then
turn o the heater, isolate the mains and
pull out the plug.
Page 4

Trouble Shooting
Problem Possible Cause Treatment
The heater does not
operate when
plugged in and the
thermostat is set to
max
The heating
element glowing
The appliance does
not heat up or only
the fan works.
The plug is loose, bad
connection.
No power in socket outlet. Insert the plug in a live
The input voltage is too high
or too low.
The air inlet grill is blocked Remove any blockage
The switch is set to fan only. Turn the switch to the
Pull out the plug, check
the connection of the
plug and socket and
test the fuse. Then
reconnect the heater.
powered socket.
Use a power supply as
stipulated on the rating
label.
and ensure the heater
is positioned away from
any potential items
which could obscure
the air inlet.
heat setting.
The thermostat needs
adjusting.
The self-resetting cut-out
has operated.
The appliance is not stood
upright on an even surface.
urn the thermostat
up and listen for an
auiditable click. If
the thermostat is not
damaged, the heater
will automatically
switch on and o again
when the desired
temperature is reached.
Turn the heater o and
inspect for blockage in
the air inlet or outlet.
Disconnect the plug
and wait at least
10 minutes for the
unit to reset abefore
attempting to restart
the heater.
Put the heater on a
level surface.
Page 5
Cleaning
Disconnect the heater from the mains by removing the plug from the power outlet. If
the product has been in use allow it to cool down completely before commencing any
work. If the enclosure is dirty, wipe with dry soft cloth. Do not use water and never
use solvents to clean the heater. Ensure the heater has been allowed to cool down
completely.
Storage
If the heater is to be stored, ensure it has fully cooled down and is placed in a clean,
dry area.
Maintenace
Any repairs undertaken must be carried out by a qualied electrician.
Contents and Construction
1x Ceramic Fan Heater. Supplied complete with 1.4m H05VV-F 3G 1.00mm cable and
approved B/S1363/A
molded plug.
The main unit and frame are constructed from steel plate and protected with a
heat-resistant powder coating.
Page 6

The heater must never be left unattended while in use and should only be operated in
accordance with the instructions provided.
The user must fully understand all the hazards associated with the use of this heater.
The heater should not be operated by minors or persons that are unfamiliar with the
operating instructions.
Do not cover the heater at any time.
Do not operate the heater with wet hands.
Parts of this product will become very hot and can cause serious burns if touched.
Extra attention must be paid if children, vulnerable people or animals are present, they
should be kept away from the heater and continuously supervised when it is in use or
when cooling down.
Children should never be allowed to play with or near this appliance.
NOTE:
If the heater stops completely due to the self-resetting thermal cut-out operating.
Unplug the heater from the power supply and allow it to cool for ten minutes.
This will prevent the heater starting unexpectedly.
It is essential that you read the instructions contained in this manual before
using the heater for the rst time. Failure to follow these instructions could
result in damage to the heater, property damage or personal injury. This manual
should be stored safely for future reference.
WEEE Disposal
Waste electrical production should not be disposed of with household
waste. Please recycle where facilities exist. Check with your Local
Authority or retailer for recycling advice.
Page 7
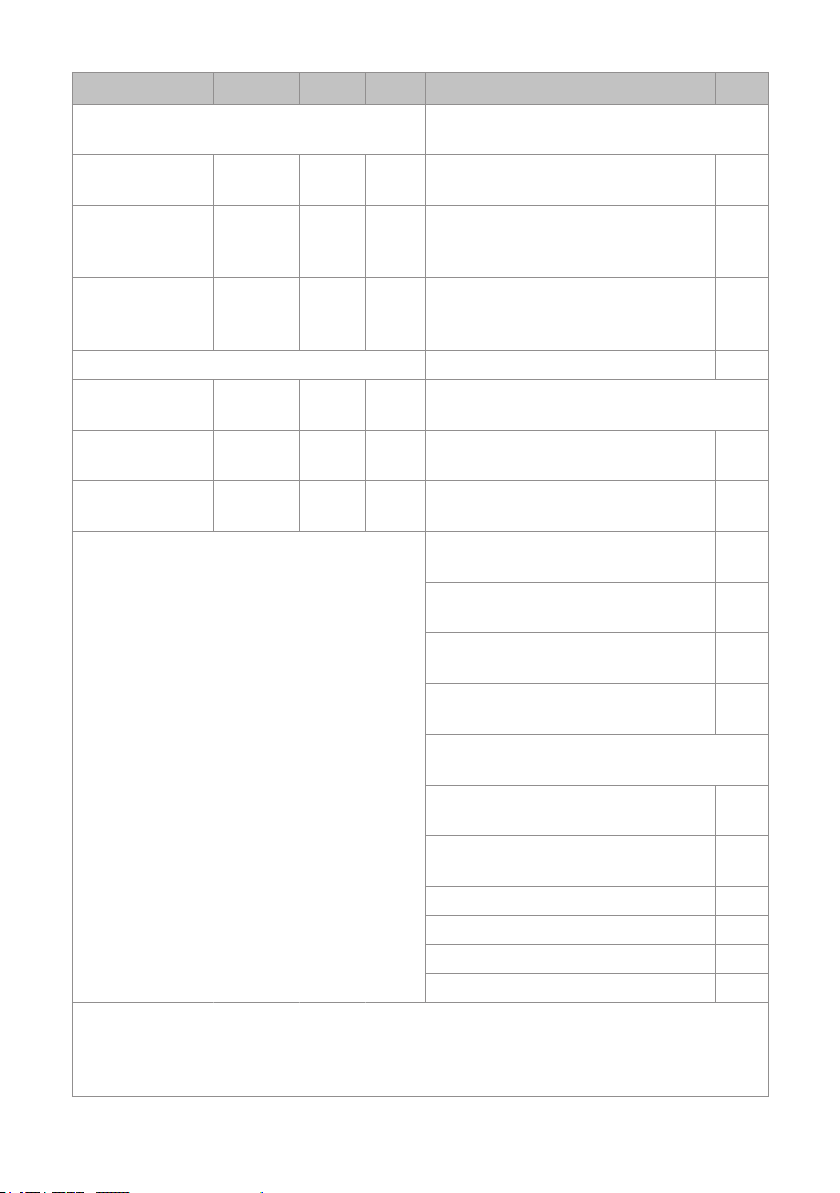
Item Symbol Value Unit Item Unit
Heat output Type of heat input, for electrical storage
local space heaters only (select one)
Nominal heat
output
Minimum
heat output
(indicative)
Maximum
continuous
heat output
Auxiliary electricity consumption Fan assisted heat output No
At nominal heat
output
At minimum
heat output
In standby
mode
Remark:
For electric local space heaters, the measured seasonal space heating energy
eciency ƞs cannot be worse than the declared value at the nominal heat output of
the unit.
Pnom 2 KW Manual heat charge control with
integrated thermostat
Pmin 1 KW Manual heat charge control with
room and/or outdoor temperature
feedback
Pmax 2 KW Electronic heat charge control with
room and/or outdoor temperature
feedback
elmax N/A KW Type of heat output/room temperature
control (select one)
elmin N/A KW Single stage heat output and no
room temperature control
elSB N/A W Two or more manual stages, no
room temperature control
With mechanic thermostat room
temperature control
With electronic room temperature
control
Electronic room temperature
control plus day timer
Electronic room temperature
control plus week timer
Other control options (multiple selections
possible)
Room temperature control, with
presence detection
Room temperature control, with
open window detection
With distance control option No
With adaptive start control No
With working time limitation No
With black bulb sensor No
No
No
No
No
No
Yes
No
No
No
No
No
Page 8

FAITHFULL TOOLS
Phoenix House,
3 White Lodge Business Estate, Hall Road,
Norwich, Norfolk, NR4 6DG, United Kingdom
E-mail: [email protected]
www.faithfulltools.com
 Loading...