

Page 1
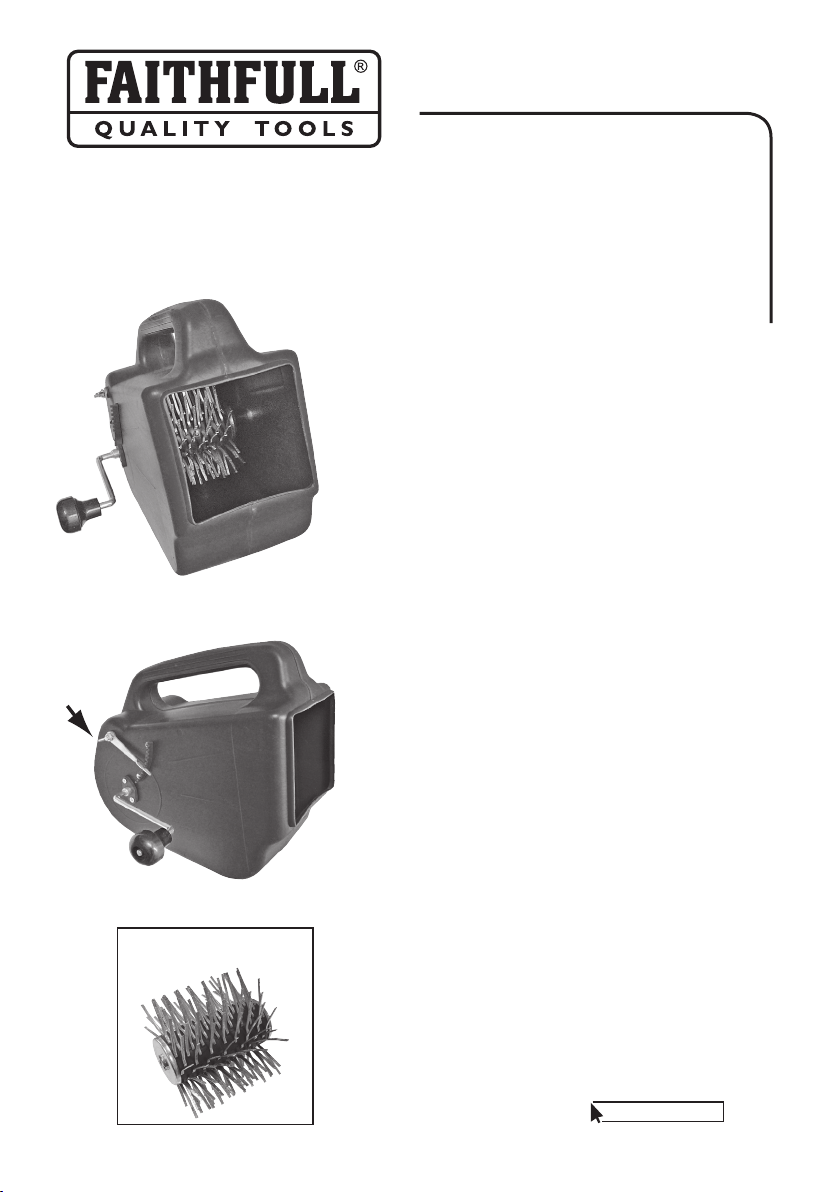
Heavy-Duty
Flicker Machine
Wall Coating Sprayer
GENERAL OPERATING INSTRUCTIONS
■
Do not overload the Flicker machine, best results are
obtained using small quantities and relling at frequent
intervals.
■
Do not set the icker bar adjuster beyond the second
notch when the machine is new. Only when the bar
wears should it be set to a lower notch.
■
Regulate the speed, turning the handle to ensure that
the maximum amount of material is thrown on to the
surface to obtain a thin covering
FAI FLICKHD
Adjustable
pressure
bar
Replacement comb roller
Part No. FAI FLICKHDC
■
Do not attempt to cover the backing material or achieve
a nal nish in one application. Always apply several
thin coats until the desired result is achieved.
■
Keep the machine moving with this mouth tilted slightly
downwards in order to avoid overloading the ickers.
CARE AND MAINTENANCE
■
Always ensure the machine is thoroughly washed out
at the end of the working day, or if the machine is to be
left unused for an extended period of time
■
The machine can be stripped by simply removing the
wingnut and withdrawing the handle and roller unit for
cleaning.
FAITHFULL TOOLS
Phoenix House,
3 White Lodge Business Estate,
Hall Road, Norwich, Norfolk, NR4 6DG
E-mail: [email protected]
www.faithfulltools.com
Page 2
g 1
1
5
4
3
2
g 2
6
g 3
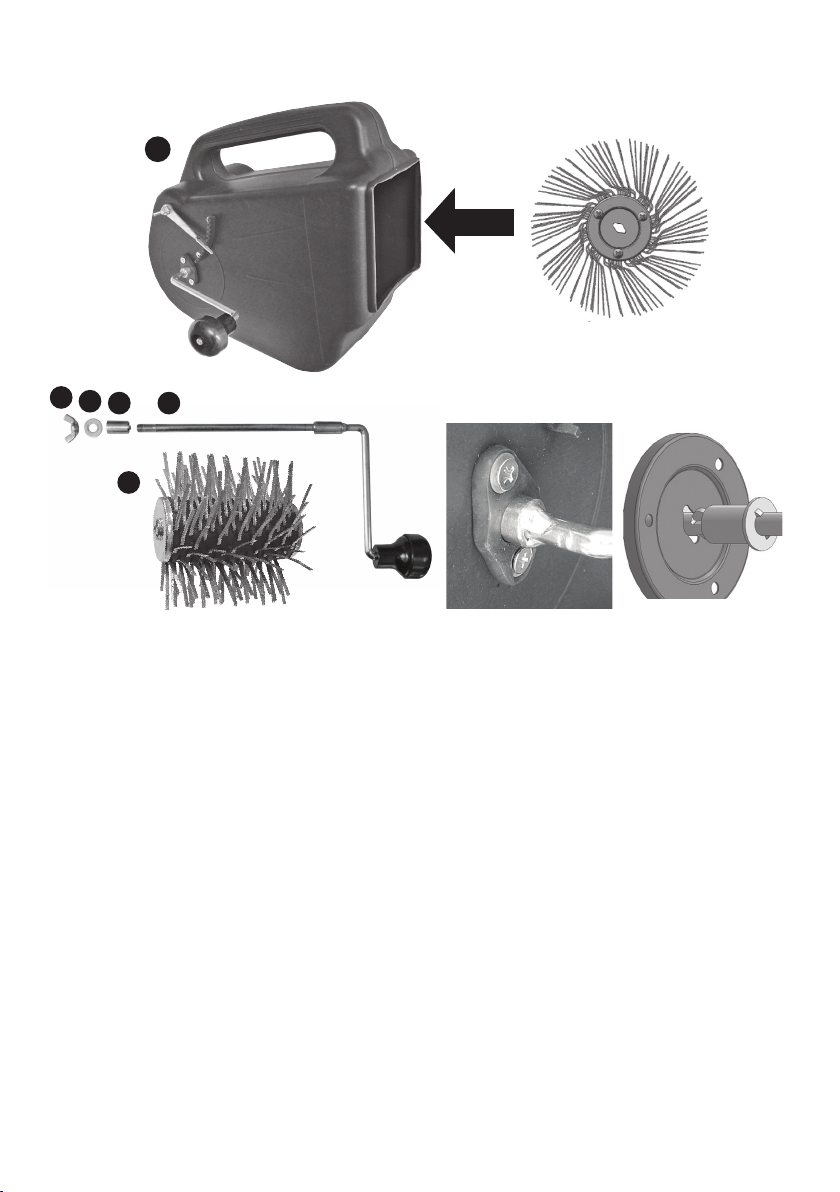
Assembly instructions:
The Flicker machine will require
assembly prior to its rst use
1) Plastic casing
2) Drive handle with locating bush and drive lug
3) Locating bush with drive lug
4) Steel washer
5) Wing nut
6) Flicker comb with drive slots
The icker comb must rst be placed inside
the plastic casing ensuring that the icker arms
are pointing backwards towards the back of
the casing (g 1). The icker combs drive shaft
bore must now be aligned with the bush support
holes. Once in position the drive handle should
then be fed through the bush support (g 2) and
completely through the icker comb until the drive
lug on the handle locating bush engages on the
drive slots, located on the icker comb (g 3).
The second locating bush should then be slid
down the protruding end of the drive handle
shaft ensuring that the drive lug is pointing
downwards towards the comb. The locating
bush must be pushed fully through the bush
support until its drive lug engages in the drive
slot of the icker comb, rotate the comb as
necessary to align the slot with the lugs.
Once the comb is xed in position check that
both the drive slots on the comb are engaged
with the drive lugs on the locating bushes.
Then slide the washer down the drive shaft
and secure the complete assembly with the
supplied wing nut.
Please Note: It is possible for the machine
to be set up for either left or right hand use
depending on the user’s preference.
IMPORTANT:
It is essential that the location bushes drive
lugs are both fully engaged in to the icker
comb drive slots prior to use, to ensure the
correct operation of the icker machine.
 Loading...