

Page 1
First Use Assembly
Unscrew the black ller cap and remove the additional service kit
stored inside the sprayer’s tank and place in a safe place for future
use.
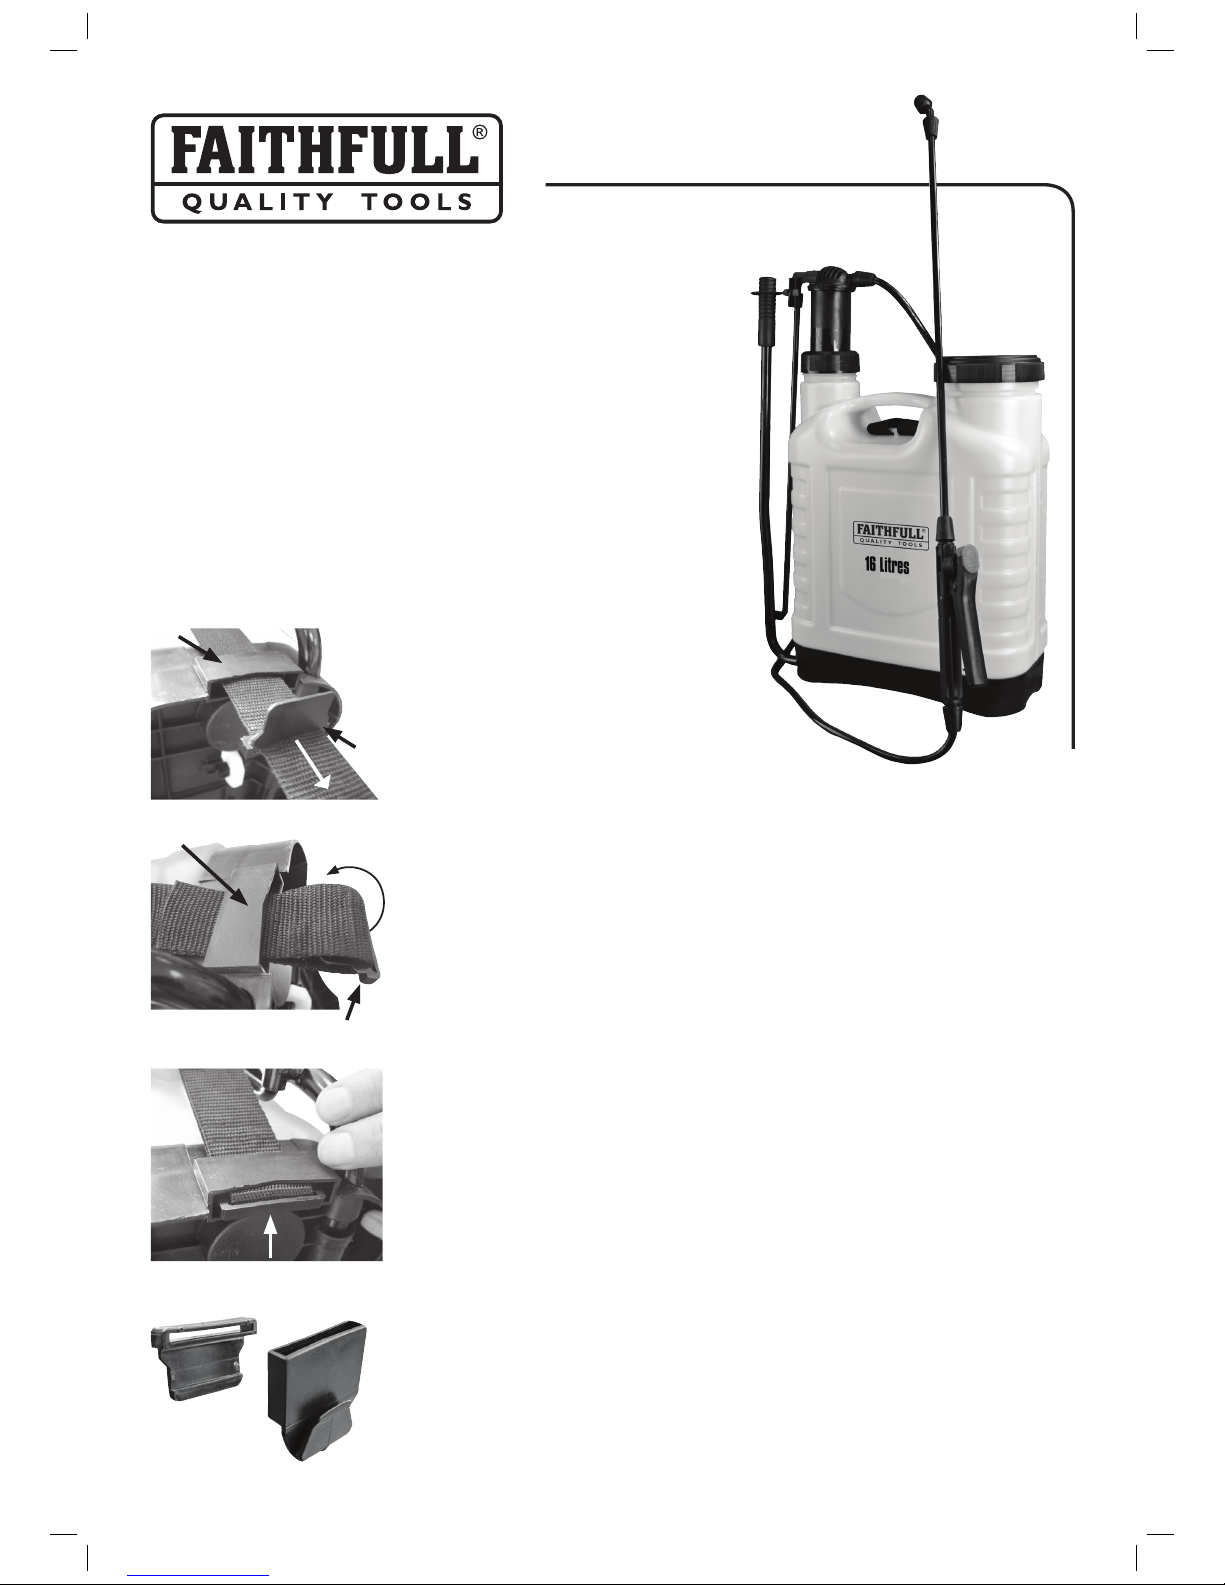
The sprayer will require the harness straps to be attached prior
to rst use. One quick release hook clip and two locking clips are
supplied with the sprayer. One locking clip is used to x the harness
directly onto the tank base and the second is used to attach the
harness to the quick release hook and allow adjustment of the strap
length before attaching it to the tank.
Fixing the harness
1. Attaching the xed strap to the sprayer tank.
First pass the webbing strap
though the xed hook clip
located on the side base of
the tank, then through one
of the locking clips (Fig.1).
Fold the webbing strap back
over the locking clip and
then thread the end back
through the xed hook clip
(Fig 2).
Hold the end of the strap
and the webbing strap
together and pull the locking
clip up into the xed hook
clip. This will lock the strap
in position. (Fig 3).
Repeat the procedure to
attach the quick release
clip to the other end of the
webbing strap. The hook
then clips to the bottom of
the sprayer.
The t of the harness can
be adjusted to suit the user
by releasing the locking
clips on both straps and
pulling the strap end up to
shorten its length.
FAI SPRAY16
Knapsack Sprayer
16 Litres
Please read these instructions
carefully and retain for future reference.
This sprayer is designed for the application of water based
domestic garden and agricultural chemicals, disinfectants
and cleaning agents. Do not use to spray caustic or corrosive
solutions or use with spirit based products as this may affect
the pumps seals.
Operating Instructions
1 Before lling always check that the sprayer’s shoulder straps
are correctly tted and adjusted so that the sprayer sits
comfortably on your back.
2 Unscrew the large ller opening cap but do not remove the
internal plastic lter.
3 Fill the sprayer to the desired level ensuring you do not
exceed the maximum ll mark.
4 Replace the cap and screw down rmly.
5 Operate the pump handle 8 - 10 times to draw liquid into the
pump pressure chamber and to provide the required working
pressure.
6 To commence spraying depress the trigger handle until
the desired ow rate is achieved. The trigger is tted with
a handy lock so that it may be locked in the on position for
prolonged spraying operations.
7 Continue operating the pump handle using a steady motion
to maintain pressure in the sprayer pump whilst spraying.
Fig. 1
Fixed hook
clip
Locking
clip
Locking clip
facing inwards
Fixed hook
clip
Fig. 2
Fig. 3
Locking clip and webbing strap pulled
together into the xed hook clip
Quick release hook
Locking clip
Page 2
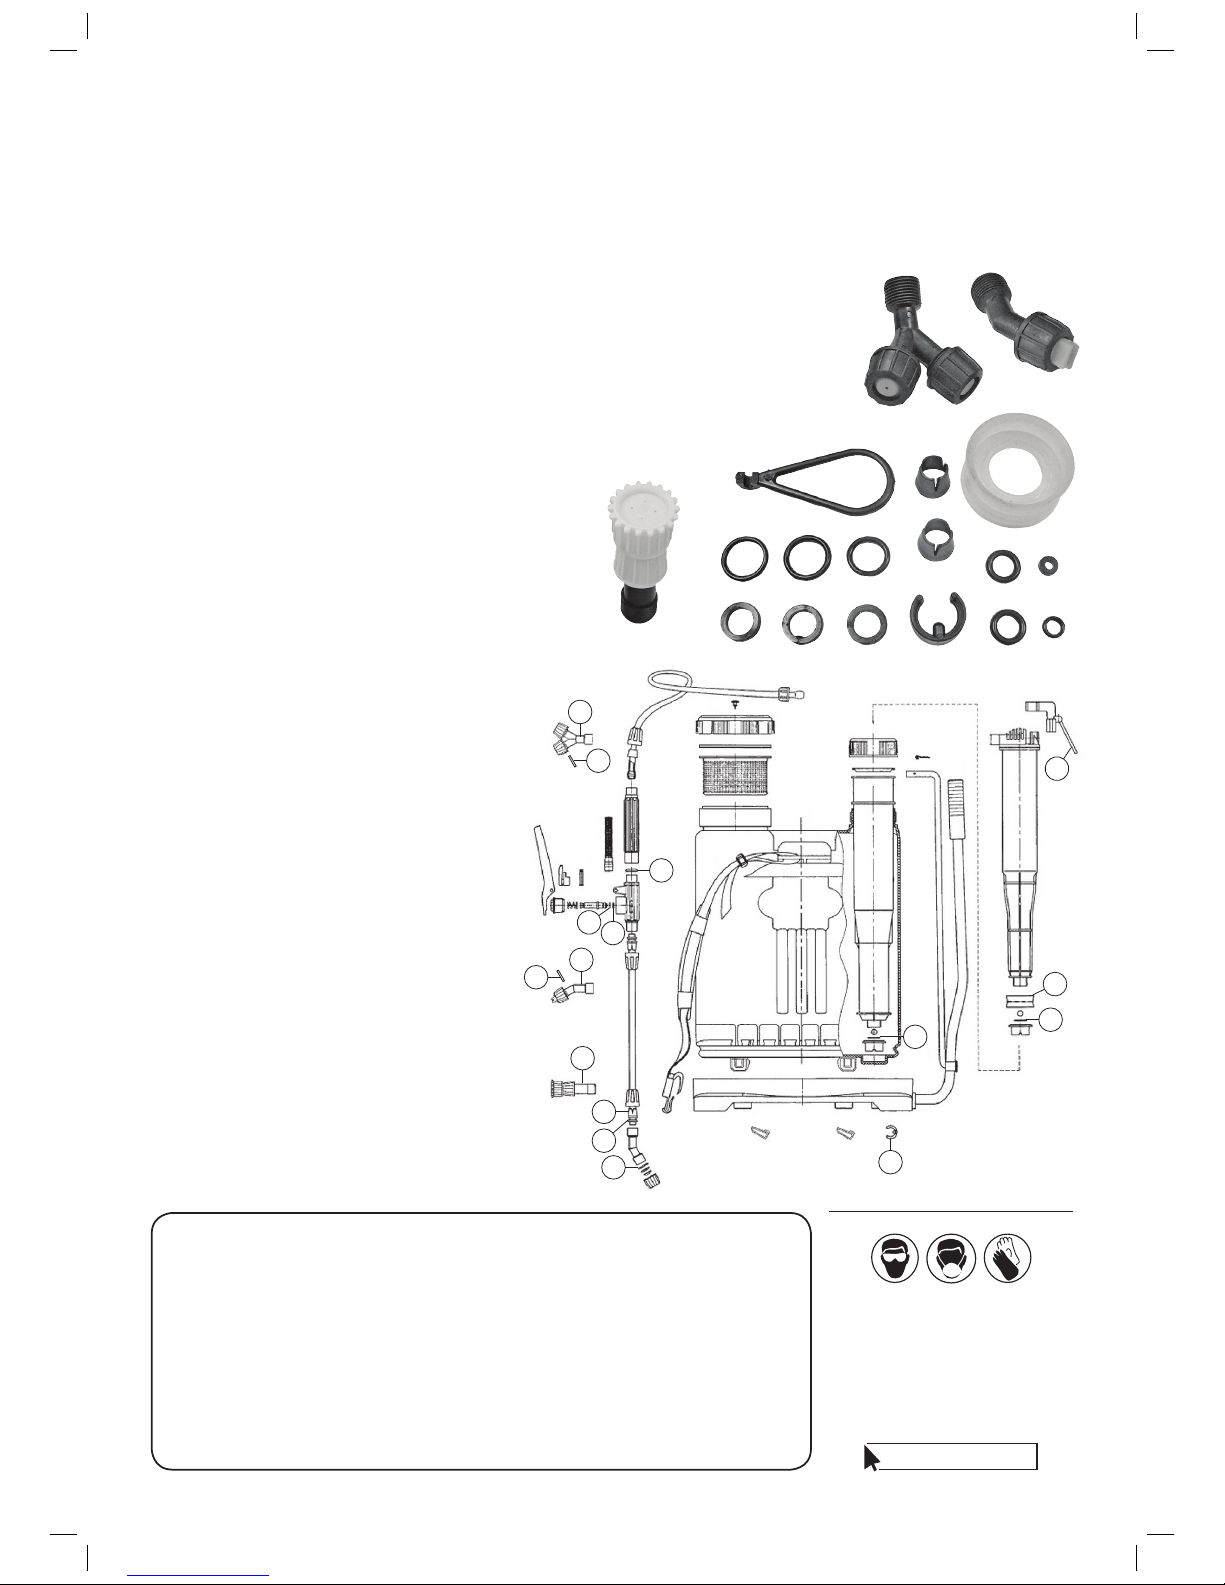
Extra Spray Nozzles and Service Pack included:
Qty
1. Operation Arm Fixed Ring 1
2. Bowl 1
3. O-Ring 15.5 x 2.5mm 2
4. Fixed Buckle 1
5. Handle Sealing Ring 1
6. Switch Sealing pad 1
7. Valve Core O-Ring 1
8. Split Sleeve 2
9. Spindle O-Ring 2
10. Spray Head Sealing Ring 3
11. 30 deg Twin Spray Nozzle 1
12. Fan Spray Nozzle 1
13. Four Hole Spray Nozzle 1
8 Spray nozzles may be adjusted by twisting until
the required spray pattern is obtained (from a
mist through to a coarse jet). Additional nozzles
are supplied to provide different spray patterns,
depending on the type of work being carried out.
Do not undo nozzles too far as this will cause
them to leak from the rear.
9 If the nozzle continues to drip after the trigger
handle has been shut off, there is probably air in
the discharge system (nozzle, handle, tap and
hose). Purge the system by turning the nozzle to
jet and operating the trigger on and off in short
bursts, until the liquid shuts off cleanly. Collect
any liquid in a separate container to use later.
FAITHFULL TOOLS
Phoenix House,
3 White Lodge Business Estate,
Hall Road, Norwich, Norfolk, NR4 6DG
E-mail: [email protected]
www.faithfulltools.com
ALWAYS WEAR
SUITABLE PROTECTION
General Safety Tips
■ When using garden pesticides, herbicides, insecticides, fungicides or any other form of
garden chemical always obey the manufacturers instructions fully.
■ Avoid contact with the skin and eyes, do not eat, drink or smoke when using the sprayer.
■ Do not use garden sprayers for the application of ammable liquids.
■ Wear the appropriate protective equipment coverall, gloves, goggles and suitable
respiratory mask.
■ Always direct the spray downwind as spraying into the wind will result in operator
contamination.
■ For details of a complete range of protective equipment that is suitable for use with
garden chemicals visit the SCAN Safety Website at www.scan-safety.com
Looking After Your Sprayer
Blocked Nozzles
If a nozzle becomes blocked or fails to spray the
correct pattern, unscrew the nozzle tip and clean
the components under running water or a water
jet. Do not use a metallic instrument to unblock
a nozzle as this may alter the nozzle aperture
making the nozzle ineffective.
Cleaning
Add a little detergent and some warm water (not
hot) to the sprayer and spray through the system.
Repeat the above operation with clean cold
water. Finally check that the nozzle is free from
any residue. Your sprayer will now be perfectly
clean and ready for its next use. Always dispose
of any unused garden chemicals safely and in
accordance with the manufactures instructions.
After Use
Always release the pressure from the pump
cylinder before storage. Hold or lock the sprayers
trigger in the on position until the pressure in the
pump has been released.
Storage
Store the sprayer under cover and avoid freezing
temperatures. For winter storage ensure that all
uid is removed from the tank, hose and lance
before storing. Do not store in direct sunlight, in a
greenhouse or any areas where extremes of heat
may occur.
1
2
3 3
5
4
6
7
8
9
10
10 10
9
8
11 12
13
13
12
11
5
6
7
10
3
4
3
2
1
10
8
9
10
 Loading...