

Page 1
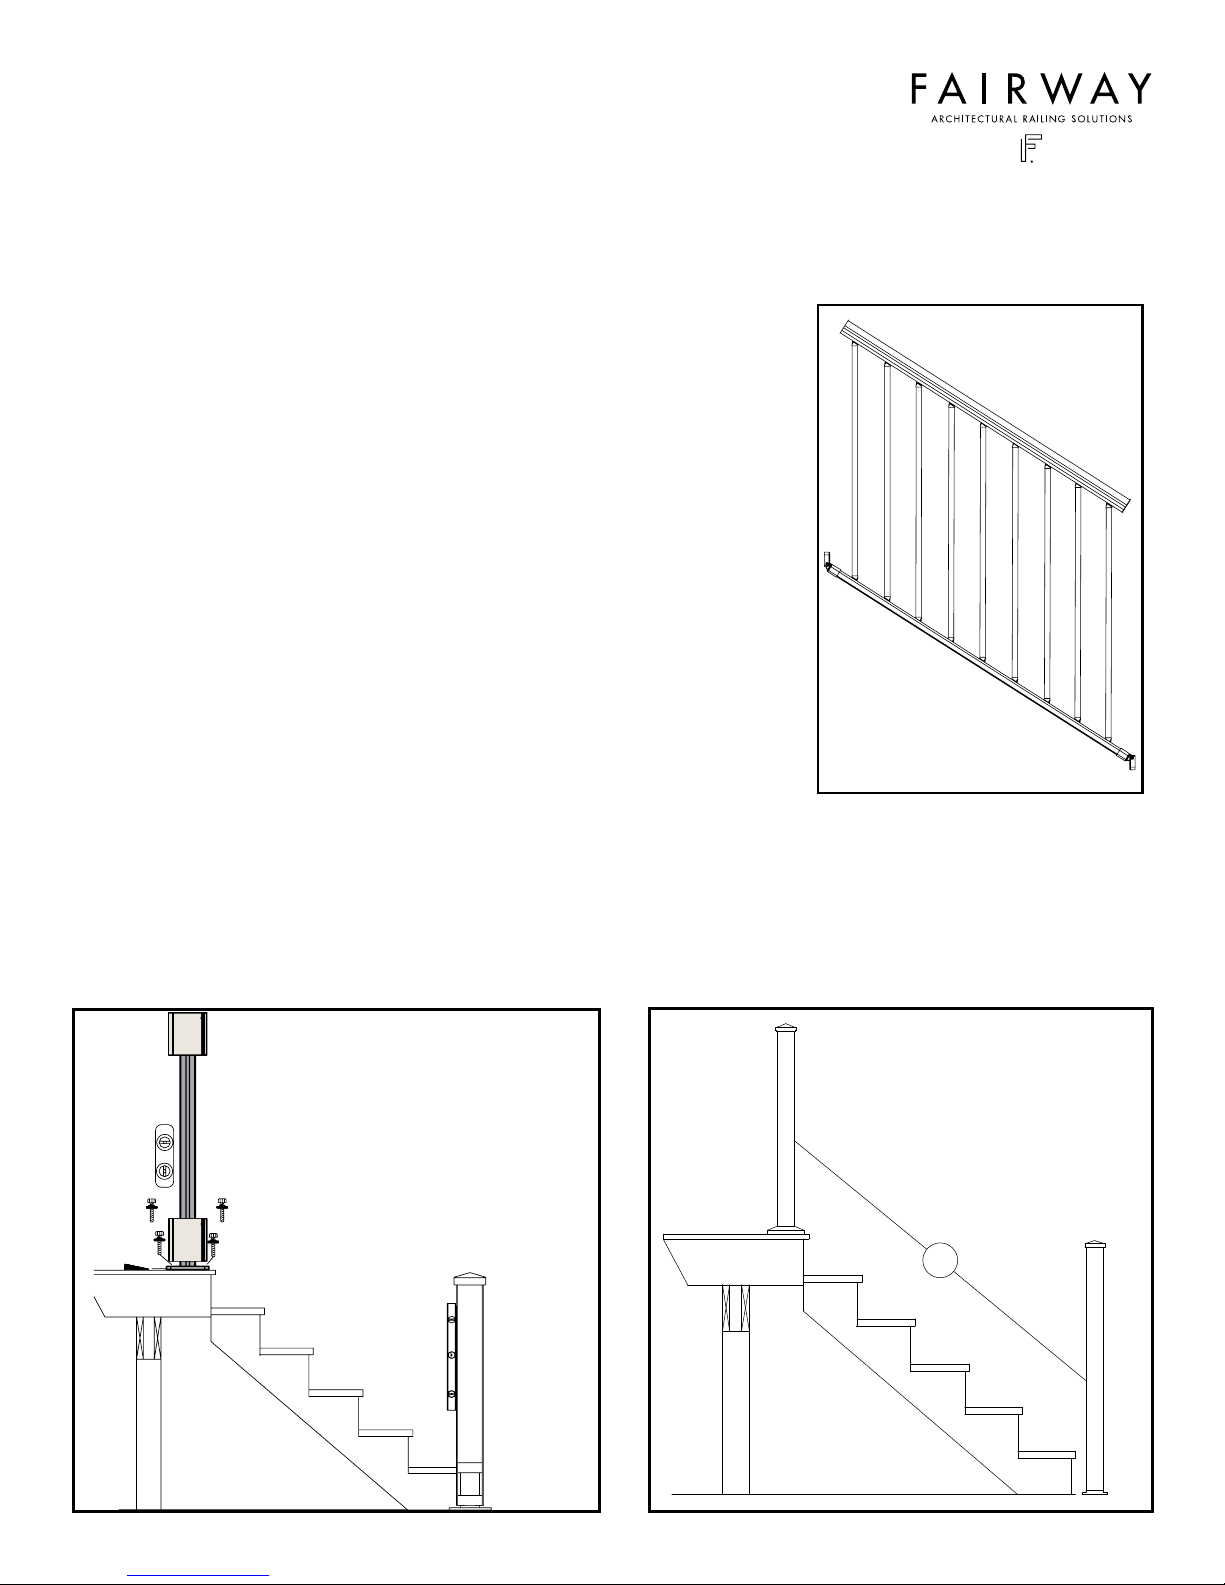
Top Stair Run
A310 ADJUSTABLE STAIR RAILING
FAIRWAY ARCHITECTURAL RAILING SOLUTIONS ©2017
INSTALLATION GUIDE
Review all local building codes before starting the installation.
Wear proper safety equipment.
ALWAYS LAY RAILING ON CLEAN & SOFT SURFACE TO AVOID DAMAGE
Kit Includes:
1 • Sculpted Top Rail (with adjustable stair knuckles and spacers installed).
1 • Bottom Rail (with adjustable stair knuckles installed).
2 • Bottom Rail Brackets (PTP/OTP) Stair with screws.
Balusters
Top rail brackets sold separately.
Before Starting the Installation
Review all local building codes. Wear proper safety equipment.
www.FairwayRailing.com
Step 1
Mount & plumb surface post mount (bolts & shims not included).
Slide sleeve over post mount and check for plumb.
(See Step 1 illustration)
Step 2
With post plumb and sleeved, measure distance from post to post (see Step 2 illustration).
For TOP RAIL - deduct 3-1/4" from measurement.
For BOTTOM RAIL - deduct 2-1/2" from measurement.
NOTE: All measurements apply to stair pitch between 32-38 degrees.
Step 1
Kit Layout
Step 2
909918
Page 2
A310 ADJUSTABLE STAIR RAILING
FAIRWAY ARCHITECTURAL RAILING SOLUTIONS ©2017
INSTALLATION GUIDE
(continued)
Step 3
Remove end spacers, mid-spacers, and adjustable stair knuckles from rails.
Cut top and bottom rails to length.
Step 4
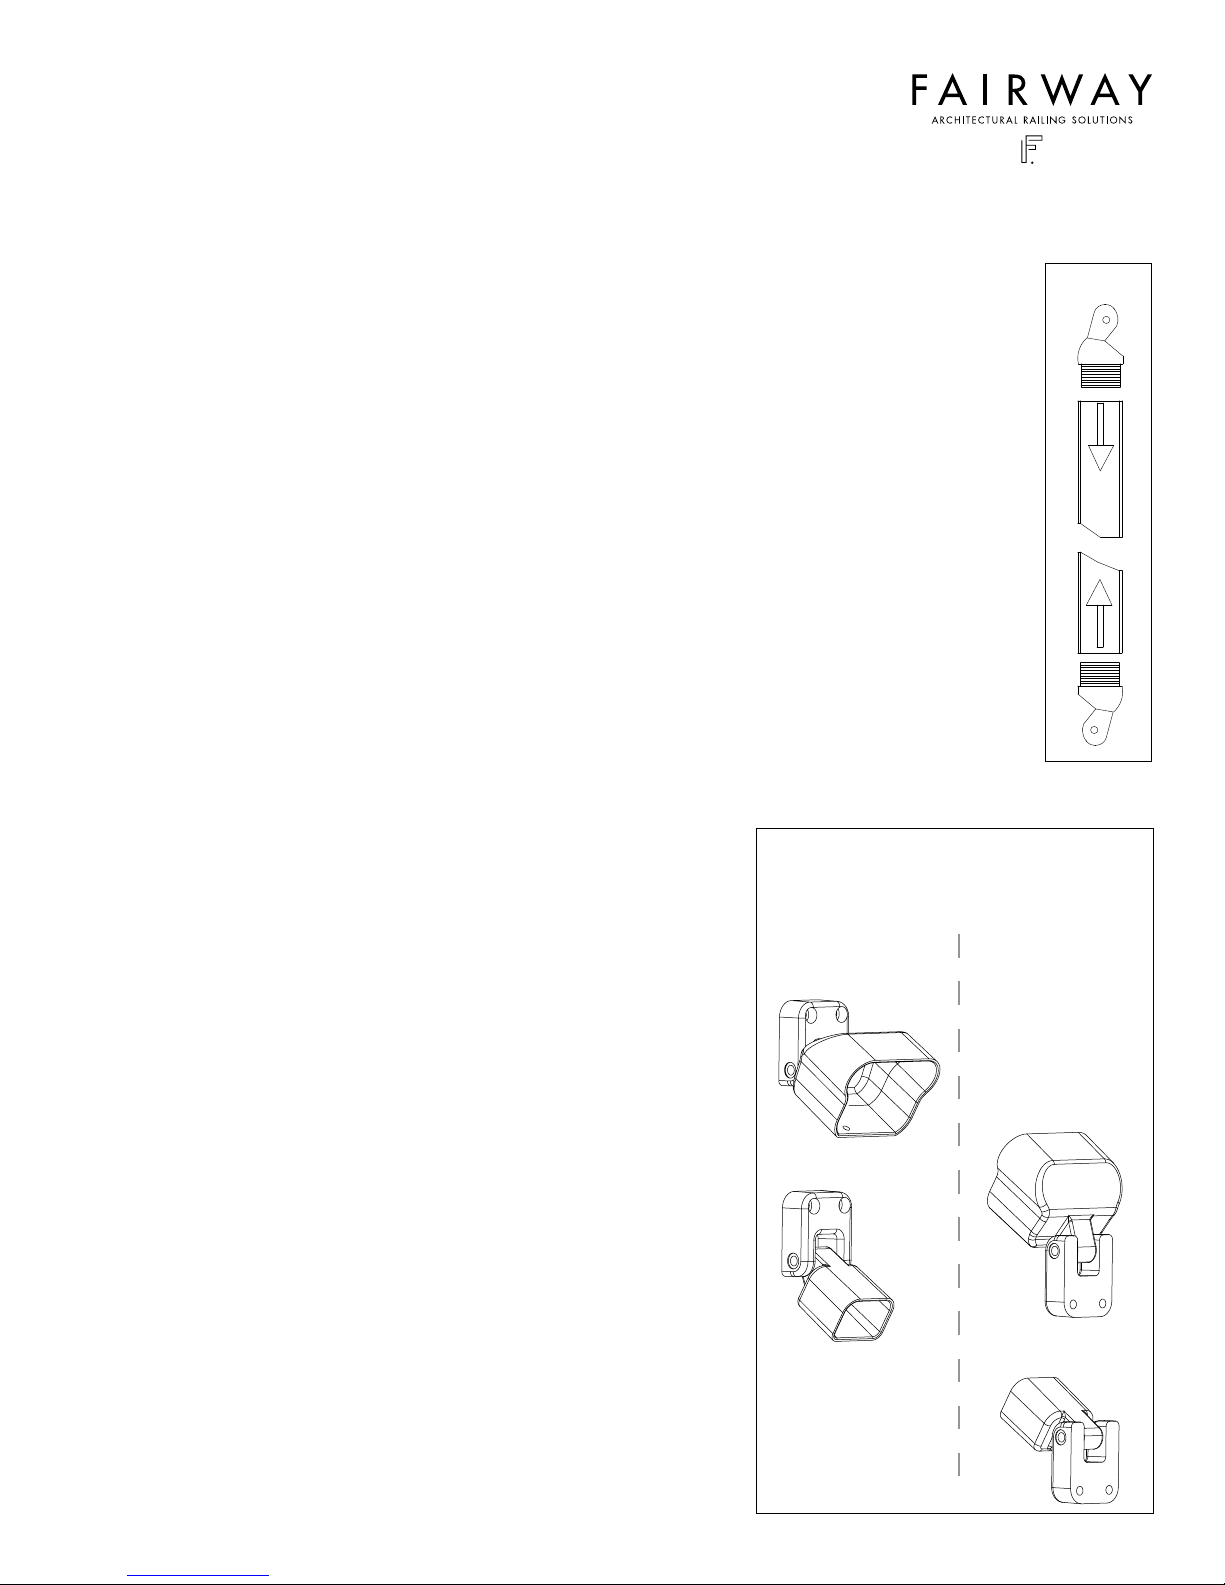
Insert adjustable stair knuckles into baluster ends.
Ensure knuckles are facing opposite directions (see Step 4 illustration).
Slide a baluster (with knuckles) into bottom rail. NOTE: Lay rail on a at, non-
abrasive surface or have a helper assist with keeping components in place.
Slide a mid-spacer into bottom rail.
Repeat the process until the bottom rail is full of balusters and mid-spacers.
NOTE: Ensure baluster knuckles are facing the same direction.
Step 5
Slide balusters and mid-spacers ush to one end of rail. Measure open space on
opposite end.
Divide this distance in half to allow for equal spacing.
NOTE: At rail ends, the TOTAL space should be no greater than 8" and no less
than 4", with equal and maximum spacing on both ends.
Mid-spacers may need to be uniformly cut to adjust spacing.
Equally cut both end spacers to t.
Center balusters and mid-spacers on rail. Install end spacers
on rail ends, screws oriented on the rail ends.
Bracket Orientation
www.FairwayRailing.com
Step 4
Step 7
Step 6
Repeat steps 4 and 5 for top rail, ensuring baluster spacing
matches bottom rail.
Step 7
Assemble stair brackets (See step 7 illustration).
Brackets mounted to TOP POST - mounting anges are
oriented UP.
Brackets mounted to BOTTOM POST - mounting anges
are oriented DOWN.
Slide brackets on rail section ends.
(Do not install set screws yet).
Place complete railing section between posts.
NOTE: Blocks can be used under bottom rail brackets to
hold section in place. Install self-tapping screws through
brackets into posts. Make nal check of baluster plumb and
install set screws through top rail bracket into rail.
Install post caps and post base trim.
Mounting screw
anges oriented up
Bottom of runTop of run
Mounting screw anges
oriented down
909918
 Loading...