

Page 1
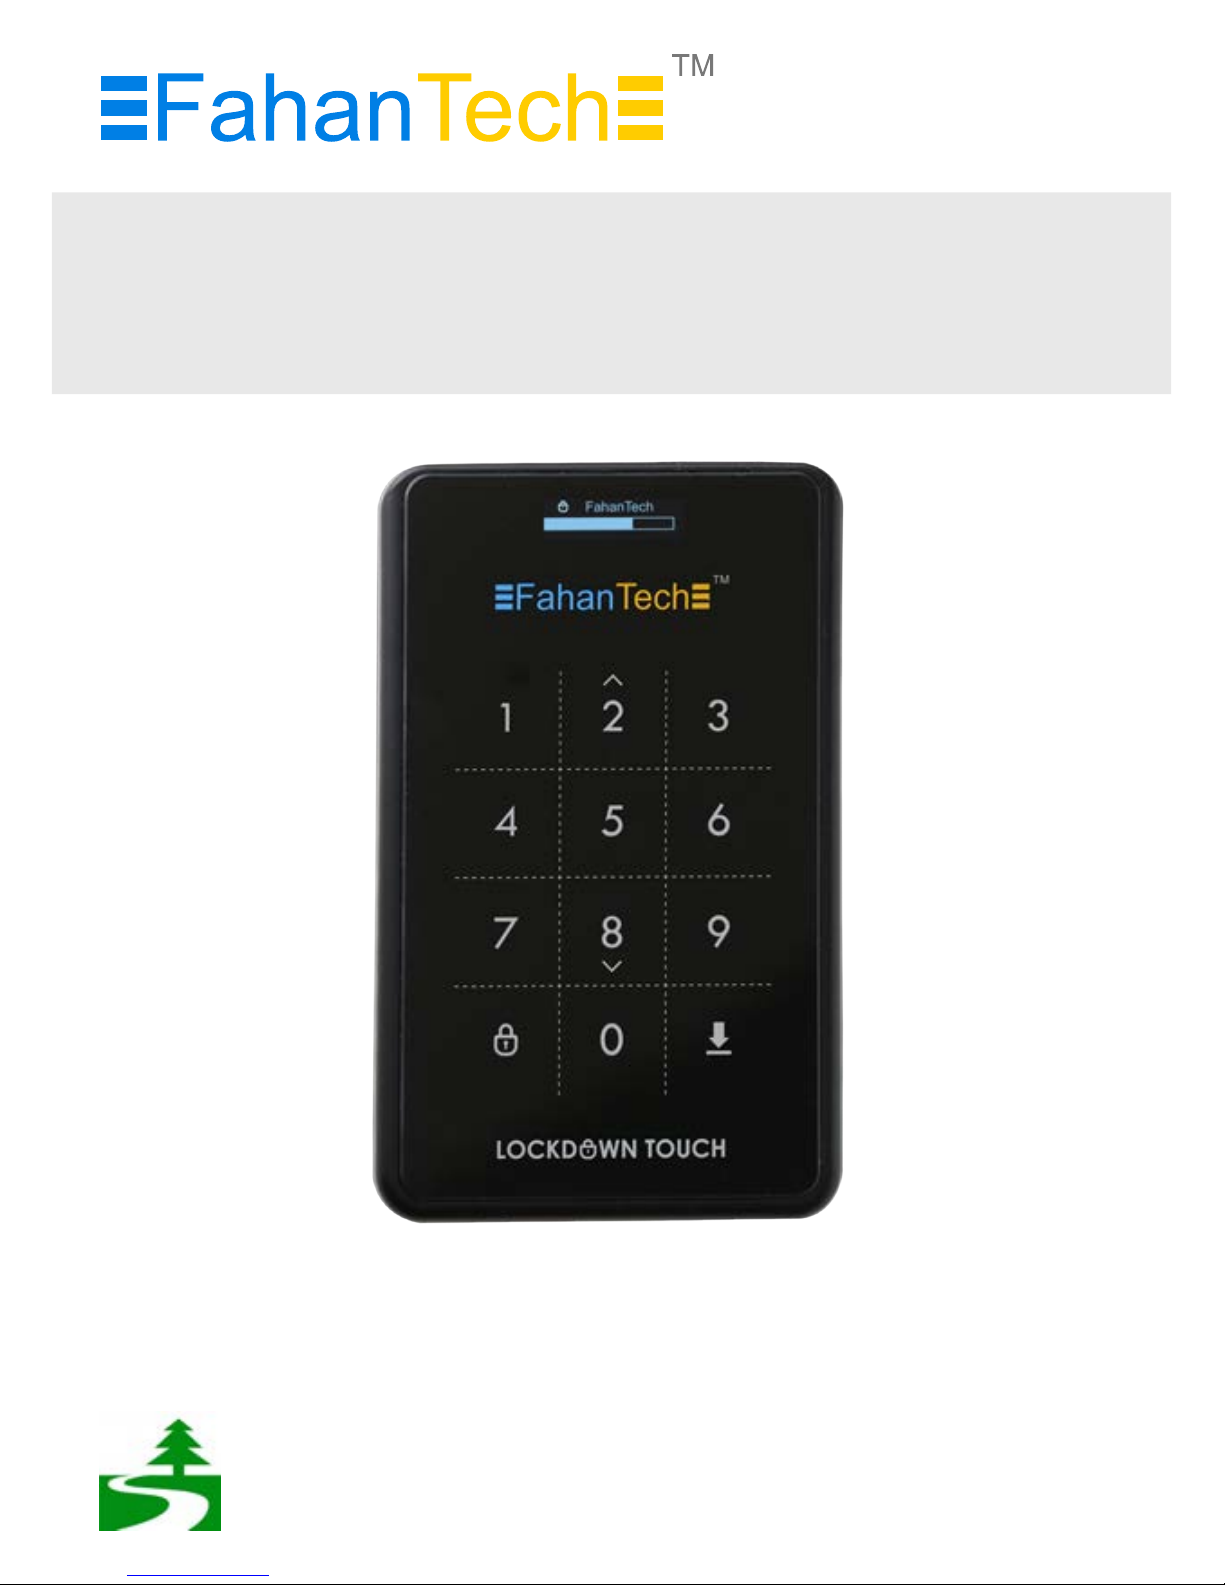
2.5-inch SATA HDD Enclosure with
AES 256-bit Hardware Encryption
User Manual
* For the benefit of our environment, this full manual is only available online.
Please support us on the idea of not providing a printed copy in the future.
Page 2

Product Introduction
The FahanTech Lockdown Touch is a 2.5-inch external drive enclosure with AES
256-bit hardware encryption . It utilizes a smooth touch pad for password input.
Right out of the box, the FahanTech Lockdown Touch is ready to turn nearly any
2.5-inch SATA HDD/SSD to a highly secure external storage device that protects
your data against prying eyes.
Packaging Contents
• 1 x 2.5-in SATA enclosure
• 1 x USB 3.0 cable
•
•
1 x screw driver and a few screws
1 x user manual
System Requirements
• The FahanTech Lockdown Touch will work with any system that supports
external USB storage and has one working USB port available.
•
NOTE: Although this device works with any system that supports external
USB storage - for example, on a smart TV that has USB port - it
does need to be set up and formatted on a computer system first.
Using an Advanced Encryption Standard algorithm (256-bit AES), all of the data
on the hard drive or SSD is securely protected against prying eyes. Encryption is
performed completely in-hardware and real-time, ensuring top performance
while eliminating the need for software installation of any kind, so any system
that supports a USB storage device will be compatibile with this enclosure.
Access to the encrypted content is only allowed through the touch keypad by
inputing the currect password, baring any unauthorized users.
2.5-inch SATA hard drive or solid state drive (max 9.5mm in height)
It is recommended that the enclosure act as a backup to important files, and
not as additional storage (unless also regularly backed up), as lost passwords or
hardware failure (SATA drive or enclosure) will result in the stored data being
unrecoverable.
User Manual
1
Page 3

Product Information
Menu
Scroll Bar
1. Press to display
menu items
2. Press&hold for
3 seconds to
safely eject/
re-connect
hard drive/SSD
OLED Display
Displays drive status
and menu items.
Touch Pad
For password
input.
To scroll menu
items up/down
Enter
“Okay” key
USB 3.0 Micro-B
User Manual
2
Page 4

HDD/SSD Installation
1) There is a small groove near the
USB3.0 port on FahanTech
Lockdown Touch. Simply push up
the back panel using your
fingertip to open it.
2) Install a 2.5-inch hard drive or
SSD. Please note that Lockdown
Touch only supports maximum
9.5mm thick 2.5-inch HDD/SSD.
For slimmer HDD/SSD, it is
recommended to add extra
padding material to help fix it
in place.
3) Close the back panel and screw
it tightly by using the included
screw driver and screws.
User Manual
3
Page 5

4) Connect FahanTech Lockdown
Touch to your desktop or laptop
with the USB3.0 cable.
How to Use
Password Setup
1. When connected to a host computer for the first time, the OLED readout will
prompt you to setup a password or not. If no password is used, the enclosure
will function as a standard external hard drive enclosure without encryption.
Will you use password?
0 = NO, 1 = YES
2. After you have selected the option to use a password, you will be prompted
to enter a 4 ~ 8 digit password. Press when complete.
Enter a password first time
********
User Manual
4
3. Re-enter the password as confirmation and press .
CAUTION: If the password is lost, the data on the drive will not be recoverable.
Page 6
Re-enter your password
********
For a brand new HDD/SSD, it should be initialized, partitioned and formatted
first for normal use (reading, writing) regardless of security function.
Below instructions are for Windows XP but the steps are very similar in other
versions.
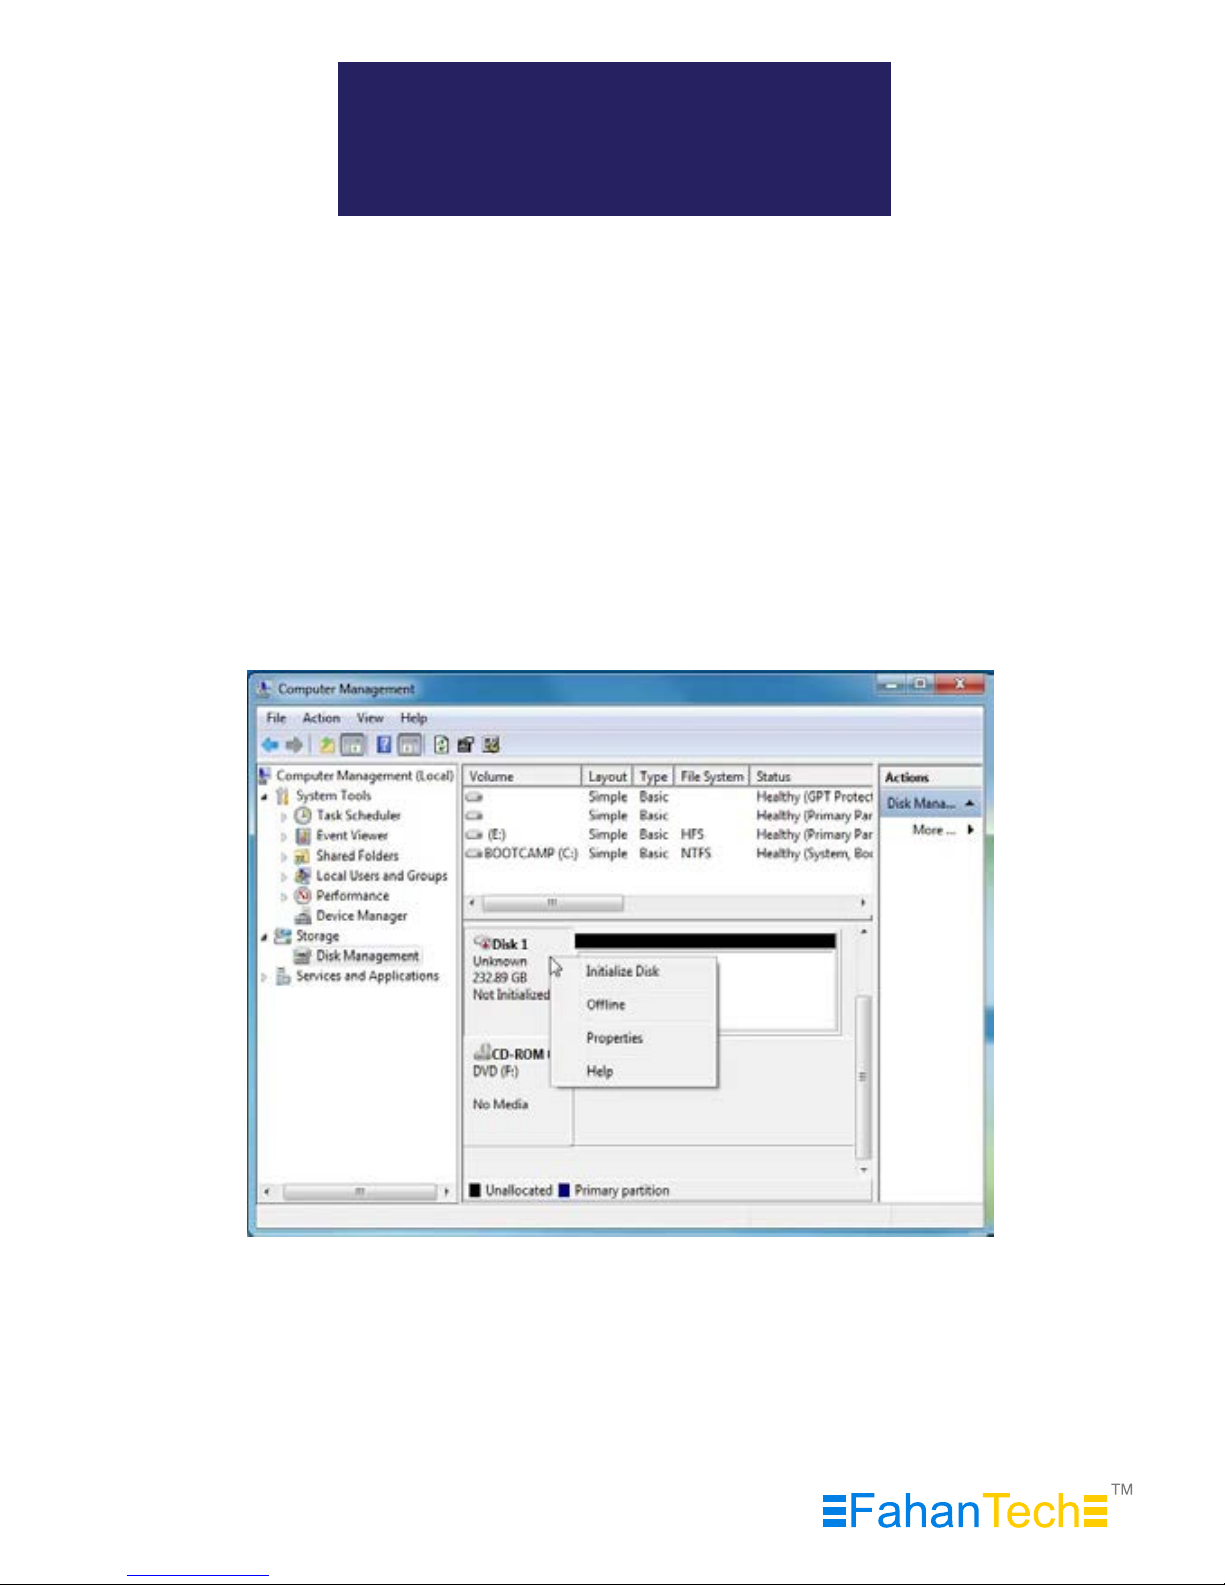
3. Right-click on the external hard drive and select [Initialize Disk] to begin
partitioning and formatting process.
User Manual
5
HDD/SSD Initialization
1. Select [Control Panel] -> [Administrative Tools], then open up [Computer
Management], then go to [Disk Management]
2. Your system can’t recognize the drive installed in Lockdown Touch
Page 7
NOTE: Please be careful not to initialize used or existing HDD
which includes any valuable DATA on it.
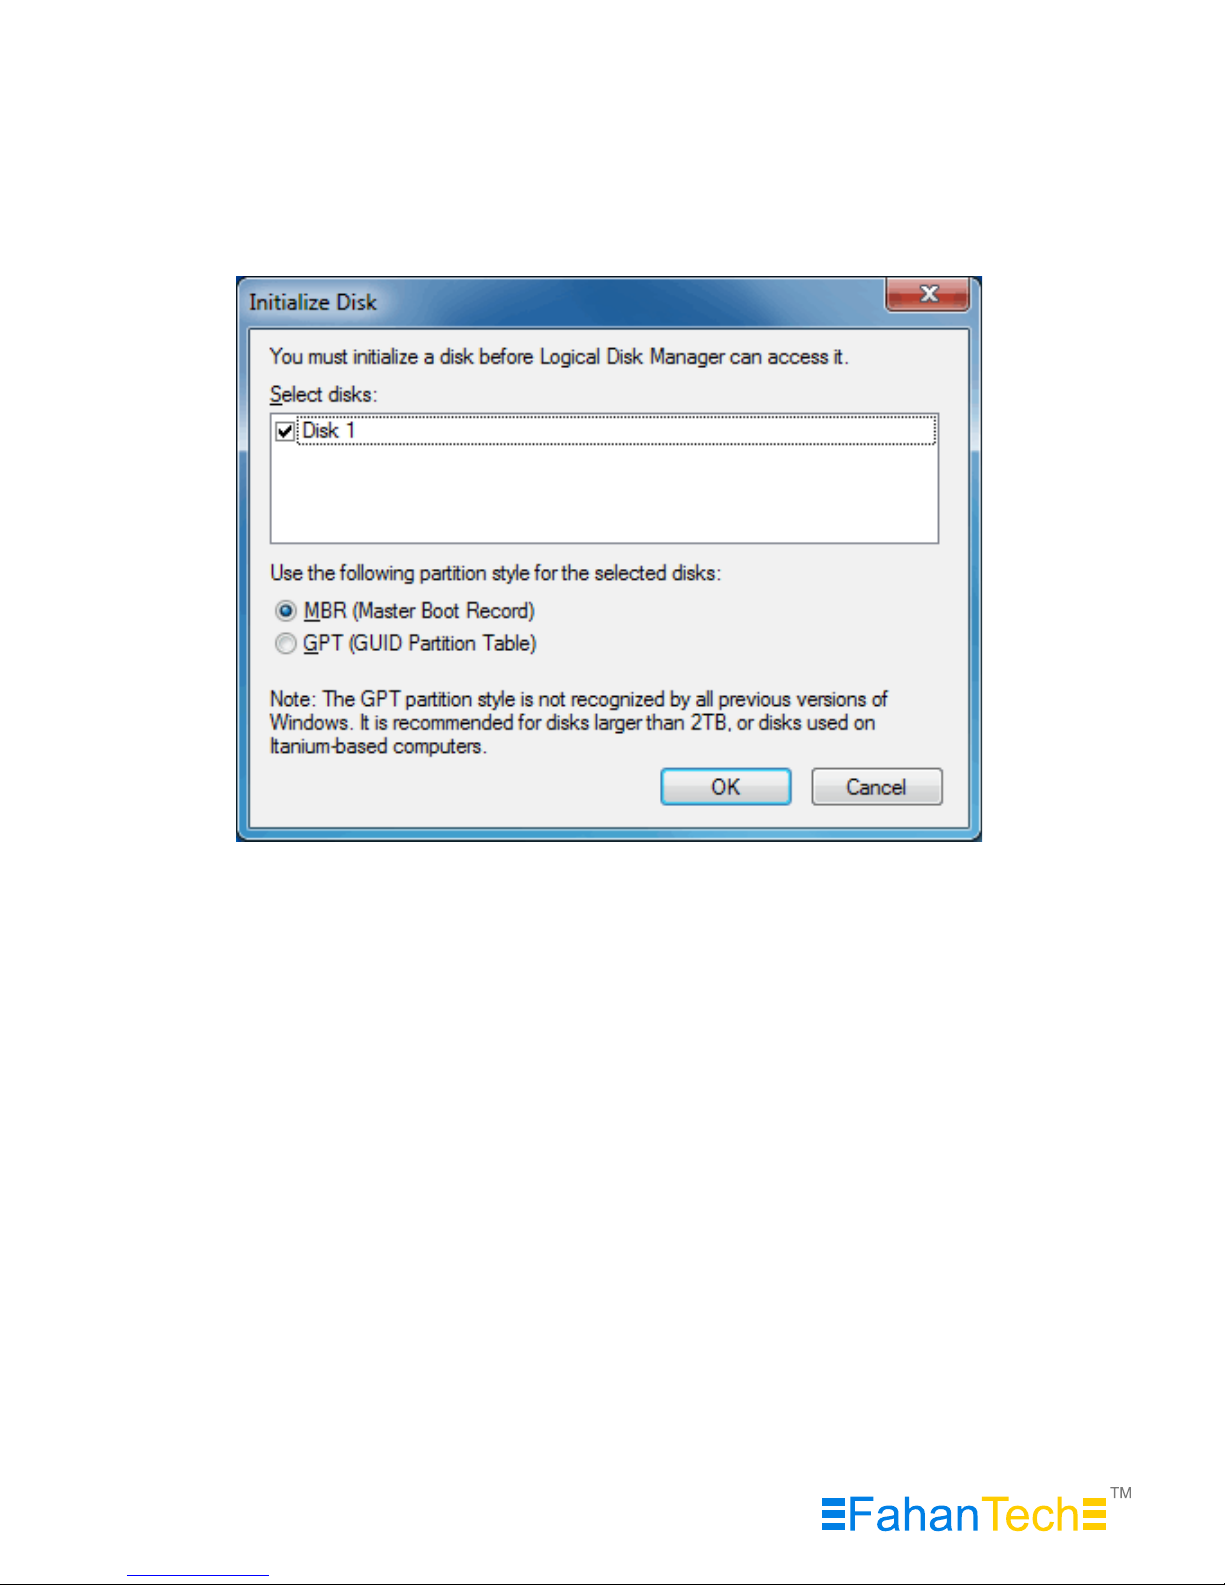
4. Select “MBR” in the menu of [Initialize Disk] and press “OK”.
5. [Initialize Disk] is completed, then the Hard Disk displays “Online”.
Now, you can begin the partitioning and formatting process on the Hard
Disk. Right-click on the drive’s space details (below picture) and select
“New Simle Volume...”.
User Manual
6
Page 8

User Manual
7
6. “New Simple Volume Wizard” pops up to give you some
selections about the new partition.
Page 9
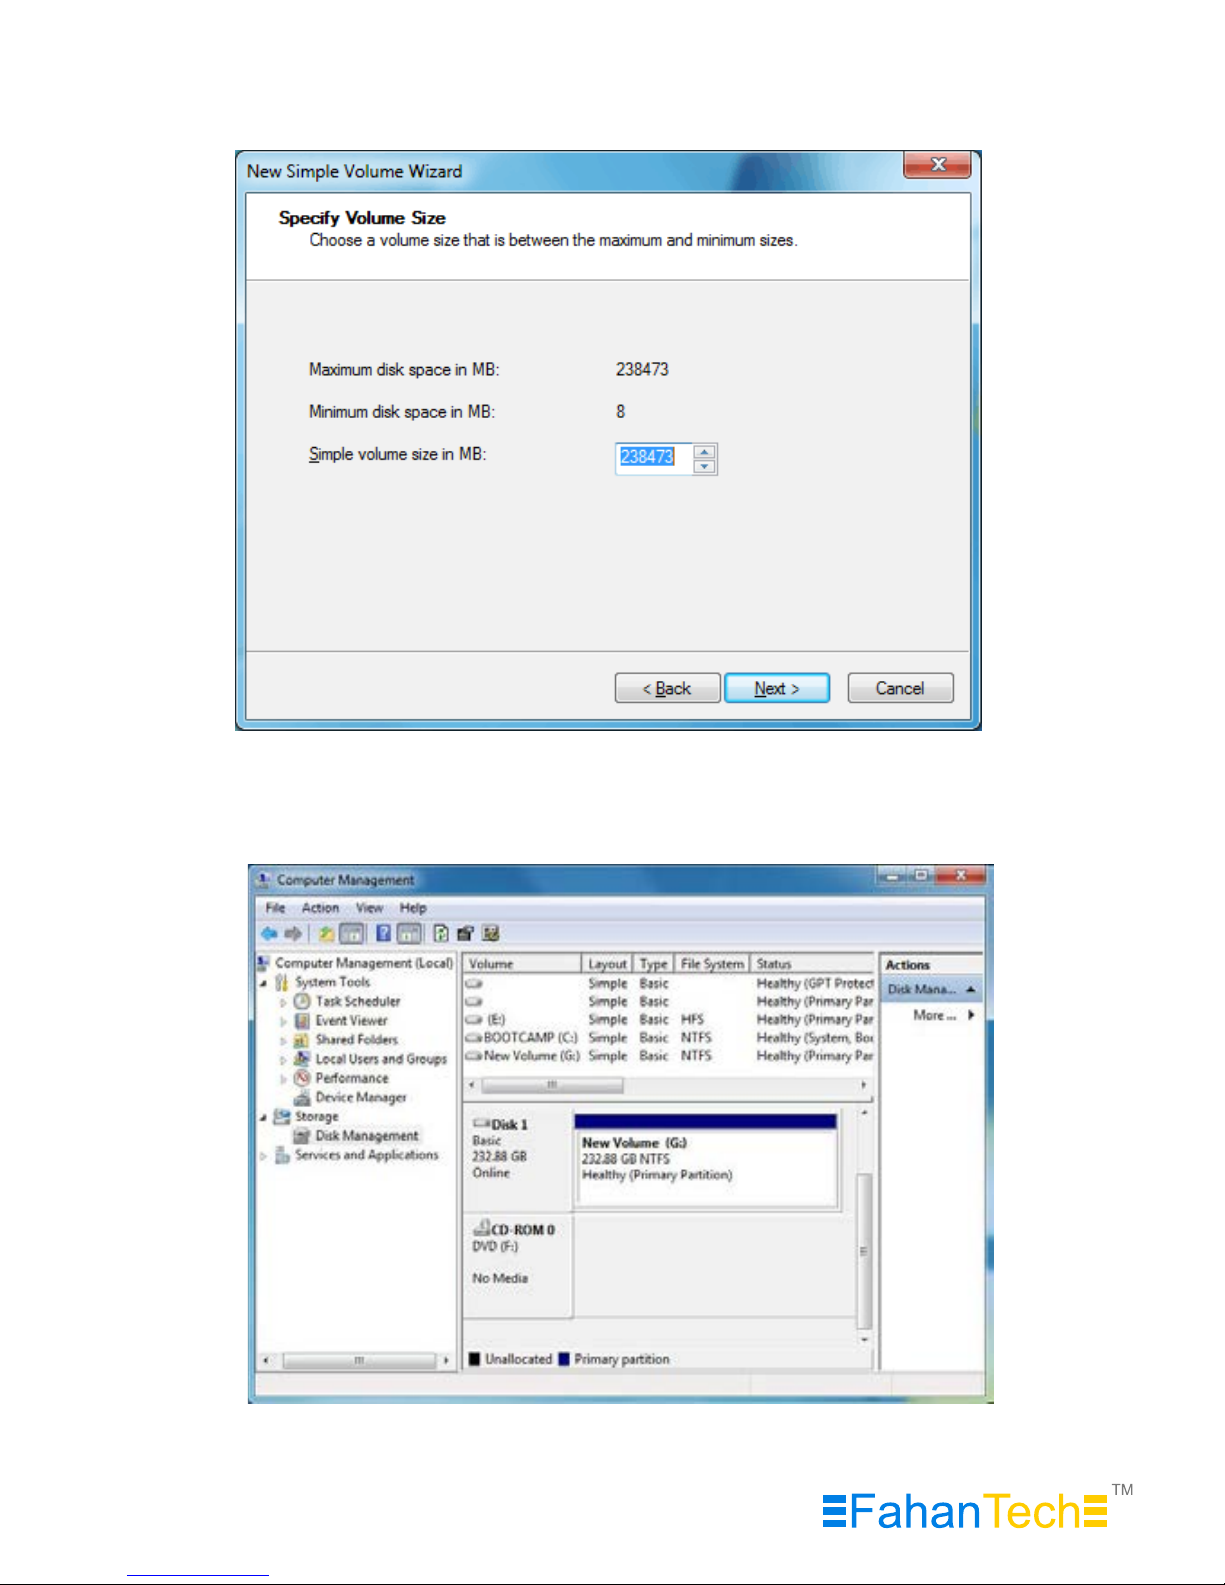
7. Click “Next” and set partition size..
8. That’s it. You are good to go.
User Manual
8
Page 10
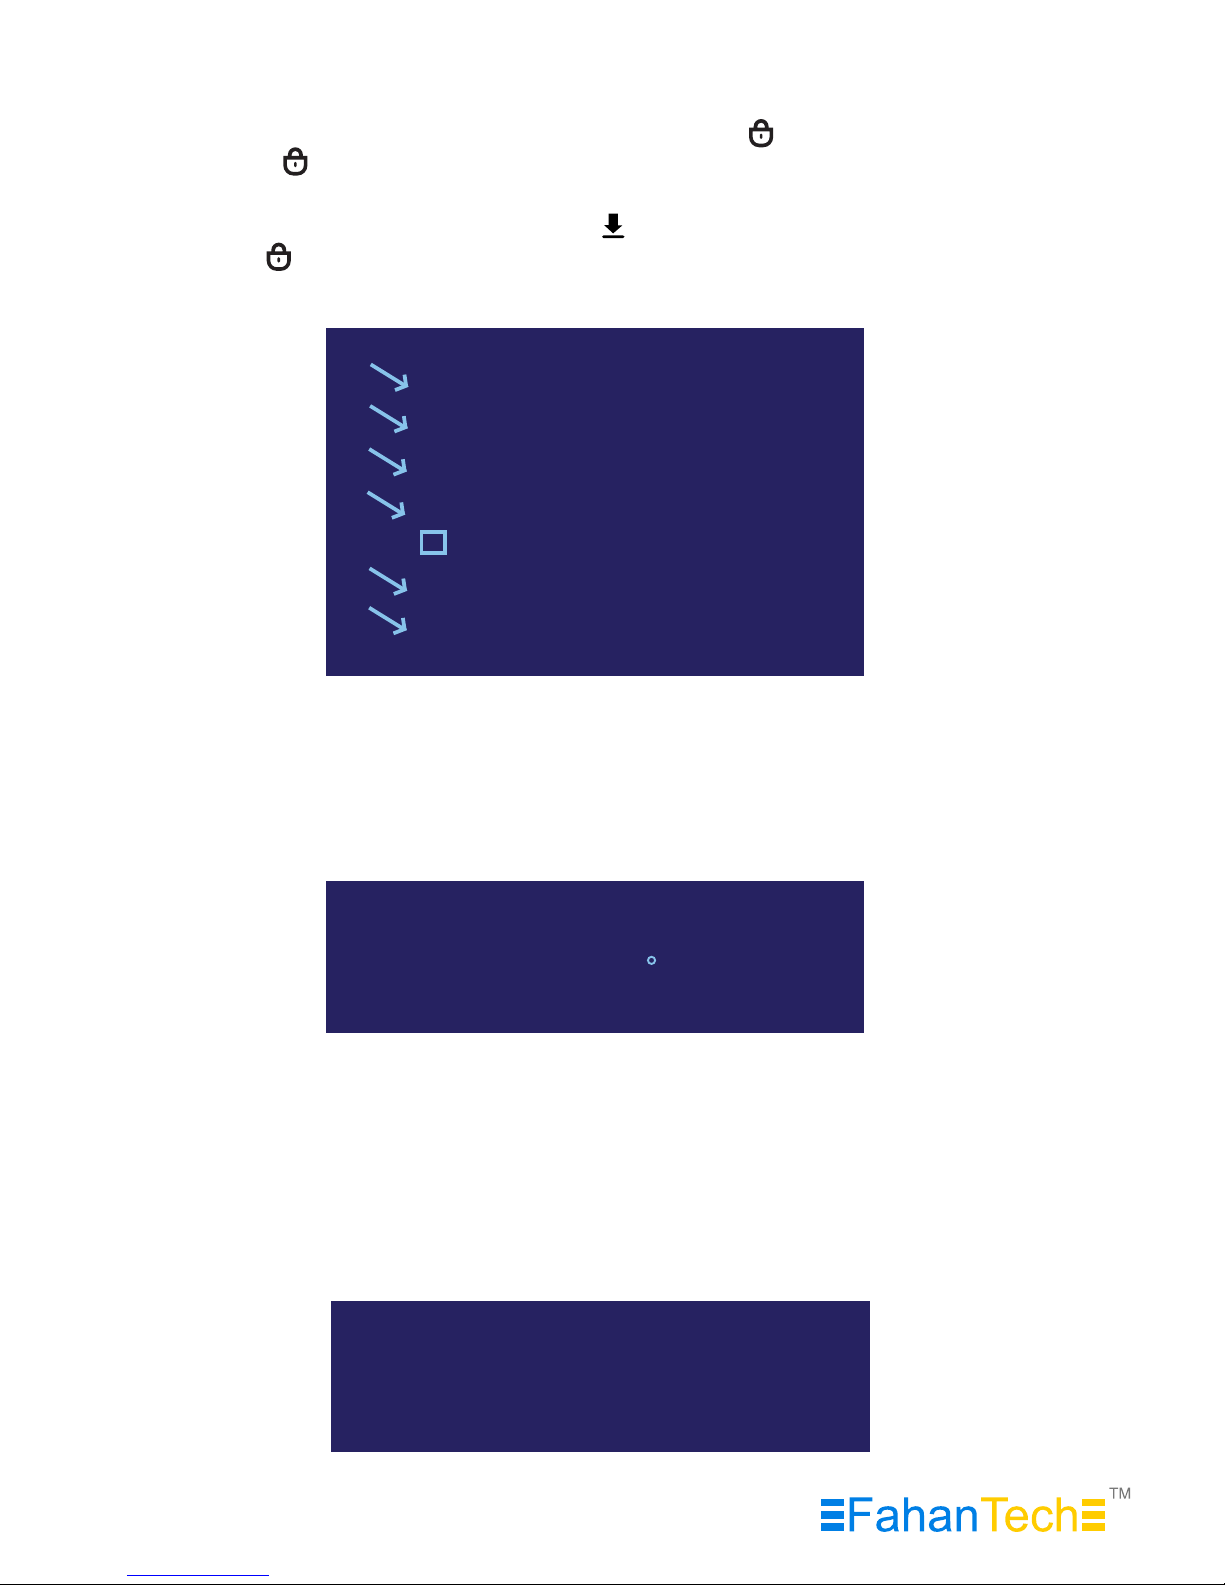
Lockdown Touch Menu
Lockdown Touch supports additional functions via (Menu Icon) on it.
Press (touch) button on the front touch panel, then OLED shows 5 main
features one by one like the picture. You can move up and down in the menu
by using 2 and 8 button. Press (touch) button to go into the selected
menu. Press button to return to the previous menu.
HDD Temp.
HDD Usage Timer
USB Connection Speed
Password Change
Write Protection
User Info
HDD Initialization
HDD Temp.
Displays temperature of installed HDD (In some cases, for SSD and HDD models,
it may not show temperature info)
HDD Temp.
Temp: 34 C
HDD Usage Timer
Displays two counters measuring the total time the installed SATA drive has been
in use since being installed/initialized.
A: Total time the installed SATA drive has been actively read/write.
T: Total time the installed SATA drive has been connected to a host computer.
User Manual
9
A: 30M 27S
T: 6H 33M
Page 11
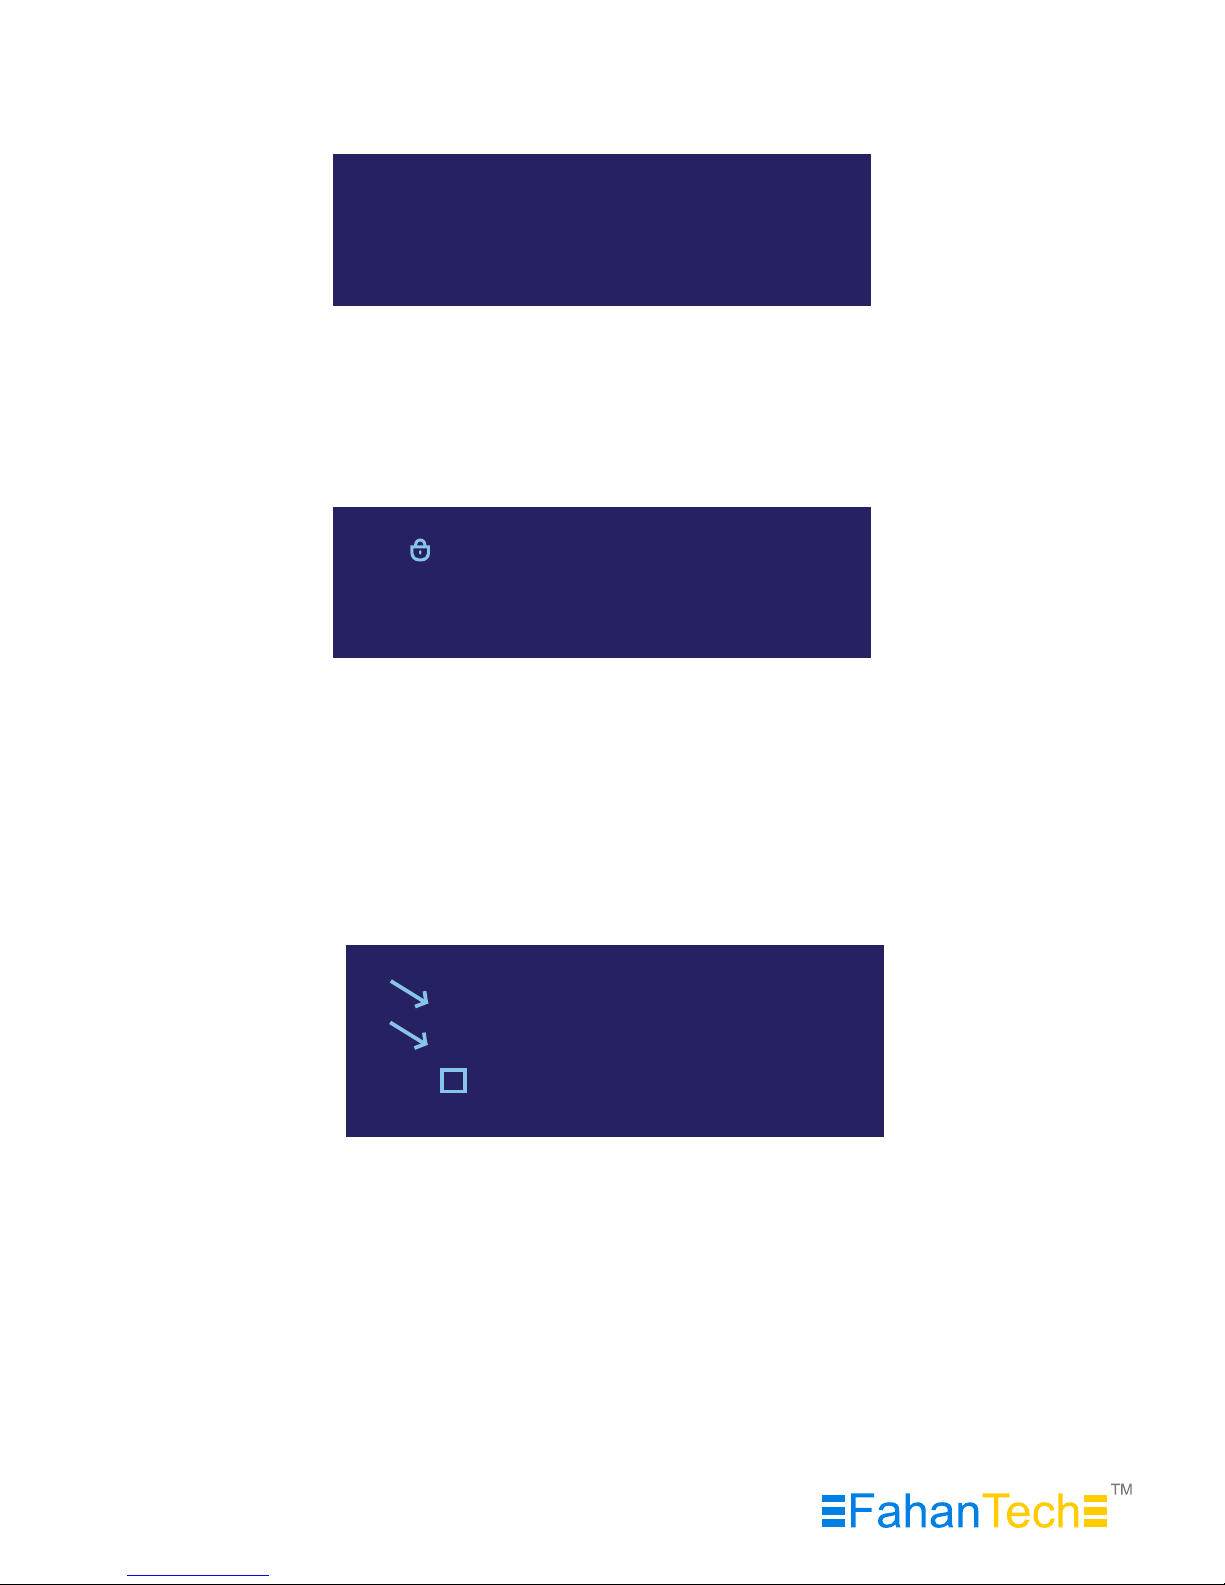
USB Connection Speed
Displays the current USB connection mode (i.e. USB 3.0/ USB 2.0).
USB Connection Speed
USB 3.0
Password Change
To change the current set password, first you are required to enter the old
password,followed by the new password. The password must be between
4 ~ 8 digits.
Re-enter your password
Password Change Success
Write Protection
Enables write protection on the installed HDD/SSD, which prevents data from
being written to or deleted from the SATA drive. Data can only be read.
User Info
1.Name ( )
2. Phone Number ( )
User Info Display
Here you can set and display optional user info, such as a name (8 character
limit) and phone number (20 character limit). A name can be configured to
display on the OLED display on startup, instead of the standard logo and the
phone number can be set to display when an incorrect password is entered.
This can be used as contact info for returning misplaced units. Check the “User
Info Display” option to enable this feature.
User Manual
10
Page 12
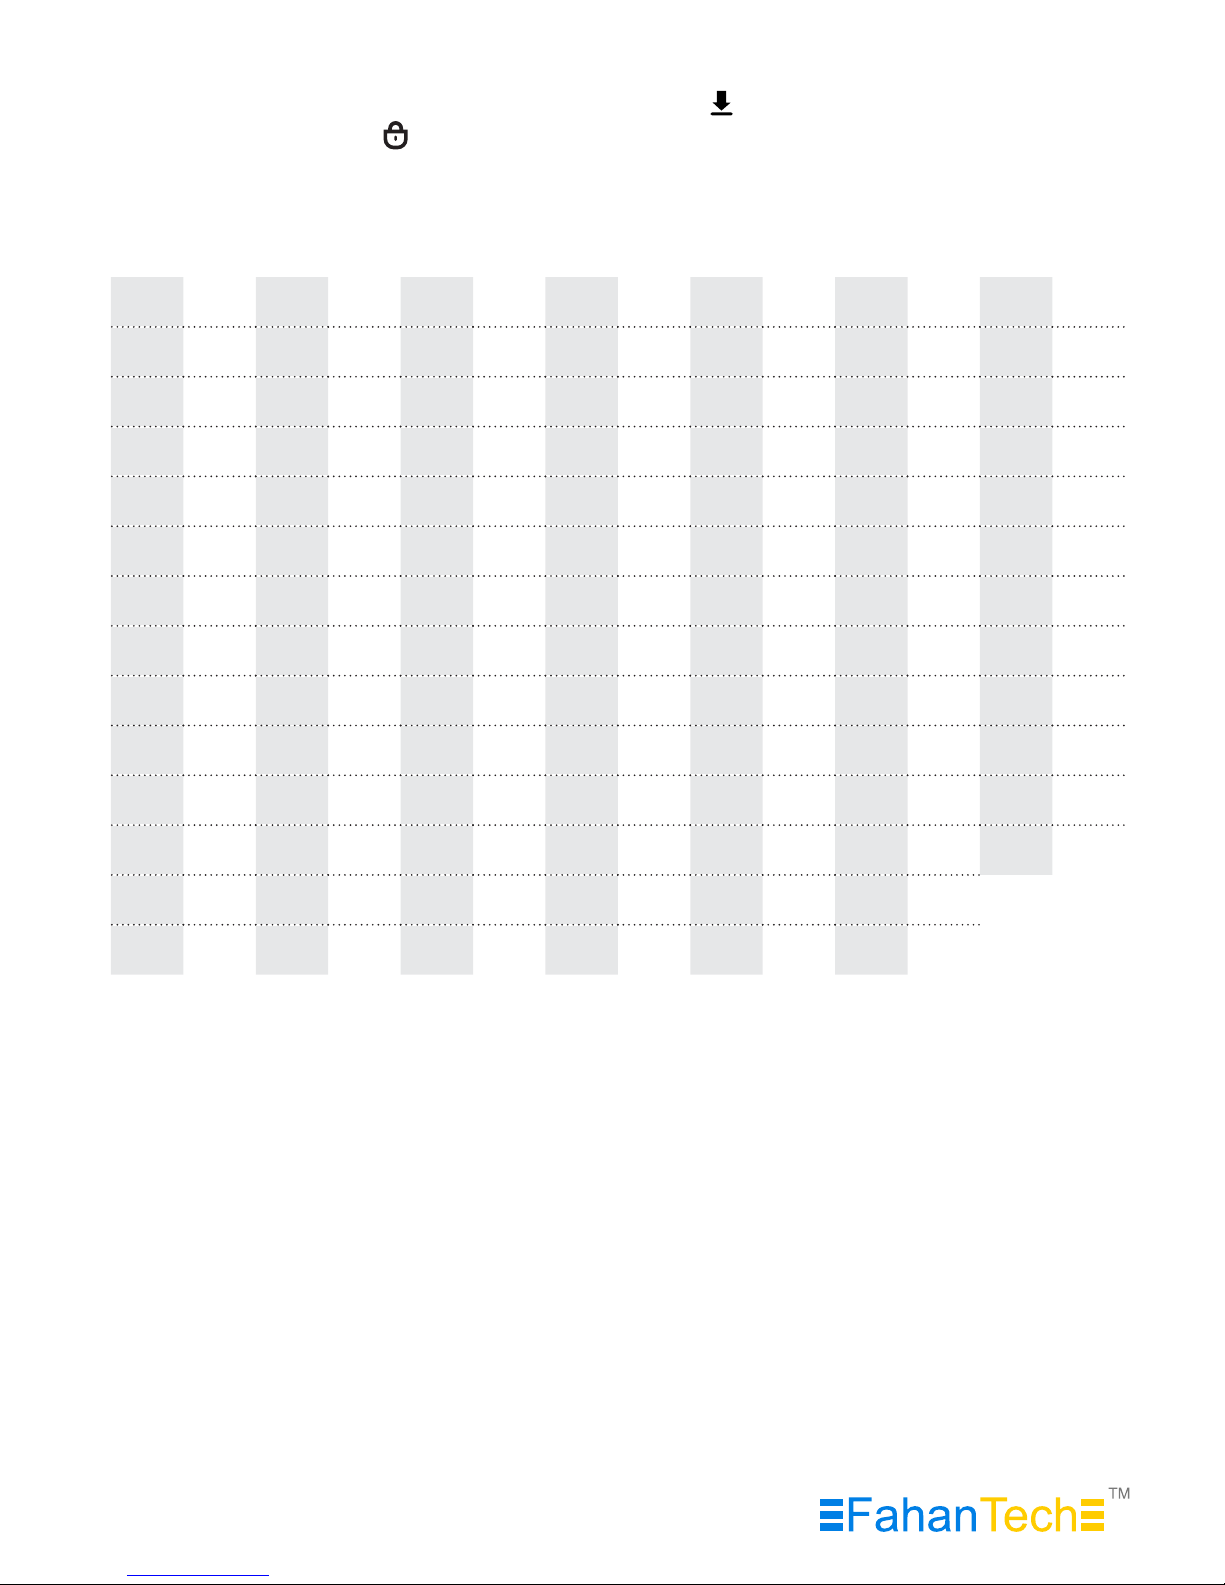
When entering characters for the “Name”, refer to the following chart. Enter the
code for the desired character and then press . When finished entering all
characters, press the button to save and exit.
NOTE: There is no backspace, so if a wrong character is entered, you must exist
and re-enter the menu to start over.
0 sp 14 . 28 < 42 J 56 X 70 f 84 t
1 ! 15 / 29 = 43 K 57 Y 71 g 85 u
2 “ 16 0 30 > 44 L 58 Z 72 h 86 v
3 # 17 1 31 ? 45 M 59 [ 73 i 87 w
4 $ 18 2 32 @ 46 N 60 \ 74 j 88 x
5 % 19 3 33 A 47 O 61 ] 75 k 89 y
6 & 20 4 34 B 48 P 62 ^ 76 l 90 z
7 ‘ 21 5 35 C 49 Q 63 _ 77 m 91 {
8 ( 22 6 36 D 50 R 64 ` 78 n 92 |
9 ) 23 7 37 E 51 S 65 a 79 o 93 }
10 * 24 8 38 F 52 T 66 b 80 p 94 ~
11 + 25 9 39 G 53 U 67 c 81 q 95 []
12 , 26 : 40 H 54 V 68 d 82 r
13 - 27 ; 41 I 55 W 69 e 83 s
HDD Initialization
The installed HDD/SSD drive can be re-initialized while connected to the host
computer, which will result in the drive partition being deleted and drive being
treated as a new drive (usage timer will also be reset). The SATA drive will need
to be re-partitioned and formatted on the host computer afterwards.
WARNING: This will result in all data on the drive being lost.
User Manual
11
Page 13

User Manual
12
Do you want to initialize HDD
0=NO, 1=YES
Additional Function
Smart Mount/Unmount
Instead of unmounting the USB enclosure through the operating system, the
enclosure has a built in feature that can disconnect it from the host computer.
Pressing and holding the button for 3 seconds will automatically
disconnect the enclosure from the host computer. Pressing and holding the
button again for 3 seconds will reconnect the enclosure with the host
computer.
When data is being written or read from the drive you will not be able do so
and OLED displays “HDD is busy”.
FahanTech is a company that specializes in professional security storage, which
is at the core of our business. We also provide consumer level portable power
solutionsand cool computer & smartphone accessories.
General Info: [email protected]
Sales : [email protected]
Branding: [email protected]
www.fahantech.com
 Loading...