

Page 1
installation
For Models: N310 05, N310 06
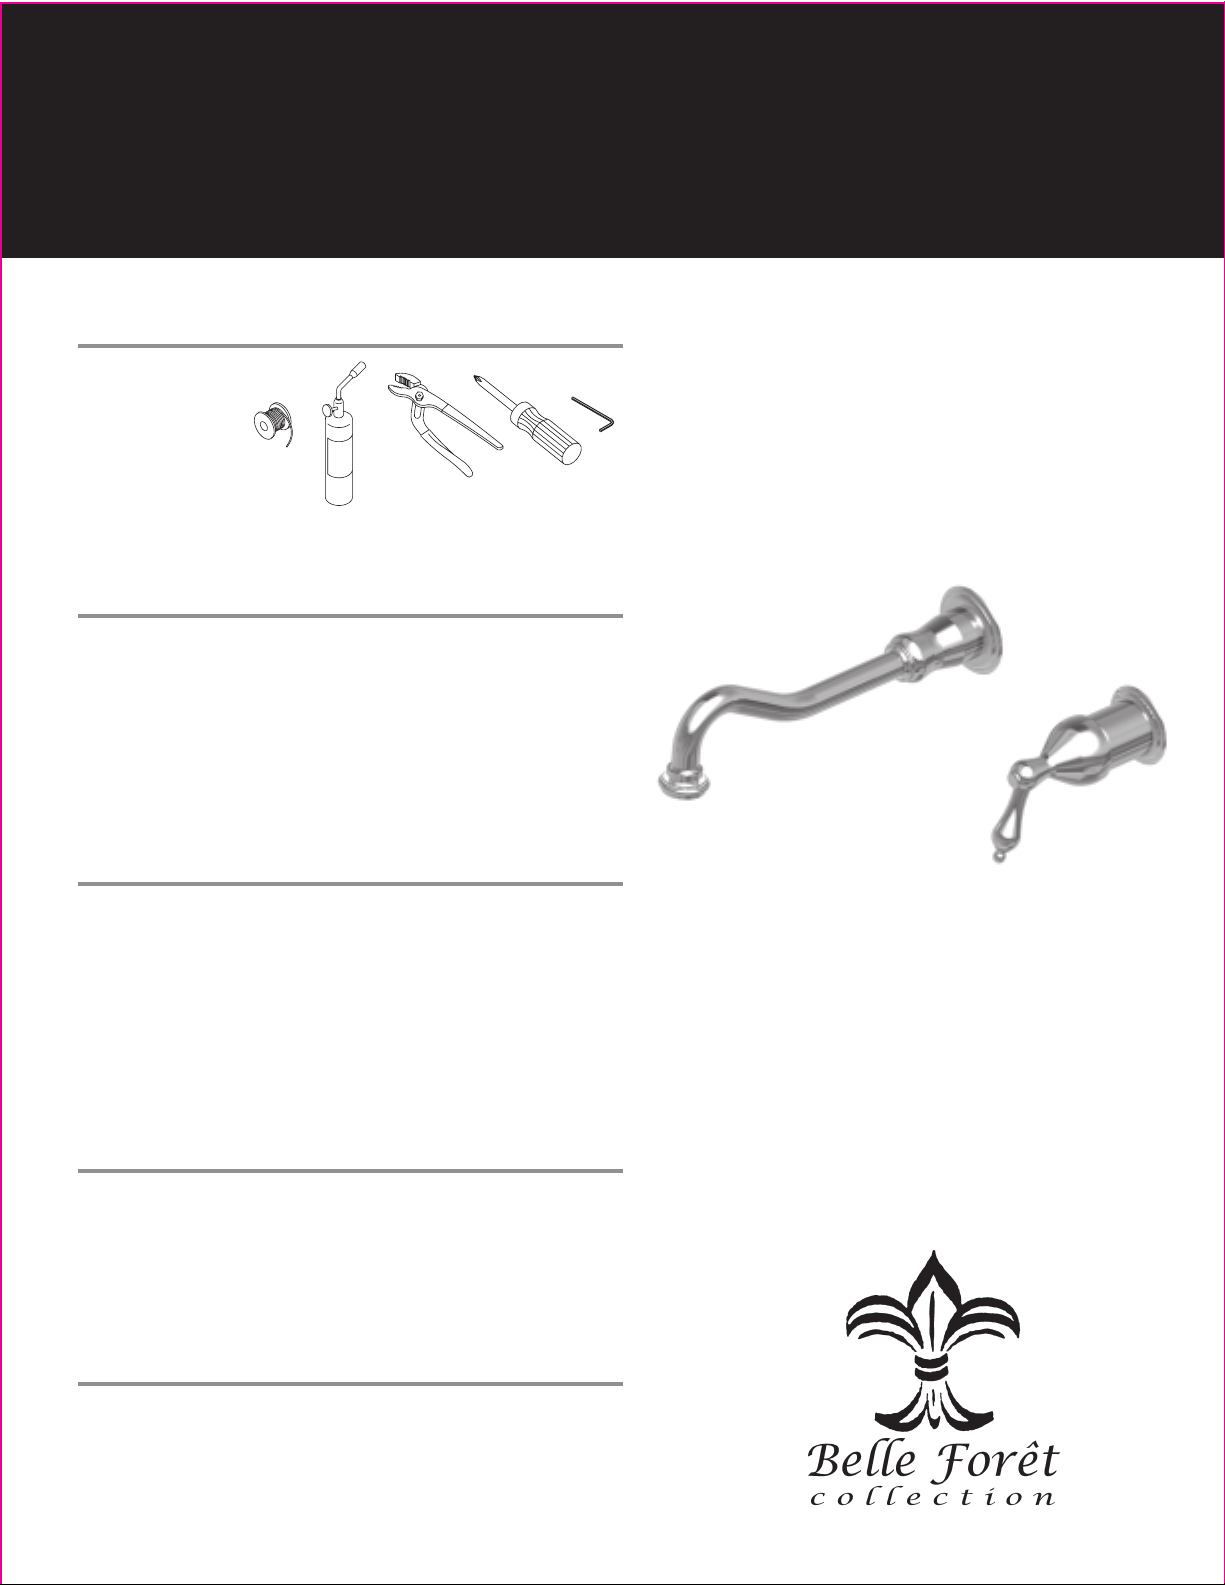
Tools
Maintenance
Your new faucet is designed for years of trouble-free performance.
Keep it looking new by cleaning it periodically with a soft cloth.
Avoid abrasive cleaners, steel wool and harsh chemicals as these will dull the finish
and void your warranty.
Safety Tips
• If you use soldering for the installation of the faucet, the seats, cartridges and
washers will have to be removed before using flame. Otherwise, warranty will be
void on these parts.
• Protect your eyes with safety glasses when cutting or soldering water supply line.
• Cover your drain to avoid losing parts.
Important points
Prior to beginning installation, turn off the cold and hot water lines and open the
old faucet to release built-up pressure.
Things You May Need
All installations can vary depending on how your previous faucet was installed.
Necessary supplies to install your faucet are not all included; however, they are
available wherever plumbing supplies are sold. When choosing your installation
supplies, make sure they are IAPMO and/or CSA approved products.
• Propane torch
• Solder
• Groove joint plier
• Phillips screwdriver
• Hex wrench
Page 2
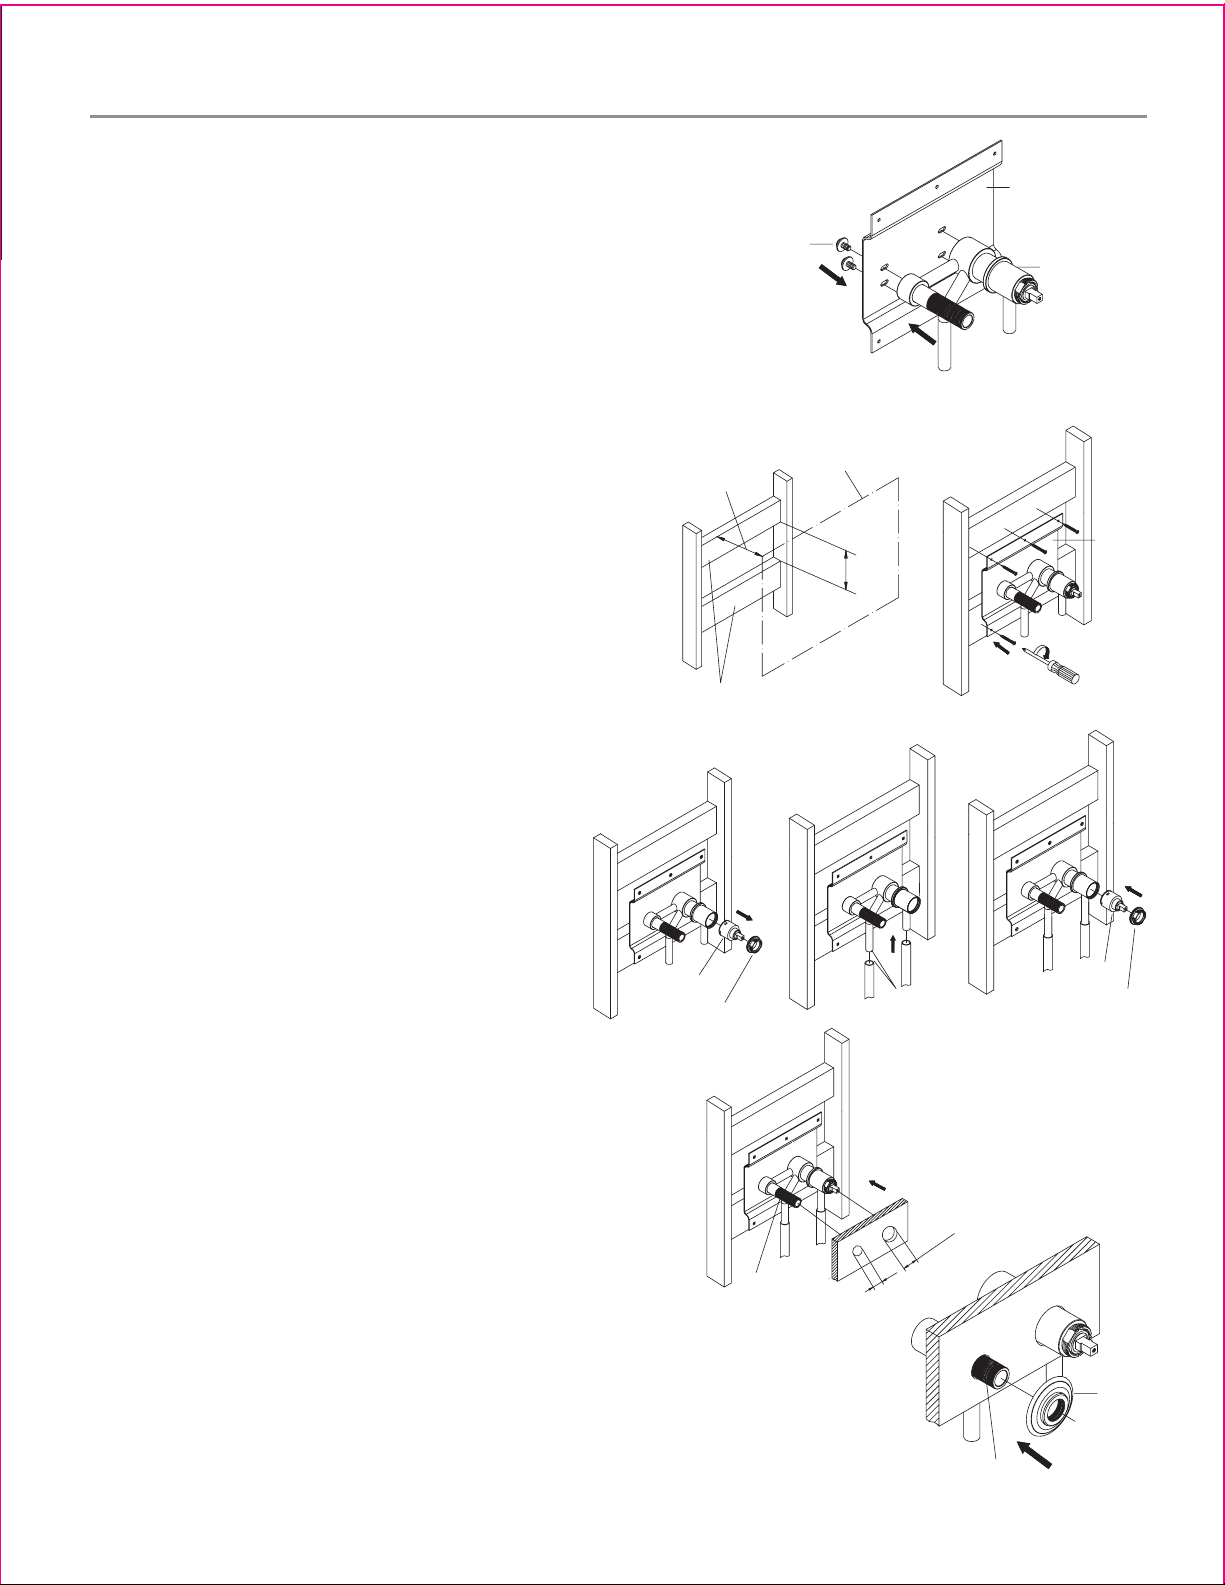
Preparation/Assembly
1
2A 2B
3-1 3-2 3-3
4
5
1
Shut off main water supply before installation.
Place faucet body on wall plate and secure with screws provided.
2
Construct suitable stud framing. Horizontal braces should be spaced
5
1/2" apart, and should be placed 2 1/8" min to 3 1/4" max depth
from the finished wall. Secure the wall plate to stud framing with
screws provided.
3
Remove adjusting ring and cartridge. Connect to 1/2 copper water
supplies. Replace cartridge and secure with lock nut. Turn on water
supply and faucet, and check for leaks. Place the plastic protective
sleeves on the body.
4
Complete finished wall, leaving a 1" diameter hole for the spout
outlet, and a 1 7/8" hole for the cartridge & bonnet.
5
Remove the plastic protective sleeves. Thread spout trim ring on to
spout outlet until it is flush to the wall.
Steps 1-5
Solder connection
1
-7/
8"
1"
Screw
Wall plate
Wall plate
Faucet body
Finished wall
5-1/2"
2-1/8" min to 3-1/4" max
1-1/2" x 3-1/2"
Trim ring
Spout outlet
Spout outlet
Cartridge
Lock nut
Cartridge
Lock nut
Page 3

Preparation/Assembly
6
8
6
Install spout to spout shank:
Slide back canopy from spout end. Insert spout into the spout
mounting shank. Tighten set screw with Allen wrench provided.
Slide canopy to spout trim ring.
7
Thread the sleeve onto the handle valve. Slide the escutcheon onto
the sleeve until it is against the wall. Install handle. See 7A & 7B.
A. For lever handle, install handle and secure with screw. Insert Index
button. (See image 7-2)
B. For Spiral handle, install handle canopy and secure with screw
(see image 7-3). Install and align handle wire, and secure by
tightening set screw with Allen wrench provided
(see image 7-4). Install handle knob.
8
Remove the aerator, and turn on hot and cold water for 1 minute
each to flush the lines. Turn faucet off, and replace aerator.
Steps 6-8
7-2
7-5
7-1
7-47-3
Allen wrench
Spout
Aerator
Set screw
Spout canopy
Spout trim ring
Canopy
Set screw
Allen wrench
Handle wire
Handle
Handle knob
Handle valve
Handle
Sleeve
Escutcheon
Page 4

Parts Breakdown
Aerator
Canopy
Handle canopy
Handle
Set screw
Handle knob
Index knob
O-ring
Metal index
Porcelain index
Handle wire
Valve body
Escutcheon
Cartridge
Sleeve
Spout
Trouble-Shooting
PROBLEM
Aerator leaks or has an inconsistent water flow pattern.
CAUSE
Aerator is dirty or improperly installed.
SOLUTION
Remove aerator, check for debris in the aerator screens, and confirm the rubber washer is properly installed.
Spout trim ring
Plastic protective sleeves
Set screw
Allen wrench
Canopy
Lock nut
 Loading...