

Page 1
Lavatory Sinks
ar
Mounting Clips (included)
Screwdriver
Electric Drill
Page 2
Please carefully read complete instructions before begining installation.
1. Unpack the new sink and check the contents of the materials supplied: (1) sink,
Mounting brackets, cutout template.
2. Supplied cutout template provides two installation options.
Topmount (Drop-in) installation
Undermount installation
3. Place the template in desired position on countertop, locating center of the bowl
over cabinet and faucet holes.
4. Trace the outline of the template and cut countertop along the inside of the line using
appropriate tools. Template is for guide only. Use physical sink to ensure accurate cutout
opening. Attach faucet and drain fitting as necessary at this point according to the mfr’s
instructions.
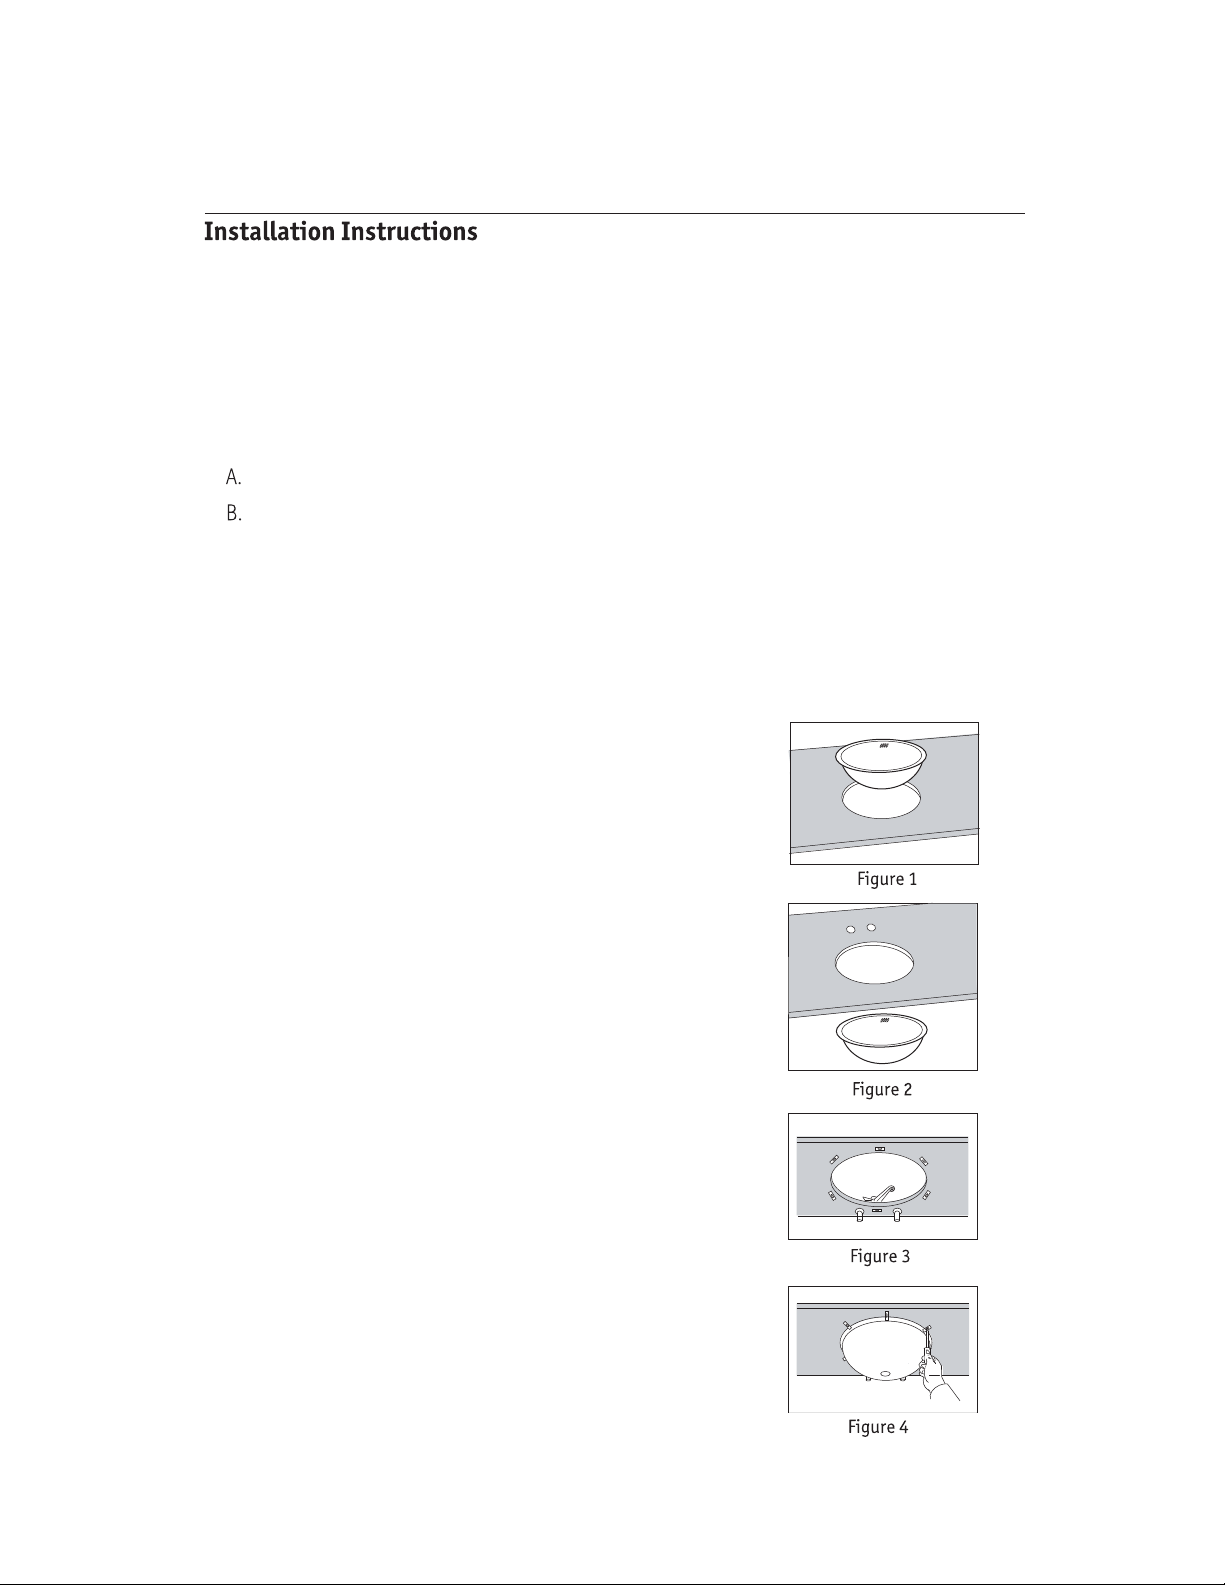
5. Topmount (drop-In ) Installation (Figure 1)
Apply adhesive caulk sealant (not furnished) around the
underside of the rim. Place the sink carefully, align and
press firmly around perimeter of the sink rim.
Allow sealant to set before proceeding.
6. Undermount Installation (Figure 2)
6-1. Locate and drill holes on the underside of the countertop,
approximately 1” from edge of the sink rim to be installed.
Loosely attach mounting brackets to the underside of the
countertop parallel to the cutout opening. (Depending on
the countertop materials, correct type of fasteners may be
recommended by your installer or supplier) (Figure 3)
6-2 Apply adhesive caulk sealant (not furnished)
around the topside of the rim. Allow sealant to
set before proceeding. Place the sink from the
underside of the countertop carefully, align and
press firmly.
6-3 Turn bent end of mounting bracket to snug
over the sink rim and tighten fasteners.
(Figure 4)
Page 3

7. Countertop Installation (Vessel sink) (Figure 5)
7-1. Prepare countertop by drilling a 1-3/4” diameter drain hole at desired location. (Figure 6)
7-2. Position lavatory sink on countertop as shown Secure lavatory to the countertop by
installing drain through drain hole. (Figure 7)
7
8. Install waste system according to the mfr’s instructions.
Do not over tighten screw. Wipe off excess sealant. Install waste system to drain according to
mfr’s instructions and check leakage
HOUZER stainless steel sinks are produced to the highest manufacturing standards and are covered by
a limited lifetime warranty that protects the original purchaser against any defects in materials and
workmanship undernormal use. If upon determination by HOUZER that the sink is defective,
HOUZER will replace without charge, with an equivalent sink or refund, will be sent to the original
purchaser that it has been used in a residential application and installed, used and maintained
according to the instructions supplied with the sink, and not damaged due to abuse, misuse or negligence.
This warranty will not cover any labor charges incurred in installation, removal, replacement or repair,
transportation cost or any consequential damages, which might be caused by the product. HOUZER shall
not be liable in case of;
Improper installation or modification of original product.
Damages resulting from abuse, such as scratches by dropping heavy objects into the sink
Scratches resulting from scrubbing with steel wool, abrasive pads or cleaners
Improper application such as exposure to corrosive chemicals, or photographic solutions
Any commercial application
If the original purchaser finds a defect in material or workmanship, please contact HOUZER Warranty Service,
PO Box 1027, Somerset, NJ 08875-1027. Please include proof of purchase or sales receipt. The law in some
states may expand or modify this warranty. This warranty supersedes all other warranties, expressed or implied.
Page 4

HOUZER Inc. PO Box 1027, Someset, NJ 08875-1027 Ph.1.800.880.3639 F. 732.247.7006 www.HouzerSink.com
 Loading...