

Ezytrail STIRLING GT, K-Series Stirling LX Setup Manual
Scan this qr code with
your smart phone
to see the SET-UP Video
ON YOUTUBE!
K-Series Stirling Gt
Set-up Guide
1
INDEX
2 Maintenance Guide
7 Safety Tips
8 Set-Up Guide
16 K-Series Power Control Panel
17 Troubleshooting Guide
18 Periodic Maintenance Schedule
20 Camping Tips
22 Pre-Journey Checklist
23 Camping Checklist
24 Pole Diagram
25 Fridge Chart

Maintenance Guide
Maintenance Recommendations:
Depending on the amount of kilometres travelled and the type of road surface encountered
during a trip, maintenance of your trailer and tent is a must on your return to ensure your long
term enjoyment of your trailer. When planning a trip you will no doubt spend much time making
sure the tow vehicle is prepared for the road ahead, so it follows that the trailer should also be
checked out as well. [cfr. Periodic M aintenanc e Schedule page 18-19 for service intervals]
Maintenance Tips for your Camper Trailer:
Check condition and air pressure of trailer tires and spare tire regularly.
Check the fastening of the jockey wheel and stabiliser legs bolts.
Check the wheel nuts are tight.
Check the hand brake and electric brakes are adjusted and in good condition.
o Adjust brake shoes if brakes are loose.
Check cables for potential damage.
Check the hitch anchor bolts are tight and have enough grease in the hitch.
Check all lights are working.
Repack wheel bearings and adjust if necessary after long or rough terrain trips.
Touch up any stone chips quickly to prevent rust stains.
After returning from your trip, empty out all water from water tank.
Tips for Caring for Canvas Tent:
Always make sure the tent is clean and dry. If the tent was wet when packed up then it
must be erected as soon as possible on your return home to dry out to prevent mould
and stains.
Always return all zippers & mesh screens to the closed position before folding the tent.
Always have the tent fully zipped before tying down with guy ropes.
Zippers are delicate items and care must always be taken when using them
To assist with fast tent set up, devise a way to keep the tent poles separate from the PVC
cover
When not in use the trailer should never be left out in the open weather without a
storage cover.
Although our tents/annexes are constructed to rigid specifications, they should not be left
unattended for long periods of time during inclement weather. Long periods of rain may soak
the ground so that pegs become loose and/or the frame uprights may sink into the ground. One
or both of the above will weaken the rigidity of the overall structure since its strength depends
on a taught erected condition.
Water pockets may form in the roof if the unit is not erected taught, further adding to the load
on the frame supports and possibly causing a broken frame, bent poles as well as roof leakage.
2

Pre-Use & Maintenance Instructions
Weathering:
All products must be assembled prior to use and inspected for accuracy and parts. This also gives
you an opportunity to familiarise yourself with your tent set-up and to make sure you have all
necessary components. At this time the product should be hosed with water to allow seam take
up. You may find that in first wettings some leakage occurs through the seams and canvas. This
is not a fault of the manufacturer, but a natural characteristic of the blend of canvas and
synthetic fabrics. For this reason your canvas product must be erected and thoroughly saturated
and then allowed to dry prior to its first use. This procedure (weathering) should be followed a
number of times – 3 times as recommendation, this causes the fabric to shrink and help close up
fibres and seams which may cause leakage. Do not over tension seams at this stage. Any
persistent drips may need proofing with a suitable seam sealing solution.
Stitch Holes:
Every care is taken to ensure that your canvas tent is made using the finest water repellent fabric.
However, canvas products are not permanent structures and in extreme conditions some water
may penetrate. Seepage may occur in the seams through the needle holes created in the sewing
process. This is normal and can be corrected with the application of seam sealing compound. It
is suggested you purchase a wax stick or water proofing compound to keep with your camping
equipment.
Storage:
Canvas products have excellent fungus resistance. As a result you can pack your canvas product
wet if necessary for a short period of time. However, we recommend that the canvas product
should not be left wet for more than 24 hours. Dry your canvas product thoroughly and dust off
any foreign particles before storage. Fold your canvas product loosely and store in a dry place
off the ground.
Cleaning:
Do not use a washing machine or any detergents as this may destroy your proofing. Remove
dust, etc. with a soft brush and warm water. If it is necessary to use a mild detergent or canvas
mildew remover, reproof the area with suitable waterproofing compound.
Wicking:
Your canvas product will not leak if you touch the canvas. However, if you rub your finger back
and forth continuously on the canvas you may eventually draw water through (wicking). For this
reason it is advisable not to have anything touching your canvas product. Similarly, if canvas is
left to pool, water may draw through the fabric causing leakage. This is not considered to be a
defect.
Zips:
All care is taken in the design to cover zips with storm flaps or position them where water will
not flow. At times wind driven rain could force water under the flaps and through the zips. To
minimise this, make sure all doors and windows are closed with flaps securely covering the zip
wherever possible.
3
Zipper Care:
All zippers on your canvas product will give you years of service. However, care must be taken
when using your zips. Never force a zipper - reduce tension so all zippers run smoothly without
straining.
Have zips closed when pegging out the tent.
Have zips open slightly (to allow air into the tent) during erection.
Before final tensioning of a tent close all zips.
Always use two hands to operate zippers.
Damaging your product from over tensioning may void your warranty.
Reducing the Risk of Jamming Fabric in the Zip:
When using the zip, hold the pull-tab between your thumb and forefinger with your
thumb facing you.
As you are closing the zip, clear the way in front and under the zip slider using the back
of your hand and cup the zip slider underneath with your remaining 3 fingers.
Use this action for opening or closing. Keep the fabric clear of the zip slider - zip and unzip
slowly.
What to do if the Zipper Gets Caught:
Pull the fabric bit by bit out of the slider. Do not try and pull all the fabric in one go.
Do not force the slider or the fabric.
If the Slider Does Not Close the Zipper Properly:
With use the jaws of a zip slider can open slightly over time. This can be exaggerated
quickly if fabric is caught into the zipper. When this occurs the slider does not compress
and interlock zipper coil teeth tightly enough and the zip bursts open or does not close.
To fix this, simply undo the zip and with the slider at the end of the zip lightly crimp the
jaws of the zip slider together with a pair of pliers.
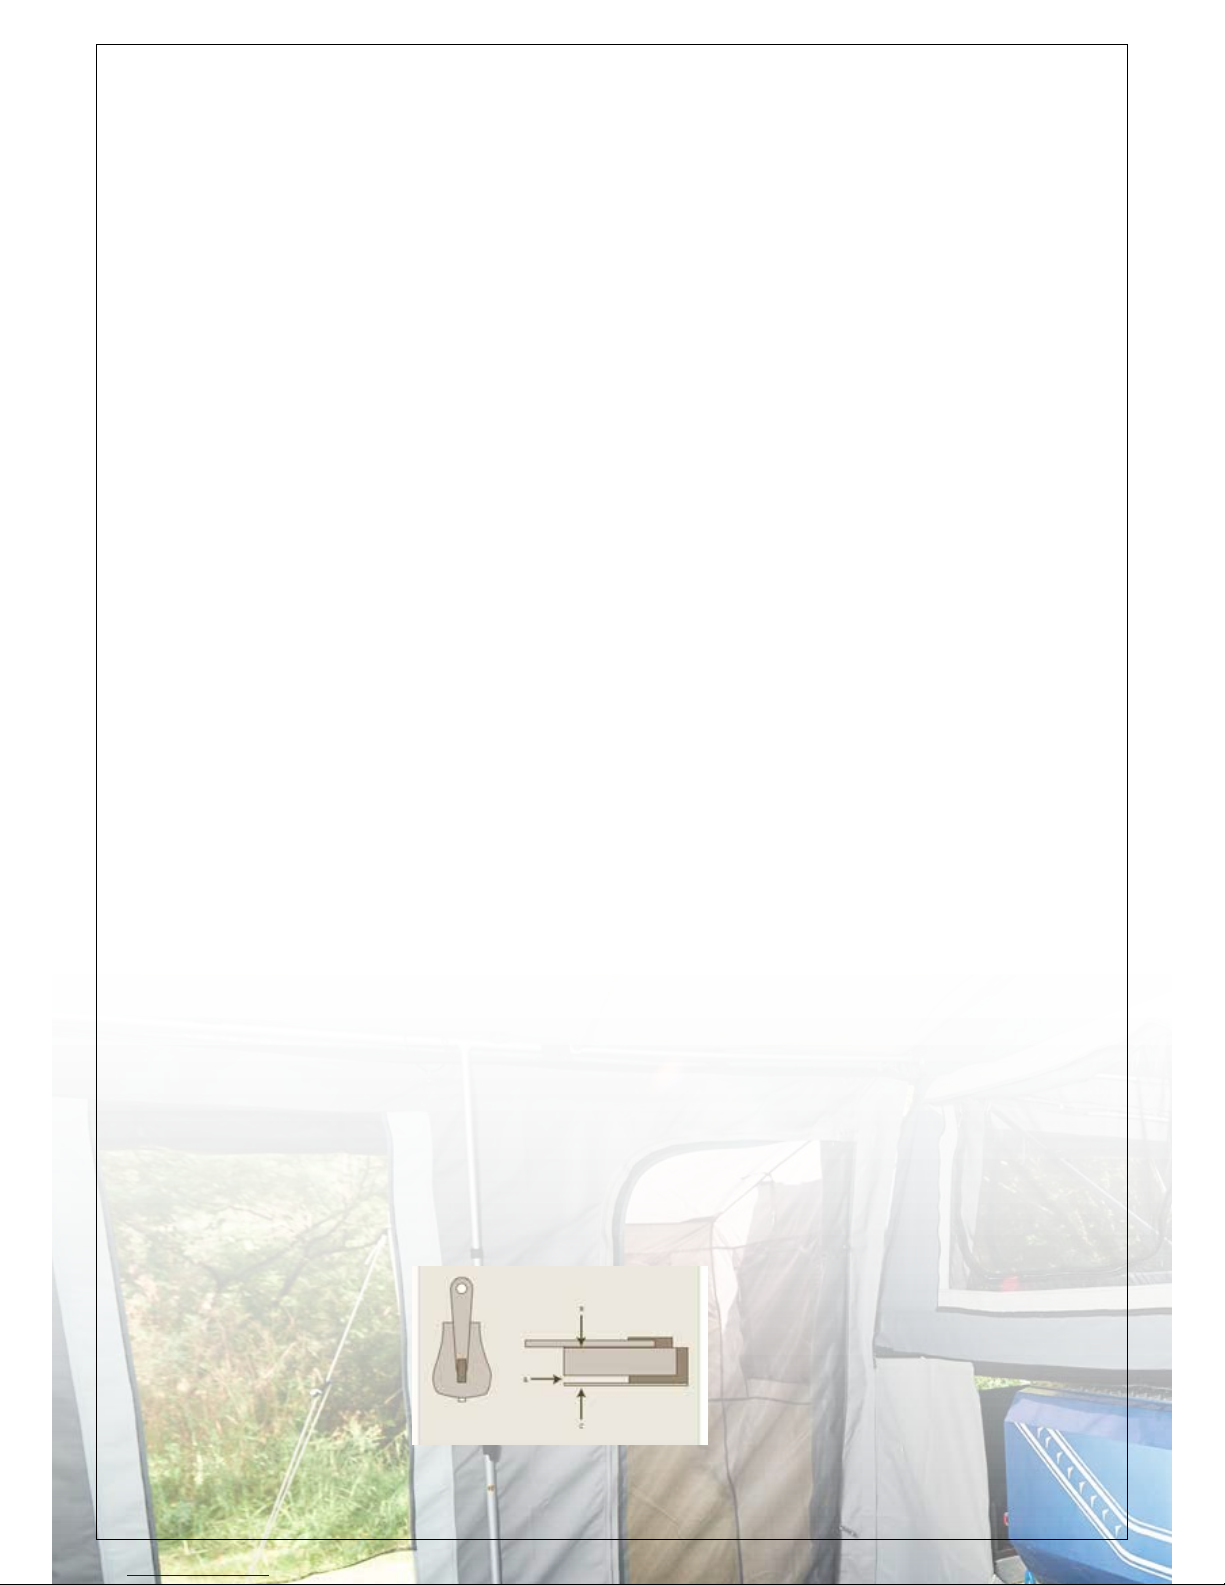
Crimping Instructions for a Zip Slider:
The most common reason why zips burst open is that the zip slider does not close the
coil tight enough. Commonly wear and tear or fabric jamming will cause the gap marked
“A” to increase, diagram below.
By gently “crimping” the slider together at points “B” and “C” with a pair of pliers, gap
“A” can be adjusted most times to its correct opening, see drawing below. Crimping in
other planes is worth a try if “B” and “C” fails to rectify the problem. This crimping is done
when the zip slider is still attached to the zip coil and is in the fully open position.
4
Caring for your Galvanised Steel Poles, Pole Joiners and Zips:
Buckland & Stirling Z customers
Your steel poles have been hot dip galvanised to provide long life with minimum corrosion. Salt,
sand, dirt and water are the enemy of any steel product and zip. Make sure the poles and zips
are always clean and dry before storage. When the poles and zips have been used in damp,
dusty, sandy or salty conditions they must be cleaned and coated with a thin film of oil or silicon
based liquid spray before storage. Many of the frame poles are connected with pole joiners
which are designed to keep your poles organised and to allow quick assembly of the pole frame.
Over stretching or dropping the poles will easily damage the pole joiners and this is not covered
by the warranty. Please make sure you handle the poles carefully, especially when unpacking
and packing away into the carry bag.
Condensation:
When warm moist air meets cooler air, condensation of water gas into water liquid occurs. Th e
Camper Trailer Tent walls and roof form an impermeable layer between the inside and outside
climatic conditions. The moisture inside the tent condenses on the canvas fabric and water
droplets are formed. Sometimes these water droplets build up to appear that the fabric is leaking
when in fact the cause is condensation. Condensation can be reduced if the Camper Trailer Tent
is well ventilated to reduce the build-up of warm moist air on the ceiling.
Floor:
If the ground is very wet or water pools under the floor, then the downward pressure of standing
or kneeling on the floor can draw water through minute wear holes in the floor fabric or where
there are joins in the floor fabric. To prevent this, do not set up the camper trailer tent in hollows
and make sure water drains away from the tent site.
Structural Integrity:
A well set up camper trailer tent on level ground is structurally strong and the most water resistant. During periods of prolonged rain and wind it may be necessary to tighten and adjust
the frame, pegs and guy ropes as well as making sure any ground water is flowing away from the
camp site. A sagging roof or awning weakens the Camper Trailer Tent structure and could allow
water to pond on the roof causing leakage, structural damage and fabric tears.
Electric Brakes:
If your trailer is an off road model – it will probably have electric trailer brakes. Listed below is
how to connect these – if at the time of pick up – you did not yet have your electric brake
controller fitted to your car. Failure to use the electric brakes – can be dangerous and is
recommended to get a controller fitted ASAP.
1. Firstly, unscrew 7 pin (round or flat) plug to reveal wiring.
2. Blue wire is for electric brakes.
3. Connect blue wire to 5
th
pin on the inside of the trailer connection
4. Under trailer, located close to the right hand side wheel and suspension setup, you will
find two plastic plugs (a male and female) that need to be connected.
5. Connect both the male and female plugs together.
(You may need to cut zip tie to bring plugs together)
5
6. Now test your trailer’s electric braking system. Connect your 7 pin plug to your tow
vehicle.
7. Ensure your vehicle’s control unit is switched on. Have someone engage the brakes on
the tow vehicle – whilst the car is stationery.
8. The second person goes to the trailer wheel and listens for a humming noise. No
humming noise – means that the brakes are not yet connected – follow step 1 to 7
again to ensure correct fitment.
9. Now follow brake controller instruction manual for correct setup of your controller and
test as per their recommendations.
Water tank:
Your water tank is brand new and needs to be cleaned and flushed before use.
Before first use – please fill you tank with 30 or so litres of water and 5 to 10ml of vanilla essence.
This will help to take any smells and tastes from the water tank. Let this sit for a day or two and
then flush out. We r ecommend that before each trip – you flush your tank and refill with fresh
water.
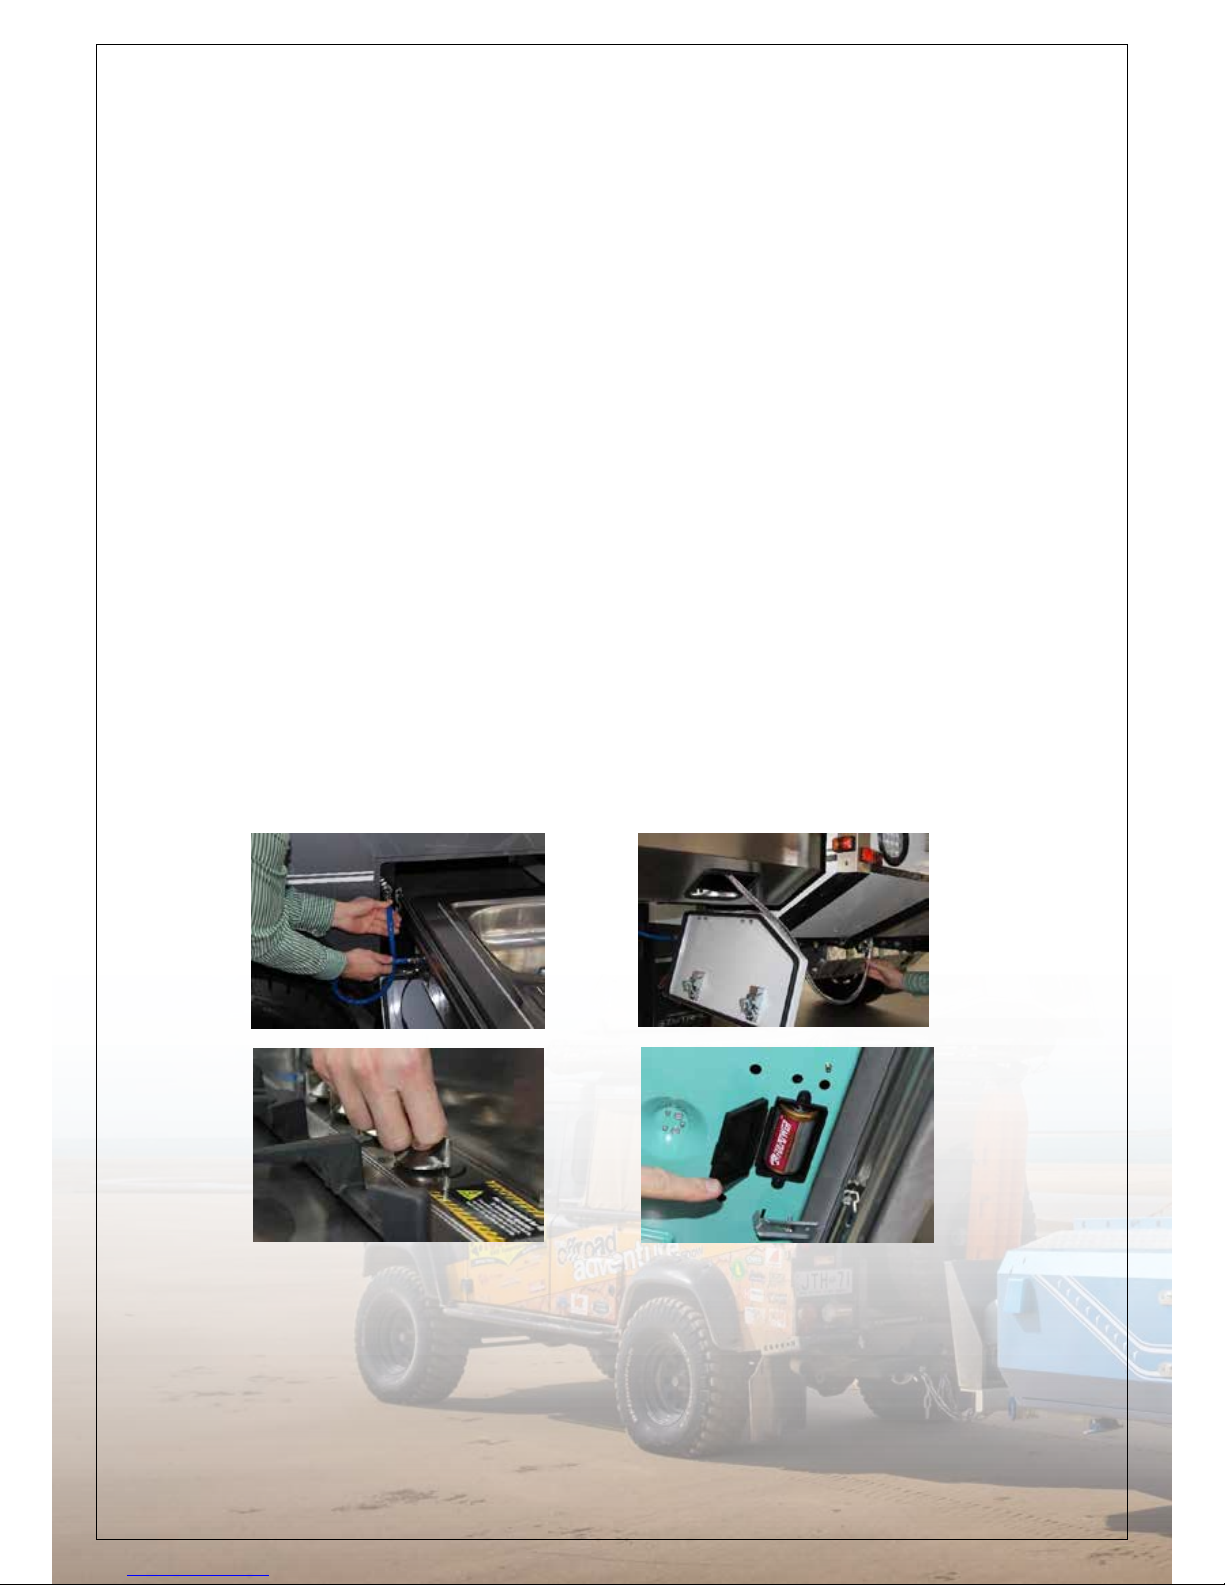
4 Stove Burner:
Connect the water and gas as shown (A). Both have click and twist connectors. To switch on the
stove, simply turn the flame regulator counter-clockwise while pushing down (B); the clicking
noise stops when the flame is activated. First time might take a while as gas travels from the
trailer front. Make sure gas bottle and gas line regulator are open. To replace the battery of the
stove, you simply lift the stove out of its frame. The battery box contains 1x Type D battery (C).
Caution:
Cleaners that use bleach as an ingredient should not be used. Bleach can cause fading and lead
to damage of the canvas fabric, the stitching and the waterproofing.
The pole joiners within the poles are provided for easy assembly of the frame. The pole joiners
are not required for any structural reason and the poles perform perfectly well without the pole
(A)
(A)
(B)
(C)
6

7
joiners. Age, over-stretching and mishandling may cause failure. Pole joiners are not covered by
warranty.
Always carry a roll of heavy duty tape for simple repairs to small rips, cuts and ash burns. The
tape not only blocks the hole, it will minimise any further tearing.
When removing pegs do not use the webbing attached to your Camper Trailer Tent as a handle.
Either use another peg, a peg remover or the claw of a hammer hooked under the peg to remove
them. A couple of taps with a hammer on the side of the peg or some twisting will often help
release the peg from the ground.
Safety Tips & Instructions
Camp Safe – Safety Habits:
Fabric used in the construction of your camper trailer tents has been treated with a mild
retardant. This retardant treatment reduces the rate at which the fabric will burn, however the
fabric will still burn if it comes into direct contact with a flame or heat source.
The application of any foreign substance to the fabric such as some water proofing treatments
or insect sprays may render the fire retardant treatment process ineffective.
The following covers several safety tips that will help you avoid some of the common hazards
encountered on a camping trip.
To Prevent Injury Caused by Gas Poisoning or Suffocation:
• Gas, fumes or lack of oxygen within the Camper Trailer Tent could result in unconsciousness,
brain damage and even death.
• Always ensure the Camper Trailer Tent is well ventilated. Even on the coldest night do not
close every vent, window and door. A well ventilated Camper Trailer Tent not only maintains
healthy oxygen levels, but also reduces condensation build up on the inside of the fabric.
• Do not use fuel burning devices that consume oxygen inside the Camper Trailer Tent. These
include candles, gas lanterns, kerosene lamps, stoves, cooking and heating appliances.
• Do not use gas appliances of any kind inside the Camper Trailer Tent.
To Prevent Injury Caused by Fire:
• Do not set up the Camper Trailer Tent near a camp fire or any other flame source.
• Do not use candles, matches or any other flame source in or near the Camper Trailer Tent.
This includes stoves, cooking equipment, lighting and heating appliances.
• Use only recommended non-flammable water repellent compounds on the canvas fabric.
• Do not spray canvas fabrics with insecticides
To Prevent Injury Caused by Electricity:
Always exercise care when using electricity and electric lighting in and near the Camper Trailer
Tent. Only use 12 volt or less for lighting.
 Loading...