

Page 1

Page 2
COPYRIGHT ©2015 Hangzhou Hikvision Digital Technology Co., Ltd. or its
subsidiaries. ALL RIGHTS RESERVED.
About this Manual
The Manual includes instructions for using and managing the product. Pictures,
charts, images and all other information hereinafter are for description and
explanation only. The information contained in the Manual is subject to change,
without notice, due to firmware updates or other reasons. Please find the latest
version in the ™ website (http://www.ezvizlife.com).
Any and all information, including, among others, wordings, pictures, graphs are the
properties of Hangzhou Hikvision Digital Technology Co., Ltd. or its subsidiaries
(hereinafter referred to be “Hikvision”). This user manual (hereinafter referred to be
“the Manual”) cannot be reproduced, changed, translated, or distributed, partially or
wholly, by any means, without the prior written permission of Hikvision. Unless
otherwise stipulated, Hikvision does not make any warranties, guarantees or
representations, express or implied, regarding to the Manual.
Trademarks Acknowledgement
™, ™, and other Hikvision’s trademarks and logos are the properties
of Hikvision in various jurisdictions. Other trademarks and logos mentioned below
are the properties of their respective owners.
Legal Disclaimer
TO THE MAXIMUM EXTENT PERMITTED BY APPLICABLE LAW, THE PRODUCT DESCRIBED,
WITH ITS HARDWARE, SOFTWARE AND FIRMWARE, IS PROVIDED “AS IS”, WITH ALL FAULTS
AND ERRORS, AND HIKVISION MAKES NO WARRANTIES, EXPRESS OR IMPLIED, INCLUDING
WITHOUT LIMITATION, MERCHANTABILITY, SATISFACTORY QUALITY, FITNESS FOR A
PARTICULAR PURPOSE, AND NON-INFRINGEMENT OF THIRD PARTY. IN NO EVENT WILL
HIKVISION, ITS DIRECTORS, OFFICERS, EMPLOYEES, OR AGENTS BE LIABLE TO YOU FOR ANY
SPECIAL, CONSEQUENTIAL, INCIDENTAL, OR INDIRECT DAMAGES, INCLUDING, AMONG
OTHERS, DAMAGES FOR LOSS OF BUSINESS PROFITS, BUSINESS INTERRUPTION, OR LOSS OF
DATA OR DOCUMENTATION, IN CONNECTION WITH THE USE OF THIS PRODUCT, EVEN IF
HIKVISION HAS BEEN ADVISED OF THE POSSIBILITY OF SUCH DAMAGES.
TO THE MAXIMUM EXTENT PERMITTED BY APPLICABLE LAW, IN NO EVENT SHALL
HIKVISION’S TOTAL LIABILITY FOR ALL DAMAGES EXCEED THE PURCHASE PRICE THE
PRODUCT.
HIKVISION does not undertake any liability for personal injury or property damage, as the result of
product interruption or service termination cause by: a) improper installation or usage other than
as requested; b) the protection of national or public interests; c) Force Majeure; d) yourself or the
third party, including not limitation, using any third party’s products, software, applications, and
among others.
REGARDING TO THE PRODUCT WITH INTERNET ACCESS, THE USE OF PRODUCT SHALL BE
WHOLLY AT YOUR OWN RISKS. HIKVISION SHALL NOT TAKE ANY RESPONSIBILITES FOR
ABNORMAL OPERATION, PRIVACY LEAKAGE OR OTHER DAMAGES RESULTING FROM CYBER
ATTACK, HACKER ATTACK, VIRUS INSPECTION, OR OTHER INTERNET SECURITY RISKS;
HOWEVER, HIKVISION WILL PROVIDE TIMELY TECHNICAL SUPPORT IF REQUIRED.
Page 3

The purpose of the Products is to provide an adequate warning in the event of illegal
encroachment in certain area; however, the proper installation of the Products will not eliminate,
but only reduce, that accidents will not occur or that there will be no personal injury or property
loss as a result. You are highly recommended to raise your vigilance and strengthen the safety
awareness in the daily life.
SURVEILLANCE LAWS VARY BY JURISDICTION. PLEASE CHECK ALL RELEVANT LAWS IN YOUR
JURISDICTION BEFORE USING THIS PRODUCT IN ORDER TO ENSURE THAT YOUR USE
CONFORMS TO THE APPLICABLE LAW. YOU FUTHER AGREE THAT THIS PRODUCT IS ONLY FOR
CIVIL USE, AND HIKVISION SHALL NOT BE LIABLE IN THE EVENT THAT THIS PRODUCT IS USED
WITH ILLEGITIMATE PURPOSES, SUCH AS THIRD PARTY RIGHTS INFRINGEMENT, MEDICAL
TREATMENT, SAFETY EQUIPMENT OR OTHER SITUATIONS WHERE THE PRODUCT FAILURE
COULD LEAD TO DEATH OR PERSONAL INJURY, OR WEAPON OF MASS DESTRUCTION,
CHEMINCAL AND BIOLOGICAL WEAPON, NUCLEAR EXPLOSION, AND ANY UNSAFE NUCLEAR
ENERGY USES OR ANTI-HUMANITY USAGES. YOU SHOULD UNDERTAKE ALL
RESPONSIBILITIES FOR LOSSES OR DAMAGES RESULTING FROM THE ABOVE USAGES
WHATSOEVER.
IN THE EVENT OF ANY CONFLICTS BETWEEN THE ABOVE AND THE APPLICABLE LAW, THE
LATER PREVAILS.
Page 4
Regulatory Information
This device complies with Part 15 of the FCC Rules. Operation is subject to the following two
conditions:
(1) This device may not cause harmful interference, and
(2) This device must accept any interference received, including interference that may cause
undesired operation.
Please take attention that changes or modification not expressly approved by the party
responsible for compliance could void the user’s authority to operate the equipment.
Note: This product has been tested and found to comply with the limits for a Class B digital device,
pursuant to Part 15 of the FCC Rules. These limits are designed to provide reasonable protection
against harmful interference in a residential installation. This product generates, uses, and can
radiate radio frequency energy and, if not installed and used in accordance with the instructions,
may cause harmful interference to radio communications. However, there is no guarantee that
interference will not occur in a particular installation. If this product does cause harmful
interference to radio or television reception, which can be determined by turning the equipment
off and on, the user is encouraged to try to correct the interference by one or more of the following
measures:
—Reorient or relocate the receiving antenna.
—Increase the separation between the equipment and receiver.
—Connect the equipment into an outlet on a circuit different from that to which the receiver is
connected.
—Consult the dealer or an experienced radio/TV technician for help.
EU Conformity Statement
This product and - if applicable - the supplied accessories too are marked with
"CE" and comply therefore with the applicable harmonized European standards
listed under the EMC Directive 2004/108/EC, the RoHS Directive 2011/65/EU.
2012/19/EU (WEEE directive): Products marked with this symbol cannot be
disposed of as unsorted municipal waste in the European Union. For proper
recycling, return this product to your local supplier upon the purchase of
equivalent new equipment, or dispose of it at designated collection points. For
more information see: www.recyclethis.info.
2006/66/EC (battery directive): This product contains a battery that cannot be
disposed of as unsorted municipal waste in the European Union. See the product
documentation for specific battery information. The battery is marked with this
symbol, which may include lettering to indicate cadmium (Cd), lead (Pb), or
mercury (Hg). For proper recycling, return the battery to your supplier or to a
designated collection point. For more information see: www.recyclethis.info.
Импортер-поставщик в России: ЗАО "Хиквижн"
Импортер-поставщик в Республике Беларусь: ООО "Торговый дом "АВАНТ-ТЕХНО"
Page 5

Box Contents
ENGLISH
T6 x1
Foam Sticker x2
(1 mm thick & 3 mm thick)
The figures in this manual are for reference only and may differ
from the actual product.
(Installed on the back of T6 by default)
Installation Guide x 1
1
Base x1
Power Cable x1
Page 6

Basics
Button
LED Indicator
Flickers Blue Once: The door or window resumes to the
closed status.
Flickers Red Once: The door or window is opened.
Charging Interface
Base
Charging
You’re recommended to charge the T6 for the first-time using.
Connect the T6 to the power socket with the power cable. The
indicator turns red indicating the T6 is charging and turns blue when
T6 is charged.
The battery can last for up to 3 months. Recharge if the battery
runs out.
Power Socket
2
Page 7
Adding to Internet Alarm Hub
The Internet Alarm Hub (such as A1) should be purchased separately.
Option 1 (Recommended)
Removing the Base
1
Slide the base according to the arrow on it to remove it from the T6. You
can see the device QR code on the back of T6.
Adding T6 to Internet Alarm Hub
2
- Download and install the EZVIZ app by searching the “EZVIZ” in App
Store (iOS version) and Google Play
- Start the app and register for an EZVIZ user account following the
start-up wizard.
- Log in the EZVIZ app and scan the device QR code to add it to the
Internet Alarm Hub.
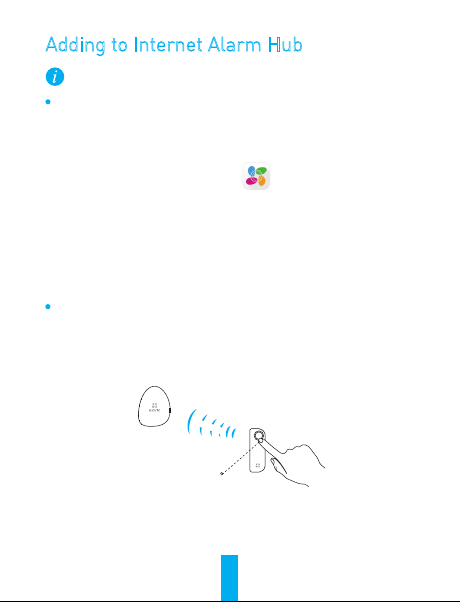
Option 2 Adding by Operating the Internet Alarm Hub
- Enable the “Adding Detectors Mode” of your Internet Alarm Hub.
- Take T6 close to the Internet Alarm Hub (within 50cm) and press the button
on the T6, the blue indicator flickers twice indicating the adding signal is
sent.
Internet
Alarm Hub
- The Internet Alarm Hub issues a voice prompt of the detector type and
serial No. indicating the detector is added.
Within 50CM
Indicator
TM
(Android version).
3
Page 8

Installing Detector
Pasting the Foam Sticker
1
Paste the foam sticker to the base of the T6.
If you want to install the T6 to the metal door or window, use the 3 mm thick
foam sticker.
3 mm1 mm
If you want to install the T6 to other doors or windows, use either of the supplied
foam sticker.
3 mm1 mm
Installing the T6
2
- You can install the T6 on the door or window, as shown in the following
figures. Paste the base to the desired installation place.
Window Door
- Slide the T6 to the base and secure it with the base.
4
Page 9
Recording Closed Status
3
Keep the door or window closed and then press and hold the button on T6
for 2s to record the closed status. The indicator flickers red for 15s
indicating the status is recorded.
The closed status requires recording again after the T6 being taken
off to recharge or adjust the installation position.
Completing Installation
4
The indicator blinks red when the door or window gets opened and send
the alarm message to the linked EZVIZ account.
The indicator blinks blue when the door or window gets closed.
Maintenance
When the battery runs out, a low battery warning will be sent to the EZVIZ
account to remind you to recharge. Slide the T6 to take it off from the base to
recharge and install it back after recharged.
Specifications
Charging Voltage
Battery Capacity
Battery Life
Working Temperature
Charging Humidity
Working Humidity
Trigger Angle
Power Consumption
5V
450mAh/1.66Wh
3 Months
-10°C to 55°C (14°F to 131°F)
0 to 40%
10% to 90%
>3°
≤10dBm
5
Page 10
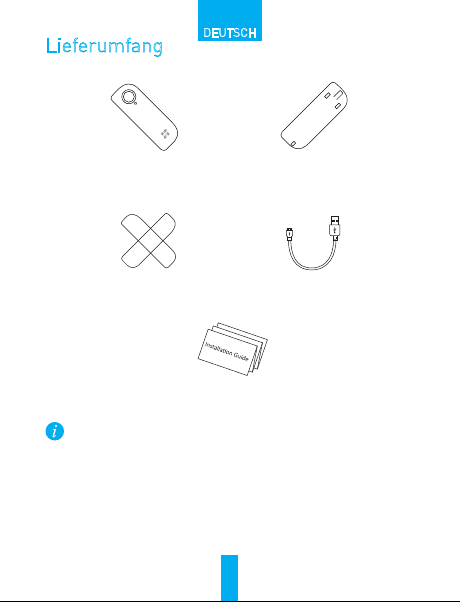
Lieferumfang
DEUTSCH
T6 x1
Schaumstoffaufkleber x2
(1 und 3 mm dick)
Installationsleitfaden x1
Die Abbildungen in diesem Handbuch dienen lediglich zur
Veranschaulichung und können vom tatsächlichen Produkt
abweichen.
Sockel x1
(Standardmäßig auf der
Rückseite des T6 montiert)
Ladekabel x1
6
Page 11

Allgemeines
Taste
LED-Anzeige
Blinkt einmal blau: Tür oder Fenster kehrt in den
Geschlossen-Status zurück
Blinkt einmal rot: Tür oder Fenster ist geöffnet
Ladeschnittstelle
Sockel
Aufladen
Vor der erstmaligen Benutzung sollte der T6 zunächst aufgeladen werden.
Schließen Sie den T6 dazu mit dem Ladekabel an eine Steckdose an. Die
LED-Anzeige leuchtet daraufhin rot als Hinweis darauf, dass der T6 aufgeladen
wird. Sie leuchtet blau, wenn der T6 vollständig aufgeladen ist.
Steckdose
Der Akku gewährleistet eine Betriebsdauer von maximal drei Monaten. Bei
nachlassender Kapazität muss er wieder aufgeladen werden.
7
Page 12
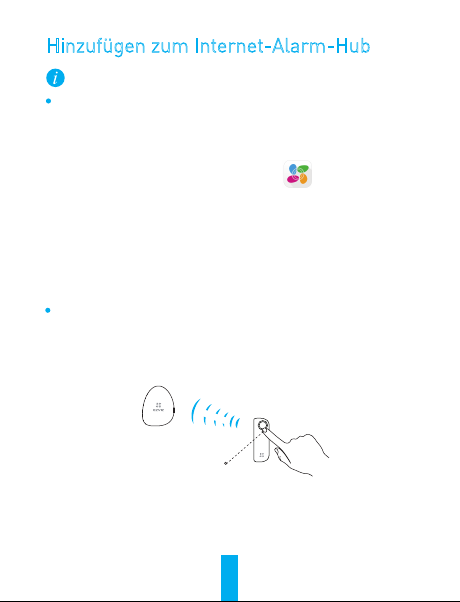
Hinzufügen zum Internet-Alarm-Hub
Der Internet-Alarm-Hub (z.B. A1) ist separat zu erwerben.
Option 1 (empfohlen) Hinzufügen per EZVIZ App
Entfernen des Sockels
1
Schieben Sie den Sockel in Pfeilrichtung, um ihn vom T6 zu entfernen.
Der QR-Code des Geräts ist auf der Rückseite des T6 zu sehen.
T6 zum Internet-Alarm-Hub hinzufügen
2
- EZVISZ App herunterladen und installieren, indem Sie „EZVIZ" im App
Store (iOS-Version) oder bei Google Play
- Die App starten und ein EZVIZ-Anwenderkonto nach Anweisungen
des Assistenten erstellen.
- Bei der EZVIZ App anmelden und den QR-Code des Geräts
einscannen, um es zum Internet-Alarm-Hub hinzuzufügen.
Option 2 Hinzufügen mittels Internet-Alarm-Hub
- Aktivieren Sie den "Adding Detectors"-Modus am Internet-Alarm-Hub.
- Bringen Sie den T6 in die Nähe des Internet-Alarm-Hub (weniger als 50cm)
und drücken Sie die Taste am T6. Die blaue LED blinkt zweimal als Hinweis
darauf, dass das Verbindungssignal gesendet wurde.
max. 50 cm
Internet-
Alarm-Hub
LED-Anzeige
- Die Alarmbox gibt eine Voice Guide-Bestätigung bezüglich Meldertyp und
Seriennummer aus. Damit ist der Melder hinzugefügt.
TM
(Android-Version) suchen.
8
Page 13

Meldermontage
Befestigen des Schaumstoffaufklebers
1
Befestigen Sie den Schaumstoffaufkleber am Sockel des T6.
Um den T6 an Metalltüren oder -fenstern anzubringen, benutzen Sie den 3mm
dicken Schaumstoffaufkleber.
3 mm1 mm
Um den T6 an anderen Türen oder Fenstern anzubringen, benutzen Sie einen der
mitgelieferten Schaumstoffaufkleber.
3 mm1 mm
Montage des T6
2
- Sie können den T6 wie in den folgenden Abbildungen gezeigt an einer
Tür oder einem Fenster anbringen. Befestigen Sie den Sockel an der
gewünschten Montagestelle.
Fenster Tür
- Schieben Sie den T6 auf den Sockel und fixieren Sie ihn.
9
Page 14
Geschlossen-Status erfassen
3
Schließen Sie das Fenster bzw. die Tür und halten Sie dann die Taste zwei Sekunden
lang gedrückt, um den Geschlossen-Status zu erfassen. Die LED-Anzeige blinkt 15
Sekunden lang rot als Hinweis darauf, dass der Staus erfasst wurde.
Der Geschlossen-Status muss erneut erfasst werden, wenn der T6 zum
Aufladen entfernt oder die Montageposition verändert wurde.
Installation abschließen
4
Die Anzeige blinkt rot, wenn die Tür bzw. das Fenster geöffnet wird, und sendet
eine Alarmmeldung an das verknüpfte EZVIZ-Account.
Die Anzeige blinkt blau, wenn die Tür bzw. das Fenster geschlossen wird.
Instandhaltung
Wenn die Batteriekapazität nachlässt, wird eine entsprechende Warnung an das
EZVIZ-Account geschickt, damit der Akku wieder aufgeladen wird. Nehmen Sie den
T6 vom Sockel, um ihn aufzuladen, und bringen Sie ihn anschließend wieder an.
Technische Daten
Ladespannung
Batteriekapazität
Batterielebensdauer
Betriebstemperatur
Luftfeuchtigkeit (Laden)
Luftfeuchtigkeit (Betrieb)
Auslösewinkel
Leitungsaufnahme
5V
450mAh/1,66Wh
3 Monate
-10°C bis 55°C
0% bis 40%
10% bis 90%
>3°
≤10dBm
10
Page 15
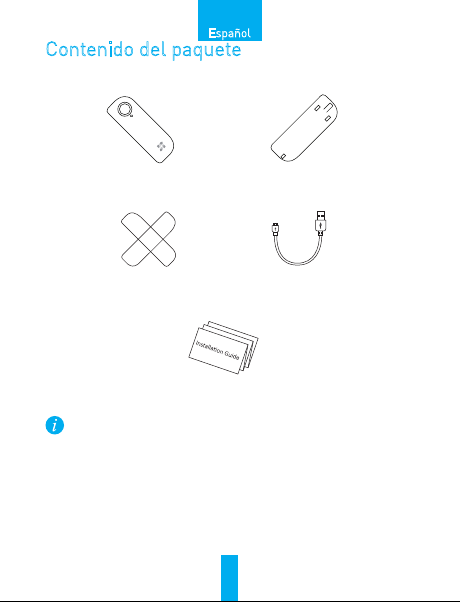
Contenido del paquete
Español
T6 x1
Adhesivo de espuma x2
(grosor de 1 y 3 mm)
Base x1 (instalada en la parte
posterior del T6 de forma
predeterminada)
Cable de
alimentación x1
Guía de instalación x1
Las figuras de este manual solo se incluyen a modo de
referencia y pueden no ser idénticas al producto en cuestión.
11
Page 16
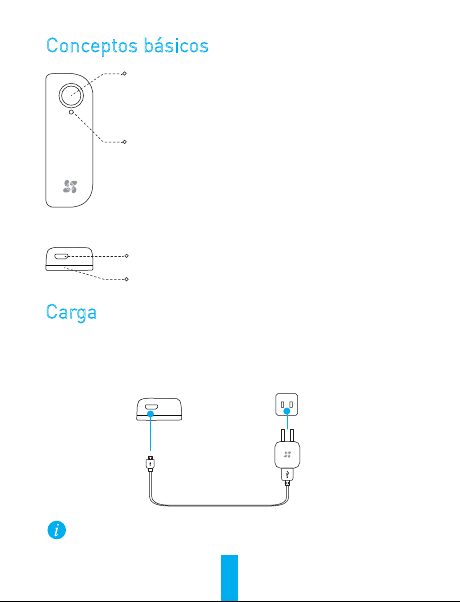
Conceptos básicos
Botón
Indicador LED
Parpadea una vez en azul: La puerta o la ventana reanuda
el estado "cerrado".
Parpadea una vez en rojo: La puerta o la ventana está
abierta.
Interfaz de carga
Base
Carga
Se recomienda que cargue el T6 antes de utilizarlo por primera vez.
Conecte el T6 a la toma de corriente con el cable de alimentación. El indicador se
vuelve rojo para indicar que el T6 se está cargando y se vuelve azul cuando la carga
ha finalizado.
La batería puede durar hasta tres meses. Si la batería se acaba, recárguela.
Toma de corriente
12
Page 17
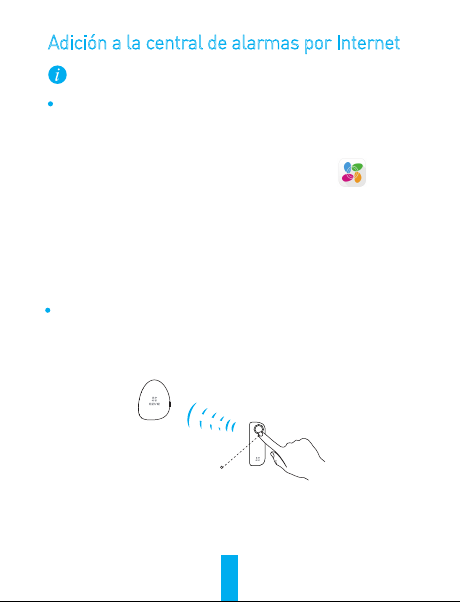
Adición a la central de alarmas por Internet
La central de alarmas por Internet (como, por ejemplo, la A1) debe
adquirirse por separado.
Opción 1 (recomendada) Adición mediante la aplicación EZVIZ
Extracción de la base
1
Deslice la base según indica la flecha de la misma para extraerlo del T6.
El código QR del dispositivo se encuentra en la parte posterior del T6.
Adición del T6 a la central de alarmas por Internet
2
- Descargue la Aplicación Móvil EZVIZ buscando "EZVIZ" en App Store
(versión iOS) y Google Play
- Inicie la aplicación y regístrese para obtener una cuenta de usuario de
EZVIZ mediante el asistente de inicio.
- Inicie sesión en la aplicación y escanee el código QR del dispositivo
para añadirlo a la central de alarmas por Internet.
Opción 2 Adición mediante la central de alarmas por Internet
- Active el modo de adición de detectores en la central de alarmas por
Internet.
- Acerque el T6 al centro de alarmas por Internet (en un área de 50 cm) y
pulse el botón del dispositivo; el indicador azul parpadea dos veces para
indicar que se ha enviado la señal de adición.
Central de
alarmas por
Internet
- El centro de alarmas por Internet emitirá un aviso de voz sobre el tipo de
detector y el número de serie, lo que indica que el detector se ha añadido.
TM
(versión Android).
Dentro 50 cm
Indicador
13
Page 18
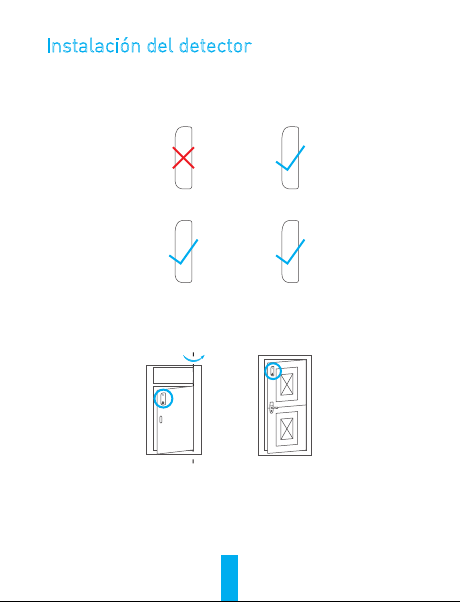
Instalación del detector
Pegado del adhesivo de espuma
1
Pegue el adhesivo de espuma en la base del T6.
Si desea instalar el T6 en puertas o ventanas metálicas, utilice el adhesivo de
espuma grueso de 3 mm.
3 mm1 mm
Si desea instalar el T6 en otras puertas o ventanas, utilice el adhesivo de espuma
proporcionado.
3 mm1 mm
Instalación del T6
2
- Puede instalar el T6 en la puerta o la ventana, como se muestra en las
figuras siguientes. Pegue la base a la ubicación de instalación que
desee.
Ventana Puerta
- Deslice el T6 en la base y fíjelo a esta.
14
Page 19
Registro del estado "cerrado"
3
Mantenga cerrada la puerta o la ventana y, a continuación, mantenga
pulsado el botón del T6 durante dos segundos para registrar el estado
"cerrado". El indicador parpadeará en rojo durante 15 segundos, lo que
indica que el estado se ha registrado.
El estado "cerrado" se debe volver a registrar si extrae el T6 para
recargarlo o si ajusta la posición de instalación.
Finalización de la instalación
4
El indicador parpadea en rojo cuando se abre la puerta o la ventana y
envía el mensaje de alarma a la cuenta de EZVIZ vinculada.
El indicador parpadea en azul cuando se cierra la puerta o la ventana.
Mantenimiento
Cuando se agote la batería, se enviará una advertencia de nivel de batería bajo a
la cuenta de EZVIZ para recordarle que la cargue. Deslice el T6 para extraerlo de
la base a fin de recargarlo e instalarlo de nuevo una vez recargado.
Especificaciones
Voltaje de carga
Capacidad de la batería
Vida de la batería
Temperatura de trabajo
Humedad de carga
Humedad de trabajo
Ángulo del disparador
Consumo de alimentación
5 V
450 mAh/1,66 Wh
3 meses
De -10°C a 55°C (de 14°F a 131°F)
De 0 a 40%
De 10% a 90%
>3°
≤10dBm
15
Page 20
FRANÇAIS
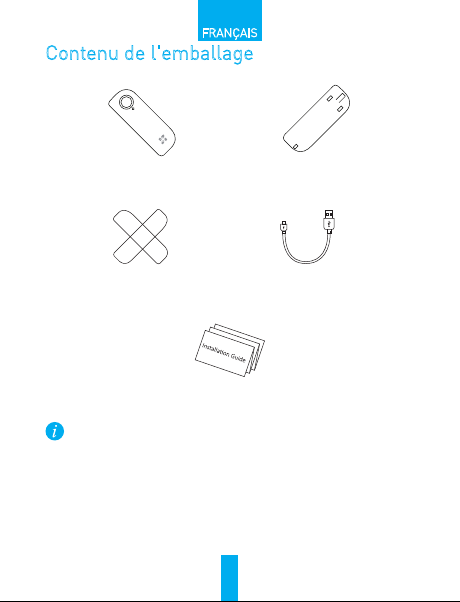
Contenu de l'emballage
1 T6
2 patins adhésifs en mousse
(épaisseur de 1 ou 3mm)
1 guide d'installation
Les chiffres figurant dans ce manuel sont donnés uniquement à
titre indicatif et peuvent varier d'un produit à l'autre.
16
1 socle
(Installé par défaut au dos
du T6)
1 câble
d'alimentation
Page 21

Notions de base
Touche
Diode témoin
Clignote une fois en bleu: la porte ou de la fenêtre revient
dans l'état fermé.
Clignote une fois en rouge: la porte ou de la fenêtre est
ouverte.
Interface de mise en charge
Socle
Charge en cours
Il est conseillé de charger le T6 avant de le mettre en service.
Branchez le cordon d'alimentation du T6 dans la prise murale. L'indicateur s'allume en
rouge, indiquant que le T6 est en charge. Il passe au bleu lorsque le T6 est chargé.
L'autonomie de la batterie peut atteindre 3mois. Si la batterie est épuisée,
rechargez-la.
Prise d'alimentation
17
Page 22

Ajout au concentrateur d'alarme Internet
Le concentrateur d'alarme Internet (tel qu'un A1) doit être acheté
séparément).
Option 1 (recommandé)
Retrait du socle
1
Faites coulisser le socle dans le sens de la flèche pour le retirer du T6.
Le code QR est situé au dos du T6.
Ajout du T6 au concentrateur d'alarme Internet
2
- Téléchargez et installez l'application EZVIZ depuis App Store (version
iOS) ou Google Play
- Démarrez l'application et ouvrez un compte d'utilisateur EZVIZ en
suivant les instructions de l'assistant.
- Ouvrez une session dans l'application EZVIZ et scannez le code QR de
l'appareil pour l'ajouter au concentrateur d'alarme Internet.
Option 2 Ajout en actionnant le concentrateur d'alarme Internet
- Activez le mode Ajout de détecteurs de votre concentrateur d'alarme
Internet.
- Placez le T6 à proximité du concentrateur d'alarme Internet (50cm maxi)
puis appuyez sur le bouton situé dessus; le témoin bleu clignote deux fois,
indiquant que le signal d'ajout est envoyé.
TM
(version Android).
Concentrateur
d'alarme Internet
- Le concentrateur d'alarme Internet émet un message vocal indiquant que
le type de détecteur et le n° de série, signalant que celui-ci a été ajouté.
Moins de 50 cm
Indicateur
18
Page 23

Installation du détecteur en cours
Pose du patin adhésif en mousse
1
Collez le patin adhésif en mousse au socle du T6.
Si vous souhaitez installer le T6 sur une porte ou une fenêtre métallique, utilisez
le patin adhésif en mousse de 3mm d'épaisseur.
3 mm1 mm
Si vous souhaitez installer le T6 sur d'autres portes ou fenêtres, utilisez un des
patins adhésifs en mousse fournis.
3 mm1 mm
Installation du T6
2
- Comme le montrent les figures suivantes, vous pouvez installer le T6
sur une porte ou une fenêtre. Collez le socle à l'emplacement
souhaité.
Fenêtre Porte
- Faites coulisser le T6 sur le socle puis fixez-le à celui-ci.
19
Page 24

Enregistrement de l'état fermé
3
Maintenez la porte ou la fenêtre fermée puis maintenez le bouton du T6
enfoncé pendant 2 secondes pour enregistrer l'état fermé. Le témoin
clignote en rouge pendant 15s pour indiquer que l'état est enregistré.
L'état fermé doit être réenregistré après que le T6 est mis hors tension
pour être rechargé ou pour modifier la position d'installation.
Fin de l'installation
4
Le témoin clignote en rouge lorsque la porte ou la fenêtre est ouverte, et un
message d'alarme est transmis au compte EZVIZ associé.
Le témoin clignote en bleu lorsque la porte ou la fenêtre est fermée.
Maintenance
Lorsque la batterie est épuisée, un avertissement est envoyé au compte EZVIZ
afin de rappeler qu'elle doit être mise à recharger. Faites coulissez le T6 hors du
socle pour le mettre à recharger puis remettez-le en place lorsqu'il est
rechargé.
Spécifications
Tension en charge
Capacité de la batterie
Durée de vie de la batterie
Température de fonctionnement
Humidité en charge
Hygrométrie de fonctionnement
Angle de déclenchement
Consommation
5V
450mAh/1,66Wh
3 mois
-10 °C - 55 °C (14 °F - 131 °F)
0% à 40%
10% - 90%
> 3°
≤ 10dBm
20
Page 25

ITALIANO
Contenuto della confezione
T6 (1)
Adesivo gommato (2)
(1 mm di spessore &
3 mm di spessore)
Guida
all'installazione (1)
Le figure in questo manuale sono solo esemplificative e possono
differire dal prodotto reale.
Base (1)
(Normalmente installato
sul retro del T6)
Cavo di
alimentazione (1)
21
Page 26

Elementi
Pulsante
LED
Lampeggia in blu una volta: La porta o la finestra torna in
stato chiuso.
Lampeggia in rosso una volta: La porta o la finestra è
aperta.
Connettore di carica
Carica
Si raccomanda di caricare il T6 prima di utilizzarlo per la prima volta.
Collegare il T6 ad una presa elettrica tramite il cavo di alimentazione. L'indicatore si
accende in rosso per indicare che il T6 si sta caricando e diventa blu quando il T6 è
carico.
La batteria può durare fino a 3 mesi. Caricare non appena la batteria è scarica.
Connettore di alimentazione
22
Page 27

Aggiungere all'Internet Alarm Hub
L'Internet Alarm Hub deve essere acquistato separatamente.
Opzione 1 (consigliata) Aggiungere tramite l'app EZVIZ
Rimuovere la base
1
Far scorrere la base nella direzione della freccia per rimuoverla dal T6.
Il QR code è visibile sul retro del T6.
Aggiungere il T6 all'Internet Alarm Hub
2
- Scaricare e installare l'app EZVIZ ricercando "EZVIZ" nell'App Store
(versione iOS) o in Google Play
- Avviare l'app e registrare un account di utente EZVIZ seguendo la
procedura guidata.
- Accedere all'app EZVIZ e leggere il QR code del dispositivo per
aggiungerlo all'Internet Alarm Hub.
Opzione 2 Aggiungere azionando l'Internet Alarm Hub
- Attivare la modalità di aggiunta rivelatori "Adding Detectors Mode"
dell'Internet Alarm Hub.
- Avvicinare T6 all'Internet Alarm Hub (entro un raggio di 50 cm) e premere
il pulsante sul T6; l'indicatore blu lampeggia due volte per confermare
l'invio del segnale di aggiunta.
Internet
Alarm Hub
- Internet Alarm Hub conferma l'aggiunta del rivelatore con un messaggio
vocale in cui specifica il tipo e il numero di serie del rilevatore.
TM
Entro 50 cm
Indicatore
23
(versione Android).
Page 28

Installare il rivelatore
Incollare l'adesivo gommato
1
Incollare l'adesivo gommato alla base del T6.
Per installare il T6 su porte o finestre in metallo, utilizzare l'adesivo gommato
da 3 mm di spessore.
3 mm1 mm
Per installare il T6 su altre porte o finestre, utilizzare uno degli adesivi
gommati in dotazione.
3 mm1 mm
Installare T6
2
- T6 si monta su una porta o una finestra, come illustrato nelle figure
seguenti. Incollare la base nella posizione desiderata.
Finestra Porta
- Inserire il T6 nella base e fissarlo con la base.
24
Page 29

Registrare lo stato chiuso
3
Per registrare lo stato chiuso tenere la porta o la finestra chiuse e tenere
premuto il tasto sul T6 per 2s. L'indicatore lampeggia per 15s ad indicare
che lo stato è registrato.
Dopo aver smontato il T6 per caricare la batteria o dopo aver modificato
la posizione di montaggio è necessario registrare nuovamente lo stato
chiuso.
Completare l'installazione
4
L'indicatore lampeggia in rosso quando la porta o la finestra viene aperta
e un messaggio di allarme viene inviato all'account EZVIZ collegato.
L'indicatore lampeggia in blu quando la porta o la finestra viene chiusa.
Manutenzione
Quando la batteria si scarica, un avviso di batteria bassa viene inviato
all'account EZVIZ. Estrarre il T6 per dalla base facendolo scorrere, per
ricaricarlo e reinstallarlo dopo averlo ricaricato.
Specifiche
Tensione di carica
Capacità batteria
Durata batteria
Temperatura di esercizio
Umidità in carica
Umidità di esercizio
Angolo intercettazione
Consumi energetici
5 V
450 mAh/1,66 Wh
3 mesi
da -10 °C a 55 °C
da 0 a 40%
da 10% a 90%
>3 °
≤10 dBm
25
Page 30

NEDERLANDS
Inhoud van de verpakking
T6 x1
Schuimsticker x2
(1 mm dik en 3 mm dik)
Installatiegids x1
De afbeeldingen in deze handleiding zijn alleen bedoeld voor
referentiedoeleinden en kunnen afwijken van het daadwerkelijke product.
26
Basis x1
(standaard op de achterzijde
van de T6 geplaatst)
Voedingskabel x1
Page 31

Basisbeginselen
Knop
LED-licht
Eén keer blauw knipperen: de gesloten status van de deur
of het raam wordt hervat.
Eén keer rood knipperen: de deur of het raam is geopend.
Oplaadinterface
Basis
Opladen
Het is raadzaam om de T6 op te laden voorafgaand aan het eerste gebruik.
Sluit de T6 met de voedingskabel aan op een stopcontact. De indicator gaat rood
branden, wat betekent dat de T6 wordt opgeladen; de indicator wordt blauw
wanneer de T6 volledig is opgeladen.
De batterij kan 3 maanden meegaan. Laad de batterij op als deze leeg is.
Stopcontact
27
Page 32

Toevoegen aan Internet Alarm Hub
De Internet Alarm Hub (zoals de A1) moet afzonderlijk worden
aangeschaft.
Optie 1 (aanbevolen) Toevoegen via de EZVIZ-app
De basis verwijderen
1
Verschuif de basis in de richting van de pijl om deze te verwijderen van de
T6. U ziet de QR-code van het apparaat op de achterzijde van de T6.
De T6 toevoegen aan de Internet Alarm Hub
2
- Download en installeer de EZVIZ-app door in de App Store
(iOS-versie) of Google Play
- Start de app en registreer een EZVIZ-gebruikersaccount door de
stappen in de opstartwizard te volgen.
- Meld u aan bij de EZVIZ-app en scan de QR-code van het apparaat om
deze toe te voegen aan de Internet Alarm Hub.
Optie 2 Toevoegen door de Internet Alarm Hub te bedienen
- Schakel de modus voor het toevoegen van detectors van de Internet Alarm
Hub in.
- Plaats de T6 in de buurt van de Internet Alarm Hub (binnen 50 cm) en druk
op de knop op de T6. De blauwe indicator knippert twee keer om aan te
geven dat het toevoegsignaal is verzonden.
Internet
Alarm Hub
TM
(Android-versie) te zoeken naar 'EZVIZ'.
Binnen 50 cm
- De Internet Alarm Hub geeft een gesproken prompt van het detectortype en
het serienummer om aan te geven dat de detector is toegevoegd.
Indicator
28
Page 33

De detector installeren
De schuimsticker opplakken
1
Plak de schuimsticker op de basis van de T6.
Als u de T6 op metalen deuren of ramen wilt installeren, gebruikt u de 3 mm
dikke schuimsticker.
3 mm1 mm
Als u de T6 op andere deuren of ramen wilt installeren, gebruikt u een van de
meegeleverde schuimstickers.
3 mm1 mm
De T6 installeren
2
- U kunt de T6 installeren op een deur of raam, zoals weergegeven in de
volgende afbeeldingen. Plak de basis op de gewenste installatielocatie.
Raam Deur
- Schuif de T6 op de basis en maak deze hieraan vast.
29
Page 34

De gesloten status registreren
3
Houd de deur of het raam gesloten en houd de knop op de T6 2 seconden
ingedrukt om de gesloten status te registreren. De indicator knippert 15
seconden rood om aan te geven dat de status wordt geregistreerd.
De gesloten status moet opnieuw worden geregistreerd nadat de T6 is
verwijderd om deze op te laden of om de installatiepositie te wijzigen.
De installatie voltooien
4
De indicator knippert rood als een deur of raam wordt geopend, en er wordt een
alarmbericht verzonden naar het gekoppelde EZVIZ-account.
De indicator knippert blauw wanneer de deur of het raam wordt gesloten.
Onderhoud
Als de batterij leeg raakt, wordt hierover een waarschuwing verzonden naar het
EZVIZ-account om u eraan te herinneren de batterij op te laden. Verschuif de T6 om
deze van de basis te verwijderen en op te laden. Plaats de T6 terug nadat deze is
opgeladen.
Specificaties
Oplaadspanning
Batterijvermogen
Levensduur batterij
Bedrijfstemperatuur
Vochtigheid bij opladen
Bedrijfsvochtigheid
Triggerhoek
Stroomverbruik
5V
450 mAh/1,66 Wh
3 maanden
-10 °C tot 55 °C
0 tot 40%
10% tot 90%
>3°
≤10 dBm
30
Page 35

POLSKI
Zawartość opakowania
T6 1 szt.
Pianka samoprzylepna 2 szt.
(grubość 1 mm i 3 mm)
Instrukcja instalacji
1 szt.
Rysunki w niniejszej instrukcji mają charakter ilustracyjny i
mogą odbiegać od wyglądu rzeczywistego produktu.
Podstawa 1 szt.
(Domyślnie montowana z tyłu T6)
Kabel zasilający
1 szt.
31
Page 36

Opis ogólny
Przycisk
Wskaźnik LED
Pojedyncze mignięcie w kolorze niebieskim: Drzwi lub
okno wracają do statusu zamkniętego.
Pojedyncze mignięcie w kolorze czerwonym: Drzwi lub
okno zostały otwarte.
Interfejs ładowania
Ładowanie
Zalecamy naładowanie T6 przed rozpoczęciem użytkowania.
Podłącz T6 do gniazdka sieciowego za pomocą kabla zasilającego. Podczas ładowania
czujnika T6 wskaźnik zmienia kolor na czerwony, a po naładowaniu na niebieski.
Akumulator może dostarczać prądu przez czas do 3 miesięcy. Po wyczerpaniu
akumulatora należy go naładować.
Gniazdko sieciowe
32
Page 37

Dodawanie do internetowej centralki alarmowej
Internetową centralkę alarmową (taką jak A1) należy zakupić osobno.
Opcja 1 (Zalecana) Dodawanie za pomocą aplikacji EZVIZ
Zdejmowanie bazy
1
Przesuń podstawę zgodnie z kierunkiem umieszczonej na niej strzałki,
aby zdjąć ją z T6. Z tyłu T6 znajduje się kod QR urządzenia.
Dodawanie T6 do internetowej centralki alarmowej
2
- Pobierz i zainstaluj aplikację EZVIZ. W tym celu wyszukaj frazę „EZVIZ”
w App Store (wersja na iOS) lub Google Play
- Uruchom aplikację i zarejestruj konto użytkownika EZVIZ po
zakończeniu pracy kreatora.
- Zaloguj się do aplikacji EZVIZ i zeskanuj kod QR urządzenia, aby je
dodać do internetowej centralki alarmowej.
Opcja 2 Dodawanie przy użyciu internetowej centralki alarmowej
- Włącz „Tryb dodawania czujników” internetowej centralki alarmowej.
- Przybliż T6 do internetowej centralki alarmowej (w promieniu 50 cm) i
naciśnij przycisk na T6. Niebieski wskaźnik zamiga dwukrotnie, wskazując,
że został wysłany sygnał dodawania.
TM
(wersja na Androida).
Internetowa
centralka alarmowa
- Po dodaniu czujnika internetowa centralka alarmowa odtworzy komunikat
głosowy informujący o typie i numerze seryjnym czujnika.
Odległość do 50 cm
Wskaźnik
33
Page 38

Instalacja czujnika
Przyklejanie pianki samoprzylepnej
1
Przyklej piankę samoprzylepną do podstawy T6.
Aby przymocować T6 do metalowych drzwi lub okna, użyj pianki samoprzyl-
epnej o grubości 3 mm.
3 mm1 mm
Aby przymocować T6 do innych drzwi lub innego okna, użyj którejś z dołączonych
pianek samoprzylepnych.
3 mm1 mm
Instalowanie T6
2
- Czujnik T6 można zainstalować na drzwiach lub oknie w sposób
przedstawiony na poniższych rysunkach. Przymocuj bazę w żądanym
miejscu instalacji.
- Wsuń T6 do podstawy i zabezpiecz go za pomocą podstawy.
Okno Drzwi
34
Page 39

Rejestracja statusu zamkniętego
3
Kiedy drzwi lub okno są zamknięte, naciśnij przycisk na T6 i przytrzymaj przez
2 s w celu zarejestrowania statusu zamkniętego. Zarejestrowanie statusu
zostanie potwierdzone miganiem wskaźnika na czerwono przez 15 s.
Status zamknięty należy zarejestrować ponownie, w przypadku
zdjęcia T6 w celu naładowania lub zmiany miejsca instalacji.
Zakończenie instalacji
4
Wskaźnik zamiga na czerwono, gdy okno lub drzwi zostaną otwarte, i wyśle
wiadomość alarmową do powiązanego konta EZVIZ.
Wskaźnik zamiga na niebiesko, gdy okno lub drzwi zostaną zamknięte.
Konserwacja
Gdy akumulator się wyczerpie, do konta EZVIZ zostanie wysłane ostrzeżenie
przypominające o konieczności naładowania akumulatora. Przesuń T6, aby
wyjąć go z bazy w celu naładowania, po naładowaniu zainstaluj go ponownie.
Dane techniczne
Napięcie ładowania
Pojemność akumulatora
Czas pracy akumulatora
Temperatura robocza
Wilgotność podczas ładowania
Wilgotność podczas pracy
Kąt wyzwalania
Pobór mocy
5V
450 mAh / 1,66 Wh
3 miesięcy
od -10°C do 55°C (od 14°F do 131°F)
od 0% do 40%
od 10% do 90%
>3°
≤ 10 dBm
35
Page 40

Conteúdo da caixa
PORTUGUÊS
1 T6
2 Autocolantes de espuma
(1 mm de espessura e
3mm de espessura)
1 Guia de instalação
As figuras deste manual servem apenas de referência e podem
ser diferentes do produto real.
1 Base (Montada na parte de
trás do T6 por predefinição)
1 Cabo de
alimentação
36
Page 41

Informações básicas
Botão
Indicador LED
Pisca uma vez a azul: o estado de porta ou janela fechada
é retomado.
Pisca uma vez a vermelho: a porta ou a janela está aberta.
Interface de carregamento
Base
Carregamento
Recomenda-se que carregue o T6 antes da primeira utilização.
Ligue o T6 à tomada de alimentação com o cabo de alimentação. O indicador fica
vermelho, indicando que o T6 está a carregar, e fica azul quando o T6 estiver
carregado.
A bateria pode durar até 3 meses. Se a bateria ficar sem carga, efetue o
recarregamento.
Tomada de alimentação
37
Page 42

Adição ao hub de alarme de Internet
O hub de alarme de Internet (como o A1) deve ser adquirido
separadamente.
Opção 1 (recomendada) Adição por meio da aplicação EZVIZ
Remoção da base
1
Deslize a base de acordo com a seta existente para retirá-la do T6. O
código QR do dispositivo está na parte de trás do T6.
Adição do T6 ao hub de alarme de Internet
2
– Transfira e instale a aplicação EZVIZ pesquisando por "EZVIZ" na App
Store (versão iOS) e na Google Play
– Inicie a aplicação e faça o registo para obter uma conta de utilizador
EZVIZ seguindo o assistente de arranque.
– Inicie sessão na aplicação EZVIZ e digitalize o código QR do dispositivo
para adicioná-lo ao hub de alarme de Internet.
Opção 2 Adição utilizando o hub de alarme de Internet
– Ative o "Modo de adição de detetores" do seu hub de alarme de Internet.
– Aproxime o T6 do hub de alarme de Internet (numa distância até 50cm) e
prima o botão no T6. O indicador azul pisca duas vezes informando que o
sinal de adição foi enviado.
Hub de alarme
de Internet
– O hub de alarme de Internet emite um comando de voz com o tipo e o n.º
de série do detetor, indicando que o detetor foi adicionado.
Até 50 cm
Indicador
38
TM
(versão Android).
Page 43

Instalação do detetor
Colagem do autocolante de espuma
1
Cole o autocolante de espuma na base do T6.
Se quiser instalar o T6 numa porta ou janela de metal, utilize o autocolante de
espuma de 3 mm de espessura.
3 mm1 mm
Se quiser instalar o T6 noutras portas ou janelas, utilize um dos autocolantes de
espuma fornecidos.
3 mm1 mm
Instalação do T6
2
– Pode instalar o T6 na porta ou janela, tal como ilustrado nas figuras
abaixo. Cole a base no local de instalação pretendido.
Janela Porta
– Deslize o T6 para a base e prenda-o com a base.
39
Page 44

Gravação do estado Fechado
3
Mantenha a porta ou janela fechada e depois prima sem soltar o botão
T6 durante 2 seg para gravar o estado Fechado. O indicador pisca a
vermelho durante 15 seg indicando que o estado está gravado.
O estado Fechado tem de ser gravado novamente se retirar o T6
para recarregar ou ajustar a posição de instalação.
Conclusão da instalação
4
O indicador pisca a vermelho quando a porta ou a janela é aberta e
envia a mensagem de alarme para a conta EZVIZ ligada.
O indicador pisca a azul quando a porta ou a janela é fechada.
Manutenção
Quando a bateria fica com pouca carga, é enviado um aviso de bateria fraca para a
conta EZVIZ, para lembrá-lo de que tem de recarregar a bateria. Faça deslizar o T6
para fora da base para recarregar e volte a montá-lo quando estiver carregado.
Especificações
Tensão de carga
Capacidade da bateria
Tempo de vida da bateria
Temperatura de funcionamento
Humidade de carregamento
Humidade na área de funcionamento
Ângulo de acionamento
Consumo de energia
5 V
450 mAh/1,66 Wh
6 meses
-10 °C a 55 °C (14 °F a 131 °F)
0 a 40%
10% a 90%
>3°
≤10dBm
40
Page 45

Koli İçeriği
Türkçe
T6 x1
Köpük Yapışrıcı x2
(1 mm kalınlığında ve
3 mm kalınlığında)
Kurulum Kılavuzu x1
Bu kılavuzda bulunan şekiller sadece referans amaçlıdır ve gerçek
üründen biraz farklı olabilir.
Taban x1
(Varsayılan olarak T6'nın
arkasına takılır)
Güç Kablosu x1
41
Page 46

Temel Ögeler
Düğme
LED göstergesi
Yanıp Söner Mavi Bir kez: Kapı veya pencere kapalı duruma geri
döner.
Yanıp söner Kırmızı Bir kez: Kapı veya pencere açılır.
Arabirim şarj edilmesi
Taban
Şart Etme
İlk kez kullanım için T6'yı şarj etmeniz tavsiye edilir.
Güç kablosunu kullanarak T6'yı güç adaptörüne bağlayın. T6'nın şarj edildiğini
göstermek üzere gösterge kırmızı renkte ve şarj işlemi tamamlandığında mavi
renkte yanar.
Pil 3 aya kadar kullanılabilir. Eğer pil biterse yeniden şarj edin.
Elektrik Prizi
42
Page 47

İnternet Alarm Sunucusuna Ekleme
Bir İnternet Alarm Sunucusunun (A1 gibi) ayrıca san alınması gerekir.
Seçenek 1 (Tavsiye edilir) EZVIZ Uygulaması ile Ekleme
Tabanın sökülmesi
1
T6'dan ayırmak için tabanı ok yönünde kaydırın. Cihazın QR kodunu T6'nın arka
kısmında görebilirsiniz.
İnternet Alarm Sunucusuna T6 Ekleme
2
- App Store (iOS versiyonu) ve Google PlayTM (Android versiyonu) içinde
“EZVIZ” metnini arayarak EZVIZ uygulamasını indirin ve kurulumunu yapın.
- Uygulamayı başlan ve kurulum sihirbazını izleyerek bir EZVIZ kullanıcı
hesabına kaydolun.
- EZVIZ uygulamasında oturum açın ve İnternet Alarm Sunucusuna eklemek
için cihazın QR Kodunu okutun.
Seçenek 2 İnternet Alarm Sunucusu Çalıştırılarak Ekleme
- İnternet Alarm Sunucunuzda “Detektör Ekleme Modunu” etkinleşrin.
- T6'yı İnternet Alarm Sunucusunun yakınlarına götürün (50cm yakınına) ve T6'nın
üzerinde bulunan butona basın, ekleme talebinin gönderildiğini göstermek üzere
mavi göstergeler iki kez yanıp sönecekr.
İnternet Alarm
Sunucusu
- İnternet Alarm Sunucusu, T6'nın eklendiğini göstermek üzere detektör pini ve seri
numarasını sesli olarak bildirir.
Within 50CM
Gösterge
43
Page 48

Detektörün Kurulumu
Köpük Yapışrıcının Yapışrılması
1
Köpük yapışrıcıyı T6'nın tabanına yapışrın.
Eğer T6'yı metal bir kapı veya pencereye yapışrmak isterseniz, 3 mm kalınlığında köpük
yapışrıcıyı kullanın.
3 mm1 mm
Eğer T6'yı diğer kapı veya pencerelere yapışrmak isterseniz, birlikte verilen köpük
yapışrıcılardan herhangi birini kullanın.
3 mm1 mm
T6'nın kurulumu
2
- T6'yı kapıya veya pencereye, aşağıdaki şekillerde gösterildiği gibi monte
edebilirsiniz Tabanı istediğiniz montaj yerine yapışrın.
- T6'yı tabana kaydırın ve taban ile sabitleyin.
Pencere Kapı
44
Page 49

Kapalı Durumun Kaydedilmesi
3
Kapalı durumun kaydedilmesi için kapı veya pencereyi kapalı tutun ve sonra 2s
boyunca T6 üzerindeki butona basılı tutun. Kapalı durumun kaydedildiğini
göstermek üzere gösterge 15s boyunca hızla yanıp söner.
T6 şarj edilmek üzere yerinden çıkarıldığında veta montaj yeri
ayarlandığında kapalı durumun yeniden kaydedilmesi gerekir.
Kurulumun Tamamlanması
4
Kapı veya pencere açıldığı zaman gösterge kırmızı renkte hızla yanıp sönmeye başlar
ve bağlanlı olan EZVIZ hesabına bir alarm mesajı gönderilir.
Kapı veya pencere kapaldığı zaman gösterge mavi renkte hızla yanıp söner.
Bakım
Pil biği zaman, yeniden şarj yapılması gerekğini harlatmak üzere, EZVIZ
hesabına bir düşük pil uyarı mesajı gönderilir. T6'yı yeniden şarj ekten sonra tekrar
şarj etmek ve kurmak için tabandan almak üzere kaldırın.
Teknik Özellikler
Şarj Gerilimi
Batarya Kapasitesi
Batarya Ömrü
Çalışma Sıcaklığı
Şarj Rutube
Çalışma Rutube
Tekleme Açısı
Güç tükemi
5V
450mAh/1.66Wh
3 Ay
-10°C ila 55°C (14°F ila 131°F)
0 to 40%
% 10 ila 90
>3°
≤10dBm
45
Page 50

Комплект поставки
Русский
T6 x 1
Крепежный стикер x2
(стикером 1мм & стикером 3мм)
Краткая инструкция x1
Вся информация в данной инструкции носит справочный характер.
46
Основание x1
(Установлен с обратной стороны
T6 по умолчанию)
Кабель питания x1
Page 51

Зарядка
Кнопка
LED-индикатор
Мигает синим: дверь или окно закрыты.
Мигает красным: дверь или окно открыты.
Зарядка
Основание
Зарядка
Перед первым включением рекомендуется полностью зарядить
аккумулятор. Подключите разъем зарядки к кабелю питания. Индикатор
загорится красным, указывая на то, что идет зарядка и синим, когда
аккумулятор будет заряжен.
Аккумулятор может сохранять заряд до 3 мес., после чего его надо
зарядить.
Электросеть
47
Page 52

Добавление к Центру управления Умным домом
Центр управления Умным домо м А1 приоб ретается о тдельно.
Вариант1 (Рекомендуется)
Удаление базы
1
Снимите основание c T6 в соответствии со стрелкой. Вы увидите QR-код на
задней панели T6.
Подключение Т6 к Центру Умного дома
2
- Скачайте и установите “EZVIZ” в App Store (версия iOS) и в Google Play
( версия Android).
- Запустите приложение, зарегистрируйтесь и создайте учетную запись на
EZVIZ.
- Войдите в EZVIZ, сканируйте QR-код устройства, чтобы добавить его в
Центр управления Умным домом.
TM
Вариант 2 Добавление в работающий Центр управления Умным домом
Включите режим “добавление новых датчиков” на вашем Центре управления
Умным домом.
- Поднесите T6 к Центру управления Умным домом (не более 50cm) и нажмите
кнопку на T6, синий мигнет дважды, указывая на то, что устройство добавлено.
Центруправления
Умным домом
-
Центр управления Умным домом с помощью голосовой подсказки сообщит тип
и серийный номер добавленного устройства.
не более 50cm
Индикатор
48
-
Page 53

Монтаж датчика
Наклейка стикера
1
Наклейте стикер на основание T6.
Если вы собираетесь установить T6 на металлической двери, воспользуйтесь
стикером 3мм.
3 mm1 mm
Если вы собираетесь установить T6 на двери и окна из других материалов,
воспользуйтесь любым из двух стикеров
3 mm1 mm
Монтаж T6
2
- Вы может установить T6 на двери или окне в соответствии со
следующими рисунками. Установите основание на необходимо вам
место.
- Вставьте T6 на основание и закрепите его.
Window Door
49
Page 54

Запись закрытого состояния
3
Закройте дверь или окно, а затем нажмите и удерживайте кнопку на Т6 в
течение 2с для записи закрытого состояния. Мигающий красным в течение
15с индикатор означает, что статус записывается.
Операцию следует повторить в случае снятия устройства для
зарядкиили новой регулировки положения..
Завершение монтажа
4
Индикатор будет мигать красным, когда дверь или окно открыты. На EZVIZ
будет отправлено тревожное сообщение.
Индикатор мигает синим, когда дверь или окно закрыты.
Техническое обслуживание
Когда аккумулятор разрядится, предупреждение будет отправлено в EZVIZ
Пазы в T6 необходимы, чтобы снять датчик с основания для зарядки
аккумулятора.
Спецификация
Напряжение зарядки
Емкость аккумулятора
Срок службы аккумулятора
Рабочая температура
Влажность на время зарядки
Рабочая влажность
Угол срабатывания
Потребляемая мощность
5V
450mAh/1.66Wh
3 месяца
-10°C to 55°C
0 to 40%
10% to 90%
>3°
≤10dBm
50
Page 55

Thank you for purchasing EZVIZ products. This limited warranty gives you, the original purchaser
of the EZVIZ product, specific legal rights. You may also have other legal rights that vary by state,
province or jurisdicon. The disclaimers, exclusions, and limitaons of liability under this limited
warranty will not apply to the extent prohibited by applicable law. No distributor, reseller, agent, or
employee is authorized to make any medicaon, extension, or addion to this limited warranty.
Your EZVIZ product is warranted for a period of one (1) year from the date of purchase against
defects in materials and workmanship, or such longer period as may be required by law in the
country or state where this product is sold, when used normally in accordance with user manual.
You can request warranty service by emailing us at support@ezvizlife.com .
For any defecve EZVIZ products under warranty, HANGZHOU HIKVISION DIGITAL TECHNOLOGY
CO., LTD. (“the Company”) will, at its opon, (i) repair or replace your product free of charge; (ii)
exchange your product with a funconal equivalent product; (iii) or refund the original purchase
price, provided you provide the original purchase receipt or copy, brief explanaon of the defect,
and return the product in its original packaging. At the sole discreon of the Company, repair or
replacement may be made with a new or refurbished product or components. This warranty
does not cover the postal cost, insurance and any other incidental charges incurred by you in
returning the product.
Except where prohibited by applicable law, this is your sole and exclusive remedy for breach of this
limited warranty. Any product that has either been repaired or replaced under this limited
warranty will be covered by the terms of this limited warranty for the longer of ninety (90) days
from the date of delivery or the remaining original warranty period.
This warranty does not apply and is void:
• If the warranty claim is made outside the warranty period or if the proof of purchase is not
provided.
• For any malfuncon, defect or failure caused by or resulng from the evidence of impact,
mishandling ,tampering, use contrary to the applicable instrucon manual, incorrect power line
voltage, accident, loss, the, fire, flood or other Acts of God, shipping damage or damage
resulng from repairs performed by unauthorized personnel.
• For any consumable parts, such as baeries, where the malfuncon is due to the normal aging
of the product.
• Cosmec damage, including but not limited to scratches, dents and broken plasc on ports.
• Any soware, even if packaged or sold with EZVIZ hardware.
• For any other damages free from defects in material or workmanship.
• Roune cleaning, normal cosmec and mechanical wear and tear.
Please do not hesitate to contact your seller, or send e-mails to us support@ezvizlife.com, with
any quesons.
COPYRIGHT ©2015 HANGZHOU HIKVISION DIGITAL TECHNOLOGY CO., LTD. ALL RIGHTS
RESERVED.
LIMITED WARRANTY
Page 56

Bedankt voor de aankoop van EZVIZ-producten. Met deze beperkte garane worden u, de oorspronkelijke
koper van het EZVIZ-product, specifieke juridische rechten verleend. Mogelijk hee u ook andere rechten
die verschillen per staat, provincie of rechtsgebied. De vrijwaringen, uitsluingen en beperkingen van
aansprakelijkheid in deze beperkte garane zijn niet van toepassing voor zover dit is verboden door het
toepasselijk recht. Geen enkele distributeur, wederverkoper, agent of werknemer is gemachgd om deze
beperkte garane aan te passen, te verlengen of uit te breiden.
Voor dit EZVIZ-product geldt een garaneperiode van één (1) jaar vanaf de aankoopdatum voor materiaalen fabricagedefecten, of voor een langere periode als dit weelijk is vereist in het land of de staat waarin dit
product wordt verkocht. De garaneperiode geldt alleen voor normaal gebruik in overeenstemming met
deze gebruikershandleiding
U kunt garaneservice aanvragen door een e-mail te sturen naar support@ezvizlife.com .
Voor defecte EZVIZ-producten die onder de garane vallen, zal HANGZHOU HIKVISION DIGITAL
TECHNOLOGY CO., LTD. (”het Bedrijf”) naar eigen inzicht (i) het product gras repareren of vervangen; (ii)
het product omruilen voor een funconeel vergelijkbaar product; of (iii) de oorspronkelijke aankoopprijs
restueren nadat het oorspronkelijke aankoopbewijs of een kopie hiervan en een korte uitleg van het
defect is aangeleverd, en het product is geretourneerd in de oorspronkelijke verpakking. Naar eigen inzicht
van het Bedrijf zal de reparae of vervanging plaatsvinden door nieuwe of gereviseerde producten of
onderdelen te leveren. Deze garane biedt geen dekking voor de verzendkosten, verzekeringskosten en
andere incidentele kosten die u hebt moeten betalen voor het retourneren van het product.
Tenzij dit verboden is door het toepasselijk recht, is dit uw enige en exclusieve middel voor het verbreken
van deze beperkte garane. Producten die zijn gerepareerd of vervangen onder deze beperkte garane, zijn
gedekt onder de voorwaarden van deze beperkte garane voor een periode van negeng (90) dagen)
vanaf de datum van levering of voor de resterende duur van de oorspronkelijke garane, waarbij de langste
van deze twee perioden wordt aangehouden.
Deze garane is niet van toepassing en wordt ongeldig verklaard:
• Als de garaneclaim buiten de garaneperiode wordt gedaan of als het aankoopbewijs niet wordt
aangeleverd.
• In het geval van onjuist funconeren, defecten of fouten die aantoonbaar het gevolg zijn van stoten,
onjuist gebruik, manipulae, gebruik dat niet in lijn is met de instruces in de handleiding, een onjuiste
voedingspanning, ongevallen, verlies, diefstal, brand, overstromingen of andere overmacht,
verzendschade of schade die het gevolg is van reparaes die zijn uitgevoerd door niet-geautoriseerd
personeel.
• Voor verbruiksonderdelen, zoals baerijen, waarbij het onjuist funconeren het gevolg is van normale
veroudering van het product.
• Bij cosmesche schade, inclusief, maar niet beperkt tot krassen, deuken en gebroken plasc op de
poorten.
• Voor soware, zelfs wanneer deze is meegeleverd of verkocht bij de EZVIZ-hardware.
• Voor andere schade dan materiaal- en fabricagedefecten.
• Voor vervuiling door normaal gebruik, en normale cosmesche en mechanische slijtage.
Neem voor vragen contact op met de verkopende parj, of neem contact met ons op via
support@ezvizlife.com.
COPYRIGHT ©2015 HANGZHOU HIKVISION DIGITAL TECHNOLOGY CO., LTD. ALLE RECHTEN
VOORBEHOUDEN.
BEPERKTE GARANTIE
Page 57

Vielen Dank für den Kauf eines EZVIZ-Produkts. Diese beschränkte Garane gibt Ihnen, dem Erstkäufer des
EZVIZ-Produkts, besmmte gesetzliche Rechte. Je nach Staat, Provinz oder Land können Ihnen weitere
gesetzliche Rechte zustehen. Die Haungsausschlüsse und -beschränkungen gemäß dieser beschränkten
Garane gelten ausschließlich im gesetzlich zulässigen Umfang. Kein Händler, Wiederverkäufer, Vertreter
oder Mitarbeiter ist befugt, Modifikaonen, Erweiterungen oder Ergänzungen an dieser beschränkten
Garane vorzunehmen.
Ihr EZVIZ-Produkt hat eine Garane auf Material- und Herstellungsfehler, die ab dem Kaufdatum für ein (1)
Jahr oder so lange gilt, wie dies in dem Staat oder Land, in dem dieses Produkt gekau wurde, gesetzlich
vorgeschrieben ist, sofern es in Übereinsmmung mit der Bedienungsanleitung normal benutzt wird.
Garaneansprüche richten Sie bie per E-Mail an support@ezvizlife.com .
Im Fall eines defekten EZVIZ-Produkts mit gülger Garane wird HANGZHOU HIKVISION DIGITAL
TECHNOLOGY CO., LTD. ("das Unternehmen") nach eigenem Ermessen (i) Ihr Produkt kostenlos reparieren
oder ersetzen, (ii) Ihr Produkt gegen ein funkonsfähiges vergleichbares Produkt austauschen oder (iii) den
ursprünglichen Kaufpreis unter der Voraussetzung erstaen, dass Sie das Produkt in dessen
Originalverpackung unter Beigabe des Originalkauelegs oder einer Kopie davon sowie einer kurzen
Beschreibung des Defekts zurückschicken. Das Unternehmen wird nach alleinigem Ermessen Produkte
oder Komponenten entweder reparieren oder gegen neue oder generalüberholte Produkte oder
Komponenten austauschen. Diese Garane deckt keine Versand-, Versicherungs- oder sonsge
Nebenkosten, die Ihnen durch die Rücksendung des Produkts entstehen.
Soweit nicht durch geltendes Recht untersagt, ist dies Ihr einziges und ausschließliches Rechtsmiel im Fall
einer Verletzung dieser beschränkten Garane. Jedes Produkt, das im Rahmen dieser beschränkten
Garane entweder repariert oder ausgetauscht wurde, wird für maximal neunzig (90) Tage ab Lieferdatum
oder für die Restlaufzeit der ursprünglichen Garane von den Besmmungen dieser beschränkten Garane
abgedeckt.
Diese Garane gilt nicht und ist hinfällig:
• wenn der Garaneanspruch außerhalb der Garanefrist oder ohne Vorlage des Kauelegs geltend
gemacht wird.
• bei Fehlfunkonen, Defekten oder Fehlern, die durch Stoßeinwirkung, Fehlbedienung, Sabotage,
Benutzung im Widerspruch zur entsprechenden Bedienungsanleitung, falsche Spannungsversorgung,
Unfall, Verlust, Diebstahl, Brand, Überschwemmung oder andere Naturkatastrophen, Versandschäden
oder Beschädigungen infolge von Reparaturen durch unbefugte Personen verursacht wurden oder
darauf zurückzuführen sind.
• für Verbrauchsgüter wie Baerien, bei denen die Fehlfunkon auf normale Produktalterung
zurückzuführen ist.
• kosmesche Schäden, einschließlich, aber nicht begrenzt auf Kratzer, Beulen und gebrochene
Kunststoeile an Anschlüssen.
• für jede Soware, auch wenn diese zusammen mit der EZVIZ-Hardware verpackt und verkau wurde.
• für sonsge Schäden, die keine Material- oder Verarbeitungsfehler sind.
• für rounemäßige Reinigungen sowie normalen kosmeschen und mechanischen Verschleiß.
Bei Fragen können Sie sich jederzeit an Ihren Verkäufer oder per E-Mail an support@ezvizlife.com an uns
wenden.
COPYRIGHT ©2015 HANGZHOU HIKVISION DIGITAL TECHNOLOGY CO., LTD. ALLE RECHTE VORBEHALTEN.
BESCHRÄNKTE GARANTIE
Page 58

Gracias por adquirir productos EZVIZ. Esta garana limitada le concede a usted, el comprador original del
producto EZVIZ, derechos legales específicos. Es posible que tenga otros derechos legales en función de su
estado, provincia o jurisdicción. Los avisos de exención de responsabilidad, las exclusiones y las limitaciones
de responsabilidad de esta garana limitada no se aplicarán hasta el máximo prohibido por la legislación
aplicable. Ningún distribuidor, revendedor, representante o empleado ene autorización para introducir
alteraciones, ampliaciones o incorporaciones en virtud de esta garana limitada.
Su producto de EZVIZ está cubierto por la garana por un período de un (1) año desde la fecha de compra
frente a defectos de materiales y mano de obra, o en el plazo más largo que requiera la ley en el país o
estado donde se venda este producto, cuando se usa normalmente de acuerdo con el manual de usuario.
Puede solicitar el servicio de garana por correo electrónico en support@ezvizlife.com .
Para cualquier producto de EZVIZ defectuoso en garana, HANGZHOU HIKVISION DIGITAL TECHNOLOGY
CO., LTD. ("la Empresa"), a su discreción, (I) reparará o sustuirá el producto de forma gratuita; (II) cambiará
su producto por un producto equivalente funcional; (III) o reembolsará el precio de compra original,
siempre y cuando proporcione el recibo de compra original o una copia, una breve descripción del defecto
y devuelva el producto en su embalaje original. A la entera discreción de la Empresa, la reparación o la
sustución pueden realizarse por un producto o componentes nuevos o reacondicionados. Esta garana
no cubre el coste postal de transporte, el seguro ni ningún otro coste incidental en el que incurra durante la
devolución del producto.
Excepto si lo prohíbe la legislación vigente, esta es la solución única y exclusiva en caso de incumplimiento
de esta garana limitada. Cualquier producto que se haya reparado o sustuido en virtud de esta garana
limitada estará cubierto por los términos de la misma durante el periodo máximo de noventa (90) días a
parr de la fecha de entrega o el período de garana original restante.
Esta garana no se aplica y se considerará nula:
• Si la reclamación de garana se realiza fuera del periodo de garana o si no se proporciona la prueba de
compra.
• En caso de funcionamiento incorrecto, defecto o avería causados por o como resultado de las pruebas de
impacto, impericia, manipulación, uso contrario al manual de instrucciones aplicable, voltaje incorrecto
de la línea eléctrica, accidente, pérdida, robo, incendio, inundación u otros actos de fuerza mayor, daños
en el envío o daños ocasionados por reparaciones realizadas por personal no autorizado.
• En el caso de las piezas consumibles, como las baterías, si el funcionamiento incorrecto se debe al
desgaste normal del producto.
• Daños cosmécos, incluidos, pero sin limitarse a, arañazos, abolladuras y plásco roto en puertos.
• Cualquier soware, incluso si se ha incluido y vendido con el hardware de EZVIZ.
• En caso de otros daños libres de defectos en el material o la mano de obra.
• La limpieza runaria, cambios cosmécos y el desgaste mecánico natural.
Si ene alguna pregunta, no dude en ponerse en contacto con su representante comercial, o bien envíenos
un mensaje a support@ezvizlife.com con la pregunta que desee.
COPYRIGHT ©2015 HANGZHOU HIKVISION DIGITAL TECHNOLOGY CO., LTD. RESERVADOS TODOS LOS
DERECHOS.
GARANTÍA LIMITADA
Page 59

Merci d'avoir acheté nos produits EZVIZ. En tant qu'acheteur original de produit EZVIZ, cee garane
limitée vous accorde certains droits. Selon le pays, la région ou la juridicon où vous résidez, il est
possible que vous bénéficiiez d'autres droits. Les dénis de responsabilités, exclusions et limitaons de
responsabilité civile spulés dans cee garane limitée s'appliquent uniquement dans les limites
prévues par la loi. Aucun distributeur, revendeur, agent ou employé n'est autorisé à apporter de
modificaon, d'extension ou d'ajout à cee garane.
Votre produit EZVIZ est garan pendant une période de un (1) an à compter de la date d'achat pour
tout défaut de pièces et de main d'œuvre, ou pour une durée supérieure si la législaon en vigueur
dans le pays ou l'état où ce produit est vendu l'exige, dès lors qu'il est ulisé conformément aux
instrucons du manuel de l'ulisateur.
Pour faire valoir la garane, écrivez-nous à l'adresse suivante : support@ezvizlife.com .
Si un défaut est signalé sur un produit EZVIZ pendant la période de garane, Hangzhou Hikvision
Digital Technology Co., Ltd. (« la Société ») pourra, à sa discréon, (i) réparer ou remplacer votre
produit gratuitement ; (ii) remplacer votre produit par un produit équivalent en état de marche ; (iii)
rembourser le prix d'achat. Vous devrez toutefois présenter la preuve d'achat et une brève explicaon
du défaut constaté, et renvoyer le produit dans son emballage d'origine. La Société pourra réparer ou
remplacer le produit ou les composants par un produit ou des composants neufs ou remis en état.
Cee garane ne couvre pas les frais de port, l'assurance ni les éventuels frais annexes de renvoi du
produit.
Sauf si la législaon en vigueur l'interdit, cee garane est votre seul et unique recours. Tout produit
réparé ou remplacé en vertu de la présente garane limitée sera couvert pendant une durée de
quatre-vingt-dix (90) jours à compter de la date de livraison ou jusqu'à l'échéance de la période
garane originale.
Cee garane ne s'applique pas et est considérée comme nulle dans les cas suivants :
• si l'ulisateur se prévaut de la garane hors de la période de couverture ou s'il ne fournit pas de
preuve d'achat ;
• en cas de dysfonconnement, de défaut ou de panne due ou induite par un choc, une mauvaise
manipulaon, un sabotage, une ulisaon non conforme aux instrucons du manuel, une tension
d'alimentaon incorrecte, un accident, une perte, un vol, un incendie, une inondaon ou toute
autre catastrophe naturelle, un préjudice subi pendant le transport ou résultant de réparaons par
un personnel non agréé ;
• consommables, tels que les baeries, où le dysfonconnement est dû au vieillissement normal du
produit ;
• dommages superficiels tels que, entre autres, les rayures, les bosses ou les pièces en plasque
cassées ;
• logiciels, même fournis ou vendus avec le matériel EZVIZ ;
• préjudices autres que les défauts de pièces ou de main d'œuvre ;
• neoyage de roune, vieillissement de l'aspect extérieur et usure mécanique normale.
Pour toute queson, n'hésitez pas à contacter votre revendeur ou à nous écrire à l'adresse suivante :
support@ezvizlife.com.
COPYRIGHT ©2015 HANGZHOU HIKVISION DIGITAL TECHNOLOGY CO., LTD. TOUS DROITS RÉSERVÉS.
GARANTIE LIMITÉE
Page 60

Dziękujemy za zakup produktów EZVIZ. Niniejsza ograniczona gwarancja daje użytkownikowi,
czyli oryginalnemu nabywcy produktu EZVIZ, określone prawa. Użytkownikowi mogą też
przysługiwać inne prawa, które zależą od danego państwa, obszaru terytorialnego lub jurysdykcji.
Zastrzeżenia, wyłączenia i ograniczenia odpowiedzialności wynikające z niniejszej ograniczonej
gwarancji nie będą miały zastosowania w zakresie zabronionym przez obowiązujące prawo.
Żaden dystrybutor, sprzedawca, przedstawiciel ani pracownik nie jest uprawniony do
dokonywania jakichkolwiek zmian, rozszerzeń lub uzupełnień niniejszej ograniczonej gwarancji.
Udzielamy gwarancji na produkt EZVIZ na okres jednego (1) roku od daty nabycia, obejmującej
wady materiałowe i wykonawstwa, pod warunkiem normalnego używania produktu zgodnie z
instrukcją obsługi. Wskazany okres może być dłuższy, jeśli wymaga tego prawo w kraju, w którym
ten produkt jest sprzedawany.
Można wysłać do nas zgłoszenie gwarancyjne pocztą elektroniczną na adres support@ezvizlife.com .
Dla wszelkich produktów EZVIZ objętych gwarancją, HANGZHOU HIKVISION DIGITAL
TECHNOLOGY CO., LTD. („Firma”), według własnego uznania, (i) bezpłatnie naprawi lub wymieni
produkt; (ii) zamieni produkt na inny o porównywalnej funkcjonalności; (iii) zwróci użytkownikowi
pierwotną cenę zakupu pod warunkiem przedstawienia oryginału lub kopii dowodu zakupu,
krótkiego opisu usterki oraz zwrotu produktu w oryginalnym opakowaniu. Według wyłącznego
uznania Firmy, naprawa lub wymiana może zostać przeprowadzona z wykorzystaniem nowego
lub regenerowanego produktu lub części. Niniejsza gwarancja nie obejmuje kosztu przesyłki,
ubezpieczenia i innych dodatkowych opłat poniesionych przez użytkownika w związku ze
zwrotem produktu.
Z wyjątkiem przypadków zabronionych przez obowiązujące prawo, powyższe warunki stanowią
jedyny i wyłączny środek rekompensaty za naruszenie niniejszej ograniczonej gwarancji. Każdy
produkt naprawiony lub wymieniony na podstawie niniejszej ograniczonej gwarancji będzie
objęty jej warunkami przez czas pozostały do wygaśnięcia okresu pierwotnej gwarancji lub przez
dziewięćdziesiąt (90) dni, zależnie od tego, który okres będzie dłuższy.
Niniejsza gwarancja nie obowiązuje i zostaje unieważniona:
• Jeśli zgłoszenie z tytułu gwarancji zostanie wniesione po upływie okresu gwarancji lub jeśli
użytkownik nie dostarczy dowodu zakupu.
• W przypadku jakiejkolwiek awarii lub usterki spowodowanej przez lub wynikającej z wyraźnie
widocznego uderzenia, nieprawidłowej obsługi, próby manipulacji, stosowania niezgodnie z
instrukcją, nieprawidłowego napięcia zasilania, wypadku, zgubienia, kradzieży, pożaru, powodzi
lub innych klęsk żywiołowych, szkód transportowych lub spowodowanych naprawą przez
nieupoważniony personel.
• W przypadku wszelkich części eksploatacyjnych, takich jak baterie, których usterka wynika z
normalnego starzenia się produktu.
• W przypadku szkód kosmetycznych, m.in. zarysowań, wgięć i pękniętych plaskowych części
portów.
• W przypadku jakiegokolwiek oprogramowania, nawet jeśli jest ono dołączone lub sprzedawane
ze sprzętem EZVIZ.
• W przypadku innych szkód niewynikających z wad materiałowych lub wykonawstwa.
• W przypadku standardowego czyszczenia, oraz typowego zużycia kosmetycznego i
mechanicznego.
Jeśli mają Państwo jakiekolwiek pytania, prosimy o kontakt ze sprzedawcą lub przesłanie ich do
nas pocztą elektroniczną na adres support@ezvizlife.com.
COPYRIGHT ©2015 HANGZHOU HIKVISION DIGITAL TECHNOLOGY CO., LTD. WSZELKIE PRAWA
ZASTRZEŻONE.
OGRANICZONA GWARANCJA
Page 61

Grazie per aver acquistato i prodo EZVIZ. La presente garanzia limitata accorda all'acquirente
originale del prodoo EZVIZ, specifici diri legali. L'acquirente originale potrebbe godere anche
altri diri legali che variano da stato, provincia o giurisdizione. Le declinazioni di responsabilità,
le esclusioni e le limitazioni di responsabilità ai sensi della presente garanzia limitata non si
applicano ove espressamente vietate dalla legge applicabile. Nessun distributore, rivenditore,
agente o dipendente è autorizzato a fornire rimedi, estensioni o aggiunte alla presente garanzia
limitata.
Il prodoo EZVIZ è garanto per un periodo di un (1) anno dalla data di acquisto contro dife
nei materiali e nella lavorazione, o un periodo più lungo, ove richiesto dalla legge del paese o
dello stato in cui il prodoo è stato venduto, se ulizzato normalmente, in conformità con il
manuale utente.
Il servizio di assistenza in garanzia può essere richiesto via email, all'indirizzo support@ezvizlife.com .
Per eventuali prodo EZVIZ difeosi in garanzia,HANGZHOU HIKVISION DIGITAL TECHNOLOGY
CO., Ltd. ("la Società"), avrà facoltà a sua discrezione di, (i) riparare o sostuire il prodoo a tolo
gratuito; (ii) sostuire il vostro prodoo con un prodoo funzionalmente equivalente; (iii) o
rimborsare il prezzo di acquisto originale, a fronte dell'esibizione della ricevuta di acquisto
originale o in copia, una breve spiegazione del difeo e il reso del prodoo nella sua confezione
originale. A esclusiva discrezione della Società, la riparazione o la sostuzione può avvenire con
un prodoo o con dei componen nuovi o ricondiziona. Questa garanzia non copre spese
postali, assicurazione ed eventuali altre spese accessorie sostenute dall'acquirente per la
restuzione del prodoo.
Salvo laddove proibito dalla legge applicabile, ciò costuisce l'unico ed esclusivo rimedio per la
violazione della presente garanzia limitata. Qualsiasi prodoo riparato o sostuito ai sensi della
presente garanzia limitata sarà coperto dai termini della presente garanzia limitata per il periodo
di maggiore durata tra novanta (90) giorni dalla data di consegna o il periodo di garanzia
originale residuo.
Questa garanzia non si applica e risulterà nulla:
• Se la richiesta di applicazione della garanzia perviene al di fuori del periodo di garanzia o se la
prova di acquisto non viene fornita.
• Per qualsiasi malfunzionamento, difeo o guasto causato da, o confermato da prove di
evidenza di, avvenuto impao, uso improprio, manomissione, uso contrario alle istruzioni del
relavo manuale, tensione di alimentazione errata, incidente, smarrimento, furto, incendio,
inondazione o altre cause di forza maggiore, danni di spedizione o danni causa da riparazioni
eseguite da personale non autorizzato.
• Per eventuali componen consumabili, quali baerie, dove il mal funzionamento è dovuto al
normale invecchiamento del prodoo.
• Danni esteci, inclusi ma non limita a graffi, ammaccature e roure delle plasche delle
porte.
• Qualsiasi soware, anche se confezionato o venduto con hardware EZVIZ.
• Per eventuali altri danni esen da dife nei materiali o nella lavorazione.
• Pulizia ordinaria e il normale deterioramento esteco e meccanico.
Non esitate a contaare il venditore, o a inviarci un e-mail a support@ezvizlife.com, per qualsiasi
domanda.
COPYRIGHT ©2015 HANGZHOU HIKVISION DIGITAL TECHNOLOGY CO., LTD. TUTTI I DIRITTI
RISERVATI.
GARANZIA LIMITATA
Page 62

Obrigado por comprar produtos EZVIZ. Na qualidade de comprador original do produto
EZVIZ, esta garana limitada confere-lhe direitos legais específicos. Poderá ter ainda outros
direitos legais que variam consoante o estado, a província ou a jurisdição. As renúncias,
exclusões e limitações de responsabilidade expressas nesta garana limitada não se
aplicarão na medida em que tal seja proibido pela legislação aplicável. Nenhum distribuidor,
revendedor, agente ou funcionário está autorizado a realizar qualquer modificação, extensão
ou adição à presente garana limitada.
O seu produto EZVIZ tem um (1) ano de garana, a contar da data de compra, contra
defeitos de materiais e mão-de-obra, ou tem um período maior, se tal for exigido pela
legislação do país ou estado onde este produto é vendido, desde que ulizado normalmente
de acordo com o Manual do ulizador.
Pode pedir uma assistência coberta pela garana enviando-nos um e-mail para
support@ezvizlife.com.
Para produtos EZVIZ com defeito cobertos pela garana, a HANGZHOU HIKVISION DIGITAL
TECHNOLOGY CO., LTD. ("a Empresa"), por opção sua, (i) reparará ou substuirá o seu
produto gratuitamente; (ii) trocará o seu produto por um produto equivalente funcional; (iii)
ou reembolsará o preço de compra original, desde que forneça o recibo de compra original
ou a respeva cópia, uma breve explicação do defeito e desde que devolva o produto na sua
embalagem original. A reparação ou substuição poderá ser feita com um produto ou
componentes novo(s) ou renovado(s), ficando esta decisão ao critério da Empresa. Esta
garana não cobre as despesas postais, o seguro e quaisquer outros encargos acessórios
incorridos por si ao devolver o produto.
Salvo nos casos em que é proibido pela legislação aplicável, este é o seu único e exclusivo
recurso por incumprimento desta garana limitada. Qualquer produto que seja reparado ou
substuído nos termos desta garana limitada estará coberto pelos termos da mesma por
um período máximo de noventa (90) dias a parr da data de entrega ou pelo período da
garana original restante.
A presente garana não se aplica e será nula:
• Se a reclamação da garana for feita fora do período da garana ou se não for fornecida
prova de compra.
• No caso de mau funcionamento, defeito ou falha causada(o) ou resultante de provas de
impacto, ulização incorreta, adulteração do produto, ulização contrária ao manual de
instruções aplicável, tensão errada da linha de alimentação, acidente, perda, roubo,
incêndio, inundação ou outras catástrofes naturais, danos de transporte ou danos
resultantes de reparações executadas por pessoal não autorizado.
• No caso de consumíveis como, por exemplo, baterias, em que o mau funcionamento se
deva ao envelhecimento normal do produto.
• No caso de danos de cosméca, incluindo, embora sem caráter limitavo, riscos, mossas e
plásco pardo nas portas.
• Relavamente a qualquer soware, mesmo tendo sido embalado ou vendido com
hardware EZVIZ.
• No caso de quaisquer outros danos isentos de defeitos de material ou de mão-de-obra.
• Limpeza de rona, cosméca normal e desgaste mecânico.
Não hesite em contactar o seu revendedor ou enviar-nos um e-mail para support@ezvizlife.com, em caso de dúvidas.
COPYRIGHT ©2015 HANGZHOU HIKVISION DIGITAL TECHNOLOGY CO., LTD. TODOS OS
DIREITOS RESERVADOS.
GARANTIA LIMITADA
Page 63

EZVIZ ürünleri san aldığınız için teşekkür ederiz. Bu sınırlı garan, EZVIZ ürününü san
alan kişi olarak size, özel hukuki haklar vermektedir. Ülke, şehir veya yargı sistemlerine
bağlı olarak değişebilecek başka hukuki haklara da sahip olabilirsiniz. Yürürlükteki yasalar
tarandan engellenmesi halinde, bu sınırlı garan kapsamında bildirilen feragatler,
issnalar ve sorumluluk sınırları uygulanmayacakr. Hiçbir distribötörün, perakende
sacısının, aracının veya çalışanın bu sınırlı garan üzerinde herhangi bir değişiklik,
uzan veya eklen yapmaya yetkisi yoktur.
EZVIZ ürününüz, san alındığı tarihten ibaren bir (1) yıl süreyle ya da ürünün saldığı
ülkede veya şehirde yasalar tarandan gerekli görülen süre boyunca,kullanım kılavuzuna
uygun bir şekilde kullanılması koşuluyla, malzeme ve işçilik hatalarına karşı garanlidir.
Aşağıdaki adrese e-posta göndererek bizden garan servisi talep edebilirsiniz:
support@ezvizlife.com .
Garan kapsamında arızalanan herhangi bir EZVIZ ürünü için, HANGZHOU HIKVISION
DIGITAL TECHNOLOGY CO., LTD. (“Şirket”) kendi tercihine bağlı olarak, orijinal saş
belgesini veya kopyasını sağlamanız, arızanın kısa bir açıklamasını belirtmeniz ve ürünü
orijinal ambalajında iade etmeniz koşuluyla, (i) ürününüzü ücretsiz bir şekilde onaracak
veya değişrecek; (ii) ürününüzü işlevleri açısından eşdeğer bir ürün ile değişrecek;
veya (iii) san alma sırasında ödediğiniz ile ücre iade edecekr. Yegane takdir yetkisi
Şirkete ait olmak üzere, onarım veya değişrme işlemi yeni ya da yenilenmiş ürün veya
bileşenler ile yapılabilir. Bu garan, ürünün iadesi sırasında ortaya çıkabilecek posta
masraflarını, sigorta ve diğer isteğe bağlı maliyetleri kapsamamaktadır.
Yasalar tarandan engellenmediği sürece, bu sınırlı garan koşullarının yerine gerilmesi
için tek ve yegane sorumlu siz olacaksınız. Bu sınırlı garan kapsamında onarımı yapılan
veya değişrilen herhangi bir ürün için, teslim tarihinden ibaren, ilk garan süresi
geçerli kalacak veya eğer daha uzunsa, doksan (90) gün boyunca bu sınırlı garan
uygulanacakr.
Aşağıdaki hallerde bu garan uygulanmaz ve geçersiz kalır:
• Garan talebinin garan süresi dolduktan sonra yapılması veya ürünün saş belgesinin
sağlanamaması.
• Herhangi bir darbe, hatalı kullanım, kurcalama, kullanım kılavuzunda belirlen
açıklamaların aksi yönünde kullanım, hatalı giriş gerilimi, kaza, kayıp, hırsızlık, yangın,
su taşkını ve diğer doğal afetler, nakliye hasarı veya yetkili olmayan kişiler tarandan
yapılan onarımlar nedeniyle veya bu tür durumlar sonucu ortaya çıkan her türlü arıza,
hasar veya bozulmalar.
• Piller gibi her türlü sarf malzemeler için, arızanın ürünün normal aşınma ve yıpranması
ile ilgili olması.
• Çizilme, çökme, bağlan uçlarında bulunan plask parçaların kırılması dahil olmak
üzere, ancak bunlarla sınırlı kalmaksızın görsel hasarlar.
• EZVIZ donanımı ile birlikte ambalajlanmış veya salmış olsa dahi her türlü yazılım
sorunları.
• Malzeme ve işçilik hatası olmayan diğer her türlü hasarlar.
• Run temizlik, normal görünüm bozulması ve mekanik aşınma ve yıpranma.
Her türlü sorularınız için lüen sacınız ile ileşime geçmekte tereddüt etmeyin veya
support@ezvizlife.com adresinden bize bir e-posta gönderin.
TELİF HAKKI ©2015 HANGZHOU HIKVISION DIGITAL TECHNOLOGY CO., LTD. TÜM
HAKLARI SAKLIDIR.
SINIRLI GARANTİ
Page 64

Благодарим Вас за покупку продукции EZVIZ. Эта ограниченная гарантия дает Вам как
покупателю продукта EZVIZ определенные юридические права. Вы также можете
иметь другие юридические права, которые определяются законами государства,
провинции или юрисдикцией. Исключения и ограничения ответственности в
соответствии с данной ограниченной гарантией не действительны в случае, если они
противоречат действующему законодательству. Ни дистрибьютор, ни дилер, ни агент
или сотрудник не имеет права вносить какие-либо изменения или дополнения к
данной ограниченной гарантии.
На Ваш продукт EZVIZ дается гарантия сроком на один(1) год с момента покупки на
дефекты материалов и изготовления, или на более длительный период, в
соответствии с законом государства, где продается этот товар, при условии
правильного использования в соответствии с руководством пользователя.
Вы можете запросить гарантийное обслуживание, обратившись по электронной
почте support@ezvizlife.com.
В случае неисправности продуктов EZVIZ по гарантии, HIKVISION DIGITAL TECHNOLOGY
CO., LTD. Ханчжоу ("Компания") произведет, по своему выбору, (I) ремонт или замену
изделия бесплатно; (II) обмен продукта на функционально эквивалентный; (III)
возврат первоначальной стоимости, при условии, что Вы предоставите оригинал или
копию квитанции о покупке, краткое объяснение дефекта, а также вернете товар в
оригинальной упаковке. На усмотрение Компании, может производиться ремонт или
замена нового или отремонтированного продукта или его компонентов. Данная
гарантия не распространяется на почтовые расходы, страховку и любые другие
непредвиденные расходы, понесенные Вами в связи с возвратом продукта.
За исключением случаев, запрещенных действующим законодательством, этот
документ является Вашим единственным и исключительным средством судебной
защиты, в случае нарушения Ваших прав, закрепленных в ограниченной гарантии. К
любому продукту, который уже был отремонтирован или заменен по данной
ограниченной гарантии, применимы условия документа в течение девяноста (90)
дней с момента поставки или оставшегося первоначального гарантийного срока.
Данная гарантия не применяется и является недействительной:
• В случае подачи заявки на гарантийный ремонт по истечении гарантийного срока
или отсутствия доказательства факта покупки.
• В случае неисправностей, дефектов, вызванных неправильным использованием,
нарушением инструкций по эксплуатации, при неправильном напряжении сети,
аварии, утере, краже, пожаре, наводнении или иных стихийных бедствиях,
повреждении груза или ущербе, нанесенными в результате ремонта, выполненного
не уполномоченными лицами.
• Для любых расходных частей, таких как батареи, когда неисправность происходит
из-за естественного старения продукта.
• При косметических повреждениях, в том числе, но не только, при царапинах,
вмятинах и сломанном пластике на портах.
• Для любого программного обеспечения, даже если оно было упаковано или
продано вместе с оборудованием EZVIZ.
• Для любых других повреждений, дефектов материала или изготовления.
• Для планового косметического и механического износа.
Чтобы задать вопрос продавцу или отправить нам письмо, пожалуйста, обращайтесь
по данному адресу: support@ezvizlife.com
COPYRIGHT ©2015 HANGZHOU HIKVISION DIGITAL TECHNOLOGY CO., LTD. ALL RIGHTS RESERVED.
ОГРАНИЧЕННАЯ ГАРАНТИЯ
Page 65

UD.6L0208B0097A01
 Loading...