

Ezviz S5 Quick Start Manual

ACTION CAMERA
ACTION CAMERA
Quick Start Guide
Quick Start Guide
UD01202B
1
1
2
3
3
4
1
5
6
8
7
1
9
10
10
11
11
1
13
13
12
12
14
14
5
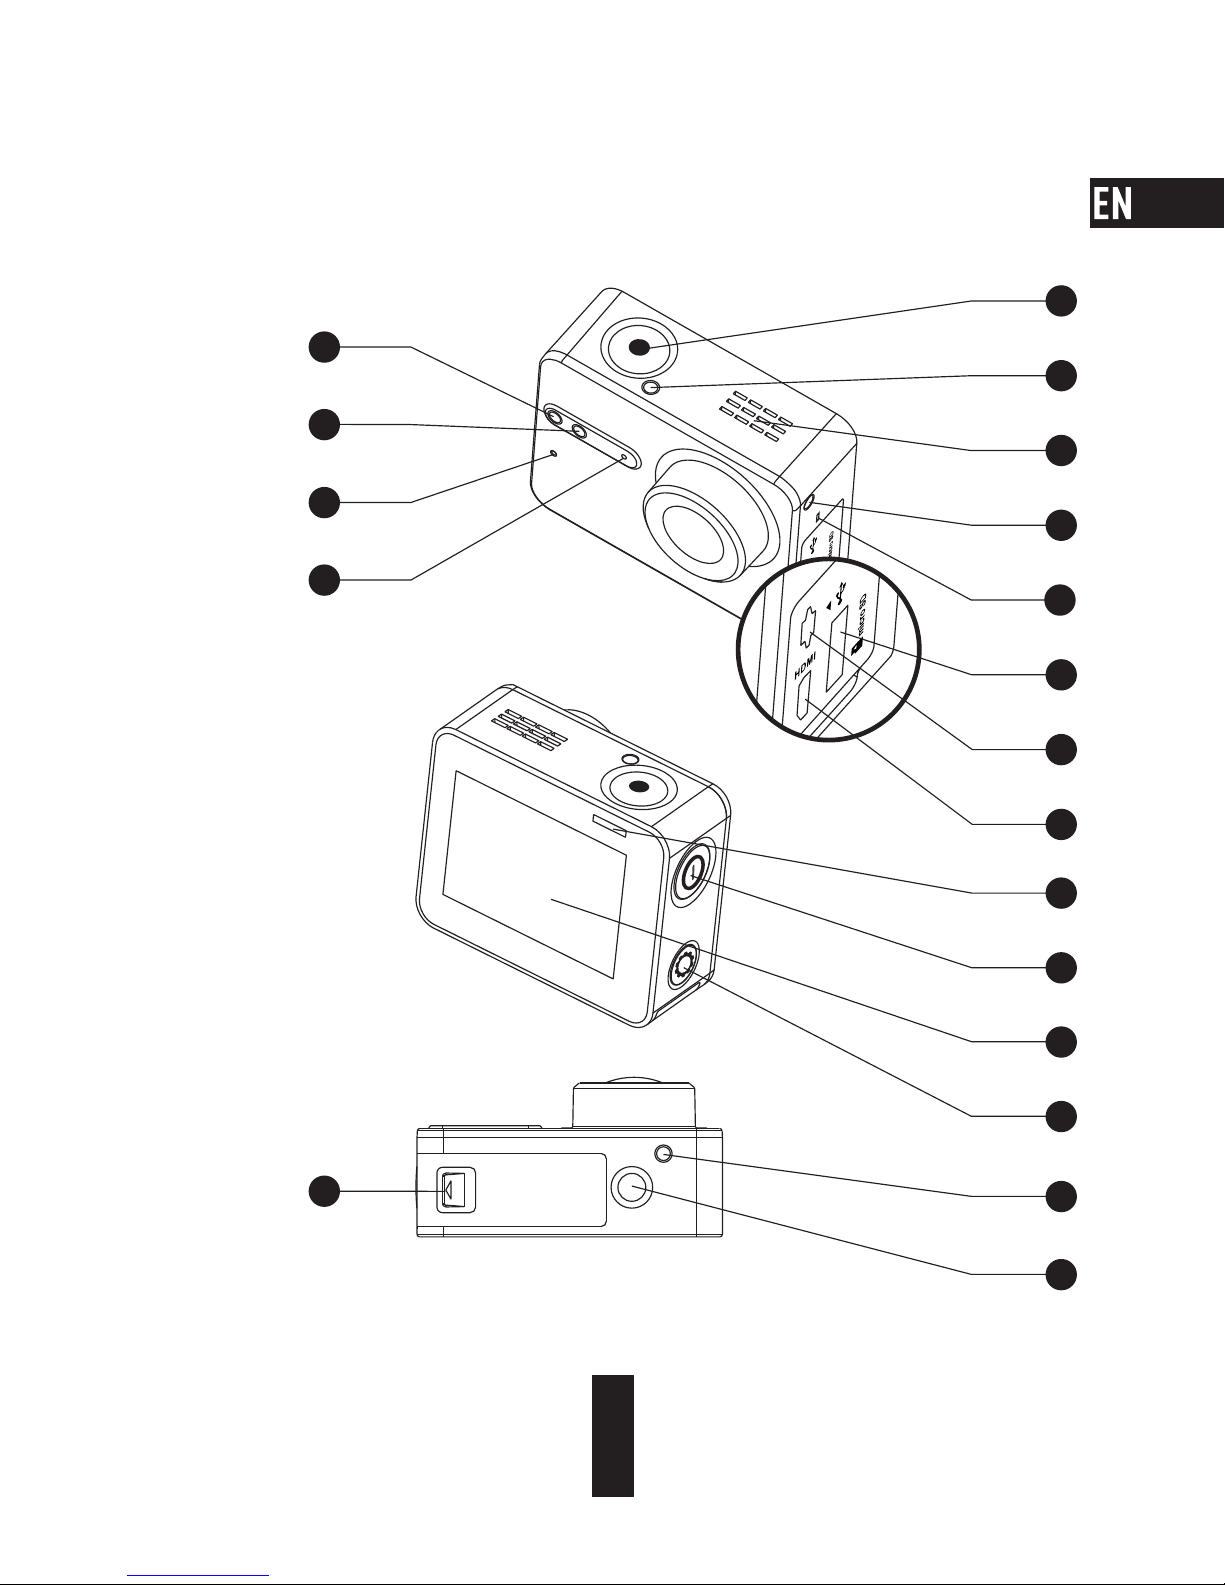
Basics
1

1 Recording Status LED Indicator Steady on: Standby
Flicker: Recording
2 Wi-Fi Status LED Indicator Unlit: Wi-Fi is off
Flicker: Wi-Fi is on
3 MIC Microphone
4 Shutter Start/Stop recording
5 Speaker Audible sound and video playback
6 Power LED Indicator Steady Red: Charging
Steady Blue: Charged
7 microSD Card Slot Insert a microSD card for storage. The microSD card is not
included in the box. Please purchase separately (see page 5
for the recommended microSD card models).
8 USB Interface USB data transfer and charging.
9 micro-HDMI Interface HDMI output
10 Power Button Hold down for 0.5 second to power on, 3 seconds to power
off.
11 LCD Screen LCD touch screen
12 Setup Button Press to enter video settings menu
Hold down to turn on Wi-Fi
13 Battery cover Hold down the arrow and pull out the cover. You can replace
the battery if it runs out.
14 Standard Bracket
Interface (1/4 inch)
Interface for various brackets.
2
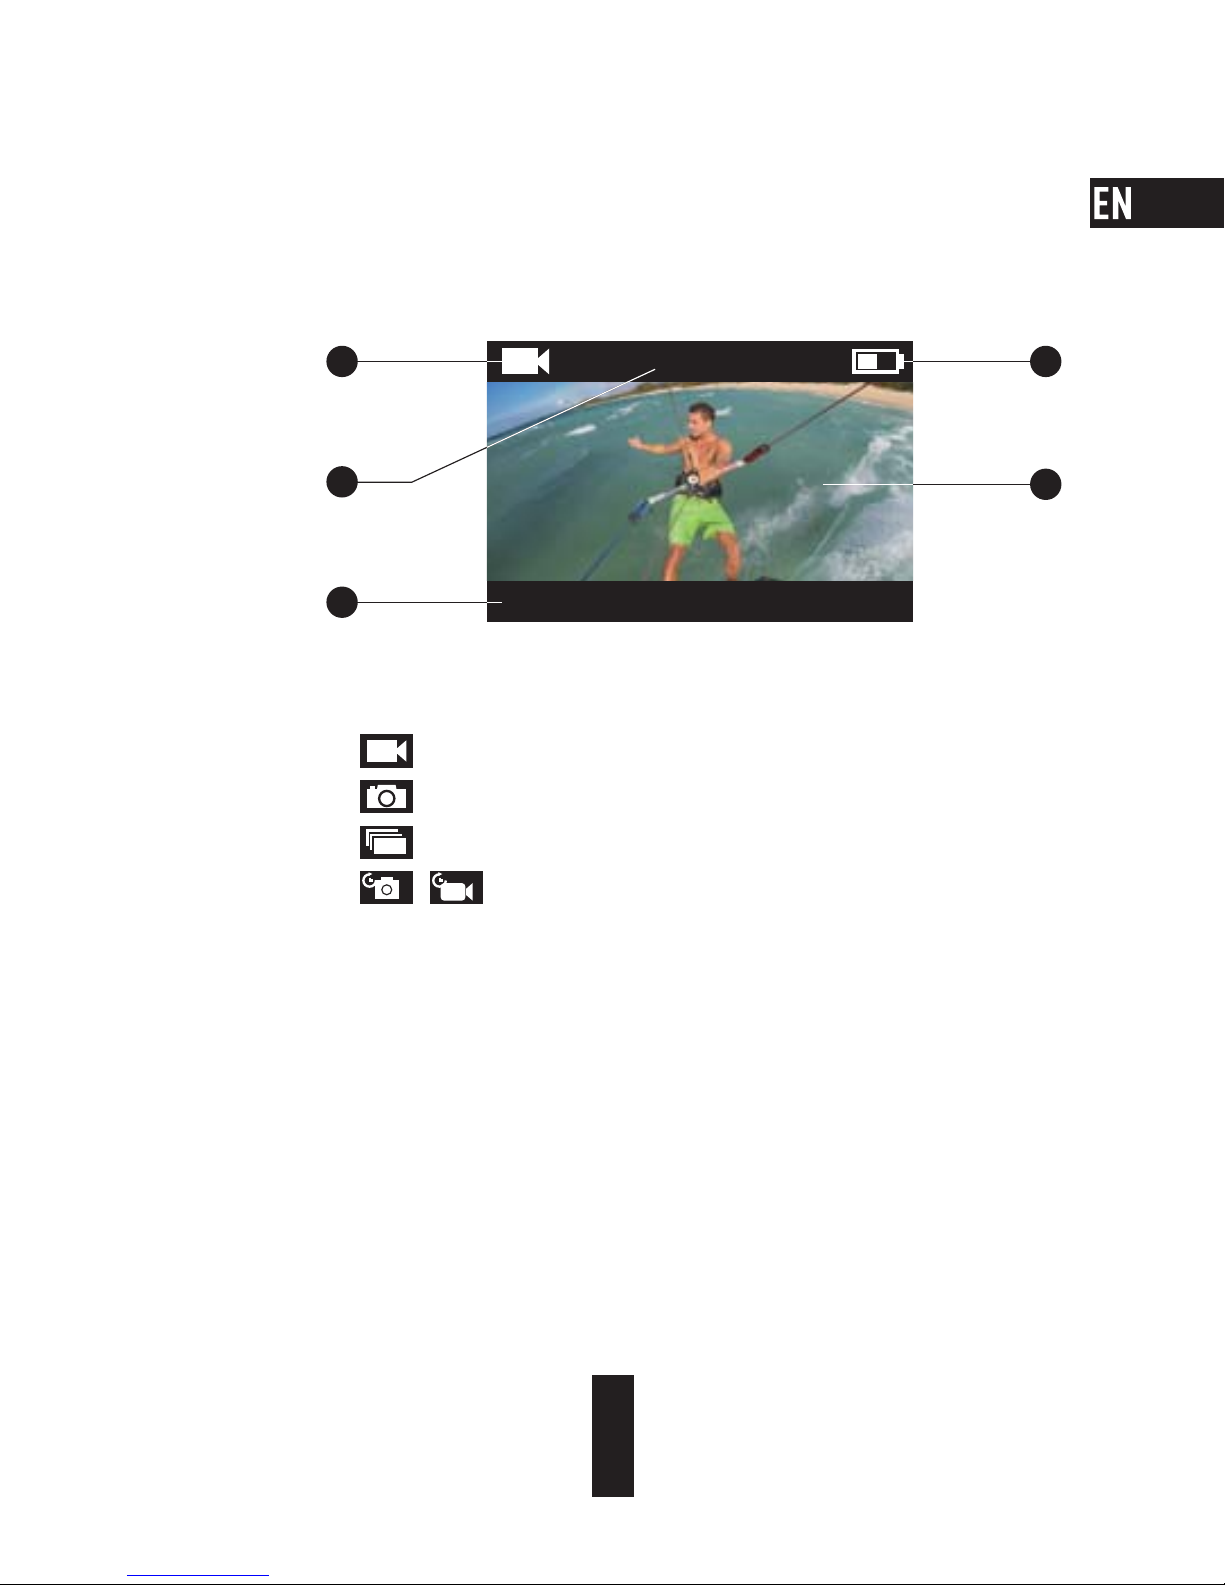
Display Introduction
00:00:00|02:00:00
4K/3 0/ Wide
1
2
4
5
3
1 Current Recording Mode
Video
Photo
Burst
Time Lapse
2 Video: Time Already Recorded / Time Left for Recording
Photo & Busrt & Time Lapse: Captured Picture Number / Left Picture Number
3 Video: Resolution/Frame Rate/ Field of View
Photo: Resolution
Burst: Resolution/Capture Rate
Time Lapse: Resolution/Capture Interval
4 Battery Status
5 Live view or playback image
/
3
Operation
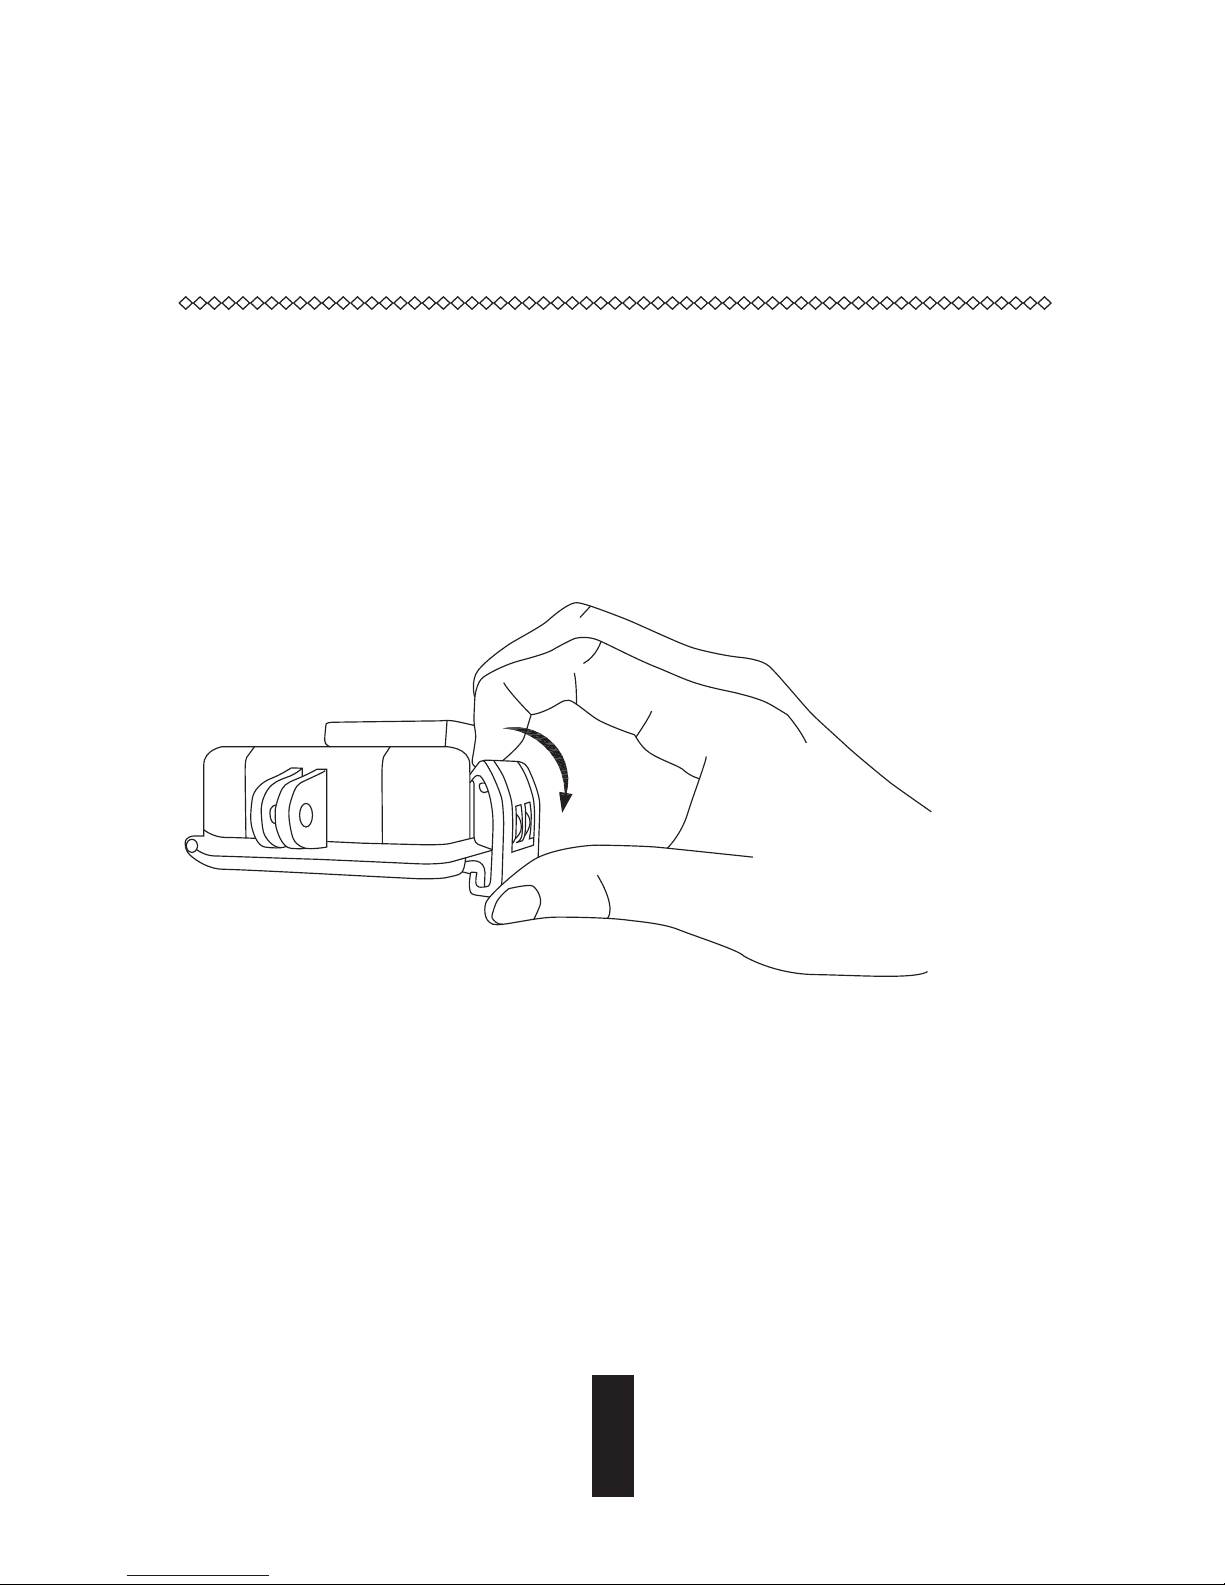
Step 1
Take out camera
The camera is placed inside a waterproof housing by default. Before using the camera for the first
time, take out the camera from waterproof housing to insert the microSD card and charge.
4
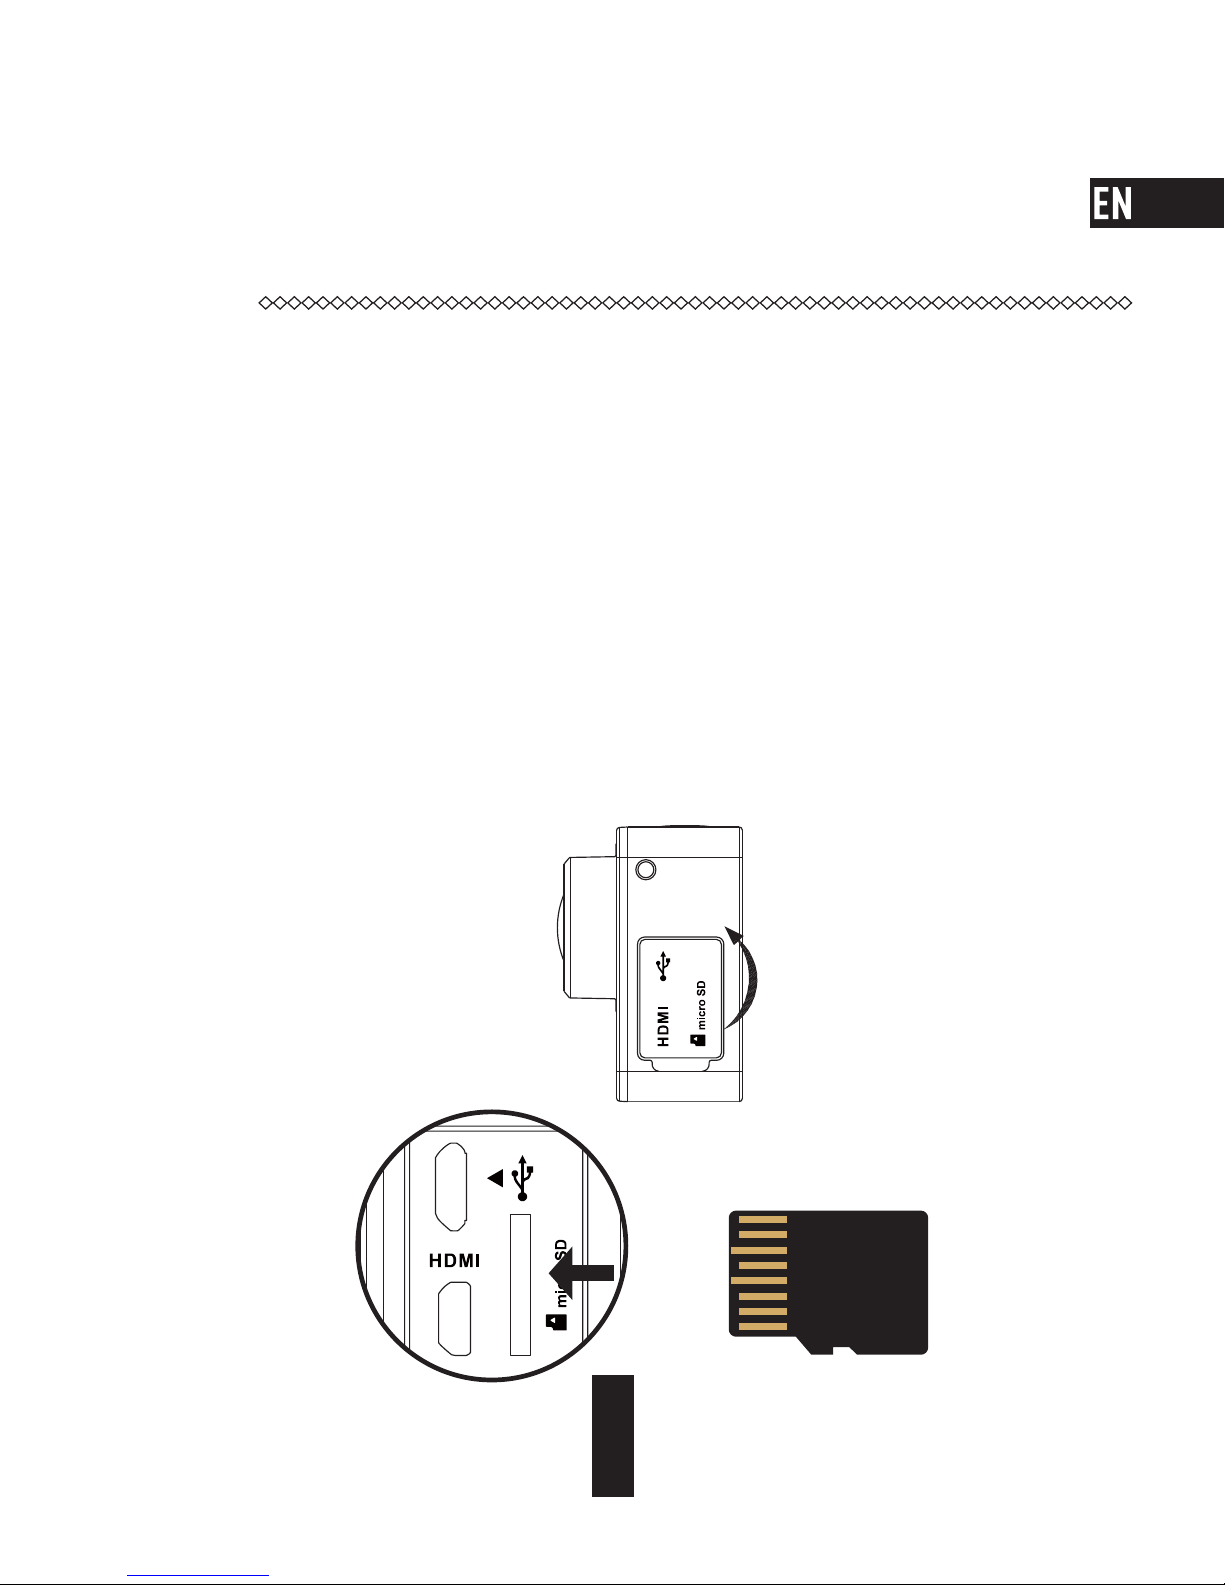
Step 2
Insert the microSD card.
The camera supports video and picture storage in the local memory card.
Insert the microSD card into the microSD card slot. (Use the recommended card model and the card
capacity should be no less than 4GB.)
MicroSD Card Level Requirement: Class 10 and above.
MicroSD Card Recommendation:
SANDISK EXTREME
®
32GB microSDHC
TM
SANDISK EXTREME® 64GB microSDHC
TM
LEXAR® 32GB microSDHCTM
LEXAR® 64GB microSDHC
TM
5
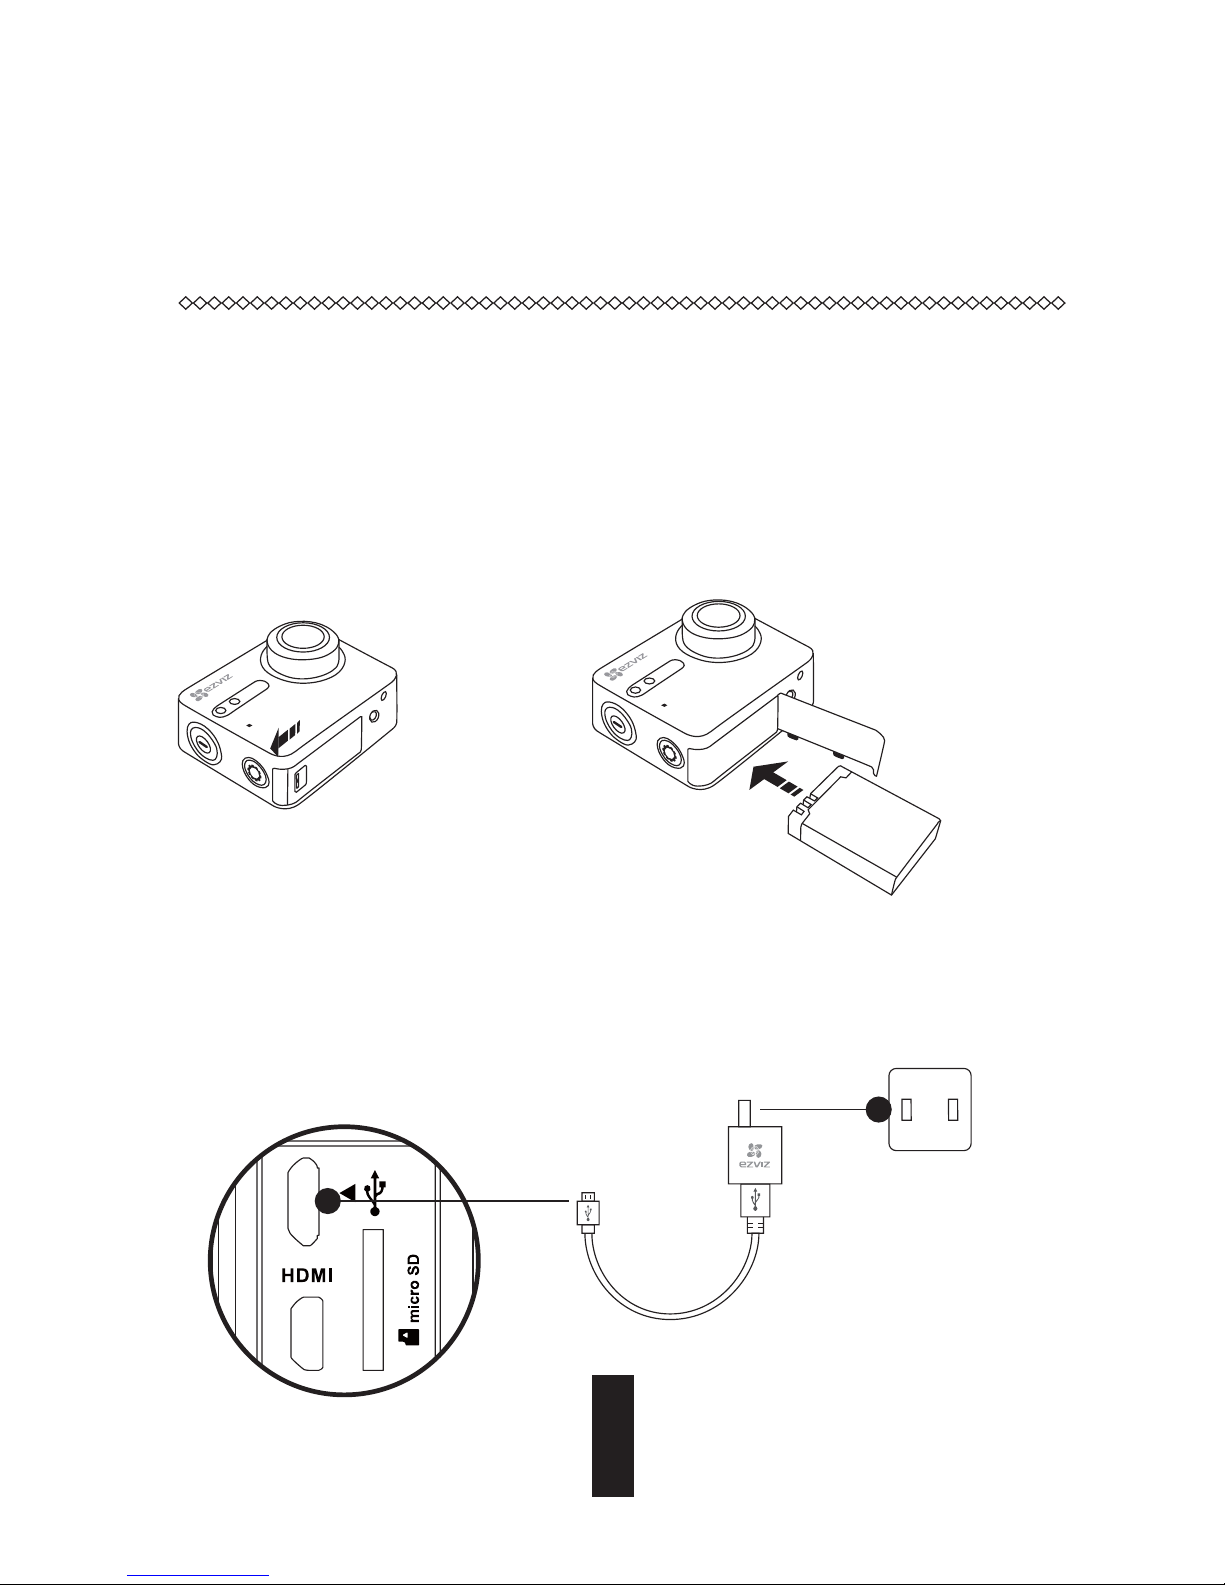
Step 3
Charge the camera.
Install the Battery
1
Hold down the arrow and pull out the cover according to the arrow. Insert the battery and
replace the battery cover.
Connect to Power
2
It’s advised to fully charge the camera in the power-off status before you use the camera for the
first time.
Power Cable
Power Socket
6
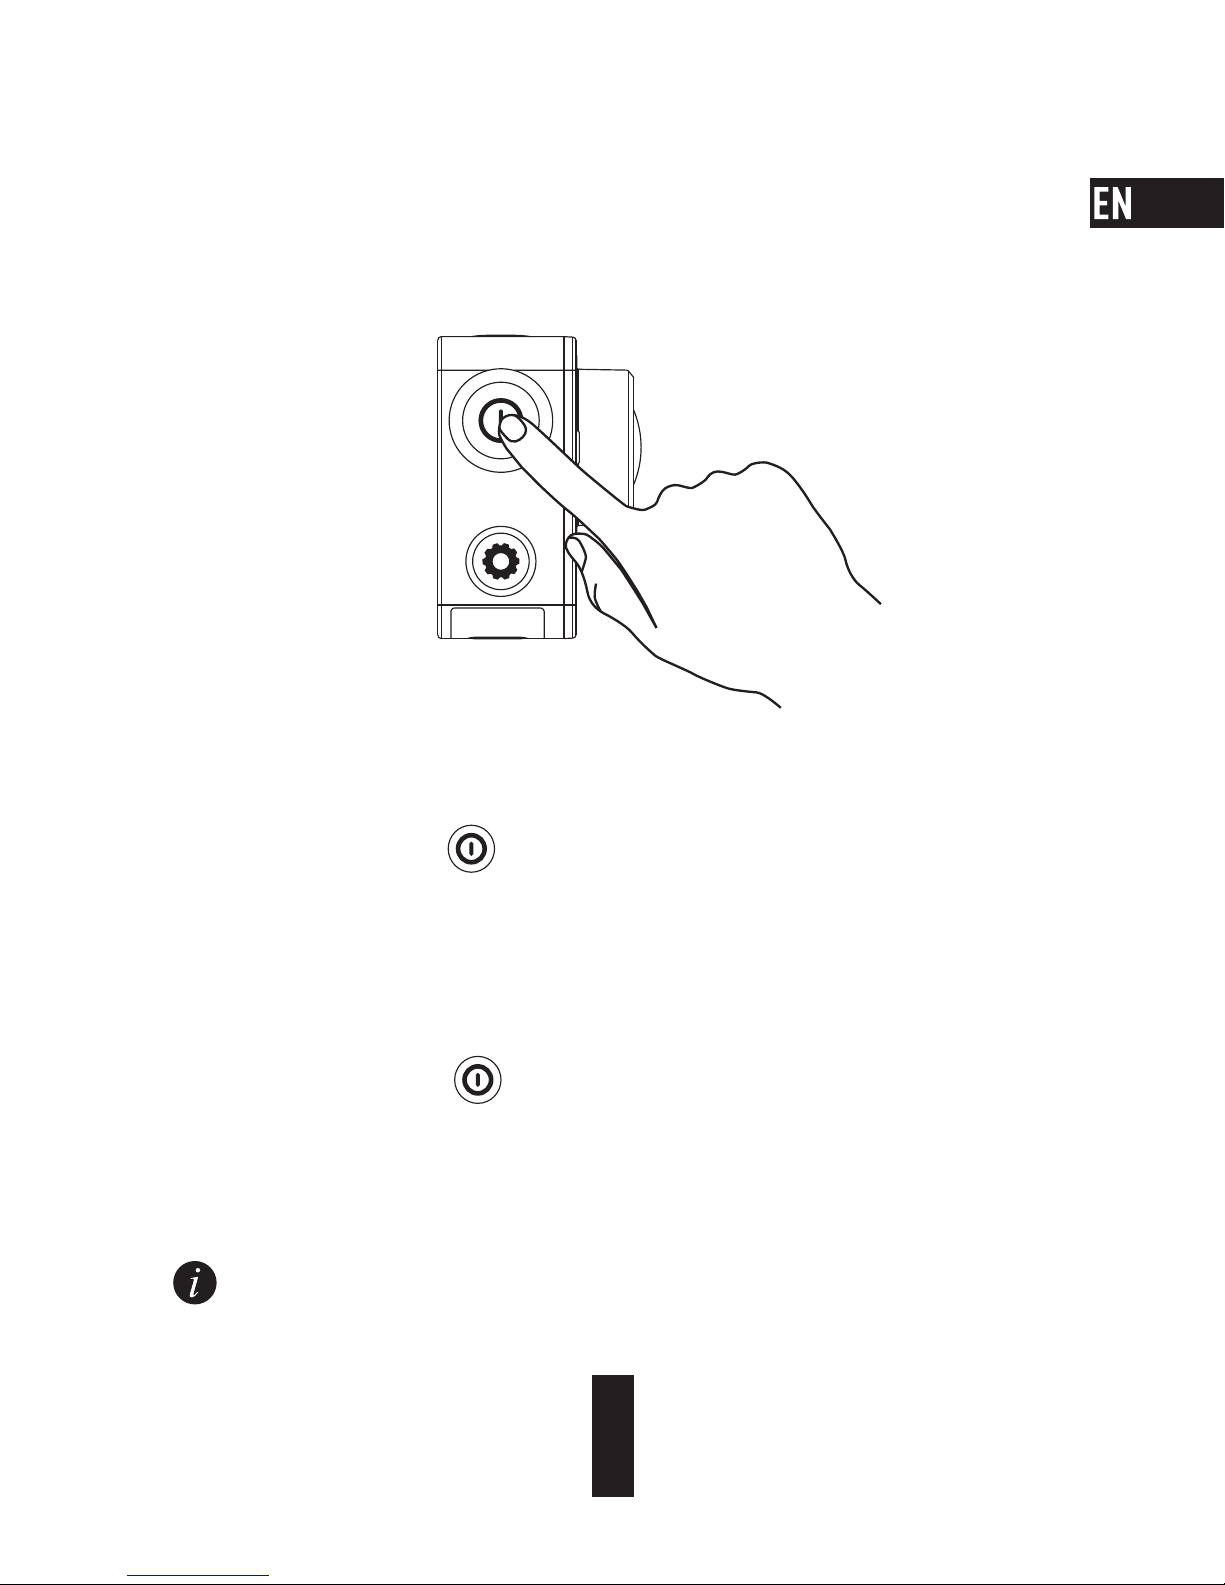
Power-on and Power-off
Power on
Hold down the power button and release until the buzzer alerting. The buzzer alerts quickly and
the Camera Status LED Indicator flickers in purple. When the indicator turns steady blue, the camera
is power-on and standby.
Power off
Hold down the power button and release until the buzzer alerting and the Camera Status LED
Indicator turning off, the camera is power-off.
You are not allowed to power off the camera when the camera is recording or capturing photos.
7
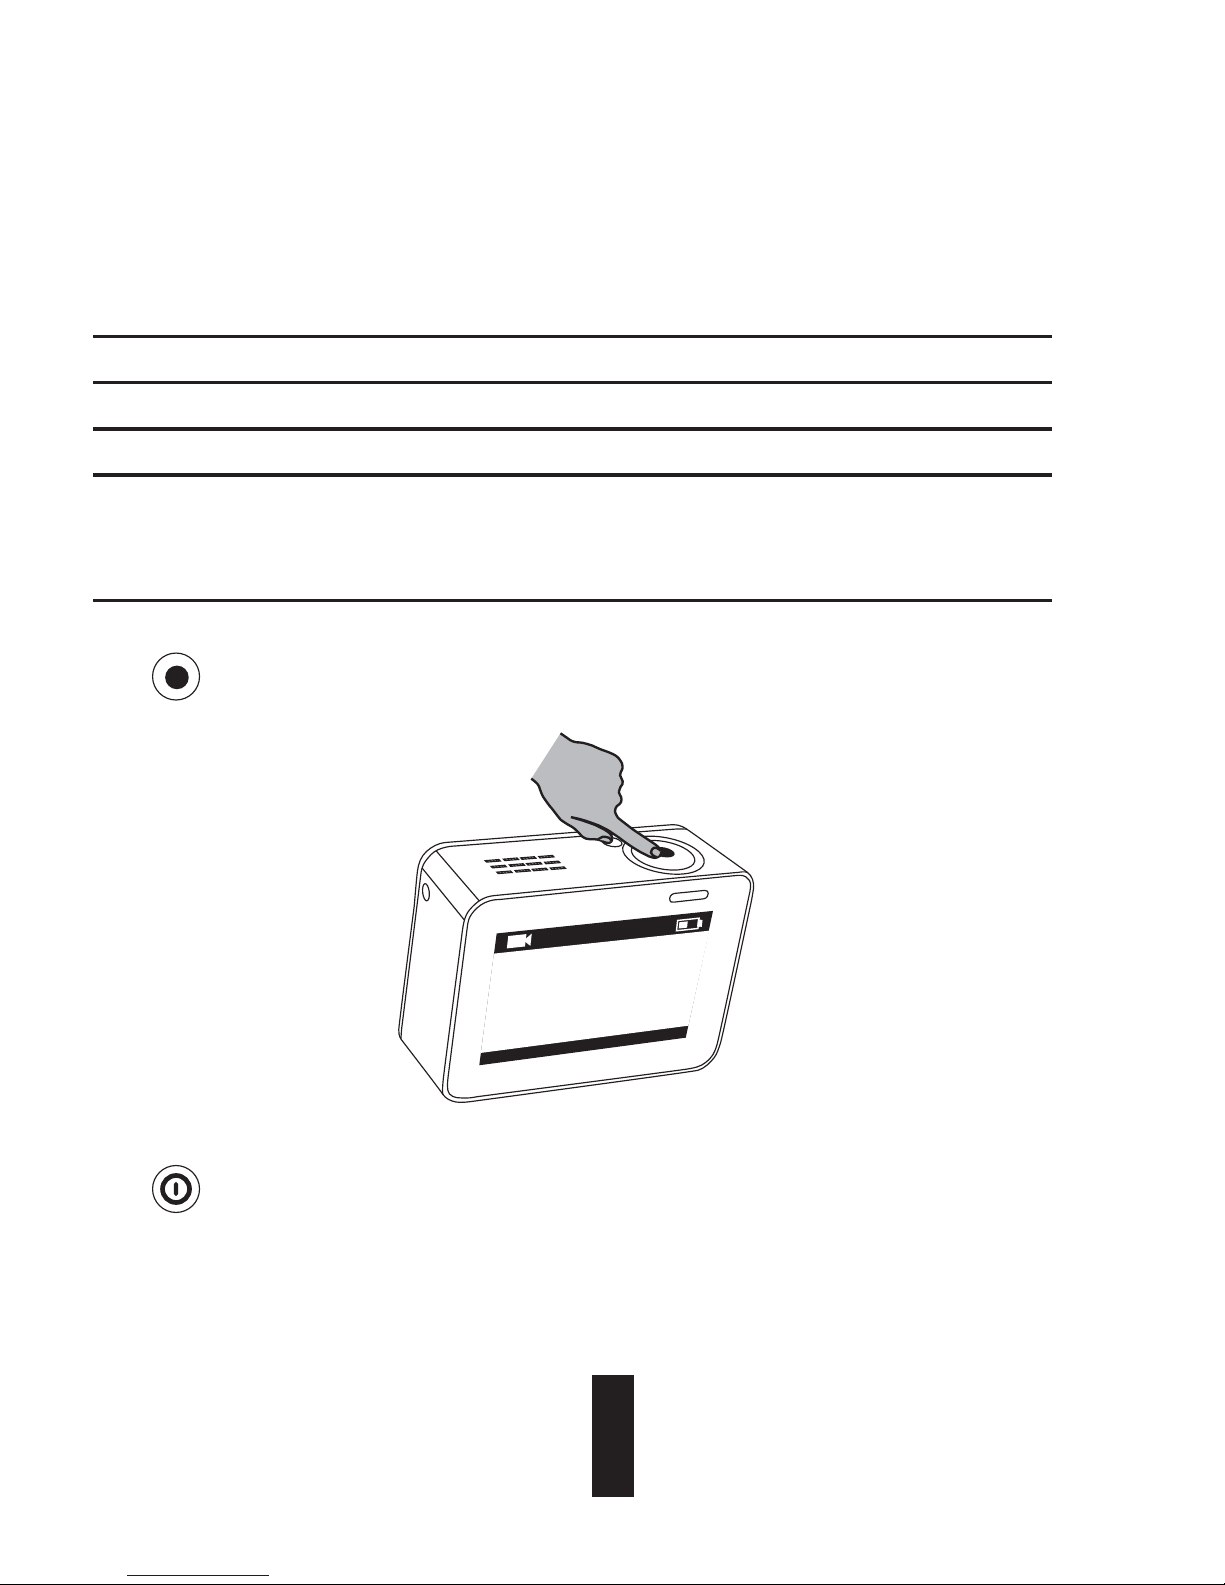
Record
The camera supports four recording modes.
Video Record video
Photo Capture a photo
Burst Capture multiple photos in a short time interval.
Time Lapse Photo/
Time Lapse Video
Continuously capture photos in a predefined interval;
Continuously capture photos in a predefined interval and make the photos
into a video.
Press to record.
0
0
:
0
0
:
0
0
|
0
2
:
0
0
:
0
0
4
K
/
30
/
W
i
d
e
Press to switch to the next recording mode or playback.
8

Set Parameters
Tap on the touch screen to show the current recording mode.
Slide
upward or press to set the advanced recording parameters.
Slide to left to enter the main menu. You can change recording mode or tap icon to enter
the camera setup menu.
00:00:00|02:00:00
4K/3 0/ Wide
9

Wireless Control
You can turn on the camera’s Wi-Fi to allow the remote control or EZVIZ SPORTS app to
connect with the camera.
Hold down
to turn on Wi-Fi.
You can set the wireless control mode in the setup menu.
• If you select App as the wireless control mode, you can search the “EZVIZ SPORTS” on App
Store or Google Play
TM
to download and install the app.
Turn on the Wi-Fi function of your mobile phone, find the Wi-Fi signal of camera and connect
with it.
Wi-Fi Name: EZVIZ_XXXX
Wi-Fi Password: 1234567890
• If you select Remote as the wireless control mode, refer to the Quick Start Guide of Remote
Control for details.
The default Wi-Fi name and password are for first-time log-in purposes only. You
must change this default password to better protect against security risks, such as
the unauthorized access by others to the product that may prevent the product from
functioning properly and/or lead to other undesirable consequences.
The Wi-Fi name and password will be reset to default after the camera is reset.
10
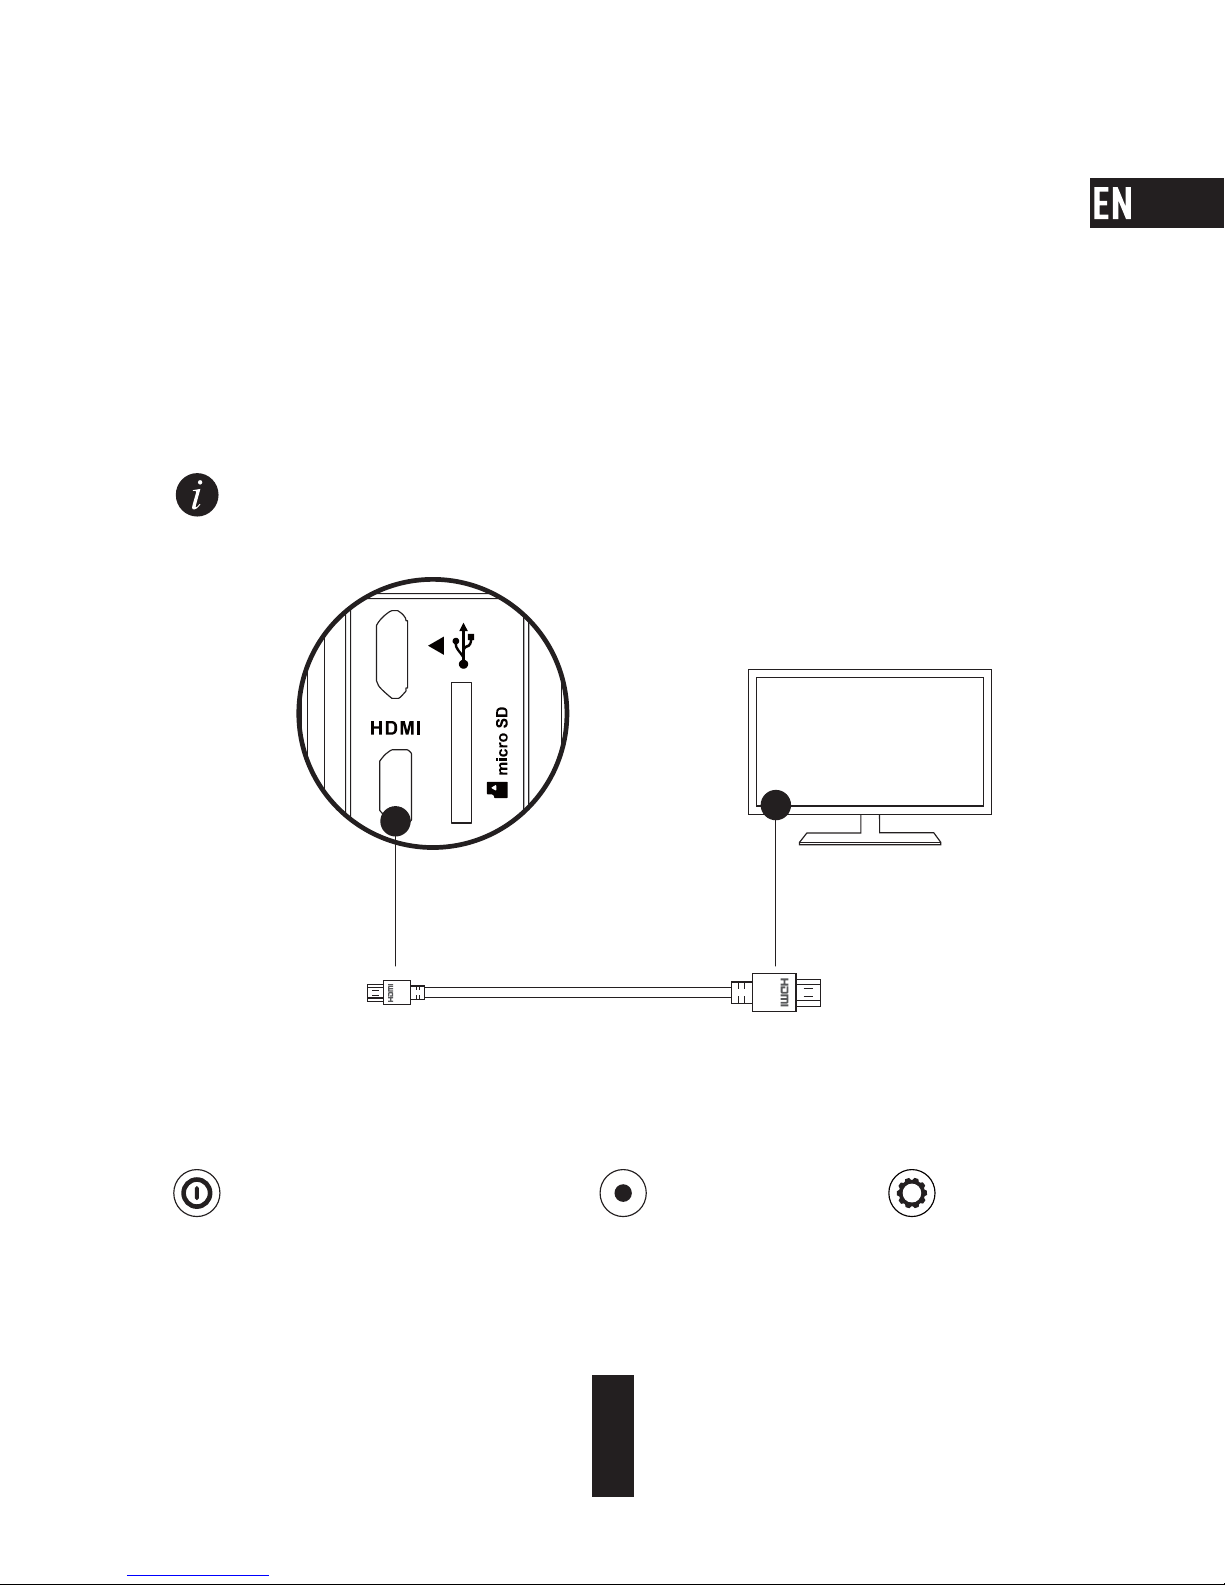
Connect with Display
You can connect the S1 and monitor with a HDMI cable to play back videos and photos, record, and get
live video.
Connect the camera to the display with a micro-HDMI cable, and power on the camera to show the live
view or playback on the display.
The HDMI cable is not included in the box. Please purchase separately.
Display
HDMI Cable
micro-HDMI Interface
The LCD screen will be invalid when the camera connects with a display. You can switch the recording
mode or enter menu with buttons.
Next Item/Next Mode Confirm Return
11
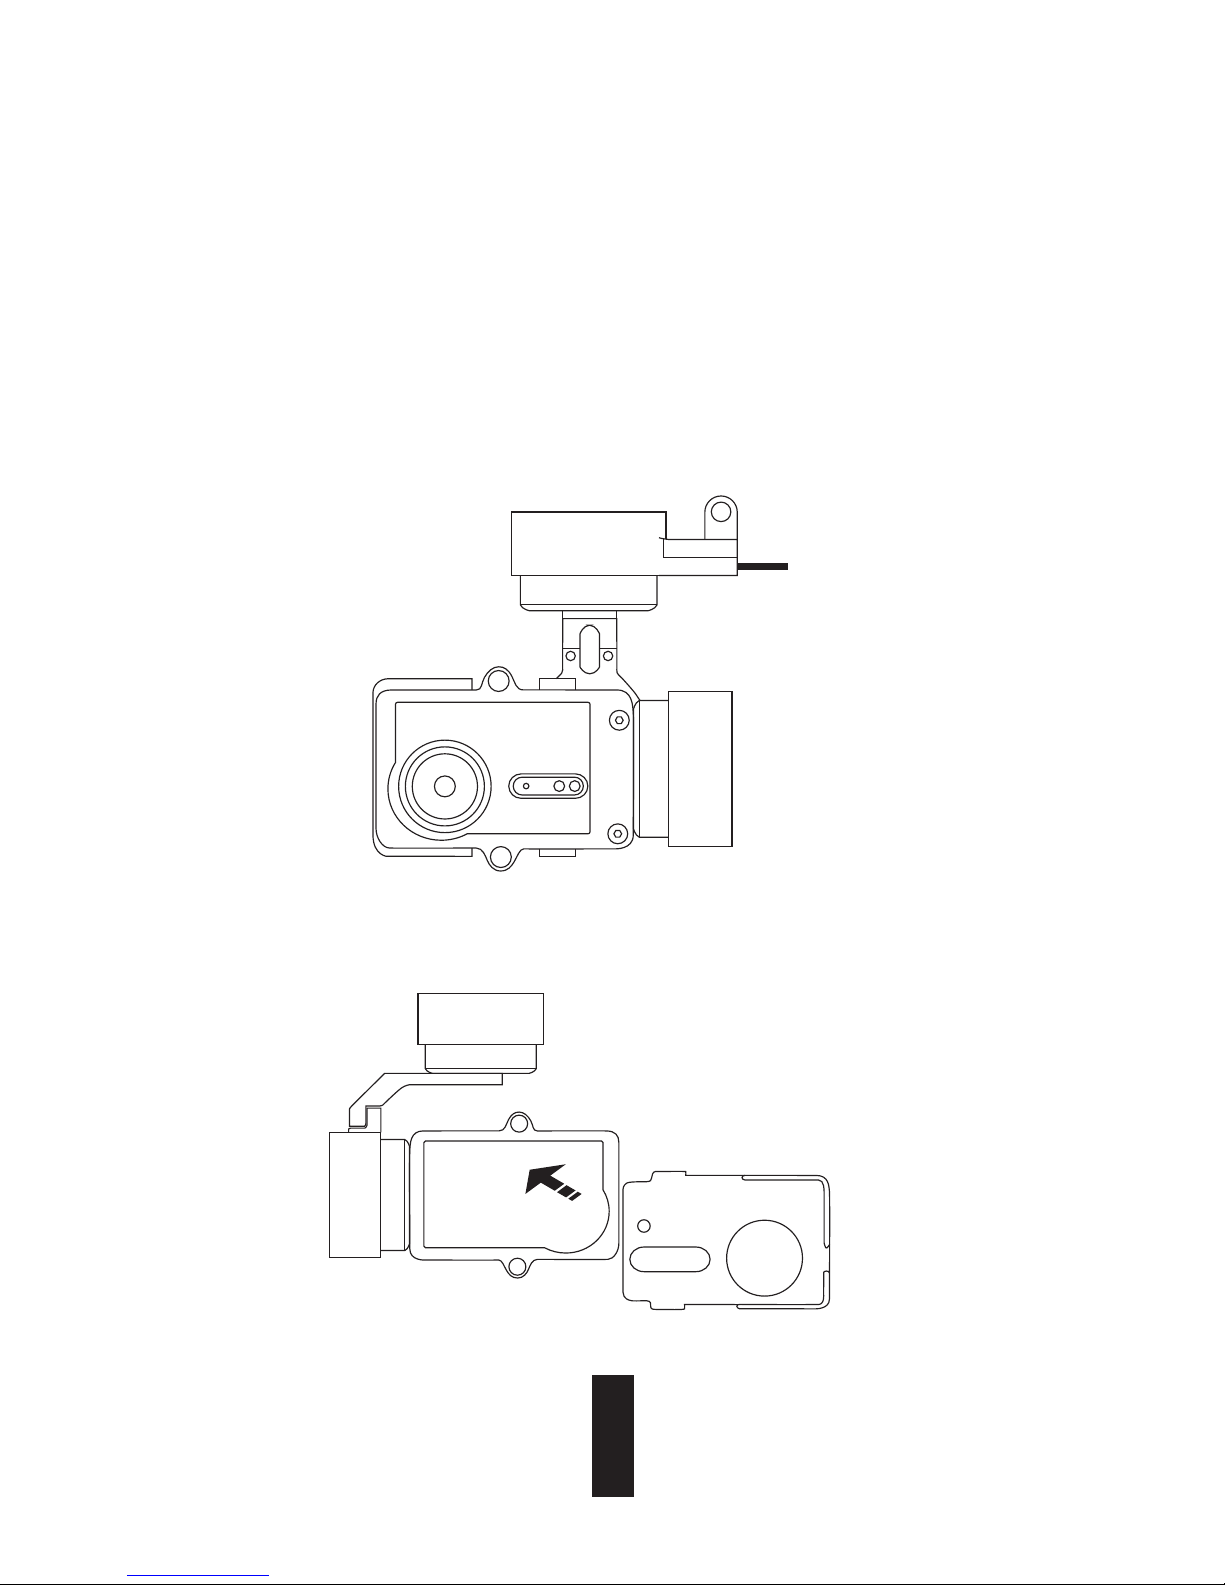
Appendix:
The frame adapter is included in the camera package. With the frame adapter, the camera can be used
with various kinds of accessories.
Applicatio 1 Installing on the Aerial Vehicle
The figure of installed camera on the aerial vehicle is shown below.
1. Place the fixing frame on the aerial vehicle.
Frame Adapter Usage
12

2. Align the camera lens with the hole on the fixing frame.
3. Properly place the fixing bracket according to the screw holes on the frame and then secure
the two screws.
13
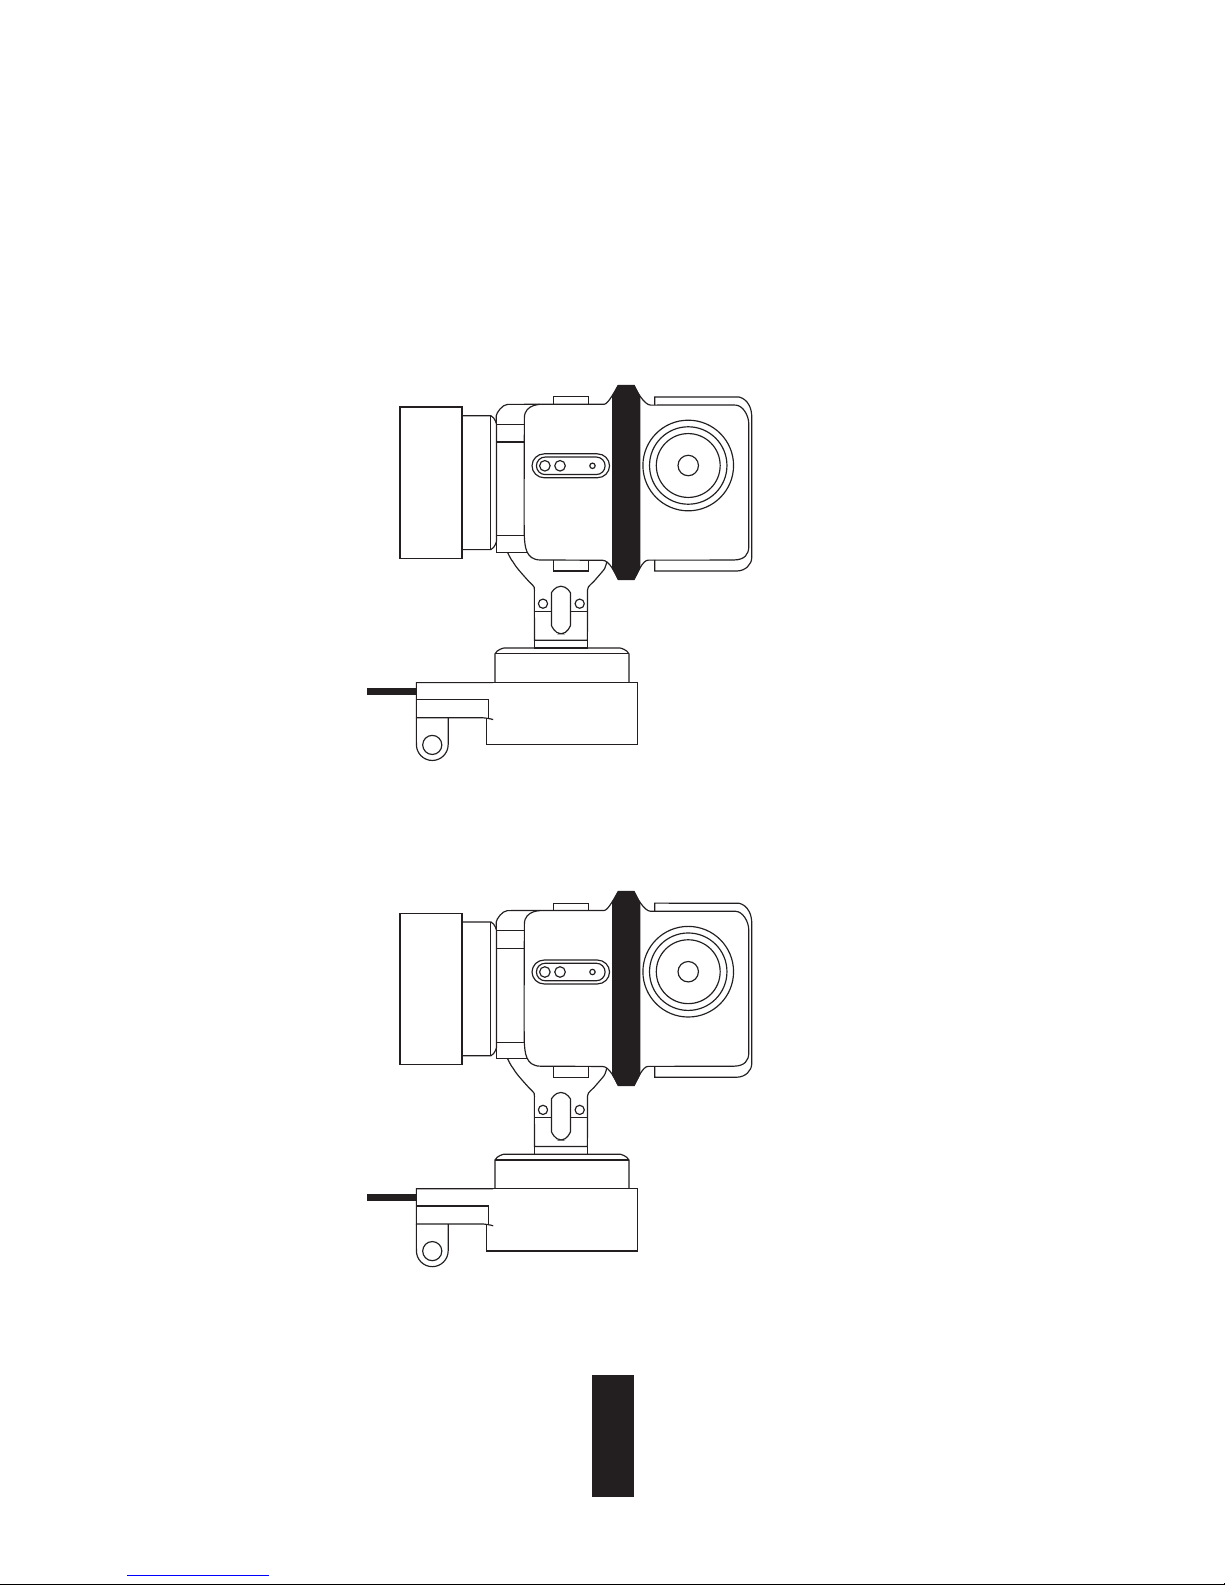
Applicatio 2 Installing on the Stabilizer
The figure of installed camera on the stabilizer is shown below.
1. Place the fixing frame on the stabilizer.
14
 Loading...