

Page 1

Quick Start Guide
RO
HU
PT
NO
SW
DK
FI
Page 2

Page 3
COPYRIGHT ©2018 Hangzhou Hikvision Digital Technology Co., Ltd. or its subsidiaries. ALL RIGHTS RESERVED.
About this Manual
The Manual includes instructions for using and managing the product. Pictures, charts, images and all other
information hereinafter are for description and explanation only. The information contained in the Manual is
subject to change, without notice, due to firmware updates or other reasons. Please find the latest version in
the
™ website (http://www.ezvizlife.com).
Any and all information, including, among others, wordings, pictures, graphs are the properties of Hangzhou
Hikvision Digital Technology Co., Ltd. or its subsidiaries (hereinafter referred to be “Hikvision”). This user
manual (hereinafter referred to be “the Manual”) cannot be reproduced, changed, translated, or distributed,
partially or wholly, by any means, without the prior written permission of Hikvision. Unless otherwise stipulated,
Hikvision does not make any warranties, guarantees or representations, express or implied, regarding to the
Manual.
Trademarks Acknowledgement
™, ™, and other Hikvision’s trademarks and logos are the properties of Hikvision in various
jurisdictions. Other trademarks and logos mentioned below are the properties of their respective owners.
Legal Disclaimer
TO THE MAXIMUM EXTENT PERMITTED BY APPLICABLE LAW, THE PRODUCT DESCRIBED, WITH ITS HARDWARE,
SOFTWARE AND FIRMWARE, IS PROVIDED “AS IS”, WITH ALL FAULTS AND ERRORS, AND HIKVISION MAKES
NO WARRANTIES, EXPRESS OR IMPLIED, INCLUDING WITHOUT LIMITATION, MERCHANTABILITY, SATISFACTORY
QUALITY, FITNESS FOR A PARTICULAR PURPOSE, AND NON-INFRINGEMENT OF THIRD PARTY. IN NO EVENT
WILL HIKVISION, ITS DIRECTORS, OFFICERS, EMPLOYEES, OR AGENTS BE LIABLE TO YOU FOR ANY SPECIAL,
CONSEQUENTIAL, INCIDENTAL, OR INDIRECT DAMAGES, INCLUDING, AMONG OTHERS, DAMAGES FOR LOSS OF
BUSINESS PROFITS, BUSINESS INTERRUPTION, OR LOSS OF DATA OR DOCUMENTATION, IN CONNECTION WITH
THE USE OF THIS PRODUCT, EVEN IF HIKVISION HAS BEEN ADVISED OF THE POSSIBILITY OF SUCH DAMAGES.
TO THE MAXIMUM EXTENT PERMITTED BY APPLICABLE LAW, IN NO EVENT SHALL HIKVISION’S TOTAL LIABILITY
FOR ALL DAMAGES EXCEED THE PURCHASE PRICE THE PRODUCT.
HIKVISION does not undertake any liability for personal injury or property damage, as the result of product
interruption or service termination cause by: a) improper installation or usage other than as requested; b)
the protection of national or public interests; c) Force Majeure; d) yourself or the third party, including not
limitation, using any third party’s products, software, applications, and among others.
REGARDING TO THE PRODUCT WITH INTERNET ACCESS, THE USE OF PRODUCT SHALL BE WHOLLY AT YOUR OWN
RISKS. HIKVISION SHALL NOT TAKE ANY RESPONSIBILITES FOR ABNORMAL OPERATION, PRIVACY LEAKAGE OR
OTHER DAMAGES RESULTING FROM CYBER ATTACK, HACKER ATTACK, VIRUS INSPECTION, OR OTHER INTERNET
SECURITY RISKS; HOWEVER, HIKVISION WILL PROVIDE TIMELY TECHNICAL SUPPORT IF REQUIRED.
The purpose of the Products is to provide an adequate warning in the event of illegal encroachment in certain
area; however, the proper installation of the Products will not eliminate, but only reduce, that accidents will not
occur or that there will be no personal injury or property loss as a result. You are highly recommended to raise
your vigilance and strengthen the safety awareness in the daily life.
SURVEILLANCE LAWS VARY BY JURISDICTION. PLEASE CHECK ALL RELEVANT LAWS IN YOUR JURISDICTION
BEFORE USING THIS PRODUCT IN ORDER TO ENSURE THAT YOUR USE CONFORMS TO THE APPLICABLE LAW. YOU
FUTHER AGREE THAT THIS PRODUCT IS ONLY FOR CIVIL USE, AND HIKVISION SHALL NOT BE LIABLE IN THE EVENT
THAT THIS PRODUCT IS USED WITH ILLEGITIMATE PURPOSES, SUCH AS THIRD PARTY RIGHTS INFRINGEMENT,
MEDICAL TREATMENT, SAFETY EQUIPMENT OR OTHER SITUATIONS WHERE THE PRODUCT FAILURE COULD
LEAD TO DEATH OR PERSONAL INJURY, OR WEAPON OF MASS DESTRUCTION, CHEMINCAL AND BIOLOGICAL
WEAPON, NUCLEAR EXPLOSION, AND ANY UNSAFE NUCLEAR ENERGY USES OR ANTI-HUMANITY USAGES. YOU
SHOULD UNDERTAKE ALL RESPONSIBILITIES FOR LOSSES OR DAMAGES RESULTING FROM THE ABOVE USAGES
WHATSOEVER.
IN THE EVENT OF ANY CONFLICTS BETWEEN THE ABOVE AND THE APPLICABLE LAW, THE LATER PREVAILS.
Regulatory Information
FCC Information
This device complies with Part 15 of the FCC Rules. Operation is subject to the following two conditions:
(1) This device may not cause harmful interference, and
(2) This device must accept any interference received, including interference that may cause undesired
operation.
Page 4

Note: This product has been tested and found to comply with the limits for a Class B digital device, pursuant
to Part 15 of the FCC Rules. These limits are designed to provide reasonable protection against harmful
interference in a residential installation. This product generates, uses, and can radiate radio frequency energy
and, if not installed and used in accordance with the instructions, may cause harmful interference to radio
communications. However, there is no guarantee that interference will not occur in a particular installation.
If this product does cause harmful interference to radio or television reception, which can be determined by
turning the equipment off and on, the user is encouraged to try to correct the interference by one or more of
the following measures:
—Reorient or relocate the receiving antenna.
—Increase the separation between the equipment and receiver.
—Connect the equipment into an outlet on a circuit different from that to which the receiver is connected.
—Consult the dealer or an experienced radio/TV technician for help.
Please take attention that changes or modification not expressly approved by the party responsible for
compliance could void the user’s authority to operate the equipment.
This equipment should be installed and operated with a minimum distance 20cm between the radiator and your
body.
This device complies with Industry Canada licence-exempt RSS standard(s). Operation is subject to the
following two conditions:
(1) this device may not cause interference, and
(2) this device must accept any interference, including interference that may cause undesired operation of the
device.
Under Industry Canada regulations, this radio transmitter may only operate using an antenna of a type
and maximum (or lesser) gain approved for the transmitter by Industry Canada. To reduce potential radio
interference to other users, the antenna type and its gain should be so chosen that the equivalent isotropically
radiated power (e.i.r.p.) is not more than that necessary for successful communication.
EU Conformity Statement
This product and - if applicable - the supplied accessories too are marked with "CE" and
comply therefore with the applicable harmonized European standards listed under the Radio
Equipment Directive 2014/53/EU, the EMC Directive 2014/30/EU, the RoHS Directive 2011/65/
EU.
2012/19/EU (WEEE directive): Products marked with this symbol cannot be disposed of as
unsorted municipal waste in the European Union. For proper recycling, return this product
to your local supplier upon the purchase of equivalent new equipment, or dispose of it at
designated collection points. For more information see: www.recyclethis.info.
2006/66/EC and its amendment 2013/56/EU (battery directive): This product contains a
battery that cannot be disposed of as unsorted municipal waste in the European Union. See
the product documentation for specific battery information. The battery is marked with this
symbol, which may include lettering to indicate cadmium (Cd), lead (Pb), or mercury (Hg).
For proper recycling, return the battery to your supplier or to a designated collection point.
For more information see: www.recyclethis.info.
Гарантийный срок-1 год
Срок службы-3 года
Производитель:Ханджоу Хиквижн Диджитал Технолоджи(Китай)
Импортер-поставщик в России: ЗАО ''Хиквижн''
Импортер-поставщик в Республике Беларусь:ООО ''Торговый Дом
''АВАНТ-ТЕХНО''
Сайт:www.ezviz.ru
EC DECLARATION OF CONFORMITY
Hereby, Hangzhou Hikvision Digital Technology Co., Ltd. declares that the radio equipment type [CS-C2C-31WFR,
CS-C2C-UVWXYZ, CS-CV200, CS-CV300, CS-CV106, CS-CV206, CS-CV306] is in compliance with Directive
2014/53/EU.The full text of the EC DECLARATION OF CONFORMITY is available at the following web link:
http://www.ezvizlife.com/declaration-of-conformity.
Due to the product shape and dimension, the name and address of the importer/manufacturer are
printed on the package.
SAVE THIS MANUAL FOR FUTURE REFERENCE
Page 5

Setup
Step 1 Power-on
Plug the power cable into the camera and to the power adapter and then into a power
outlet, as shown in the figure below.
Power Cable
Power Outlet
Step 2 Camera Setup
1. Create an user account
- Connect your mobile phone to Wi-Fi.
- Download and install the EZVIZ app by searching “EZVIZ” in App Store and Google
PlayTM.
- Launch the app and register for an EZVIZ user account following the start-up
wizard.
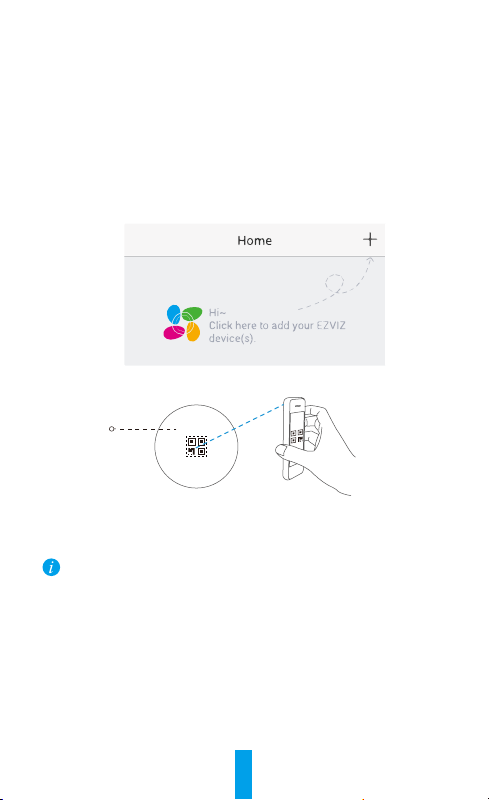
2. Add a camera to EZVIZ
- Log in the EZVIZ app.
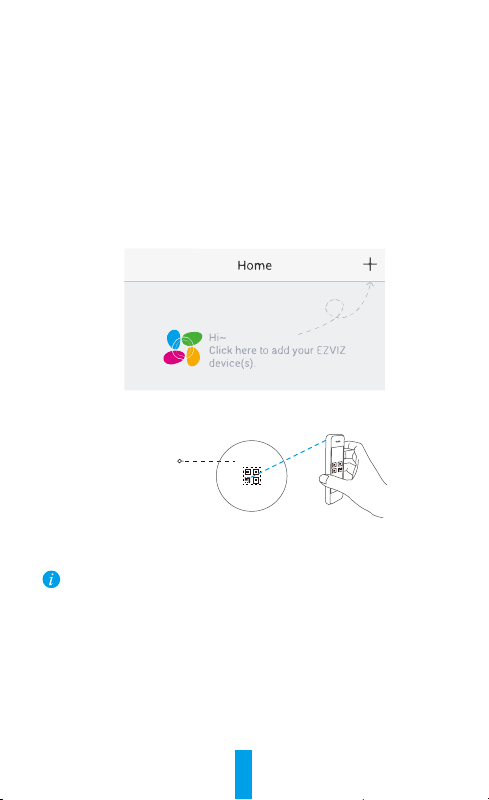
- From the EZVIZ app Home screen, tap “+” on the upper-right hand corner to go to
the scan QR code interface.
- Scan the QR Code on the bottom of the camera.
Bottom of the Camera
- Follow the EZVIZ app wizard to finish Wi-Fi configuration.
If your product is 2.4GHz only, we kindly recommend you switch off router’s 5GHz
first to proceed adding process.
1
Page 6
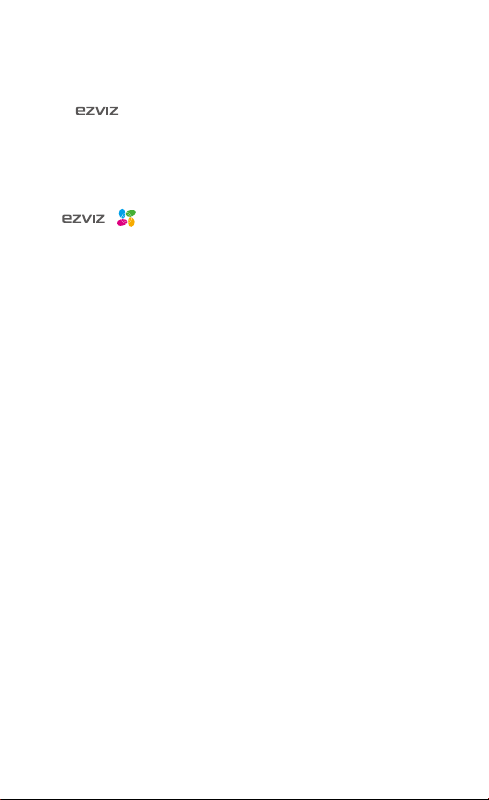
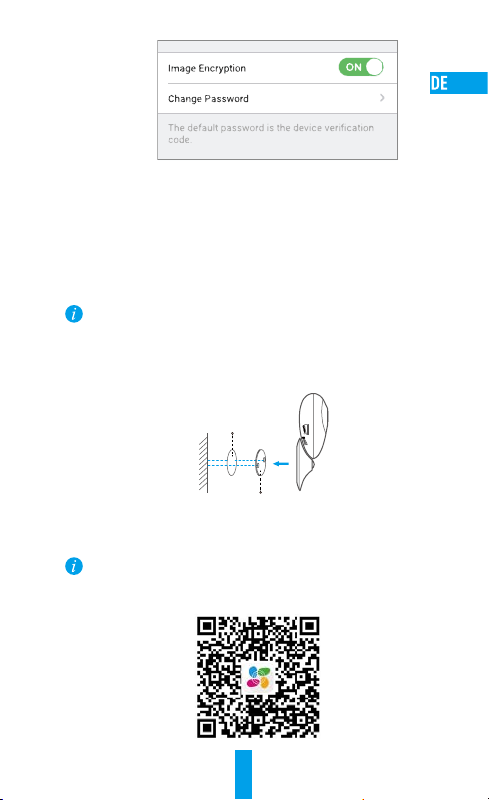
3. Changing the default password (Optional)
After adding the camera, you are required to change the device password to ensure
your video security. The password is used for the Image Encryption. If you turn on
the Image Encryption, you are required to input your password when you live view or
play back the camera.
- Go to the camera settings screen to change the default password.
- Tap on “Change Password”.
- Tap on “Edit”.
- Enter the original verification code located on the bottom of the camera.
- Enter the new password. Please use letters and numbers between 6 to 12
characters.
Installation
Step 1 Installing the Metal Plate (Optional)
Pick a clean and flat surface and secure the metal plate to the desired position with the foam
stickers or screws (not included).
There’s a magnet piece inside the camera. You can skip this step if the surface is made
of metal.
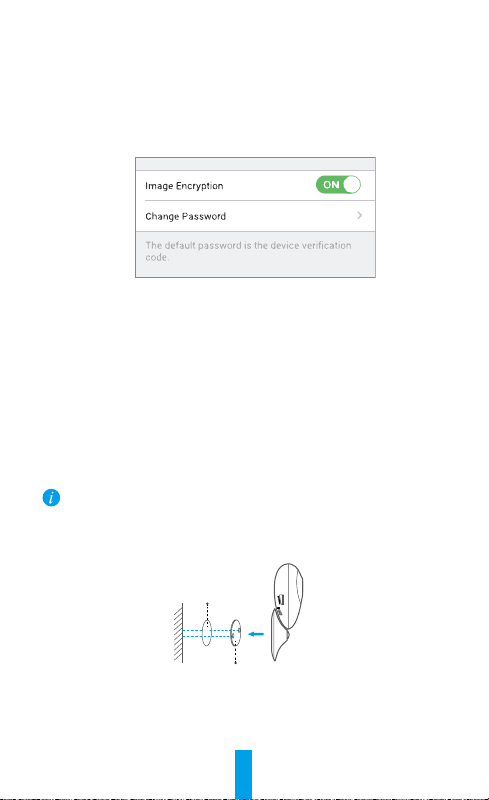
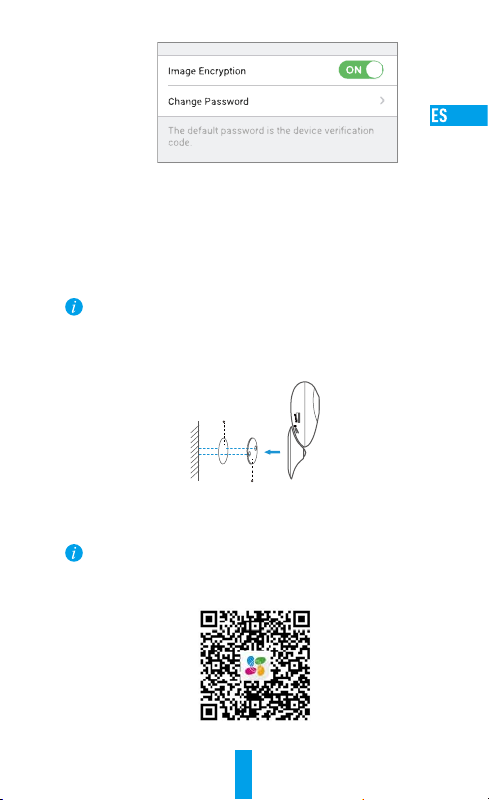
Step 2 Installing the Camera
Secure the camera magnetically to the metal plate or metal surface (see figure below).
Foam Sticker
Step 3 Completing Installation
Adjust the camera angle as required.
Metal Plate
2
Page 7
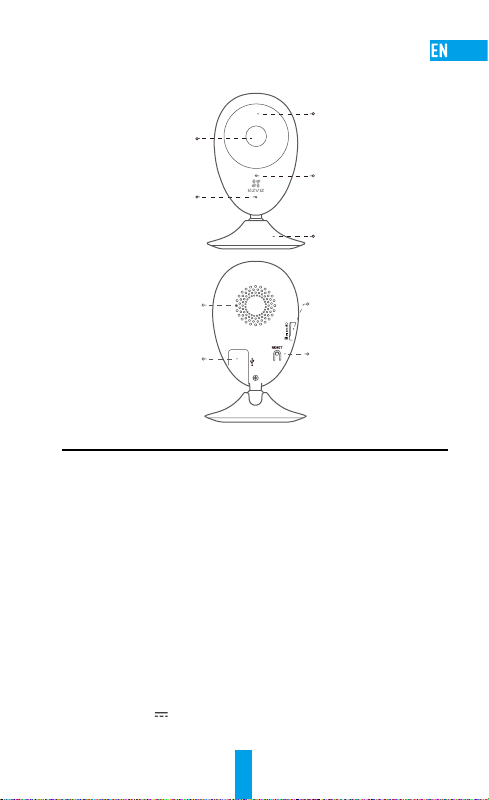
Appendix
Basics
IR Light
Lens
Microphone
Speaker
Power Input
LED Indicator
Magnetic Base
microSD Card Slot
RESET
Name Description
IR Light Auto light source for dark environment. The camera video has two
LED Indicator • Solid Red: Camera is starting up.
microSD Card
Slot
RESET Hold down the RESET button for 5 seconds while the camera is running,
Power Input
Speaker Two-way talk.
modes: color (for daylight recording) and black and white with IR
illuminator (for night condition).
• Slowly Flashing Red: Wi-Fi connection has failed.
• Fastly Flashing Red: Device exception (e.g. MicroSD card error).
• Solid Blue: Video is being viewed or played back in EZVIZ App.
• Flastly Flashing Blue: Camera is ready for the Wi-Fi connection.
• Slowly Flashing Blue: Camera is running properly.
For microSD card (not included with this product). You can purchase
separately. Recommended compatibility: Class 10, maximum space
128GB. After inserting the card, you can record the event inside the
camera.
the camera restarts and all parameters are reset to default.
5V±10%
3
Page 8
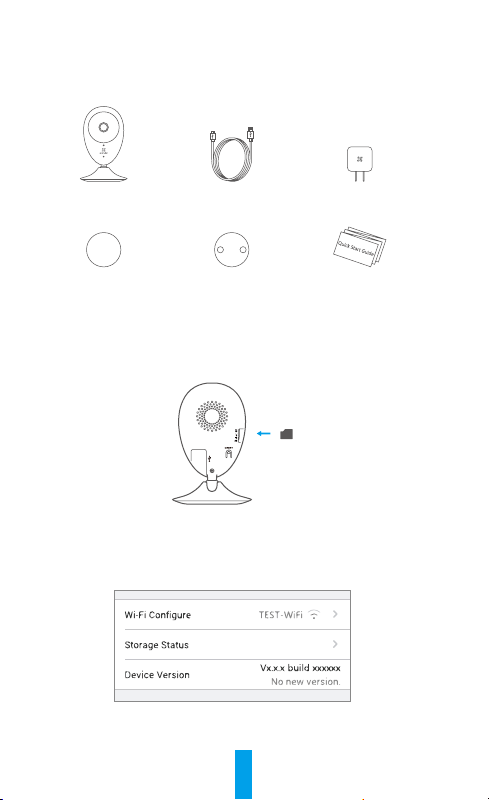
Box Content
Internet Camera (x1) USB Cable (x1) Power Adapter (x1)
Foam Sticker X2
Metal Plate X1
(3.5mm Hole Diameter
)
Quick Start Guide X1
Installing Memory Card
Insert a microSD card into the slot until a click.
Initializing Memory Card
1. In the EZVIZ app, check the memory card status by tapping on the Storage Status in the
Device Settings interface.
2. If the memory card status displays as Uninitialized, tap to initialize it. The status will then
change to Normal. You can then start recording any event triggered video in the camera such
as motion detection.
4
Page 9
Troubleshooting
“The device is offline.” or “The device is not registered.” prompts appear when adding
Q:
the camera using the EZVIZ App.
1. Make sure the network, which the camera is connected to, is working properly and
A:
the router’s DHCP is enabled.
2. Hold down the RESET button for 5s to reset the settings if you change the network
parameters.
The mobile phone cannot receive alarm prompts when the camera is online.
Q:
1. Make sure the EZVIZ app is running on your mobile phone.
A:
2. For Android OS mobile phone, make sure the app is running in the background;
and for iOS mobile phones, enable the message push function in “Settings >
Notification”.
Does the camera support power via USB devices or a portable battery.
Q:
It’s advised to use the EZVIZ standard power adapter to provide a stable voltage supply.
A:
For detailed information, please visit www.ezvizlife.com.
Scan the QR code to view more.
5
Page 10
Kamera einrichten
1. Ein Benutzerkonto erstellen
- Smartphone mit dem Wi-Fi-Netz verbinden.
- Laden Sie die EZVIZ App herunter, indem Sie im App Store und in Google PlayTM
nach “EZVIZ” suchen, und installieren Sie sie.
- Starten Sie die App und registrieren Sie sich für ein EZVIZ-Benutzerkonto gemäß
den Anweisungen im Start-Assistenten.
2. Eine Kamera zu EZVIZ hinzufügen
- Melden Sie sich an der EZVIZ App an.
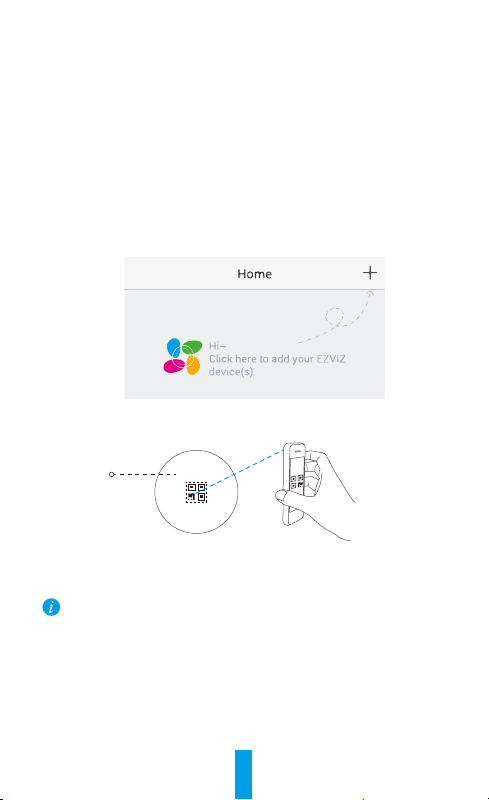
- Tippen Sie auf dem Home-Bildschirm der EZVIZ App oben rechts auf „+“, um die
Oberfläche zum Scannen des QR-Codes aufzurufen.
- Scannen Sie den QR-Code auf der Unterseite der Kamera.
Unterseite der Kamera
- Folgen Sie dem EZVIZ-App-Assistenten, um die WLAN-Konfiguration
abzuschließen.
Falls Ihr Produkt nur 2,4 GHz ist, empfehlen wir, zunächst die 5 GHz des
Routers auszuschalten, um mit dem Hinzufügen fortzufahren.
3. Das Standardpasswort ändern (optional)
Nachdem Sie die Kamera hinzugefügt haben, müssen Sie das Gerätepasswort
ändern, um Ihre Videosicherheit zu gewährleisten. Das Passwort dient zur
Bildverschlüsselung. Wenn Sie die Bildverschlüsselung aktivieren, müssen Sie Ihr
Passwort eingeben, um die Liveanzeige oder Videos von der Kamera wiederzugeben.
- Rufen Sie den Bildschirm mit den Kameraeinstellungen auf, um das Standardpasswort
zu ändern.
- Tippen Sie auf „Change Password“ (Passwort ändern).
6
Page 11
- Tippen Sie auf „Edit“ (Bearbeiten).
- Geben Sie den originalen Prüfcode ein, der sich an der Unterseite der Kamera befindet.
- Geben Sie das neue Passwort ein. Verwenden Sie hierfür 6 bis 12 Buchstaben und Ziffern.
Installation
Schritt 1 Montage der Metallplatte (optional)
Wählen Sie eine saubere und ebene Oberfläche und befestigen Sie die Metallplatte mit
Klebepads oder Schrauben (nicht im Lieferumfang) an der gewünschten Position.
In der Kamera befindet sich ein Magnet. Sie können diesen Schritt überspringen, wenn
die Oberfläche aus Metall besteht.
Schritt 2 Installation der Kamera
Befestigen Sie die Kamera magnetisch an der Metallplatte oder an einer Metalloberfläche (siehe
Abbildung unten).
Klebepads
Metallplatte
Schritt 3 Abschluss der Installation
Passen Sie die Ausrichtung der Kamera nach Wunsch an.
Nähere Informationen finden Sie auf www.ezvizlife.com.
Scannen Sie den QR-Code, um mehr zu erfahren.
7
Page 12
Configuración de la cámara
1. Cree una cuenta de usuario
- Conecte el teléfono móvil a la red Wi-Fi.
- Descargue e instala la app EZVIZ buscando “EZVIZ” en el App Store y Google PlayTM.
- Abra la app y registre una cuenta de usuario de EZVIZ siguiendo las instrucciones
del asistente de instalación.
2. Agregue una cámara a EZVIZ
- Inicie sesión en la app EZVIZ.
- Desde la pantalla de inicio de la app EZVIZ, toque el símbolo “+” situado en la
esquina superior derecha para entrar en la interfaz de escaneo del código QR.
- Escanee el código QR que figura en la parte inferior de la cámara.
Parte inferior de
la cámara
- Siga las indicaciones del asistente de la aplicación EZVIZ para terminar la
configuración Wi-Fi.
Si su producto es solo de 2,4 GHz, le recomendamos que primero desactive
la banda de 5 GHz del enrutador para seguir con el proceso de conexión.
3. Cambio de la contraseña predefinida (Opcional)
Una vez agregada la cámara, deberá cambiar la contraseña del dispositivo para
garantizar la seguridad de su vídeo. La contraseña se utiliza para codificar la
imagen. Si activa la Codificación de imagen, deberá escribir la contraseña cuando
vea la cámara en directo o la reproduzca.
- Vaya a los ajustes de la cámara para cambiar la contraseña predefinida.
- Toque “Change Password” (Cambiar contraseña).
8
Page 13
- Toque “Edit” (Editar).
- Introduzca el código de verificación original situado en la parte inferior de la
cámara.
- Introduzca la contraseña nueva. Utilice letras y números entre 6 y 12 caracteres.
Instalación
Paso 1 Instalación de la placa de metal (Opcional)
Seleccione una superficie lisa y limpia y coloque la placa de metal en la posición deseada con
los adhesivos de espuma o tornillos (no incluidos).
En el interior de la cámara hay un imán. Si la superficie está hecha de metal, puede
omitir este paso.
Paso 2 Instalación de la cámara
Monte la cámara en la placa de metal o superficie metálica con el imán (consulte la siguiente
figura).
Adhesivo de espuma
Placa metálica
Paso 3 Fin de la instalación
Ajuste el ángulo de la cámara según sea necesario.
Para obtener información detallada, visite www.ezvizlife.com.
Escanee el código QR para ver más.
9
Page 14

Configuration de la caméra
1. Créez un compte utilisateur
- Raccordez votre téléphone portable au réseau Wi-Fi.
- Téléchargez et installez l’application EZVIZ en recherchant «EZVIZ» dans l’App
Store ou Google Play
- Lancez l’application et créez un compte utilisateur EZVIZ en suivant l’assistant de
démarrage.
2. Ajouter une caméra à EZVIZ
- Connectez-vous dans l’application EZVIZ.
- Depuis l’écran d’accueil de l’application EZVIZ, appuyez sur «+» dans le coin
supérieur droit pour accéder à l’interface de lecture du code QR.
- Scannez le code QR situé sur le fond de la caméra.
Fond de la
caméra
- Suivez l'assistant de l'application EZVIZ pour terminer la configuration Wi-Fi.
Si votre produit fonctionne en bande de fréquence de 2,4GHz, nous vous
recommandons de bien vouloir désactiver en premier la bande de fréquence de
5GHz pour procéder à l’ajout.
3. Modifier le mot de passe par défaut (facultatif)
Après avoir ajouté la caméra, vous devrez modifier le mot de passe de l’appareil pour
garantir la sécurité de votre vidéo. Le mot de passe est utilisé pour le cryptage des
images. Si le cryptage des images est activé, vous devrez saisir votre mot de passe
au moment de l’affichage de la vue en direct ou pour lire les vidéos de la caméra.
- Accédez à l’écran des réglages de la caméra pour modifier le mot de passe par défaut.
- Appuyez sur «Change Password» (Modifier le mot de passe).
TM
.
10
Page 15
- Appuyez sur «Edit» (Modifier).
- Saisissez le code de vérification d’origine situé sur le fond de la caméra.
- Saisir le nouveau mot de passe. Veuillez utiliser des lettres et des chiffres pour
le mot passe d’une longueur de 6 à 12caractères.
Installation
Étape 1 Installation de la plaque métallique (facultatif)
Choisissez une surface plane et propre, puis fixez la plaque métallique à la position souhaitée à
l’aide des autocollants expansés ou des vis (non fournis).
La caméra dispose d’un élément magnétique interne. Ignorez cette étape si la surface
est métallique.
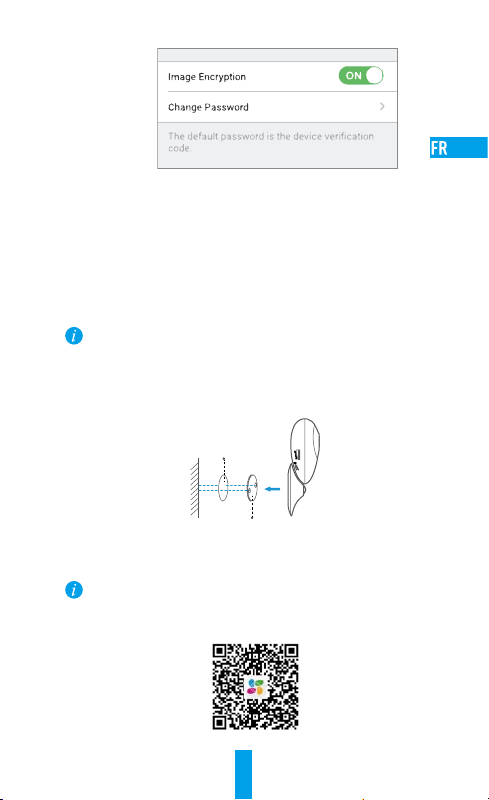
Étape 2 Installation de la caméra
Fixez à l’aide de sa partie magnétique la caméra sur la plaque ou la surface métallique (voir la
figure ci-dessous).
autocollants expansés
plaque métallique
Étape 3 Fin de l’installation
Ajustez l’angle de la caméra le cas échéant.
Pour des informations détaillées, veuillez visiter www.ezvizlife.com.
Scannez le code QR pour en savoir plus.
11
Page 16
Configurazione della videocamera
1. Creare un account utente
- Collegare il telefono cellulare alla Wi-Fi.
- Scaricare e installare l'app EZVIZ cercando "EZVIZ" in App Store o Google PlayTM.
- Avviare l'app e registrare un account utente di EZVIZ seguendo le istruzioni della
procedura guidata all'avvio.
2. Aggiungere una videocamera a EZVIZ
- Effettuare l'accesso nell'app EZVIZ.
- Dalla schermata iniziale dell'app EZVIZ, toccare "+" nell'angolo superiore destro
per passare all'interfaccia di acquisizione del codice a matrice.
- Acquisire il codice a matrice riportato sotto la videocamera.
Parte inferiore
della videocamera
- Seguire le istruzioni della procedura guidata dell’app EZVIZ per terminare la
configurazione della rete Wi-Fi.
Se il prodotto acquistato supporta solo la banda dei 2.4GHz, si consiglia di
disattivare la banda dei 5GHz sul router, prima di iniziare la procedura di
connessione.
3. Cambiare la password predefinita (opzionale)
Dopo aver aggiunto la videocamera, viene richiesto di cambiare la password del
dispositivo per garantire la sicurezza dei video. La password è utilizzata per la
crittografia delle immagini. Se si attiva la funzione Image Encryption (Crittografia
immagini), viene richiesta l'immissione della password durante il live view e la
riproduzione dei video della videocamera.
- Passare alla schermata delle impostazioni della videocamera per cambiare la
password predefinita.
- Toccare "Change Password" (Cambia password).
12
Page 17

- Toccare "Edit" (Modifica).
- Inserire il codice di verifica originale riportato sotto la videocamera.
- Inserire la nuova password. La password può contenere da 6 a 12 caratteri, ed è
consigliabile utilizzare sia lettere che numeri.
Installazione
Passo 1 Installazione della piastra metallica (opzionale)
Scegliere un punto d'installazione in cui la superficie sia liscia e libera da ostacoli, quindi
fissare la piastra metallica nel punto desiderato utilizzando l'adesivo gommato o delle viti (non
fornite a corredo).
All'interno della videocamera è presente una calamita. Se la superficie è metallica,
questo passaggio può essere ignorato.
Passo 2 Installazione della videocamera
Agganciare della videocamera alla piastra metallica o altra superficie di metallo tramite il
supporto magnetico (figura sotto).
Adesivo gommato
Piastra metallica
Passo 3 Completamento dell'installazione
Regolare l'angolazione della videocamera secondo necessità.
Per informazioni dettagliate, visitare www.ezvizlife.com.
Scansionare il codice QR per vedere più dettagli.
13
Page 18

Instellen camera
1. Een gebruikersaccount aanmaken
- Verbind uw mobiele telefoon met de wifi.
- Download en installeer de EZVIZ-app door te zoeken naar “EZVIZ” in de App Store
- Start de app en registreer een EZVIZ-gebruikersaccount via de opstartwizard.
2. Een camera toevoegen aan EZVIZ
- Meld u aan op de EZVIZ-app.
- Tik vanuit het startscherm van de EZVIZ-app op “+” in de rechterbovenhoek om
- Scan de QR-code aan de onderkant van de camera.
Onderkant van
de camera
- Volg de wizard van de EZVIZ-app om wifi-configuratie te voltooien.
Als uw product alleen gebruik maakt van 2,4 GHz, raden we u aan eerst de 5 GHz
van de router uit te zetten voordat u verdergaat met het verbindingsproces.
3. Het standaard wachtwoord wijzigen (optioneel)
Nadat u de camera hebt toegevoegd, moet u het wachtwoord van het apparaat
wijzigen om uw videosoftware te waarborgen. Het wachtwoord wordt gebruikt voor
de beeldcodering. Als u de beeldcodering inschakelt, dient u uw wachtwoord in te
voeren wanneer u live kijkt of de camera afspeelt.
- Ga naar het scherm Camera-instellingen om het standaard wachtwoord te wijzigen.
- Tik op “Change Password (Wachtwoord wijzigen)”.
TM
of Google Play
naar de interface QR-code te gaan.
.
14
Page 19
- Tik op “Edit (Bewerken)”.
- Voer de originele verificatiecode in die u kunt vinden aan de onderkant van de camera.
- Voer het nieuwe wachtwoord in. Gebruik letters en nummers tussen 6 en 12
karakters.
Installatie
Stap 1 Installatie van de metalen plaat (optioneel)
Kies een schone en vlakke ondergrond en bevestig de metalen plaat op de gewenste positie
met de schuimstickers of schroeven (niet meegeleverd).
Er zit een magnetisch onderdeel in de camera. U kunt deze stap overslaan als het
oppervlak van metaal is gemaakt.
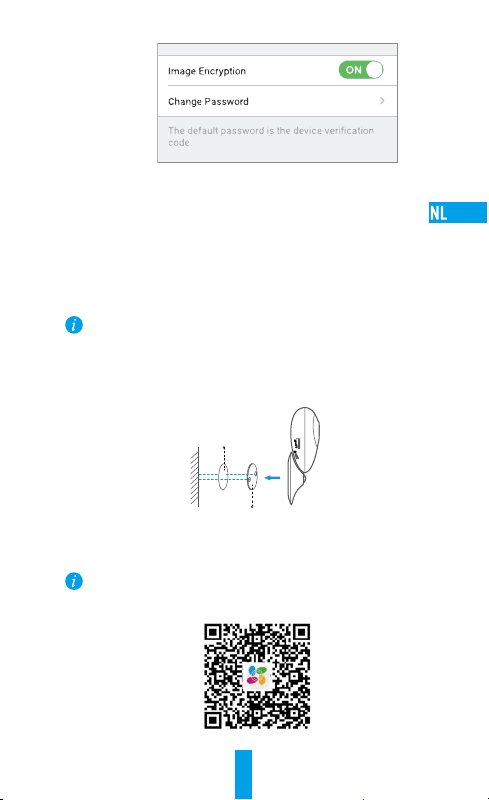
Stap 2 Het installeren van de camera
Plaats de camera magnetisch op de metalen plaat of het metalen oppervlak (zie onderstaande
afbeelding).
Schuimsticker
Metalen plaat
Stap 3 Installatie voltooien
Pas de camerahoek indien nodig aan.
Bezoek voor meer informatie www.ezvizlife.com.
Scan de QR-code om meer te zien.
15
Page 20

Konguracja kamery
1. Utwórz konto użytkownika
- Połącz telefon komórkowy zsiecią Wi-Fi.
- W sklepie App Store lub Google Play
zainstaluj aplikację EZVIZ.
- Uruchom aplikację i zarejestruj swoje konto użytkownika EZVIZ przyuż yciu kreatora
startowego.
2. Dodaj kamerę do aplikacji EZVIZ
- Zaloguj się w aplikacji EZVIZ.
- Na ekranie głównym aplikacji EZVIZ naciśnij przycisk „+” znajdujący się w prawym
górnym rogu, aby przejść do interfejsu skanowania kodów QR.
- Zeskanuj kod QR znajdujący się na spodzie kamery.
Spód kamery
- Postępuj zgodnie zinstrukcjami aystenta aplikacji EZVIZ w celuzakończenia
konguracji Wi-Fi.
Jeżeli Twoje urządzenie korzysta zczęstotliwości 2,4GHz, zdecydowanie
zalecamy wyłączenie obsługi częstotliwości 5GHz wrouterze przed kontynuacją
procesu dodawania urządzenia.
3. Zmiana hasła domyślnego (opcjonalnie)
Po dodaniu kamery należy zmienić hasło urządzenia, aby zapewnić bezpieczeństwo
podczas lmowania. Hasło jest wykorzystywane do szyfrowania obrazu. Jeśli włączono
opcję Image Encryption (Szyfrowanie obrazu), wówczas do wyświetlenia podglądu
na żywo lub odtworzenia plików zarejestrowanych przez kamerę wymagane jest
wprowadzenie hasła.
- Przejdź do ekranu ustawień kamery i zmień hasło domyślne.
- Wybierz opcję Change Password (Zmień hasło).
TM
wyszukaj „EZVIZ”, anastępnie pobierz i
16
Page 21

- Wybierz opcję Edit (Edytuj).
- Wprowadź oryginalny kod werykacyjny znajdujący się na spodzie kamery.
- Wprowadź nowe hasło. Hasło powinno się składać z liter i cyfr i powinno mieć
długość od 6 do 12 znaków.
Instalacja
Krok 1 Mocowanie płytki metalowej (opcjonalnie)
Wybierz czystą i płaską powierzchnię, anastępnie przymocuj płytkę metalową wwybranej
pozycji, korzystając wtym celu zpianki przylepnej lub śrub (nie wchodzą w skład zestawu).
Wewnątrz kamery znajduje się magnes. Jeżeli powierzchnia montażowa jest wykonana
zmetalu, można pominąć ten krok.
Krok 2 Instalowanie kamery
Przymocuj kamerę za pomocą magnesu do przykręconej płytki metalowej lub metalowej
powierzchni montażowej (patrz rysunek poniżej).
Pianka przylepna
Płytka metalowa
Krok 3 Zakończenie instalacji
Dostosuj kąt ustawienia kamery zgodnie zwymaganiami.
Abyuzyskać więcej informacji, skorzystaj zwitryny www.ezvizlife.com.
Abyuzyskać więcej informacji, zeskanuj kod QR.
17
Page 22

Настройка камеры
1. Создание аккаунта пользователя
-Подключите мобильный телефон к сети Wi-Fi.
-Загрузите и установите приложение EZVIZ, выполнив поиск по
слову «EZVIZ» в App Store или Google PlayTM.
-Запустите приложение и зарегистрируйте новый аккаунт
пользователя EZVIZ, следуя инструкциям мастера запуска.
2. Добавление камеры в EZVIZ
-Авторизуйтесь в приложении EZVIZ.
-В верхнем правом углу главного экрана приложения EZVIZ
нажмите «+», чтобы открыть интерфейс сканирования QR-кода.
-Отсканируйте QR-код на нижней панели камеры.
Нижняя
панель
камеры
-Чтобы закончить настройку Wi-Fi, следуйте инструкциям мастера
установки EZVIZ.
Если ваше изделие поддерживает только частоту 2,4 ГГц, перед
подключением к сети Wi-Fi рекомендуется отключить режим 5 ГГц
на роутере.
3. Изменение пароля по умолчанию (дополнительно)
После добавления камеры необходимо изменить пароль
устройства для защиты ваших видеоданных. Пароль используется
для шифрования изображений. Если шифрование включено, вы
должны ввести пароль как для просмотра изображений с камеры в
реальном времени, так и для просмотра записей.
-Чтобы изменить пароль по умолчанию, перейдите на экран
настроек камеры.
-Нажмите Change Password (Изменить пароль).
18
Page 23

-Нажмите Edit (Изменить).
-Введите оригинальный код подтверждения, указанный на нижней
панели камеры.
-Введите новый пароль. Используйте от 6 до 12 буквенно-
цифровых символов.
Установка
Шаг 1 Установка металлической пластины (дополнительно)
Выберите чистую и ровную поверхность и прикрепите в нужном месте
металлическую пластину, используя наклейки из пеноматериала или винты
(последние не входит в комплект поставки).
Внутри камеры находится магнит. Этот шаг можно пропустить, если
имеется металлическая поверхность.
Шаг 2 Установка камеры
Установите камеру с магнитным креплением на металлическую пластину
или на любую металлическую поверхность (см. рис. ниже).
Наклейка из пеноматериала
Металлическая пластина
Шаг 3 Завершение установки
Отрегулируйте угол наклона камеры, как требуется.
Для получения подробной информации посетите веб-сайт www.
ezvizlife.com.
Чтобы увидеть больше, отсканируйте QR-код.
19
Page 24

Ρύθμιση κάμερας
1. Δημιουργήστε έναν λογαριασμό χρήστη
- Συνδέστε το κινητό σας τηλέφωνο στο Wi-Fi.
- Κατεβάστε και εγκαταστήστε την εφαρμογή EZVIZ αναζητώντας τον όρο
"EZVIZ" στο App Store και το Google PlayTM.
- Εκκινήστε την εφαρμογή και δημιουργήστε έναν λογαριασμό χρήστη EZVIZ
ακολουθώντας τον οδηγό εκκίνησης.
2. Προσθέστε μια κάμερα στο EZVIZ
- Συνδεθείτε στην εφαρμογή EZVIZ.
- Από την Αρχική οθόνη της εφαρμογής EZVIZ, πατήστε το "+" στην πάνω δεξιά γωνία
για να ανοίξει η διεπαφή σάρωσης κωδικού QR.
- Σαρώστε τον κωδικό QR στο κάτω μέρος της κάμερας.
Κάτω μέρος της
κάμερας
- Ακολουθήστε τον οδηγό εφαρμογής EZVIZ για να ολοκληρώσετε τη ρύθμιση
παραμέτρων Wi-Fi.
Εάν το προϊόν σας λειτουργεί μόνο στα 2.4GHz, σας προτείνουμε να απενεργοποιήσετε
πρώτα τη λειτουργία 5GHz του δρομολογητή σας, προτού συνδεθείτε στο ασύρματο
δίκτυο.
3. Αλλαγή προεπιλεγμένου κωδικού πρόσβασης (προαιρετικά)
Αφού προσθέσετε την κάμερα, πρέπει να αλλάξετε τον κωδικό πρόσβασης της
συσκευής, προκειμένου να εξασφαλίσετε την ασφάλεια των βίντεό σας. Ο κωδικός
πρόσβασης χρησιμοποιείται στη λειτουργία Image Encryption (Κρυπτογράφηση
εικόνας). Αν ενεργοποιήσετε τη λειτουργία Image Encryption (Κρυπτογράφηση
εικόνας), θα πρέπει να συμπληρώνετε τον κωδικό πρόσβασής σας κάθε φορά που
πραγματοποιείτε ζωντανή προβολή ή αναπαραγωγή εγγραφής της κάμερας.
- Μεταβείτε στην οθόνη ρυθμίσεων κάμερας για να αλλάξετε τον προεπιλεγμένο
κωδικό πρόσβασης.
- Πατήστε "Change Password" (Αλλαγή κωδικού πρόσβασης).
20
Page 25

- Πατήστε "Edit" (Επεξεργασία).
- Πληκτρολογήστε τον αρχικό κωδικό επαλήθευσης που βρίσκεται στο κάτω μέρος της
κάμερας.
- Εισαγάγετε τον νέο κωδικό πρόσβασης. Χρησιμοποιήστε γράμματα και αριθμούς, από
6 έως 12χαρακτήρες.
Εγκατάσταση
Βήμα 1 Εγκατάσταση της μεταλλικής πλάκας (προαιρετικά)
Επιλέξτε μια καθαρή και επίπεδη επιφάνεια και ασφαλίστε τη μεταλλική πλακέτα στην επιθυμητή
θέση, με τα αυτοκόλλητα από αφρολέξ ή τις βίδες (δεν παρέχονται).
Υπάρχει ένας μαγνήτης στο εσωτερικό της κάμερας. Μπορείτε να παραλείψετε αυτό το
βήμα, αν η επιφάνεια είναι κατασκευασμένη από μέταλλο.
Βήμα 2 Εγκατάσταση της κάμερας
Τοποθετήστε σταθερά την κάμερα στην μεταλλική πλάκα ή τη μεταλλική επιφάνεια με τη βοήθεια
του μαγνήτη (βλ. παρακάτω σχήμα).
Αυτοκόλλητο από αφρολέξ
Βήμα 3 Ολοκλήρωση της εγκατάστασης
Ρυθμίστε τη γωνία της κάμερας όπως απαιτείται.
Για λεπτομερείς πληροφορίες, επισκεφτείτε τη διεύθυνση www.ezvizlife.com.
Μεταλλική πλακέτα
Σαρώστε τον κωδικό QR, για να δείτε περισσότερα.
21
Page 26

Nastavení kamery
1. Vytvořte si uživatelský účet
- Připojte mobilní telefon ksíti Wi-Fi.
- Stáhněte si anainstalujte aplikaci EZVIZ tak, že vyhledáte „EZVIZ“ v obchodech App
Store aGoogle PlayTM.
- Spusťte aplikaci. Postupujte podle pokynů průvodce prvním spuštěním a
zaregistrujte svůj uživatelský účet EZVIZ.
2. Přidejte kameru do aplikace EZVIZ
- Přihlaste se do aplikace EZVIZ.
- Na domovské obrazovce aplikace EZVIZ stiskněte „+“ vpravém horním rohu
apřejděte do rozhraní pro skenování kódu QR.
- Naskenujte kód QR na spodní části kamery.
Spodní část kamery
- Postupujte podle průvodce aplikace EZVIZ adokončete konguraci sítě Wi-Fi.
Pokud je výrobek vybaven pouze pásmem 2,4GHz, před pokračováním
vpřipojování doporučujeme ve směrovači možnost pásma 5GHz vypnout.
3. Změna výchozího hesla (volitelná)
Kzajištění zabezpečení videa je po přidání kamery třeba, abyste změnili heslo zařízení.
Heslo se používá kšifrování obrazu. Pokud zapnete funkci šifrování obrazu, je při
aktivaci živého zobrazení nebo přehrávání kamery třeba zadat heslo.
- Přejděte na obrazovku nastavení kamery azměňte výchozí heslo.
- Stiskněte tlačítko „Change Password (Změnit heslo)“.
22
Page 27

- Stiskněte tlačítko „Edit (Upravit)“.
- Zadejte původní ověřovací kód umístěný na spodní části kamery.
- Zadejte nové heslo. Použijte písmena a číslice a zadejte heslo o délce 6 až
12znaků.
Montáž
Krok1 Montáž kovové destičky (volitelná)
Vyberte čistý a rovný povrch a pomocí pěnových samolepek nebo šroubů (nejsou součástí
dodávky) připevněte kovovou destičku do požadované polohy.
Uvnitř kamery se nachází magnetický díl. Pokud je povrch zkovového materiálu,
můžete tento krok přeskočit.
Krok2 Montáž kamery
Připevněte kameru magneticky ke kovové destičce nebo kovovému povrchu (viz obrázek níže).
Pěnová samolepka
Kovová destička
Krok3 Dokončení montáže
Nastavte požadovaný úhel kamery.
Podrobné informace naleznete na webu www.ezvizlife.com.
Chcete-li zobrazit více, naskenujte kódQR.
23
Page 28

Nastavenie kamery
1. Vytvorenie používateľského účtu
-Pripojte mobilný telefón k sieti Wi-Fi.
-Stiahnite a nainštalujte aplikáciu EZVIZ vyhľadaním názvu „EZVIZ“
v obchode App Store a Google PlayTM.
-Spustite aplikáciu a zaregistrujte používateľský účet EZVIZ podľa
sprievodcu pri spustení.
2. Pridanie kamery do účtu EZVIZ
-Prihláste sa do aplikácie EZVIZ.
-Na obrazovke Home (Domov) aplikácie EZVIZ klepnite na znamienko
„+“ v pravom hornom rohu, aby ste prešli do rozhrania skenovania
QR kódu.
-Naskenujte QR kód v spodnej časti kamery.
Spodná časť
kamery
-Pomocou sprievodcu aplikáciou EZVIZ dokončite konfiguráciu
pripojenia Wi-Fi.
Ak produkt podporuje iba 2,4 GHz pásmo a chcete pokračovať
v pridávaní, odporúčame najprv vypnúť 5 GHz pásmo smerovača.
3. Zmena predvoleného hesla (voliteľná)
Po pridaní kamery je potrebné zmeniť heslo zariadenia, aby sa zaručilo
zabezpečenie vášho videa. Heslo sa používa na šifrovanie obrazov. Ak
zapnete možnosť Image Encryption (Šifrovanie obrazov), pri živom
zobrazení alebo prehrávaní kamery bude potrebné zadať heslo.
-Ak chcete zmeniť predvolené heslo, prejdite na obrazovku nastavení
kamery.
-Klepnite na položku „Change Password“ (Zmeniť heslo).
24
Page 29

-Klepnite na položku „Edit“ (Upraviť).
-Zadajte pôvodný overovací kód umiestnený v spodnej časti kamery.
-Zadajte nové heslo. Použite písmená a čísla v dĺžke 6 až 12 znakov.
Inštalácia
Krok 1 Inštalácia kovovej platne (voliteľná)
Vyberte čistý a rovný povrch a upevnite kovovú platňu do požadovanej polohy
pomocou penových nálepiek alebo skrutiek (nie sú súčasťou balenia).
Vnútri kamery sa nachádza magnetická súčasť. Tento krok môžete
preskočiť, ak je povrch z kovu.
Krok 2 Inštalácia kamery
Magneticky zaistite kameru na kovovú platňu alebo kovový povrch (pozri
obrázok nižšie).
Penová nálepka
Kovová platňa
Krok 3 Dokončenie inštalácie
Podľa potreby nastavte uhol kamery.
Podrobné informácie nájdete na stránke www.ezvizlife.com.
Ďalšie informácie zobrazíte po naskenovaní QR kódu.
25
Page 30

Configurarea camerei
1. Creați un cont de utilizator
-Conectați telefonul mobil la Wi-Fi.
-Descărcați și instalați aplicația EZVIZ căutând „EZVIZ” în App Store și
Google PlayTM.
-Lansați aplicația și înregistrați-vă pentru un cont de utilizator EZVIZ
urmând expertul de pornire.
2. Adăugați o cameră la EZVIZ
-Autentificați-vă în aplicația EZVIZ.
-Din ecranul principal al aplicației EZVIZ, atingeți „+” în colțul din
dreapta sus pentru a accesa interfața de scanare a codului QR.
-Scanați codul QR de pe baza camerei.
Partea inferioară
a camerei
-Urmaţi expertul aplicaţiei EZVIZ pentru a finaliza configurarea WiFi.
Dacă produsul dvs. funcționează doar în banda de 2,4 GHz, vă
recomandăm să opriți banda de 5 GHz a routerului mai întâi pentru
continua cu procesul de adăugare.
3. Schimbarea parolei implicite (opțional)
După adăugarea camerei, vi se solicită să schimbați parola
dispozitivului pentru a asigura securitatea video. Parola este utilizată
pentru criptarea imaginilor. Dacă activați Image Encryption (Criptare
imagini), vi se solicită să introduceți parola pentru vizualizare live sau
redare cameră.
-Accesați ecranul cu setările camerei pentru a modifica parola
implicită.
-Apăsați „Change Password” (Schimbare parolă).
26
Page 31

-Apăsați „Edit” (Editare).
-Introduceți codul de verificare original situat în partea inferioară a
camerei.
-Introduceți parola nouă. Utilizați litere și cifre între 6 și 12 caractere.
Instalarea
Pasul 1 Instalarea plăcii metalice (opțional)
Alegeți o suprafață curată și plană și fixați placa metalică în poziția dorită cu
bandă autoadezivă sau șuruburi (nu sunt incluse).
Există o bucată de magnet în cameră. Puteți trece peste acest pas dacă
suprafața este realizată din metal.
Pasul 2 Instalarea camerei
Fixați camera magnetic pe placa metalică sau la/pe suprafața metalică (a se
vedea figura de mai jos).
Bandă autoadezivă
RO
Pasul 3 Finalizarea instalării
Reglați unghiul camerei după cum este necesar.
Pentru informații detaliate, vizitați www.ezvizlife.com.
Scanați codul QR pentru a vedea mai multe.
Placă metalică
27
Page 32

Kamerabeállítás
1. Hozzon létre egy felhasználói fiókot
-Csatlakoztassa mobiltelefonját a Wi-Fi hálózatra.
-Az App Store-ban vagy a Google PlayTM-en keresse meg az „EZVIZ”
alkalmazást, töltse le, majd telepítse.
-Indítsa el az alkalmazást, és az indítási varázslót követve regisztráljon
egy EZVIZ felhasználói fiókot.
2. Adjon egy kamerát az EZVIZ-hez
-Jelentkezzen be az EZVIZ alkalmazásba.
-Az EZVIZ alkalmazás kezdőképernyőjén koppintson a „+” jelre a jobb
felső sarokban. Ekkor a QR-kód szkennelési felületére jut.
-Szkennelje be a kamera alján található QR-kódot.
A kamera alja
-A Wi-Fi konfigurálás befejezéséhez kövesse az EZVIZ alkalmazás
varázslójának utasításait.
Ha a készüléke csak a 2,4 GHz használatára alkalmas, akkor javasoljuk,
hogy a csatlakoztatás előtt kapcsolja ki a router 5 GHz-es funkcióját.
3. Az alapértelmezett jelszó módosítása (opcionális)
A kamera hozzáadása után a videobiztonság érdekében módosítania
kell az eszközjelszót. A jelszó a képtitkosításhoz szükséges. Ha
bekapcsolja a képtitkosítást, akkor az élőképek megtekintésekor és
lejátszáskor meg kell adnia a jelszót.
-Az alapértelmezett jelszó módosításához nyissa meg a kamerabeállítások
képernyőjét.
-Koppintson a „Change Password” (Jelszó módosítása) lehetőségre.
28
Page 33

-Koppintson az „Edit” (Szerkesztés) gombra.
-Írja be az eredeti ellenőrző kódot, amely a kamera alján található.
-Írja be az új jelszót. Használjon betűkből és számokból álló,
6–12 karakter hosszúságú jelszót.
Telepítés
1. lépés A fémlemez felerősítése (opcionális)
Válasszon egy tiszta, sima felületet, és a fémlemezt rögzítse a kívánt pozícióban
a kétoldalú öntapadós ragasztókoronggal vagy a csavarokkal (nem tartozék).
A kamerában egy mágnes található. Ha a felület anyaga fém, ezt a lépést
kihagyhatja.
2. lépés A kamera telepítése
Rögzítse mágnesesen a kamerát a fémlemezhez vagy fémfelülethez (lásd az
alábbi ábrát).
Kétoldalú öntapadós
ragasztókorong
Fémlemez
3. lépés A telepítés befejezése
Állítsa be a kamera szögét igény szerint.
Részletes információkért keresse fel a következő weboldalt: www.ezvizlife.
com.
Ha többet szeretne látni, szkennelje be a QR-kódot.
29
HU
Page 34

Configuração da câmara
1. Criee uma conta de utilizador
- Ligue o telemóvel à rede Wi-Fi.
- Transfira e instale a App EZVIZ procurando "EZVIZ" na App Store e Google Play
- Inicie a App e registe-se para criar uma conta de utilizador EZVIZ seguindo o
assistente de configuração.
2. Adicionar uma câmara ao EZVIZ
- Inicie sessão na App EZVIZ.
- A partir do ecrã inicial da App EZVIZ, toque no símbolo "+" no canto superior
direito e siga para a interface da leitura do código QR.
- Leia o Código QR na parte inferior da câmara.
Parte inferior da
câmara
- Siga o assistente da App EZVIZ para concluir a configuração da rede Wi-Fi.
Se o seu produto não for “dual-band” (ou seja, se apenas tiver uma frequência
de 2.4 GHz), recomendamos que desligue a frequência de 5 GHz antes de ligar à
rede Wi-Fi.
3. Alterar a palavra-passe predefinida (Opcional)
Depois de adicionar a câmara, deve alterar a palavra-passe do dispositivo para
garantir a segurança dos seus vídeos. A palavra-passe é usada para a Encriptação
das imagens. Se ativar a Encriptação de imagens, deve inserir a sua palavra-passe
quando seleciona a visualização ao vivo ou reprodução da câmara.
- Vá para o ecrã de definições da câmara para alterar a palavra-passe predefinida.
- Toque em "Change Password" (Alterar palavra-passe).
30
TM
.
Page 35

- Toque em "Edit" (Editar).
- Insira o código de verificação original situado na parte inferior da câmara.
- Insira a palavra-passe nova. Utilize letras e números entre 6 a 12 caracteres.
Instalação
Passo 1 Instalação da placa de metal (Opcional)
Escolha uma superfície limpa e lisa e fixe a placa de metal na posição desejada com os
autocolantes de espuma ou parafusos (não incluídos).
Existe um íman no interior da câmara. Pode ignorar este passo se a superfície for metálica.
Passo 2 Instalação da câmara
Fixe a câmara de forma magnética à placa de metal ou superfície metálica (ver figura abaixo).
Autocolante de espuma
Placa metálica
Passo 3 Conclusão da instalação
Ajuste o ângulo da câmara conforme necessário.
Para obter informações detalhadas visite a página www.ezvizlife.com.
Faça a leitura do código QR para visualizar mais.
31
PT
Page 36

Oppsett av kamera
1. Opprette en brukerkonto
- Koble mobiltelefonen til et Wi-Fi-nettverk.
- Last ned og installer EZVIZ-appen ved å søke etter “EZVIZ” i App Store eller Google
TM
Play
.
- Start appen, og opprett en EZVIZ-brukerkonto ved å følge oppstartsveiviseren.
2. Legge til et kamera til EZVIZ.
- Logg inn på EZVIZ-appen.
- Fra startsiden til EZVIZ-appen, trykk på “+” øverst til høyre for å gå til siden hvor
du kan skanne QR-koden.
- Skann QR-koden som du finner under kameraet.
Undersiden av
kameraet
- Følg veiviseren i EZVIZ-appen for å fullføre konfigureringen av Wi-Fi.
Hvis produktet ditt kun har 2,4 GHz, anbefaler vi at du slår av ruterens 5
GHz-funksjonalitet før du starter tilkoblingsprosessen.
3. Endre standardpassordet (valgfri)
Etter at kameraet er lagt til, må du endre enhetens passord for å ta vare på
videosikkerheten. Passordet er brukt for bildekrypteringen. Hvis du aktiverer
bildekryptering, må du skrive inn passordet ved live-visning eller avspilling av
kameraet.
- Gå til menyen for kamerainnstillinger for å endre standardpassordet.
- Trykk på “Change Password” (Bytt passord).
32
Page 37

- Trykk på “Edit” (Endre).
- Skriv inn den originale verifikasjonskoden som du finner under kameraet.
- Skriv inn et nytt passord. Bruk mellom 6 til 12 tegn med bokstaver og tall.
Installasjon
Trinn 1 Montere metallplaten (valgfri)
Velg en ren og flat overflate, og fest metallplaten til ønsket posisjon med klistrelappen i skum
eller skruer (ikke inkludert).
Det er en magnetisk del på innsiden av kameraet. Du kan hoppe over dette trinnet hvis
overflaten er av metall.
Trinn 2 Montere kameraet
Fest kameraet magnetisk til metallplaten eller en overflate av metall (se figuren under).
Klistrelapp i skum
Trinn 3 Fullføre installasjonen
Juster kameravinkelen etter behov.
For mer informasjon, besøk www.ezvizlife.com.
Skann QR-koden for å se mer.
33
Metallplate
NO
Page 38

Installation av kamera
1. Skapa ett användarkonto
- Anslut din mobiltelefon till Wi-Fi.
- Ladda ned och installera EZVIZ-appen genom att söka efter ”EZVIZ” på App Store
eller Google Play
- Starta appen och registrera ett användarkonto för EZVIZ med hjälp av startguiden.
2. Lägg till en kamera i EZVIZ
- Logga in i appen EZVIZ.
- Tryck på ”+” i det övre, högra hörnet av EZVIZ startskärm för att gå till sidan för
att skanna QR-kod.
- Skanna QR-koden på kamerans undersida.
Kamerans undersida
- Följ guiden i EZVIZ-appen för att slutföra Wi-Fi-konfigurationen.
Om din produkt endast har 2,4GHz rekommenderar vi att du först stänger av
routerns 5GHz och sedan fortsätter med processen att lägga till.
3. Ändra standardlösenordet (valfritt)
När du har lagt till kameran måste du ändra enhetens lösenord för att säkerställa
säkerheten för dina videor. Lösenordet används för kryptering av bilderna. Om du
slår på Image Encryption (Bildkryptering) måste du ange ditt lösenord när du vill
titta i realtid eller spela upp bilder från kameran.
- Gå till skärmen för kamerainställningar för att ändra standardlösenordet.
- Tryck på ”Change Password” (Ändra lösenord).
TM
.
34
Page 39

- Tryck på ”Edit” (Redigera).
- Ange den ursprungliga verifieringskoden som står på kamerans undersida.
- Ange det nya lösenordet. Använd bokstäver och siffror från 6 till 12 tecken.
Installation
Steg 1 Installera metallplattan (valfritt)
Välj en ren och plan yta och skruva fast metallplattan i önskad position med skumetiketterna
och skruvarna (inte inkluderade).
Det finns en magnetisk del inuti kameran. Du kan hoppa över det här steget om ytan är
tillverkad av metall.
Steg 2 Installera kameran
Fäst kameran magnetiskt på metallplattan eller metallytan (se bild nedan).
Skumetikett
Metallplatta
Step 3 Slutför installationen
Justera kameravinkeln efter behov.
Besök www.ezvizlife.com för mer information.
Skanna QR-koden för att visa mer.
35
SW
Page 40

Konfiguration af kamera
1. Opret en brugerkonto
- Slut din mobiltelefon til wi-fi-netværket.
- Hent og installér appen EZVIZ ved at søge efter “EZVIZ” i App Store og Google Play
- Start appen, og registrér en EZVIZ-brugerkonto ved at følge opstartsguiden.
2. Tilføj et kamera til EZVIZ
- Log ind på appen EZVIZ.
- Tryk på “+” i øverste højre hjørne af startskærmen i appen EZVIZ for at gå til siden
til scanning af QR-koden.
- Scan QR-koden på bunden af kameraet.
Bunden på kameraet
- Følg guiden til appen EZVIZ for at afslutte konfigurationen af wi-fi.
Hvis dit produkt udelukkende tilbyder 2,4 GHz, anbefaler vi, at du slår 5 GHz
fra i din router, inden du fortsætter tilslutningen.
3. Skift standardadgangskode (valgfri)
Når du har tilføjet kameraet, skal du ændre standardadgangskoden af hensyn til
sikkerheden af dine videoer. Adgangskoden bruges til kryptering af billeder. Hvis
du aktiverer kryptering af billeder, skal du indtaste adgangskoden, når du ser
livevisning eller afspiller fra kameraet.
- Gå til siden med indstillinger for kameraet for at ændre standardadgangskoden.
- Tryk på “Change Password” (Skift adgangskode).
TM
.
36
Page 41

- Tryk på “Edit” (Redigér).
- Indtast den oprindelige kontrolkode, der findes på bunden af kameraet.
- Indtast ny adgangskode. Brug 6-12 bogstaver og tal.
Installation
Trin 1 Installation af metalplade (valgfri)
Vælg en ren og flad overflade og fastgør metalpladen til den ønskede position med skumsticker
eller skruer (medfølger ikke).
Der er en magnet i kameraet. Du kan springe trinet over, hvis overfladen er af metal.
Trin 2 Installation af kamera
Fastgør kameraet magnetisk til metalpladen eller metaloverfladen (se figuren nedenfor).
Skumsticker
Metalplade
Trin 3 Afslutning af installation
Justér kameravinklen efter behov.
Besøg www.ezvizlife.com for detaljerede oplysninger.
Scan QR-koden for at få vist mere.
37
DK
Page 42

Kameran määritys
1. Luo käyttäjätili
- Yhdistä matkapuhelimesi Wi-Fi-verkkoon.
- Lataa ja asenna EZVIZ-sovellus hakemalla se ”EZVIZ”-hakusanalla App Storesta
tai Google Play
- Käynnistä sovellus ja rekisteröi EZVIZ-käyttäjätili ohjatun käyttöönoton ohjeita
noudattamalla.
2. Lisää kamera EZVIZ-tiliin
- Kirjaudu EZVIZ-sovellukseen.
- Siirry QR-koodin skannaussivulle napauttamalla EZVIZ-sovelluksen aloitusnäytön
oikeassa yläkulmassa olevaa ”+”-symbolia.
- Skannaa kameran pohjassa oleva QR-koodi.
- Noudata EZVIZ-sovelluksen ohjattua asennusta Wi-Fi-yhteyden määrittämisessä.
Jos tuotteessa on vain 2,4GHz:n tuki, suosittelemme poistamaan
reitittimen 5GHz:n taajuuden käytöstä ennen jatkamista.
3. Oletussalasanan vaihtaminen (valinnainen)
Kameran lisäämisen jälkeen sinun on vaihdettava laitteen salasana videoiden
suojaamiseksi. Salasanaa käytetään kuvan salaukseen. Jos kuvan salaus on
käytössä, sinun on annettava salasanasi, kun katselet reaaliaikaista videota tai
toistat kameran videokuvaa.
- Siirry kameran asetuksiin oletussalasanan vaihtamista varten.
- Valitse ”Change Password” (vaihda salasana).
Kameran pohja
TM
-kaupasta.
38
Page 43

- Valitse ”Edit” (muokkaa).
- Anna kameran pohjassa oleva alkuperäinen vahvistuskoodi.
- Anna uusi salasana. Salasanassa voi olla 6–12 kirjainta ja numeroa.
Asennus
1. vaihe Metallilevyn asennus (valinnainen)
Kiinnitä metallilevy puhtaaseen ja tasaiseen kohtaan haluttuun asentoon tarratyynyillä tai
ruuveilla (ei sisälly toimitukseen).
Kameran sisällä on magneetti. Voit ohittaa tämän vaiheen, jos pinta on metallia.
2. vaihe Kameran asennus
Kiinnitä kamera metallilevyyn tai metallipintaan magneettisesti (katso alla oleva kuva).
Tarratyyny
Metallilevy
3. vaihe Asennuksen viimeistely
Säädä kamera haluttuun kulmaan.
Katso lisätietoa osoitteesta www.ezvizlife.com.
Katso lisää skannaamalla QR-koodi.
FI
39
Page 44

Thank you for purchasing EZVIZ products. This limited warranty gives you, the original purchaser of the
EZVIZ product, specific legal rights. You may also have other legal rights that vary by state, province or
jurisdiction. The disclaimers, exclusions, and limitations of liability under this limited warranty will not
apply to the extent prohibited by applicable law. No distributor, reseller, agent, or employee is authorized
to make any medication, extension, or addition to this limited warranty.
Your EZVIZ product is warranted for a period of two (2) years from the date of purchase against defects
in materials and workmanship, or such longer period as may be required by law in the country or state
where this product is sold, when used normally in accordance with user manual.
You can request warranty service by emailing us at support.eu@ezvizlife.com.
For any defective EZVIZ products under warranty, HANGZHOU HIKVISION DIGITAL TECHNOLOGY CO., LTD.
(“the Company”) will, at its option, (i) repair or replace your product free of charge; (ii) exchange your
product with a functional equivalent product; (iii) or refund the original purchase price, provided you
provide the original purchase receipt or copy, brief explanation of the defect, and return the product in
its original packaging. At the sole discretion of the Company, repair or replacement may be made with a
new or refurbished product or components. This warranty does not cover the postal cost, insurance and
any other incidental charges incurred by you in returning the product.
Except where prohibited by applicable law, this is your sole and exclusive remedy for breach of this
limited warranty. Any product that has either been repaired or replaced under this limited warranty will
be covered by the terms of this limited warranty for the longer of ninety (90) days from the date of
delivery or the remaining original warranty period.
This warranty does not apply and is void:
• If the warranty claim is made outside the w arranty period or if the proof of purchase is not provided.
• For any malfunction, defect or failure caused by or resulting from the evidence of impact,
mishandling ,tampering, use contrary to the applicable instruction manual, incorrect power line
voltage, accident, loss, theft, fire, flood or other Acts of God, shipping damage or damage resulting
from repairs performed by unauthorized personnel.
• For any consumable parts, such as batteries, where the malfunction is due to the normal aging of the
product.
• Cosmetic damage, including but not limited to scratches, dents and broken plastic on ports.
• Any software, e ven if packaged or sold with EZVIZ hardware.
• For any other damages free from defects in material or workmanship.
• Routine cleaning, normal cosmetic and mechanical wear and tear.
Please do not hesitate to contact your seller, or send e-mails to us support.eu@ezvizlife.com, with any
questions.
COPYRIGHT ©2018 HANGZHOU HIKVISION DIGITAL TECHNOLOGY CO., LTD. ALL RIGHTS RESERVED.
LIMITED WARRANTY
Vielen Dank für den Kauf eines EZVIZ-Produkts. Diese beschränkte Garantie gibt Ihnen, dem Erstkäufer
des EZVIZ-Produkts, bestimmte gesetzliche Rechte. Je nach Staat, Provinz oder Land können
Ihnen weitere gesetzliche Rechte zustehen. Die Haftungsausschlüsse und -beschränkungen gemäß
dieser beschränkten Garantie gelten ausschließlich im gesetzlich zulässigen Umfang. Kein Händler,
Wiederverkäufer, Vertreter oder Mitarbeiter ist befugt, Modifikationen, Erweiterungen oder Ergänzungen
an dieser beschränkten Garantie vorzunehmen.
Ihr EZVIZ-Produkt wird für einen Zeitraum von zwei (2) Jahren ab Kaufdatum gegen Material- und
Verarbeitungsfehler oder für einen längeren Zeitraum garantiert, der in dem Land, in dem dieses
Produkt verkauft wird, gesetzlich vorgeschrieben ist, wenn es bestimmungsgemäß und gemäß der
Bedienungsanleitung verwendet wird.
Garantieansprüche richten Sie bitte per E-Mail an support.eu@ezvizlife.com.
Im Fall eines defekten EZVIZ-Produkts mit gültiger Garantie wird HANGZHOU HIKVISION DIGITAL
TECHNOLOGY CO., LTD. ("das Unternehmen") nach eigenem Ermessen (i) Ihr Produkt kostenlos
reparieren oder ersetzen, (ii) Ihr Produkt gegen ein funktionsfähiges vergleichbares Produkt austauschen
oder (iii) den ursprünglichen Kaufpreis unter der Voraussetzung erstatten, dass Sie das Produkt in
dessen Originalverpackung unter Beigabe des Originalkaufbelegs oder einer Kopie davon sowie einer
kurzen Beschreibung des Defekts zurückschicken. Das Unternehmen wird nach alleinigem Ermessen
Produkte oder Komponenten entweder reparieren oder gegen neue oder generalüberholte Produkte
oder Komponenten austauschen. Diese Garantie deckt keine Versand-, Versicherungs- oder sonstige
Nebenkosten, die Ihnen durch die Rücksendung des Produkts entstehen.
Soweit nicht durch geltendes Recht untersagt, ist dies Ihr einziges und ausschließliches Rechtsmittel im
Fall einer Verletzung dieser beschränkten Garantie. Jedes Produkt, das im Rahmen dieser beschränkten
Garantie entweder repariert oder ausgetauscht wurde, wird für maximal neunzig (90) Tage ab Lieferdatum
oder für die Restlaufzeit der ursprünglichen Garantie von den Bestimmungen dieser beschränkten
Garantie abgedeckt.
Diese Garantie gilt nicht und ist hinfällig:
Page 45

• wenn der Garantieanspruch außerhalb der Garantiefrist oder ohne Vorlage des Kaufbelegs geltend
gemacht wird.
• bei Fehlfunktionen, Defekten oder Fehlern, die durch Stoßeinwirkung, Fehlbedienung, Sabotage,
Benutzung im Widerspruch zur entsprechenden Bedienungsanleitung, falsche Spannungsversorgung,
Unfall, Verlust, Diebstahl, Brand, Überschwemmung oder andere Naturkatastrophen, Versandschäden
oder Beschädigungen infolge von Reparaturen durch unbefugte Personen verursacht wurden oder
darauf zurückzuführen sind.
• für Verbrauchsgüter wie Batterien, bei denen die Fehlfunktion auf normale Produktalterung
zurückzuführen ist.
• kosmetische Schäden, einschließlich, aber nicht begrenzt auf Kratzer, Beulen und gebrochene
Kunststoffteile an Anschlüssen.
• für jede Software, auch w enn diese zusammen mit der EZVIZ-Hardware verpackt und verkauft wurde.
• für sonstige Schäden, die keine Material- oder Verarbeitungsfehler sind.
• für routinemäßige Reinigungen sowie normalen kosmetischen und mechanischen Verschleiß.
Bei Fragen können Sie sich jederzeit an Ihren Verkäufer oder per E-Mail an support.eu@ezvizlife.com an
uns wenden.
COPYRIGHT ©2018 HANGZHOU HIKVISION DIGITAL TECHNOLOGY CO., LTD. ALLE RECHTE VORBEHALTEN.
BESCHRÄNKTE GARANTIE
Gracias por adquirir productos EZVIZ. Esta garantía limitada le concede a usted, el comprador original del
producto EZVIZ, derechos legales específicos. Es posible que tenga otros derechos legales en función
de su estado, provincia o jurisdicción. Los avisos de exención de responsabilidad, las exclusiones y las
limitaciones de responsabilidad de esta garantía limitada no se aplicarán hasta el máximo prohibido por
la legislación aplicable. Ningún distribuidor, revendedor, representante o empleado tiene autorización
para introducir alteraciones, ampliaciones o incorporaciones en virtud de esta garantía limitada.
Su producto EZVIZ dispone de un periodo de garantía de dos (2) años a partir de la fecha de compra por
defectos de material y fabricación, o de un periodo más largo si así lo exige la ley del país o el estado
donde se vende el producto, en condiciones normales de uso según el manual del usuario.
Puede solicitar el servicio de garantía por correo electrónico en support.eu@ezvizlife.com.
Para cualquier producto de EZVIZ defectuoso en garantía, HANGZHOU HIKVISION DIGITAL TECHNOLOGY
CO., LTD. ("la Empresa"), a su discreción, (I) reparará o sustituirá el producto de forma gratuita; (II)
cambiará su producto por un producto equivalente funcional; (III) o reembolsará el precio de compra
original, siempre y cuando proporcione el recibo de compra original o una copia, una breve descripción
del defecto y devuelva el producto en su embalaje original. A la entera discreción de la Empresa, la
reparación o la sustitución pueden realizarse por un producto o componentes nuevos o reacondicionados.
Esta garantía no cubre el coste postal de transporte, el seguro ni ningún otro coste incidental en el que
incurra durante la devolución del producto.
Excepto si lo prohíbe la legislación vigente, esta es la solución única y exclusiva en caso de
incumplimiento de esta garantía limitada. Cualquier producto que se haya reparado o sustituido en
virtud de esta garantía limitada estará cubierto por los términos de la misma durante el periodo máximo
de noventa (90) días a partir de la fecha de entrega o el período de garantía original restante.
Esta garantía no se aplica y se considerará nula:
Page 46

• Si la reclamación de garantía se realiza fuera del periodo de garantía o si no se proporciona la prueba
de compra.
• En caso de funcionamiento incorrecto, defecto o avería causados por o como resultado de las pruebas
de impacto, impericia, manipulación, uso contrario al manual de instrucciones aplicable, voltaje
incorrecto de la línea eléctrica, accidente, pérdida, robo, incendio, inundación u otros actos de fuerza
mayor, daños en el envío o daños ocasionados por reparaciones realizadas por personal no autorizado.
• En el caso de las piezas consumibles, como las baterías, si el funcionamiento incorrecto se debe al
desgaste normal del producto.
• Daños cosméticos, incluidos, pero sin limitarse a, arañazos, abolladuras y plástico roto en puertos.
• Cualquier software, incluso si se ha incluido y v endido con el hardware de EZVIZ.
• En caso de otros daños libres de defectos en el material o la mano de obra.
• La limpieza rutinaria, cambios cosméticos y el desgaste mecánico natural.
Si tiene alguna pregunta, no dude en ponerse en contacto con su representante comercial, o bien
envíenos un mensaje a support.eu@ezvizlife.com con la pregunta que desee.
COPYRIGHT ©2018 HANGZHOU HIKVISION DIGITAL TECHNOLOGY CO., LTD. RESERVADOS TODOS LOS
DERECHOS.
GARANTÍA LIMITADA
Merci d'avoir acheté nos produits EZVIZ. En tant qu'acheteur original de produit EZVIZ, cette garantie
limitée vous accorde certains droits. Selon le pays, la région ou la juridiction où vous résidez, il est
possible que vous bénéficiiez d'autres droits. Les dénis de responsabilités, exclusions et limitations
de responsabilité civile stipulés dans cette garantie limitée s'appliquent uniquement dans les limites
prévues par la loi. Aucun distributeur, revendeur, agent ou employé n'est autorisé à apporter de
modification, d'extension ou d'ajout à cette garantie.
Votre produit EZVIZ est garanti pour une période de deux (2) ans à compter de la date d'achat, contre les
défauts de matériaux et de fabrication, ou tout autre délai plus long prévu par la législation du pays ou
de l'état où est vendu ce produit, à condition d'être utilisé de manière normale et conforme au manuel
de l'utilisateur.
Pour faire valoir la garantie, écrivez-nous à l'adresse suivante: support.eu@ezvizlife.com.
Si un défaut est signalé sur un produit EZVIZ pendant la période de garantie, Hangzhou Hikvision Digital
Technology Co., Ltd. (« la Société ») pourra, à sa discrétion, (i) réparer ou remplacer votre produit
gratuitement ; (ii) remplacer votre produit par un produit équivalent en état de marche ; (iii) rembourser
le prix d'achat. Vous devrez toutefois présenter la preuve d'achat et une brève explication du défaut
constaté, et renvoyer le produit dans son emballage d'origine. La Société pourra réparer ou remplacer le
produit ou les composants par un produit ou des composants neufs ou remis en état. Cette garantie ne
couvre pas les frais de port, l'assurance ni les éventuels frais annexes de renvoi du produit.
Sauf si la législation en vigueur l'interdit, cette garantie est votre seul et unique recours. Tout produit
réparé ou remplacé en vertu de la présente garantie limitée sera couvert pendant une durée de quatrevingt-dix (90) jours à compter de la date de livraison ou jusqu'à l'échéance de la période garantie
originale.
Cette garantie ne s'applique pas et est considérée comme nulle dans les cas suivants :
Page 47

• si l'utilisateur se prévaut de la garantie hors de la période de couverture ou s'il ne fournit pas de
preuve d'achat.
• en cas de dysfonctionnement, de défaut ou de panne due ou induite par un choc, une mauvaise
manipulation, un sabotage, une utilisation non conforme aux instructions du manuel, une tension
d'alimentation incorrecte, un accident, une perte, un vol, un incendie, une inondation ou toute autre
catastrophe naturelle, un préjudice subi pendant le transport ou résultant de réparations par un
personnel non agréé ;
• consommables, tels que les batteries, où le dysfonctionnement est dû au vieillissement normal du
produit ;
• dommages superficiels tels que, entre autres, les rayures, les bosses ou les pièces en plastique
cassées ;
• logiciels, même fournis ou vendus av ec le matériel EZVIZ ;
• préjudices autres que les défauts de pièces ou de main d'œuvre ;
• netto yage de routine, vieillissement de l'aspect extérieur et usure mécanique normale.
Pour toute question, n'hésitez pas à contacter votre revendeur ou à nous écrire à l'adresse suivante:
support.eu@ezvizlife.com.
COPYRIGHT ©2018 HANGZHOU HIKVISION DIGITAL TECHNOLOGY CO., LTD. TOUS DROITS RÉSERVÉS.
GARANTIE LIMITÉE
Grazie per aver acquistato i prodotti EZVIZ. La presente garanzia limitata accorda all'acquirente originale
del prodotto EZVIZ, specifici diritti legali. L'acquirente originale potrebbe godere anche altri diritti
legali che variano da stato, provincia o giurisdizione. Le declinazioni di responsabilità, le esclusioni e le
limitazioni di responsabilità ai sensi della presente garanzia limitata non si applicano ove espressamente
vietate dalla legge applicabile. Nessun distributore, rivenditore, agente o dipendente è autorizzato a
fornire rimedi, estensioni o aggiunte alla presente garanzia limitata.
Questo prodotto EZVIZ è coperto da garanzia contro difetti di materiali e lavorazione per un periodo di
due (2) anni a partire dalla data di acquisto o per un periodo più lungo, ove richiesto dalla legge nel
Paese o Stato in cui il prodotto è venduto, se usato normalmente attenendosi alle istruzioni contenute
nel manuale dell’utente.
Il servizio di assistenza in garanzia può essere richiesto via email, all'indirizzo support.eu@ezvizlife.com.
Per eventuali prodotti EZVIZ difettosi in garanzia,HANGZHOU HIKVISION DIGITAL TECHNOLOGY CO., Ltd.
("la Società"), avrà facoltà a sua discrezione di, (i) riparare o sostituire il prodotto a titolo gratuito;
(ii) sostituire il vostro prodotto con un prodotto funzionalmente equivalente; (iii) o rimborsare il prezzo
di acquisto originale, a fronte dell'esibizione della ricevuta di acquisto originale o in copia, una breve
spiegazione del difetto e il reso del prodotto nella sua confezione originale. A esclusiva discrezione
della Società, la riparazione o la sostituzione può avvenire con un prodotto o con dei componenti
nuovi o ricondizionati. Questa garanzia non copre spese postali, assicurazione ed eventuali altre spese
accessorie sostenute dall'acquirente per la restituzione del prodotto.
Salvo laddove proibito dalla legge applicabile, ciò costituisce l'unico ed esclusivo rimedio per la
violazione della presente garanzia limitata. Qualsiasi prodotto riparato o sostituito ai sensi della
presente garanzia limitata sarà coperto dai termini della presente garanzia limitata per il periodo di
maggiore durata tra novanta (90) giorni dalla data di consegna o il periodo di garanzia originale residuo.
Questa garanzia non si applica e risulterà nulla:
Page 48

• Se la richiesta di applicazione della garanzia perviene al di fuori del periodo di garanzia o se la prova
di acquisto non viene fornita.
• Per qualsiasi malfunzionamento, difetto o guasto causato da, o confermato da prove di evidenza di,
avvenuto impatto, uso improprio, manomissione, uso contrario alle istruzioni del relativo manuale,
tensione di alimentazione errata, incidente, smarrimento, furto, incendio, inondazione o altre cause
di forza maggiore, danni di spedizione o danni causati da riparazioni eseguite da personale non
autorizzato.
• Per eventuali componenti consumabili, quali batterie, dove il mal funzionamento è dovuto al normale
invecchiamento del prodotto.
• Danni estetici, inclusi ma non limitati a graffi, ammaccature e rotture delle plastiche delle porte.
• Qualsiasi software, anche se confezionato o venduto con hardw are EZVIZ.
• Per eventuali altri danni esenti da difetti nei materiali o nella lavorazione.
• Pulizia ordinaria e il normale deterioramento estetico e meccanico.
Non esitate a contattare il venditore, o a inviarci un e-mail a support.eu@ezvizlife.com, per qualsiasi
domanda.
COPYRIGHT ©2018 HANGZHOU HIKVISION DIGITAL TECHNOLOGY CO., LTD. TUTTI I DIRITTI RISERVATI.
GARANZIA LIMITATA
Page 49

Bedankt voor de aankoop van EZVIZ-producten. Met deze beperkte garantie worden u, de oorspronkelijke
koper van het EZVIZ-product, specifieke juridische rechten verleend. Mogelijk heeft u ook andere rechten
die verschillen per staat, provincie of rechtsgebied. De vrijwaringen, uitsluitingen en beperkingen van
aansprakelijkheid in deze beperkte garantie zijn niet van toepassing voor zover dit is verboden door het
toepasselijk recht. Geen enkele distributeur, wederverkoper, agent of werknemer is gemachtigd om deze
beperkte garantie aan te passen, te verlengen of uit te breiden.
Uw EZVIZ-product is gegarandeerd tegen materiaal- en fabricagefouten voor een periode van twee (2) jaar
vanaf de aankoopdatum, of een langere periode die wettelijk vereist is in het land of de staat waar dit
product wordt verkocht, mits normaal gebruikt volgens de gebruikershandleiding.
U kunt garantieservice aanvragen door een e-mail te sturen naar support.eu@ezvizlife.com.
Voor defecte EZVIZ-producten die onder de garantie vallen, zal HANGZHOU HIKVISION DIGITAL TECHNOLOGY
CO., LTD. (”het Bedrijf”) naar eigen inzicht (i) het product gratis repareren of vervangen; (ii) het product
omruilen voor een functioneel vergelijkbaar product; of (iii) de oorspronkelijke aankoopprijs restitueren
nadat het oorspronkelijke aankoopbewijs of een kopie hiervan en een korte uitleg van het defect is
aangeleverd, en het product is geretourneerd in de oorspronkelijke verpakking. Naar eigen inzicht van het
Bedrijf zal de reparatie of vervanging plaatsvinden door nieuwe of gereviseerde producten of onderdelen
te leveren. Deze garantie biedt geen dekking voor de verzendkosten, verzekeringskosten en andere
incidentele kosten die u hebt moeten betalen voor het retourneren van het product.
Tenzij dit verboden is door het toepasselijk recht, is dit uw enige en exclusieve middel voor het verbreken
van deze beperkte garantie. Producten die zijn gerepareerd of vervangen onder deze beperkte garantie, zijn
gedekt onder de voorwaarden van deze beperkte garantie voor een periode van negentig (90) dagen) vanaf
de datum van levering of voor de resterende duur van de oorspronkelijke garantie, waarbij de langste van
deze twee perioden wordt aangehouden.
Deze garantie is niet van toepassing en wordt ongeldig verklaard:
• Als de garantieclaim buiten de garantieperiode wordt gedaan of als het aankoopbewijs niet wordt
aangeleverd.
• In het geval van onjuist functioneren, defecten of fouten die aantoonbaar het gevolg zijn van stoten,
onjuist gebruik, manipulatie, gebruik dat niet in lijn is met de instructies in de handleiding, een
onjuiste voedingspanning, ongevallen, verlies, diefstal, brand, overstromingen of andere overmacht,
verzendschade of schade die het gevolg is van reparaties die zijn uitgevoerd door niet-geautoriseerd
personeel.
• Voor verbruiksonderdelen, zoals batterijen, waarbij het onjuist functioneren het gevolg is van normale
veroudering van het product.
• Bij cosmetische schade, inclusief, maar niet beperkt tot krassen, deuken en gebroken plastic op de
poorten.
• Voor softw are, zelfs wanneer deze is meegeleverd of verkocht bij de EZVIZ-hardware.
• Voor andere schade dan materiaal- en fabricagedefecten.
• Voor v ervuiling door normaal gebruik, en normale cosmetische en mechanische slijtage.
Neem voor vragen contact op met de verkopende partij, of neem contact met ons op via support.eu@
ezvizlife.com.
COPYRIGHT ©2018 HANGZHOU HIKVISION DIGITAL TECHNOLOGY CO., LTD. ALLE RECHTEN VOORBEHOUDEN.
BEPERKTE GARANTIE
Page 50

Dziękujemy za zakup produktów EZVIZ. Niniejsza ograniczona gwarancja daje użytkownikowi,
czyli oryginalnemu nabywcy produktu EZVIZ, określone prawa. Użytkownikowi mogą
też przysługiwać inne prawa, które zależą od danego państwa, obszaru terytorialnego
lub jurysdykcji. Zastrzeżenia, wyłączenia i ograniczenia odpowiedzialności wynikające z
niniejszej ograniczonej gwarancji nie będą miały zastosowania w zakresie zabronionym
przez obowiązujące prawo. Żaden dystrybutor, sprzedawca, przedstawiciel ani pracownik nie
jest uprawniony do dokonywania jakichkolwiek zmian, rozszerzeń lub uzupełnień niniejszej
ograniczonej gwarancji.
Gwarancja dotycząca produktu EZVIZ, obejmująca wady materiałów iwykonania, obowiązuje
przez dwa (2) lata oddaty zakupu lub dłuższy okres zależnie od przepisów obowiązujących
wkraju lub regionie, wktórym produkt jest sprzedawany, pod warunkiem, że produkt jest
użytkowany zgodnie zpodręcznikiem użytkownika.
Można wysłać do nas zgłoszenie gwarancyjne pocztą elektroniczną na adres support.eu@
ezvizlife.com.
Dla wszelkich produktów EZVIZ objętych gwarancją, HANGZHOU HIKVISION DIGITAL
TECHNOLOGY CO., LTD. („Firma”), według własnego uznania, (i) bezpłatnie naprawi lub
wymieni produkt; (ii) zamieni produkt na inny o porównywalnej funkcjonalności; (iii) zwróci
użytkownikowi pierwotną cenę zakupu pod warunkiem przedstawienia oryginału lub kopii
dowodu zakupu, krótkiego opisu usterki oraz zwrotu produktu w oryginalnym opakowaniu.
Według wyłącznego uznania Firmy, naprawa lub wymiana może zostać przeprowadzona z
wykorzystaniem nowego lub regenerowanego produktu lub części. Niniejsza gwarancja nie
obejmuje kosztu przesyłki, ubezpieczenia i innych dodatkowych opłat poniesionych przez
użytkownika w związku ze zwrotem produktu.
Z wyjątkiem przypadków zabronionych przez obowiązujące prawo, powyższe warunki
stanowią jedyny i wyłączny środek rekompensaty za naruszenie niniejszej ograniczonej
gwarancji. Każdy produkt naprawiony lub wymieniony na podstawie niniejszej ograniczonej
gwarancji będzie objęty jej warunkami przez czas pozostały do wygaśnięcia okresu pierwotnej
gwarancji lub przez dziewięćdziesiąt (90) dni, zależnie od tego, który okres będzie dłuższy.
Niniejsza gwarancja nie obowiązuje i zostaje unieważniona:
• Jeśli zgłoszenie z tytułu gwarancji zostanie wniesione po upływie okresu gwarancji lub jeśli
użytkownik nie dostarczy dowodu zakupu.
• W przypadku jakiejkolwiek awarii lub usterki spowodowanej przez lub wynikającej z
wyraźnie widocznego uderzenia, nieprawidłowej obsługi, próby manipulacji, stosowania
niezgodnie z instrukcją, nieprawidłowego napięcia zasilania, wypadku, zgubienia, kradzieży,
pożaru, powodzi lub innych klęsk żywiołowych, szkód transportowych lub spowodowanych
naprawą przez nieupoważniony personel.
• W przypadku wszelkich części eksploatacyjnych, takich jak baterie, których usterka wynika z
normalnego starzenia się produktu.
• W przypadku szkód kosmetycznych, m.in. zarysowań, wgięć i pękniętych plastikowych
części portów.
• W przypadku jakiegokolwiek oprogramowania, nawet jeśli jest ono dołączone lub
sprzedawane ze sprzętem EZVIZ.
• W przypadku innych szkód niewynikających z wad materiałowych lub wykonawstwa.
• W przypadku standardowego czyszczenia, oraz typowego zużycia kosmetycznego i
mechanicznego.
Jeśli mają Państwo jakiekolwiek pytania, prosimy o kontakt ze sprzedawcą lub przesłanie ich
do nas pocztą elektroniczną na adres support.eu@ezvizlife.com.
COPYRIGHT ©2018 HANGZHOU HIKVISION DIGITAL TECHNOLOGY CO., LTD. WSZELKIE PRAWA
ZASTRZEŻONE.
OGRANICZONA GWARANCJA
Page 51

Благодарим Вас за покупку продукции EZVIZ. Эта ограниченная гарантия дает Вам
как покупателю продукта EZVIZ определенные юридические права. Вы также можете
иметь другие юридические права, которые определяются законами государства,
провинции или юрисдикцией. Исключения и ограничения ответственности в
соответствии с данной ограниченной гарантией не действительны в случае, если
они противоречат действующему законодательству. Ни дистрибьютор, ни дилер, ни
агент или сотрудник не имеет права вносить какие-либо изменения или дополнения
к данной ограниченной гарантии.
Компания EZVIZ гарантирует, что приобретенный вами продукт не будет иметь
дефектов материалов и изготовления при нормальной эксплуатации согласно
руководству пользователя в течение двух (2) лет с даты покупки или в течение более
длительного периода времени, если это требуется по закону той страны или штата,
где данный продукт был продан.
Вы можете запросить гарантийное обслуживание, обратившись по электронной
почте support.eu@ezvizlife.com.
В случае неисправности продуктов EZVIZ по гарантии, HIKVISION DIGITAL
TECHNOLOGY CO., LTD. Ханчжоу ("Компания") произведет, по своему выбору, (I)
ремонт или замену изделия бесплатно; (II) обмен продукта на функционально
эквивалентный; (III) возврат первоначальной стоимости, при условии, что Вы
предоставите оригинал или копию квитанции о покупке, краткое объяснение
дефекта, а также вернете товар в оригинальной упаковке. На усмотрение Компании,
может производиться ремонт или замена нового или отремонтированного продукта
или его компонентов. Данная гарантия не распространяется на почтовые расходы,
страховку и любые другие непредвиденные расходы, понесенные Вами в связи с
возвратом продукта.
За исключением случаев, запрещенных действующим законодательством, этот
документ является Вашим единственным и исключительным средством судебной
защиты, в случае нарушения Ваших прав, закрепленных в ограниченной гарантии.
К любому продукту, который уже был отремонтирован или заменен по данной
ограниченной гарантии, применимы условия документа в течение девяноста (90)
дней с момента поставки или оставшегося первоначального гарантийного срока.
Данная гарантия не применяется и является недействительной:
• В случае подачи заявки на гарантийный ремонт по истечении гарантийного срока
или отсутствия доказательства факта покупки.
• В случае неисправностей, дефектов, вызванных неправильным использованием,
нарушением инструкций по эксплуатации, при неправильном напряжении
сети, аварии, утере, краже, пожаре, наводнении или иных стихийных бедствиях,
повреждении груза или ущербе, нанесенными в результате ремонта,
выполненного не уполномоченными лицами.
• Для любых расходных частей, таких как батареи, когда неисправность происходит
из-за естественного старения продукта.
• При косметических повреждениях, в том числе, но не только, при царапинах,
вмятинах и сломанном пластике на портах.
• Для любого программного обеспечения, даже если оно было упаковано или
продано вместе с оборудованием EZVIZ.
• Для любых других повреждений, дефектов материала или изготовления.
• Для планового косметического и механического износа.
Чтобы задать вопрос продавцу или отправить нам письмо, пожалуйста, обращайтесь
по данному адресу: support.eu@ezvizlife.com
COPYRIGHT ©2018 HANGZHOU HIKVISION DIGITAL TECHNOLOGY CO., LTD. ALL RIGHTS
RESERVED.
ОГРАНИЧЕННАЯ ГАРАНТИЯ
Page 52

Σας ευχαριστούμε για την αγορά των προϊόντων EZVIZ. Η παρούσα περιορισμένη ευθύνη παρέχει σε εσάς, τον
αρχικό αγοραστή του προϊόντος EZVIZ, ειδικά νομικά δικαιώματα. Ενδέχεται να έχετε κι άλλα νομικά δικαιώματα που
ποικίλλουν ανάλογα με το κράτος, την περιοχή ή τη δικαιοδοσία σας. Οι αποποιήσεις, εξαιρέσεις και περιορισμοί
ευθύνης βάσει της παρούσας περιορισμένης εγγύησης δεν ισχύουν στον βαθμό που απαγορεύεται από το εφαρμοστέο
δίκαιο. Κανένας διανομέας, μεταπωλητής, αντιπρόσωπος ή εργαζόμενος δεν είναι εξουσιοδοτημένος να προβεί σε
οποιαδήποτε τροποποίηση, επέκταση ή προσθήκη στην παρούσα περιορισμένη εγγύηση.
Το προϊόν EZVIZ σας διαθέτει εγγύηση για περίοδο δύο (2) ετών από την ημερομηνία αγοράς, σχετικά με ατέλειες στα
υλικά και την κατασκευή ή για μεγαλύτερο χρονικό διάστημα, όπως απαιτείται βάσει του νόμου στη χώρα ή το κράτος
όπου αγοράστηκε το προϊόν, εφόσον το προϊόν χρησιμοποιείται κανονικά, σύμφωνα με το εγχειρίδιο χρήσης.
Μπορείτε να υποβάλετε αίτηση για επισκευή στο πλαίσιο της παρούσας εγγύησης, στέλνοντάς μας e-mail στη
διεύθυνση support.eu@ezvizlife.com.
Για τυχόν ελαττωματικά προϊόντα EZVIZ που καλύπτονται από εγγύηση, η εταιρεία HANGZHOU HIKVISION DIGITAL
TECHNOLOGY CO., LTD. (“η Εταιρεία”), κατά την προαίρεσή της, (i) θα επισκευάσει ή αντικαταστήσει το προϊόν σας
δωρεάν, (ii) θα ανταλλάξει το προϊόν σας με ένα αντίστοιχο λειτουργικό προϊόν ή (iii) θα επιστρέψει το αντίτιμο της
αρχικής τιμής αγοράς, με την προϋπόθεση ότι θα προσκομίσετε την πρωτότυπη απόδειξη αγοράς ή αντίγραφο αυτής
με σύντομη επεξήγηση του ελαττώματος του προϊόντος και ότι θα επιστρέψετε το προϊόν στην αρχική του συσκευασία.
Κατά τη διακριτική ευχέρεια της Εταιρείας, η επισκευή ή η αντικατάσταση ενδέχεται να πραγματοποιηθεί με νέο
ή επισκευασμένο προϊόν ή εξαρτήματα. Η παρούσα εγγύηση δεν καλύπτει ταχυδρομικά έξοδα, ασφάλιση ή άλλες
παρεπόμενες δαπάνες, με τις οποίες θα επιβαρυνθείτε κατά την επιστροφή τους προϊόντος.
Εκτός αν απαγορεύεται από το εφαρμοστέο δίκαιο, αυτό είναι το μόνο και αποκλειστικό σας ένδικο μέσο σε περίπτωση
παραβίασης της παρούσας περιορισμένης εγγύησης. Οποιοδήποτε προϊόν έχει επισκευαστεί ή αντικατασταθεί
δυνάμει της παρούσας περιορισμένης ευθύνης καλύπτεται από τους όρους αυτής της περιορισμένης εγγύησης είτε
για διάστημα ενενήντα (90) ημερών από την ημερομηνία παράδοσης, είτε για την εναποµένουσα αρχική περίοδο
εγγύησης, όποιο είναι μεγαλύτερο.
Η παρούσα εγγύηση δεν ισχύει ή θεωρείται άκυρη:
• Εάν η αξίωση εγγύησης εγερθεί εκτός της περιόδου εγγύησης ή σε περίπτωση μη προσκόμισης του αποδεικτικού
αγοράς.
• Για οποιαδήποτε δυσλειτουργία, ελάττωμα ή βλάβη που προκληθεί από ή οφείλεται σε εμφανή πρόσκρουση, κακό
χειρισμό, παραποίηση, χρήση αντίθετη με το σχετικό εγχειρίδιο οδηγιών, εσφαλμένη τάση τροφοδοσίας, ατύχημα,
απώλεια, κλοπή, πυρκαγιά, πλημμύρα ή λοιπές θεομηνίες, βλάβη κατά την αποστολή ή ζημιά που απορρέει από
επισκευές που πραγματοποιήθηκαν από μη εξουσιοδοτημένο προσωπικό.
• Για οποιαδήποτε αναλώσιμα εξαρτήματα, όπως οι μπαταρίες, η δυσλειτουργία των οποίων οφείλεται στη κανονική
χρήση του προϊόντος με την πάροδο του χρόνου.
• Για αισθητικές ζημιές, συμπεριλαμβανομένων, μεταξύ άλλων, γρατζουνιών, βαθουλωμάτων και σπασμένων
πλαστικών στις θύρες.
• Για οποιοδήποτε λογισμικό, ακόμη κι αν συσκευάστηκε ή πωλήθηκε μαζί με το υλισμικό της EZVIZ.
• Για οποιαδήποτε άλλη βλάβη που δεν οφείλεται σε ελαττώματα σε υλικά και στην ποιότητα κατασκευής.
• Για συνήθη καθαρισμό, φυσιολογική αισθητική και μηχανική φθορά.
Για τυχόν ερωτήσεις, μη διστάσετε να επικοινωνήσετε με το κατάστημα πώλησης ή να μας στείλετε e-mail στη
διεύθυνση support.eu@ezvizlife.com.
ΠΝΕΥΜΑΤΙΚΑ ΔΙΚΑΙΩΜΑΤΑ ©2018 HANGZHOU HIKVISION DIGITAL TECHNOLOGY CO., LTD. ΜΕ ΤΗΝ ΕΠΙΦΥΛΑΞΗ
ΠΑΝΤΟΣ ΔΙΚΑΙΩΜΑΤΟΣ.
ΠΕΡΙΟΡΙΣΜΕΝΗ ΕΓΓΥΗΣΗ
Page 53

Děkujeme, že jste zakoupili výrobek EZVIZ. Tato omezená záruka vám, původnímu kupujícímu
výrobku EZVIZ, dává specická zákonná práva. Můžete mít i další práva, která se liší podle státu,
provincie nebo jurisdikce. Odmítnutí, výjimky a omezení odpovědnosti v rámci této omezené
záruky platí jen v rozsahu daném příslušným zákonem. Žádný distributor, prodejce, zástupce nebo
zaměstnanec není oprávněn provádět žádné úpravy, rozšíření nebo dodatky k této omezené záruce.
Produkt EZVIZ je po dobu dvou (2) let od data zakoupení (nebo po delší období, které může být
vyžadováno zákonem v dané zemi nebo ve státě, kde je tento produkt prodáván) kryt zárukou na
vady materiálu a zpracování při běžném používání vsouladu snávodem kpoužití.
O záruční servis můžete požádat na této e-mailové adrese support.eu@ezvizlife.com.
V případě jakéhokoliv vadného produktu EZVIZ v záruce, společnost HANGZHOU HIKVISION DIGITAL
TECHNOLOGY CO., LTD. (dále jen „společnost“) podle svého uvážení, (i) opraví nebo vymění výrobek
zdarma; (ii) nahradí výrobek za ekvivalentní funkční výrobek; (iii) nebo vrátí původní kupní cenu,
pokud poskytnete originální doklad o koupi nebo jeho kopii, stručný popis závady a výrobek vrátíte v
původním balení.
Na základě vlastního uvážení společnosti výrobek může být opraven nebo nahrazen novým nebo
modernizovaným výrobkem nebo komponenty. Tato záruka se nevztahuje na poštovní náklady,
pojištění a další dodatečné poplatky, které vám vznikly při vrácení výrobku.
Kromě případů daných příslušným zákonem je toto vaší jedinou a výhradní náhradou za porušení
závazků této omezené záruky. Na každý výrobek, který byl buď opraven nebo vyměněn v rámci této
omezené záruky se vztahuje tato omezená záruka po dobu devadesáti (90) dnů ode dne doručení
nebo po dobu zbývající původní záruční doby.
Tato záruka neplatí a nevztahuje se:
• Je-li záruční reklamace uskutečněna mimo záruční dobu, nebo v případě, že není poskytnut
doklad o koupi.
• Na jakékoliv poruchy, závady nebo selhání způsobené nárazem, nesprávnou manipulací,
narušením, používáním výrobku v rozporu s platným návodem, nesprávným elektrickým
napětím, nehodou, ztrátou, odcizením, požárem, povodní nebo jinými zásahy vyšší moci,
poškozením při přepravě nebo poškozením v důsledku oprav prováděných neoprávněnými
osobami.
• Na jakékoliv spotřební díly, jako jsou baterie, kde závada je způsobena normálním stárnutím
produktu.
• Kosmetické poškození, mimo jiné na poškrábání, promáčknutí a zlomené plasty na portech.
• Jakýkoliv software a to i v případě, že byl součástí produktu nebo prodáván spolu s hardwarem
EZVIZ.
• Na jakékoliv jiné poškození bez vad na materiálu nebo zpracování.
• Normální kosmetické a mechanické opotřebení, opotřebení v důsledku pravidelného čištění.
S případnými dotazy se prosím obraťte se na svého prodejce nebo pošlete e-mail na adresu
support.eu@ezvizlife.com.
COPYRIGHT ©2018 HANGZHOU HIKVISION DIGITAL TECHNOLOGY CO., LTD. VŠECHNA PRÁVA
VYHRAZENA.
OMEZENÁ ZÁRUKAOMEZENÁ ZÁRUKA
Page 54

Ďakujeme za zakúpenie produktov EZVIZ. Táto obmedzená záruka vám ako originálnemu
kupujúcemu produktu EZVIZ zaručuje špecifické zákonné práva. Môžete mať aj iné zákonné práva,
ktoré sa líšia v závislosti od štátu, kraja alebo jurisdikcie. Zrieknutie sa zodpovednosti, vylúčenie
a obmedzenie zodpovednosti v rámci tejto obmedzenej záruky sa nevzťahuje na rozsah, ktorý
je zakázaný platnými zákonmi. Žiaden distribútor, predajca, zástupca ani zamestnanec nie je
oprávnený robiť žiadne úpravy, rozšírenie, ani doplnenie tejto obmedzenej záruky.
Váš produkt EZVIZ je v záručnej lehote po dobu dvoch (2) rokov od dátumu zakúpenia v prípade
chyby materiálu a spracovania alebo dlhšieho obdobia, ktoré môžu požadovať zákony v krajine
alebo štáte, kde sa tento produkt predáva, keď sa používa bežne v súlade s návodom na použitie.
O záručný servis môžete požiadať odoslaním e-mailu na adresu support.eu@ezvizlife.com.
V prípade akýchkoľvek chybných produktov EZVIZ v záruke spoločnosť HANGZHOU HIKVISION
DIGITAL TECHNOLOGY CO., LTD. („spoločnosť“) podľa vlastného uváženia vykoná (i) bezplatnú
opravu alebo výmenu produktu; (ii) výmenu produktu za funkčný ekvivalentný produkt; (iii)
prípadne vráti pôvodnú kúpnu cenu za predpokladu, že poskytnete pôvodný doklad o kúpe
alebo jeho kópiu, stručné vysvetlenie poruchy a vrátite produkt v pôvodnom balení. Na základe
vlastného uváženia spoločnosti môže byť oprava alebo výmena vykonaná použitím nového alebo
renovovaného produktu alebo komponentov. Táto záruka sa nevzťahuje na poštovné, poistenie
a akékoľvek ďalšie vedľajšie náklady, ktoré vznikli pri vrátení produktu.
S výnimkou prípadov, keď to príslušné zákony zakazujú, je to váš výlučný a výhradný opravný
prostriedok v prípade porušenia tejto obmedzenej záruky. Na každý produkt, ktorý bol opravený
alebo vymenený v rámci tejto obmedzenej záruky, sa budú vzťahovať podmienky tejto
obmedzenej záruky počas deväťdesiatich (90) dní od dátumu doručenia alebo počas zostávajúcej
pôvodnej záručnej doby podľa toho, ktorá obdobie je dlhšie.
Táto záruka neplatí a nevzťahuje sa na nasledujúce prípady:
• A k sa nárok na záruku uskutočňuje mimo záručnej doby alebo ak nie je predložený dôkaz
o zakúpení.
• V prípade akejkoľvek nefunkčnosti, chyby alebo poruchy spôsobenými nárazom, nesprávnym
používaním, neoprávneným zasahovaním, používaním v rozpore s príslušným návodom na
používanie, nesprávnym napätím elektrickej siete, nehodou, stratou, krádežou, požiarom,
záplavou, alebo inými neočakávanými udalosťami, poškodením pri preprave, alebo poškodením
spôsobeným opravami vykonanými neoprávneným personálom, alebo ich v prípade ich
dôsledkov.
• V prípade spotrebných súčastí, ako sú napr. batérie, pri ktorých je nefunkčnosť spôsobená
bežným starnutím produktu.
• Vizuálne poškodenie vrátane, avšak bez obmedzenia na škrabance, zárezy a zlomené plastové
časti portov.
• Akýkoľvek softvér, aj keď sa dodáva alebo predáva s hardvérom EZVIZ.
• V prípade akýchkoľvek iných škôd bez poškodenia materiálu alebo spracovania.
• Rutinné čistenie, bežné vizuálne a mechanické opotrebovanie.
Ak máte akékoľvek otázky, neváhajte a obráťte sa na predajcu alebo nám odošlite e-mail na adresu
support.eu@ezvizlife.com.
AUTORSKÉ PRÁVA ©2018 HANGZHOU HIKVISION DIGITAL TECHNOLOGY CO., LTD. VŠETKY PRÁVA
VYHRADENÉ.
OBMEDZENÁ ZÁRUKA
Page 55

Vă mulțumim pentru achiziționarea produselor EZVIZ. Această garanție limitată vă conferă
dumneavoastră, cumpărătorul original al produsului EZVIZ, drepturi legale specifice. Este posibil
să aveți și alte drepturi legale care variază în funcție de stat, provincie sau jurisdicție. Negările,
excluderile și limitările răspunderii în temeiul acestei garanții limitate nu se vor aplica în măsura în
care sunt interzise de legea aplicabilă. Niciun distribuitor, re-vânzător, agent sau angajat nu este
autorizat să facă nicio modificare, extensie, sau adăugire la această garanție limitată.
Produsul EZVIZ este garantat pentru o perioadă de doi (2) ani de la data achiziţiei pentru defecte
de materiale şi manoperă sau pentru o perioadă mai lungă, dacă aceasta este impusă de legea
din ţara sau statul în care este comercializat produsul, când este utilizat normal în conformitate cu
manualul de utilizare.
Puteți solicita lucrări de service în garanție prin e-mail la support.eu@ezvizlife.com .
Pentru orice produse EZVIZ defecte aflate în garanție, HANGZHOU HIKVISION DIGITAL
TECHNOLOGY CO., LTD. („Societatea”) va (i) repara sau înlocui produsul gratuit; (ii) schimba
produsul cu un produs echivalent funcțional; (iii) sau rambursa prețul de achiziție inițial, cu condiția
să furnizați chitanța în original sau în copie, o scurtă explicație a defectului, și să returnați produsul
în ambalajul original. La discreția exclusivă a Societății, repararea sau înlocuirea se poate face cu
un produs sau componente noi sau reparate. Această garanție nu acoperă taxele poștale, costul
asigurării și orice alte costuri suplimentare suportate de către dumneavoastră în legătură cu
returnarea produsului.
Cu excepția cazului în care este interzis de legislația în vigoare, acesta este remediul dumneavoastră
unic și exclusiv pentru încălcarea acestei garanții limitate. Orice produs care a fost reparat sau
înlocuit în conformitate cu această garanție limitată va fi acoperit de termenii acestei garanții
limitate pentru o perioadă de nouăzeci (90) de zile de la data de livrare sau perioada rămasă din
garanția inițială, oricare este mai lungă.
Această garanție nu se aplică și este nulă în următoarele cazuri:
• Dacă cererea de garanție se face în afara perioadei de garanție sau dacă nu se furnizează
dovada de cumpărare.
• Pentru orice defecțiune, defect sau stricăciune cauzate de sau care sunt rezultatul evident
al unui impact, manipulări necorespunzătoare, modificări, utilizări contrar manualului de
instrucțiuni aplicabil, alimentări inadecvate, al unui accident, unei pierderi, unui furt, incendiu,
inundații sau altor evenimente de forță majoră, daune la transport sau daune rezultate din
reparații efectuate de către persoane neautorizate.
• Pentru orice piese consumabile, cum ar fi bateriile, în cazul în care defecțiunea se datorează
uzurii normale a produsului.
• Daune estetice, inclusiv, dar fără a se limita la zgârieturi, urme de lovituri plastic rupt pe porturi.
• Orice software, chiar dacă este vândut la pachet cu echipamente EZVIZ.
• Pentru orice alte daune care nu se datorează unor defecte de material sau de manoperă.
• Curățarea de rutină, uzură normală cosmetică și mecanică.
Nu ezitați să contactați vânzătorul sau trimiteți-ne un e-mail la support.eu@ezvizlife.com dacă aveți orice
întrebări.
COPYRIGHT ©2018 HANGZHOU HIKVISION DIGITAL TECHNOLOGY CO., LTD. TOATE DREPTURILE REZERVATE.
GARANȚIE LIMITATĂ
Page 56

Köszönjük, hogy EZVIZ termékeket vásárolt. Ez a korlátozott jótállás Önt, mint az EZVIZ termék
eredeti vásárlóját, bizonyos jogokkal ruházza fel. Ezeken kívül más jogok is megillethetik, melyek
államonként, tartományonként vagy joghatóságonként változhatnak. A jelen jótállás hatálya alá
eső felelősségelhárítások, -kizárások és -korlátozások csak a hatályos törvény által megengedett
mértékig érvényesek. Semmilyen terjesztő, viszonteladó, ügynök vagy alkalmazott nem jogosult
ezt a korlátozott jótállást korrigálni, kiterjeszteni vagy kibővíteni.
Rendeltetésszerű, és az ebben a használati útmutatóban leírtaknak megfelelő használat esetén
Ön EZVIZ termékének anyag- és gyártási hibáira vonatkozó jótállás két (2) évre, vagy egy olyan
hosszabb időszakra vonatkozik, amelyet a termék értékesítési országában vagy államában törvény
ír elő.
Jótállási szolgáltatás igényléséhez küldjön e-mailt a következő címre: support.eu@ezvizlife.com.
Ha a jótállással rendelkező EZVIZ termék sérült, akkor a HANGZHOU HIKVISION DIGITAL
TECHNOLOGY CO., LTD. („a Vállalat”) saját belátása szerint (i) ingyenesen megjavítja vagy kicseréli
a terméket; (ii) a terméket egy funkcionálisan azonos értékű termékre cseréli; (iii) vagy visszatéríti
az eredeti vételárat, feltéve, ha Ön benyújtja az eredeti blokkot vagy annak másolatát, röviden
ismerteti a hibát, és a terméket eredeti csomagolásában visszajuttatja. A Vállalat belátása szerint a
javításhoz vagy a cseréhez felhasználhat új vagy felújított terméket vagy alkatrészeket. Ez a jótállás
nem terjed ki a termék visszaküldésével kapcsolatos postaköltségekre, biztosítási díjakra és egyéb
járulékos költségekre.
Hacsak a törvény másként nem rendelkezik, ez a korlátozott jótállás az Ön egyetlen jogorvoslati
lehetősége. A jelen korlátozott jótállás hatálya alatt megjavított vagy kicserélt termékre ennek a
jótállásnak a feltételei vonatkoznak a szállítástól számított legalább kilencven (90) napig vagy az
eredeti jótállás lejártának napjáig (amelyik később következik be).
Ez a jótállás nem érvényes, és hatályát veszti a következő esetekben:
• Ha a jótállási igényt a jótállási időszak lejárta után nyújtják be, vagy ha a vásárlást igazoló
bizonylatot nem tudják bemutatni.
• Olyan hiba, sérülés vagy meghibásodás esetén, amelyet bizonyíthatóan ütődés, hibás kezelés,
manipulálás, a használati utasítással ellentétes használat, helytelen tápfeszültség, baleset,
elvesztés, ellopás, tűz, árvíz vagy más természeti katasztrófa, szállítási sérülés vagy jogosulatlan
személy által végzett javításból fakadó sérülés okozott.
• Az olyan fogyóeszközök esetén, mint az elemek és akkumulátorok, ahol a meghibásodás a
termék normál öregedéséből ered.
• Kozmetikai sérülések esetén, például karcolások, horpadások és törött műanyag a portokon.
• Szoftverek esetén, még akkor is, ha azokat az EZVIZ hardverrel együtt vagy egy csomagban
adták el.
• Minden egyéb sérülés esetén, amely nem anyag- vagy gyártási hibára vezethető vissza.
• Rutinszerű tisztításból, normál kozmetikai és mechanikai kopásból és elhasználódásból eredő
hibák.
Kérdés esetén forduljon eladójához, vagy küldjön e-mailt a következő címre: support.eu@ezvizlife.
com.
COPYRIGHT ©2018 HANGZHOU HIKVISION DIGITAL TECHNOLOGY CO., LTD. MINDEN JOG
FENNTARTVA.
KORLÁTOZOTT JÓTÁLLÁS
Page 57

Obrigado por comprar produtos EZVIZ. Na qualidade de comprador original do produto EZVIZ, esta garantia limitada
confere-lhe direitos legais específicos. Poderá ter ainda outros direitos legais que variam consoante o estado, a
província ou a jurisdição. As renúncias, exclusões e limitações de responsabilidade expressas nesta garantia limitada
não se aplicarão na medida em que tal seja proibido pela legislação aplicável. Nenhum distribuidor, revendedor,
agente ou funcionário está autorizado a realizar qualquer modificação, extensão ou adição à presente garantia
limitada.
O seu produto EZVIZ tem uma garantia com um período de dois (2) anos a partir da data de compra, contra defeitos
de materiais e de fabrico, ou um período mais prolongado consoante o necessário por lei no país ou estado onde o
produto é vendido, quando utilizado normalmente de acordo com o manual de utilização.
Pode pedir uma assistência coberta pela garantia enviando-nos um e-mail para support.eu@ezvizlife.com .
Para produtos EZVIZ com defeito cobertos pela garantia, a HANGZHOU HIKVISION DIGITAL TECHNOLOGY CO., LTD. ("a
Empresa"), por opção sua, (i) reparará ou substituirá o seu produto gratuitamente; (ii) trocará o seu produto por um
produto equivalente funcional; (iii) ou reembolsará o preço de compra original, desde que forneça o recibo de compra
original ou a respetiva cópia, uma breve explicação do defeito e desde que devolva o produto na sua embalagem
original. A reparação ou substituição poderá ser feita com um produto ou componentes novo(s) ou renovado(s),
ficando esta decisão ao critério da Empresa. Esta garantia não cobre as despesas postais, o seguro e quaisquer
outros encargos acessórios incorridos por si ao devolver o produto.
Salvo nos casos em que é proibido pela legislação aplicável, este é o seu único e exclusivo recurso por
incumprimento desta garantia limitada. Qualquer produto que seja reparado ou substituído nos termos desta garantia
limitada estará coberto pelos termos da mesma por um período máximo de noventa (90) dias a partir da data de
entrega ou pelo período da garantia original restante.
A presente garantia não se aplica e será nula:
• Se a reclamação da garantia for feita fora do período da garantia ou se não for fornecida prova de compra.
• No caso de mau funcionamento, defeito ou falha causada(o) ou resultante de provas de impacto, utilização
incorreta, adulteração do produto, utilização contrária ao manual de instruções aplicável, tensão errada da linha
de alimentação, acidente, perda, roubo, incêndio, inundação ou outras catástrofes naturais, danos de transporte
ou danos resultantes de reparações executadas por pessoal não autorizado.
• No caso de consumíveis como, por exemplo, baterias, em que o mau funcionamento se deva ao envelhecimento
normal do produto.
• No caso de danos de cosmética, incluindo, embora sem caráter limitativo, riscos, mossas e plástico partido nas
portas.
• Relativamente a qualquer software, mesmo tendo sido embalado ou vendido com hardware EZVIZ.
• No caso de quaisquer outros danos isentos de defeitos de material ou de mão-de-obra.
• Limpeza de rotina, cosmética normal e desgaste mecânico.
Não hesite em contactar o seu revendedor ou enviar-nos um e-mail para support.eu@ezvizlife.com, em caso de
dúvidas.
COPYRIGHT ©2018 HANGZHOU HIKVISION DIGITAL TECHNOLOGY CO., LTD. TODOS OS DIREITOS RESERVADOS.
GARANTIA LIMITADA
Page 58

Takk for at du har kjøpt et EZVIZ-produkt. Denne begrensede garantien gir deg, den opprinnelige kjøper av
EZVIZ-produktet, spesifikke lovfestede rettigheter. Du kan også ha andre lovfestede rettigheter
som varierer med stat, provins eller domsmakt. Ansvarsfraskrivelsene, utelukkelsene og
ansvarsbegrensningene i denne begrensede garantien gjelder ikke i den grad det er forbudt i henhold
til gjeldende lov. Ingen distributør, forhandler, agent eller ansatt er autorisert til å gjøre noen endring,
utvidelse eller tillegg til denne begrensede garantien.
Ditt EZVIZ-produkt har garanti for defekter i materialer og utførelse. Garantien er gyldig enten i to (2) år
fra kjøpsdatoen eller i en lengre periode hvis dette er lovpålagt der produktet blir solgt. Garantien er kun
gyldig hvis produktet brukes på normal måte og i samsvar med brukerhåndboken.
Du kan be om garantiservice ved å sende en e-post til support.eu@ezvizlife.com.
For eventuelle defekte EZVIZ-produkter under garanti, HANGZHOU HIKVISION DIGITAL TECHNOLOGY
CO., LTD. (“Selskapet”) vil, etter eget valg, (i) reparere eller erstatte produktet kostnadsfritt; (ii) bytte
produktet med et funksjonelt ekvivalent produkt; (iii) eller refundere den opprinnelige kjøpesummen,
forutsatt at du kan fremskaffe originalkvitteringen eller en kopi, gi en kort beskrivelse av feilen og
returnere produktet i originalemballasjen. Etter eget skjønn kan selskapet reparere eller erstatte
produktet eller komponenter med et nytt eller overhalt produkt eller komponenter. Denne garantien
dekker ikke fraktkostnaden, forsikringen og eventuelle andre tilleggskostnader som påløper deg ved
retur av produktet.
Med unntak av det som er forbudt i henhold til gjeldende lov, er dette ditt eneste rettsmiddel for brudd
på denne begrensede garantien. Ethvert produkt som enten er reparert eller erstattet under denne
begrensede garantien, vil bli dekket av vilkårene i denne begrensede garantien for en periode på nitti (90)
dager fra leveringsdato eller gjenværende originale garantiperiode.
Denne garantien gjelder ikke, og er ugyldig:
• Hvis garantikravet er gjort utenfor garantiperioden, eller hvis kjøpsbevis ikke kan fremskaffes.
• For funksjonsfeil, mangler eller feil som forårsakes av, eller skyldes synlige bevis for slag,
mishandling, sabotasje, bruk i strid med gjeldende brukerhåndbok, feil spenning på strømnettet,
ulykke, tap, tyveri, brann, flom eller force majeure, transportskade eller skade som følge av
reparasjoner utført av uautorisert personale.
• For eventuelle forbruksdeler, som f.eks. batterier, der feilen skyldes normal aldring av produktet.
• Kosmetisk skade, inkludert, men ikke begrenset til riper, hakk og ødelagt plast på porter.
• All programvare, selv om den er pakket eller solgt med EZVIZ-maskinvare.
• For eventuelle andre skader som ikke skyldes feil i materiale eller utførelse.
• Rutinemessig rengjøring, normal kosmetisk og mekanisk slitasje.
Ikke nøl med å kontakte selgeren, eller send e-post til oss med eventuelle spørsmål på support.eu@
ezvizlife.com.
COPYRIGHT ©2018 HANGZHOU HIKVISION DIGITAL TECHNOLOGY CO., LTD. MED ENERETT.
BEGRENSET GARANTI
Page 59

Tack för att du köper produkter från EZVIZ. Den här begränsade garantin ger specifika juridiska rättigheter till den
person som ursprungligen köpte EZVIZ-produkten. Du kan även ha andra juridiska rättigheter, beroende på delstat,
region eller jurisdiktion. De friskrivningar, undantag och begränsningar av ansvar i denna begränsade garanti gäller
inte i den mån de är förbjudna enligt tillämplig lagstiftning. Ingen distributör, återförsäljare, agent eller anställd har
rätt att göra någon form av korrigering, utökande eller tillägg i denna begränsade garanti.
Din EZVIZ-produkt har en garantiperiod på två (2) år från tillverkningsdatum för material- och tillverkningsfel,
eller sådan längre period som kan krävas av lagstiftning i det land eller stat där denna produkt säljs, vid normal
användning i enlighet med bruksanvisningen.
Om du vill göra garantianspråk skickar du e-post till oss på följande adress: support.eu@ezvizlife.com.
För alla defekta EZVIZ-produkter med giltig garanti kommer HANGZHOU HIKVISION DIGITAL TECHNOLOGY CO., LTD.
("Företaget") efter eget gottfinnande antingen att (i) reparera eller byta ut produkten utan kostnad; (ii) byta ut
produkten mot en produkt med motsvarande funktion; (iii) eller återbetala det belopp som ursprungligen betalats
för produkten, under förutsättning att du tillhandahåller inköpskvittot i original eller en kopia tillsammans med en
kortfattad förklaring av felet och returnerar produkten i originalförpackningen. Reparationen eller bytet kan, efter
Företagets eget gottfinnande, göras med nya eller renoverade produkter eller komponenter. Garantin omfattar inte
fraktkostnader, försäkring och andra oförutsedda utgifter som uppstår till följd av returen av produkten.
Förutom på platser där detta är förbjudet enligt tillämplig lagstiftning, är detta är din enda ersättning för brott
mot denna begränsade garanti. Alla produkter som har antingen reparerats eller byts ut inom ramarna för denna
begränsade garanti omfattas av villkoren i den begränsade garantin i den längsta av antingen en period på nittio (90)
dagar från leveransdatum eller den ursprungliga garantitiden.
Garantin gäller inte i följande fall, då den är ogiltig:
• Om garantianspråket görs efter att garantitiden har gått ut eller om inköpsbevis inte kan presenteras.
• Vid felfunktion, defekter eller fel som orsakats av eller uppstått till följd av stötar, felaktig hantering,
manipulering, användning som strider mot tillhörande bruksanvisning, felaktig spänningsmatning, olyckor,
förlust, stöld, eldsvåda, översvämning eller annan force majeure, leveransskador eller skador som uppstått till
följd av reparationer som har utförts av obehörig personal.
• För förbrukningsdelar, till exempel batterier, där defekten är ett resultat av normalt åldrande av produkten.
• För skönhetsfel inklusive, men inte begränsat till, repor, bucklor och trasig plast på portar.
• För programvara, även om den förpackats eller sålts med maskinvara från EZVIZ.
• För alla andra skador utöver defekter i material eller utförande.
• För normalt slitage, normala skönhetsfel och mekaniskt slitage.
Tveka inte att kontakta din säljare eller skicka ett e-postmeddelande till support.eu@ezvizlife.com om du har några
frågor.
COPYRIGHT ©2018 HANGZHOU HIKVISION DIGITAL TECHNOLOGY CO., LTD. MED ENSAMRÄTT.
BEGRÄNSAD GARANTI
Page 60

Tak fordi du har valgt EZVIZ-produkter. Denne begrænsede garanti giver dig, den oprindelige køber af EZVIZproduktet, specifikke juridiske rettigheder. Du kan også have andre rettigheder, der varierer fra stat til stat, område
eller jurisdiktion. Ansvarsfraskrivelser, udelukkelser og begrænsninger af ansvaret under denne begrænsede garanti
gælder ikke i det omfang, som er forbudt af gældende lov. Ingen distributør, forhandler, agent eller medarbejder er
autoriseret til at foretage ændringer eller udvide eller tilføje betingelser til denne begrænsede garanti.
Dit EZVIZ-produkt er dækket af en garanti mod fejl i materialer og fremstilling i to (2) år fra købsdatoen eller i
en længere periode, hvis dette kræves ved lov i landet, hvor produktet sælges, når produktet bruges normalt i
overensstemmelse med brugervejledningen.
Du kan anmode om service under garanti ved at sende en e-mail til følgende e-mail-adresse: support.eu@ezvizlife.
com .
For alle defekte EZVIZ-produkter vil HANGZHOU HIKVISION DIGITAL TECHNOLOGY CO., LTD. (“Selskabet”) i
garantiperioden efter eget valg (i) reparere eller erstatte produktet uden beregning; (ii) ombytte produktet med et
produkt med tilsvarende funktion; (iii) eller refundere den oprindelige købspris, såfremt du fremsender den originale
købskvittering eller en kopi sammen med en kort beskrivelse af defekten, og returnerer produktet i den originale
emballage. Produktet kan, efter Selskabets eget skøn, repareres eller udskiftes med et nyt eller brugt produkt eller
nye eller brugte komponenter. Garantien dækker ikke udgifter for fragt, forsikring og yderligere udgifter, som opstår
i forbindelse med returnering af produktet.
Medmindre det ikke er tilladt under gældende lovgivning, er dette dit eneste retsmiddel i tilfælde af overtrædelser
af denne begrænsede garanti. Alle produkter, som er blevet repareret eller udskiftet i henhold til denne begrænsede
garanti, vil være omfattet af bestemmelserne i denne begrænsede garanti i halvfems (90) dage fra leveringsdatoen
eller i den resterende oprindelige garantiperiode.
Denne garanti gælder ikke i følgende tilfælde og bliver ugyldig:
• Hvis et garantikrav bliver fremsat efter at garantiperioden er udløbet eller hvis købsbeviset ikke kan blive
fremvist.
• Ved enhver fejl, defekt eller mangel, som er forårsaget af eller er opstået som følge af stød, forkert håndtering,
manipulering, anvendelse som ikke er i overensstemmelse med produktanvisningerne, tilslutning til forkert
netspænding, uheld, tab, tyveri, brand, oversvømmelse eller andre naturkatastrofer, transportskade eller skade
som skyldes uautoriserede reparationer.
• For alle forbrugsvarer, som f.ek s. batterier, hvor fejlen skyldes normal ældning af produktet.
• Kosmetiske skader, herunder men ikke begrænset til, ridser, buler og knækket plastik på porte.
• For software, selvom den er emballeret eller solgt med EZVIZ-hardware.
• For alle andre skader, der er fri for defekter i materiale eller udførelse.
• Regelmæssig rengøring, normale kosmetiske fejl og mekanisk slitage.
Tøv ikke med at kontakte din forhandler eller sende en e-mail til support.eu@ezvizlife.com, hvis du har spørgsmål.
COPYRIGHT ©2018 HANGZHOU HIKVISION DIGITAL TECHNOLOGY CO., LTD. ALLE RETTIGHEDER FORBEHOLDES.
BEGRÆNSET GARANTI
Page 61

Kiitos, että ostit EZVIZ-tuotteita. Tämä rajoitettu takuu antaa sinulle, EZVIZ-tuotteen alkuperäiselle ostajalle,
erityiset lailliset oikeudet. Sinulla voi olla myös muita laillisia oikeuksia, jotka vaihtelevat osavaltion, provinssin tai
hallintoalueen mukaan. Tämän rajoitetun takuun alaisia vastuuvapauslausekkeita ja vastuurajoituksia ei sovelleta
siinä määrin kuin sovellettavissa oleva laki estää. Maahantuojilla, jälleenmyyjillä, edustajilla tai työntekijöillä ei ole
oikeutta tehdä mitään muutoksia, laajennuksia tai lisäyksiä tähän rajoitettuun takuuseen.
EZVIZ-tuotteellasi on kahden (2) vuoden takuu ostopäivästä alkaen materiaali- tai valmistusvirheiden varalta
edellyttäen, että laitetta on käytetty normaalisti ja käyttöoppaan mukaisesti, takuukausi voi olla pidempi, jos
tuotteen myyntimaan lainsäädäntö niin vaatii.
Voit pyytää takuuhuoltoa lähettämällä sähköpostia osoitteeseen support.eu@ezvizlife.com .
Takuunalaisten viallisten EZVIZ-tuotteiden yhteydessä HANGZHOU HIKVISION DIGITAL TECHNOLOGY CO., LTD.
("yritys") valintansa mukaan (i) korjaa tai vaihtaa tuotteen maksuttomasti, (ii) vaihtaa tuotteen toimivaan vastaavaan
tuotteeseen (iii) tai palauttaa alkuperäisen ostohinnan sillä edellytyksellä, että käyttäjä toimittaa alkuperäisen
ostokuitin tai kopion siitä ja lyhyen selityksen viasta sekä palauttaa tuotteen alkuperäisessä pakkauksessaan.
Yrityksen omaa harkintavaltaa käyttäen tuotteen korjaus tai vaihto voidaan tehdä uusilla tai kunnostetuilla tuotteilla
tai komponenteilla. Tämä takuu ei kata postikuluja, vakuutusta ja mitään muita tuotteen palautuksesta johtuvia
satunnaisia kuluja.
Lukuun ottamatta tilanteita, joissa sovellettava laki estää sen, tämä on ostajan ainoa hyvitys tämän rajoitetun
takuun puitteissa. Tämän rajoitetun takuun alaisena korjattu tai vaihdettu tuote on tämän rajoitetun takuun kattama
vähintään yhdeksänkymmenen (90) päivän ajan toimituspäivästä alkaen tai alkuperäisen takuujakson loppuajan.
Tämä takuu ei kata seuraavia kohtia:
• Jos takuuvaatimus tehdään takuujakson ulkopuolella tai jos ostotodistusta ei toimiteta.
• Iskusta, väärinkäytöstä, muuttamisesta, sovellettavan käyttöohjeen vastaisesta käytöstä, virheellisestä
voimansiirtolinjan jännitteestä, onnettomuudesta, häviämisestä, varkaudesta, tulipalosta, tulvasta tai
muista luonnonmullistuksista johtuva häiriö, vika tai toimintahäiriö, kuljetusvahinko tai valtuuttamattoman
huoltohenkilöstön tekemistä korjauksista johtuva vaurio.
• Kuluvat osat, kuten paristot, joissa toimintahäiriö johtuu tuotteen normaalista vanhenemisesta.
• Kosmeettinen vaurio, mukaan lukien, muttei niihin rajoittuen, naarmut, lommot ja porttien rikkoutuneet
muoviosat.
• Ohjelmistot, vaikka ne olisivat pakattuja tai myytyjä EZVIZ-laitteiston kanssa.
• Kaikki muut vauriot, jotka eivät johdu materiaaleista tai työnlaadusta.
• Tavanomainen puhdistus, normaali kosmeettinen ja mekaaninen kuluminen.
Jos sinulla on kysyttävää, ota yhteyttä tuotteen myyjään tai lähetä meille sähköpostia osoitteeseen support.eu@
ezvizlife.com.
COPYRIGHT ©2018 HANGZHOU HIKVISION DIGITAL TECHNOLOGY CO., LTD. KAIKKI OIKEUDET PIDÄTETÄÄN.
RAJOITETTU TAKUU
Page 62

UD10467B
 Loading...