

Page 1
EZ DIRECTIONS
Instrucciones para el EZ
SAVE TIME WHILE DOING IT BY YOURSELF
Disclaimer: Please read all directions provided with your garbage disposal &
the EZ Snapper instructions.
Descargo de responsabilidad: Por favor lea todas las instrucciones que vienen con
su triturador de basura y las instrucciones del EZ Snapper.
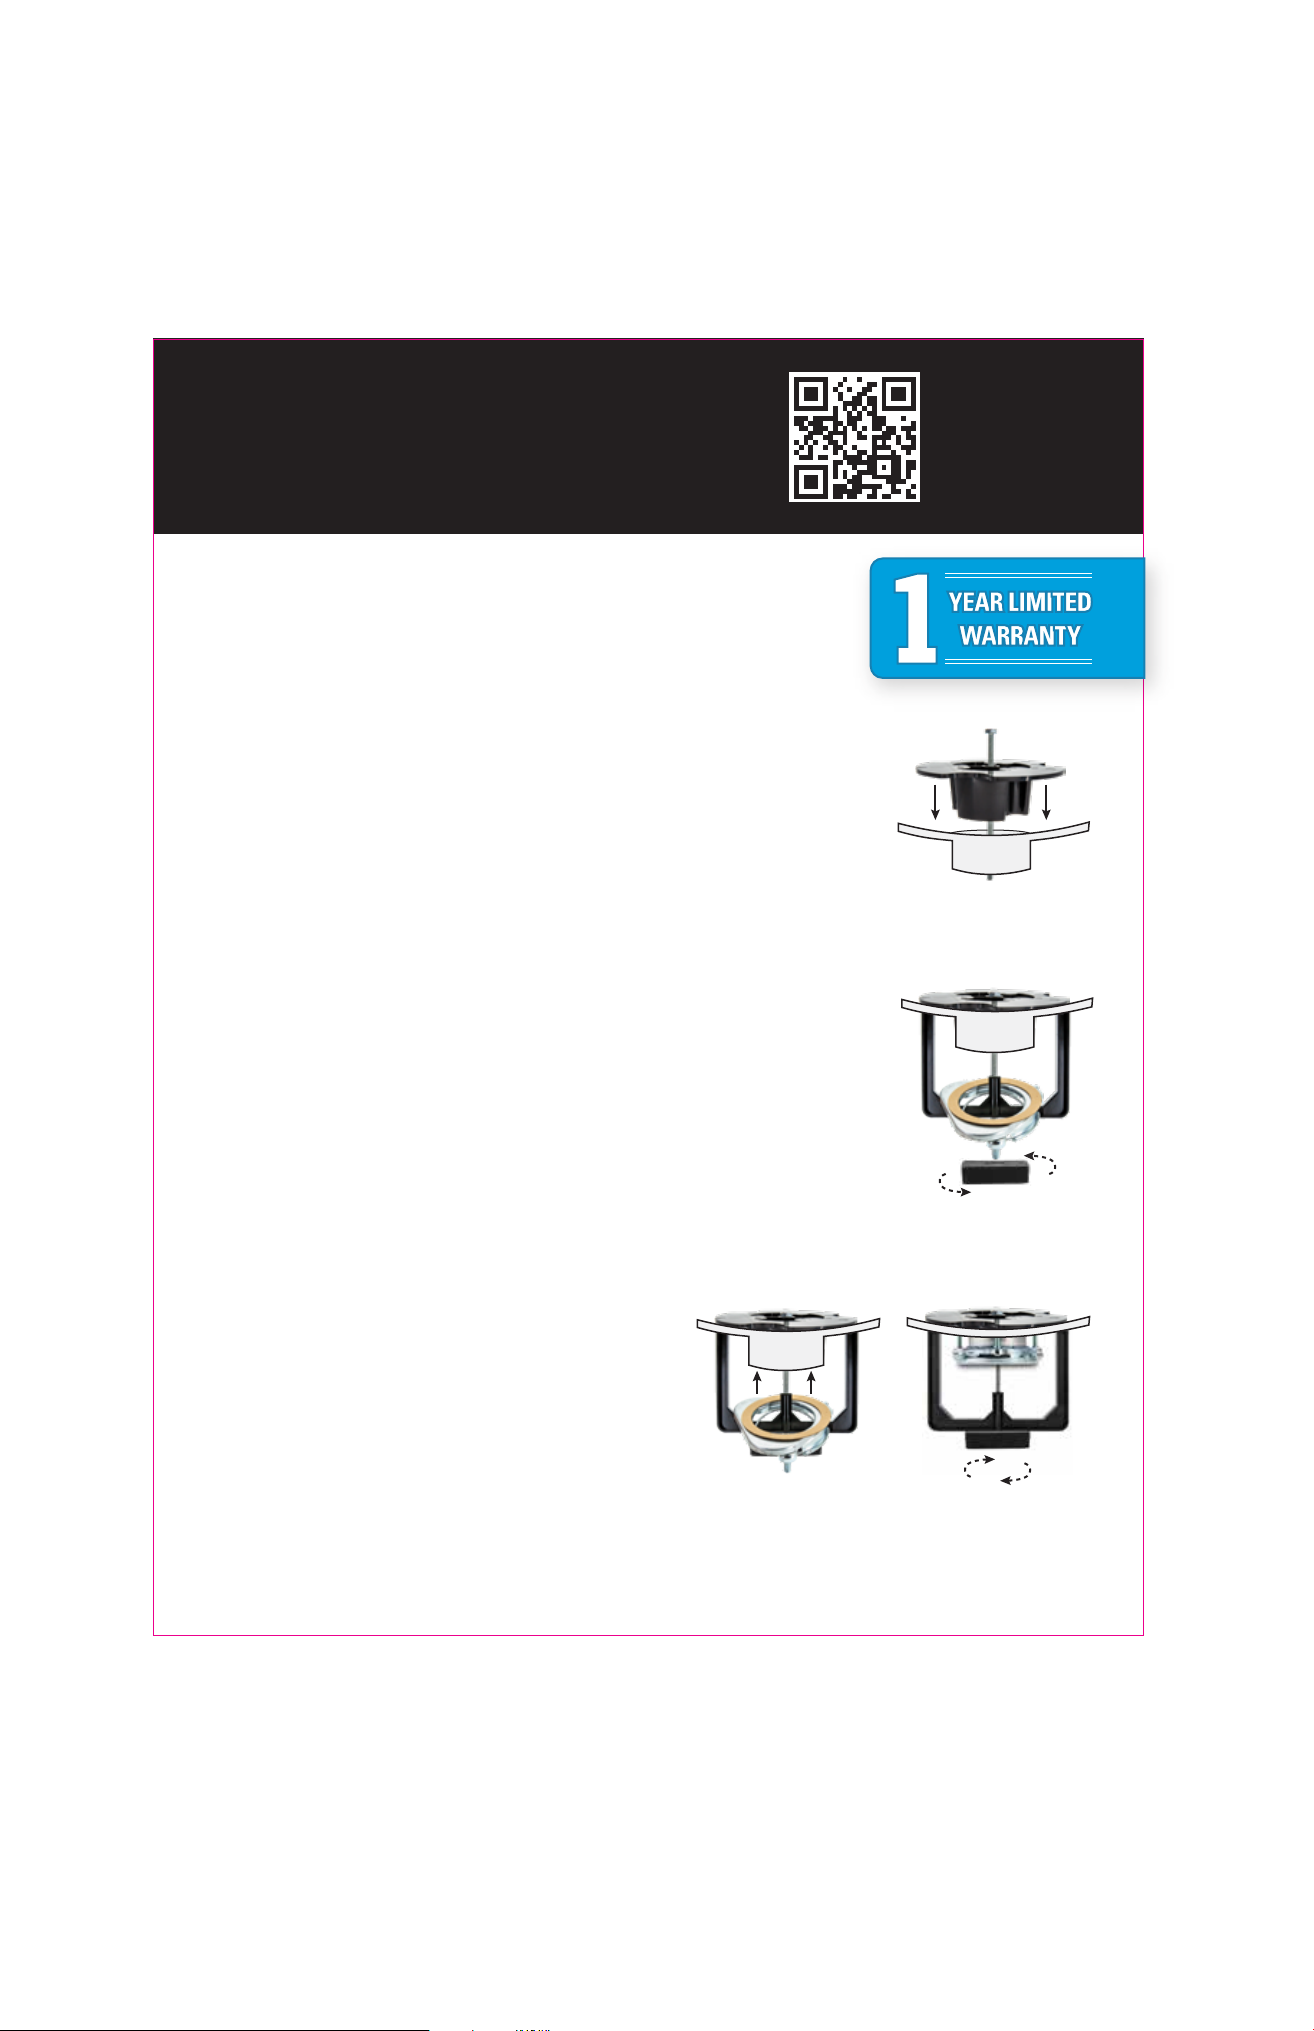
EZ STEP 1
Apply plumber’s putty evenly around the underside of the sink flange that came with
your disposal. Line up & press down into the sink. Insert the bolt through the top of the
clover, then place the clover into the sink flange.
Aplique masilla de plomero en forma pareja alrededor de la parte inferior de la brida para
fregadero que vino con su triturador. Alinee y presione hacia abajo contra el fregadero.
Introduzca el perno a través de la parte superior del trébol, luego coloque el trébol en la
brida para fregadero.
EZ STEP 2
On the center post of the horseshoe, stack in this order: the snap ring, mounting ring
(with screw heads facing down), backup flange (with the lip facing down), & the fiber
gasket. Then under the sink, slide the center post of the horseshoe onto the bolt. Screw
the nut onto the bolt, & tighten until the ends of the horseshoe are firm against the
bottom of the sink.
En el poste central de la herradura, apile lo siguiente en este orden: el anillo de retención, el
anillo de montaje (con las cabezas de los tornillos hacia abajo), la brida de respaldo (con el
labio hacia abajo), y la empaquetadura de fibra. Luego, debajo del fregadero, deslice el poste
central de la herradura en el perno. Atornille la tuerca en el perno y apriete hasta que los
extremos de la herradura estén firmes contra la parte inferior del fregadero.
SCAN QR
CODE FOR
INSTRUCTIONAL
VIDEO
YEAR LIMITED
WARRANTY
EZ STEP 3
Slide the disposal pieces up onto the sink flange & insert the snap
ring into the groove, securing everything in place. Tighten the
three bolts on the mounting ring to secure the sink flange to the
sink. Unscrew the nut, remove the horseshoe, & you are ready
to finish installation of the disposal per the manufacturer’s
instructions.
Deslice las piezas del triturador hacia arriba contra la brida para
fregadero, introduzca el anillo de retención en la ranura y sujete
todo en su sitio. Apriete los tres pernos en el anillo de montaje para
sujetar la brida contra el fregadero. Destornille la tuerca, retire la
herradura y está listo para instalar el triturador de basura según las
instrucciones del fabricante.
FIND MORE INFORMATION AT
ezsnappertool.com
 Loading...