

EZsmart tools GC18-1 User Manual
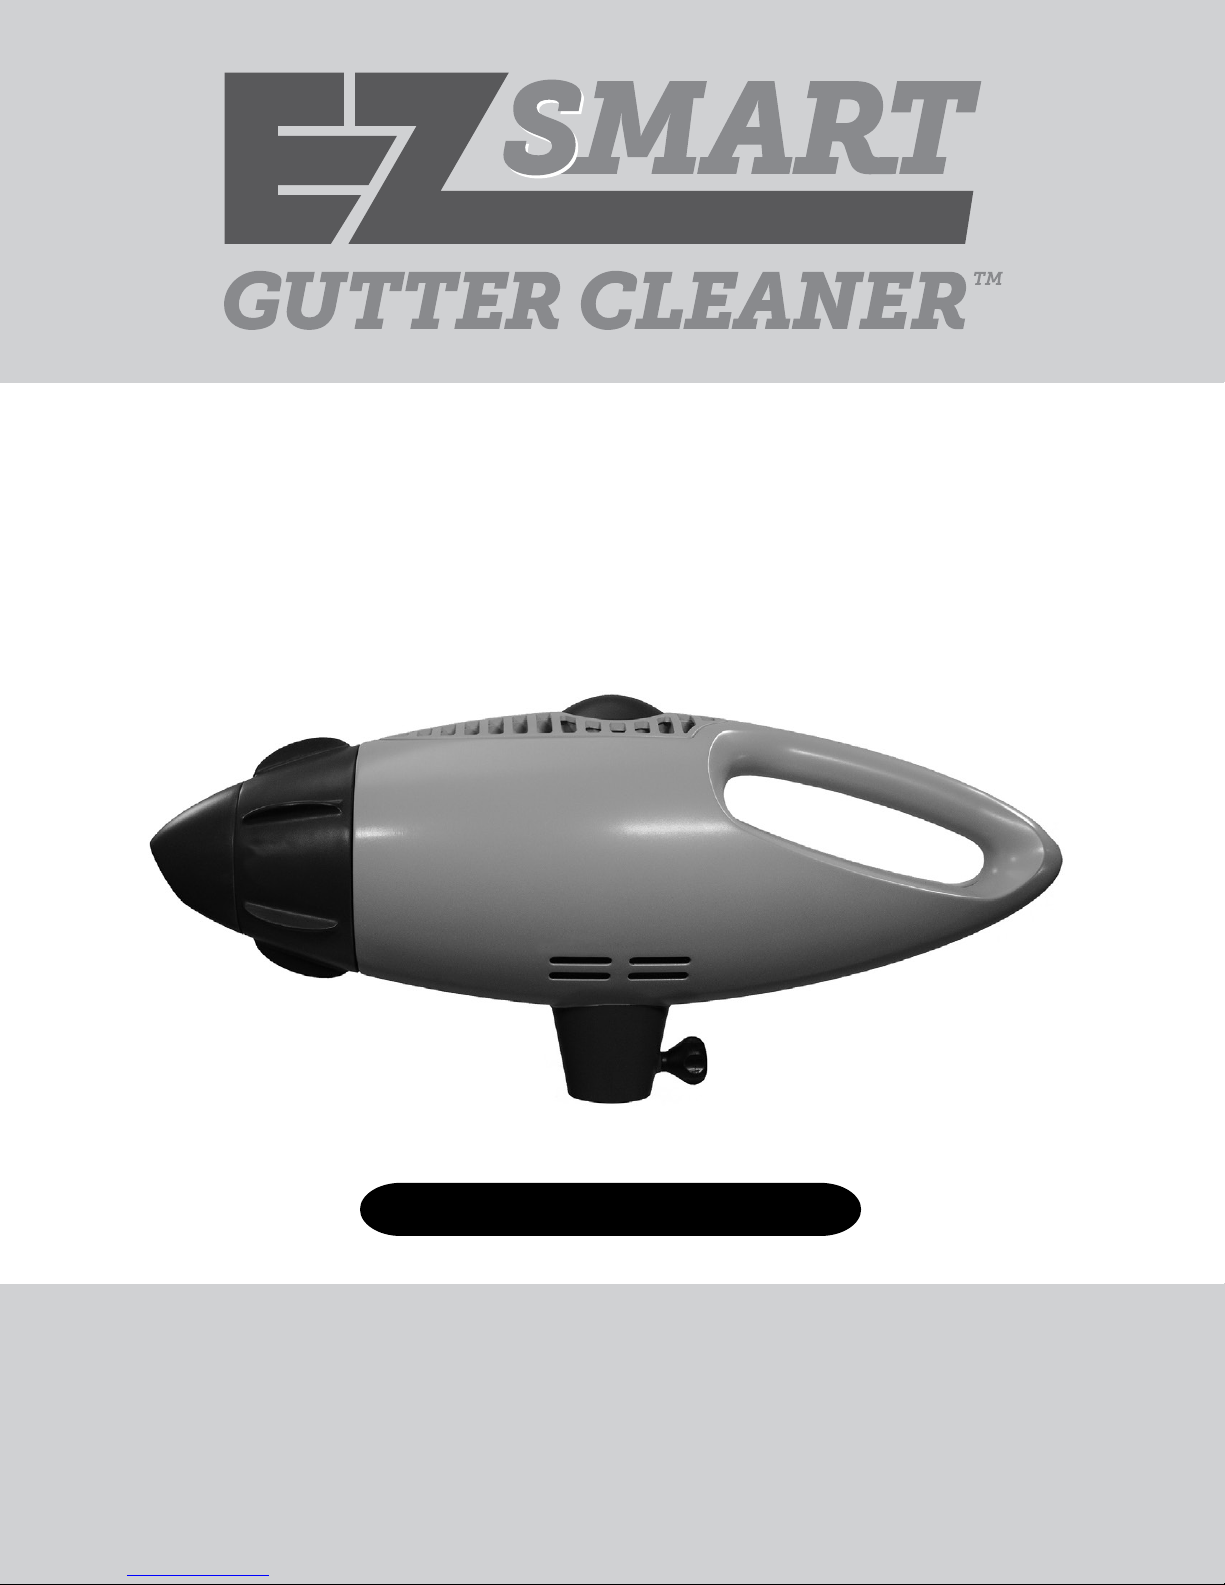
EZsmart Gutter Cleaner
Limpiador de Canaletas EZsmart
Nettoyeur de Gouttières EZsmart
Model / Modelo / Modèle: GC18-1
User Guide / Guía de usuario / Guide d’utilisation
Please read these instructions completely before operating this product.
Lea todas estas instrucciones antes de operar este producto.
Veuillez lire ces instructions complètement avant d’utiliser ce produit.
Safety Instructions
PRODUCT SAFETY: When used in the directed manner, this unit has been designed and manufactured to ensure your personal safety.
Improper use of this product can result in potential electrical shock or fire hazards. Please read all safety and operating instructions
carefully before installation and use, and keep these instructions handy for future reference.
CAUTION
RISK OF ELECTRIC SHOCK
DO NOT OPEN
WARNING: TO PREVENT FIRE OR SHOCK HAZARD, DO NOT EXPOSE THIS UNIT TO RAIN OR MOISTURE.
CAUTION: Any changes or modifications to this equipment not expressly approved by the party responsible for compliance could void
your authority to operate the equipment.
CAUTION: To reduce the risk of electric shock do not remove cover (or back). No user serviceable parts inside.
Refer servicing to qualified service personnel.
DANGEROUS VOLTAGE: The lightning flash with arrowhead, within an equilateral triangle, is intended to
alert the user to the presence of uninsulated dangerous voltage within the product’s enclosure that may be
of sufficient magnitude to constitute a risk of electric shock to persons.
ATTENTION: The exclamation point within an equilateral triangle is intended to alert the user to the presence
of important operating and maintenance (servicing) instructions in the literature accompanying the appliance.
BATTERY Recycling and Disposal Information:
• Do not dispose of electronic devices or any of their components (especially batteries) in your municipal trash collection.
• Consult your local waste management authority or a recycling organization like Earth911.com to find an electronics
recycling facility in your area.
• We have partnered with the RBRC (Rechargeable Battery Recycling Corporation) to promote
the collection and recycling of spent lithium ion batteries in the United States and Canada. The
RBRC seal indicates that we have prepaid for recycling the battery. The seal has a toll free phone
number (1-800-822-8837) that connects you to information on battery recycling locations and
information on battery disposal bans or restrictions in your area. CAUTION: Rechargeable batteries
must be recycled or disposed of properly.
Lithium-Ion Battery Warning:
• This equipment contains a rechargeable lithium-ion battery.
• Do not charge the battery in temperatures below 32° F (0° C) or higher than 113° F (45° C).
• Do not open or mutilate the battery.
• The rechargeable batteries contained in this equipment may explode if disposed of in a fire.
• Do not short-circuit the battery.
• Do not charge the rechargeable battery pack used in this equipment with any charger other than the one designed to
charge this battery pack as specified in the owner’s manual. Using another charger may damage the battery pack or
cause the battery pack to explode.
1

IMPORTANT SAFETY INFORMATION
When using this blower, basic precautions should always be followed, including the following:
1. All the safety and operating instructions should be read before the product is operated. Follow all operating
instructions.
2. The safety and operating instructions should be retained for future reference.
3. Comply with all warnings on the product and in the operating instructions.
4. Power Sources – This product should be operated only from the type of power source indicated on the marking label.
If you are not sure of the type of power supplied to your location, consult your video dealer or local power company.
For products intended to operate from battery power, or other sources, refer to the operating instructions.
5. Attachments – Do not use attachments unless recommended by the product manufacturer as they may cause a hazard.
6. Do not use blower near water – for example, near a bath tub, wash bowl, kitchen sink or laundry tub, in a wet
basement, near a swimming pool and the like.
7. Store blower indoors.
8. Do not allow blower to be used as a toy. Keep children away.
9. All visitors should be kept at a distance from the work area.
10. Do not put any object or fingers into the openings. Do not use with any opening blocked; keep free of anything that
may reduce air flow.
11. Keep hair, loose clothing, fingers and all parts of body away from openings and moving parts.
12. Do not use in areas where flammable or combustible liquids, such as gasoline, may be present.
13. Do not lend or rent the blower without the instruction manual. Be sure that anyone using it understands the
information contained in this manual.
14. To reduce the risk of injury and/or damage to property, never let your power tool run unattended. When it is not in use
(e.g. during a work break), shut it off and make sure that unauthorized persons do not use it.
15. Be alert – if you get tired, take a break. Tiredness may result in loss of control. Working with any power tool can be
strenuous. If you have any condition that might be aggravated by strenuous work, check with your doctor before
operating this blower.
16. Protect the AC Adapter from rain and dampness. Keep charger dry.
17. The AC Adapter heats up during the charging process. Do not operate on an easily combustible surface (e.g. paper,
textiles) or in an easily combustible environment – risk of fire.
18. Do not operate in a hazardous location, i.e. in a location where there are combustible liquids (fumes), vapors or dusts.
Chargers can produce sparks, which may ignite the dust or vapors – risk of explosion.
19. To reduce the risk of injury from loss of control, never work on a ladder, in a tree or any other insecure support.
20. Watch for hidden obstacles such as tree stumps, roots and ditches to avoid stumbling. For better footing, clear away
fallen branches, scrub and cuttings. Be extremely cautious when working on slopes or uneven ground.
21. Inhalation of certain dusts, especially organic dusts such as mold or pollen, can cause susceptible persons to have an
allergic or asthmatic reaction. Substantial or repeated inhalation of dust and other airborne contaminants, in particular
those with a smaller particle size, may cause respiratory or other illnesses. Control dust at the source where possible.
Use good work practices, such as operating the unit so that the wind or operating process directs any dust raised
by the power tool away from the operator. Follow the recommendations of EPA/OSHA/NIOSH and occupational and
trade associations with respect to dust (“particulate matter”). When the inhalation of dust cannot be substantially
controlled, i.e. kept at or near the ambient (background) level, the operator and any bystanders should wear a
respirator approved by NIOSH/MSHA for the type of dust encountered.
22. Never point the blower at anybody.
23. Do not attempt any maintenance or repair work not described in this user guide.
2
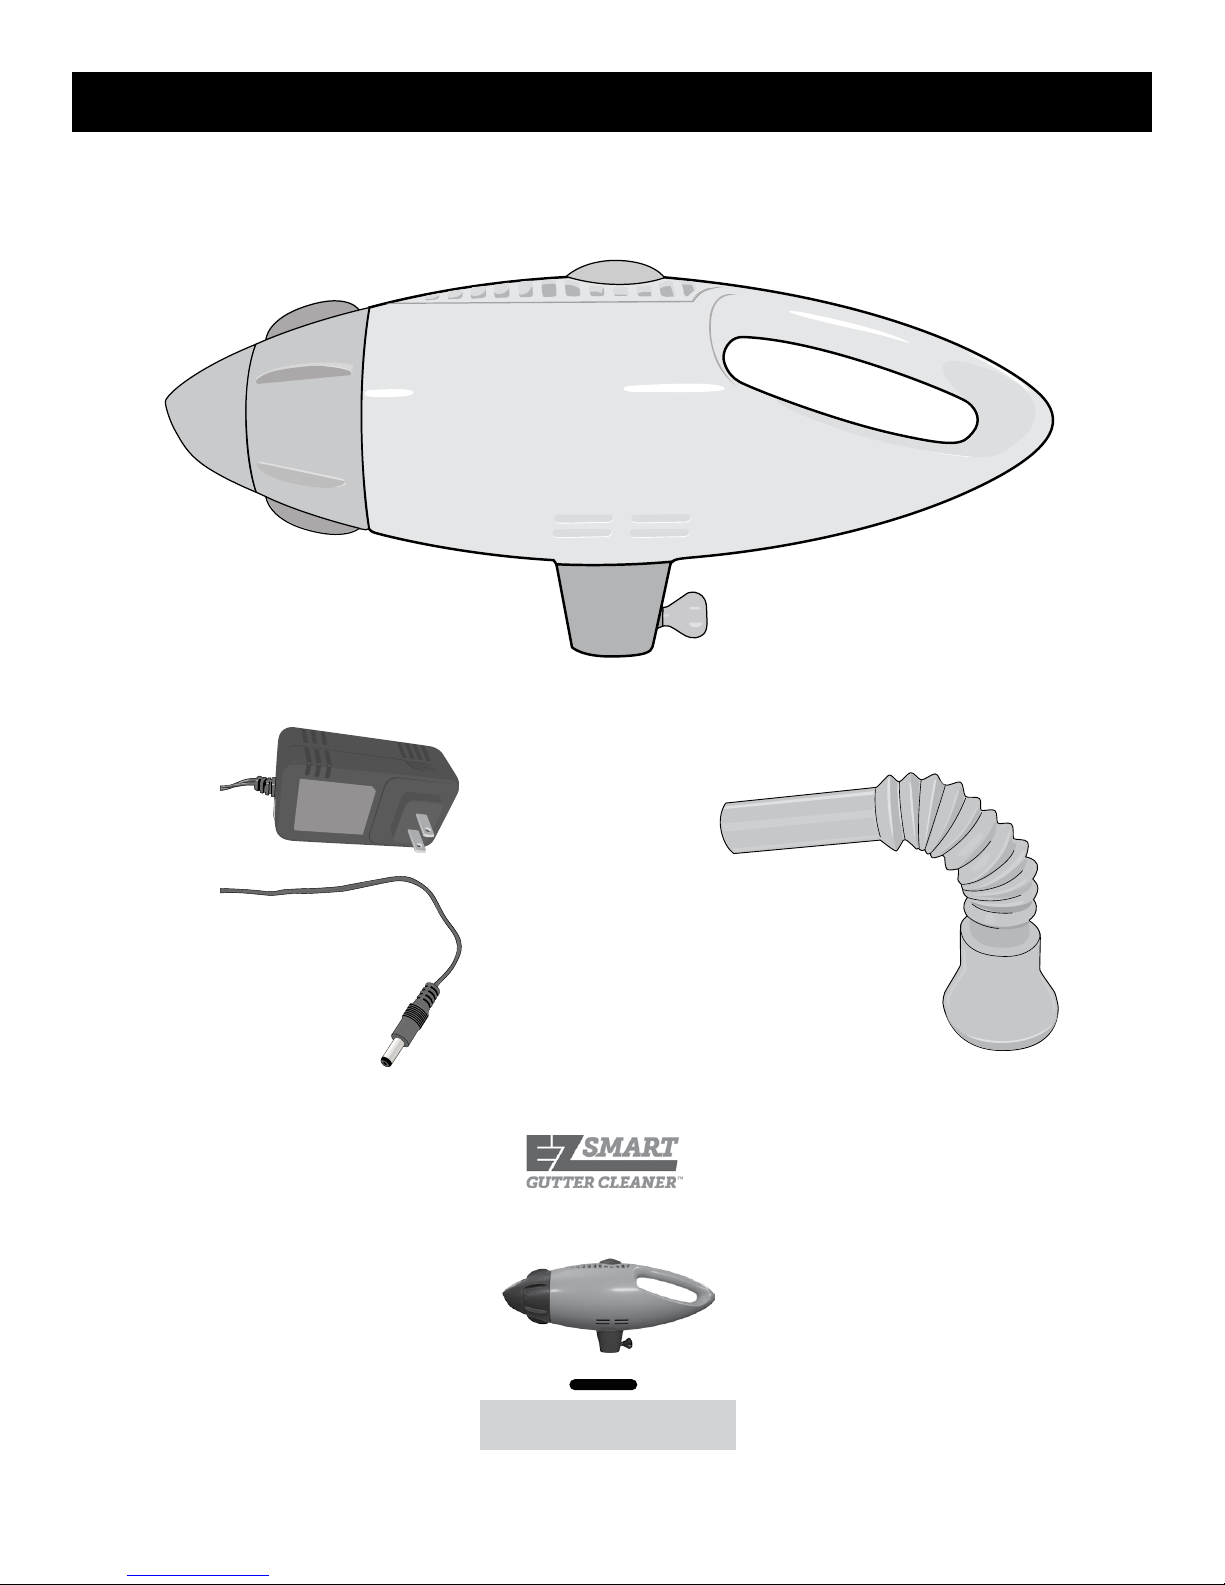
What is Included
After unpacking, you will have the following items:
AC Adapter
Blower
EZsmart Gutter
Cleaner
Hose Nozzle
Model: GC18-1
User Guide
Please read these instructions completely
before operating this product.
User Guide
3
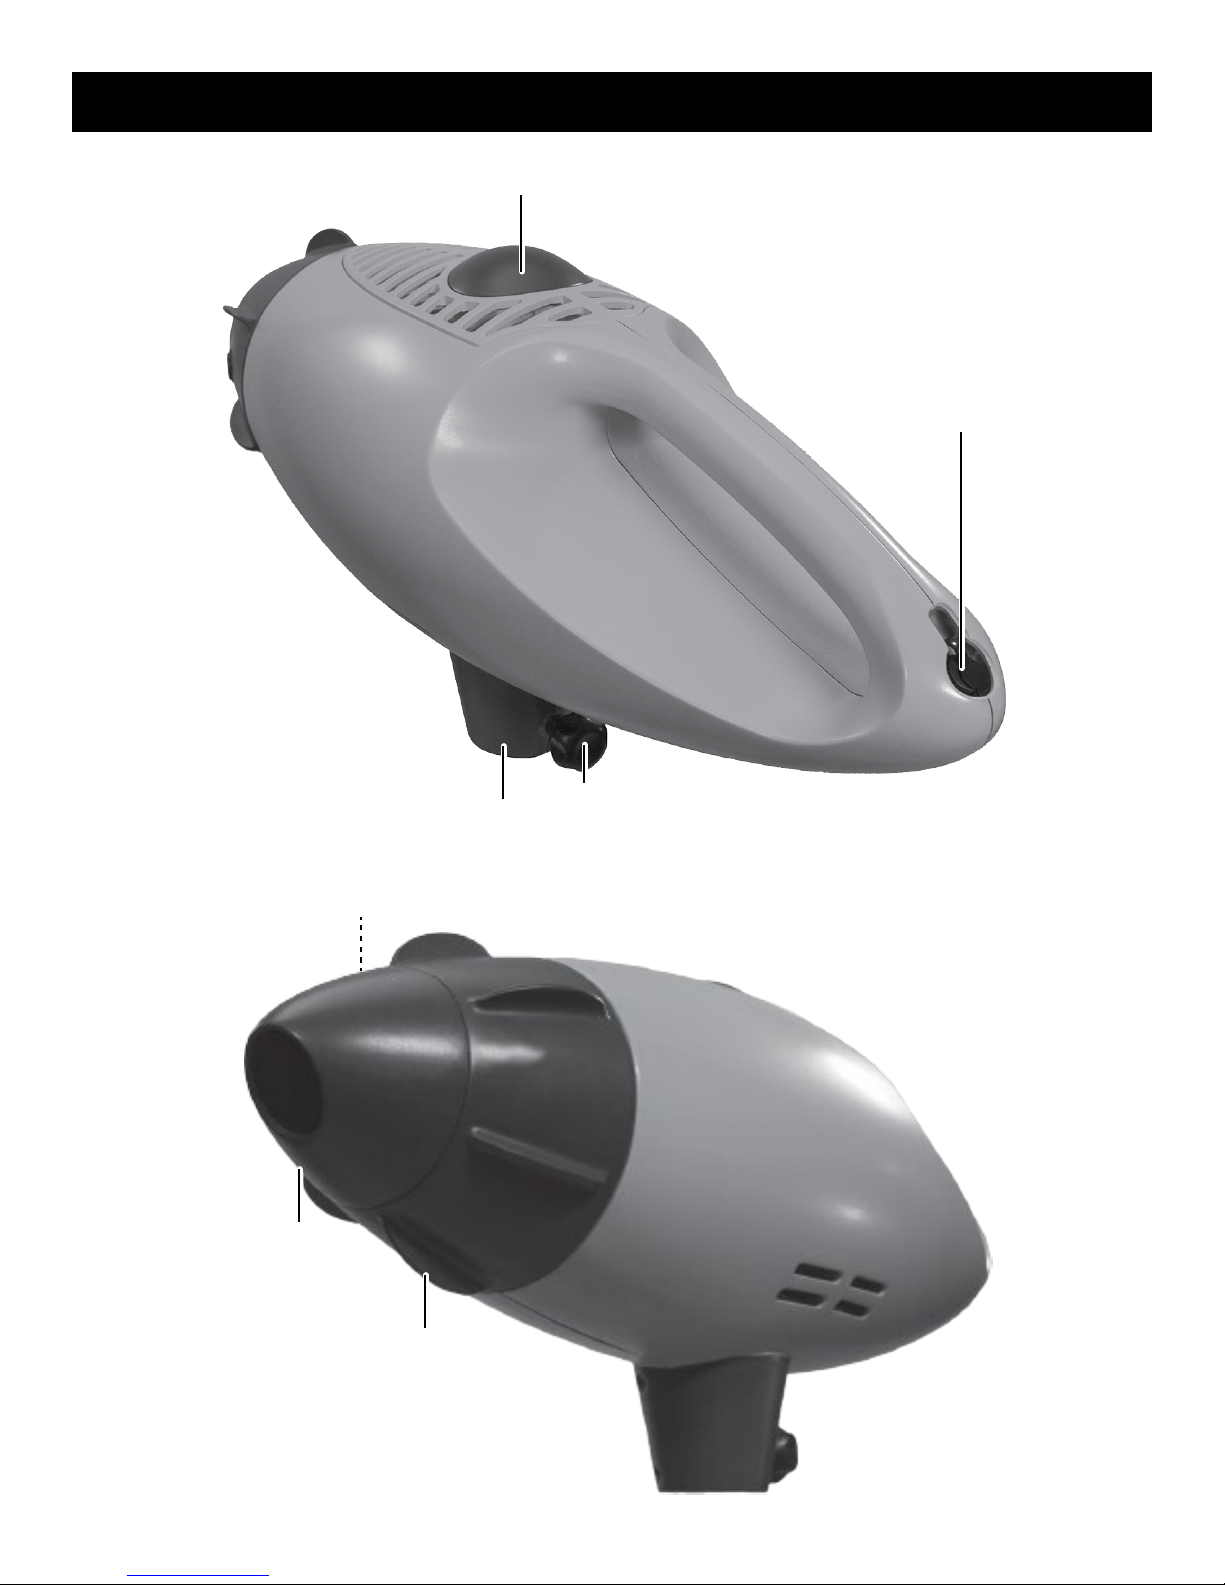
Location of Controls
On/Off Button
DC In
Jack
(Under Flap)
Nozzle Release
Nose
Fins
Pole
Chamber
Lock Nut
4
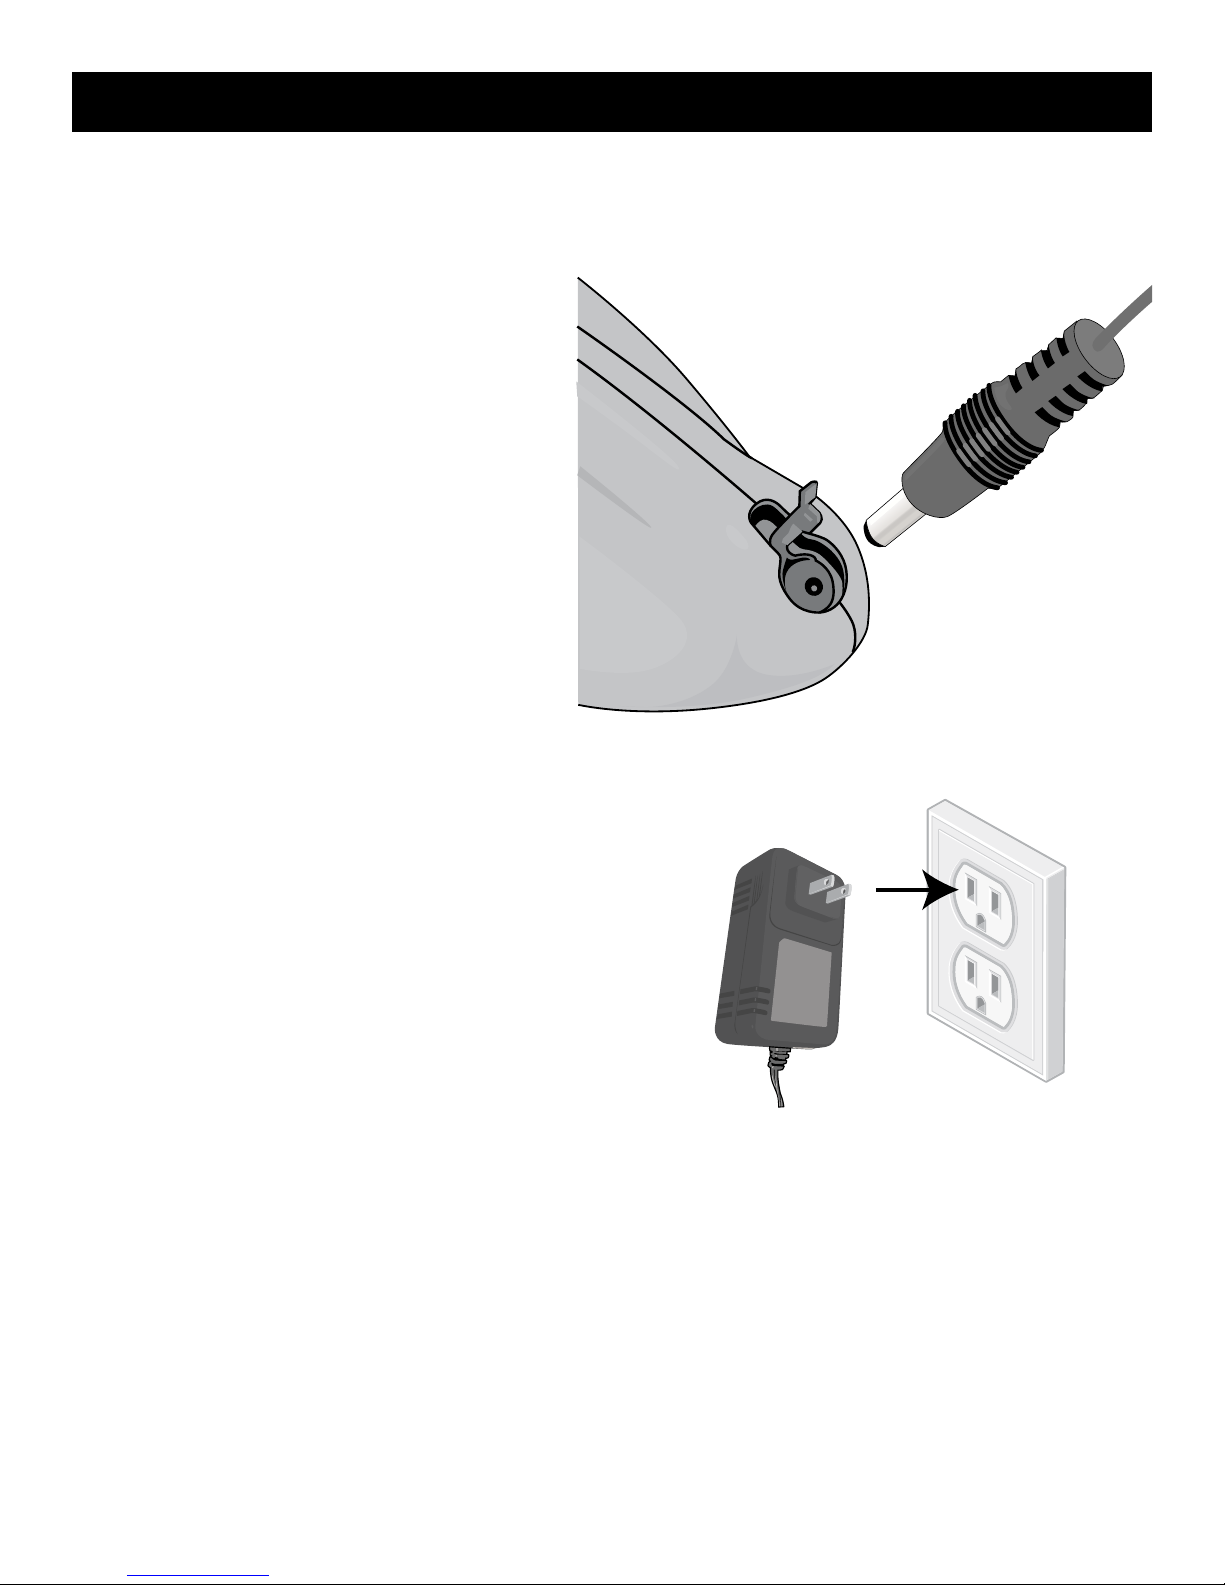
Charging the Battery
When the blower’s performance starts to degrade, it is time to recharge the battery as follows:
Lift up rubber flap to expose the DC In
1
jack. Insert the AC Adapter’s plug into the
DC In Jack.
Insert the AC Adapter into an AC Outlet
2
having 120V, 60Hz; the Indicator on the
AC Adapter will be red while it is charging.
When the indicator turns green, the blower
is fully charged. Make sure to disconnect
the AC Adapter at this point.
Important: Please charge the blower fully before first use.
5
Operation
BEFORE OPERATING:
• Make sure to read the Important Safety Information before operating.
• To reduce the risk of injury to your eyes, never operate the blower unless wearing goggles or
properly fitted protective glasses with adequate top and side protection complying with ANSI Z
87.1 (or your applicable national standard).
• We recommend the use of sound barriers (ear plugs or ear mufflers) to protect your hearing.
• Good footing is very important. Do not wear sandals, flip-flops or go barefoot.
• Always check the blower to make sure there are no cracks or anything that will indicate a problem.
Never operate if it is damaged.
• In the event of an emergency, turn the unit off immediately.
• Do not wear loose clothing, scarves or neck chains or let long hair hang loose, since these can be
drawn into rotating parts of the blower and cause injury.
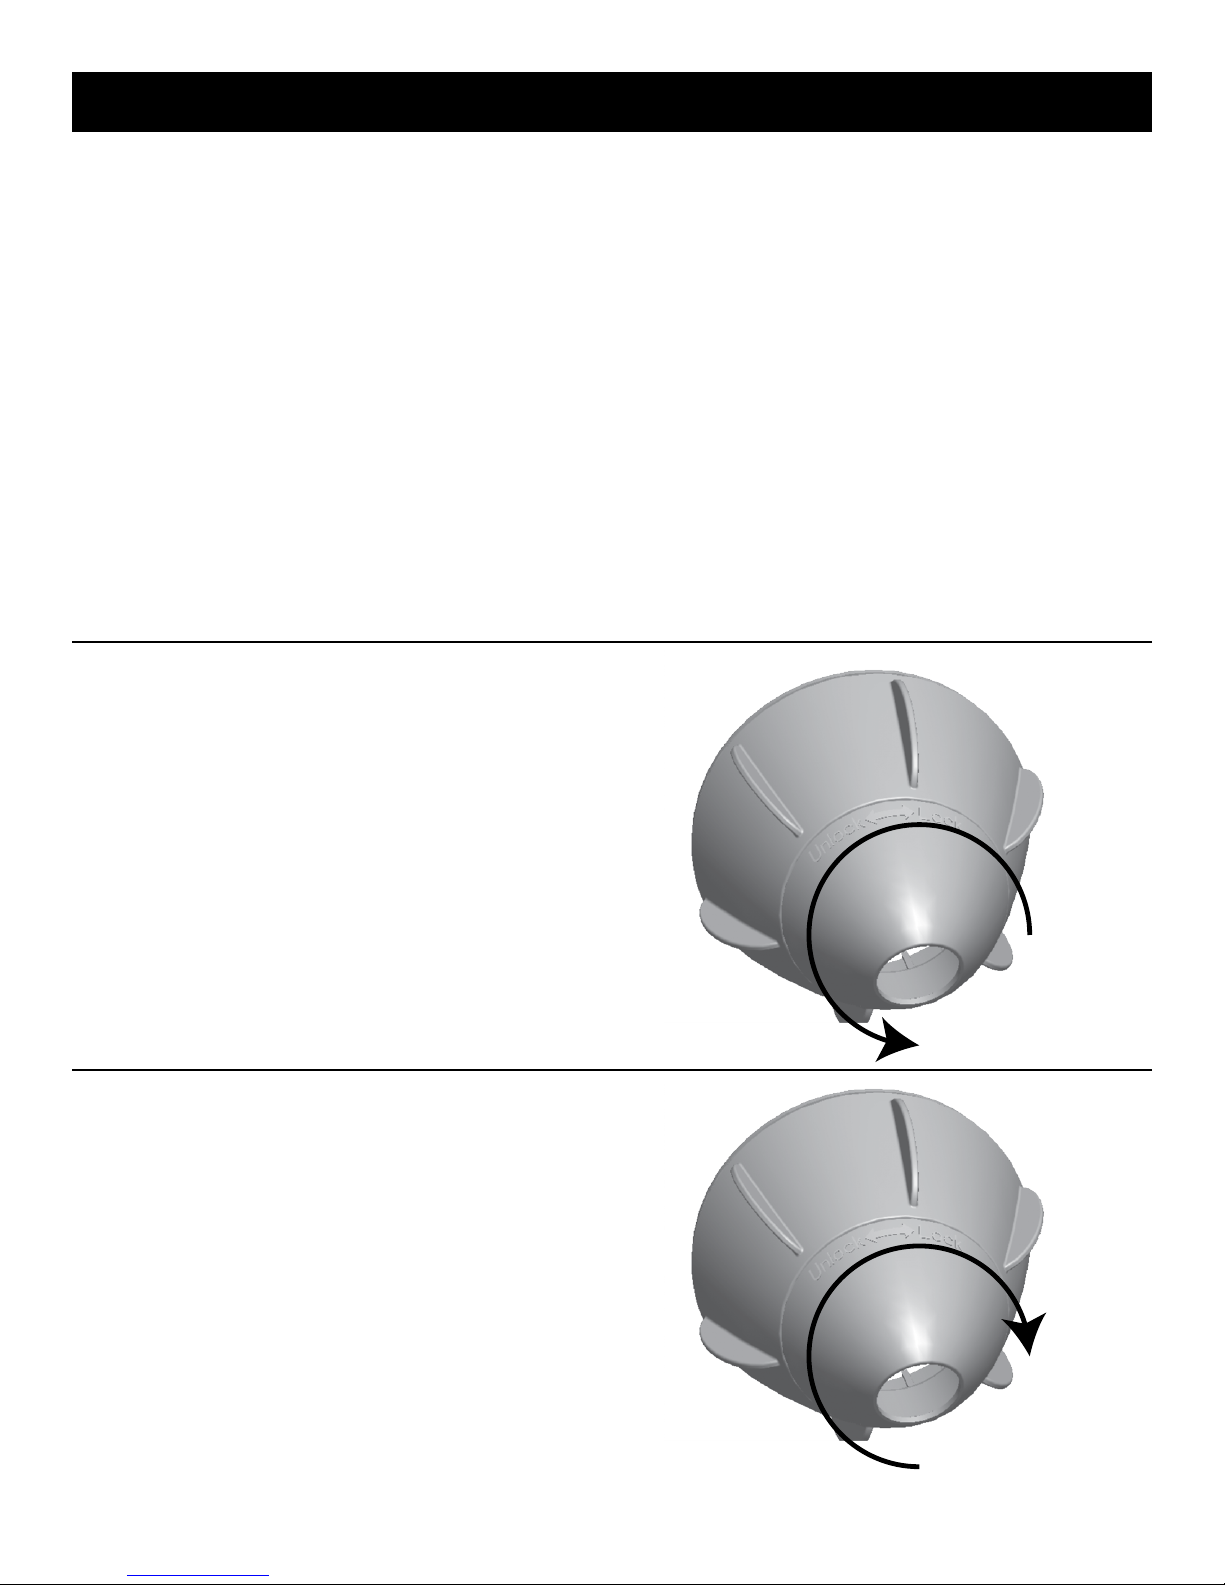
The unit comes installed with the standard
1
nozzle that is suitable for standard gutter
cleaning. However, also included is the Hose
Nozzle that will allow you to blow leaves
from around downspouts, in roof valleys
(where roofs connect), unusual gutter
hard-to-reach areas, etc.
To change a Nozzle, rotate counterclockwise 90° and lift off the Nozzle.
Insert the new Nozzle by aligning the tabs
2
with the base and then rotate clockwise
90°. Make sure it is securely inserted by
gently tugging on it.
Description of the Hose Nozzle is described
in step 8.
6
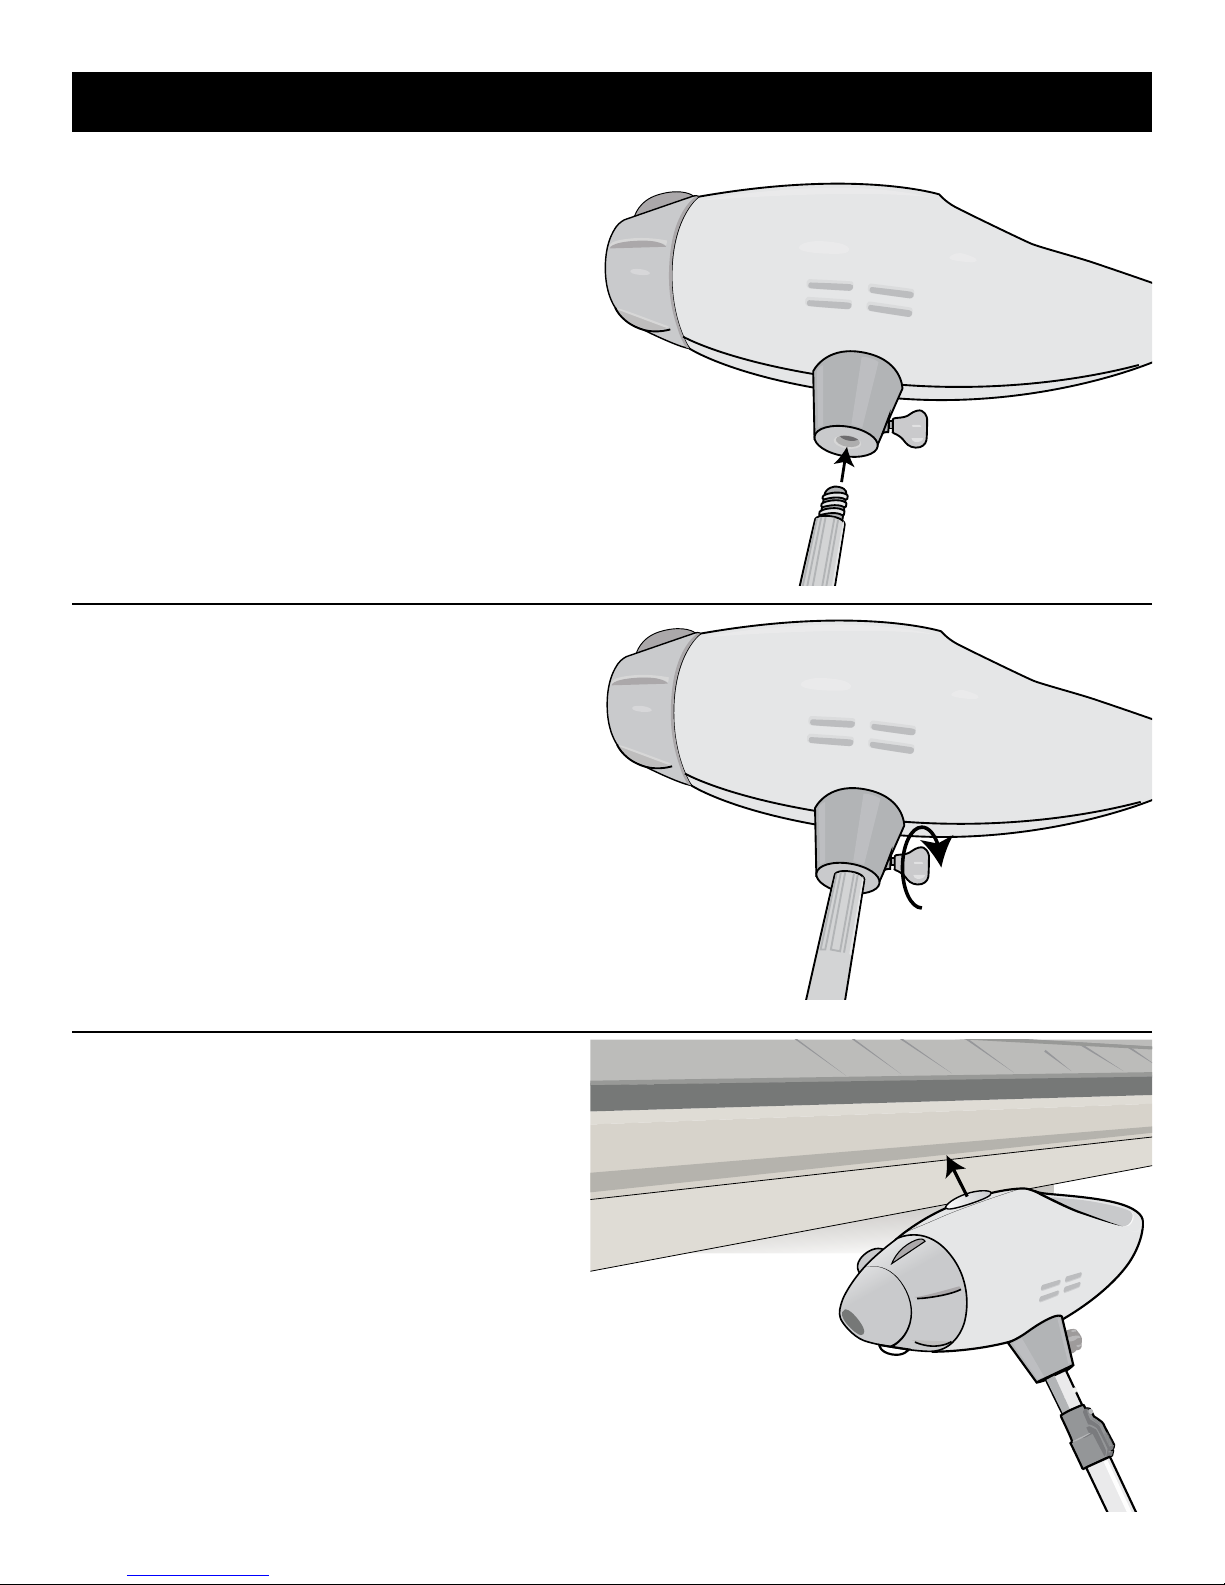
The blower is designed to attach to a
3
standard extension pole with a standard
thread, but it is a must to use one that is
strong enough to hold the weight of this
blower.
Make sure the Lock Nut is loosened to allow
the pole to be inserted. Then insert the
threaded side into the Pole Chamber and
turn the pole counter-clockwise until it is
tight, but DO NOT OVER-TIGHTEN.
After inserting the pole, tighten the Lock
4
Nut by turning it clockwise until tight, but
DO NOT OVER-TIGHTEN.
Operation
You are now ready to use the blower.
Turn the unit on by pressing the large On/
5
Off switch. This is a large push button so it
can be pressed against the bottom of the
gutter or similar surface to turn on or off.
This is the recommended method to turn on.
7
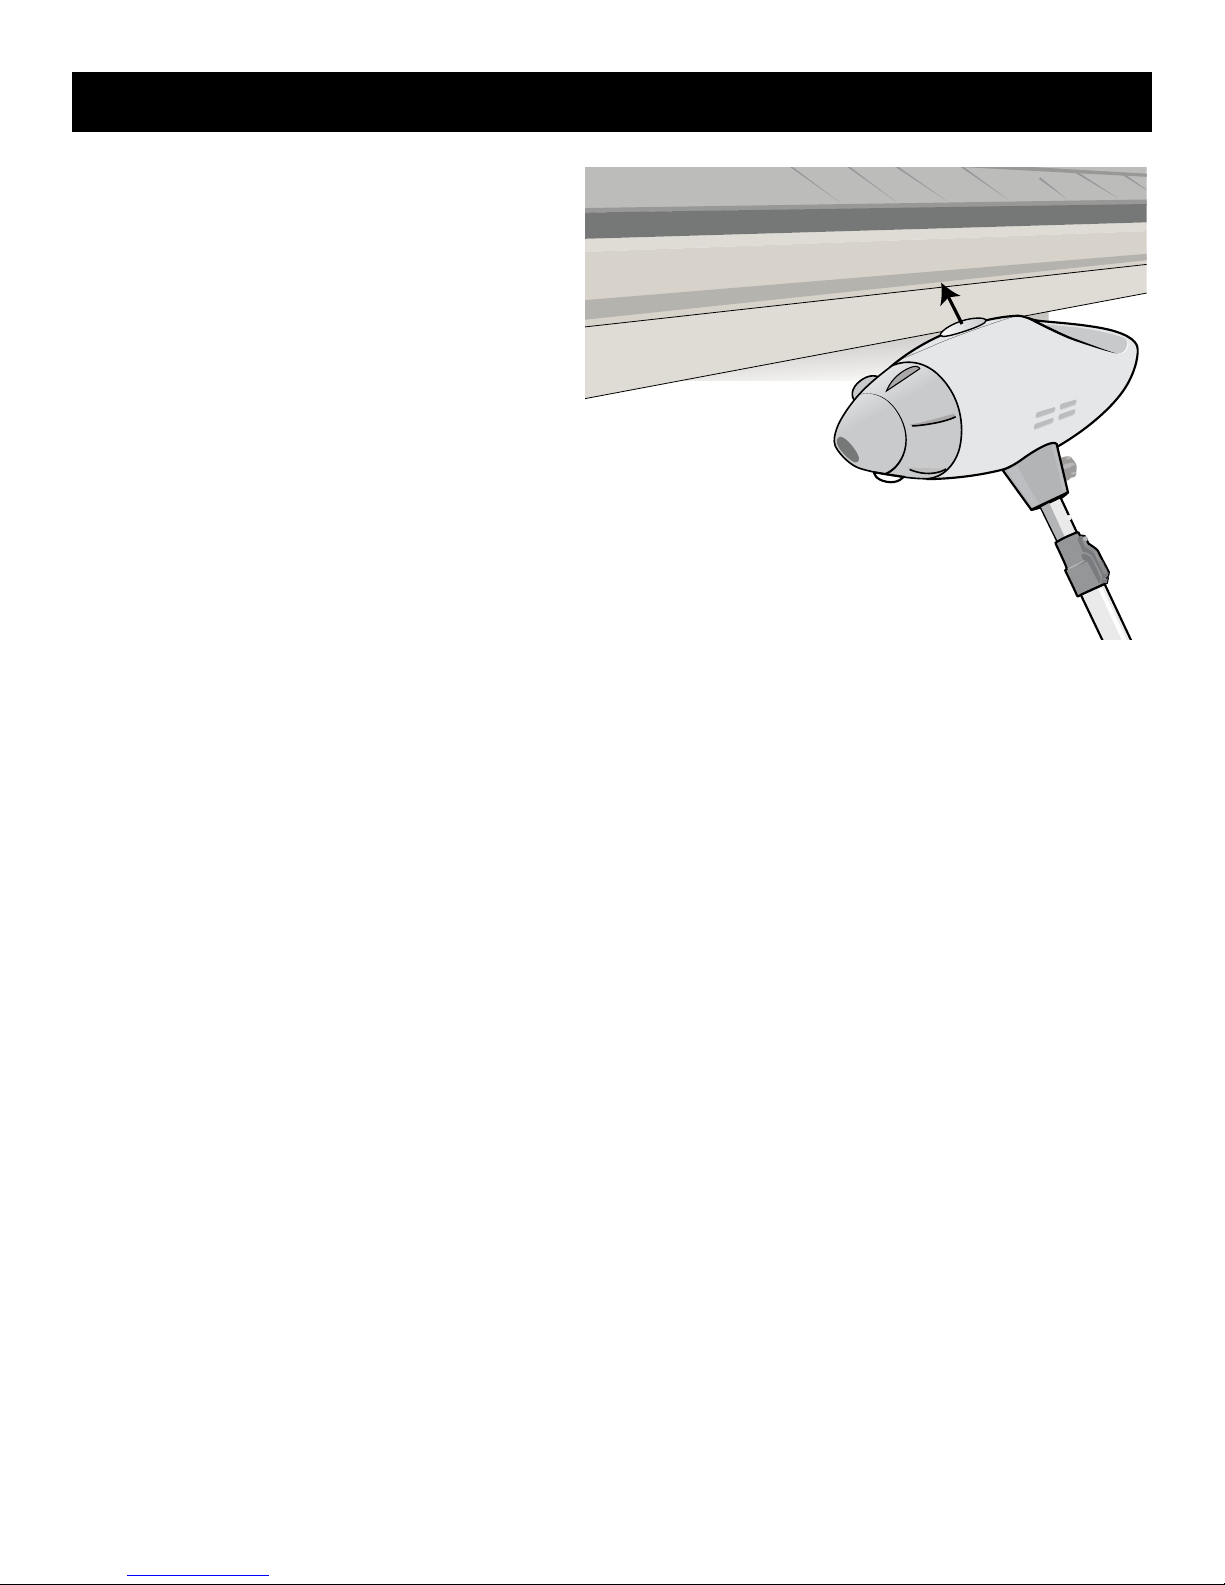
Now simply slide the blower across the
6
gutter as shown to blow out the leaves.
Stand with the pole at varying angles for
best results.
Individual conditions will vary when
using this blower. Some practice and
experimentation will be necessary to find
the most effective position for the type of
house and gutter design.
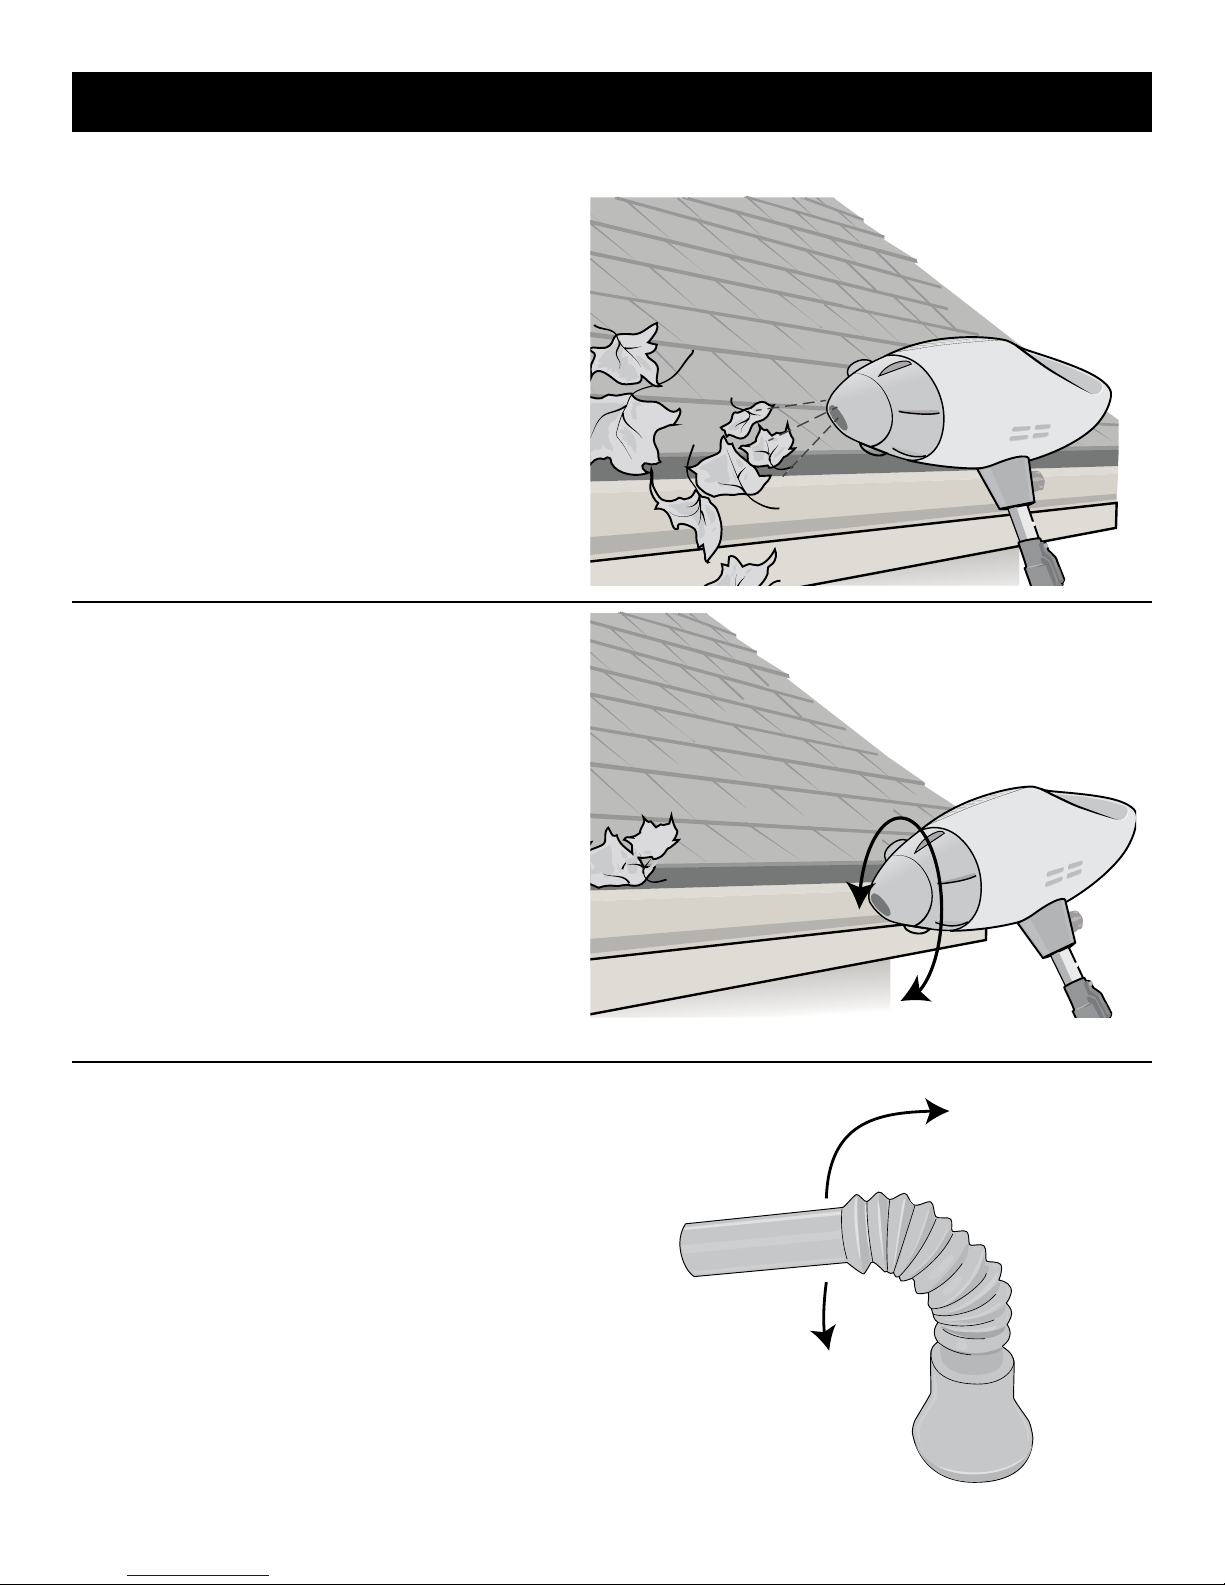
The fins along the Nozzle move freely to
7
allow you to rotate the Nozzle position.
Simply use the gutter to rotate the Nozzle
to the desired position. This is very useful
when making another pass along the
gutter in the opposite direction.
Operation
If using the Hose Nozzle, gently bend the
8
flexible hose as desired and use similarly
to the standard nozzle. See next page for
some uses for the attachment.
8
Operation
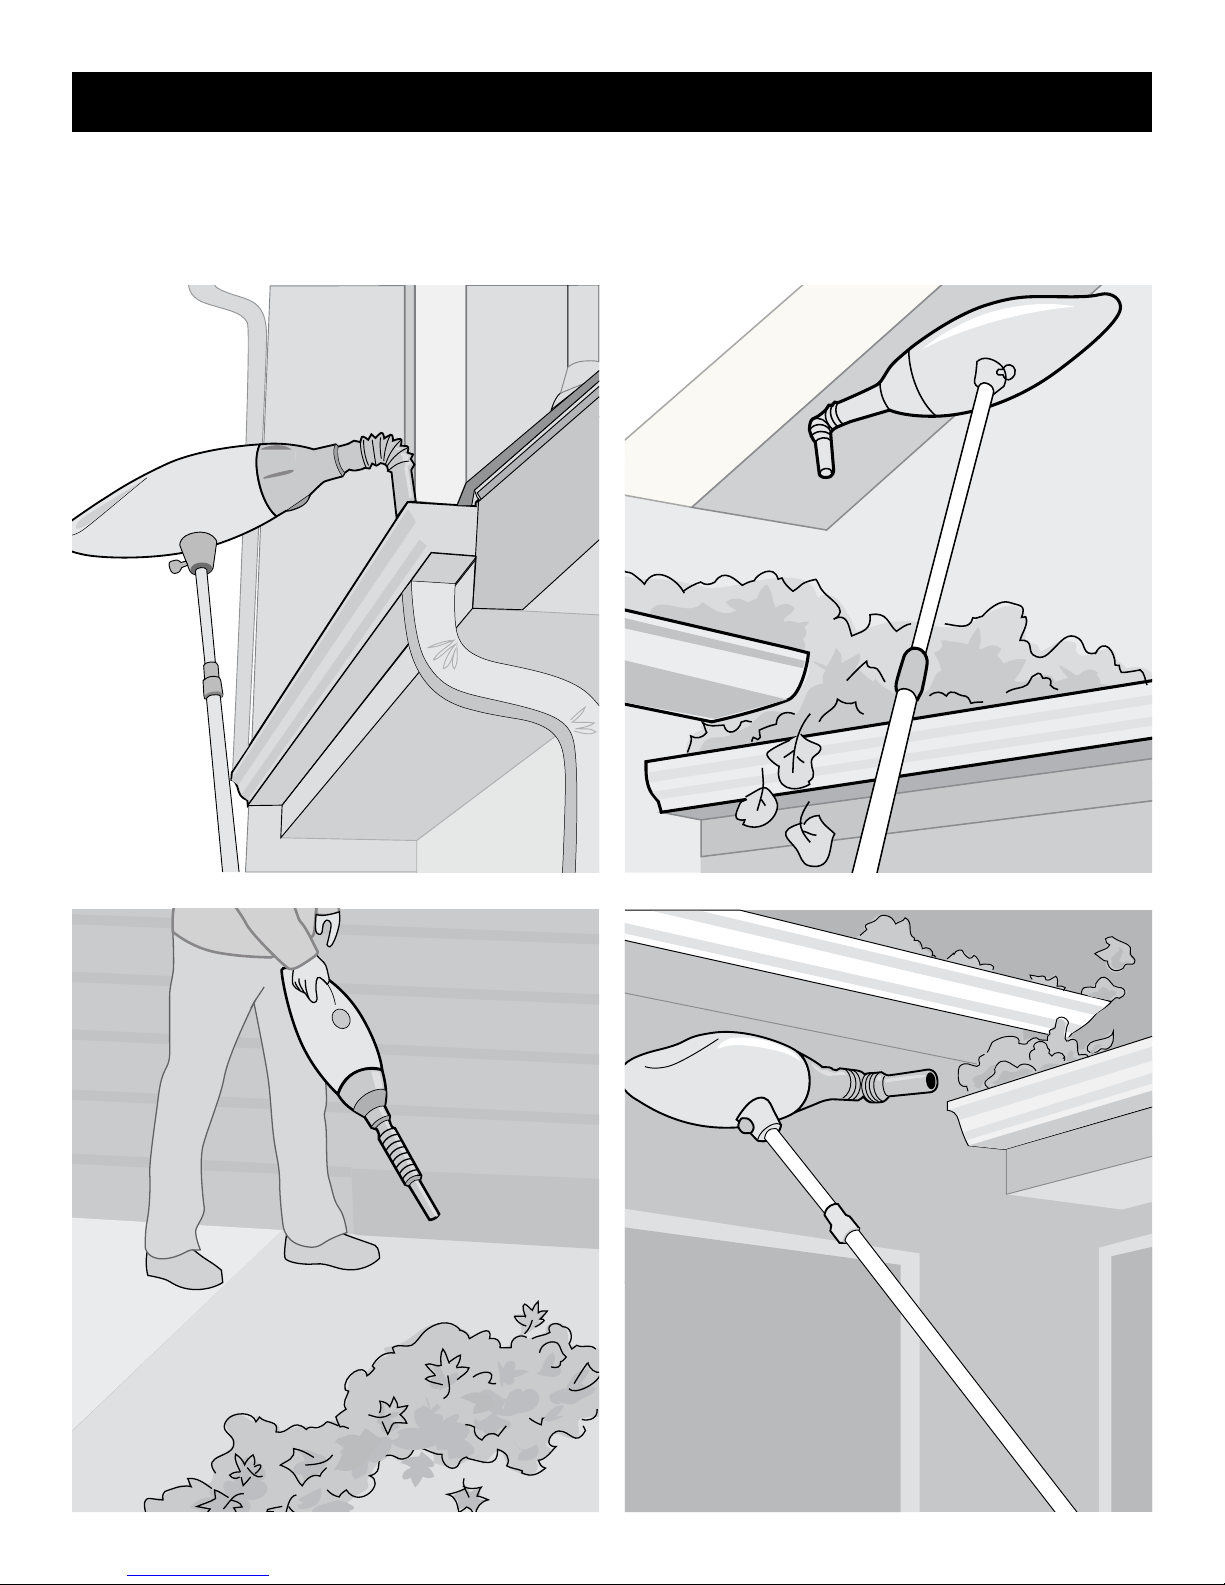
The Hose Nozzle that will allow you to blow leaves from around downspouts, in roof valleys
(where roofs connect), unusual gutter hard-to-reach areas, etc. - below are some examples.
9
When done using, tap the On/Off button on
9
the bottom of the gutter or similar surface
to turn it off.
Clean blower and store in a cool (not cold),
dry area.
Operation
Note: For videos showing the blower in use, visit:
www.EZsmartTools.com
10

Troubleshooting and Maintenance
PROBLEM: Blower will not turn on.
SOLUTION 1: Make sure the battery is charged.
SOLUTION 2: Press the On/Off button firmly to turn the unit on.
PROBLEM: Blower is not blowing as strong as usual.
SOLUTION 1: Make sure the battery is charged. When the battery is low, the blower
will not perform as well.
MAINTENANCE:
This blower does not require much maintenance other than cleaning with a damp cloth
after using.
Registering the Unit
Please visit www.EZsmartTools.com to register your new EZsmart Gutter Cleaner unit
within ten (10) days of the purchase. You will be asked to provide the store name and
date of purchase, along with your name and address.
The registration will enable us to contact you in the unlikely event of a product safety
notification. By registering, you acknowledge that you have read and understood
the instructions for use of the unit, and warnings set forth in the accompanying
instructions.
11
 Loading...