

EZPnP Technologies DP330 Series User Manual

High Speed Audio CD to Digital
Music Converter, Burner, & Player
User's Manual
Model: DP330 Series


Table of Contents
1. Introduction........................................................................ P.2
2. Features............................................................................ P. 2
3. Product Views.................................................................... P. 3
3.1 Front View................................................................... P. 3
3.2 Top View...................................................................... P. 4
3.3 Rear View.................................................................... P. 6
3.4 Battery Compartment.................................................. P. 6
4. Menu Instructions.............................................................. P. 8
4.1 LCD Display................................................................. P. 8
4.2 Icon List...................................................................... P. 8
4.3 Menu List.................................................................... P. 9
5. Usage................................................................................ P.10
5.1 Rip CD........................................................................ P.10
5.2 Playback CD............................................................... P.14
5.3 Audio Recording.......................................................... P.15
5.4 File Manager................................................................ P.17
5.4.1 Operating Instructions........................................... P.17
5.4.2 File Copy & Delete Instructions............................. P.18
5.5 Make CD..................................................................... P.19
5.6 Setup........................................................................... P.21
5.7 Important Notice.......................................................... P.27
6. FCC & Safety..................................................................... P.29
7. FCC WARNING................................................................. P.29
8. Caution.............................................................................. P.31
9. DANGER!.......................................................................... P.31
10. WARNING!........................................................................ P.31
11. Limited Product Warranty................................................... P.31
12. Product Application Scope................................................. P.31
13. Disclaimer.......................................................................... P.32
14. Acknowledgment & Trademark.......................................... P.32
15. Digital Music Licensing....................................................... P.32
1

1. Introduction
Thank you for purchasing our EZDigiPod DP330. Now you can convert your
audio CD's to DIGITAL MUSIC format without a computer. The new EZDigiPod
DP330, from EZPnP Technologies, retrieves audio files from a CD, and converts
them to DIGITAL MUSIC format quickly with the touch of a single button. Once
converted to DIGITAL MUSIC, the files are then transferred to a DIGITAL MUSIC
player or flash memory card.
EZDigiPod DP330 is the easiest way to convert your favorite CD collections to
Digital Music. Music files are transferred to your Digital Music Player or memory
cards automatically, allowing you to enjoy true, CD-quality, digital sound with song
title and artist information On-The-Go!
Note:
The DP330 supports most DIGITAL MUSIC players that can connect to USB
and be recognized as mass storage devices. However, it CANNOT support
the following type players:
• Those which DO NOT accept standard DIGITAL MUSIC format files for
playback
• Those which require a device driver or a proprietary software utility for
PC connection
2. Features
• Directly converts audio CD’s or any audio sources to MP3/FLAC/WAV format
without using a computer
• Advanced CD MAKER function converts your MP3/FLAC/WAV formatted files
from memory card or USB storage device to create your own playable audio
CD disc with NO PC Needed!
• Transfers music to your digital music player, flash memory cards, and USB
flash drives
• Provides CD metadata info update via the internet or use CD text display
• Automatically applies song titles & artist information to the digitized music
• Access songs on audio CDs, USB flash drives, and SD memory cards
effortlessly
• Voice Recording function supported
• File Manager function supported
• Graphic LCD display for user-friendly interface and easy operation
• Supports most flash-based digital music player
2
• Perfect travel companion in compact size can be powered by either AC
adapter or batteries
• Enjoy true CD-quality digital sound with song information On-The-Go!
3. Product Views
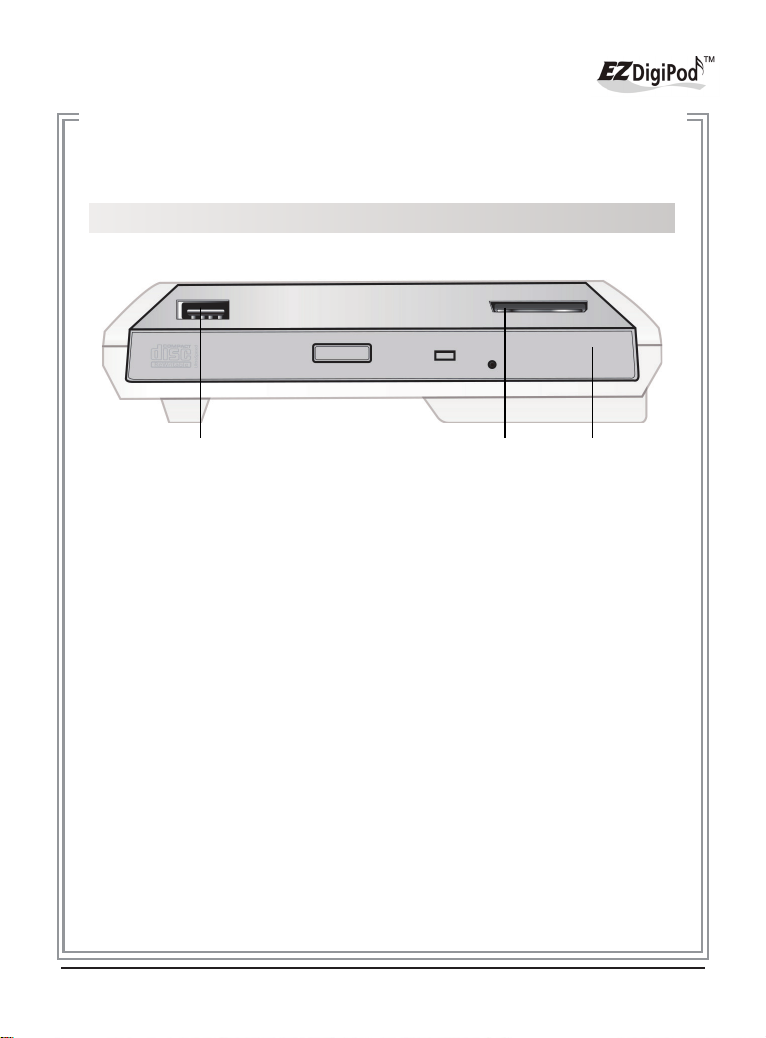
3.1 Front View
Figure 1
(1) (2) (3)
(1) USB Host Port
(2) SD/MMC Card Slot
(3) CD Burner
3

3.2 Top View
(1)
(2)
Figure 2
(1) LCD display screen :
Displays the operating menu & working status
(2) Control Keypad:
One-touch operations to control EZDigiPod functions.
(4)
(3)
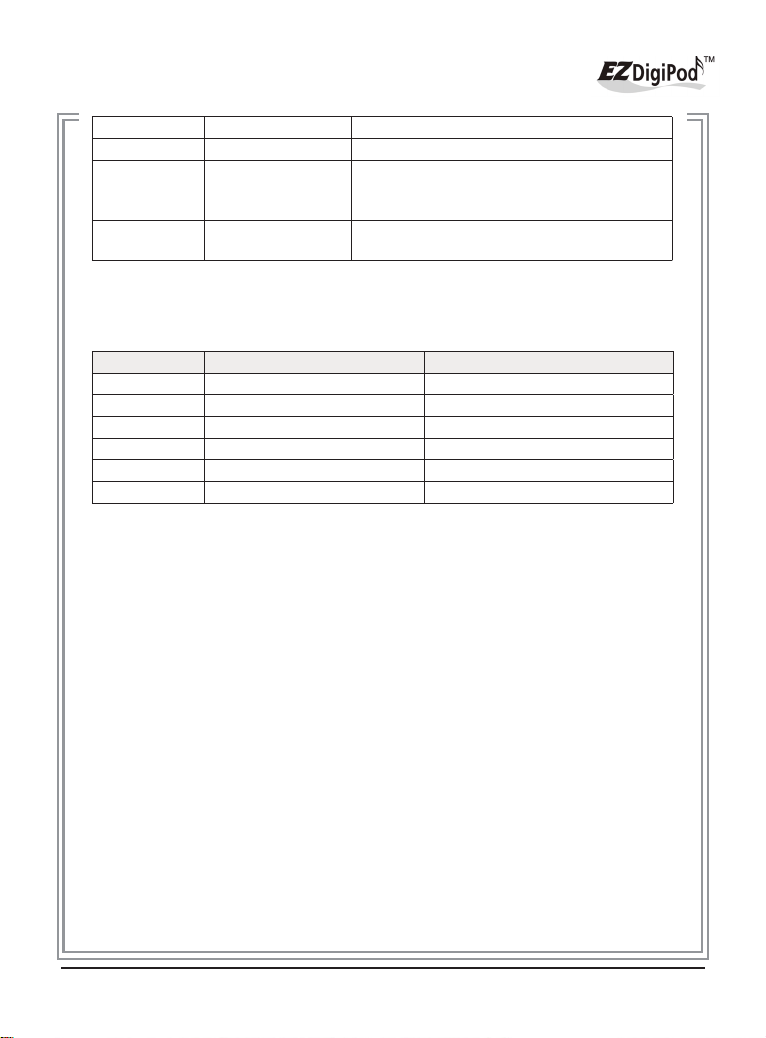
Key Function Description
Eject Eject Open tray or eject Disc
Set/Rip Set or Rip
+ Increase Adjust volume up or set value up
− Decrease Adjust volume down or set value down
Go to setup menu;for value setting; or Quick
Rip
4
▲ Up key Move up
▼ Down key Move down
◄ Left key
► Right key
(3) LED Indicator:
The green / red LED will light up as listed in table below to indicate different
operation status:
Item Operation Setting Light
0. Power off None
1. System initial stage G / R
2. Ready to Rip (Copy) None / G
3. Ready to Rip (Copy) G / F
4. Rip (Copy) Error None
5. Battery Low R / F
(4) Internal Microphone:
For voice recording
Back out of a sub-menu and goes to the
next higher level; or hold for 2 sec. to return
to the main menu
Enter key; or navigate into a sub-menu or
se-lects a function from a list
5
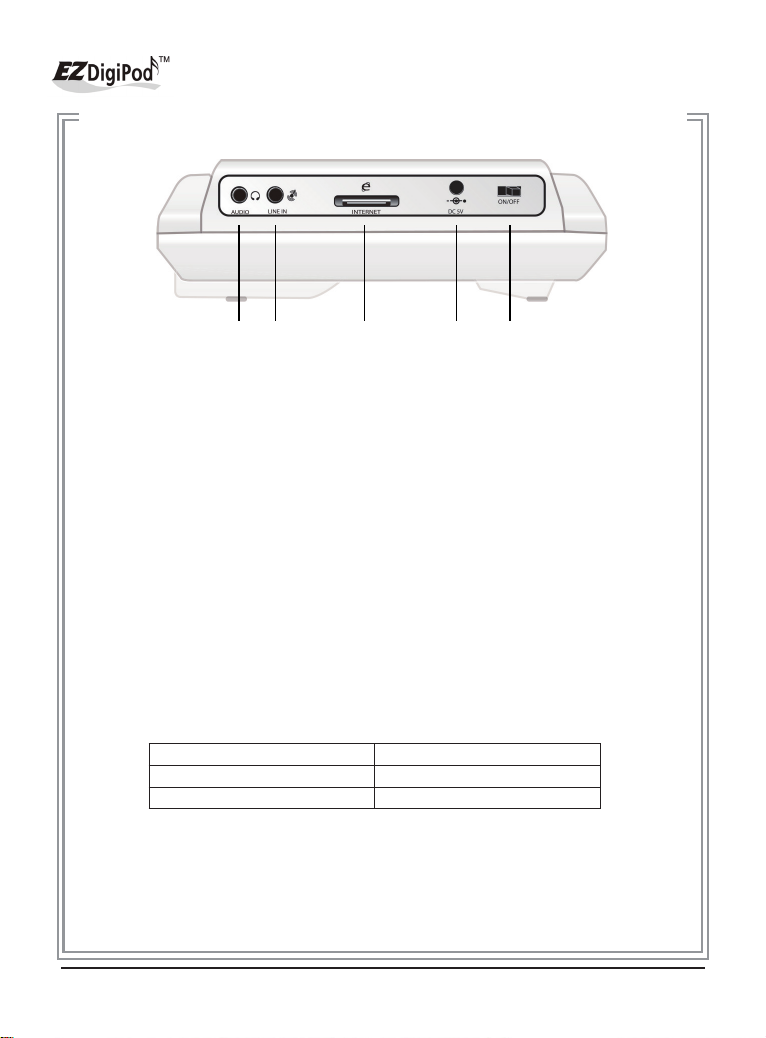
3.3 Rear View
Figure 3
(1)(2)(3)(4)(5)
(1) Power Switch:
Slide the switch to the LEFT for the “ON” position to start the unit; or slide
the switch to the RIGHT for the “OFF” position to shut down the unit.
(2) Power Connector:
Insert the power connector from the AC adaptor or the car kit adapter into
this socket.
(3) Internet Socket for ID3 tags or Metadata download
(4) Line in Socket for line-in recording:
an external microphone (not inluded) can be connected to unit
(5) Audio-out Socket for CD or DIGITAL MUSIC file playback:
amplified speakers with mini-jack or earphones (neither are included) can be
connected to the unit.
3.4 Battery Compartment
EZDigiPod DP330 requires (4) AA Ni-MH rechargeable batteries with a minimum
current rating of 2000 mAh. Note: Alkaline batteries can also be used but they
do not last as long as Ni-MH batteries. Typical estimated usage times for a fully
charged set of batteries:
Alkaline 95 min.
Ni-MH 2000mAh 110 min.
Ni-MH 2300mAh 160 min.
(Note: Alkaline batteries can also be used but they do not last as long as NiMH batteries)
6
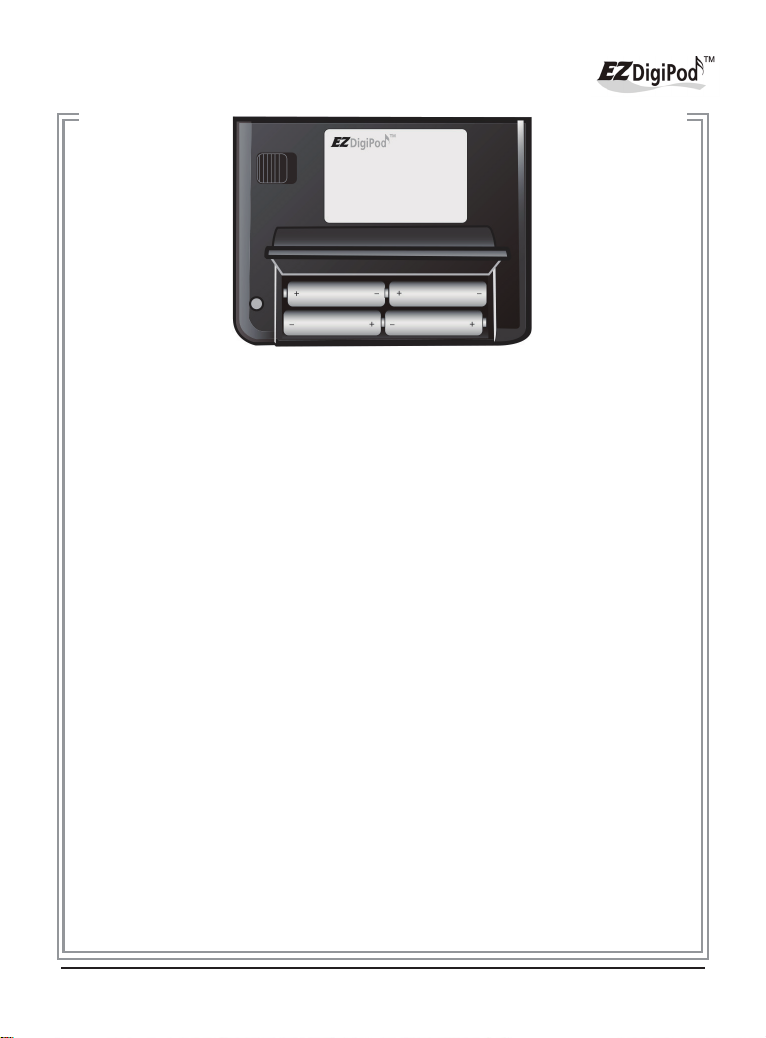
Figure 4
NOTE: Usage time and repeated discharge cycles will cause the capacity of
rechargeable batteries to diminish.
(1) The red LED indicator may blink occasionally during the conversion and
transfer operation. This is normal even if the battery is fully charged.
(2) If the red LED indicator blinks continuously, connect an AC power adapter
or recharge the batteries immediately after completing the current ripping
operation; failure to follow this instruction may result in the next ripping
operation having either damaged files or a failure.
(3) Batteries will discharge if they are not used for a period of time. Make sure
batteries are all fully charged before major usage. (The amount of discharge
will vary depending upon the temperature, and the battery manufacturer/
model. Please consult battery manufacturer’s specifi cation data).
(4) Please follow instructions provided by rechargeable battery manufacturers
for operation, recharging, maintenance and disposal of the batteries.
(NOTE: Mixing different brands of rechargeable batteries, or
mixing fully charged batteries with partial charged batteries is NOT
recommended.)
(5) Using the EZDigiPod with the AC adapter WILL NOT recharge batteries.
(6) NOTE:
When powering the unit using NiMH rechargeable batteries only, the user
must consider the added power drain associated with some memory cards
and USB devices. The use of MicroDrives, or certain USB Hard Drives and
personal media players (which are USB-powered or recharge from the USB
port) will substantially reduce the operating time for a charged set of NiMH
batteries.
7
4. Menu Instructions
4-1 LCD Display
1. Line 1:
EZDigiPod Logo / Main Menu Title
2. Menu items for selection
(use ▲ / ▼key to move up/down)
3. Line 4:
4-way button selection menu
Figure 5
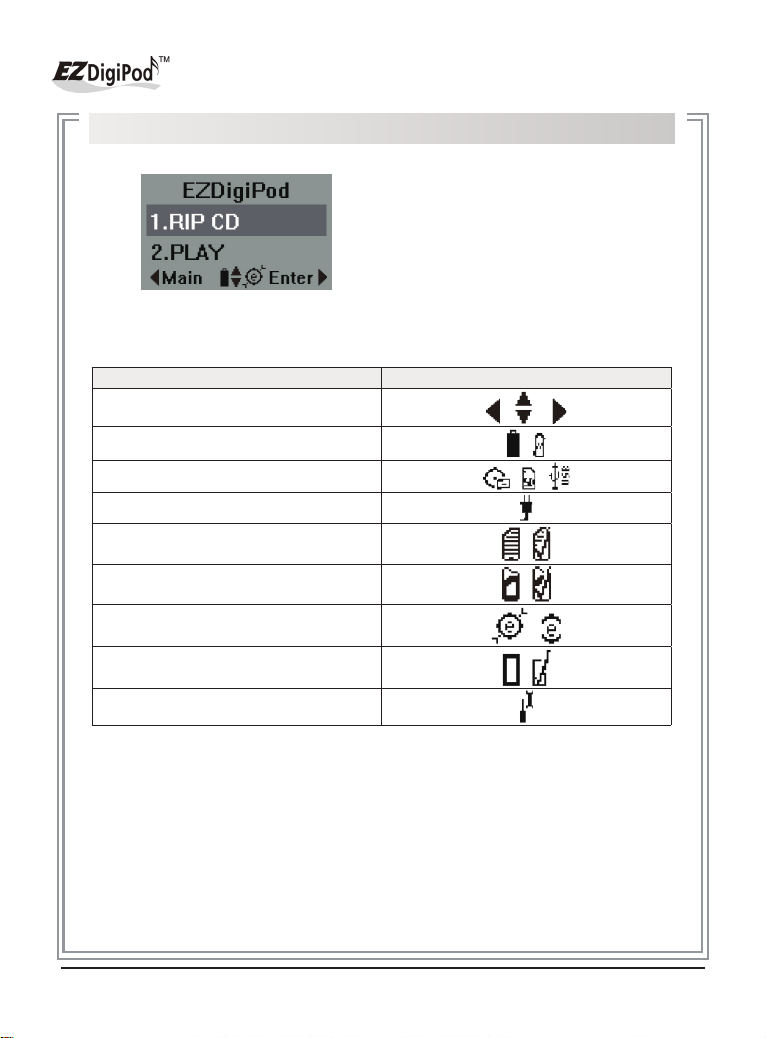
4-2 Icon List
Description Icons
Arrows
Battery High, Low ,
CD, SD, USB , ,
AC Power
File; File Selected ,
Folder; Folder Selected ,
Internet Link, UNLink ,
SET ,
Setup
, ,
8

4.3 Menu List
Main Menu Sub-Function Function Description
Rip CD to USB Quick Rip CD to USB
RIP CD
PLAY
AUDIO
RECORD
FILE
MANAGER
MAKE CD
Setup
Rip CD to SD Quick Rip CD to SD
(Can select "Rip All" or "Rip Select Song")
CD Play Plays audio CD & digital audio files
USB Play Plays digital audio files
SD Play Plays digital audio files
Line-in Record Records from analog audio
Mic Record
(Can select "Record to USB" or "Record to SD"
USB Device
SD Card
Disc (Data CD)
USB to CD Burn selected song to audio CD
SD to CD Burn selected song to audio CD
Network Set IP (for LAN connection to internet)
Bit Rate
(for MP3 format)
Rip Folder
Format Format SD card or USB storage device
Front LED Set LED Flash to be ON or OFF
System Info. Show system model version
Update Firmware Update system firmware
Rip Mode
Song Title Set format for digitized song titles
Repeat Playback Set "Repeat Folder" or "Repeat All"
LCD Contrast Set display brightness
Erase Disc Erase CD-RW Disc
Disc Burn Method
Records from internal microphone found
on top cover
Display USB storage capacity, delete
file, copy file to SD or CD
Display SD card capacity, delete file,
copy file to USB or CD
Display device capacity, copy file to
USB or SD
(CD must be ISO formatted)
Set bit rate for CD to digital music
(higher bit rates require more storage)
Selection for using Artist / Album as
folder name
Selection for Speed Rip or Play&Rip at
same time
Set DISC Burn Method to "Multi-session
or Single Session"
9
 Loading...