

EZ-ON 86Y Quick Start Manual

1-800-323-6598
EZ-ON PRODUCTS
www.ezonpro.com
1-800-323-6598
www.ezonpro.com
86Y
IMPORTANT INFO
• Meets FMVSS213.
• 86Y is for use by a passenger weighing 66 – 168lbs.
• You must use EZ-ON hardware tether kit (included) to install this conversion vest if the factory
installed tether anchor weight limit is less than the weight of the passenger if there is no tether
anchor point available in your vehicle.
• EZ-ON Products must be worn under winter jackets.
• Register this product to be notied for a safety recall.
WARRANTY
EZ-ON Products stands behind the products we make. Warranty covers any defects in material or workmanships under
normal use during the warranty period. We will repair or replace product defects for 1 year from manufacturer date.
WARNING
Death or serious injury can occur If manufacturer’s instructions are not followed correctly.
All EZ-ON products are dynamically tested to meet NHTSA standards. Please follow washing
instructions on product tag. Replace product if it is damaged, frayed, or has been in a crash.
Recommended replacement after six years.
EZ-ON Products are not liable for injury if these recommendations are not followed.
EMERGENCY RELEASE PROCEDURE
When evacuating a passenger in an 86Y belt,
one cut of the lap belt will allow the passenger to evacuate the vehicle.
EZ-ON PRODUCTS
1-800-323-6598
www.ezonpro.com
1-800-323-6598
www.ezonpro.com
86Y
1
3
5
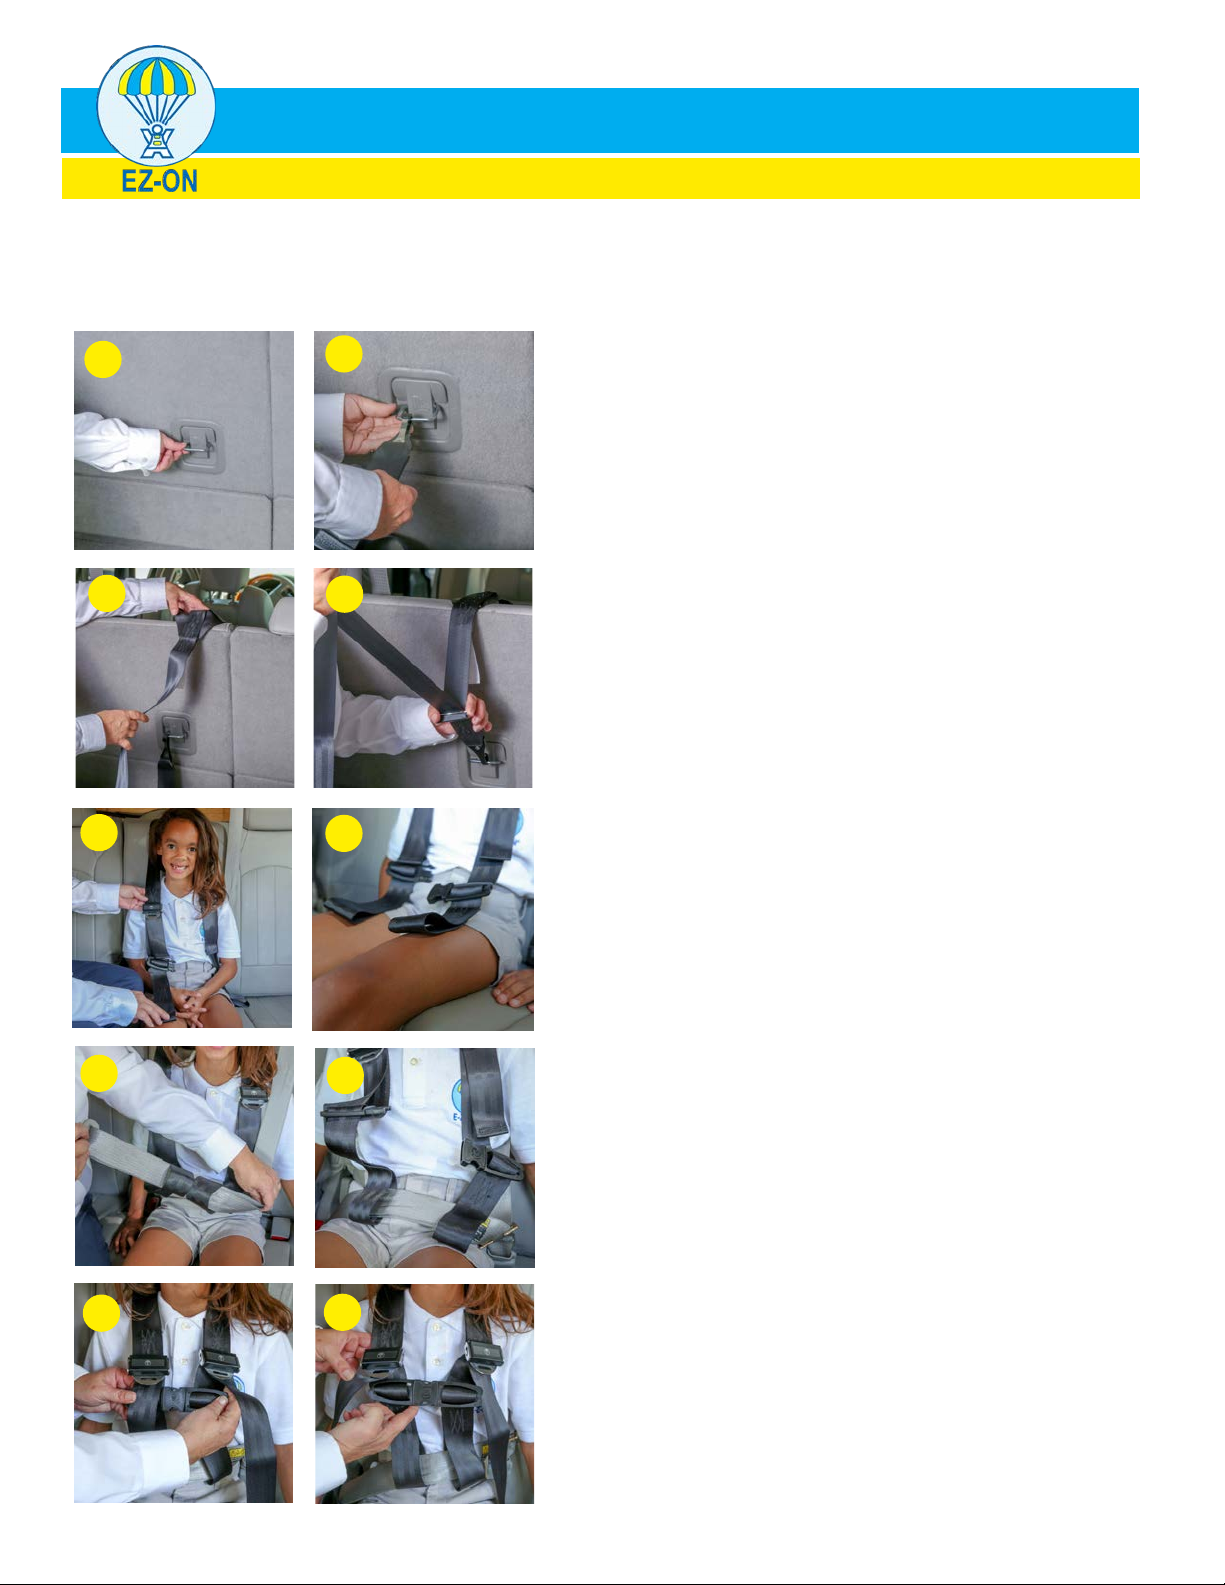
INSTALLATION INSTRUCTIONS
2
1. Locate the tether anchor bracket.
*Check the vehicle owner’s manual to locate
factory installed tether bracket.
*86Y tether strap can be turned one half twist
to snap on difcult anchor locations.
4
6
2. Connect tether hook to tether anchor bracket
directly behind passenger.
20 degrees from “Y” center is acceptable.
3. Place the Y-bridge on the seat top. Rest black
shoulder straps on the front of the seat.
4. Adjust tilt lock adjuster to remove excess
webbing so Y-bridge sits on seat top.
5. Place the adjustable belt straps over each
shoulder of the passenger.
6. Allow the belt loop ends to lay on the
passenger’s lap.
7. Thread the vehicle seat belt across the lap
and through each belt loop.
7
9
8
10
8. Buckle seat belt low across the lap and
reduce the seat belt clack. Make sure the
seat belt in in the locked position.
9. To shorten or lengthen the shoulder vest
straps slide the webbing up or down through the
adjuster. Keep both adjusters as close to the
shoulders as possible.
WARNING: Do not shorten the belt length too
much as this could pull the lap belt up and over
the stomach which might cause injury.
10. Secure the chest clip keeping the clip
below the vest adjusters at arm pit level.
 Loading...