

EZ-ON 100SMU Quick Start Manual
EZ-ON PRODUCTS
1-800-323-6598
FOR SCHOOL BUS USE ONLY
www.ezonpro.com
100SMU
SEAT MOUNT - Fits All Bus Seats
IMPORTANT INFO
• Meets FMVSS213.
• Use Only with EZ-ON Vests Compatible Vest include: 103Z, 203PB, 303Z, 403PB.
• Use on school bus seats that have entry between the seat bottom and the seat back.
• Passengers seated behind occupants with Seat Mount must be wearing a seatbelt,
a transportation vest, or must be unoccupied.
• RegisterthisSeatMounttobenotiedofasafetyrecall.
WARRANTY
EZ-ON Products stands behind the products we make. Warranty covers any defects in material or workmanships under
normal use during the warranty period. We will repair or replace product defects for 1 year from manufacturer date.
WARNING
Death or serious injury can occur If manufacturer’s instructions are not followed correctly.
All EZ-ON products are dynamically tested to meet NHTSA standards. Please follow washing
instructions on product tag. Replace product if it is damaged, frayed, or has been in a crash.
Recommended replacement after six years.
EZ-ON Products are not liable for injury if these recommendations are not followed.
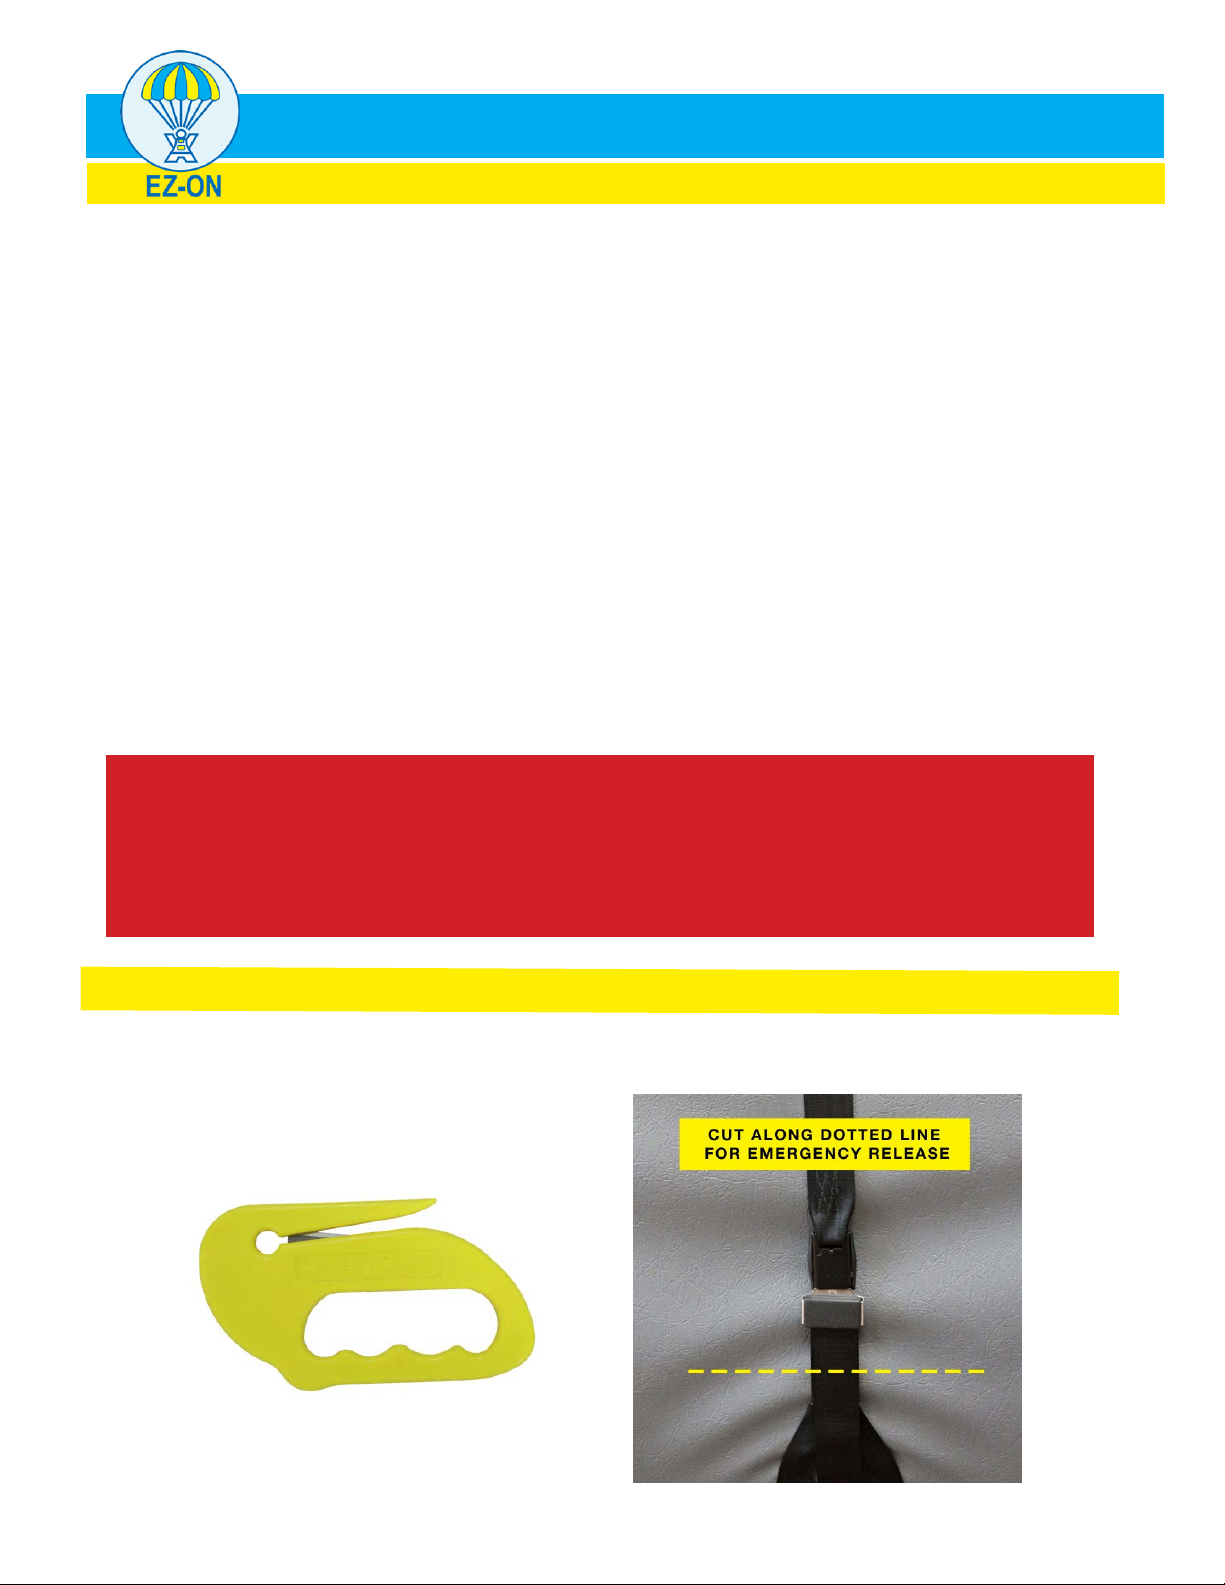
EMERGENCY RELEASE PROCEDURE
When evacuating the passenger in a safety vest, the vest webbing is never cut. One cut of the portable
seat mount webbing below the buckle will allow the passenger to evacuate the bus wearing the safety vest.
EMERGENCY CUTTING
100 SCBC
EZ-ON Safe Cut Belt Cutter
EZ-ON PRODUCTS
1-800-323-6598
www.ezonpro.com
1-800-323-6598
FOR SCHOOL BUS USE ONLY
100SMU
SEAT MOUNT - Fits All Bus Seats
1
3
5
2
4
6
www.ezonpro.com
INSTALLATION INSTRUCTIONS
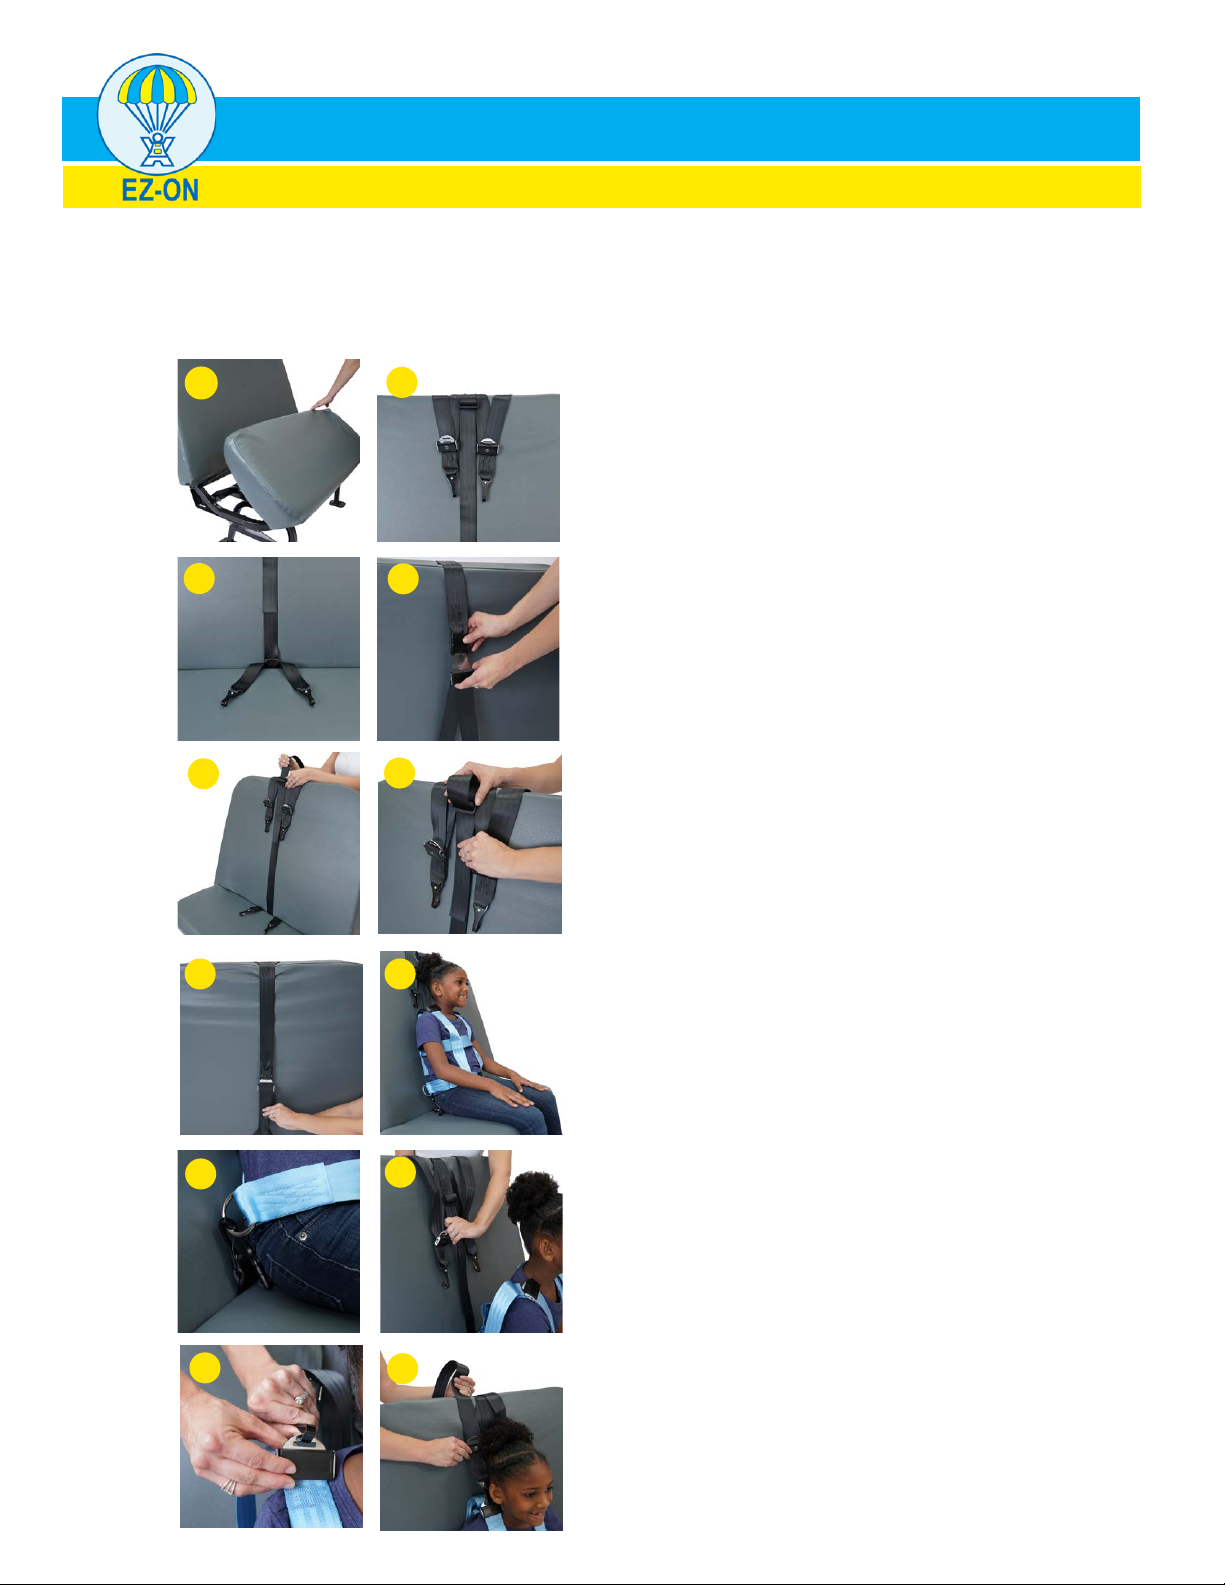
1. Unlock seat and lift up.
2. Hang adjustable hooks from top of seat.
3. Close bus seat. Make sure non-adjustable
hook ends are extending on seat bottom.
Note: Securely lock seat bottom in place.
4. Connect push button.
Note: Face of Push Button should be against
the bus seat back.
5. Adjust length of seat wrap so that the bar
slide is at the top of the bus seat, and
non-adjustable hook ends are extending
approximately 2 inches on seat bottom.
6. Back thread loose end of webbing through
bar slide.
7
9
11
8
10
12
7. Pull webbing tight at the push button.
Mount strap must be tight without slack.
Note: Webbing should be tight enough to
create a crease on the top of the bus seat.
8. Properly seat passenger.
Note: Hips low against the back of the seat
and shoulders ush to the seat.
9. Attach the non-adjustable tether hooks to
the “D” rings located at the hip level of the
seating passenger’s vest.
10. To shorten or lengthen the hip tether hooks,
rotate seat mount.
Note: Passenger should not be able to
move bottom more than 2 inches forward.
11. Attach adjustable hook ends to tether slots
on the shoulder adjusters on the vest.
12. Tighten strap by pulling webbing through
the tilt lock adjuster.
Note: Repeat steps 11 - 12 for
second shoulder strap.
 Loading...