

EZ-Net ASTRA 2 at 28.2 E User Manual
USER MANUAL
For ASTRA 2 at 28.2°E
(GILAT SkyEdge IIc Modem)

2
About EZ-Net
Congratulations on your new purchase and welcome to the world of EZ-Net
Satellite Internet, EZ-Net is the simplest touring satellite internet system to set up
and operate.
This guide will take you through the simple process required to get you online
as soon as possible.
The EZ-Net Satellite Internet Kit includes everything you need to get high speed broadband
internet on the move. Each kit includes the EZ-Net diamond dish, LNB, sturdy lightweight tripod
with ground fixings, a EZ-Net elevation and alignment kit, all the necessary leads and
connections as well as a satellite modem and WiFi router.
The product can easily be transported and stowed away in the supplied carry bag
and is quite possibly the lightest most portable product currently available on the
market,
Please note that it is important to retain your receipt or proof of purchase so that we are
able to assist and deal with any enquiries you may have.
EZ-Net is a product and brand name of Falcon Technical Ltd using our patented smart
satellite finding technology
For more information on EZ-Net and our products please visit our website:
www.ez-net.co.uk
Get in touch
EZ-Net c/o Falcon Technical Limited
Hill Farm, Northwich Road,
Dutton, Cheshire, WA4 4LE, UK
UK Enquiries: 01928 759 239
International: +44 (0) 1928 759 239
Email: contact@ez-net.co.uk

3
Package Contents:
Thanks for purchasing EZ-Net, the easy to use satellite internet system.
With your purchase you will find the following contents:
4
Getting Started:
Dish Setup
When setting up the tripod, take into account the orientation of the dish, it should be pointing in a
southeasterly direction and the dish must have a clear view towards the satellite (without any buildings, trees
etc. that may hinder the signal).
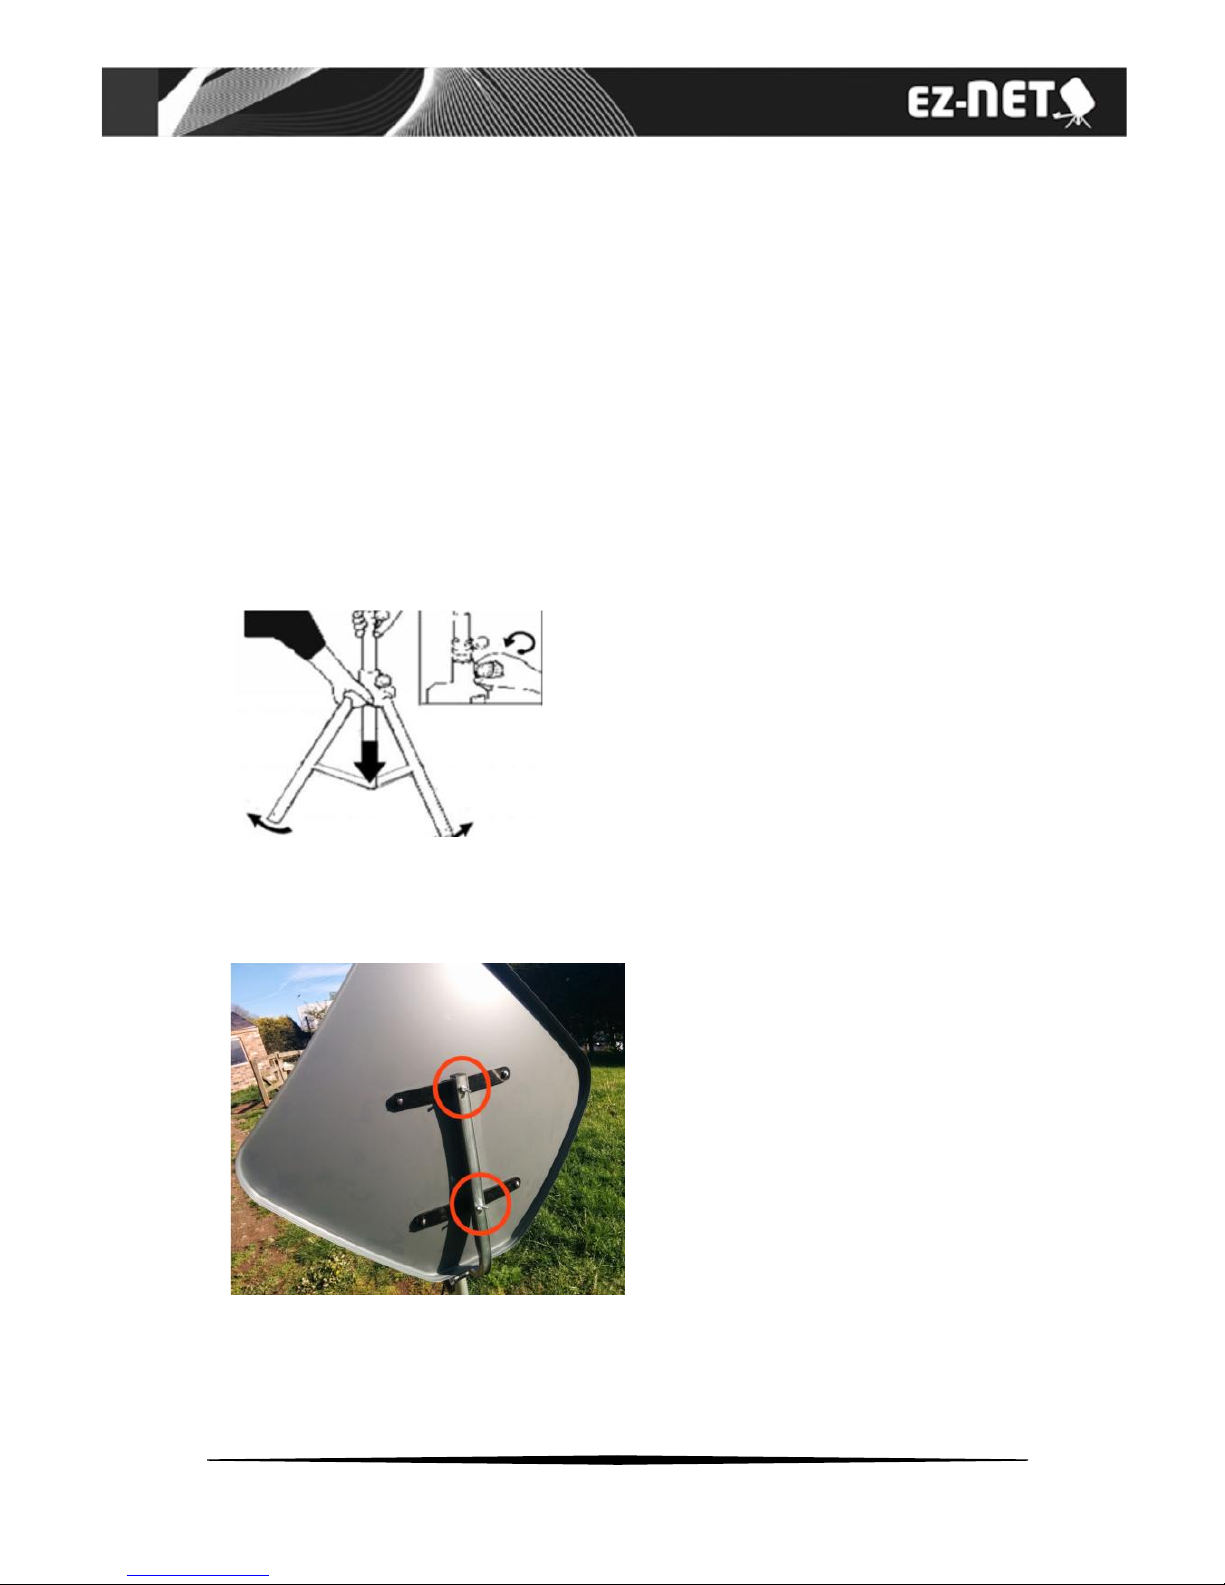
1) Loosen the fixing clamp on the tripod stand and push the legs downwards.
2) Extend the feet of the tripod stand as far as they will go for maximum stability and tighten the fixing
clamp.
3) Ideally the tripod should be placed on reasonably level ground so that the tripod is vertical, use the
ground anchor pegs to secure the tripod.
4) Attach the LNB arm to the dish using the two nuts on the rear of the dish.
5
5) Mount the dish on the tripod and use the compass to align one of the tripod legs so that it is in the azimuth
direction indicated by the dish pointing table included with the kit.
6) Rotate the dish so the LNB arm is pointing in the same direction and then tighten the thumbscrew.
7) Once the dish is secured on the tripod it should look like the image (FIG 3) Do not overtighten the
thumbscrew at this point as rotation will be required for the final step in tuning
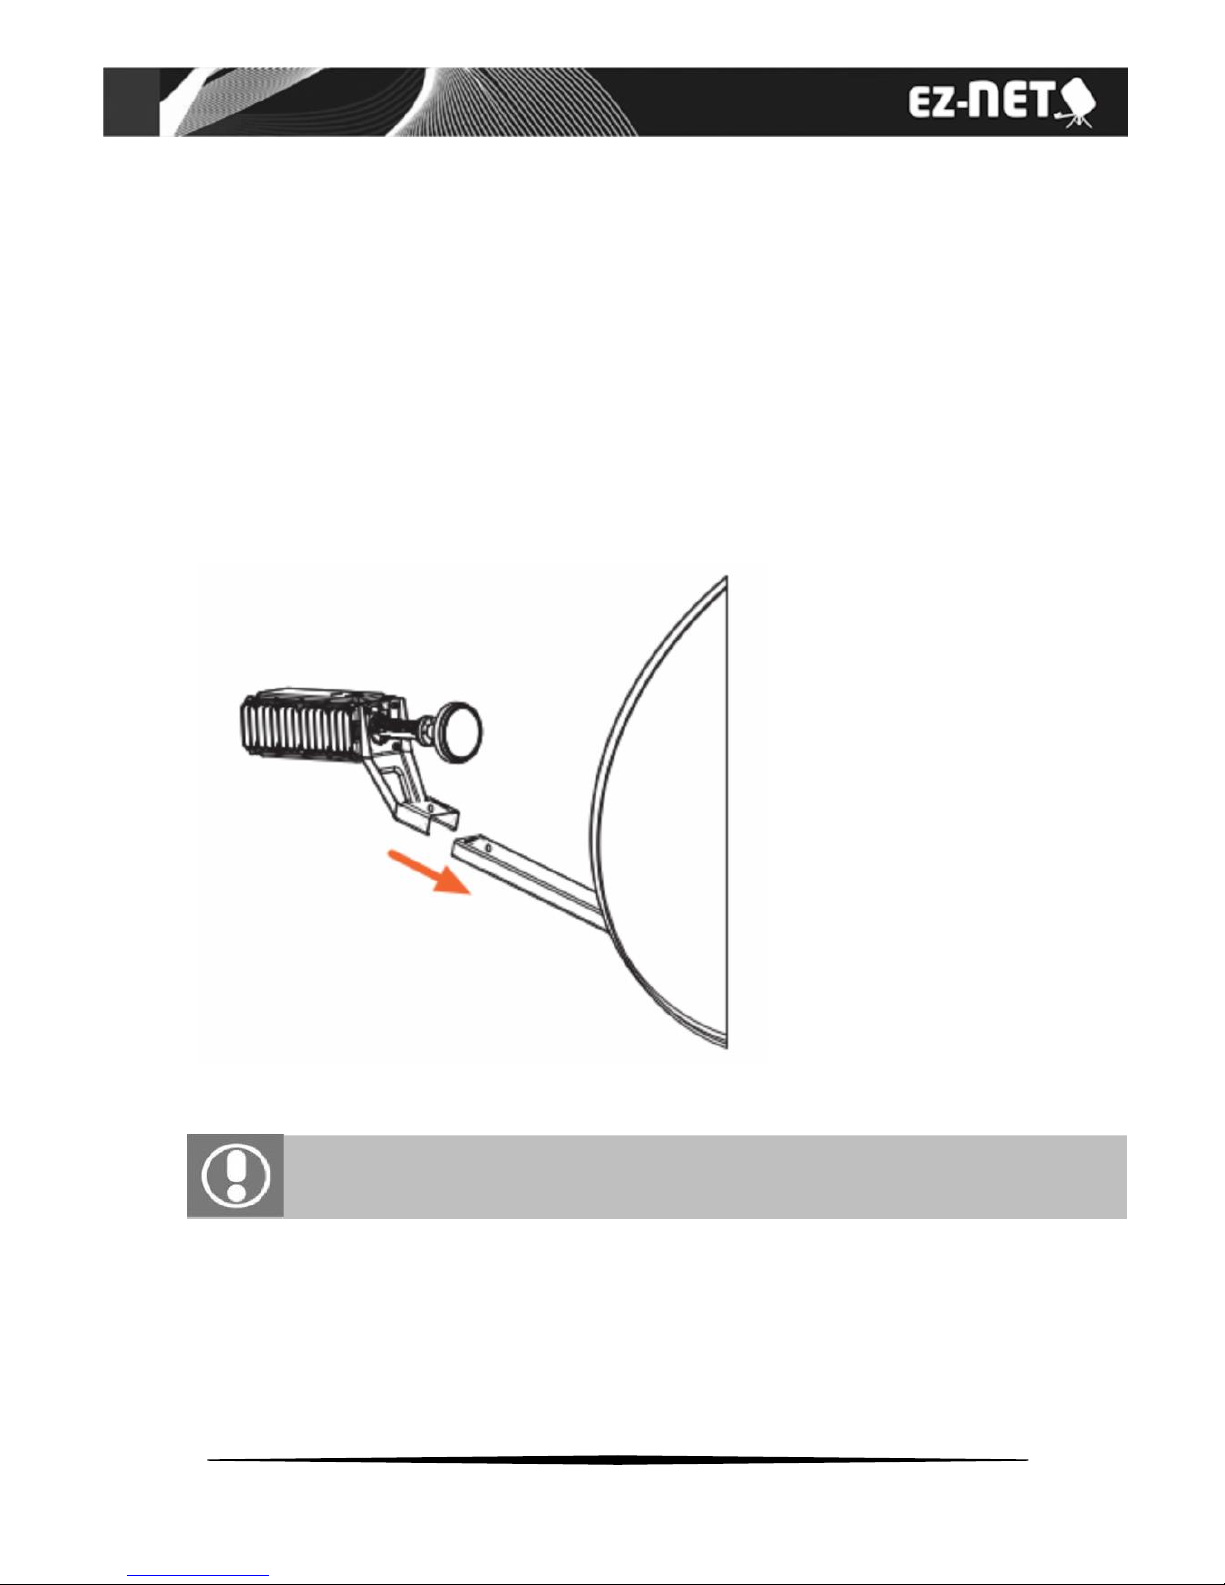
Mounting the LNB
Mount the LNB on the end of the arm and insert the bolt through the bracket to secure it.
Do not connect any leads until your satellite dish is firmly on the tripod
 Loading...