

Ezmax EZMP-4100 User Manual
Copyright © 2005 EZMAX. All rights reserv ed.
Advance permission of EZMAX is required to use User’s Guide, photos,
the relate d documents and sof tware of the product. Any vio lation ma y
follow the le g al measures.
The contents of the User’s Guide are subj ect to chang e without p rior
notice for further improvement of the product.
EZMAX
http://www.ezmax.co.kr
1
Table of Contents
Before U se
Product & Accessories ............... ..............2
PC System Requirements .......... ..............3
Safety Precautions ..................... ..............4
Features ................... ................. ...............5
Desi gnation of Parts
Front/Rear Vi ew of the Product ... ..............7
Side View of the Produc t ..........................8
Function Icons in Display ............. ..............9
Preparation
Installing USB Driver.................... ............10
Connecting Player to PC ............ ............12
Manually In stalling USB Driver.... .............13
Using Rem ovable Disk................. ............16
Disconnec ting USB Cabl e........................19
Upgrading Firmware..................... ............21
Installing LDB Manager ............. .............23
Using LDB Manager ................... ............24
Basic Functions
Basic Operation ........ ..............................29
Power On/ Off ........... ..............................32
Playback Music File .. ..............................33
Using Navigation ................. ..................36
Voice Recording/ Listening ... ..................37
MP3 Encodi ng/Listening .. .................. 38
Listeni ng to FM Radi o ......... ..................41
Reco rding/Playback FM Radi o ............. .45
Using FM Transm itter .......... ..................46
Fun ction Menu
Menu Setting .... .................................... 47
Music File Playback .............................. 48
Mana ging File ................... ................. .49
Detai led Menu Setting ......... ..................52
Playb ack Mode S etting ......................... 53
Soun d Setting ..................... ..................54
Displa y Setting .. .................................... 56
Timer Setting .... .................................... 58
Enco ding Setting ................. ..................60
Settin g ............................... ................... 61
Others
Buil t-i n Battery Charging .... .................. .64
HOLD Setting Ho ld ............................... 65
Troub leshooting .................................... 66
Speci fications ...................... .................. 68
Servic e (A/S) ...................... ..................69
Warranty ............................. .................. 70
2
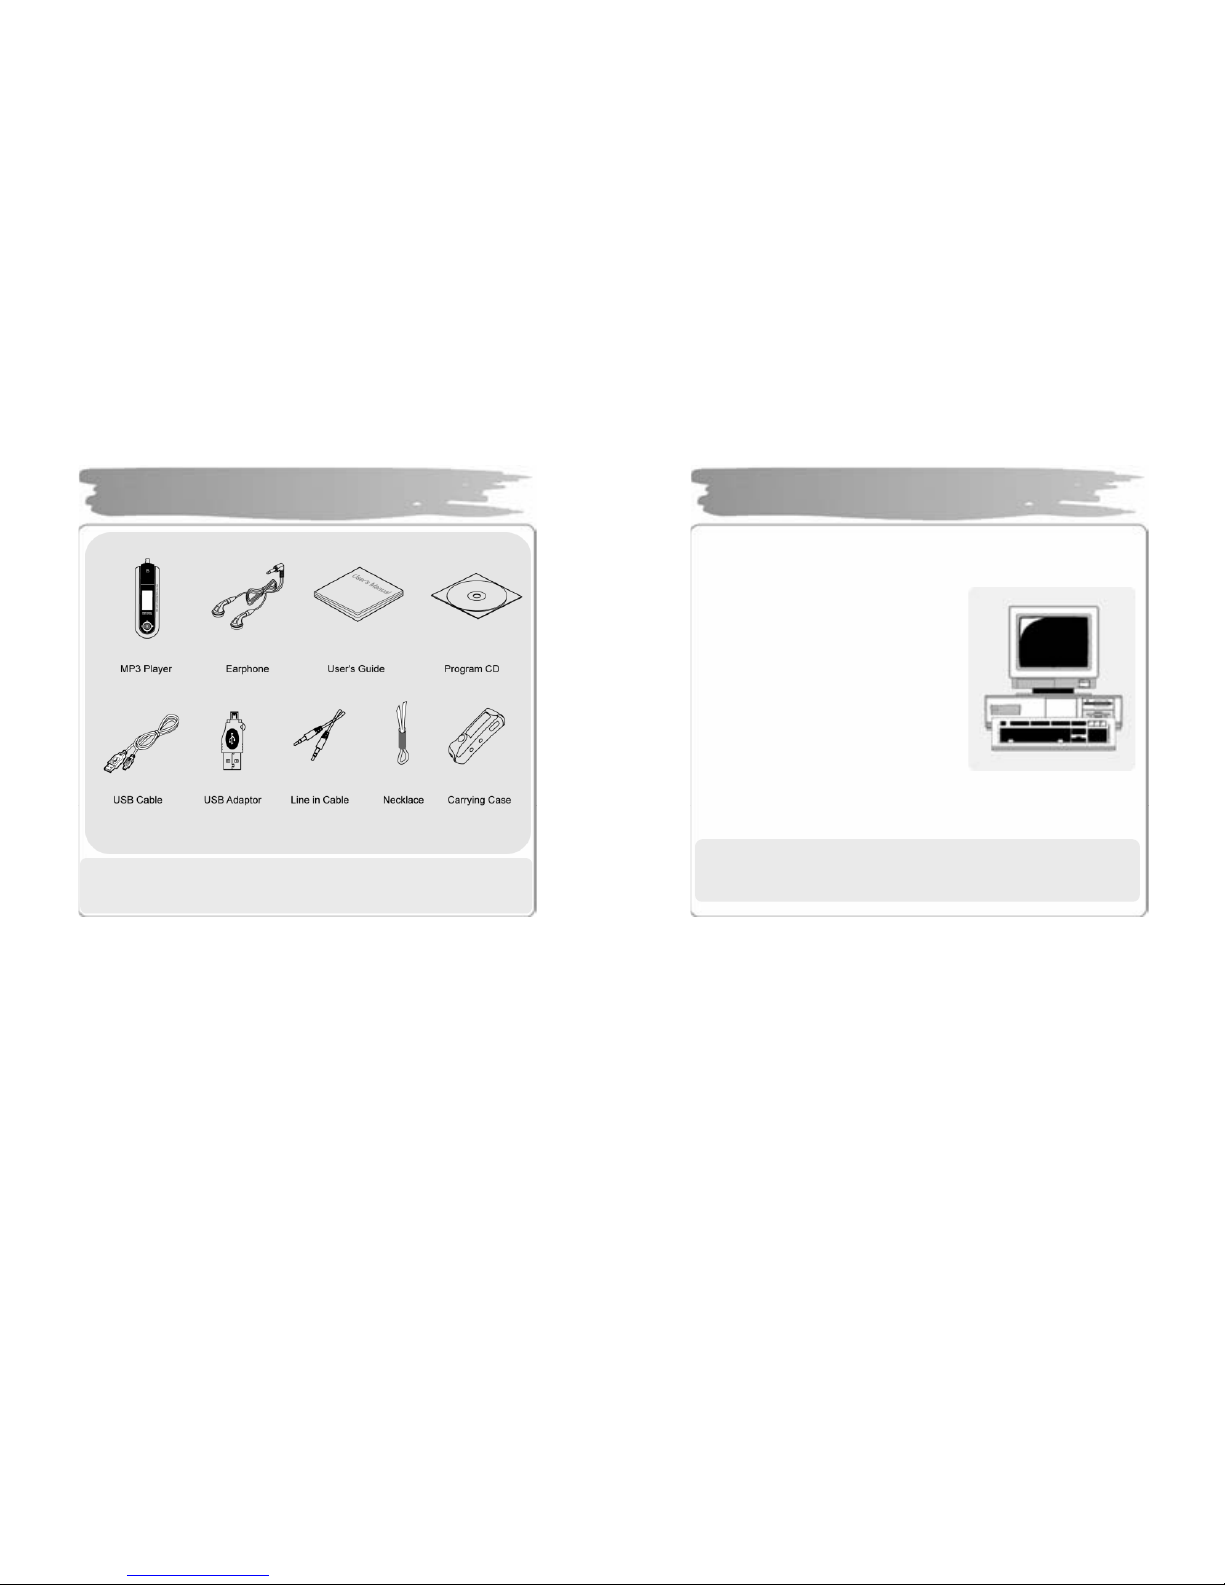
!N O T E : Acc essor i es ar e su bj ec t to c hang e w i t ho ut a p r ior n oti c e for f ur t her
impr ovem ents i n of thi s pr oduc t.
Products & Accessories
3
Basi c req ui rement s sho uld be s atisf ied t o us e thi s pla yer on yo ur PC.
Mak e sure to c hec k the f oll owi ng r ecom men datio ns bef ore it s use:
Pent i um 20 0M HZ or abo ve
Windows 98SE / ME / 2000 / XP
(Wi ndo ws 98S E - I nstal l Dr iver )
Ma c OS 9.0 / 10.0
US B Port (2.0 sup port ed)
(Re quir es PC with a c apaci ty of m ore than
Pen ti um3 1G. Could n’t b e s upp orte d
dep en ding on a mai nb oar d. Isn’t s uppor ted
with out Ser vi c e Pac k 1 und er Wi n do ws XP.)
CD- ROM Drive
Har d Disc Space 20MB or above
(an addi tio nal capac it y m ay be req ui re d to s a ve th e m usic files.)
64M B RAM o r ab ove
Di r ect X 8. 0 o r abo ve
!N O T E : Memor y spaces available may be less than those indic ated above since the
fi rmw are us es s o me por ti o ns of th e me mor y a vaila bl e to you r P C for t he
operation b y its system.
PC Sys tem Requiremen ts

4
Liste ning Cautions…
The ou tp ut of t he p r oduc t g u ar an te es the best s ou nds at it s pr oper vol ume. As
li st ening wi th a vol um e set a t a hig h p os it io n f or a long t i me may d amag e y our
sense of h ear ing , m ake s ure t o l ist en t o t he musi c at a proper v olume.
Avoid Str ong Impac t or Vi bratio n
Be c aref ul in handli ng the pr o duct and i ts acces so ri es si nc e t heir fal lin g on t he fl oor
or giving an impact on them may result i n their seri ous damages.
Storage
Avoi d the pl aces ex pos ed to hea t, hu mid it y or m ag netic fi eld
Cleaning
Wipi ng t h e pl a yer wi th c h e mi cals may res ul t i n di s c ol orat io ns or da mages on it s
sur fac e.
Wipe ou t t h e pla yer wi th a s of t clo th.
W ar n in g: T h e b at t er y of t h i s p l a yer i s r ech ar g e abl e wi t h a p o s si b l e r is k o f a
fire or explosi on.
- Do not place it ne ar a fire, flame or heating devi ces.
- Do no t repl ace t he batt er y at y our di s pos al.
(r efer t o or s eek p iec es o f a dvic e for m it s d ealer s( man ufact ur ers) .)
Warran ty period of the battery is 6 months from the dat e of it purchase .
!N O T E : N e ver tr y to disse mble , repair or remodel it.
Safety Precautions
5
Multi-Codec Pla yer
Mul ti- codec pl ayer s upp orti ng MP3, WM A, ASF (au dio) , O GG, WAV f orm at.
FM Transmitter Function(My FM Station)
If y ou sel ect th e e mb ed ded F M Tr ans m i tter m od e , you c an enjoy a h igh s ensi ti vit y
of musi c w ireles s th ro ugh d ev ice wit h FM r adio( ex . C ar audio , hom e au di o, or din ar y
FM radio) .
High Qu ality 3D Sound, MEX (Magic EXpander)
Exper i e nc e a pr ofo un d so un d due t o an i ntr o duc ti on of ME X which al l o ws you to
feel 3D e xpa nsi o n e ffec ts wi th r ichn ess whil e keep i ng the or ig inal and s tabl e s ou nd
of th e pl a yer. 3D S oun d M EX is a n ew 3D eff ec t th at d oes n ot m a ke y ou fe el t i red
even if yo u listen to it for a long time.
EL Di sp l ay
With i ts i ntr oduc ti on of Bl ue/ Yel l ow 2 C olor E L Sc re en Gr a phic Di spl a y, t he pl a yer
can c omm and more l ux uri ous and fa ncy imag es.
Firmw are Up gra de
Upg rade F ir mware t o a dd/c ha nge/im pro ve func tio ns and p er form anc e of the Pla yer .
Alwa ys enj oy t he mu si c wi t h it s lat es t v e rs ion of pe rfor manc e .
V oice R ecording
A func t ion of hi g h q uali ty v oic e rec or di n g all o ws a cl ear r ec or di ng for conf ere n c es
and lec tur es.
Features
6
FM Radio
Con ve nie nt l y enj o y th e FM r adi o wi t h a var i et y of f u nct i ons s uc h as t he
manual / au tomatic fr eq ue nc y s ear c h, au to matic tu ne t o the ra di o st ati on, and t he
stat ion pre s et.
Easy Navigation
Tr ee str uc ture all ows you to m anag e an d se arc h a spec if ic so ng mor e con venien tl y.
Lyric Display(LDB)
You ca n easil y edit , s a ve and di spla y t h e l yr ic s o f a s ong i n 3 li nes on t h e la r g e
dis pla y.
Time Di splay(Clo ck) Fu n ction
A funct ion of cloc k d ispl a y s ho w th e cur r ent ti me.
Remova ble Disk Device
You can freel y upload and d ownload files without a separate manager program
si nce the pla yer is r ec ogni zed as a re mo vable dis k wh en it is con nec ted to t he PC .
D ire c t Enco ding
You can record an external sound you hear through LINE-IN port of the player, as
fr om F M r a dio br oad casti ng.
Rechargeable Battery and USB Charging
With an i ntro duc ti on of rech a r g eable b atter y insi d e t he pr o d uct , it r e ali zes a lo ng
time playback, allowing an easy charging through USB. (Chargeable with an
ada ptor s pec ial ized for EZM P -4100 whil e pla ying. A user s h oul d s epar atel y bu y t he
ada ptor.)
Features
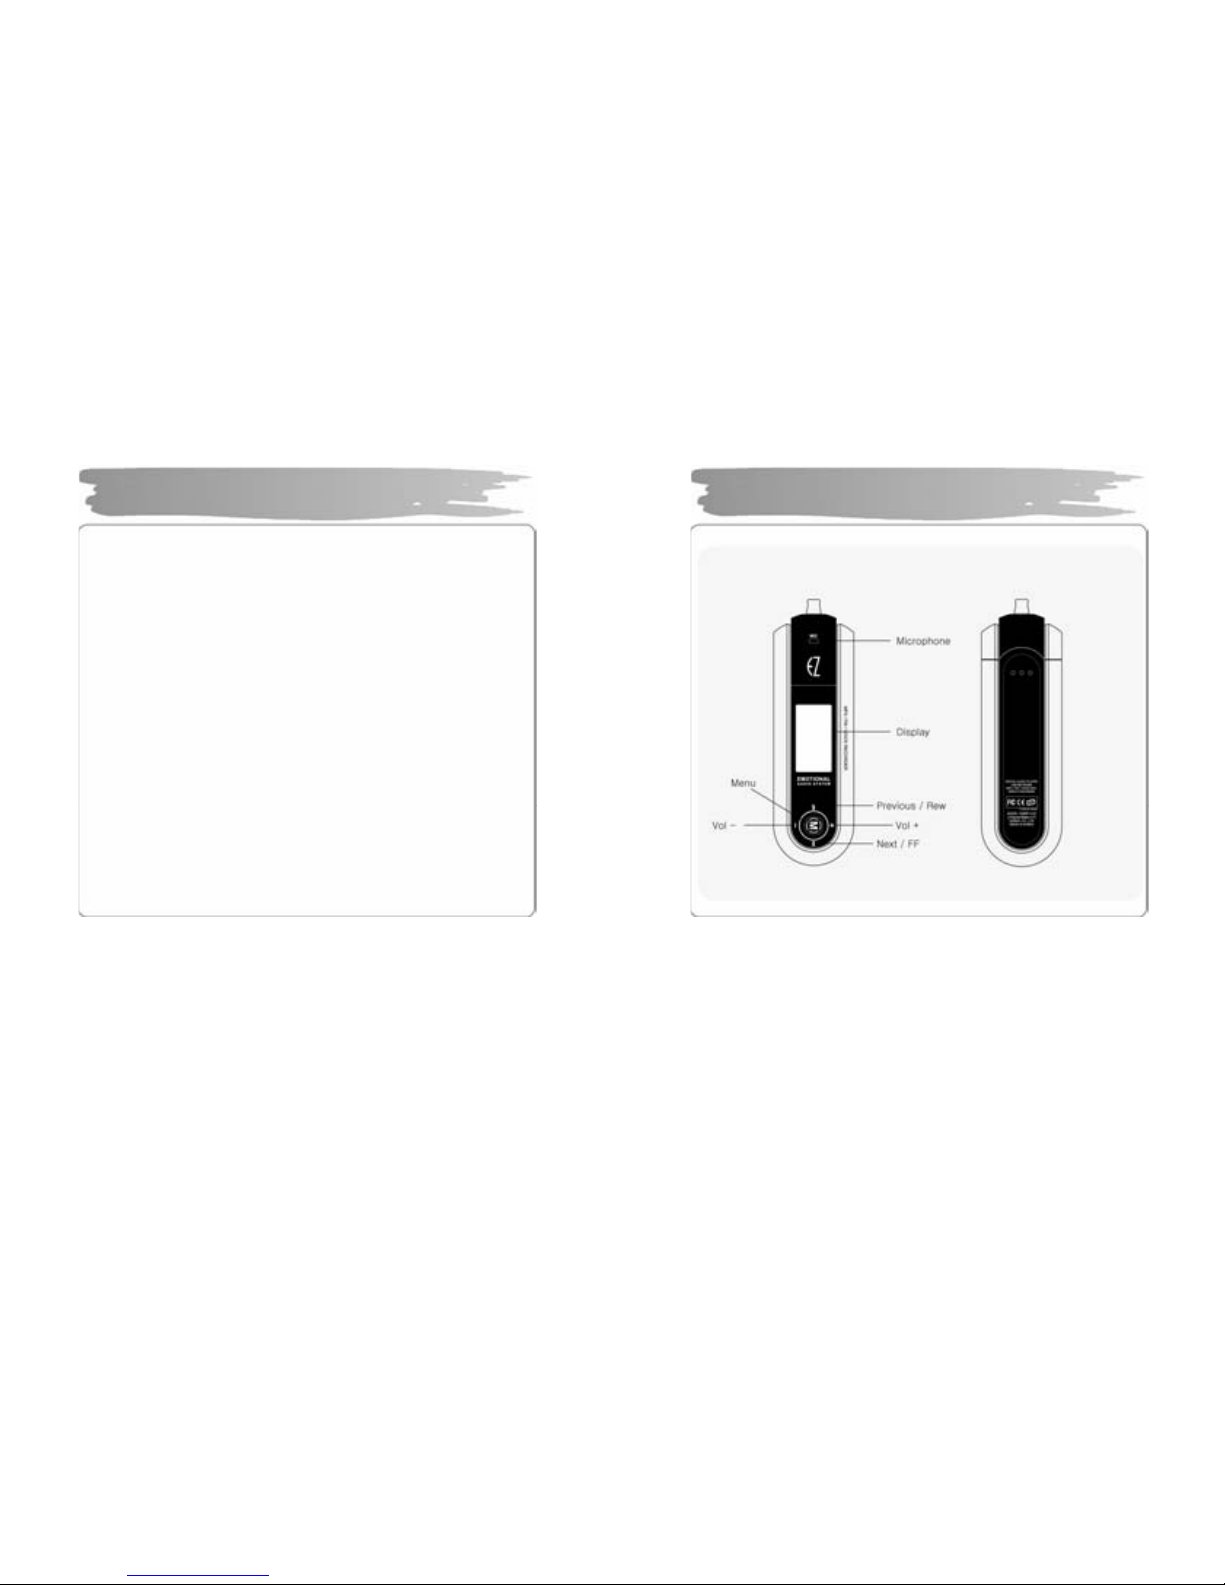
7
Front/Rear View of the Product
8
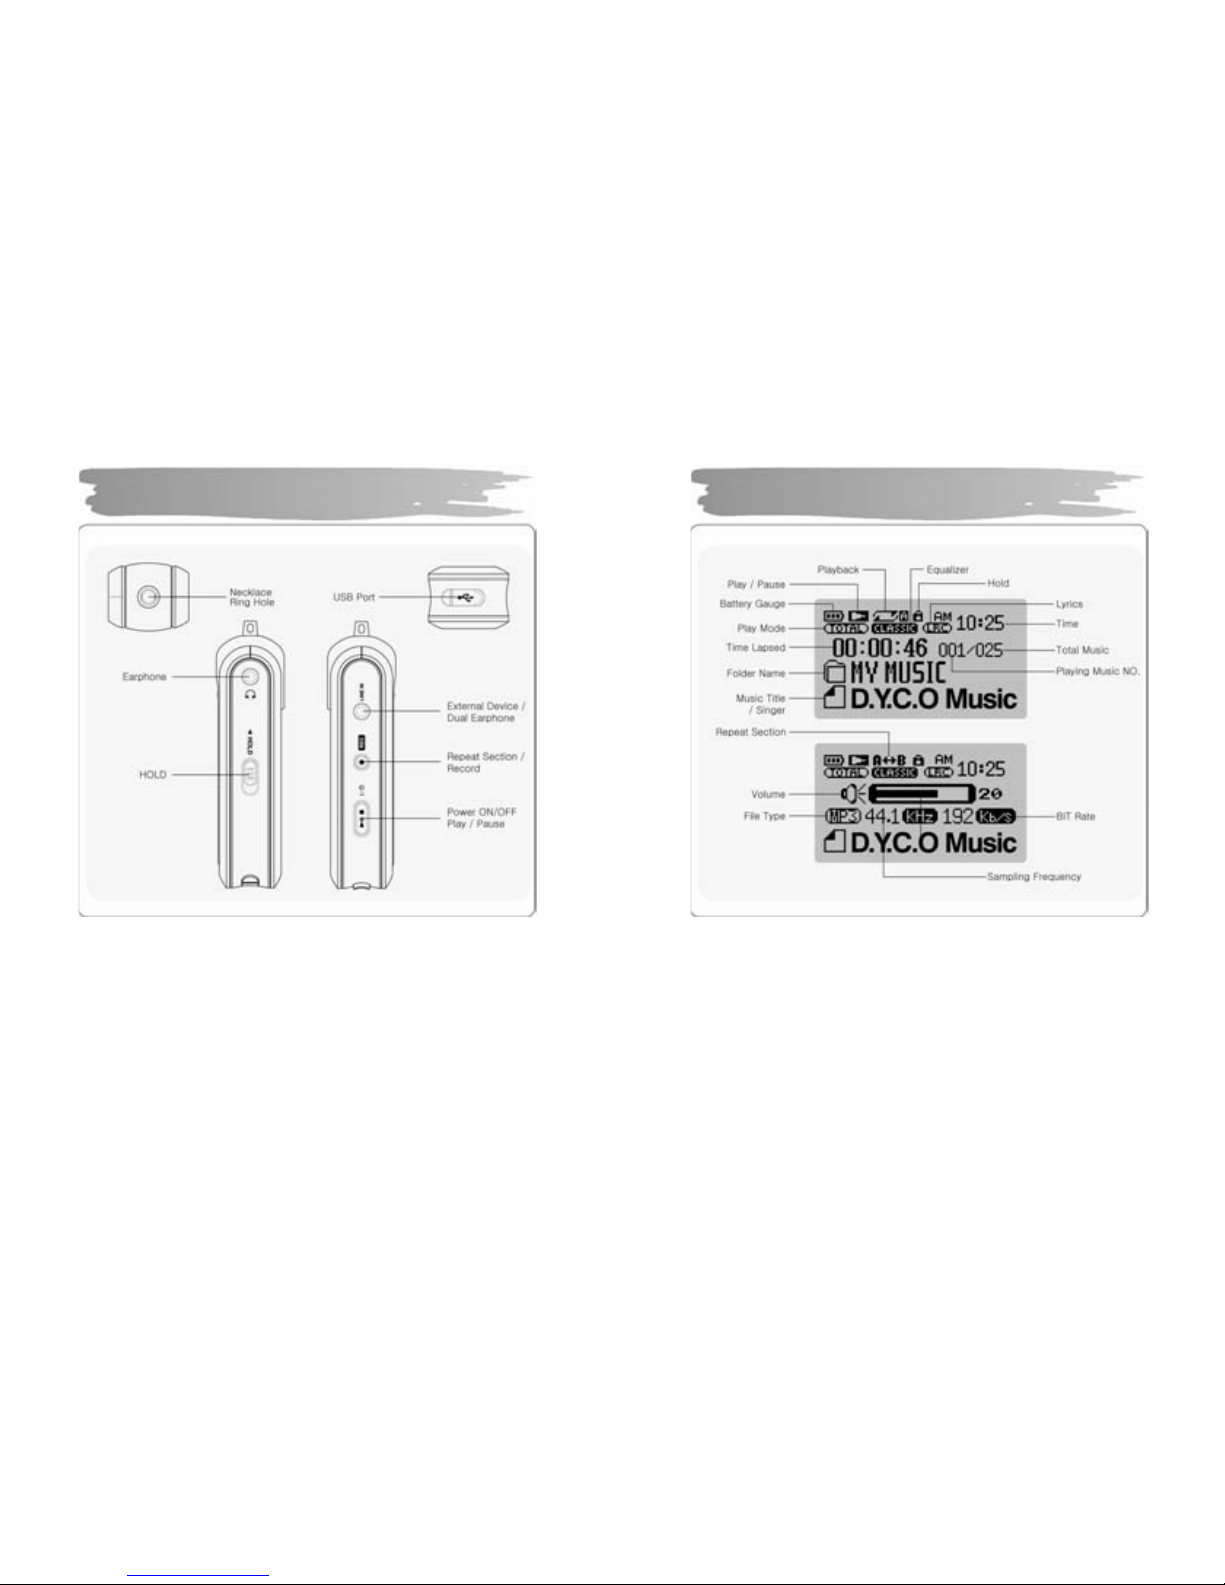
Side View of the Product
9
Function Icons in Display
10
Mak e sure to i ns tall the US B dr i ver bef or e c onnect ing it to t he PC.
When t here ap pe a r s “Ad d N e w Har d wa r e Wi z ar d ” , pr ess th e “ Canc el ” but ton a nd
ins tall Upg r ade M anag er.
If yo u ins t all Upg rad e Ma nage r, t he US B dr iver wi ll be au to mati c ally i ns tall ed.
► The dr i ver is r ec og niz ed wi tho ut ins ta ll atio n of a sep arat e prog ra m u nder
Windows ME, 2000, XP, but make sure to install it if Firmware U pgrade is
req ui r ed.
► If Upg r ade Ma nag er i s not ins tal led u nder Win do ws 98 S E, t he pla yer canno t be
rec og nized as a rem ova ble di sk. M a ke sur e to i nstall Upg rad e Man ag er.
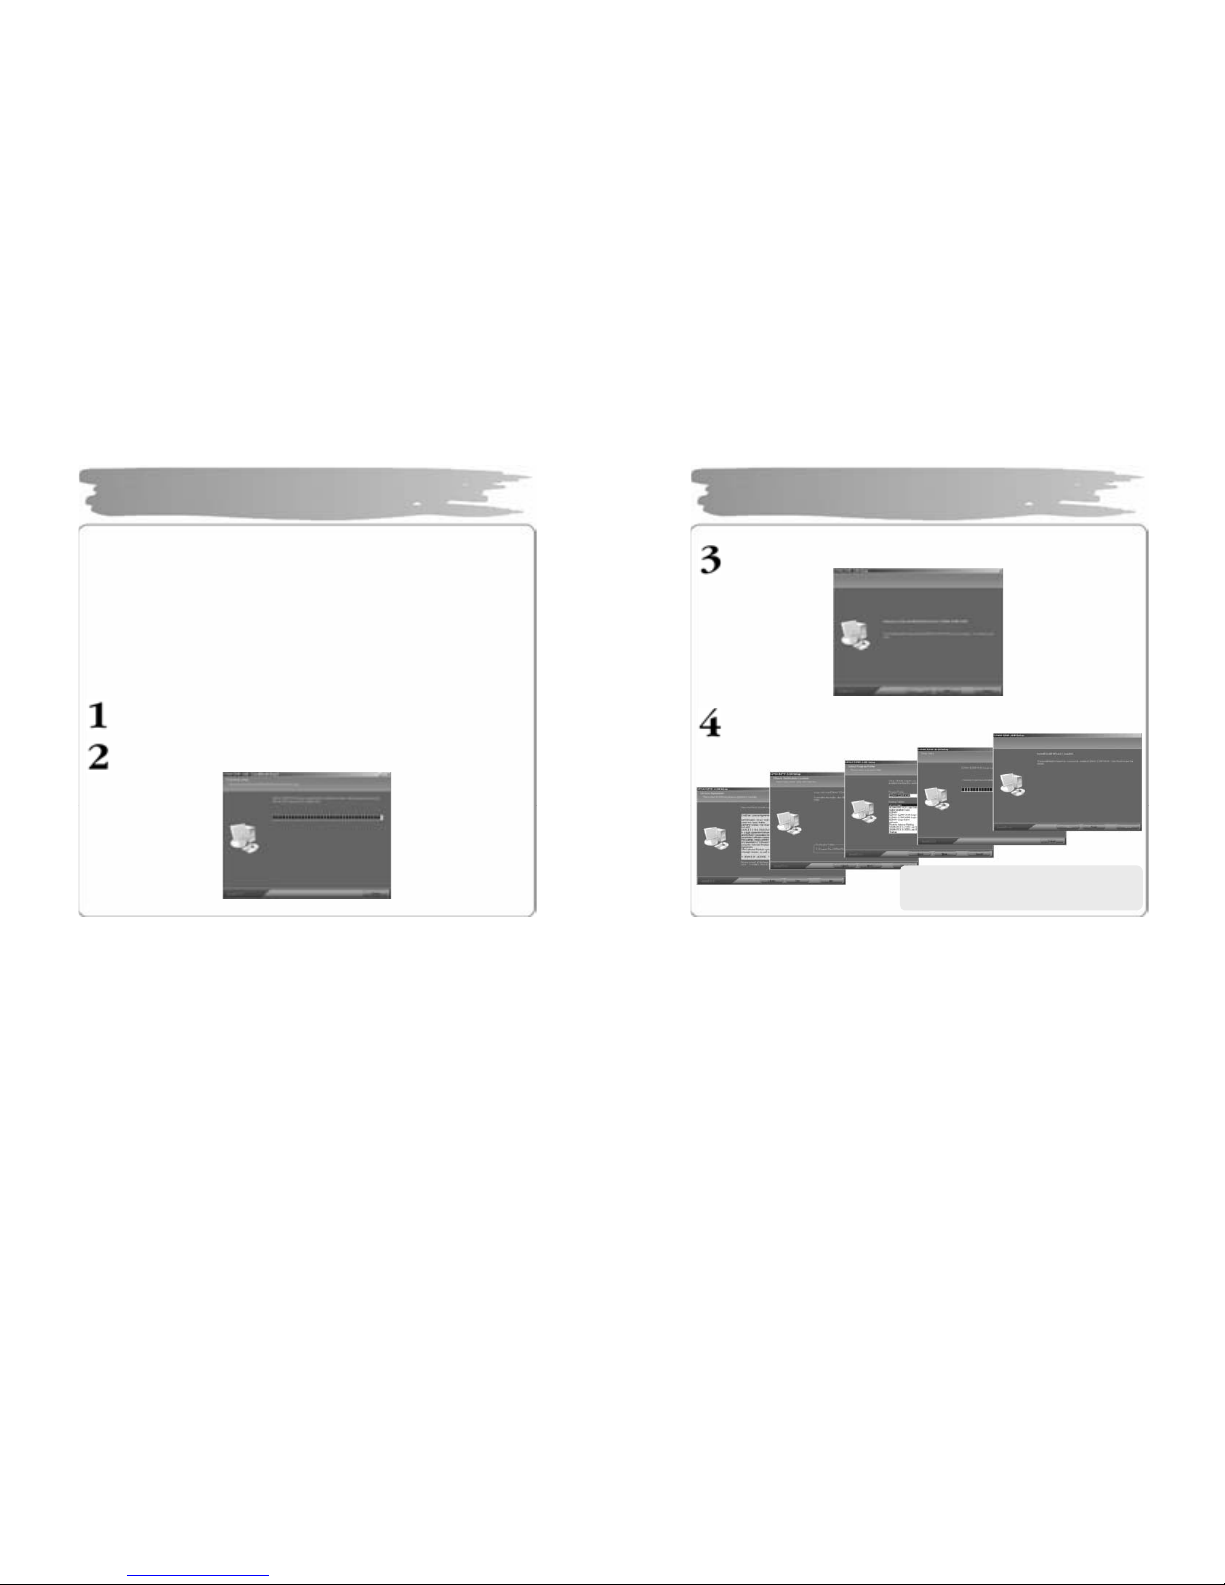
Inse rt I nstal la ti on C D i nto C D-R OM Dri ve an d t hen cl ick set up. exe in t he
folder of Upgrade Manager.
.
The installatio n will star t.
In stalling USB Driver
11
Cli ck “Next”.
Click ‘Next’ or ‘Yes” in s ubsequent wi ndows.
Installing USB Driver
When t he i ns tal lat i on has be en do ne ,
conn ect it to the PC as sh own in th e n ext
pag e
.

12
To download music files (M P3/WM A/ASF/ OGG ) from the PC, use USB cable
to connect the MP3 Player to the U SB port of the PC.
(Make s ure to use only USB cab le suppl i ed with the MP3 Play er. )
Connect ‘A’ of th e cable to the USB po rt on the part of the PC.
Open th e cover o f the USB port on the part of the player and conn ect
‘B’(a smaller part) of the cable to the USB port.
Connecting P layer to PC
13
Install th e USB dr iver in th e follo wi ng way wh en it is n ot recog nized a s a
removab le di sk.
If there doesn’t appear “E Z M A X EZMP-4100 USB Device" in “Disk Drive” of Device
Manag er or “USB M ass Stora ge D ev ice”(Except Window 9 8S E) in Uni versal Serial
Bus Controller, or if there does a yellow exclamation mark or “Unknown Device”, t he
dri ver has not b een pro perl y i nst all ed. I n t his c ase , m anual ly instal l t he dri ver .
If an er ror has occurr ed while installing USB dr iver
Chec k Device Manager.
▪ Wi ndows 98 SE/ME
C ontrol Panel →Syst em→Device M anager
▪ Windows 2000 (Professional )
C ontrol Panel →Syst em→Hardwar e
→Device Manager
▪ Wi ndows XP ( Pr ofess io nal )
C ontrol Panel →Performanc e and
M aint enance→System
→Hardware→Devic e M anager
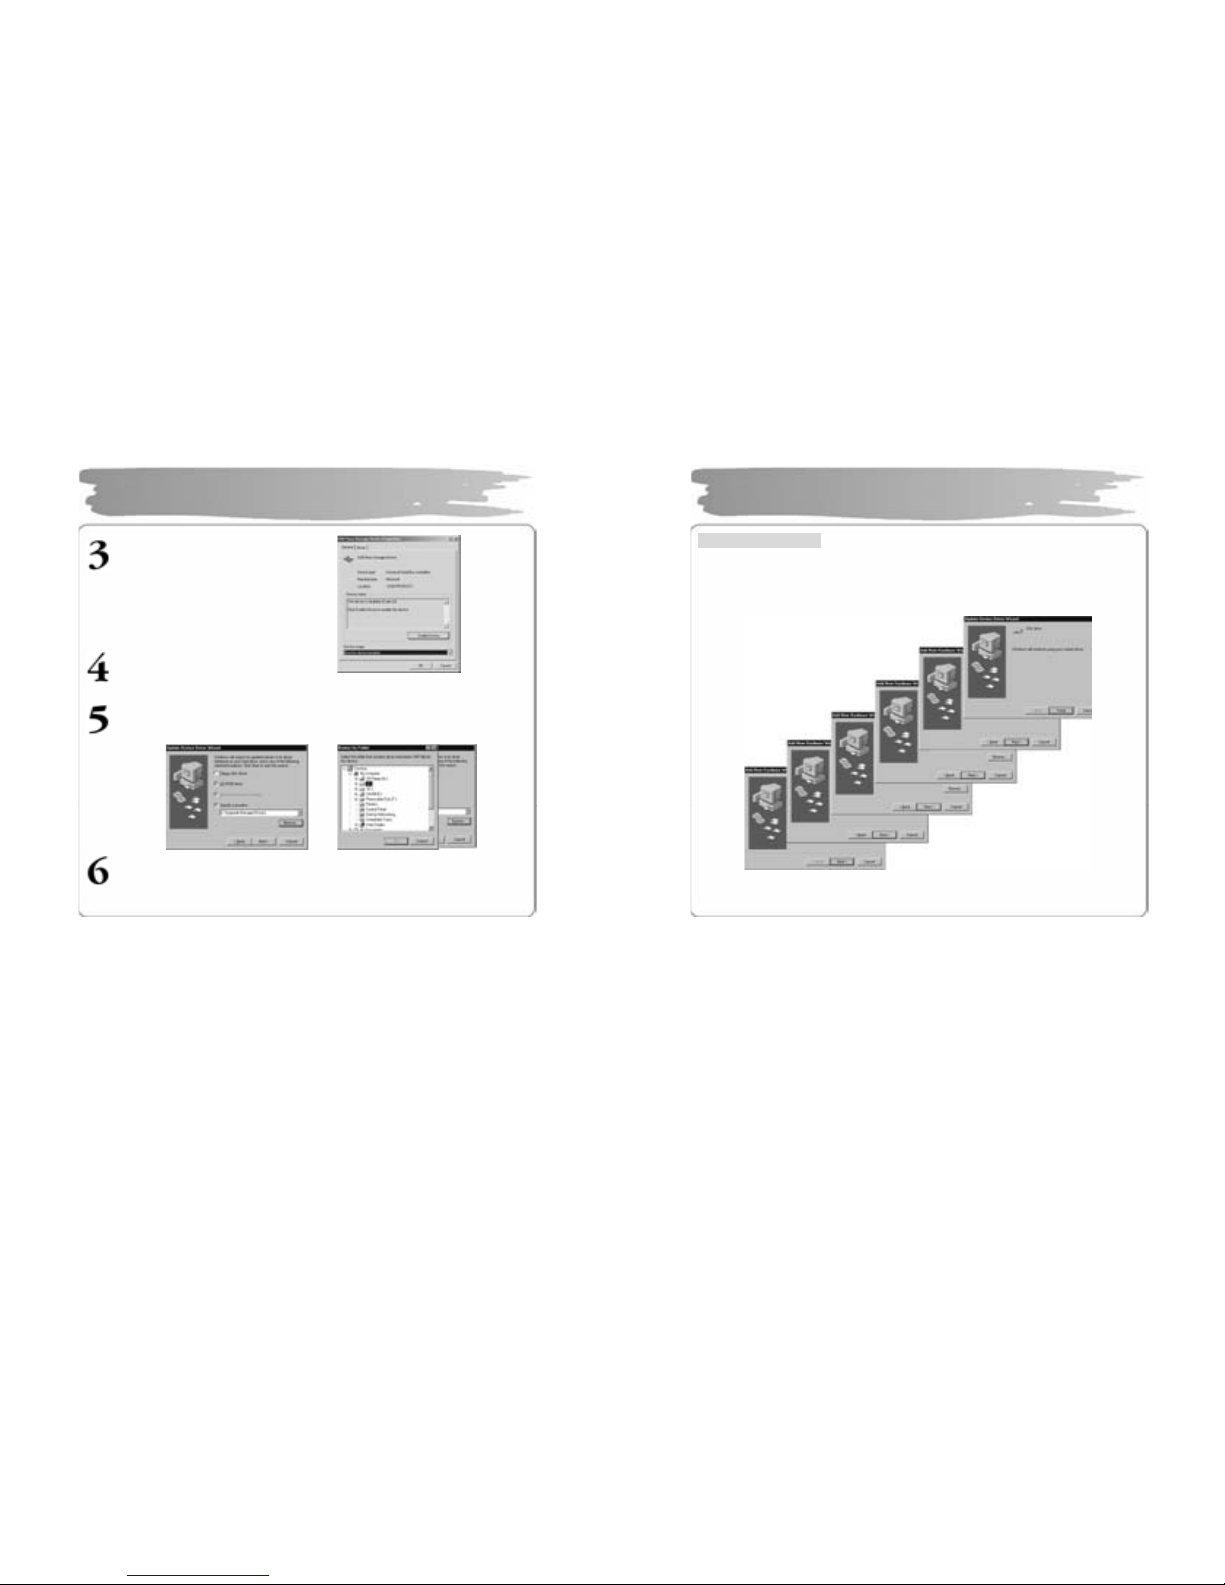
Ch ec k wh et h er ther e are an y d e vice wit h a e xcla m ati on mar k or q uest i on
mar k(unknown device or USB device) in D evice Manager.
Manually Installing USB
14
Double click the device with a
excl am atio n or qu estion m ark.
Pres s “Ins tal l D ri ver Aga in” ..
Click ‘Next’ in the subs equent wind ows. When searchi ng driver files as shown
belo w , c li ck th e “Br o wse ” to s el ec t C: \ Win n t\ Inf or C :\ Wind o ws\ In f and pr ess
“OK”.
Press “Next”: in the subsequent windows to complete the installation of the
USB dri ver.
Manually Installing USB
15
For W indows 98 SE
Cl ick ‘N e xt ’ in t he s ubs equen t wind ows.
Des ig nat e th e p ath for sear c hing t h e dri ver fil e t o \Upgrade M anager\Drivers of
CD Drive.
Make sure to r estart y our s ystem after installation i s completed.
Manually Installing USB (Win 98SE)
16
Sinc e th e pla yer i s det ected as a re mo v abl e dis k on t h e par t o f PC, you ca n eas il y
uplo ad, d ow nl oa d, or delet e mus ic fil es or fol ders i n Wi ndo ws E xpl o r er with ou t a
separ a te ma nag er pr og r am.
Cop ying fil es t o Pl ayer (D ownl oad)
1) W h en you c on nect t h e pla y er to the U SB c abl e , i t i s r eco g ni ze d as a
remo vable di s k in Wi ndo ws Ex pl orer.
2) C l ick t he re mov able di s k t o ent e r int o a m em ory ar ea of t h e pl a yer.
3) R un one m or e Wind o ws ex plor er .
4) S elec t the fi le to sa ve ,
① D rag and drop it to th e re mova ble dis k.
② Or, right-click to select Copy. Designate the r emovable di sk and right-
click to selec t Paste.
5) Then, there will appear a file transfers wind ow, indicating th at the file is
being co pied t o th e r emo vabl e dis k.
Using Removable Disk
17
Export File(Upload)
1) C onnecting the USB cable to the Player allo ws the P layer to be
recognized as a removable disk in t he Windows Explorer.
2) Sele ct t h e removable disk to have a ccess to the mem ory area of
the Player.
3) Run one more Windows Ex plorer.
4) Select a file you want to export from the removable disk, and
then:
① Drag & drop to t he disk to which you want to export.
② Or right-cl ick the mouse to select C opy, and select a folder
to which you wa nt to exp ort, and then right- click the mouse
to selec t Paste.
You can ad d or delete a folder in the W ind ows Ex plorer.
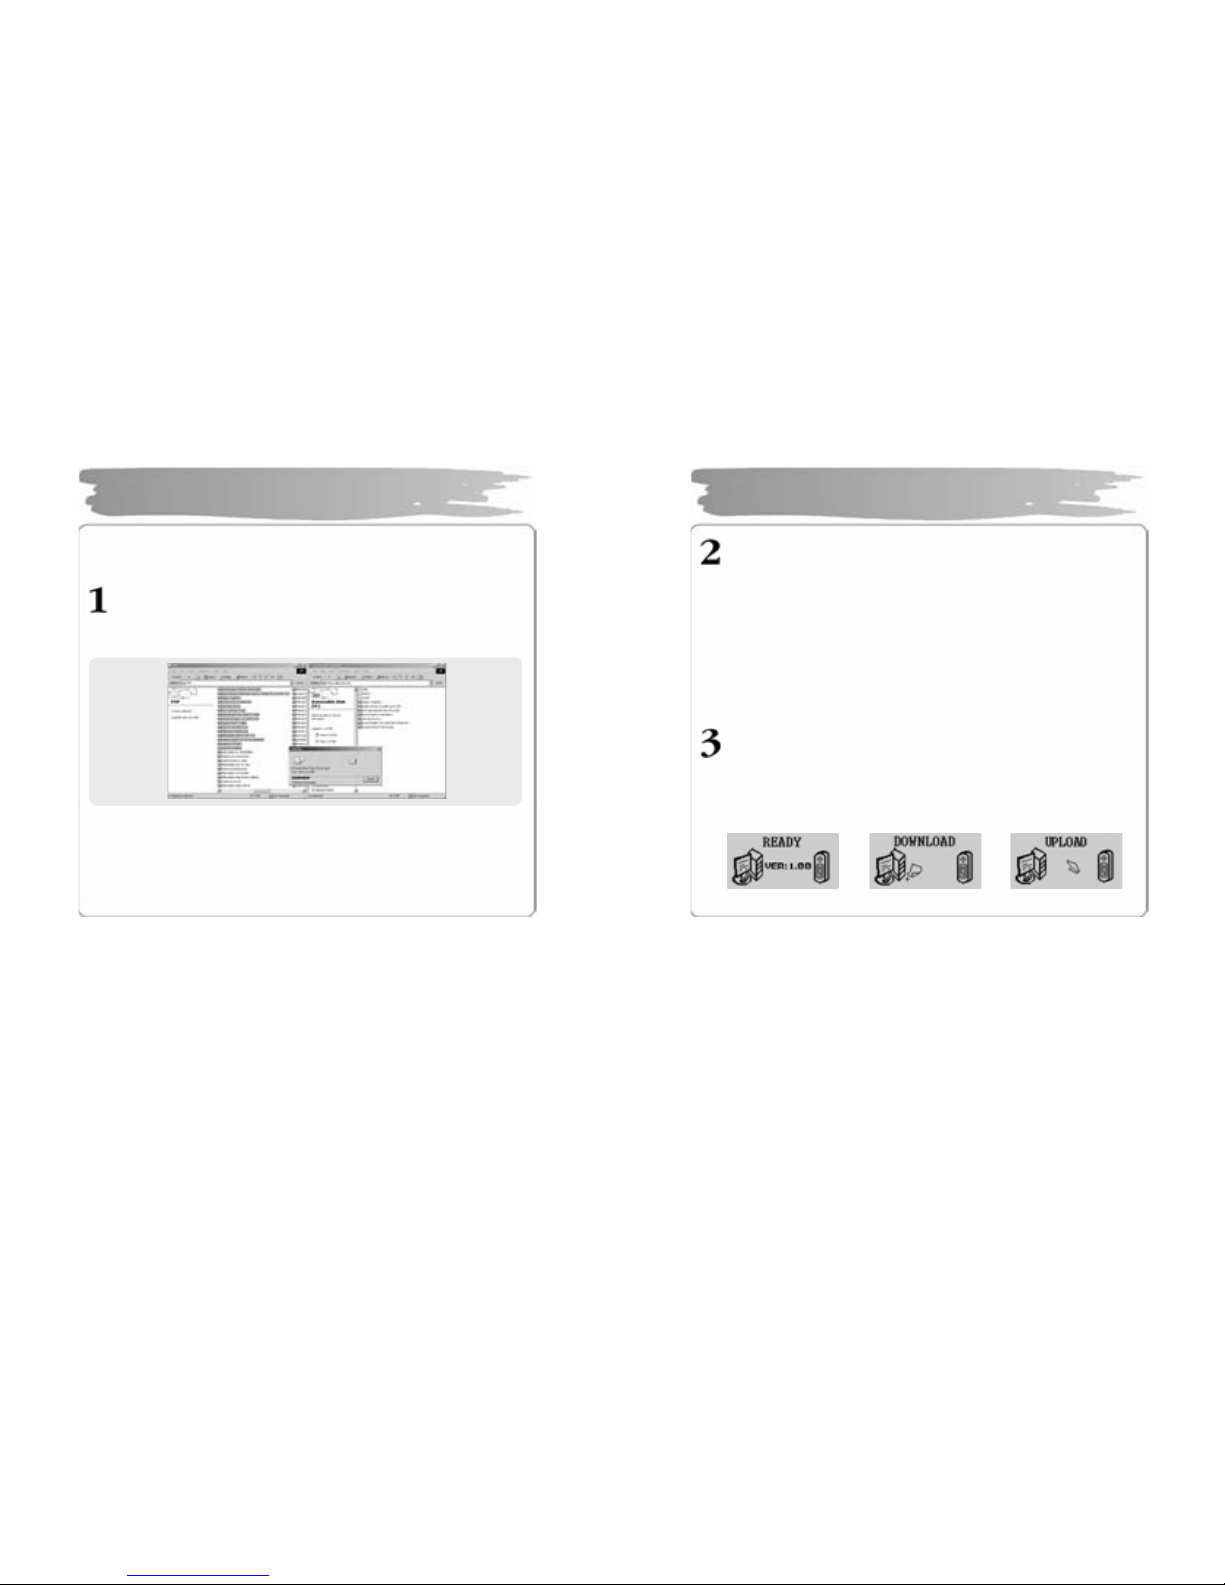
Whe n y ou d ownl oad a m usic fi le t o th e pla yer , wait u nti l th ere ap pe ars Ready
on the dis pl a y as s ho wn b el ow. If yo u di s c onn ect th e US B ca bl e dur i ng
DOW N LOAD or U P LOA D , th e fil e ma y not be pr op e r ly do wnl o a ded . C h e c k
the di spl ay(R EADY) and t hen dis co nnec t the c abl e.
READY Status DOW NLOAD UPLOAD
Using Removable Disk
18
For mat Player
1) Formatti ng in the Window s
① Select t he remo vable dis k, a nd then righ t- click the m ouse to
select F ormat (Select “FAT” as a fi le syste m).
② Click Start. (If you remov e the USB cable while form atting, the
player could be damaged. Be sure to remove it after the
formatting has b een done .)
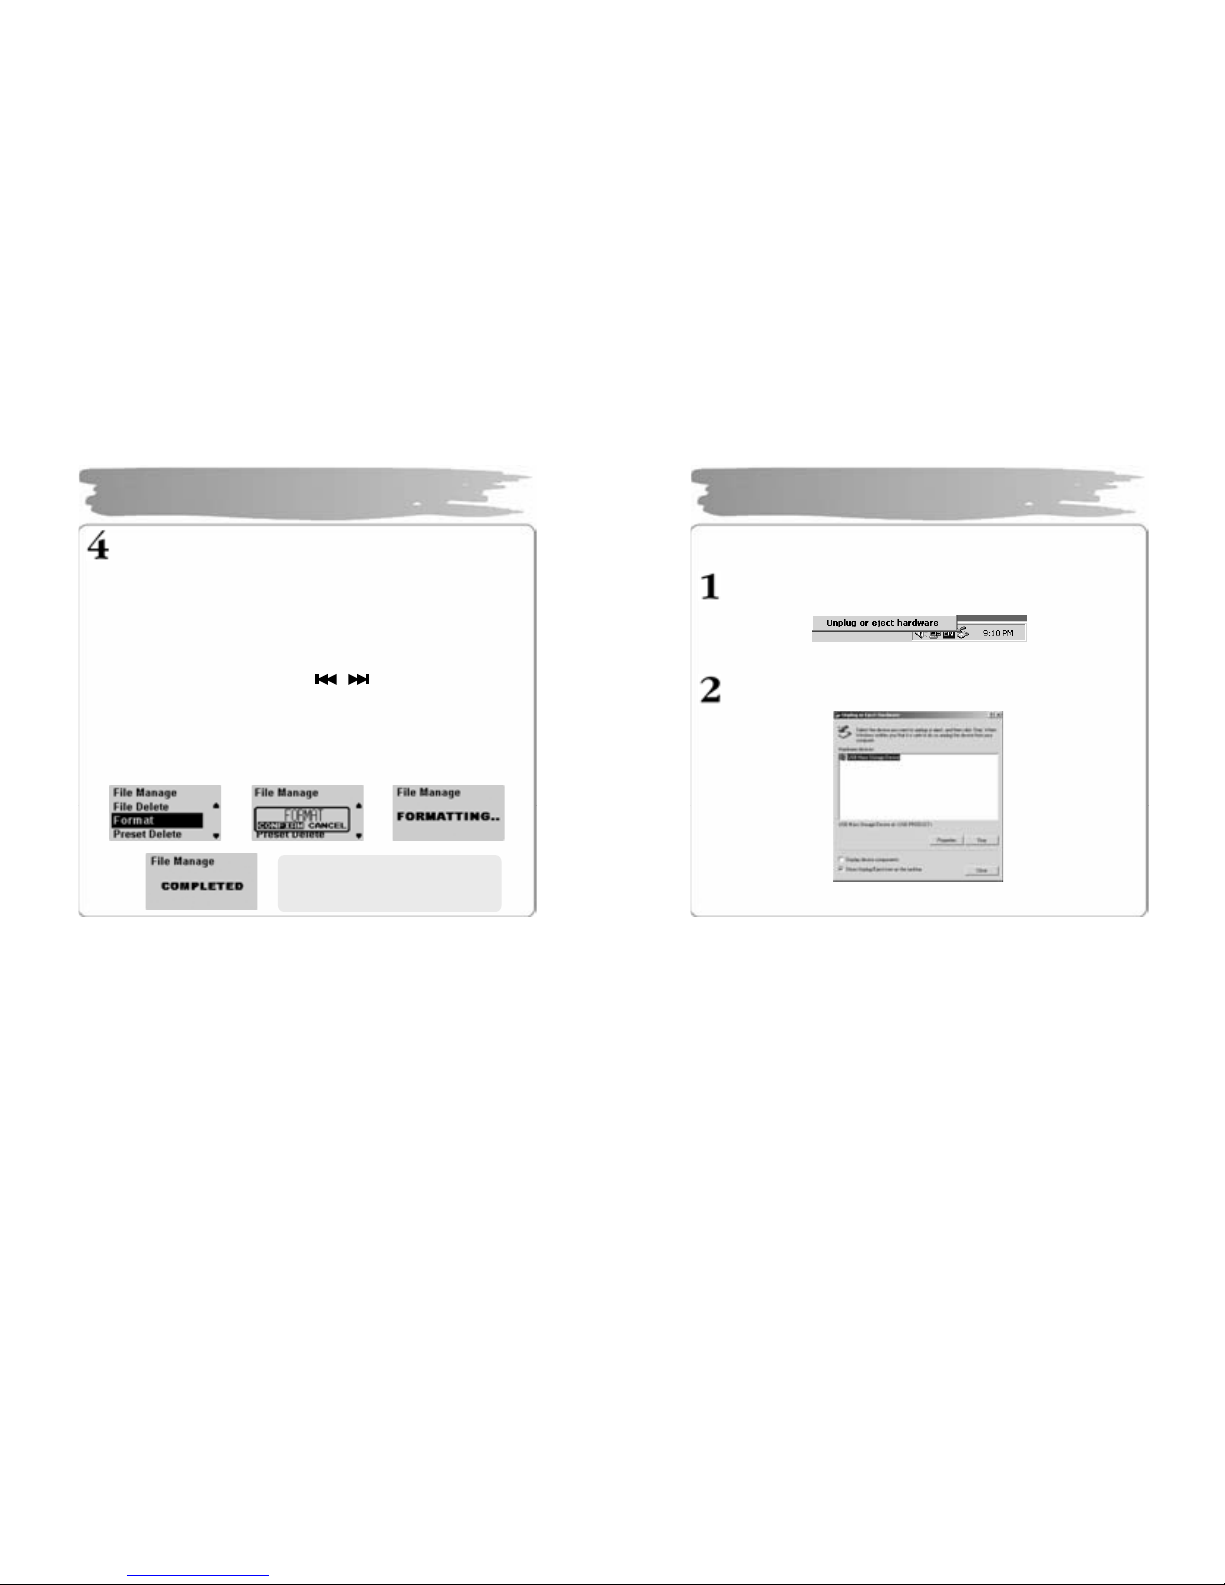
2) F ormatting in the Player
① Pr ess th e M ENU b utt on to ent er int o th e menu mo de .
② Select the File M anager with
butto n an d the n pr es s t he
MEMU button t o enter into File Manage menu.
③ Sel ec t F or ma t m e n u wit h V O L + /- b u tt o n and t he n pres s the ME N U
butt on.
④ Af ter s e l ect i ng “ C onfir m” , pr ess t he M ENU b ut t on on e m or e to s t art
formattin g .
Using Removable Disk
Î Î
Î
※ Be care ful sinc e f ormatting will
delet e al l c ont ents per mane ntl y.
19
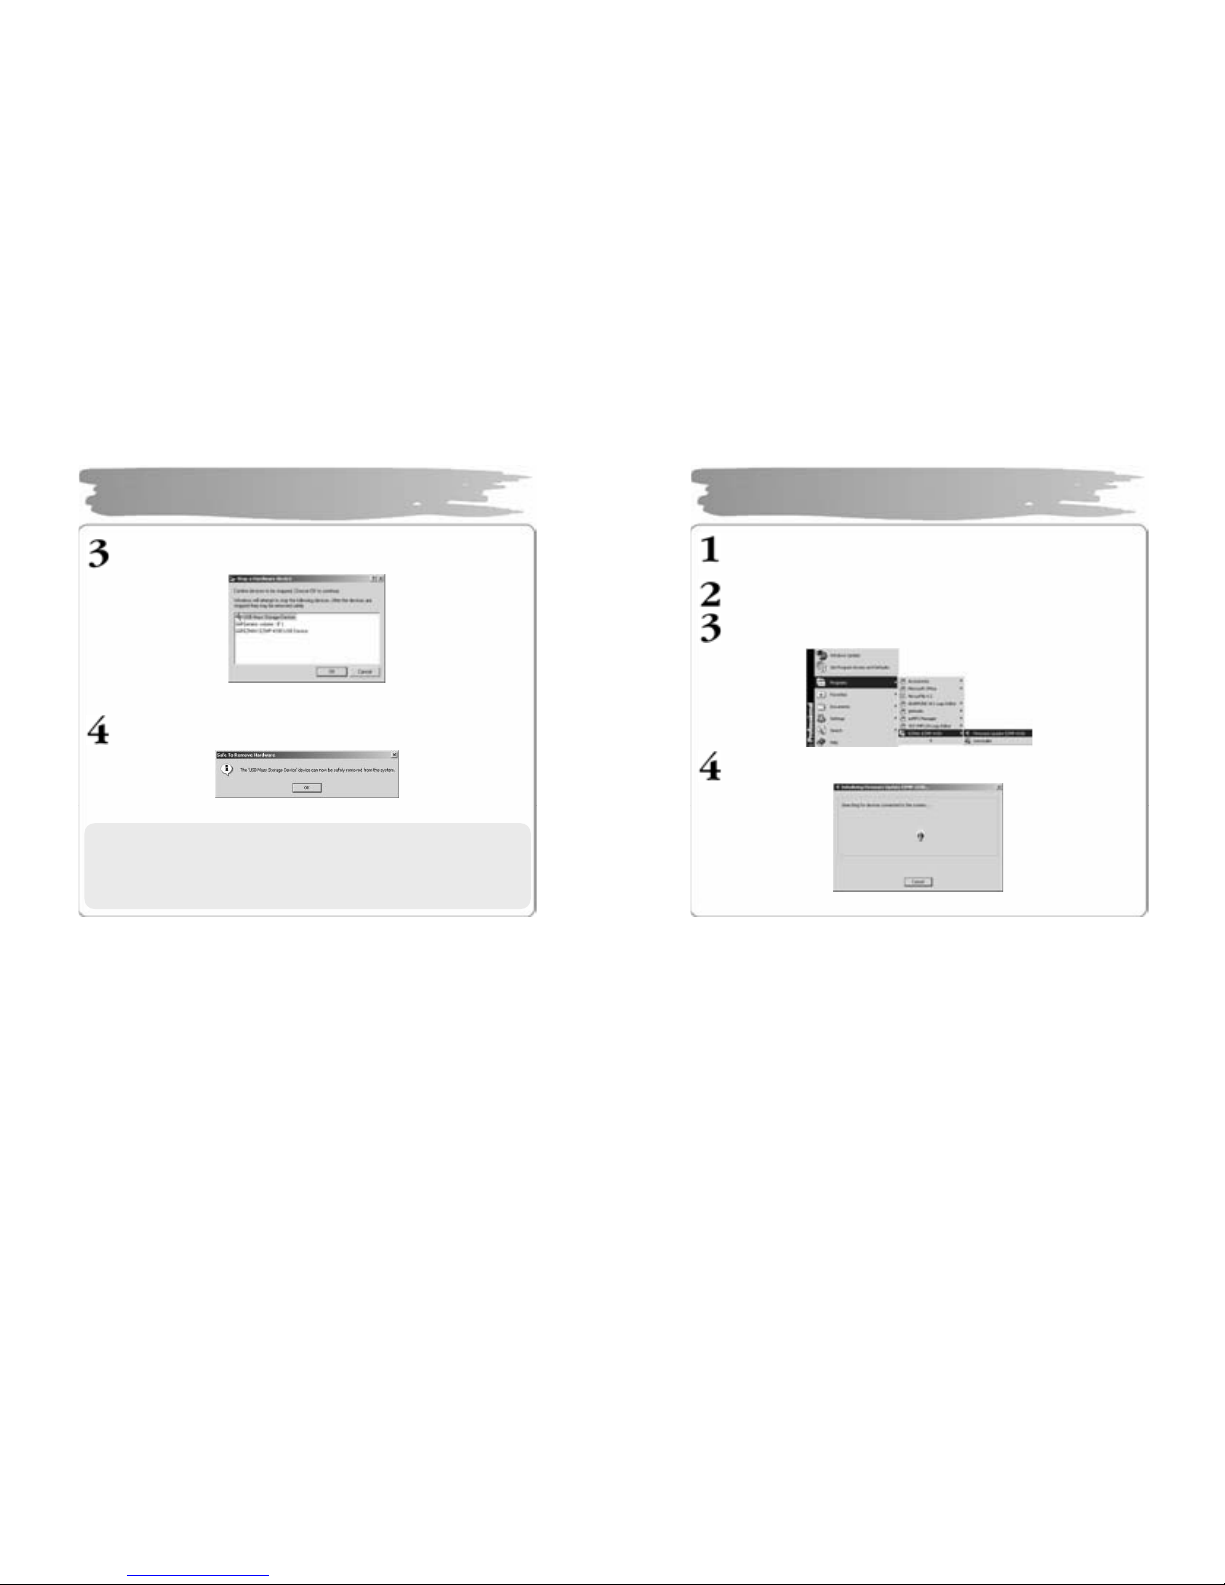
After com pleti ng fi le tr ansf er, dis conn ect the U SB c a ble i n the f ollo wing wa y.
Ri g ht-cli ck the r em ovabl e h ard war e icon on t h e tas kbar of t he des kto p,
and th en sel ect “ Re mov e Har dwar e S af ely”.
After sel ecting the device to disco nnect, clic k “Sto p” .
Disconnecting USB Ca ble
20
Cli ck “OK” to confi rm the device to sto p.
Cli ck “OK” to remo ve U SB c able.
Disc onnecting USB Cabl e
※ Abnormally disconnec ting the USB cable may res ult in damages or a
failure to the p l ayer.
Th e o rd er of m u si c f il es t h at ap p e ars wh e n you s el e ct a r em o v ab l e
disk in Windows Explorer has nothing to do with the actual
sequ ence in ac cordance with the pla yback.
21
Dow nl oa d th e la t est v er s i on of fi r mw ar e at ou r webs i te ( www. ezm ax.co . kr )
and unzi p it ( u nzi pped to 4 fil es. )
Cop y t he unzi p ped l ates t fi r mwar e fi les int o
C:\P rog ram F il es\ EZMA X\EZM P-4 10 0 fol der .
Exe cut e Fir mwar e U pgr ade manag er prog ra m.
Wai t f or th e de vice t o se arch. Con nec t U SB c able .
Upgradi ng Fir mware
22
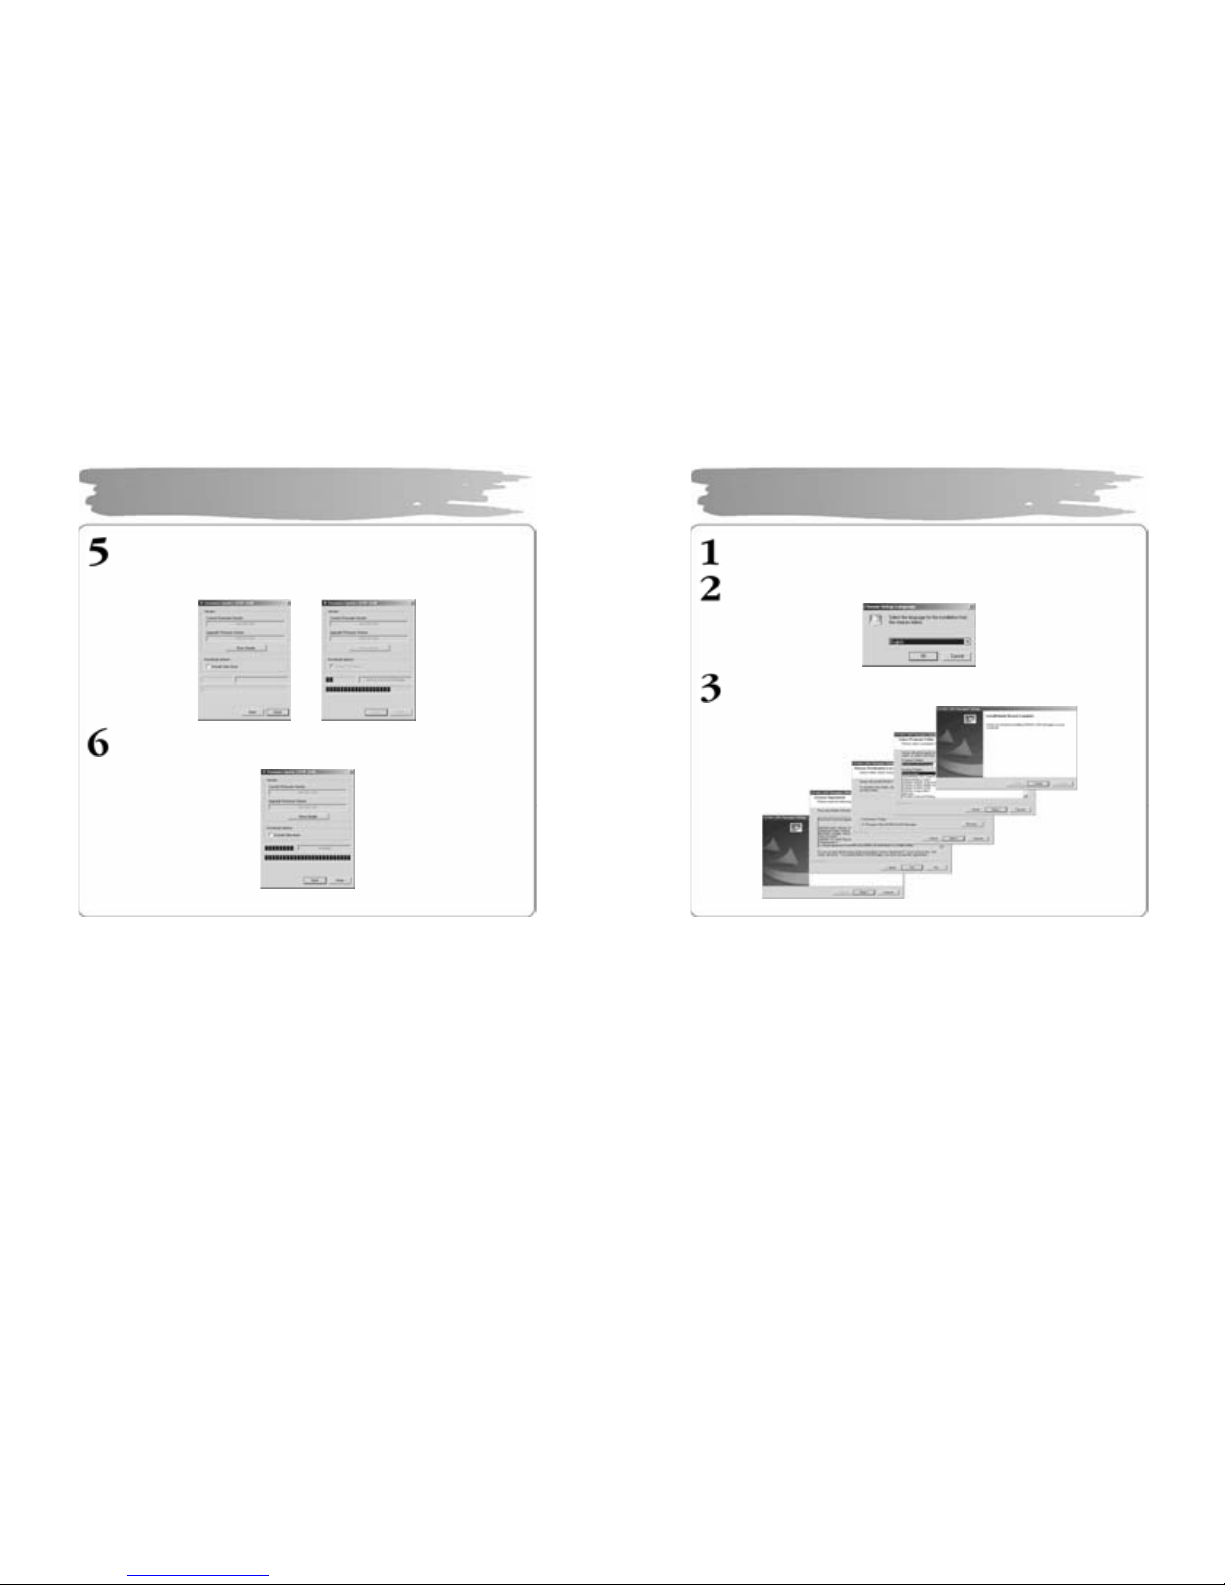
Cl i ck ”Star t” to proce ed Fi rmw are Upg rad e. Selec t “Da ta Area F or mat ting ”
to d elet e all t he files in the system.
Di sconnec t in g th e U SB ca ble du r i ng Fi r mw ar e U pg r ade ma y r esul t i n m alfun ct i ons of t he pl a yer or the PC .
Whe n t he firm ware u pg rade has b ee n co m pl et e d, cl i ck “C l ose” an d r e mo v e
the US B ca ble (Ref er t o Di sco nnec ting U SB Cabl e).
Upgradi ng Fir mware
23
Inser t the I nstall ati on C D into CD- ROM Driv e and cl ick s etup.ex e i n the fol der
of LD B Man ag er.
Sele ct a la ngu age t o us e.
Cl ic k “Nex t’ or ‘Yes ” i n th e s ubseq uen t wind ows .
In stalling LDB Manager
 Loading...