

EZMAX EZMP 2100 User Manual
Copyright 2004 EZMAX. All rights reserved.
Advance permission of EZMAX is required to use User’s Guide, photos,
the related documents and software of the product. Any violation may
follow the legal measures.
The contents of the User’s Guide are subject to change without prior
notice for further improvement of the product.
EZMAX
http://www.ezmax.co.kr

Table of Contents
Before Use
1. Product & Accessories.......2
2. PC System Requirement ...3
3. Safety Precaution ...........4
4. Features of Product.…….…..5
Designation of Product
1. Front/Rear View…….…..…….7
2. Side View………………..…….….8
3. Functional Icon of Display .9
Preparation
1. Connecting Player to PC….10
2. Installing USB Driver.......11
3. Running Basic Functions. .20
4. Installing Logo Editor &
Applying Logo to Player ……23
Basic Functions
1. Basic Operation..............27
2. Power ON/OFF................ 30
3. Play Music ....................31
4. Record Voice & Play ……..33
5. FM Listening, Record & Play
................................34
6. Record from External
Source & Play ..............36
Function Menus
1. PLAYBACK .................. 40
2. EQUALIZER ................ 41
3. DELETE ......................42
4. SETTING ....................44
Upgrade ................. 49
Others
1. About Battery
................................51
2. Trouble Shooting .......... 52
3. Product Specification ….. 54
4.
FCC Compliance Statements
.....................................55
1
1
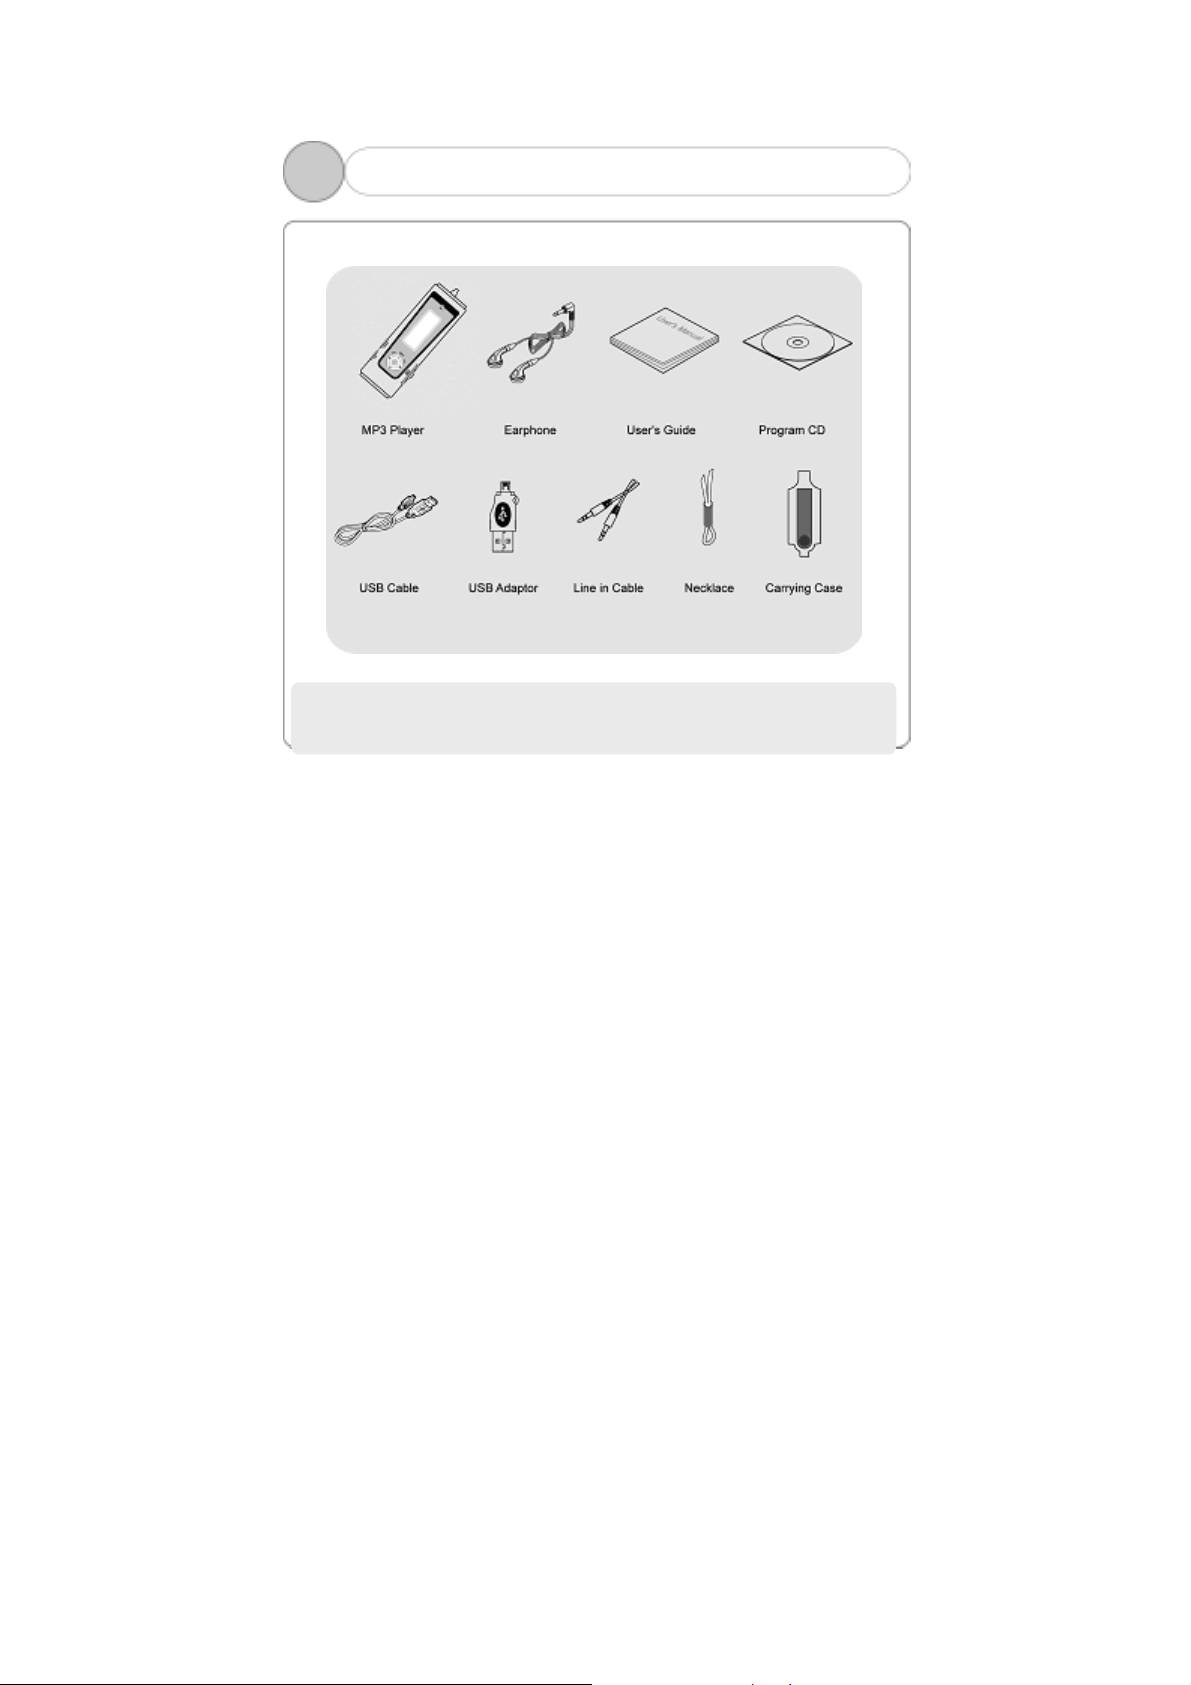
!NOTE: Accessories are subject to change w itho ut prior not ice for fur th er
1. Product & Accessories
improvement of the product performance and quality.
2

1
The followings are the basic requirements of the PC to use the MP3
Player. Please carefully read and confirm the requirements.
Pentium 200MHZ or above
Windows 98SE / ME / 2000 / XP
Mac OS 9.0 / 10.0
USB (Universal Serial Bus) Port
CD-ROM Drive
Hard Disc Space 20MB or above
64MB RAM or above
!NOTE: Actually available built-in memory in this player is less than the
nominal capacity of the product because the FirmWare uses a part of
the capacity to drive the system.
2. PC System Requirements
(Windows 98SE – Install Driver)
(Additional capacity is required
to save the music file.)
3

1
Listening to Music…
The output class of the product guarantees the best po ssible sound of
the mid-size volume. As the hig h volume for a long time may damage
the hearing, listen to music in moderate volume.
Do not exposure to the strong shock or vibration.
Please take good care of handling the product and accessories. Dropping
on the floor or giving a shock may result in a serious damage of the
product.
Storing the Product…
Avoid storing in the extreme change of temperature, high humidity and
the strong magnetic field.
Cleaning the Product…
The chemical may discolor or damage the surface of the player. Use the
soft cloth to gently clean the player.
!NOTE: Do not disassemble, repair or reconstruct the product.
3. Safety Precaution
4

1
Multi-Codec Player
Compatible with MP3, WMA and ASF (Audio) formats
FirmWare Upgrading
Upgrade FirmWare to add/change/improve functions and performance of
the Player. Always enjoy the music in the latest version of performance.
Voice Recording
The superior sound quality voice recording function allows the clear
recording in the conferences and lectures.
FM Radio
Conveniently enjoy the FM radio with a variety of functions such as the
manual/automatic frequency search, automatic tune to the radio station,
and the station preset.
4. Features of the Product (1)
5

1
Easy Navigation
A tree configuration allows the easy search and control.
6 Preset Equalizer
You can produce your own sound quality with the 5-band User EQ and 5
recommend EQs including Normal, Classic, Pop, Rock and Jazz.
Caption the Text of the Song
The text of the song is shown in two lines on the display during the
playback.
Compatible with the Removable Disk Unit
It is recognized as a removable disk unit if connecting to the PC to
upload or download files without Manager program.
Direct Encoding
Use the LINE IN on the player to convert the external sound into the
audio file. Also use the FM radio to convert the radio broadcasting into
the audio file while listening to the FM radio.
Show My Own Sense of Logo on My Player
User can display the self-created logo on the Player..
4. Features of the Product (2)
6

2
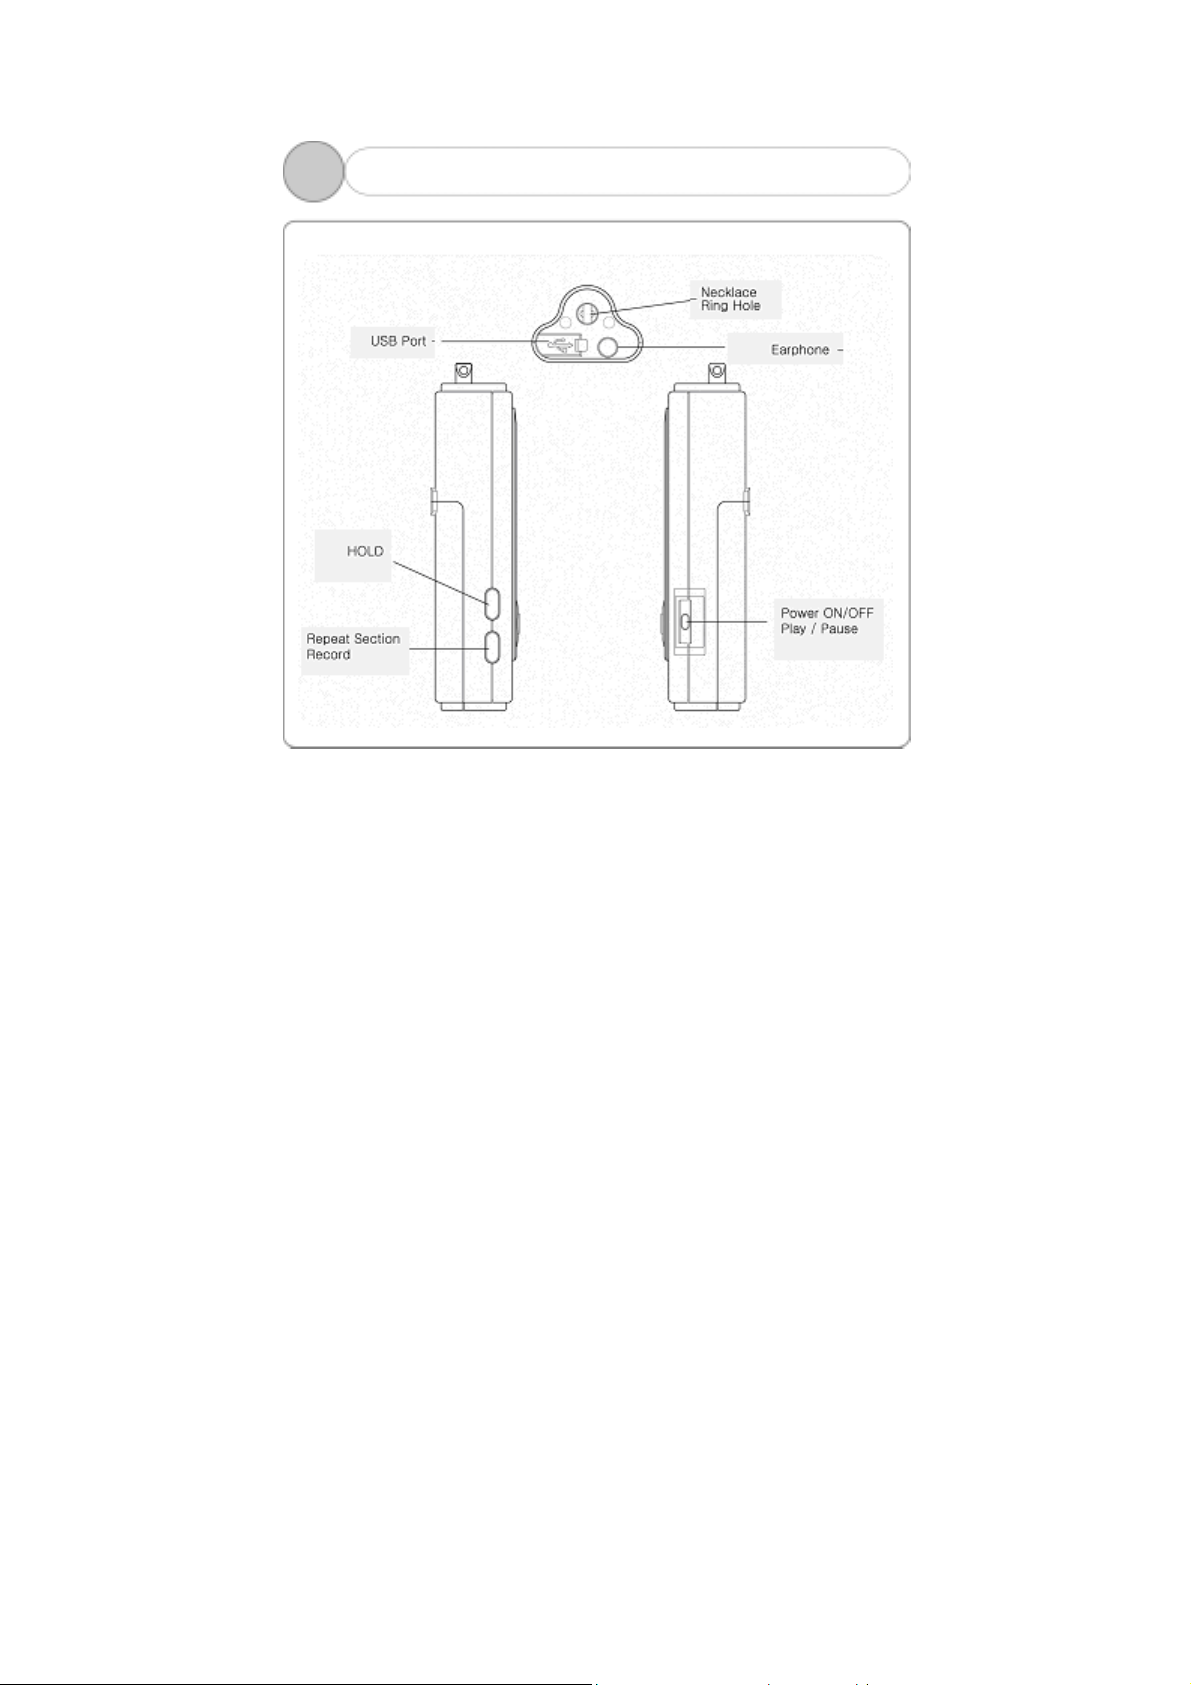
1. Front/Rear View of the Product
* Surface protective tape is applied on the front display to
prevent its scratches.
7
2
2. Side View of the Product
8
2
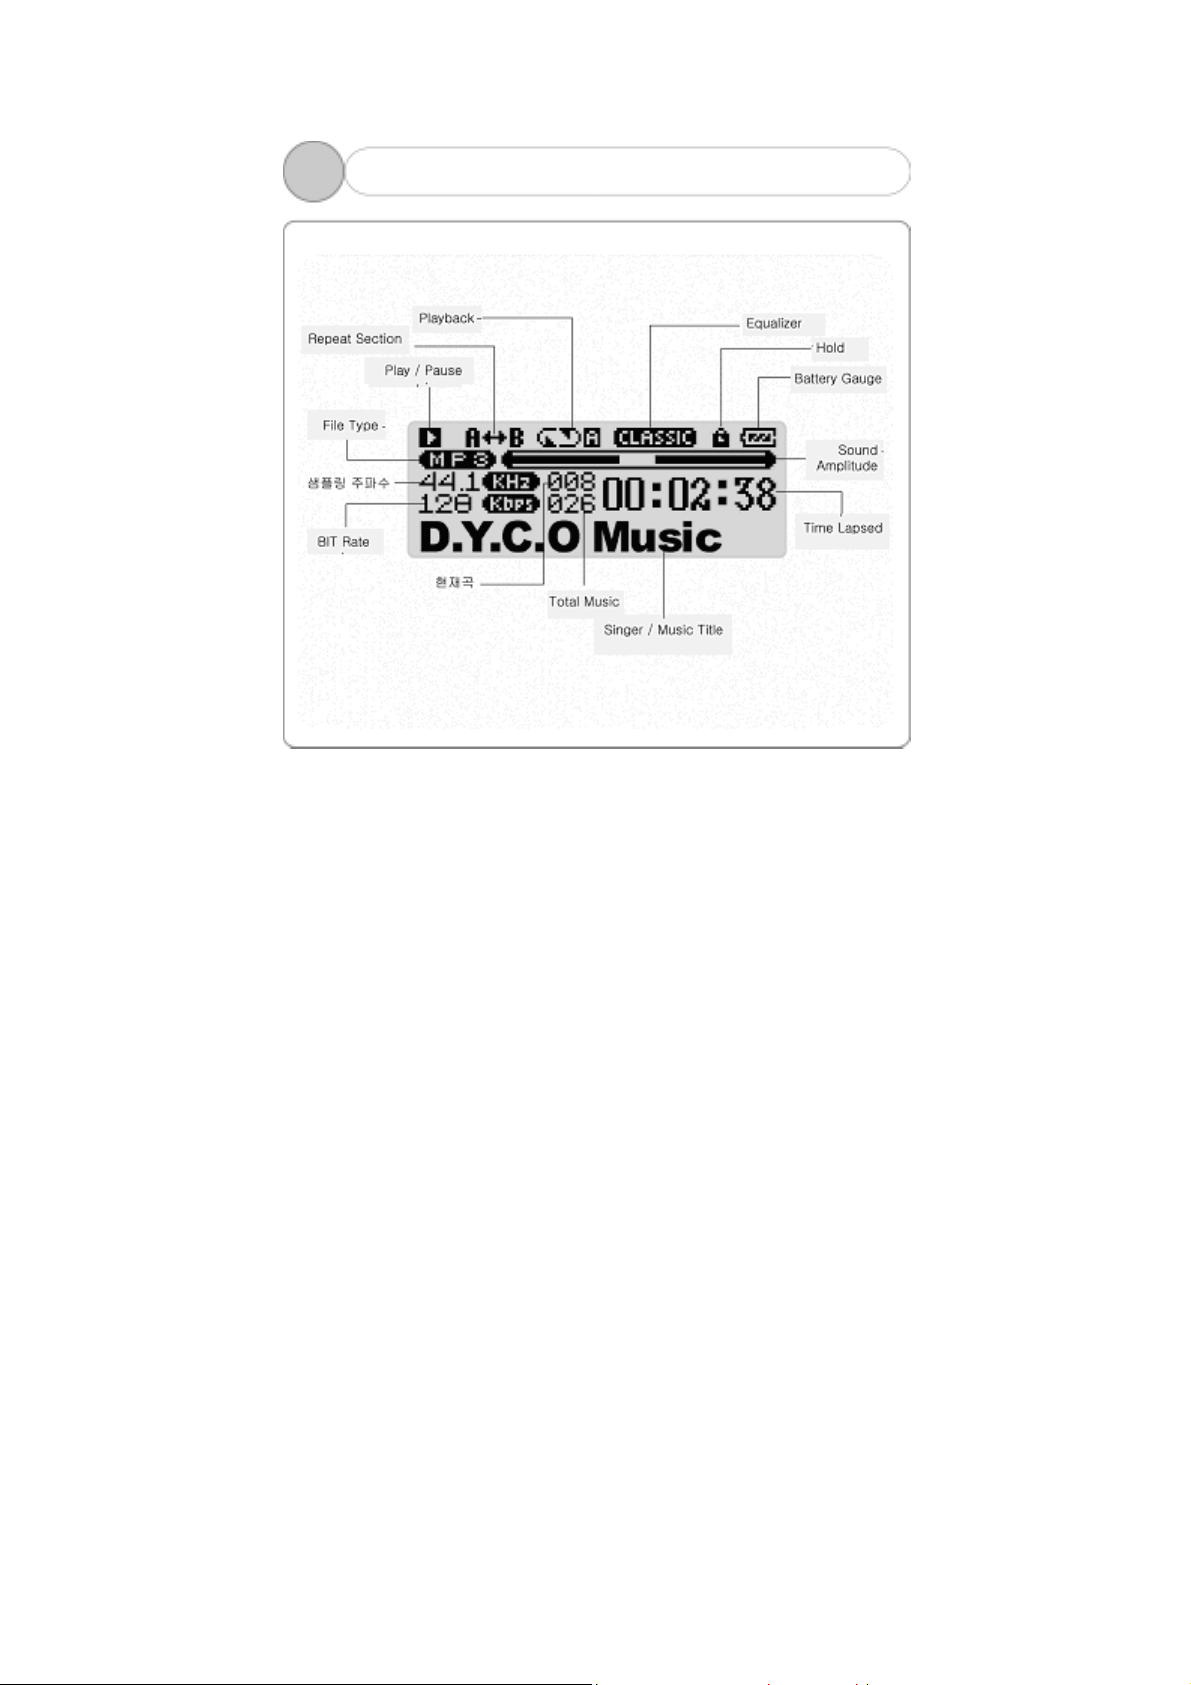
3. Functional Icon of Display
9
3
3
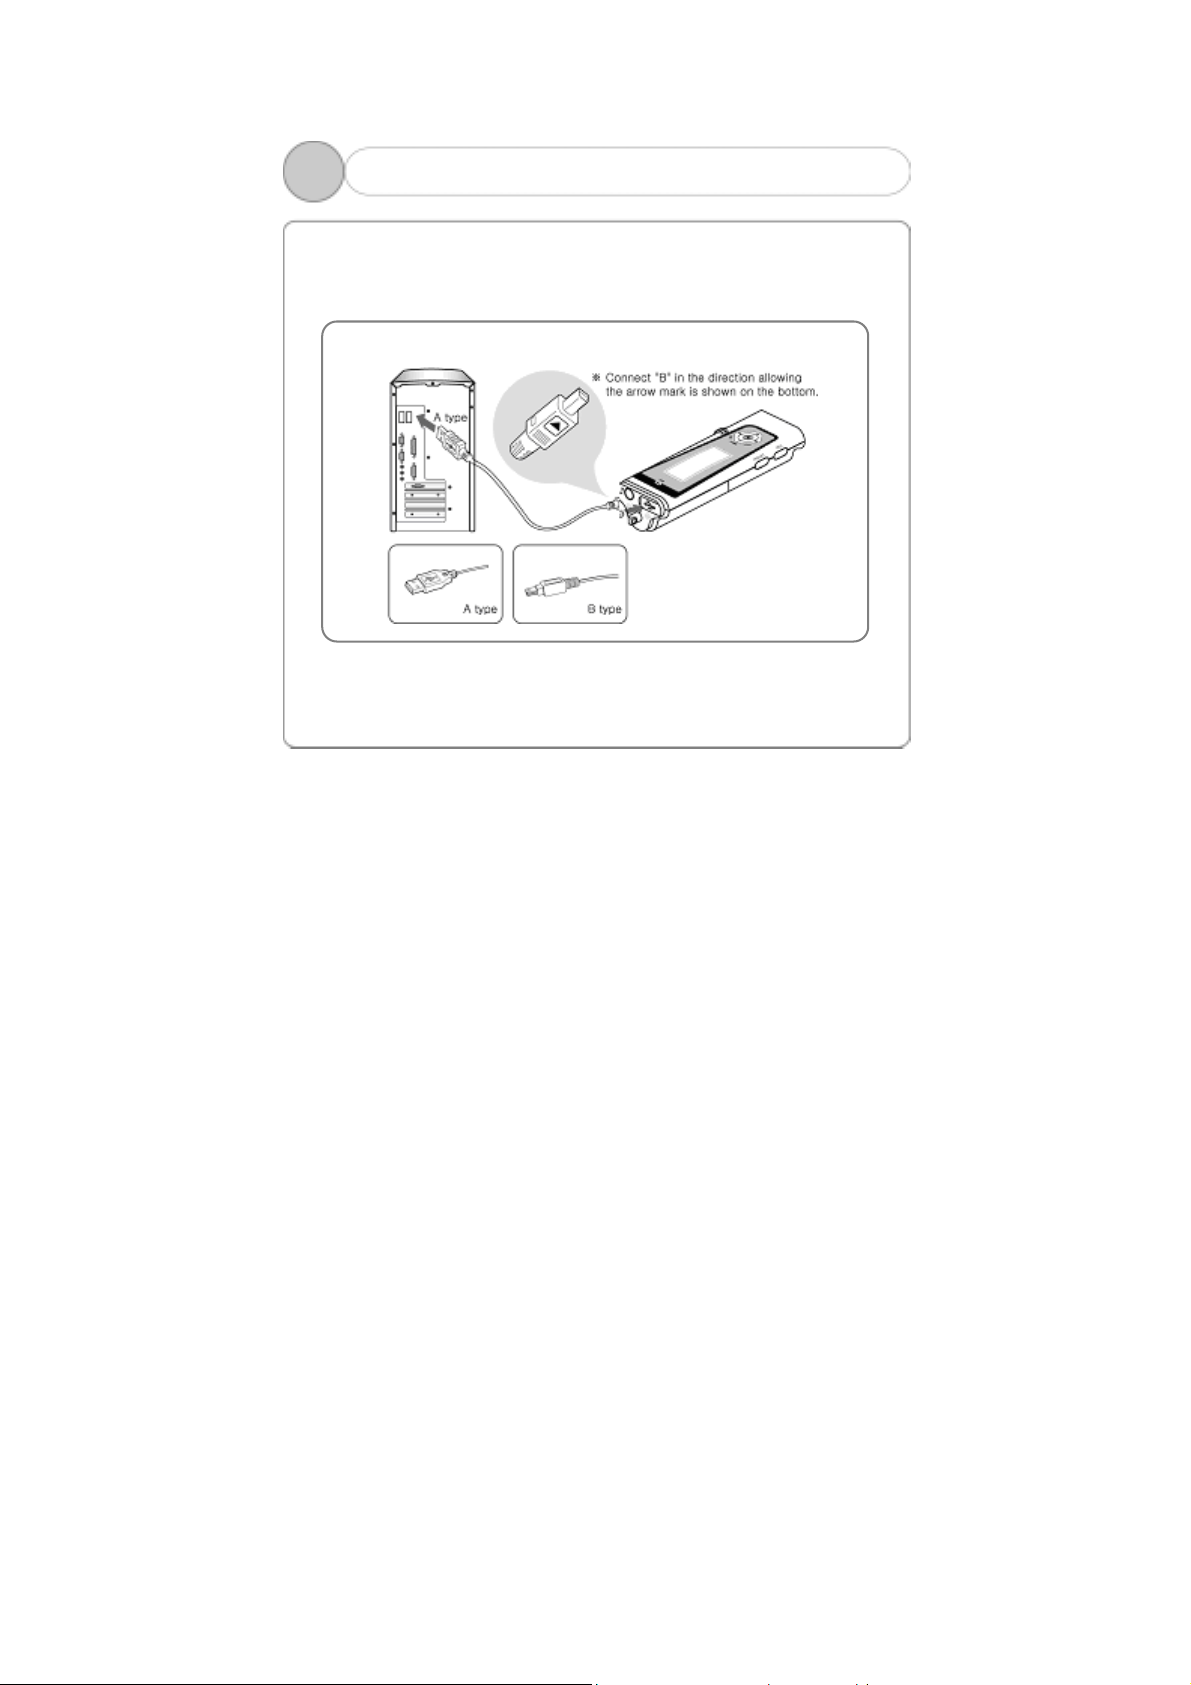
To download music files (MP3/WMA/ASF) from the PC, use US B cable to
connect MP3 Player to the USB port of the PC.
(Make sure to only use the USB cable supplied with the MP3
Player.)
1. Connecting Player to PC
Connect ‘A’ (large) to the USB port of the PC.
Connect ‘B’ (small) to the USB port found when opening USB port plug
on the Player.
10
3
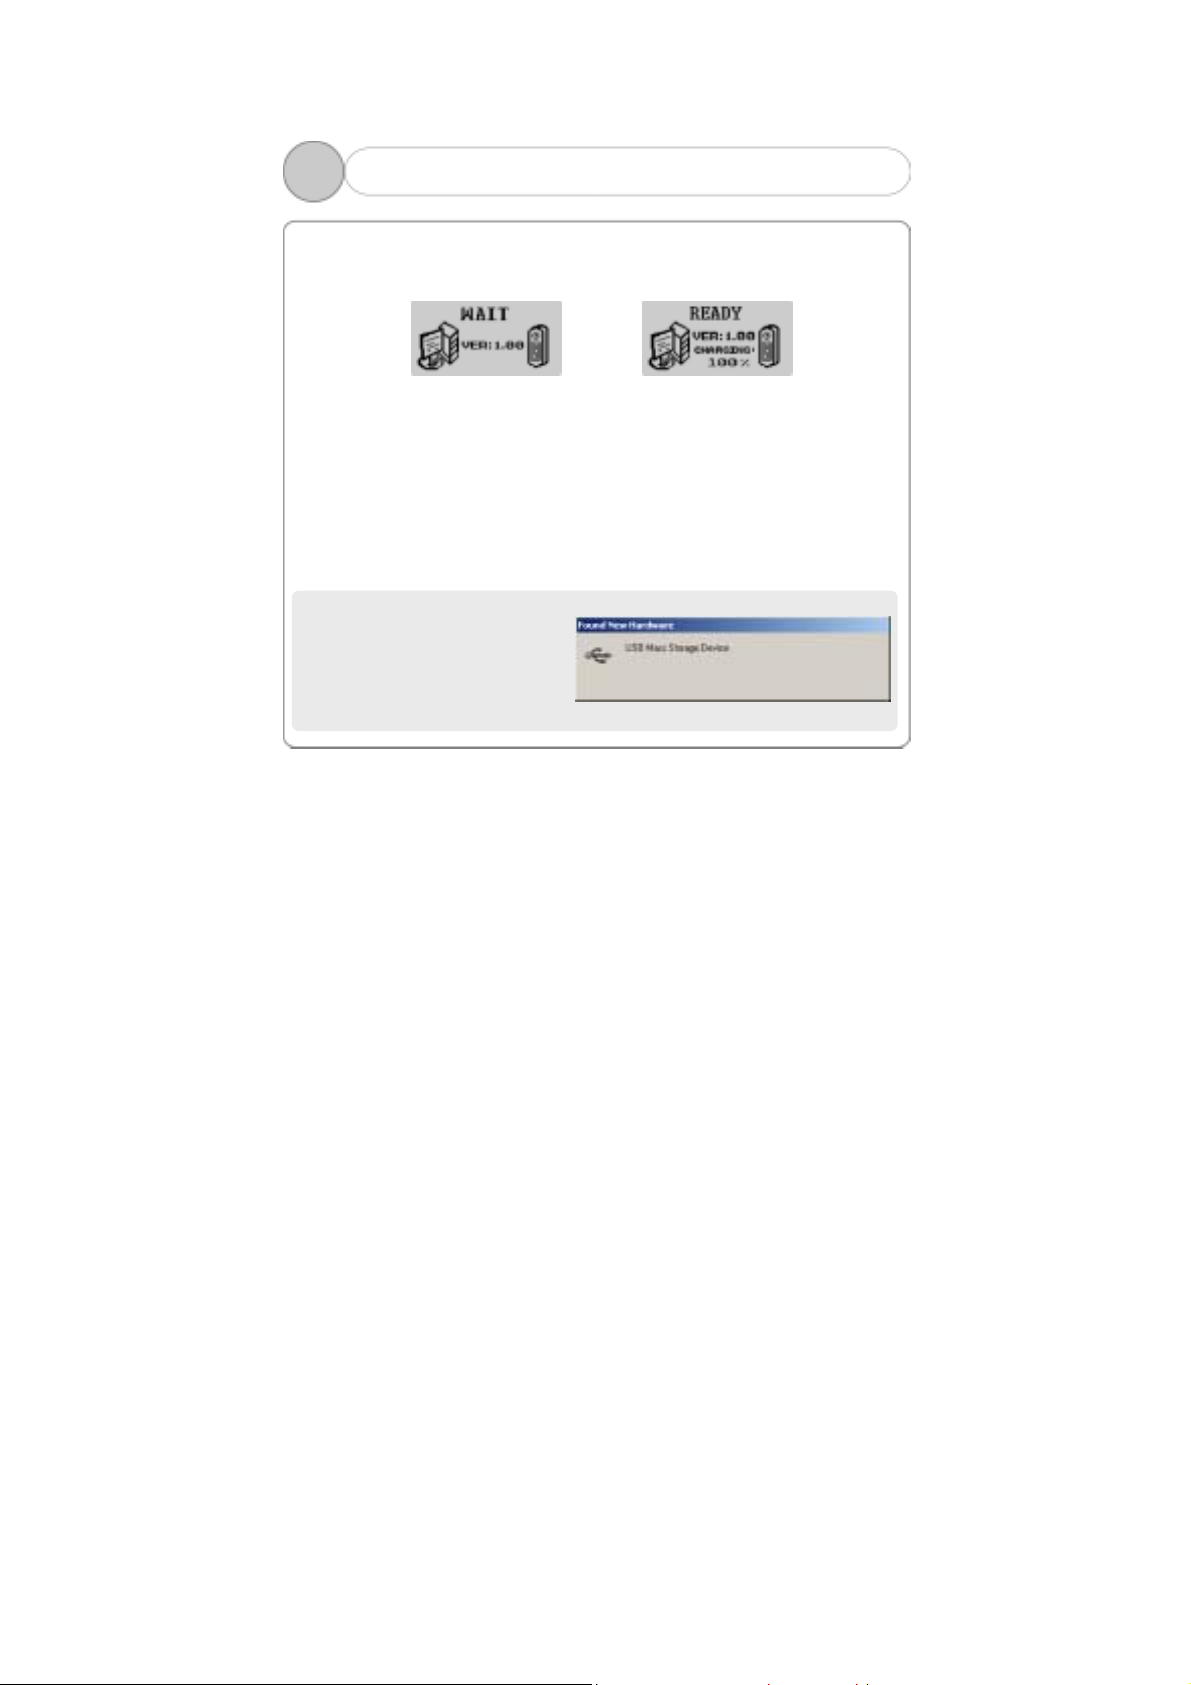
2. Installing USB Driver (1)
Connecting USB cable to the Player displays the following screen in th e
display(WAIT) on the Player.
1. Follow the instruction below for the PC of which OS is one of the
Windows ME, Windows 2000 and Windows XP.
A screen appears with a message saying, “New hardware is found” on
the PC as shown below. Follow the instruction to install the driver. The
installation may automatically be completed without showing the
installation screen depending on the PC environment.
An example here is for the WINDOWS 2000.
1) A message saying,
“Found New Hardware”
automatically appears.
Before install drive After install drive
11
3
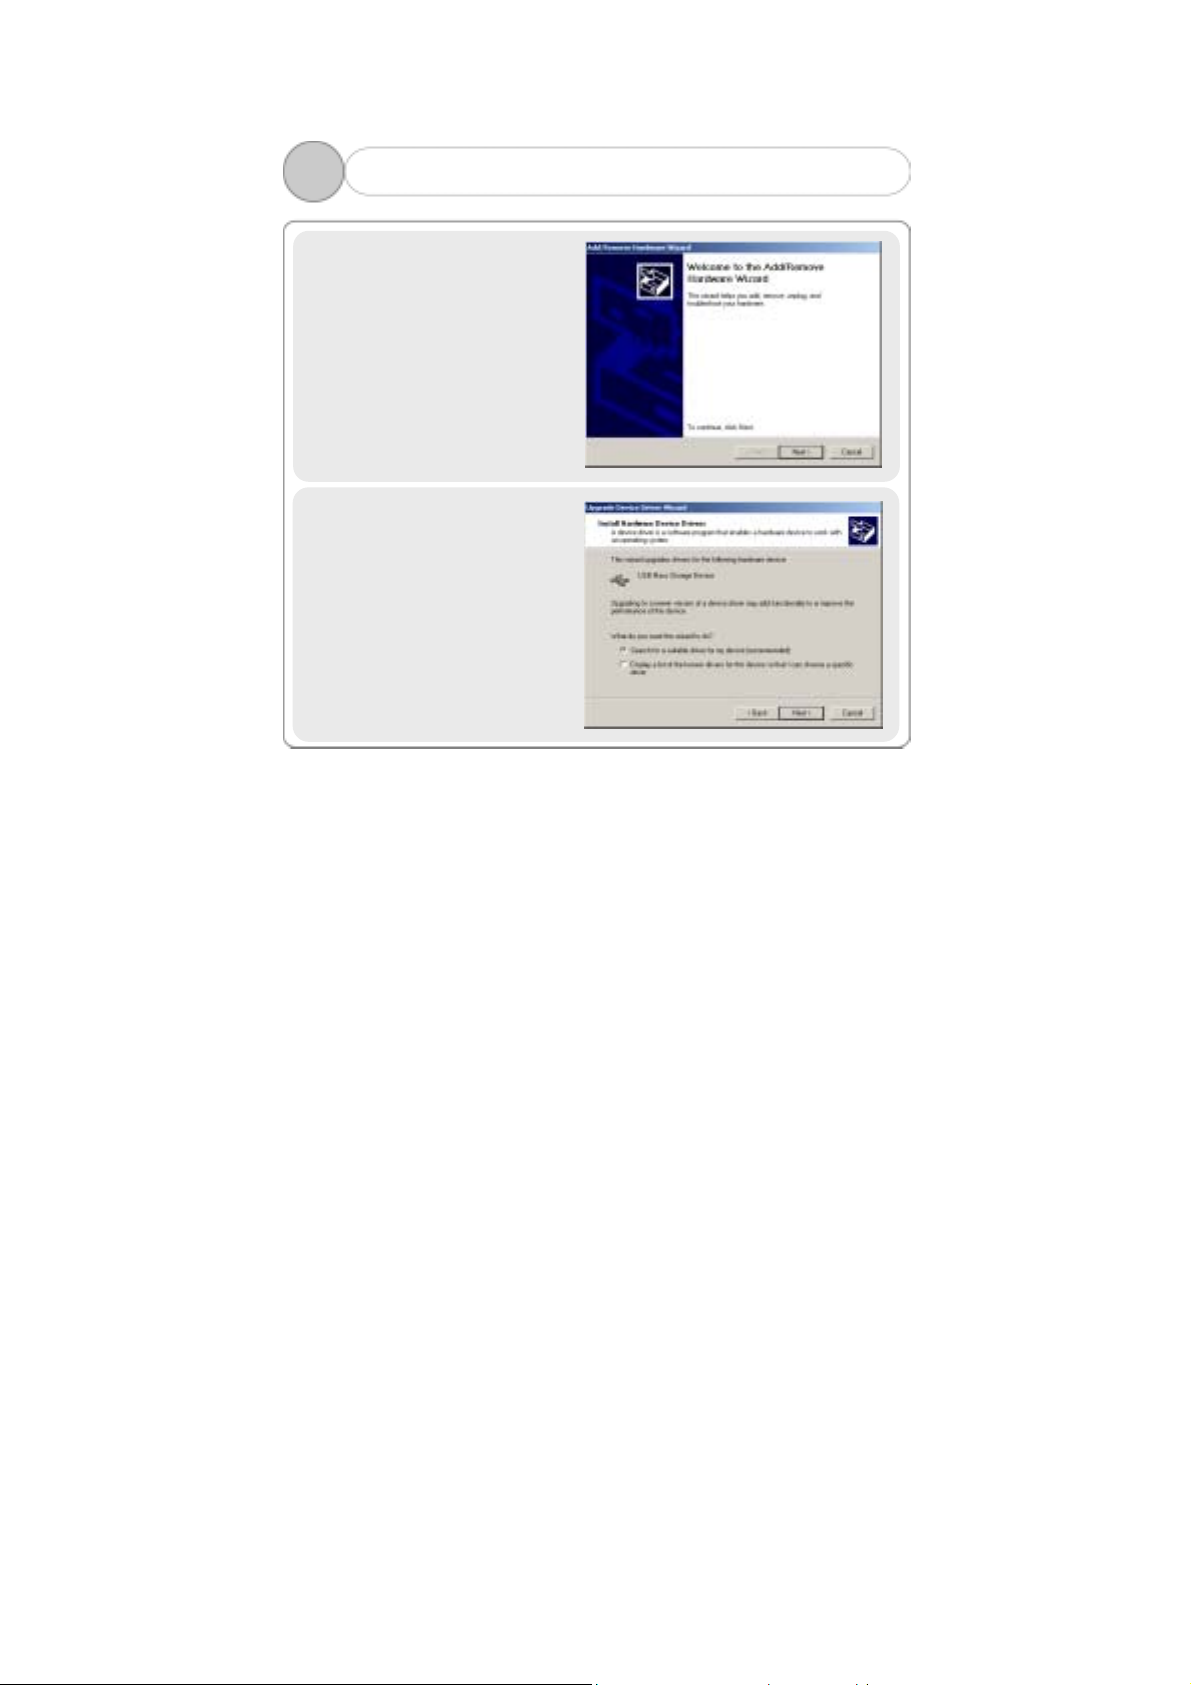
2) The “Found New Hardware
Click ‘Next ’.
3) “Hardware Device Driver
Installation” will be
continued.
Check in “Search for Driver
suitable to Device
(recommended)” to click
“Next”.
2. Installing USB Driver (2)
Wizard” is automatically
started on the PC.
12

3
4) Select “Assigned Location”
for the optional Search
Location, and then click
‘Next’.
2. Installing USB Driver (3)
5) If “Maker’s File Location to
Copy” is C:\Winnt\Inf or
C:\Windows\Inf, click ‘OK’.
If the file is not in the
C:\Winnt\Inf or
C:\Windows\Inf, use
‘Browse…’ to select.
13
3
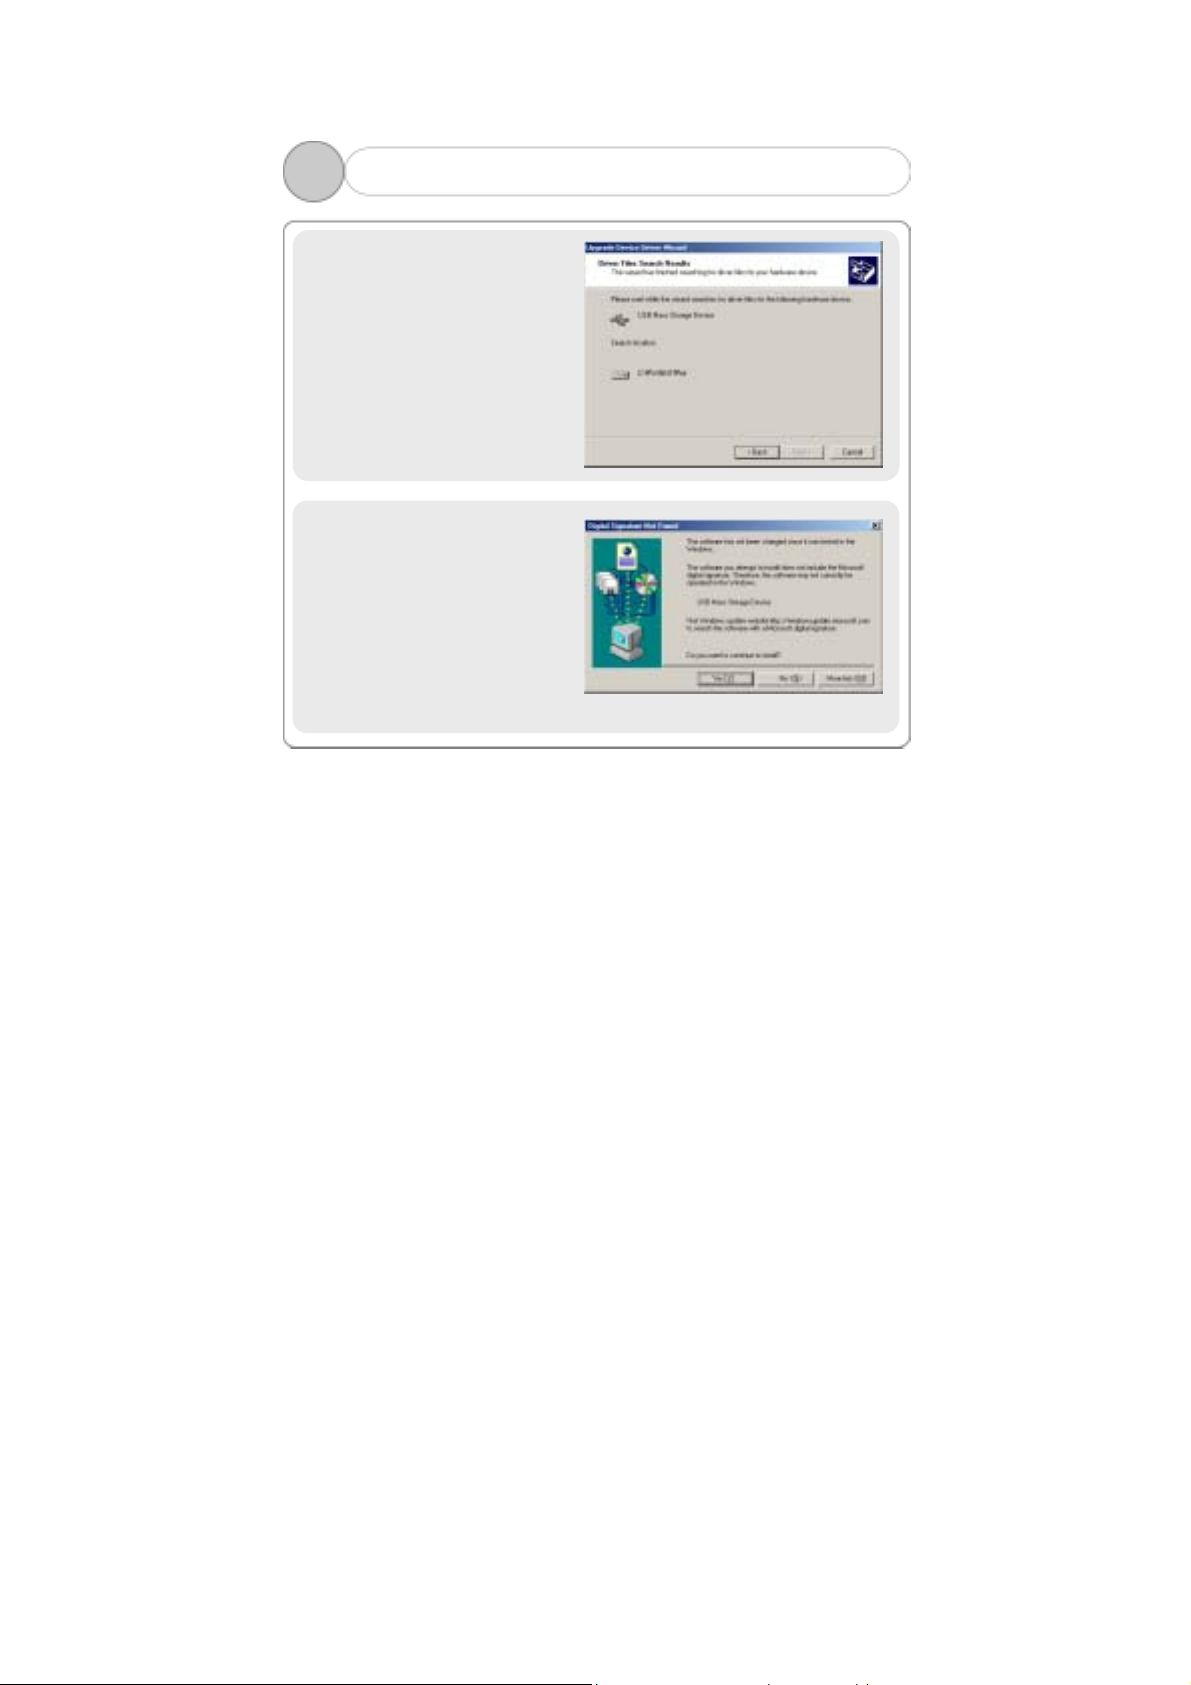
6) You will see “Drive File
Search Result”. If then, click
“Next”.
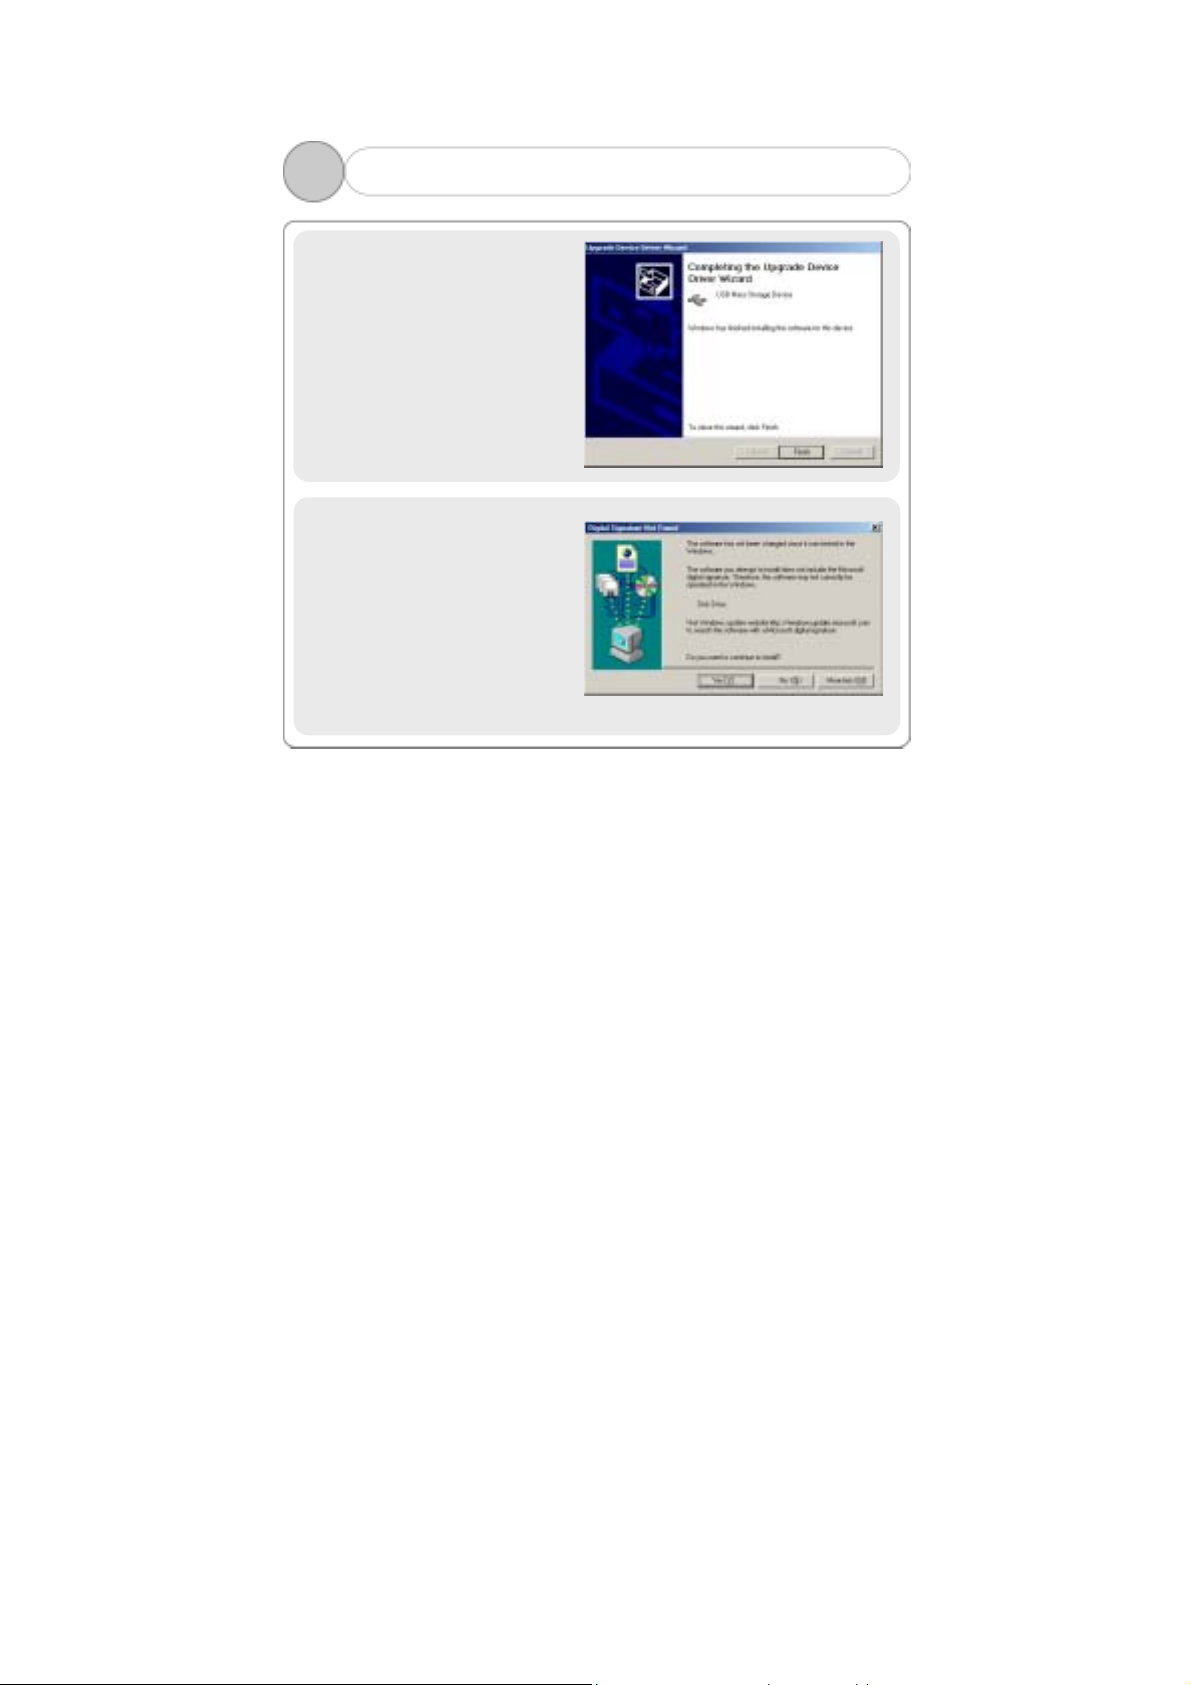
7) Click ‘Yes’ to continue the
2. Installing USB Driver (4)
installation of the USB
Mass Storage Device.
14
3
8) Click ‘Finish’ after
completing the installation of
the USB Mass Storage
Device.
9) Click ‘Yes’ to continue the
2. Installing USB Driver (5)
installation of the disk
drive.
15
3
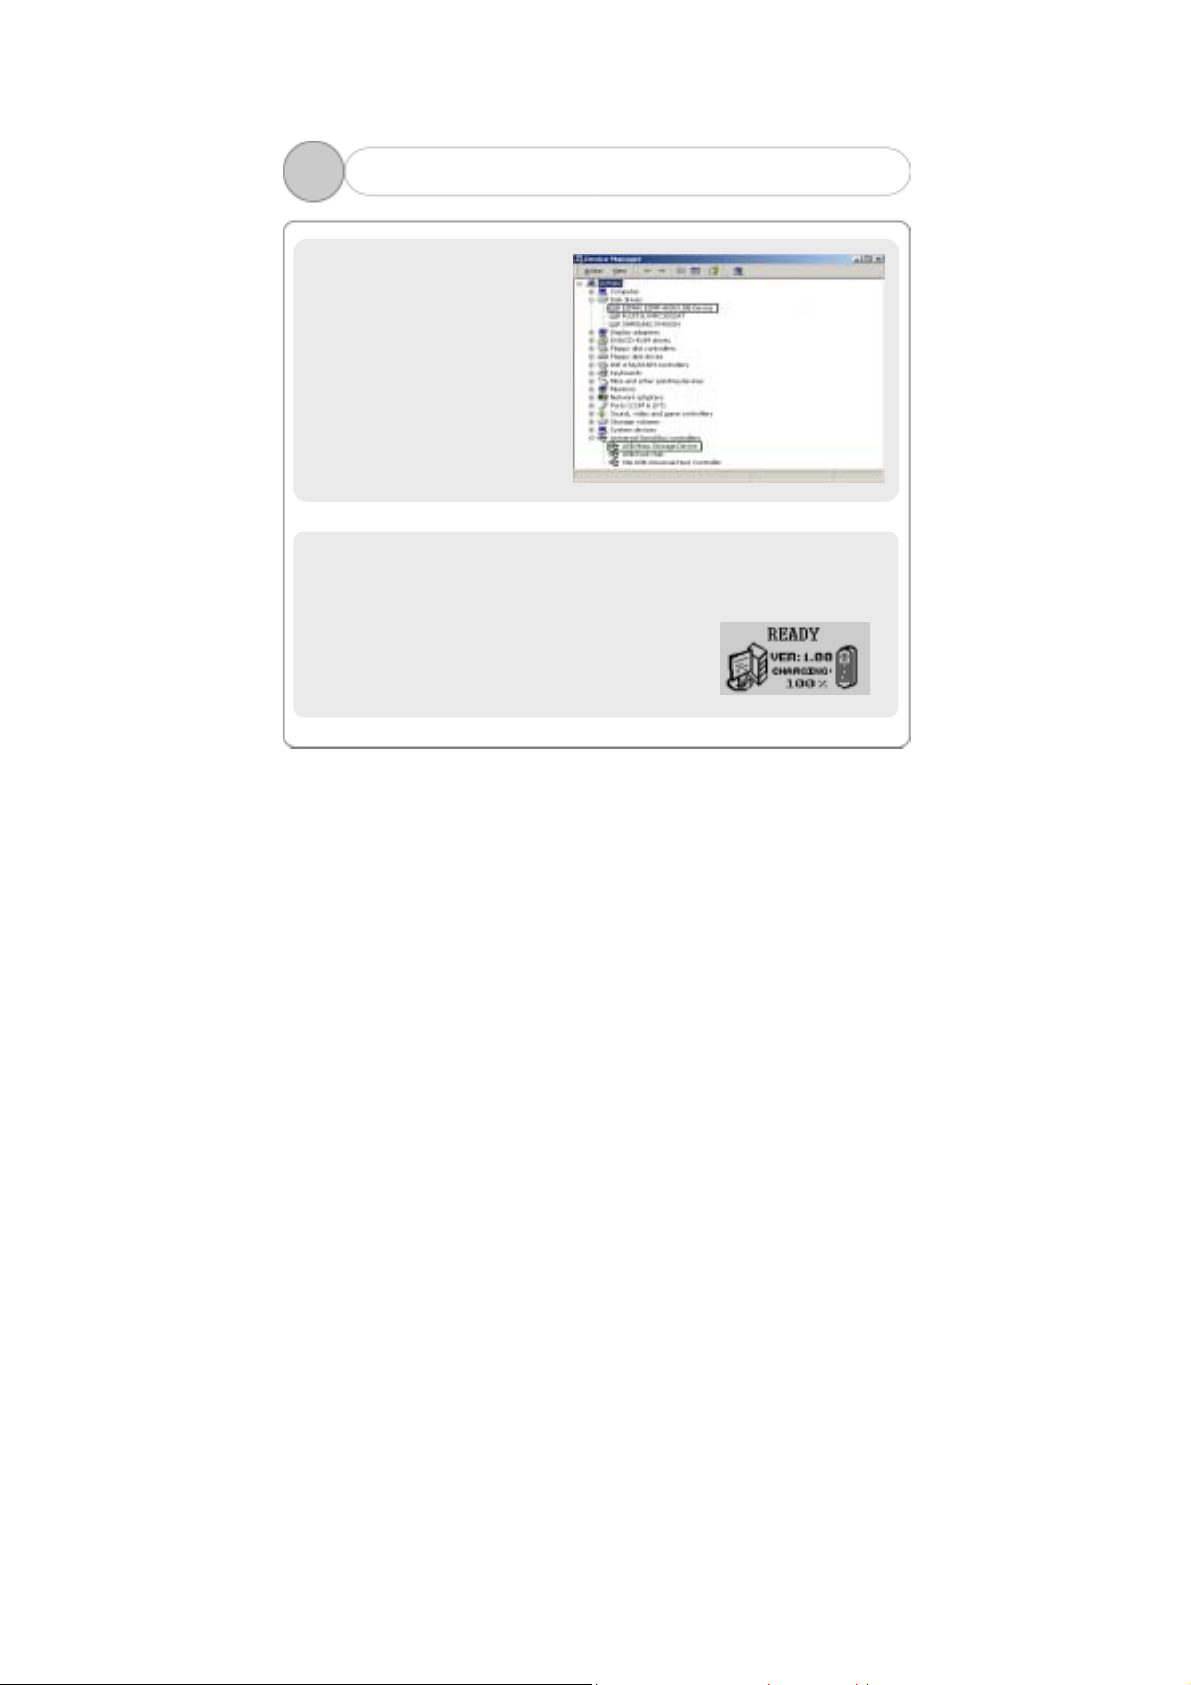
Click [Start] – [Setting] –
[Control Panel] to open
“System” icon, and then click
“Hardware” – “Device
Manager” tab to check if USB
driver is properly installed.
!Note: The example of installing a driver above applies to a co mputer
which adopts a removable disc for the first time. The specific i nstalling
process varies among users’ PC environments. In the event of the two
devices in Device Administrator or the message
“READY” being shown as above, the driver has
bee successfully installed. It takes some
30 ~ 60 seconds to install the driver among
various PC’s.
2. Installing USB Driver (6)
16

3
2. Windows 98SE can’t support a removable storage device. You should
1) Don’t connect the USB cable to the player until the following is
2) Insert the installation CD into the CD-ROM drive, and then execute
3) Connect the USB cable to the player, and the Add New Hardware
4) The installation of the
2. Installing USB Driver (7) – win 98SE
install our Win98SE Driver to use under Windows 98.
completed.
'install.bat' or in the folder Win98SE_Driver to copy the
driver file to each folder.
Wizard will appear to install the driver.
driver will be completed as
the following dialogue
window appears.
17
 Loading...