

Page 1
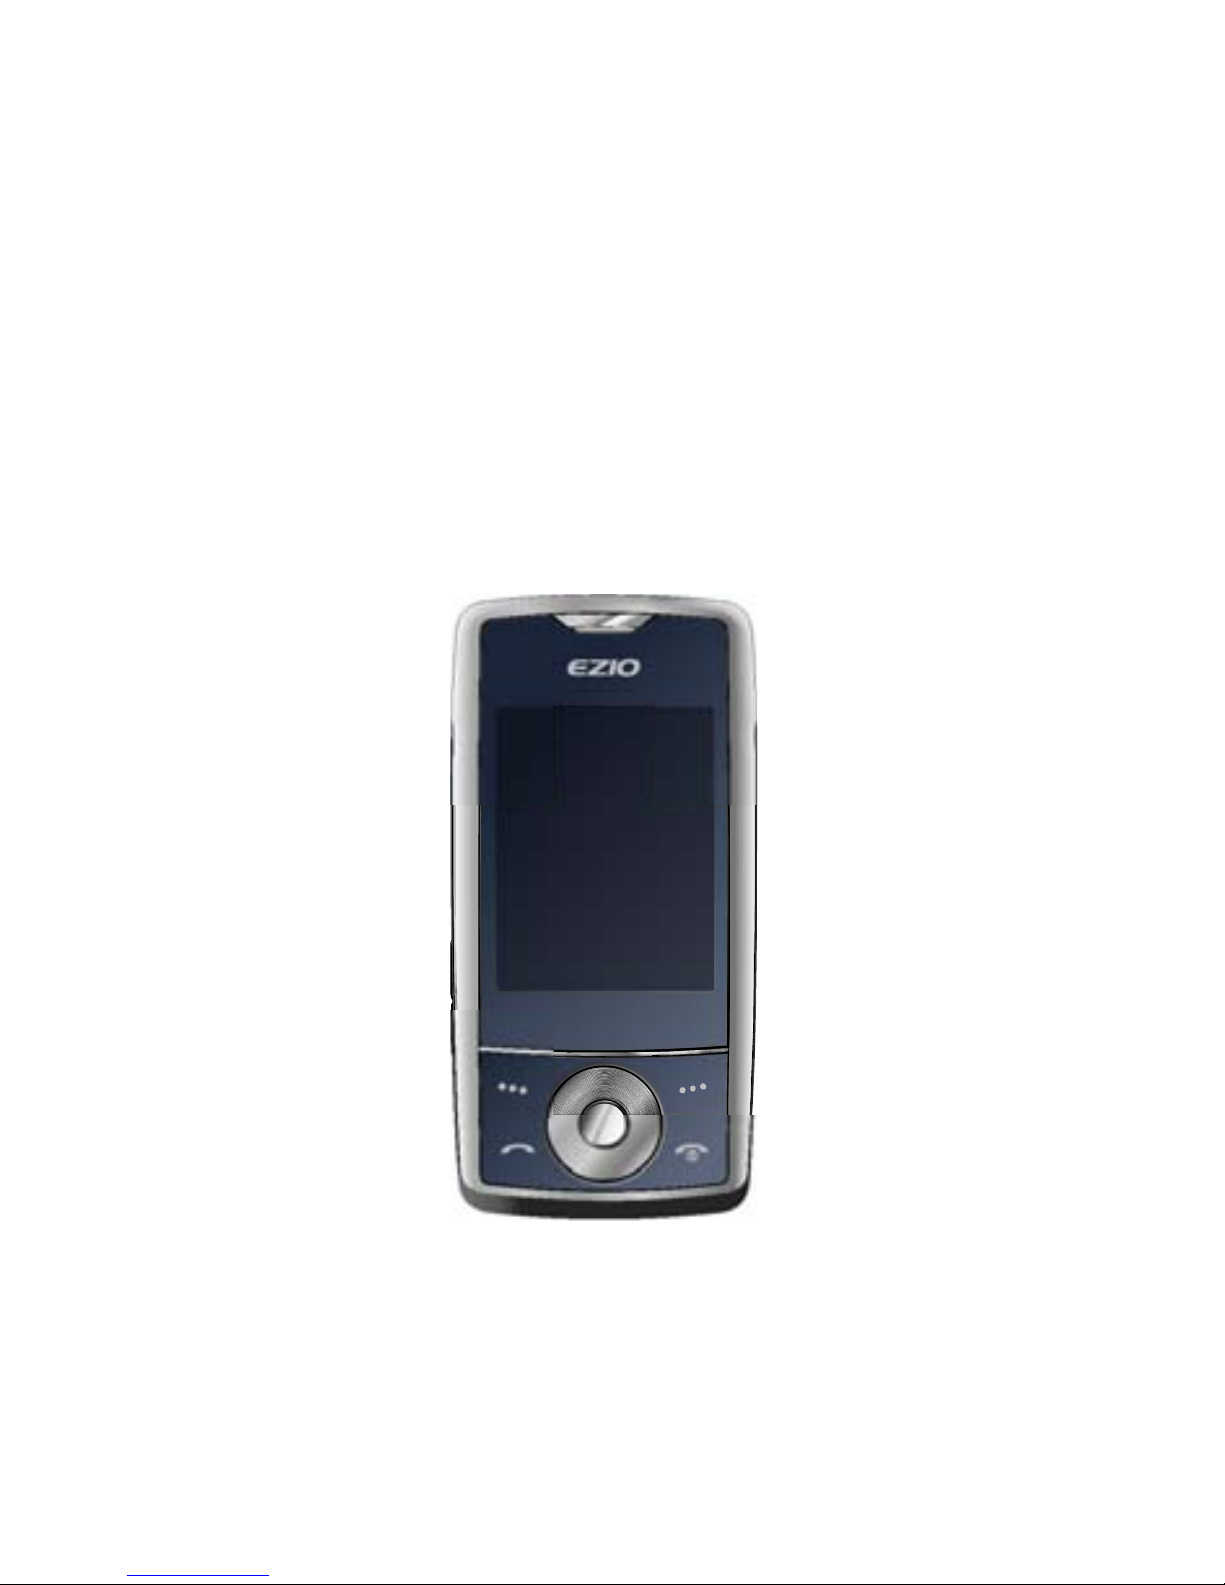
M4E User Manual
(Version 1.0)
1
Page 2

CONTENTS
1. General Information
1. 1 Introduction
1. 2 For your safety
1. 3 Battery Use
1. 4 Charger Use
2 Getting started
2. 1 What is in the box
2. 2 Phone feature
2. 3 SIM card
2. 4 Operation
2. 5 Key function
3. Overview of menu
3. 1 Phonebook
3. 2 Messaging
3. 3 Call History
3. 4 Music
3. 5 Camera
3. 6 FM Radio
3. 7 Organizer
3. 8 Se rvices
3. 9 Entertainment
3. 10 Bluetooth
3. 11 Settings
3. 12 File Manager
2
Page 3

1. General Information
1. 1 Introduction
Thank you for purchasing the M4E GSM. Please
read all information carefully before getting stared to
install and use the Mobile. This would help you to
make good use of this mobile and fully understand the
functions of mobile and be easy to operate. M4E
GSM is aimed to design for GSM/GPRS network.
M4E GSM complies with GSM/GPRS Technique
regulations and it is certified by internal and external
authorities.
For your safety, read the guidelines carefully.
Breaking the rules may be dangerous or illegal.
1. 2 For your safety
Don’t use a hand-held phone while driving.
Stop and park your vehicle safely before using your
phone.
Switch off in aircraft
Wireless devices can cause interference in aircraft.
The use of mobile telephones in an aircraft is illegal.
3
Page 4

Please switch off your mobile before taking off the
plane and please ensure the alarm clock should be
closed when the mobile is turned off.
Switch off near blasting
To avoid interference in the process of blasting, don’t
use the phone where you may read the sign of
“Blasting Spot” or “Turn off your wireless”. Observe
restrictions and follow any regulations or rules.
Switch off near dangerous stuff.
Don’t use the phone at a refueling point. Don’t use
near fuels or chemicals.
Switch the phone off in hospitals.
Switch the phone off near medical equipment. There
may be a hazard associated with the operation of
phones close to inadequately protected personal
medical devices such as hearing aids and pace
makers. Don’t put your phone on pacemakers which
means not to put it in the pocket of clothes.
Use your phone promptly
The antenna is straight over your shoulder when you
are talking to the phone. Don’t touch the antenna if
not necessary.
4
Page 5

Emergency calls
Ensure the phone is switched on and in service.
Enter the emergency number
Radio frequency (RF) exposure and SAR
The SAR limit recommended by the EU Council is
2.0W/kg
A
The highest SAR value for this model phone was
0.85 W/kg.
SAR tests are conducted using standard operating
positions with the phone transmitting at its highest
certified power level in all tested frequency bands.
------------------------------------------------------------A. The SAR limit for mobile phones used by the
public is 2.0 watts/kilogram (W/kg) averaged
over ten grams of body tissue. The limit
incorporates a substantial margin of safety to
give additional protection for the public and to
account for any variations in measurements.
The SAR values may vary, depending on
national reporting requirements and the
network band.
5
Page 6

1. 3 Battery Use
Use only approved batteries. Use of any
unauthorized accessories could damage you and your
phone and may be dangerous. If jewelry, keys, beaded
chains, or other conductive materials touch exposed
battery terminals, this could complete an electrical
circuit (short circuit), become very hot, and could
cause damage or injury. Never use a charger or
battery that is damaged.
Use the battery only for its intended purpose.
If you use the phone near the network’s base
station, it uses less power. Talk and standby time
are greatly affected by the signal strength on the
cellular network and the parameters set by the
network operator.
Battery charging time depends on the remaining
battery charge, the ty pe of battery, and the charger
used. The battery can be charged and discharged
hundreds of times, but it will gradually wear out.
When the operation time is noticeably shorter than
6
Page 7

normal, it is time to buy a new battery.
If left unused, a fully charged battery will discharge
itself over time.
Use only approved batteries, and recharges your
battery only approved chargers. Disconnect the
charger from the power source when it is not in use.
Do not leave the battery connected to a charger for
more than a week, since overcharging may shorten
its life.
Extreme temperatures will affect the charging
capacity of your battery: it may require cooling or
warming first.
Do not leave the battery in hot or cold places
because the capacity and lifetime of the battery will
be reduced. Try to keep the battery at room
temperature. A phone with a hot or cold battery may
not work temporarily, even when the battery is fully
charged.
Do not short-circuit the battery. Accidental short-
circuiting can occur when a metallic object like a
7
Page 8

coin, clip or pen causes a direct connection
between the + and – terminals of the battery (metal
strips on the battery). For example, do not carry a
spare battery in a pocket or bag where the battery
may contact metal objects. Short-circuiting the
terminals may damage the battery or the object
causing the short-ci rcuiting.
Dispose of used batteries in accordance with local
regulations. Always recycle. Do not dispose of
batter ies in a fire .
The phone could explode if the battery is replaced
with an incorrect type.
Dispose of used batteries according to the
manufacturer’s instructions.
At very high volumes, prolonged listening to a
headset can damage your hearing.
To avoid risk of personal injury, do not dispose of
your battery in a fire.
Do not throw your battery or mobile device in the
trash.
8
Page 9

1. 4 Charger Use
Please, read this manual before using the charger, for
the correct operation of the appliance.
Importan t Safety Instructions
The charger should be used for Li-Ion accumulators
charging only.
Do not charge other types of accumulators with this
charger.
Do not expose the charger to moisture or rain.
Do not disassemble the charger or the network
adapter.
Unplug the network adapter when not in use.
Do not connect this charger with the appliances or
peripheral devices, which are not indicated in this
booklet.
It is not recommended to discharge the Li-Ion
accumulator before charging.
For pluggable equipment, the socket-outlet shall be
installed near the equipment and shall be easily
9
Page 10

accessible.
Mobile phone shall only be connected to a USB
interface that meets the requirements of a Limited
Power Source according to EN 60950-1:2001
Specifications Of T he Charger
The charger consists of:
Main charger
Adapter plates (the compatibility list is cited on the
rever se side of the package)
Network adapter 110-240V alternating/direct current
Car electric cigar lighter adapter
Advices Concerning Usage
For 110-240V alternating current:
Connect the charger with the network adapter
– insert the adapter into the charger jack.
Plug the network adapter to the wall outlet
For 12V car electric cigar lighter adapter (option):
Connect the charger with the car electric cigar
lighter adapter - insert the adapter into the charger
10
Page 11

jack, marked as “Input 12-18V DC”.
Plug the adapter into yours car electric cigar lighter
(warning: this charger works under 12V connectors
only: passenger cars).
Recycling of accumulators
Accumulators should be disposed in accordance with
established rules.
It is forbidden to throw away accumulators along with
domestic garbage. If possible, use specialized
organizations services for accumulators recycling.
2. Getting Started
2. 1 Unpack
Thank you for purchasing this product. Please check
the product contents to see if you have all the
11
Page 12
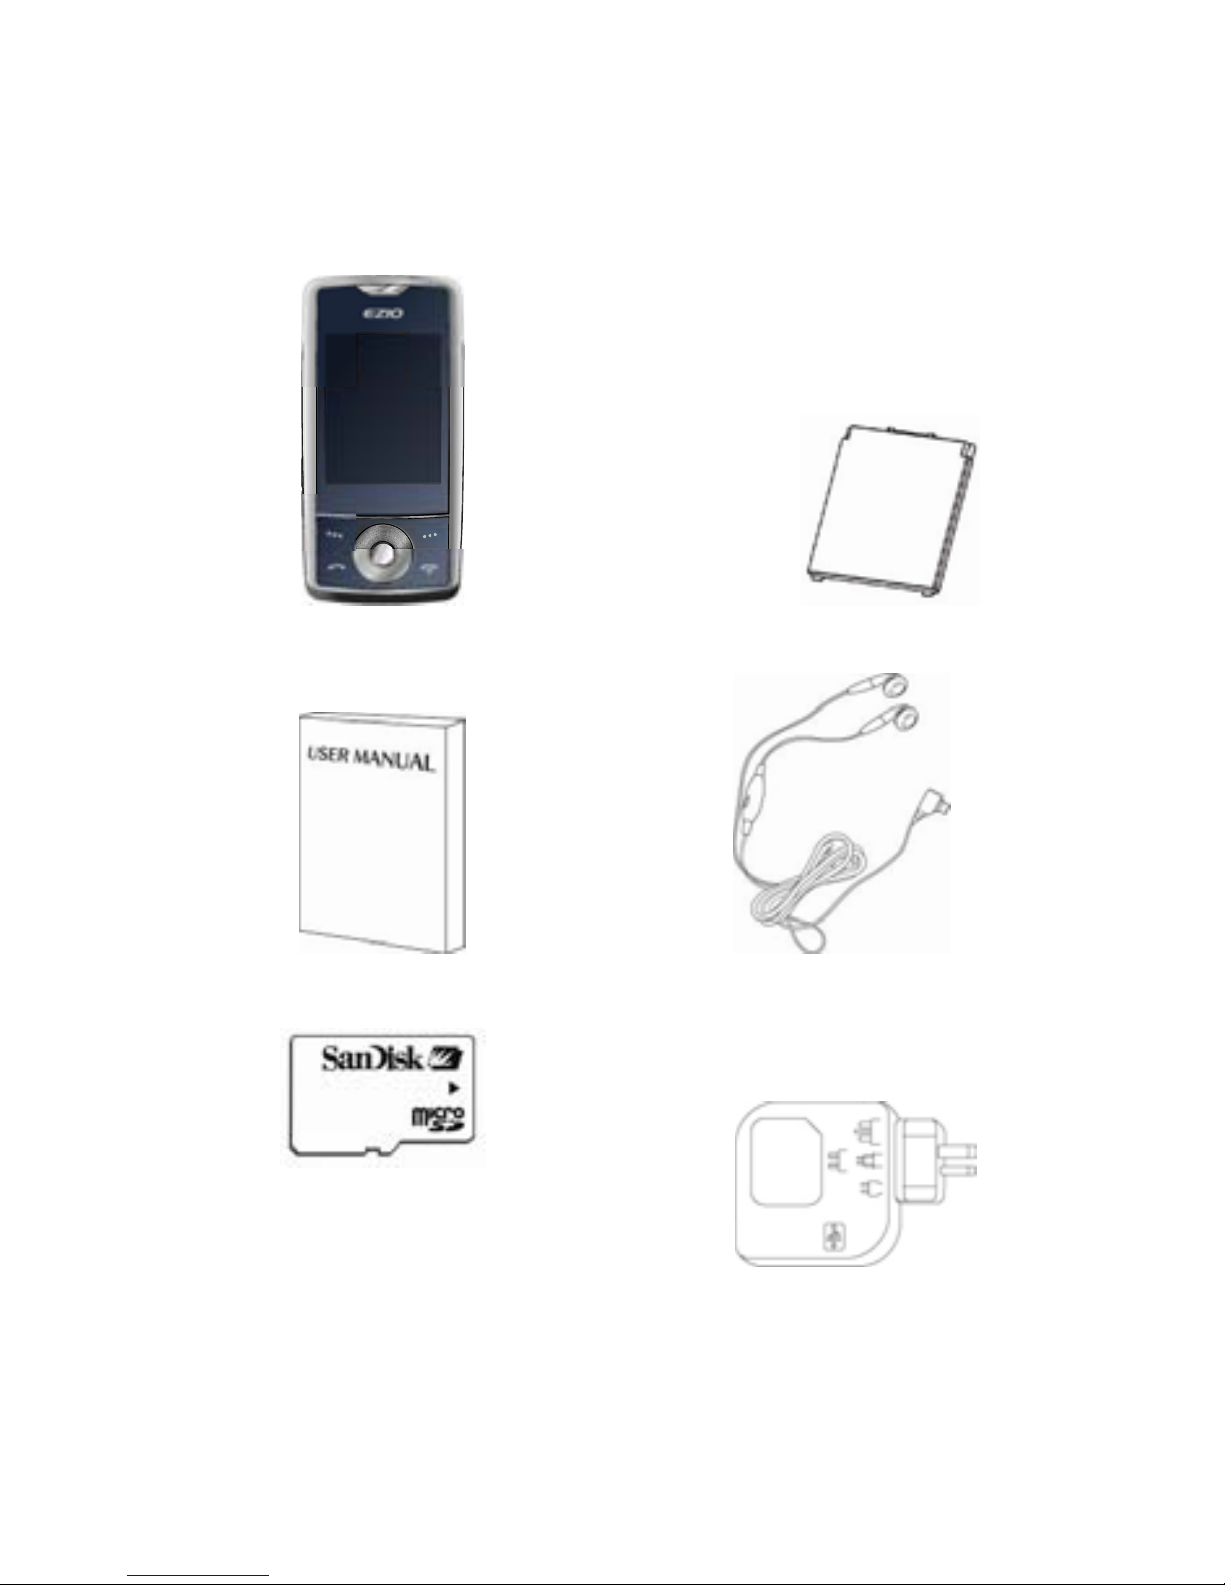
available items as below. (*Images may vary from the
actual product in your package.)
Handset
Battery
User Manual
Ear/Microphone
micro SD (T-Flash)
Card
(optional)
Travel Charger
12
Page 13

PC Sync Manager CD & USB Da ta Cable
2.2 Phone feature
13
Page 14
K
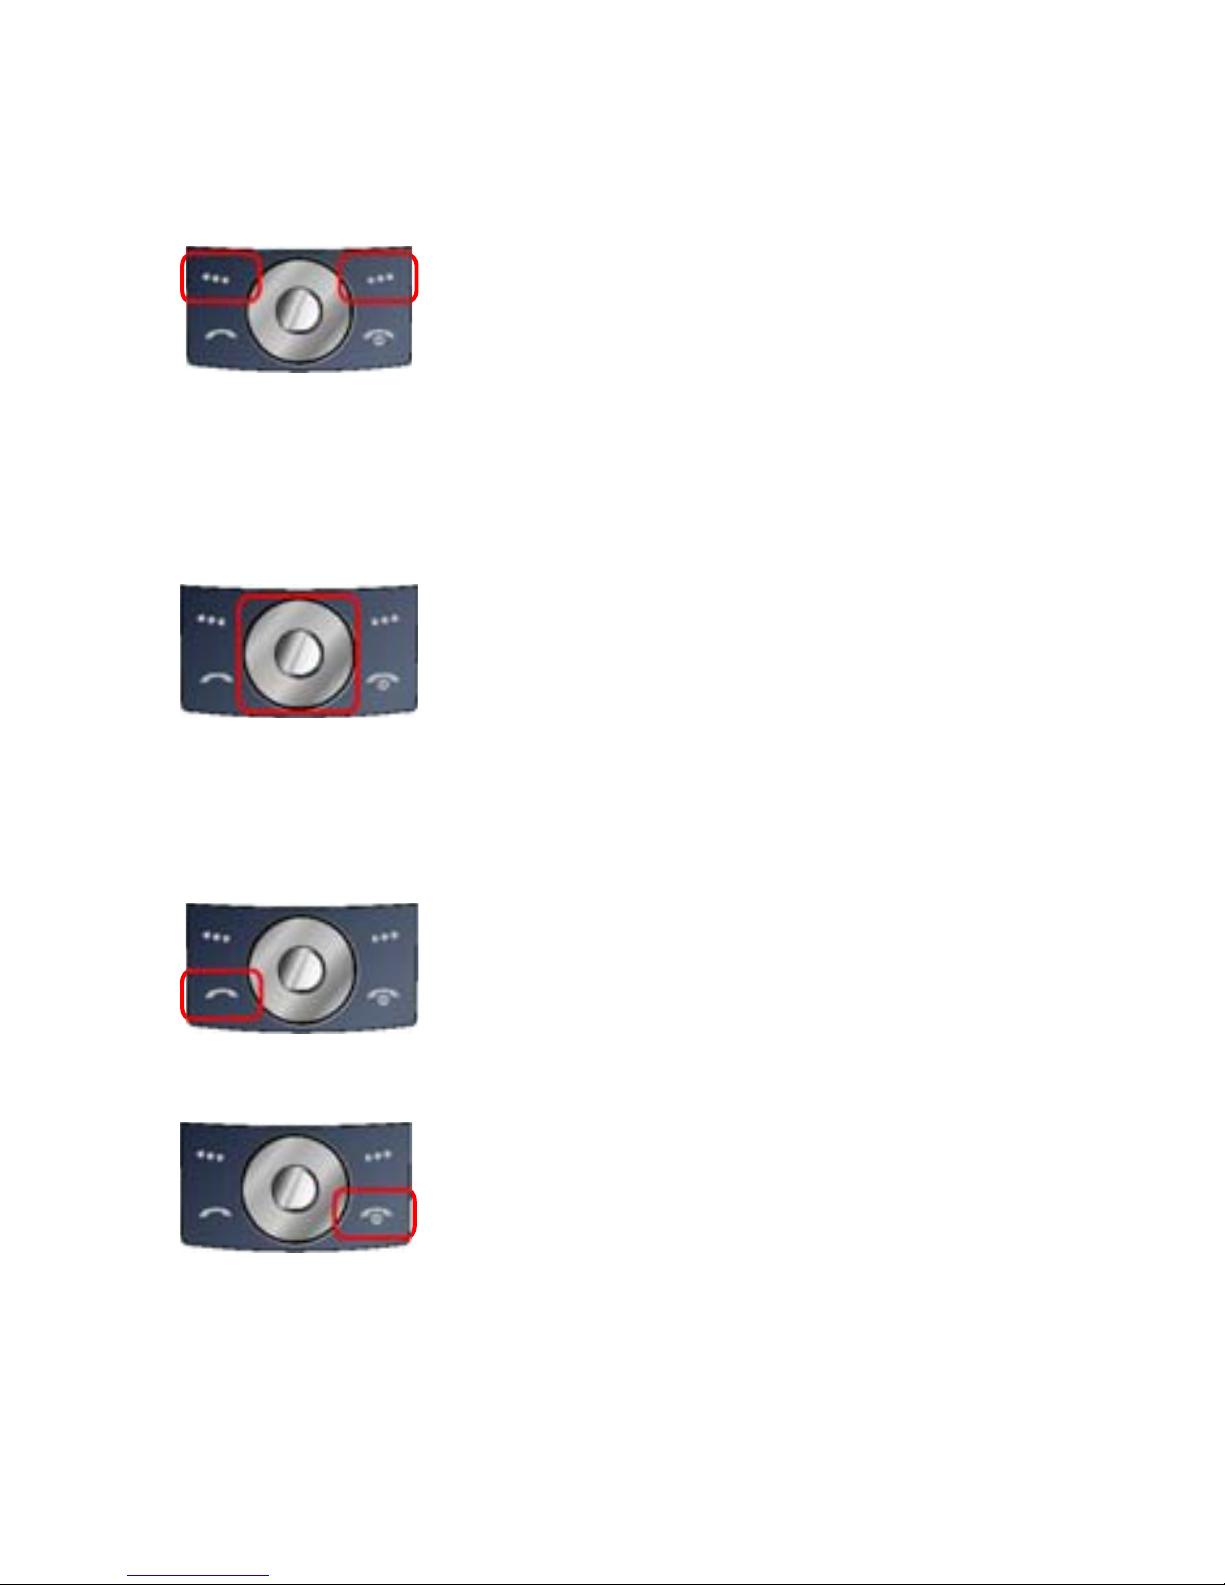
EY DEFINITION
Soft Keys
Perform functions identified by
left/right display prompt.
Right button: Cancel numbers &
letters when you make a call or
input letter for phonebook,
message or WAP.
Navigation Keys
Scroll through the menu options.
Move the cursor up and down in
the normal editing mode.
Move the cursor to left and right in
all editing mode.
Send Key
Dial or answer a call.
Recall the last call numbers in the
idle mode.
Power on/off Key & End Key
To end a call
Switch the phone on and off.
(press this key and hold)
Cancel your input in the menu
14
Page 15
facility and return to the idle mode.
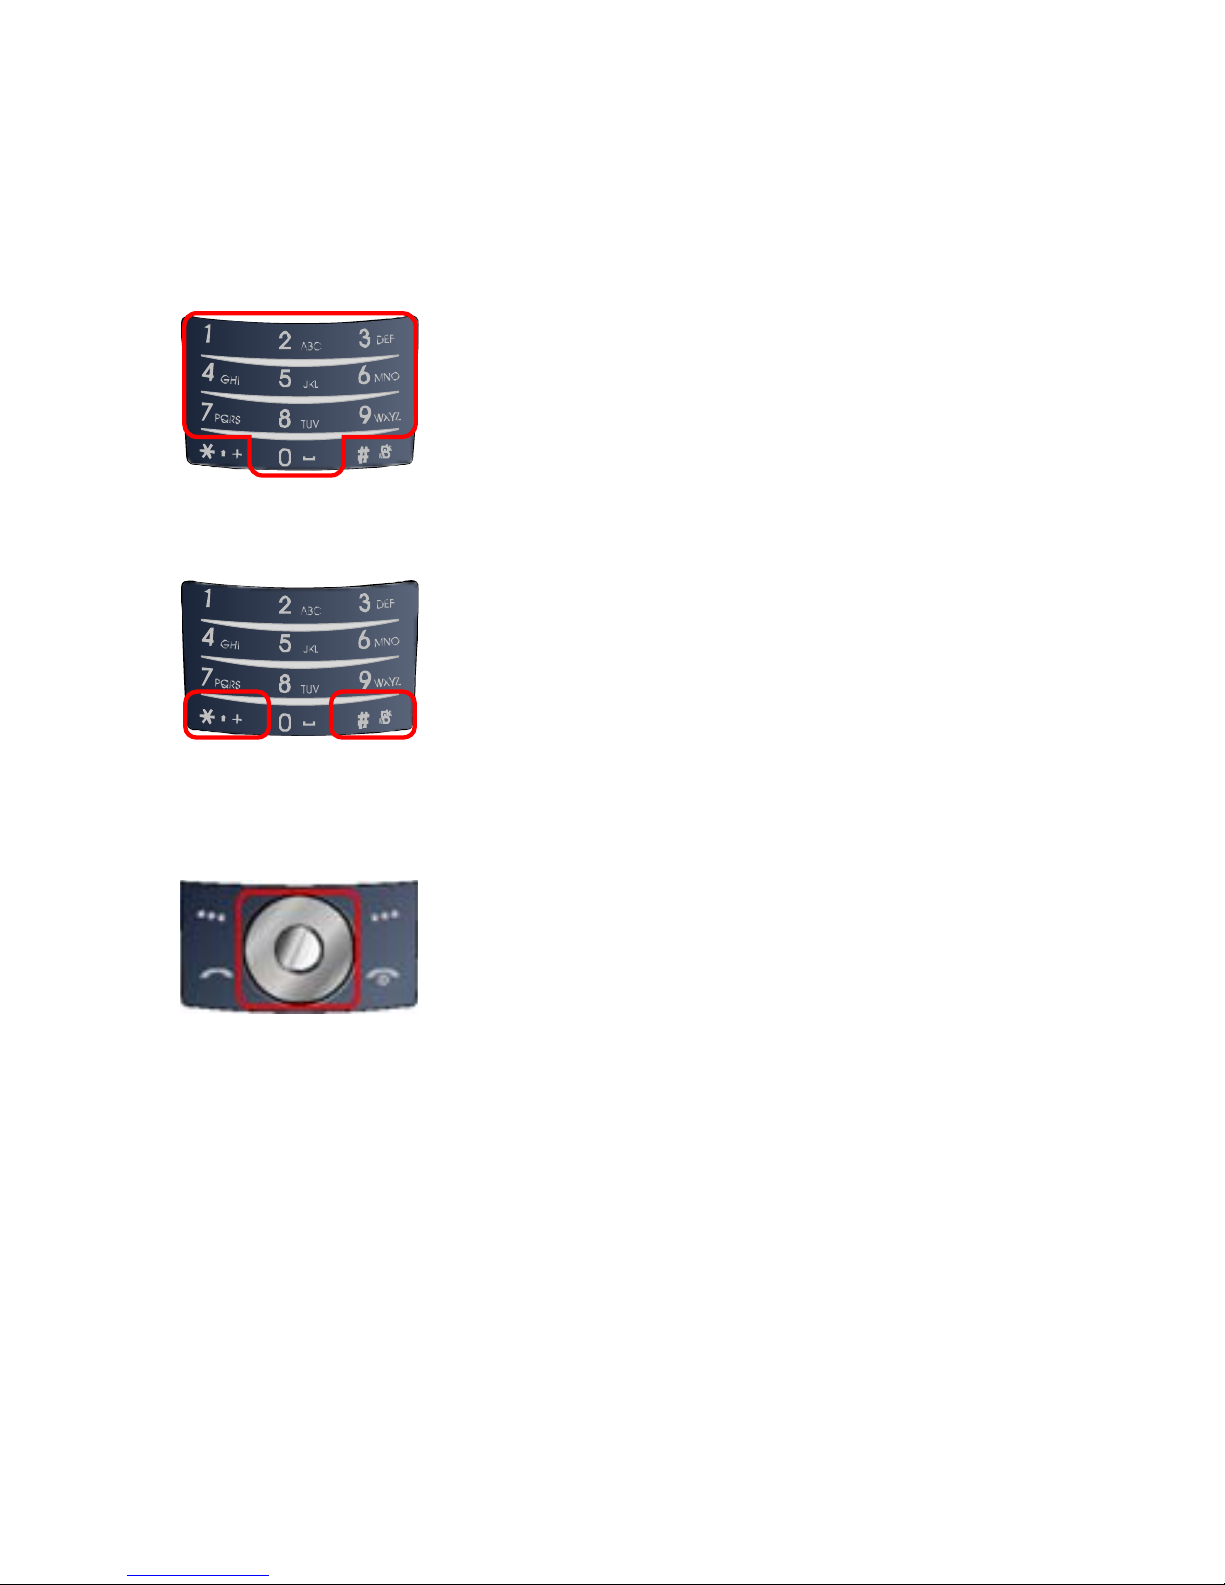
Alphanumeric Keys
You may enter numbers, letters
and special characters.
It changes camera settings in
camera mode.
Special Function Keys
Enter Special Characters /
Perform Various Functions
S
HORTCUTS
Left: Access to “Messages”
Right: Access to “FM Radio”
Up: Access to “Bluetooth”
Down: Access to “Music Player”
from an idle mode
You may dedicate the left
navigation key for favorite menu
in ‘Dedicated key’ setting menu
(Menu > 11.Settings > 1.Phone
Setup > 5.Dedicated Key)
15
Page 16
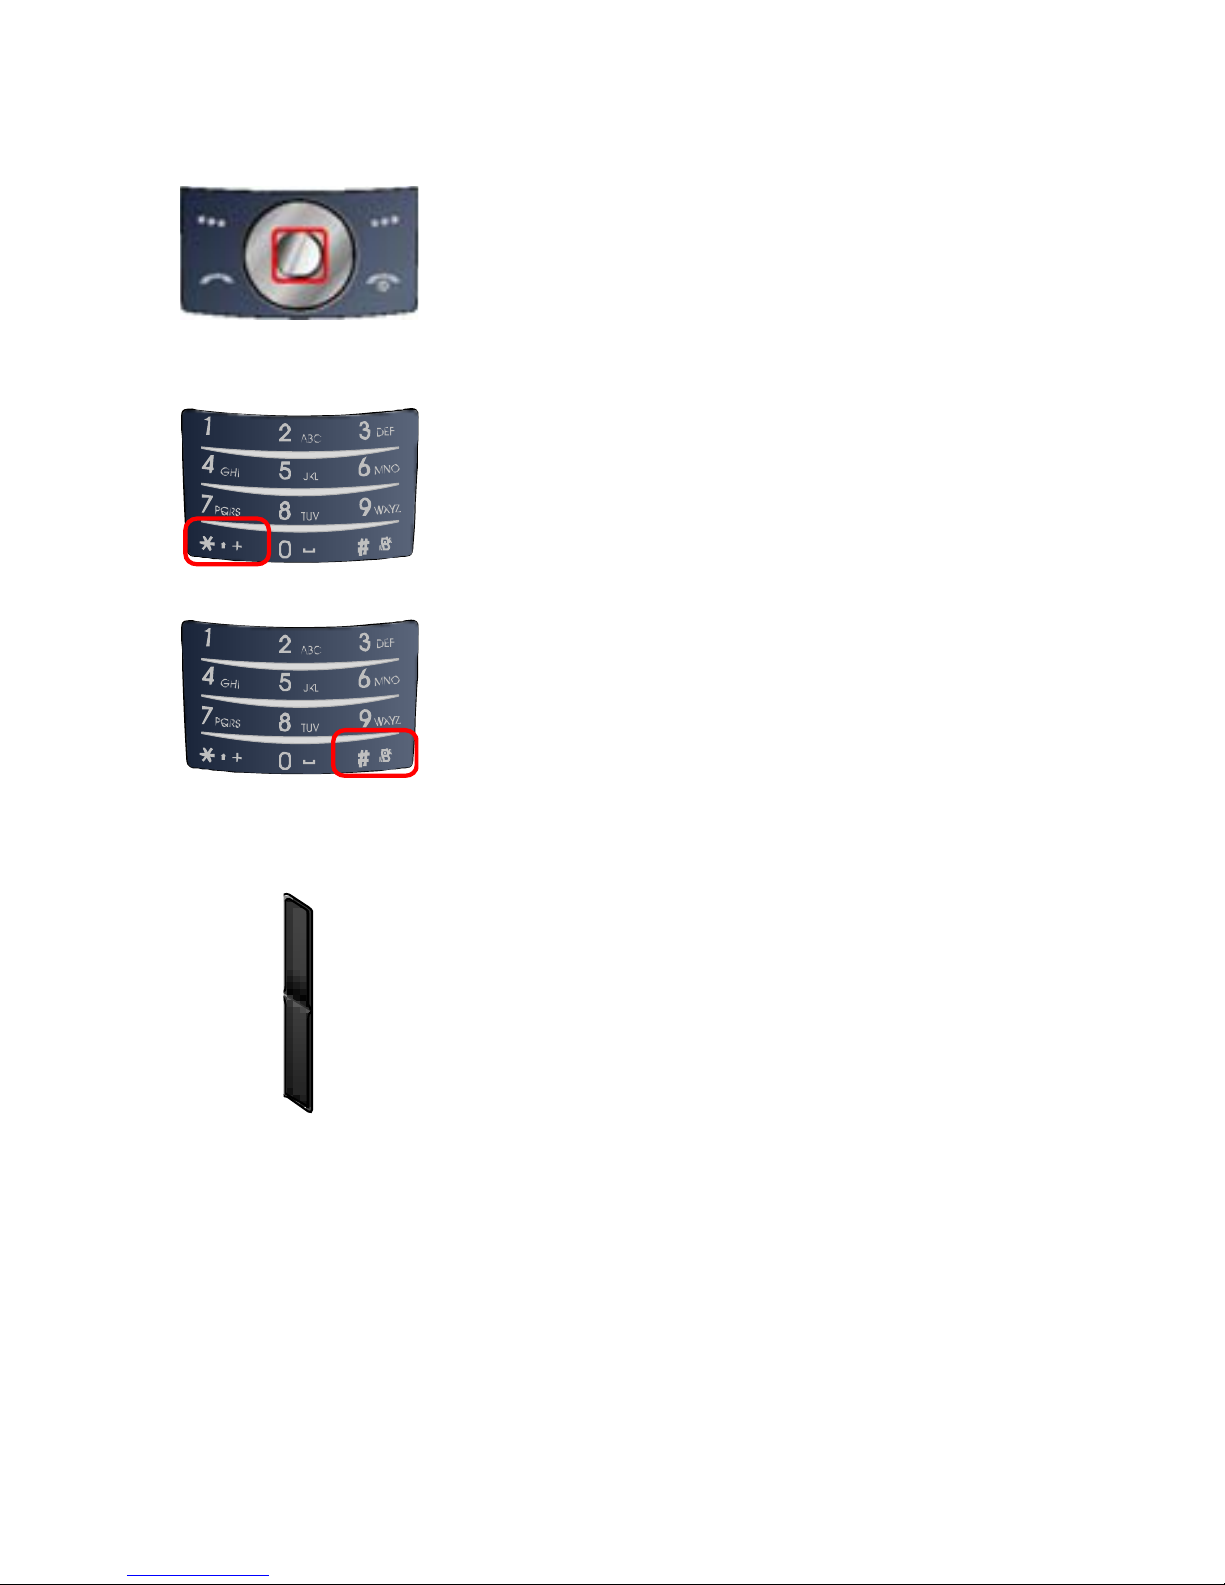
WAP Key
Access to WAP menu (press
shortly), and launch WAP
browser (press and hold).
To activate the “Keypad Lock”,
press this key and hold.
To activate the “Light Only
, press this key and Mode” option
hold.
SIDE KEY
Volume Key (side)
Press up or down key to
increase or decrease the
volume.
D
ISPLAY LAYOUT
display includes three areas.
The idle screen
16
Page 17
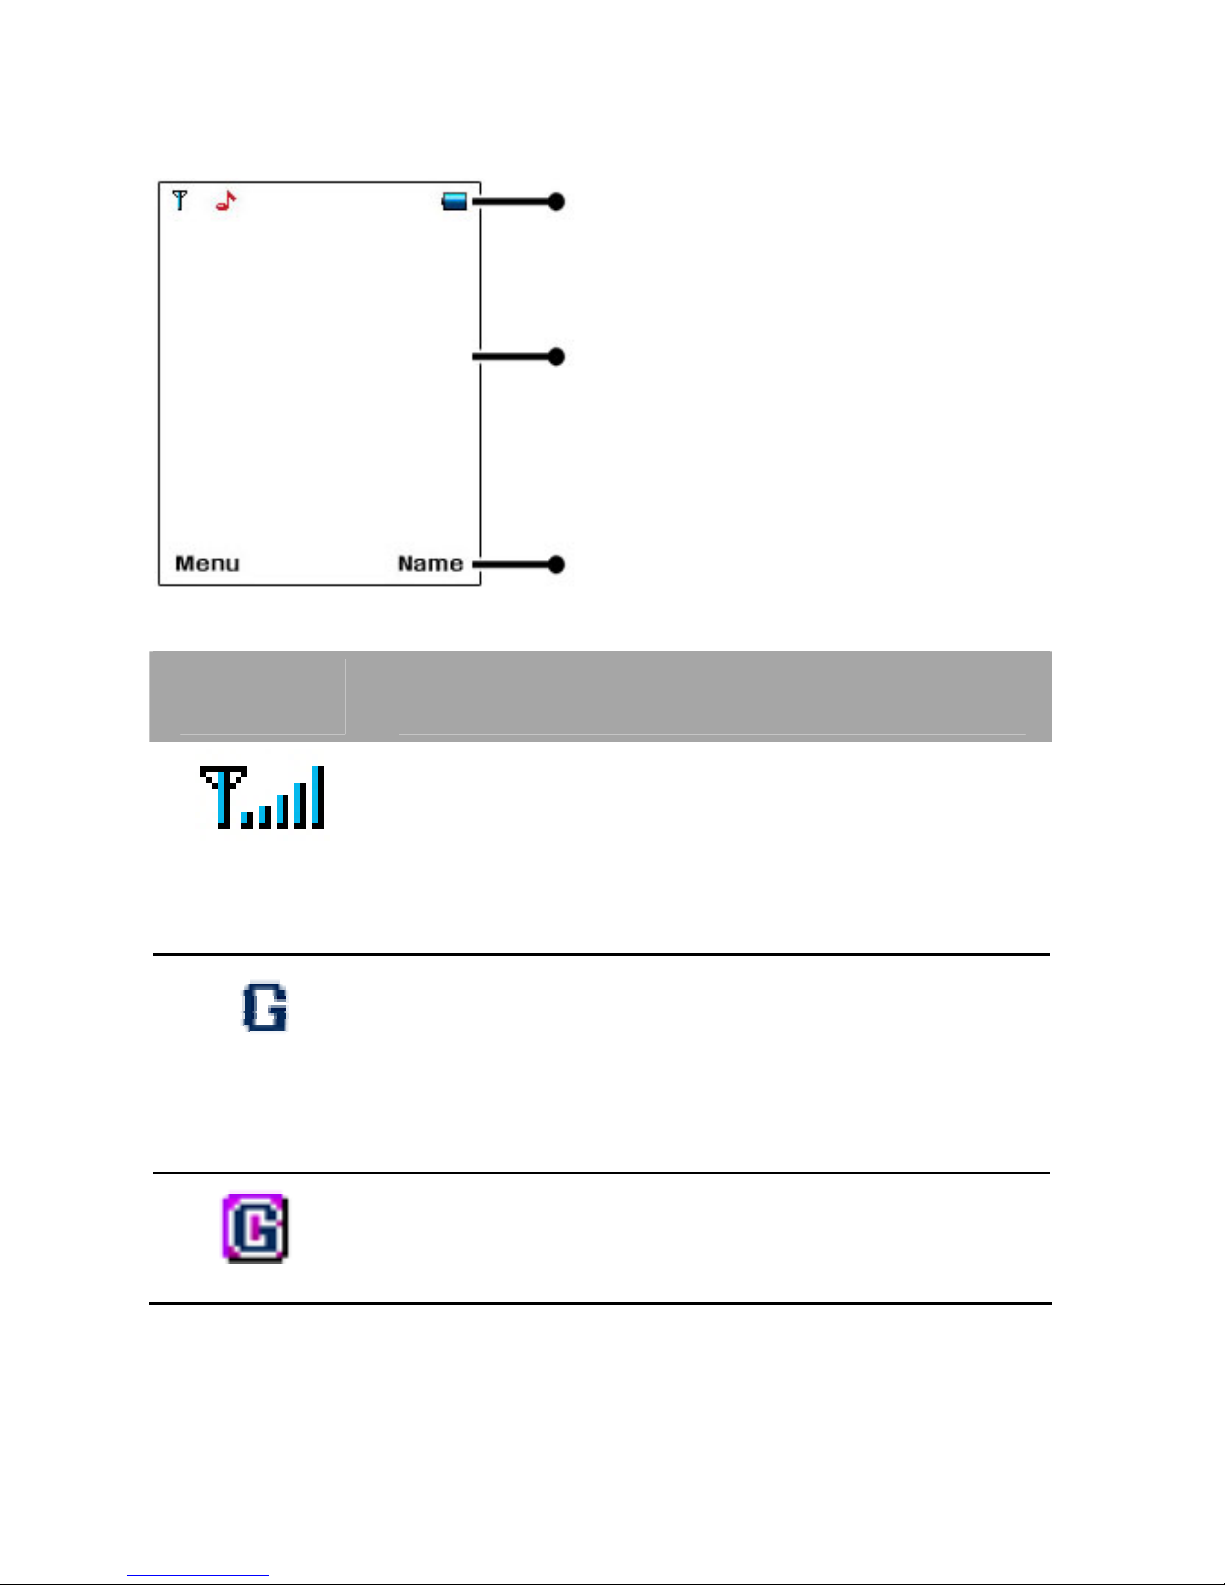
Text & Graphic Area
Status Indi cator Icons
Soft Key Area
ICONS
Icon Description
Signal Strength: Shows the strength
of the receiving signal. Greater the
number of gnal
strength.
bars, stronger the si
GPRS: Shows the strength of the
receiving GPRS
Greater the s, stronger
the signal strength.
signal.
number of bar
GPRS Connect: Appears when you
connect to GPRS.
17
Page 18
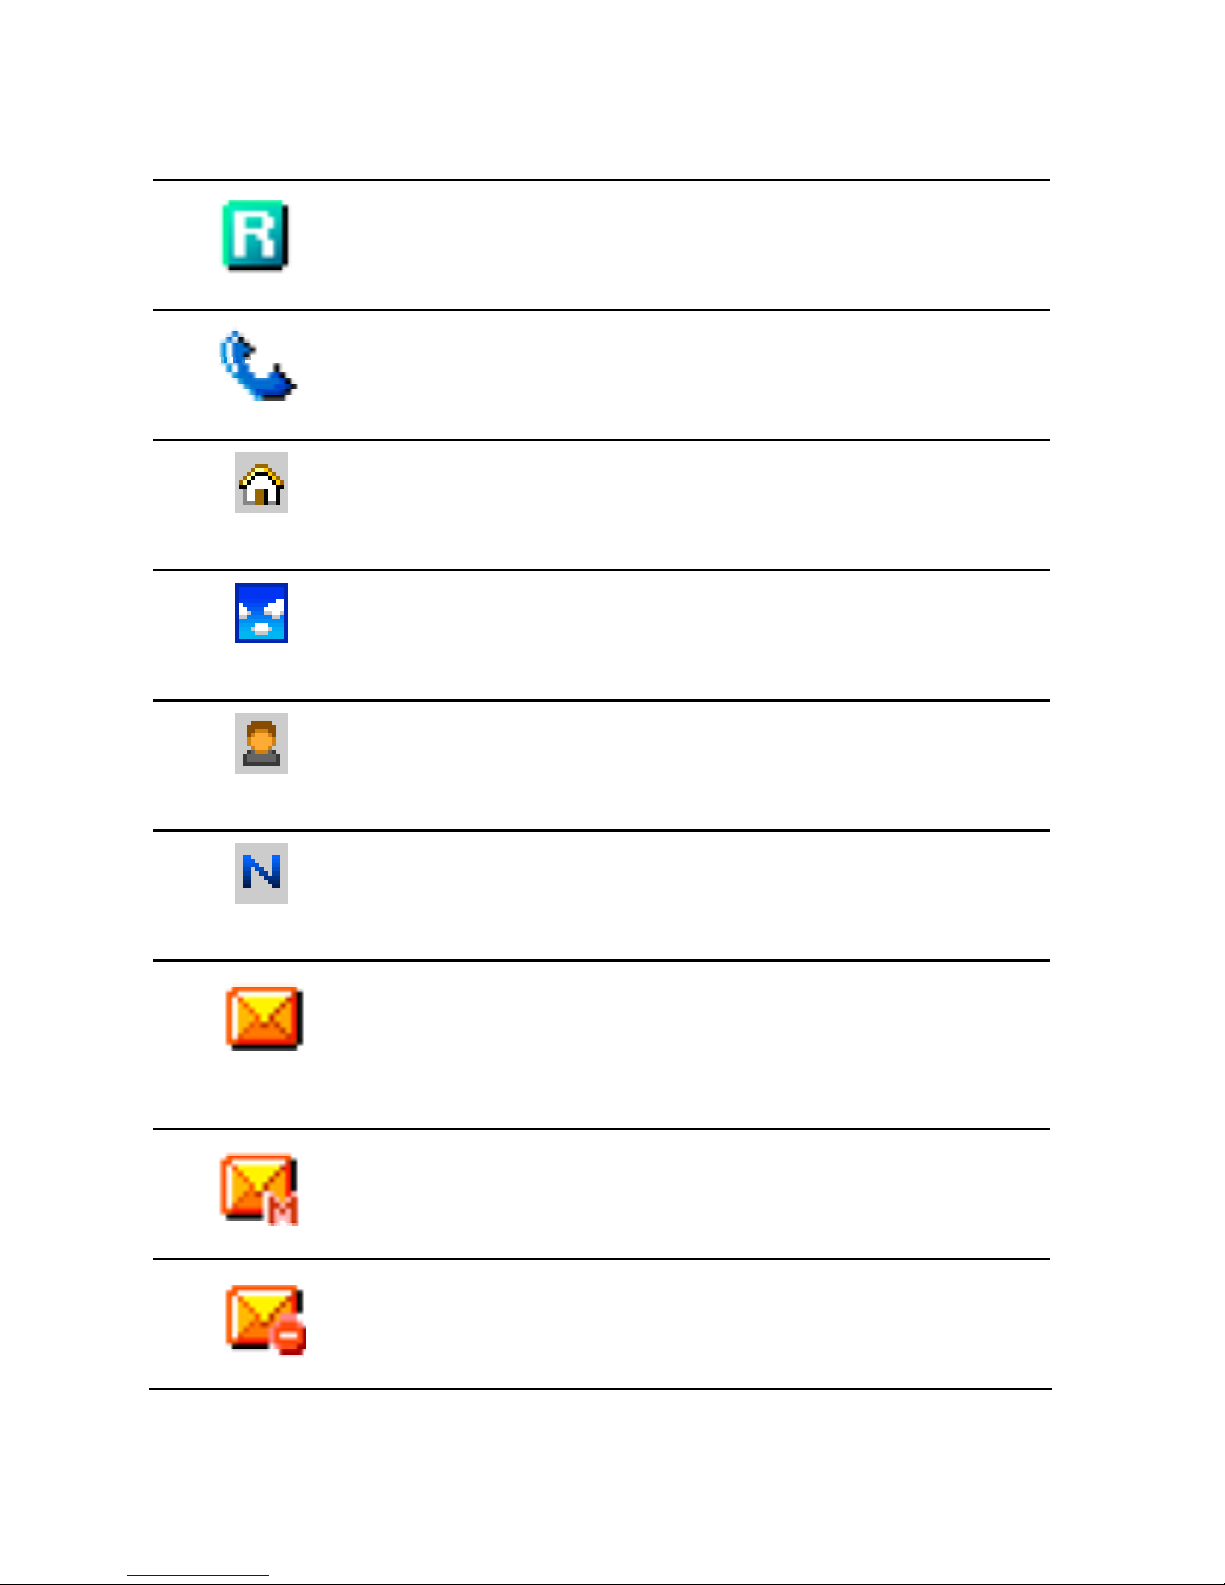
Roaming: Appears when the phone
is roaming.
Missed Calls: Appears when there
is missed call(s).
Indoors: Sets volume for indoors
purpose
Outdoors:
purpose
Sets volume for outdoors
Meeting: Sets volume in light only
mode
Normal: Set volume in normal mode
New Message: Appears when a new
.
incoming text message is received
and is unread
MMS Unread: Appears when a new
MMS message is arrived and
MMS Busy: Appears when MMS is
busy, while receiving and sending a
18
Page 19
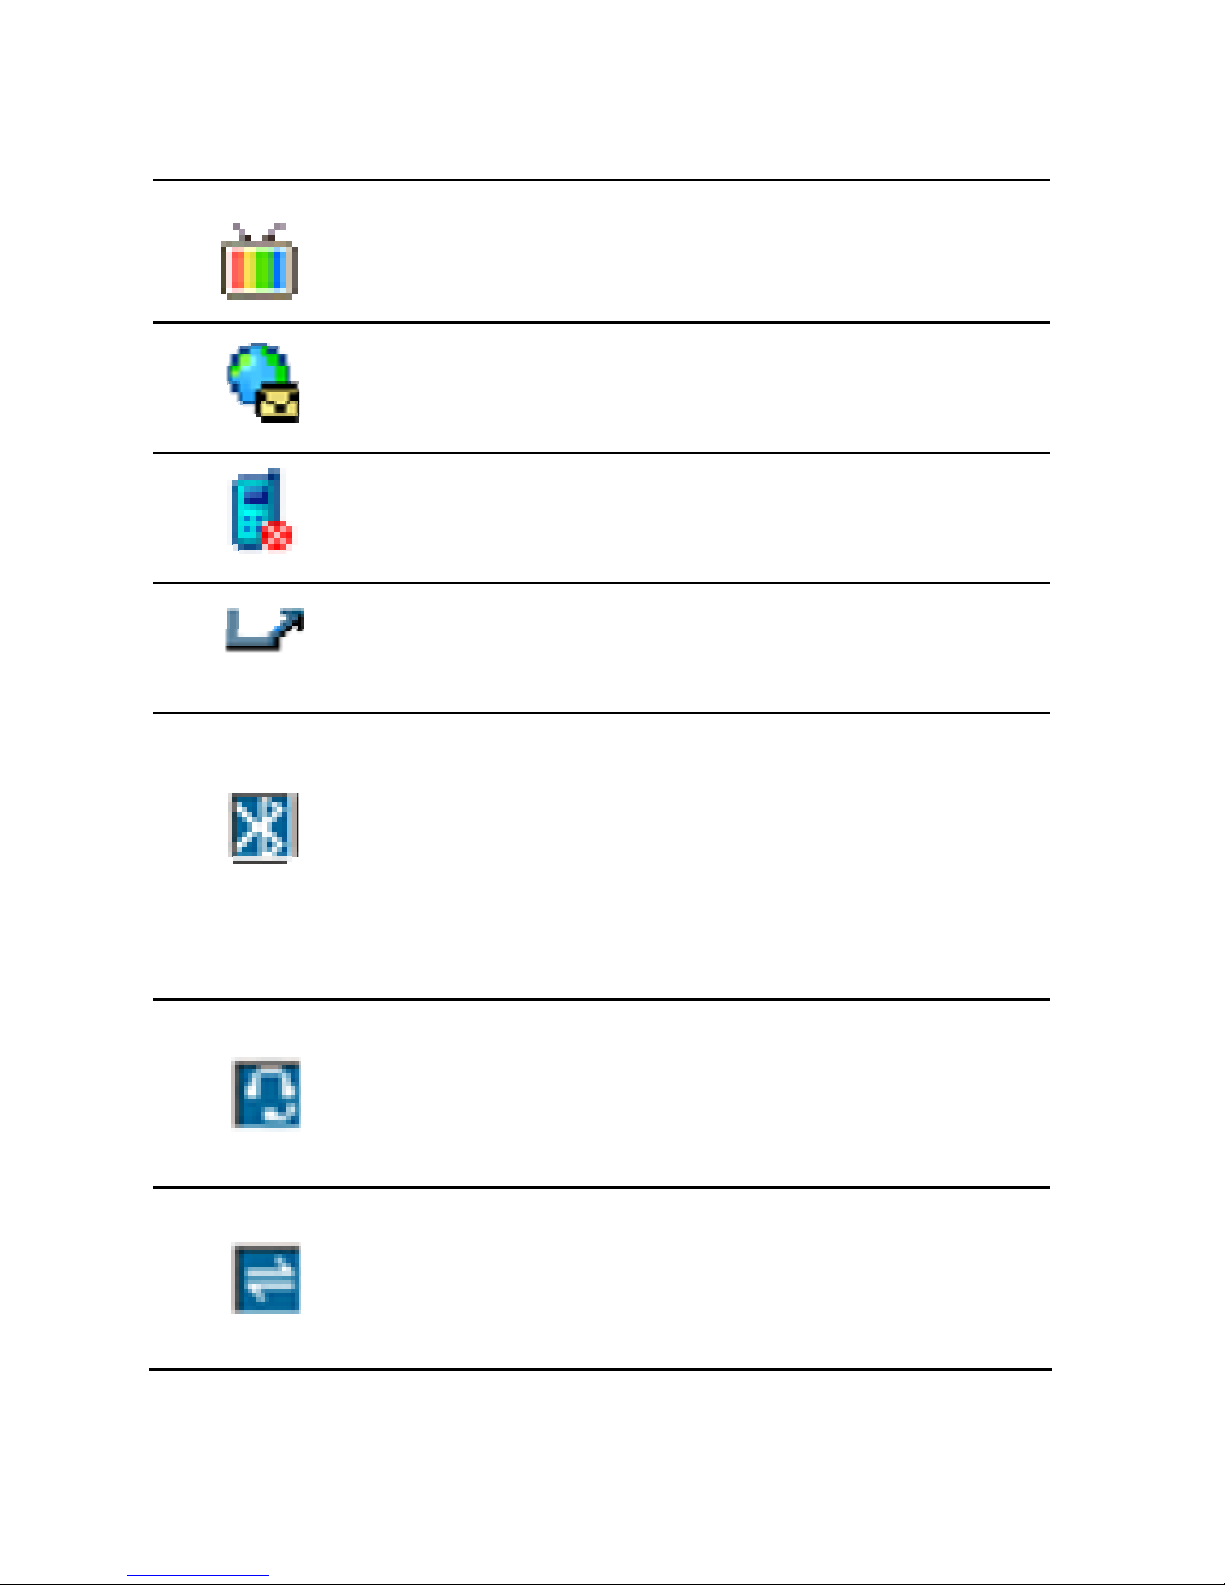
Broadcast Message: Appears when
Broadcast Message receive mode is
WAP Mail: Appears when WAP mail
is received.
Call Barring On: Appears when the
call barring mode is active.
Call Forward: Appears when the call
forward mode is active.
Bluetooth: Appears when the
Bluetooth Mode is on. It has to be on,
if you want to use the Bluetooth
function. When you finish using, turn
off the Bluetooth Mode
Bluetooth Headset: Appears when
the Bluetooth Stereo Headset/ Mono
Headset/ Hands-free is connected.
Bluetooth File Transfer: Appears
when the Bluetooth FTP and OPP
(vCard) is connected.
19
Page 20
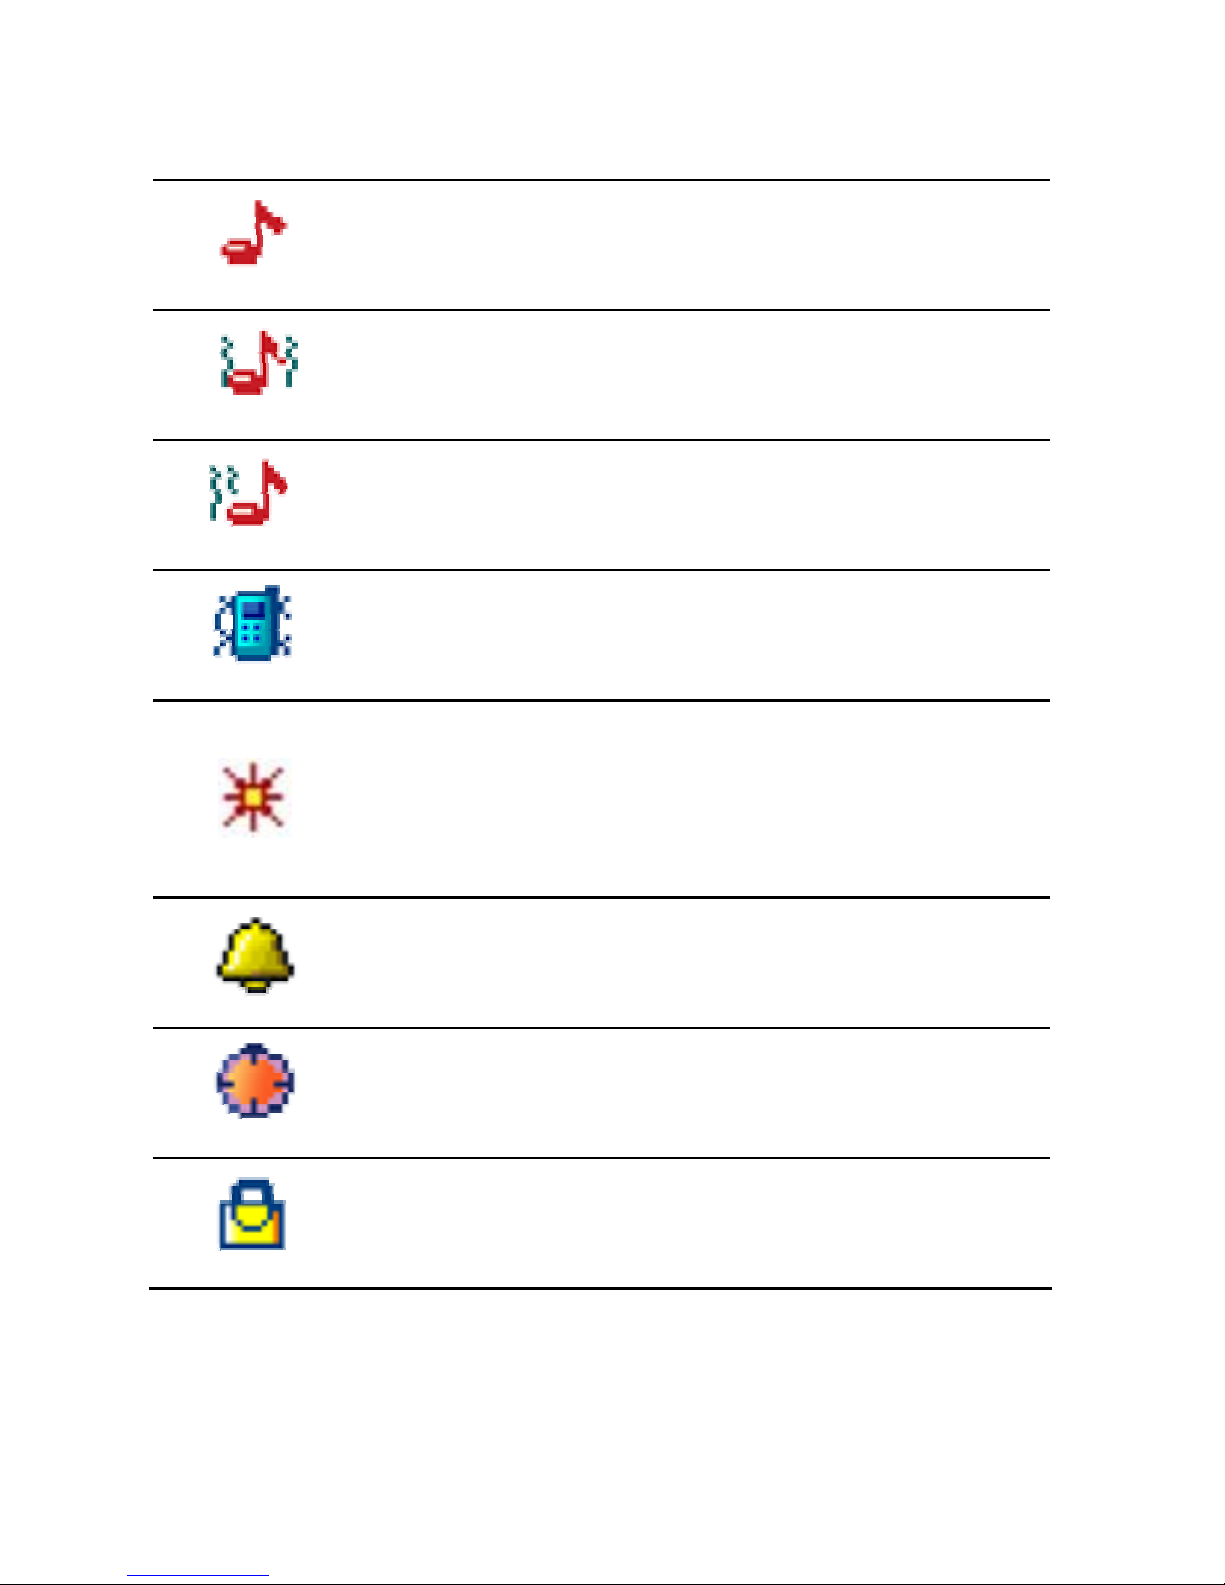
Ring: Appears when the Ring mode
is active.
Vibrate and Ring: Appears when the
Vibrate and Ring mode is active.
Vibrate then Ring: Appears when
the Vibrate then Ring mode is active.
Vibrator On: Appears when the
Vibration mode is active.
ner mode) is
Light Only Mode: Appears when the
light only mode (man
active.
Alarm On: Appears when you set
the alarm.
Stopwatch: Appears when you set
the stopwatch.
Lock: Appears when you set the
Keypad Lock.
20
Page 21
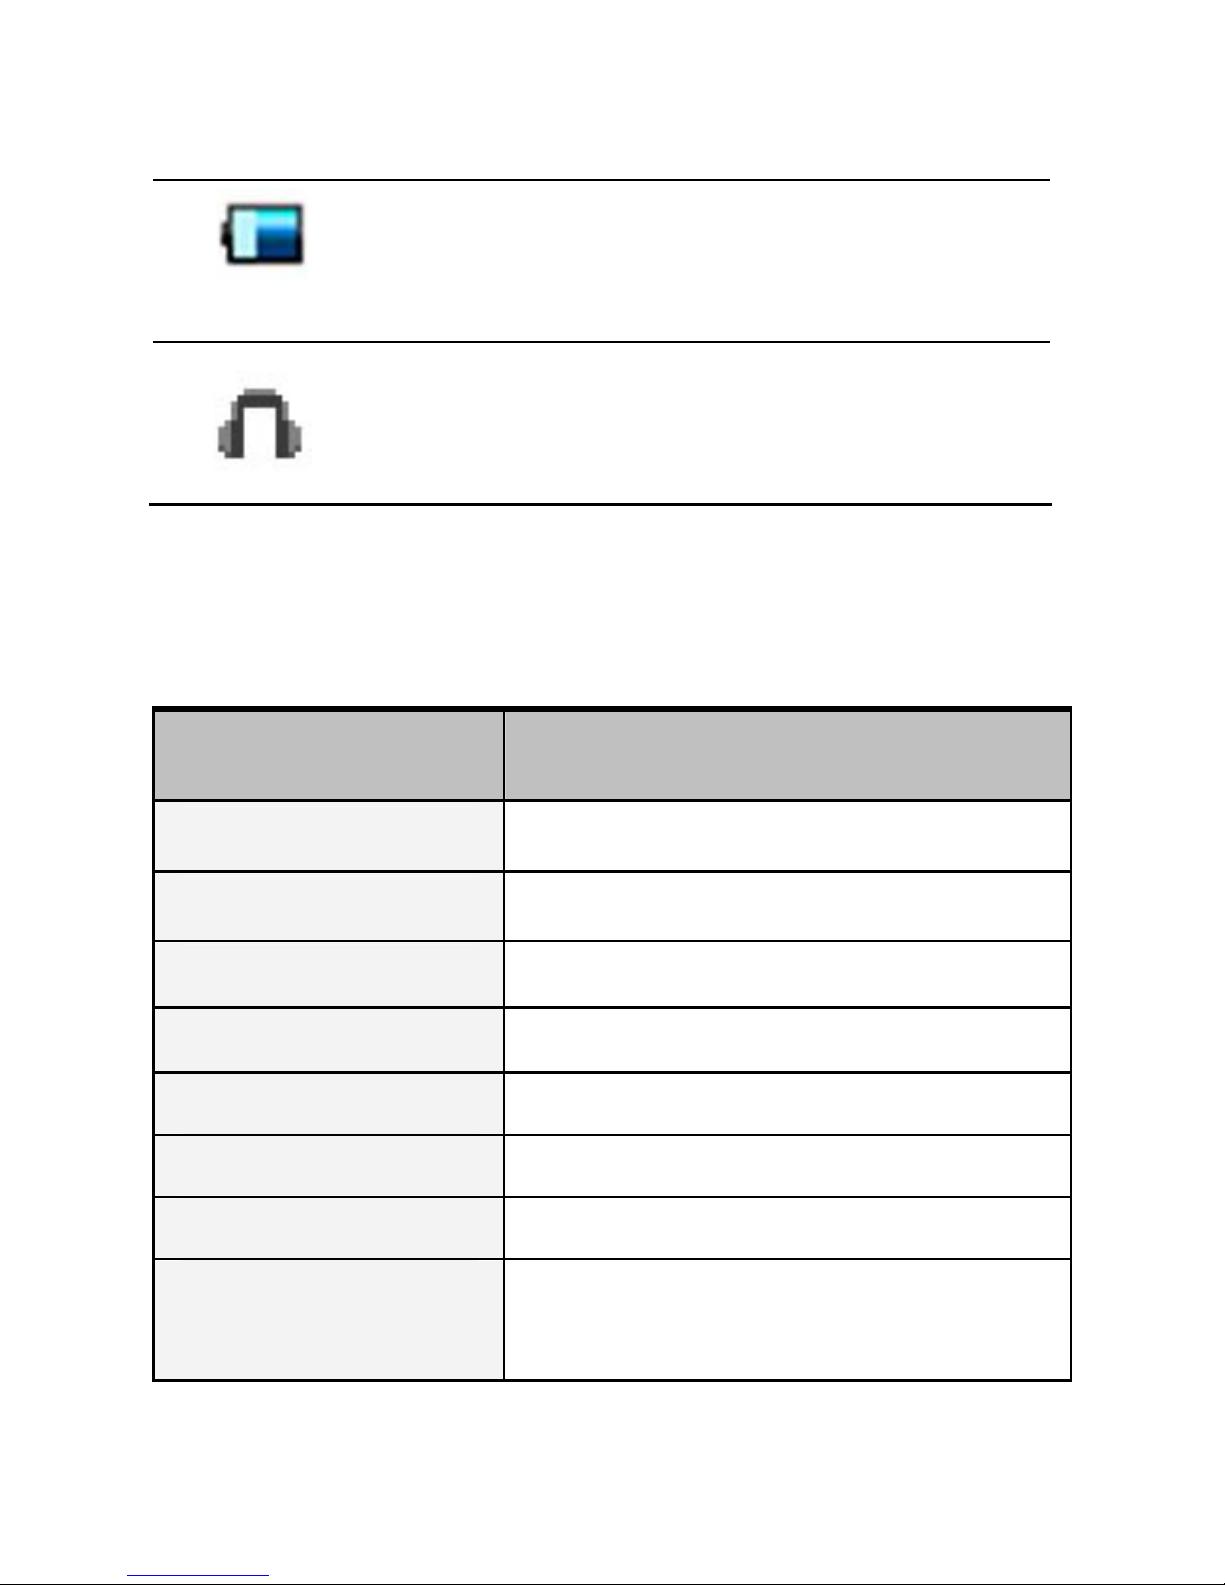
Battery Strength: Shows the level of
your battery. The more bars you see,
the more power you have left.
Headset: appears when you set the
Sounds & Alerts as Headset.
PHONE FEATUR
H/W Featu
ES
res
Feature Description
Dimension 102 x 50 x 13.7mm
Main LCD 2.2" QVGA
Camera 2MB CMOS
Flash Light No
Speaker Single Loud Speaker
Vibrator Built-in Vibrator
Antenna Internal
Phone
Memory
No
21
Page 22

SIM 3V
IrDA No
Blu .2
o music), HFP
(Headset),
(Dial-up Network), FTP,
Human
), GAVDP,
etooth v1
A2DP (Stere
(Hands-free), HSP
DUN
OPP (vCard), HID (
Interfact Device
SPP
D
ction and PC Sync
ager
ata Cable
USB Conne
Man
m icroSD
(T-Flash)
Card (Optional)
se only genuine microSD
ash) cards approved &
U※
(T-Fl
specified by the SD Card
Association and SanDisk:
http://www.sdcard.org
S/W Features
Feature Description
RF GSM850, DCS1800, PCS1900
GSM / GPRS GSM Phase 2 & 2+ / Class 8
22
Page 23

GPRS
Message MMS / EMS / SMS
WAP WAP 2.0 (Obigo B rowser)
CLDC1.1(JSR139)/MID
Java
P2.0(J
SR118)/WMA1.1(JSR120)/MM
API1.2(JRS135)/JTWI1.0(JSR
185)
DRM DRM 1.0
Text Input
T9 Intelligent Text Input,
Multitap
Video
MPEG4 Encoder / De
H.263
coder
Wallpaper
Pictures and user definable
JPG, GIF, BMP
Sound
MID, WAV, AMR, iMelody
corder (AMR, WAV,
AWB)
Music Player
MP3,
Sound Re
23
Page 24

Phonebook 500 Entries in Phonebook
Tools
Calendar, To-Do List, Alarm,
er, Currency Converter,
World Clock, Calculator, Unit
Convert
Stopwatch
2
When you subscribe to ou receive
a plug-in SIM (Subscr
w ubscription de
available optional serv
ss c hese
codes help you to
unauthorized use.
W quested for
key-in the appropriat played as asterisks)
K key.
t
. 3 SIM Card
a cellular network, y
iber Identity Module) card loaded
ith your s tails, such as your PIN, and
ices.
There are acce odes for your SIM card. T
protect the phone against
any of the code explained below,
e code (dis
hen re
and press the O
PIN
The Personal Identification Number or PIN (48digits) protects your SIM card agains
24
Page 25

unauthorized use. The PIN comes with the SIM
8-digit PUK (Personal Unblocking Key) is
2.
pressing and holding End key.
rt the SIM card.
card; see the SIM card instruction provided with
your card.
If you enter an incorrect PIN three times in
succession, the code will be disabled and cannot
be used until you re-enable it by entering the PUK.
PUK
The
required to change a disabled PIN. The PUK may
be supplied with the SIM card. If not, or in case you
have lost it, please contact your service provider.
To re-enable your PIN, proceed as follows.
4 Opera tion
Install and charge the phone
1. If the phone is already on, first turn it off by
2. Inse
(Make sure that the gold-colored con ta cts on the
card are face down)
25
Page 26

3. Install the battery.
4. Replace the battery cover.
5. Plug the travel adapter into the phone.
6. Plug the adap
7. When the phone
ter into a standard AC wall outlet.
charged (the
hone.
umber Required
Po
1 ey for more than one
2
, will
d s
t strength and current
3 he phone, hold down
is completely
battery icon becomes still), unplug the adapter
from the power outlet.
Remove the adapter from the p8.
9. Switch the Phone On/Off
10. Enter Your Pin (Access Codes)
11. Dia l the Phone N
wer On or Off
. Hold down the power on/off k
second to switch on.
. Enter your SIM card PIN, if requested. The phone
searches for your network and when detected
isplay the idle screen. The external display show
he signal strength, battery
time and date.
. When you wish to switch off t
26
Page 27

the power on/off ke y for more than two seconds.
u
Æ [11.1 Phone Setup]
d Input Methods]
[11.1 Phone Setup]
s.
C stomize your phone
Time and Date
Set time and date for your phone
[Menu] Æ [11.Settings] Æ [11.1 Phone Setup] Æ
[11.1.1. Time and Date]
Display language
Select the language for your phone menus.
[Menu] Æ [11.Settings] Æ [11.1 Phone Setup]
Æ [11.1.2. Language]
Preferred Input Methods
Select the methods for your phone menus.
[Menu] Æ [11.Settings]
Æ [11.1.3. Preferre
Use Shortcuts
Select the shortcuts for your phone menus.
[Menu] Æ [11.Settings] Æ
Æ [11.1.4. Shortcuts]
Set Dedicated key
Set up a menu for your own favorite menu item
27
Page 28

[Menu] Æ [11.Settings] Æ [11.1 Phone Setup]
e Setup]
de key]
3. Ov
To acce s [Menu] in Idle mode.
r-, network- and
subsc
Æ [11.1.5 Dedicated key]
Set Flight Mode key
Set up a flight mode for your phone menus.
Menu] Æ [11.Settings] Æ [11.1 Phon[
Æ [11.1.6 Flight Mo
erview of menu functions
ss Menu mode, pres
* Some menus are operato
ription-dependent.
1. Ph
1.1
1.2
1.3
1.4
1.5
1.6
1.7 Special Number
one Book
Quick Search
Search Entry
Add New E ntry
Multi Operation
Caller Group
peed Dial S
1.8 Settings
2. Messaging
28
Page 29

2.1 Messages
2.2 E-mail
2.3 Voice Mail
2.4 Broadcast Message
3.
s
ter
Call History
3.1 Missed Calls
3.2 Dialed Calls
3.3 Received Call
3.4 Delete Call Log
3.5 Call Time
3.6 Call Cost
3.7 SMS Counter
3.7 GPRS Coun
4.
usic
Music
4.1 Music Player
4.2 Audio Equalizer
4.3 Download m
5.
Camera
5.1 Camera
5.2 Photo Viewer
5.3 Video Recorder
29
Page 30

5.4 Video Player
5.5 Photo Editor
6.
FM Radio
6.1 FM Radio
6.2 Schedule FM Record
7.
ck
er
Organizer
7.1 Calendar
7.2 To Do List
7.3 Alarm
7.4 World Clo
7.5 Calculator
7.6 Unit Converter
7.7 Stopwatch
7.8 Sound Record
8. Services
8.1 SIM Toolkit (depends on SIM)
8.2 WAP
8.3 Data Account
9. Entertainment
9.1 Java
9.2 Java Setting
30
Page 31

9.3 Download games
so
ictures
9.4 Download funny unds
9.5 Download video
9.6 Download p
9.7 E-Book Reader
10. Bluetooth
ol
e
10.1 Bluetooth Mode
10.2 Remote Contr
10.3 My Devices
10.4 Active Devic
10.5 Se ttings
10.6 About
11
ttings
. Settings
11.1 Phone Setup
11.2 Display Setup
11.3 Sounds & Alerts
11.4 Call Setup
11.5 Network Setup
11.6 Security Setup
11.7 Restore Factory Se
12. File Manager
31
Page 32

1.
Yo e numbers on your SIM card and in
card and phone’s
separate, but they are used as
a one Book. To access s
m e mode and select Phone
Bo
1
U h r numbers in Phone Book.
F
When you select the Search Entry, after storing
numbers to phone book, you can search them by
Name.
1.3
ADD NEW ENTRY
Use this menu to add a new contact to Phone Book.
1.4
MULTI OPERAT ION
You can copy phone book data from SIM card to
Phone or from Phone to SIM. It is a useful function if
Phone Book
u can store phon
your phone’s memory. The SIM
memory are physically
single entity called Ph thi
enu, press [Menu] in Idl
ok.
.1 QUICK SEARCH
se this menu to searc fo
inding an entry
1.2
SEARCH ENTRY
32
Page 33

you want to back up your phone book data from a
SIM card to your phone and vice versa. Also you can
is menu to assign speed dial numbers (2 to 9)
called numbers.
d edit your mobile phone number
ice Dial number and SOS
view and edit the settings for the Phone
s
invoice tone.
delete all phone book data.
1.5
CALLER GROUP
Use this menu to organize your contacts in caller
groups.
1.6
SPEED DIAL
Use th
for your most frequently
1.7
SPECIAL NUMBER
You can view an
(owner number), Serv
number.
1.8
SETTINGS
You can
book as following.
torage in the phone book, the phone number in the
phone book entry list,
33
Page 34

2
U e short messages
a ages. You can also use a voicem
M ctions are available depending on
n hat your service provider supports.
nction is a
b phone, you must obtain the SMS
. Messaging
se this menu to send and receiv
nd multimedia mess
ail, E-mail and broadcast message features.
essage fun
etwork services t
2.1
MESSAGES
The SMS (Short Message Service) fu
network service and your network may or may not
support the service. You can send messages in Fax,
Page, E-mail and Text format. To send text
messages y
center number from your service provider, and enter
it on the SC Address option in Profile Settings menu.
Multimedia Message Service (MMS) delivers
messages containing a combination of text, image,
video and audio, from phone to phone or from
phone to e-mail.
34
Page 35

2.2 E-MAIL
The E-Mail application allows you to send and
d
r
e-mail
Unsent
g., “10 mails”
receive e-mails. The application supports text an
attachments. The e-mail application could be eithe
normal POP3 e-mail client or IMAP4 based
service. When highlighting on Inbox, Sent,
and Draft, the number of mails shall be displayed as
a popup hint, e.
Note:
If current incoming protocol is set to IMAP4, and
the phone is not currently connected to the
network, when before entering this screen, shall
popup a confirmation screen for the user with
message “Do you want to connect to the
network?”. If the user selects “Yes”, then can send
list folder request to network; otherwise, directly
enter this screen, and all popup hint displays “0
mails.”
35
Page 36

2.3 Voice Mail
ing the Connect to Voice, your phone will
Your phone is capable of dialing with voice-mail
server number (if provided by your network). If you
receive any voice-mail, your phone displays New
Message in the idle screen.
Select the Voice Mail from the list and press [Option]
soft key (left). You can Edit the Voice Mail server
number.
By select
dial to the configured number that has been stored in
Voice Mail list. You can then listen to the voice-mail.
Note:
Voice mail is a network feature. Please contact
your service provider for more information.
2.4 Broadcast Message
This network service allows you to receive the
broadcast messages on various topics such as
eather, traffic, local district code, local hospitals, w
36
Page 37

taxis or pharmacy in your area.
n the following
the Receive Mode (2.4.1) option is set to
For more information about broadcast message
topics, please contact your service provider.
The phone will display the Broadcast Messages
immediately when received, o
condition:
1) When the phone is in the idle mode
2) When
on
3) When the message channel is currently active in
the channel list.
Note:
This service may not be available on all networks.
For more information about the available subjects,
please contact your network service provider.
37
Page 38

3
U ,
r u
c card
s function.
To mode and
se
3.1 ed Calls
T
that er. In the missed calls list, you
can view the details of the record by pressing the
[ t key (left). In the view screen, you can
m
1
2
3) Save to Phone Book: Allows you to save the
record to the phone book
4) Dial: Allows you to call back to the recorded
number
. Call History
se this menu to view the calls you have dialed
eceived, or missed, and the length of the calls. Yo
an also check the cost of your calls, if the SIM
upports this
access this menu, press [Menu] in Idle
lect Call History.
Miss
his menu displays the most recent 20 received calls
you did not answ
Option] sof
ake a call to the number by pressing the Send Key
) View : Allows you to view the record
) Delete: Allows you to delete the record
38
Page 39

5) Edit: Allows you to edit the number and save to
the phone book
ected
d
phone book
This menu s the most recent 20 calls you
dialed calls list, you can view the
ls you
[Option] soft key (left).
y pressing the Send Key.
6) Send SMS: Allows you to send SMS to sel
name, number of your phone book
7) Send MMS: Allows you to send MMS to selecte
name, number of your
3.2 Dialed Calls
display
have dialed. In the
details of the record by pressing the [Option] soft key
(left). In the view screen, you can make a call to the
number by pressing the Send Key.
3.3 Received Calls
This menu displays the most recent 20 cal
have received.
In the list of received calls, you can view the details
of the record by pressing the
In the view screen, you can make a call to the
number b
39
Page 40

3.4 Delete Call Log
This menu lets you delete all call data of each
missed call
lete all received
category at once.
1) Missed Call: Allows you to delete all
2) Dialed Call: Allows you to delete all dialed call data
3) Received Call: Allows you to de
call data
4) Delete All: Allows you to delete all call logs
3.5 Call Time
This menu displays the time log for calls made and
received. The actual time invoiced by your service
provider will vary.
Note:
The actual time invoiced for calls by your service
provider may vary, depending on network features,
rounding-off for billing purposes and so forth.
3.6 Call Cost
This network feature displays the cost of calls. This
menu is available only if your SIM card supports this
40
Page 41

feature. Note that this is not intended to be used for
billing purposes.
Note: Not all SIM cards support this feature. The
number of items in these lists depends on the
contents of your SIM card.
3.7 SMS Counter
You can view the numbers of sent and received SMS.
nter 3.8 GPRS Cou
You can view how many GPRS message has been
sent and received, and reset the counter.
4
,
ht Navigation Key to view the play
e
. Music
4.1 Music Player
You can listen to MP3, MP4, MPG, AAC, MIDI, WAV
AMR, iMelody music files with Music Player.
Use the Left & Rig
list. It will display available music list from th
Memory Card or Phone depending on Player
41
Page 42

Settings.
And with the Up Navigation Key, the main display will
ID3 Ta
title an ou to provide the
t of the song, memory size and play time.
from the music player screen,
lbum then play the song you
s you to set equalizer as Normal, Bass, Dance,
, Party, Pop and Rock.
ic
be rotated to Play List, Spectrum, ID3 Tag and Detail.
g allows you to provide the music title, album
d singer and Detail allows y
outpu
To play the music,
select ▶ or from [Option] soft key (left), select
Current List or My A
want.
4.2 Audio Equalizer
Allow
Classical, Treble
4.3 Download Mus
Allows you to download music.
5. Camera
5.1 Camera
You can use the camera module embedded in your
42
Page 43

phone to take photos. Before taking a picture, you
Key [Left Soft Key] to save to
key, “9”. You
cally.
Key Usages in Camera Preview
Keys
g Setting (Up & Down Navigation Key):
can set your camera settings on screen by pressing
navigation keys, alphanumeric keys, and [Option]
soft key (left).
Taking and Saving a Photo
1. Choose [Camera] menu
2. Set your camera by using [Option] or
alphanumeric keys.
3. After setting the view and take a picture by
pressing the [OK] key.
4. Press the Save
the Photo Viewer.
5. If you want to send the picture by MMS
the alphanumeric promptly, press
can attach the p icture automati
※ Navigation
• Magnifyin
allows you to magnify or reduce the size of the
43
Page 44

image.
• Brightness Setting (Left & Right Navigation
Key): allows you to adjust the brightness
(Exposure Value)
camera setting by
scr le camera option icons,
N
※ A lphanumeric Keys
You can easily change the
pressing the following alphanumeric keys. The
een will display and togg
when you press the following keys.
ote: Camera options
Key Setting Key Setting
1
2
Effects 7 Picture Quality
White Balance 8 Picture Size
4 * Photo Viewer Delay Timer
5 Shoot Mode #
Show or Hide
Option Icon
44
Page 45

6 o Record 3 Frame Vide
5.2
Yo your phone by choosing
[P
di
im
5.3
ay record a video with the
Video Recorder menu.
a ys
ou can ea change
ess llowing al nu
ree tog ca ons,
hen owing key
te:
Photo Viewer
u can see your photos in
hoto Viewer] menu in [Camera] menu. It will
splay the photos with thumbnail, image name, and
age size.
Video Recorder
With this phone, you m
Alph numeric Ke
Y
pr
sily
ing the fo
the v
pha
ideo setting by
meric keys. The
sc
w
n will display and
you press the foll
gle mera option ic
s.
No Video options
Key Setting Key Setting
45
Page 46

1 Effects 4 Night Mode
White Balance 6 Camera 2
* Video Player
5
ey, you can view the recorded
5
Y
1
2. Choo
ion resizes the selected
full image
(2) Main LCD Clip function clips a part of image to
.4 Video Play er
You can view the recorded video with the Video
Player.
By pressing the 2 k
video with the width screen.
.5 Photo Editor
Photo Manager
ou can edit photo image with this function.
. Select the image file you want to edit in the File
Manager storage.
se Image file
(1) Auto Resize funct
image to
46
Page 47

f 20 pixels.
c age usi l shots
s Viewer and combine them in
one frame. You can select the layout (2 Image Tile,
9 Image Tile) with this function.
it in 176x2
Image T
You
ile
an edit photo im by ng severa
you aved at Photo
4 Image Tile and
Slide Show
You can view images as a slide show, a sequential
presentation of each image in the current folder.
6. FM Radio
6
phone
i
u o a single-chip electronically
t for listening to live-broadcast
sta
phone a nna.
T
.1 FM Radio
The FM Radio application turns the mobile
nto a portable FM Radio device. It primarily provides
sers the interface t
urned FM stereo radio
tions. You must connect the earphone to your
s it works as an ante
o listen to the radio:
47
Page 48

Con to your phone. When
screen, a default frequency is
t 4
c
nect the earphone
entering the main
selected and it’s power off for the first time of
entrance.
6.2 Schedule FM Record
This menu allows you to set the Schedule FM Radio
o record at a specific time. You can save up to
hannels.
7 .
keep track of your schedule. You
convenient features, such as Alarm,
alendar menu, the calendar
Organizer
Use this menu to
can also use
World Clock, Calculator, Unit Converter, and
Stopwatch.
To access this menu, press [Menu] in Idle mode
and select Organizer.
7.1 Calendar
The calendar helps you to keep track of your
monthly schedule.
When you access the C
48
Page 49

in Month view appears with today’s date indicated
by a red box.
7.2 To Do List
You can view all saved t
tasks saved in the calend
asks. It displays a task or
7.3 A larm
s you to set the alarm to ring at a
can save up to five alarms.
again at the time you set up.
u to check the current time
nwich Mean Time (GMT) for major
ap, press the left and right
ar. The To Do List shows
the notes of the tasks from the oldest task to the
latest task.
This menu allow
specific time. You
To stop the alarm when it rings, press the [Stop] soft
key (left) to stop the alarm or press the [Snooze]
soft key (right) to snooze the alarm so that it will
remind you
7.4 World Clock
This feature allows yo
based on Gree
cities around the world.
From the world m
49
Page 50

Navigation keys to scr oll to the city you want. As the
time line moves, the current day and time of the
ays.
igation keys. Press the *to use
nctions; Add to Memory, Subtract to
,
d 4Way Stopwatch.
given zone displ
7.5 Calculator
Use this menu to perform basic arithmetic functions;
Addition, Subtraction, Multiplication and Division
with the Nav
memory fu
Memory, Memory Clear and Memory Read.
7.6 Units Converter
You can convert from one type of unit to another.
7.7 Stopwatch
This is a tool to measure timing; Split Stopwatch
Lap Stopwatch an
Typical Stopwatch
There are Split Timing and Lap Timing
stopwatch functions in this typical stopwatch
menu.
4 Way Stopwatch
50
Page 51

You can use 4-way direction icons for measuring
times for each direction. A
When you press a direction icon, the direction
ill start timing, and three other
stopwatch w
direction stopwatches will pause the timing. If
you press the paused direction’s direction icon,
the stopwatch will resume timing.
7.8 Sound Recorder
You can record your voice from this function.
8.
Th you to use services including SIM
ca
8
If y d that provides additional
serv s, please
refer our
serv ider.
8.2
Services
is menu allows
rd additional services, WAP and Data Service.
.1 SIM Toolkit (depends on SIM)
ou use a SIM car
ices, the STK menu displays. For detail
to your SIM card instructions or contact y
ice prov
WAP
51
Page 52

The
pho wireless web. Using
the
info
as w
To
Ser e WAP
k
T ings.
here are several profiles of sites in this phone. You
as a home site and change
or set each profile.
the
ws you to change the settings for
network.
Wireless Application Protocol (WAP) on your
ne allows you to access the
web browser, you can access up-to-date
rmation and a wide variety of media content, such
allpapers, ring tones, and music files.
access this menu, press [Menu] and select
vices then WAP. You can also press th
ey in the idle mode.
his option allows you to set the WAP sett
T
can activate one of them
8.3 Data Account
gs for This menu allows you to change the settin
GSM and GPRS network services. For further details,
contact your service provider.
GSM
This setting allo
the GSM
52
Page 53

GPRS
This setting allows you to change the settings for
the GSM Data network.
9
Y
etwork profile, and free data
2 n: allows you to set the vibration to
o
3 can select the java network
from the list.
. Entertainment
ou can use your phone as your entertainment center.
9.1 Java
Using this menu you can enjoy the embedded Java
games and downloaded Java games or Java
Applications from WAP.
9.2 Java Settings
You can setup audio, n
space.
1) Java Audio: allows you to set the Java audio
sound to on or off.
) Java Vibratio
n or off.
) Java Network: you
53
Page 54

4 ata Space: you can view the free data
s
5 the remaining heap size.
nload games.
ides you to download funny sounds.
u to download pictures.
ewer application provides an easy way for
ne’s
mory card. Available file formats
) Free D
pace.
) Heap Size: you can view
9.3 Download Games
This phone provides you to dow
9.4 Download Funny Sounds
This phone prov
9.5 Download Video
This phone provides you to download video.
9.6 Download Pictures
This phone provides yo
9.7 E-Book Reader
The vi
you to read documents stored in the pho
memory or a me
are Txt and pdb file.
1 1. Bluetooth
54
Page 55

Bluetooth helps to transmit data or photos from
your m obile phone to another device nearby
without any cables.
1
The Settings menu provides you with various setting
o our preferences
a
d
T e and
s
1
can
11
11
stomize various sound and
light.
1. Settings
ptions to customize the phone to y
nd needs. You can also reset the settings to their
efault values.
o access this menu, press [Menu] in Idle mod
elect Settings.
1.1 Phone Setup
of your phone’s system Many different features
be customized to suit your preferences.
.2 Display Setup
This menu allows you to customize desired phone
display items.
.3 Sounds & Alerts
Use this menu to cu
change settings for the
55
Page 56

11.
twork
act your network service
ailability and subscribe to the
protect the phone against
y managing the several access
c
T s, and
curity mode by choosing sub
m
s ill help you to keep privacy and to
om using the phone without
y
4 Call Setup
The following Call Setup features are ne
services. Please cont
provider to check av
feature.
11.5 Network Setup
Network Setup helps you in Network Selection,
selection of Preferred Network, and GPRS
connection
11.6 Security Setup
Use this menu to
unauthorized use b
odes of your phone and SIM card.
here are six types of security setting categorie
you can optimize se
enus in “Security Setup” in “Settings” menu. These
ecurity settings w
prevent other people fr
our permission.
56
Page 57

Note:
If you enter an incorrect PIN/PIN2 three times in
succession, the SIM card is blocked. To unblock it,
you need to enter your PUK/PUK2. The codes are
s your netwupplied by ork operator.
PIN Lock
When the PIN Lock feature is on, the phon
works when you e
e only
nter PIN code for the SIM card. If
ith the SIM card, the phone
correct
e
ust
t
k
To prevent unwanted accidental key presses, you
you turn on the phone w
will ask for the password. Once the
password is entered, the phone will work with th
SIM card.
Phone Lock
When the Phone Lock feature is on, user m
enter the password each time you turn on the
phone. Making a call or operating the phone is no
available without the password.
Auto Keypad Loc
57
Page 58

can use t h is a ut o keypad l o c k fu nc t i on. You may not
nd hold the key or
, each time you need to release the
.
y. To make a call to
arting the numbers stored in
make a call or operate the phone until you press the
unlock code. However, answering a call, receiving
messages are available without entering the
unlocking key sequence.
To change the Keypad Lock setting,
1. Press a
*
2. Press the menu key and select 11. Settings /
11.6 Security Setup / 11.6.3 Auto Keypad Lock.
To unlock the Ke ypad Lock time setting,
1. Press the [unlock] soft key (left) and * key in
sequence
keypad lock
Fixed Dial
When the Fixed Dial mode is enabled, the person
using this phone can call to the phone numbers
stored in the Fixed Dial List onl
the number not st
Fixed.
58
Page 59

Dial List, you must enter the PIN2 to disable Fixed
Dial mode. If the SIM card does not have PIN2,
this feature is not supported.
Barred Dial
When the Barred Dial mode is enabled, the
using the phone cannot call numbers in the barred
person
d
P
c
B
C
To
pa en enter the new password.
Factory Settings
T
s
c
a
ial list. To call a barred number, you must enter the
IN2 to disable the barred dial mode. If the SIM
d does not have PIN2, it will not support thear
arred Dial feature.
hange Password
change the password, input the current
ssword, and th
11.7 Restore
his feature would reset the phone to the same
ettings as those configured at the factory. In this
ase, it does not delete the downloaded objects
nd phone book records. You will need to input
59
Page 60

p
p
assword to restore factory settings. The initial
assword is 0000.
12 ager
U
p
fi
s
s
e remaining memory and total
ne and the microSD Card.
p files in the
use in Wallpaper, Screen Saver, Tone
. File Man
se this menu to navigate the stored files in the
hone or the microSD (T-Flash) Card. You can open
les and use them in a way the phone supports, and
ee the total memory used and free space in the
torage.
1) You can view th
memory of the pho
2) You can open and navigate the directories
and files in the storage.
3) You can view, play, and setu
storage disks.
1) View / Play: allows you to view or play the
file.
2) Edit: allows you to edit image files.
3) Forward: allows you to forward the file to
60
Page 61

Setup, Phonebook, and to send via MM
EMS, and B
S,
luetooth.
4) Detail: displays information of the file, date
.
and size.
5) Rename: allows you to edit the file name.
6) Copy: allows you to copy the file to the other
folder or other storage.
7) Move: allows you the move the file to the
selected folder or storage. The file will be
removed from the original folder and paste
to the selected folder.
8) Delete: allows you to delete the selected file
9) Delete All Files: allows you to delete all files
in the selected folder.
10) Sort: allows you to sort the files by name, by
type, by time, and by size.
Note: After selecting Copy or Move option, press
the lef t or right navigation keys to access to the
upper or lower folder.
61
Page 62

FCC Part 1
This device art 22 and part 24
of the
rules. Oper ject to the follow ing tw o conditio
ns:
(1) thi
(2) th
includin
that may c
This equipm d found to comply
with
to Pa
designed rotection against
harm
equipmen diate radio
l
munications. However, there
o guarantee that interference will not occur in a
5 statement
complies with part 15, p
FCC
ation is sub
s device may not cause harmful interference
vice must accept any interis de ference,
g interference
ause undesired operation.
ent has been tested an
the limits for a Class B digital device, pursuant
rt 15 of the FCC Rules. These limits are
to provide reasonable p
ful interference in a residential installation. This
t generates uses and can ra
frequency energy and, if not installed and used in
accordance with the instructions, may cause harmfu
ference to radio cominter
is n
62
Page 63

particular installation. If this equipment does cause
e determined by turning the equipment
rference by one or more of the following
n between the equipment and
t
t
t
harmful interference to radio or television reception,
which can b
off and on, the user is encouraged to try to correct the
inte
measures:
- Reorient or relocate the receiving antenna.
- Increase the separatio
receiver.
- Connect the equipment into an outlet on a circuit
different from that to which the receiver is connected.
Consult the dealer or an experienced radio/TV
echnician for help.
WARNING
Changes or modifications made to this equipment no
expressly approved by Ezze Mobile Tech.., Inc. for
compliance could void
he user's authority to operate the equipment.
63
 Loading...