

EZBoilers EZ-Pro, EZ-Classic Owner's Manual
Owner’s Manual
EZBoilers
EZ-Classic and EZ-Pro
UL 2523-2009 Solid fuel fired hydronic heating appliances, water heaters, and boilers,
CAN/CSA B366.1-2011 Solid fuel fired central heating appliances.
EZBoilers
Formerly Ridgewood Stoves
1445 170th Ave.
Hersey, Michigan 49639
Call or text: (231) 823-2499
INTRODUCTION
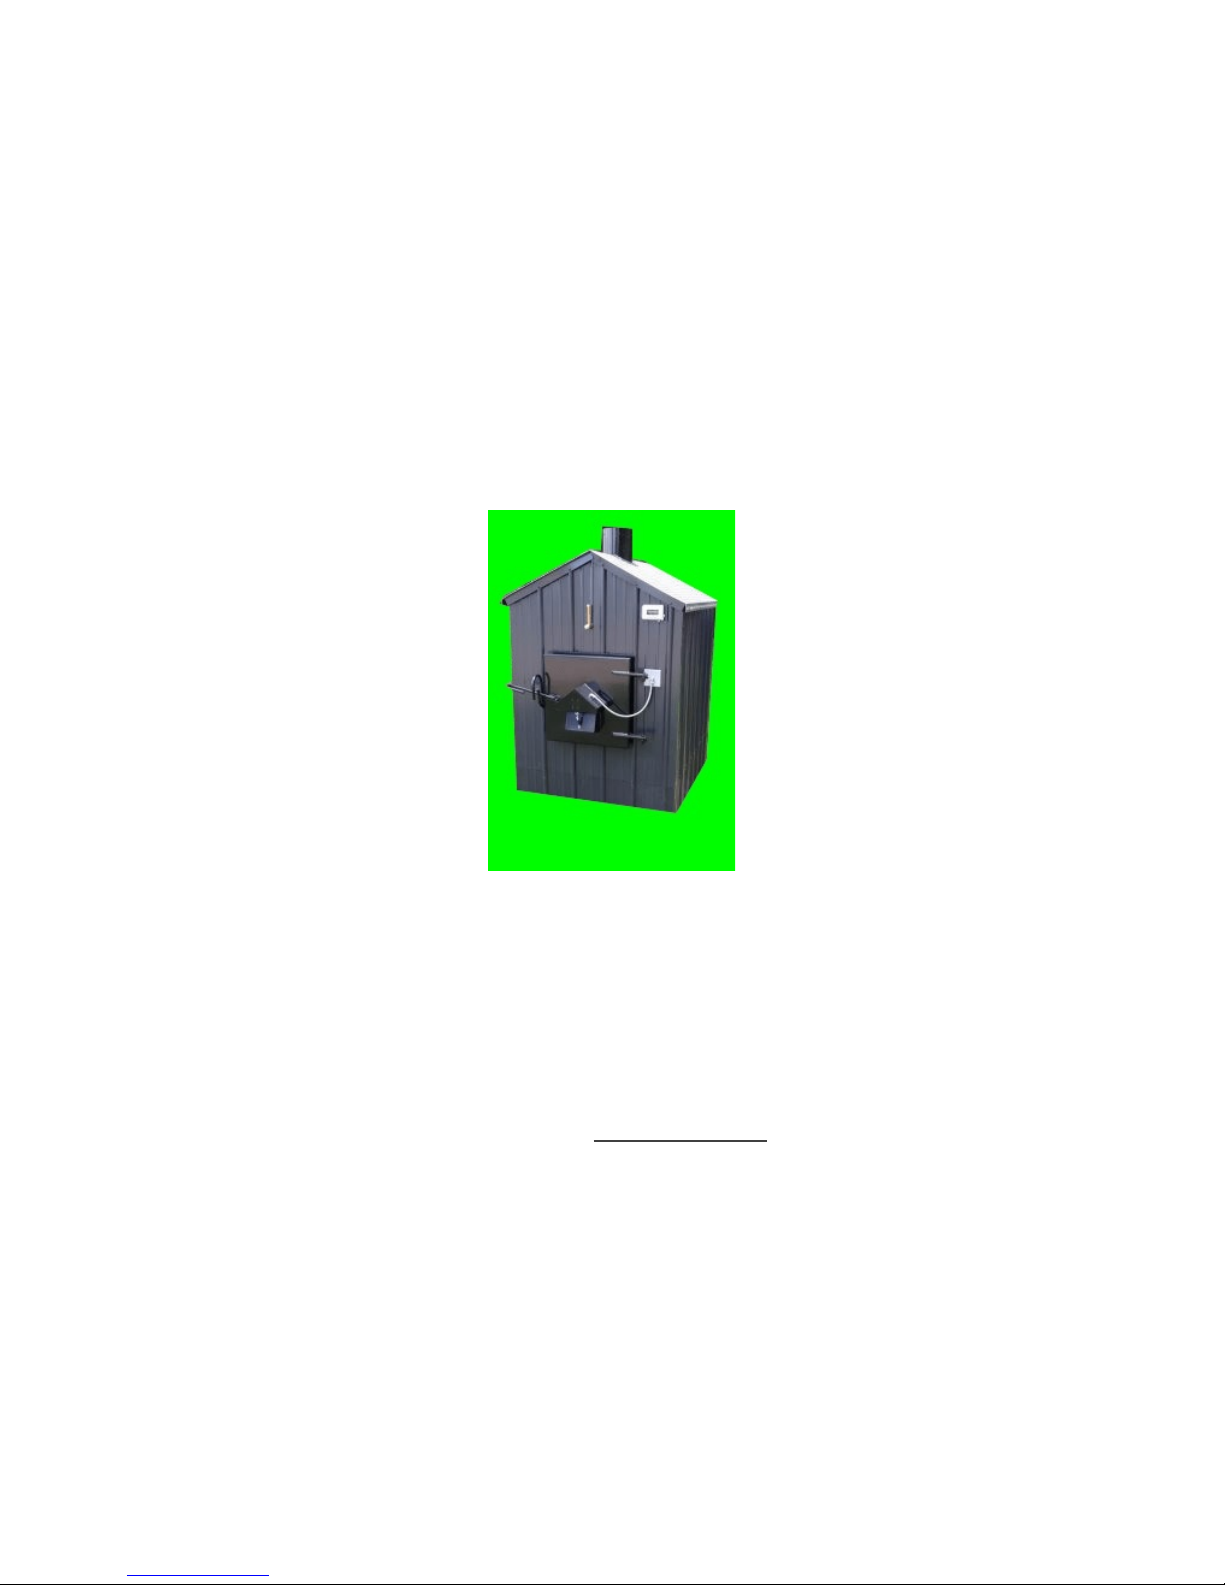
Thank you for purchasing our stove. Developed and manufactured in Hersey Michigan,
the EZBoilers “Simple and Strong” stove has been designed to supply heat and hot
water for your home or business. The strongest structural design is round and the
weakest is square or rectangular. This pertains to stoves as well. For longevity and
strength, our stove uses a round, heavy-duty design for the firebox. Rectangular designs
with many overlapping welds and faceted corners can be problematic. Our water jacket

is also a round design, and is 3/16” thick. Your stove also utilizes a natural draft burning
technology to get all of the energy out of traditional fuel sources, and to provide you
with many years of safe and cost-effective heating of your building and domestic hot
water supply. With no major electronics or fans on the outside of the unit, our stove is
simple and safer. The majority of the parts we use are off-the-shelf, readily available, to
make service easy. To ensure that you have a clear understanding of the operating
procedures of your stove, please take the time to read this manual thoroughly. If you
have any questions give us a call at (231) 823-2499. We will be happy to answer any
questions you have.
Thanks again,
The EZBoilers Simple and Strong Stove Team
Simple and Strong….,that’s our Stove.
SAFETY
Do not operate this equipment for anything other than its intended purpose.
Do not install in a home, basement or garage. This stove is intended to be used
outdoors.
Caution….Hot Surfaces….Never leave children unattended near the stove.
Do not burn any material other than natural organics. Do not burn GARBAGE,
HOUSEHOLD WASTE, STRAW, HAY or YARD WASTE. Do not use flammable liquids or
materials to start or to enhance the fire. Never use any type of petroleum product,
petroleum based product, charcoal starter, lighter fluid, lantern fuel, kerosene or any
other flammable accelerant to start your fire.
Start your fire with paper, cardboard, and small kindling, never any type of flammable
liquid.
When opening the firebox door, pause between the first (main) latch and the safety
latch. This type of latch is called a Door Anti Blowback Latch. There can be unburned
gases built up inside of the firebox during normal operation. Pausing at the safety latch
will allow those gases to ignite and burn off. Failure to make this a practice could result
in severe burns. Always close the stove door tightly after tending your fire.

Never leave the stove unattended if the firebox door is open or unlatched.
Do not touch any part of the front of your stove that is uninsulated. Temperatures can
reach 200 degrees in these areas. Failure to do this could result in severe burns.
To avoid electrical shock, disconnect the electricity before performing maintenance.
Always wear protective gloves and glasses. Be aware that hanging or loose clothing can
catch fire.
Ashes should be placed in a metal container with a tight fitting lid. The closed container
of ashes should be placed on a non-combustible floor or on the ground. All combustible
materials should be disposed of by burial in the soil, or otherwise dispersed. They
should be retained in the closed container until all cinders have thoroughly cooled.
Using an outdoor stove helps eliminate the risk of a house fire, chimney fire, indoor
smoke, or carbon monoxide poisoning.
The EZ Boilers Simple and Strong stove has been tested to UL 2523-2009 solid fuel fired
hydronic heating appliances, water heaters, and boilers, CAN/CSA B366.1-2011 Solid
fuel fired central heating appliances.
SECTION 1
INSTALLATION
CAUTION – DO NOT FIRE THIS UNIT UNTIL OPERATING INSTRUCTIONS HAVE BEEN
READ AND FULLY UNDERSTOOD. NEVER LIGHT A FIRE IN THE STOVE DRY (WITHOUT
WATER), AS THE STOVE WILL BURN UP.
THIS UNIT MUST BE INSTALLED BY A QUALIFIED INSTALLER.
Before installing your stove always check any and all applicable state and local
regulations and consult with your insurance agent.

We recommend installing your stove a distance of at least 5 feet from any structure,
and at least 25 feet away from fuel storage tanks, such as liquid propane. However,
farther away is even better. The underground insulated PEX water lines can transport
heated water for a long distance without sacrificing economy. Safety should be a top
priority. Your stove should be located with consideration to your neighbor’s property.
This type of stove is not designed to be located or operated in densely populated areas.
Stove Footprint. When you’re beginning to install your boiler, the footprint comes in
handy to position the blocks under the legs or pouring a concrete pad. EZ-Pro: L = 60
inches W = 44 inches. EZ-Classic: L = 48 inches W = 44 inches
Those measurements are from the outside of the legs, which are approximately 3 inches square. Therefore, the EZ-Pro
measures 57″ by 41″ on center, and the EZ-Classic measures 45″ by 41″ on center.
CAUTION: Lift and move the stove at your own risk. Do not lift your stove from the
bottom with a fork truck or similar equipment. You can safely lift your stove by
removing the chimney diverter clean-out, dropping a chain through the chimney into
the firebox, and attaching the chain to the door frame. The stove can also be picked up
using a fork truck by putting the forks through the door opening and into the firebox.
Electrical
We recommend that a licensed professional electrician makes all of the necessary
electrical connections involved with the installation of the stove.
Your stove operates on a 115 volt electrical source. We recommend that you use 14/2
115 volt underground wire during your installation. To avoid electrical shock, disconnect
the electricity before performing your installation.
Your stove is equipped with a 115 volt aquastat controller. The pump(s) operate on 115
volts as well.
Aquastat Controller
Before firing the stove, ensure that the aquastat is correctly programmed. While this is
done at the factory, many factors can cause the programming to be lost, and the default
programming may cause the stove to overheat and burn up. See section “Setting the
Aquastat” for details.
Grounding Rod
A properly installed grounding system will protect people from electrical shock, help
safeguard expensive electronic equipment, prevent electrolysis, limit neutral-to-ground
voltage and satisfy the NEC along the way.
Use only a 4GA or larger wire with proper grounding clips. Grind paint away where the
wire attaches to the stove in order to get a solid electrical connection.
GFCI Outlet or GFCI Breaker
Install a GFCI outlet or GFCI breaker on the stove. This will protect the user and the
electronics, and prolong the life of the stove. Installing an ordinary electrical switch
between the GFCI and the power supply coming into the stove will allow you to easily
switch off the power to the stove for maintenance. Using the GFCI reset button as a
switch would greatly shorten its life. The stove's pump(s) plug into this outlet
conveniently.
Thermostat
Install a second thermostat (110 volt line voltage thermostat), connecting it to your
existing home furnace. This will allow the heat from the outside stove to be distributed
throughout your home, without your indoor furnace’s burner cycling on and off.
Your existing furnace thermostat should be set several degrees lower than the new
stove thermostat. This will allow the existing furnace to only turn on and heat your
home if the fire goes out in your outdoor stove.
IMPORTANT: Have a qualified electrician check to ensure that these changes do not
cause the electric motor to overload. Any modification to the existing furnace must be
made in accordance with the manufacturer’s specifications and performed by a
qualified, licensed person, in accordance with local building codes.
Plumbing
We recommend that you contact a licensed professional plumber to make all necessary
plumbing installations between the stove and your existing heating system or your
building(s). There are tips for the installation elsewhere in this manual, and on our
website.
Initial Water Fill-Up
Attach a garden hose to the hose fitting on the return line pipe. Shut off the return line
ball valve and fill the entire system until water runs out of the vent pipe on the top of
the stove. Open the return line ball valve and run the pumps for 24 hours to purge the
air from the system and to check the plumbing for leaks. Check and refill the system as
necessary and pour 1 unit of sodium nitrite treatment solution into the vent pipe
located on the top of the stove.
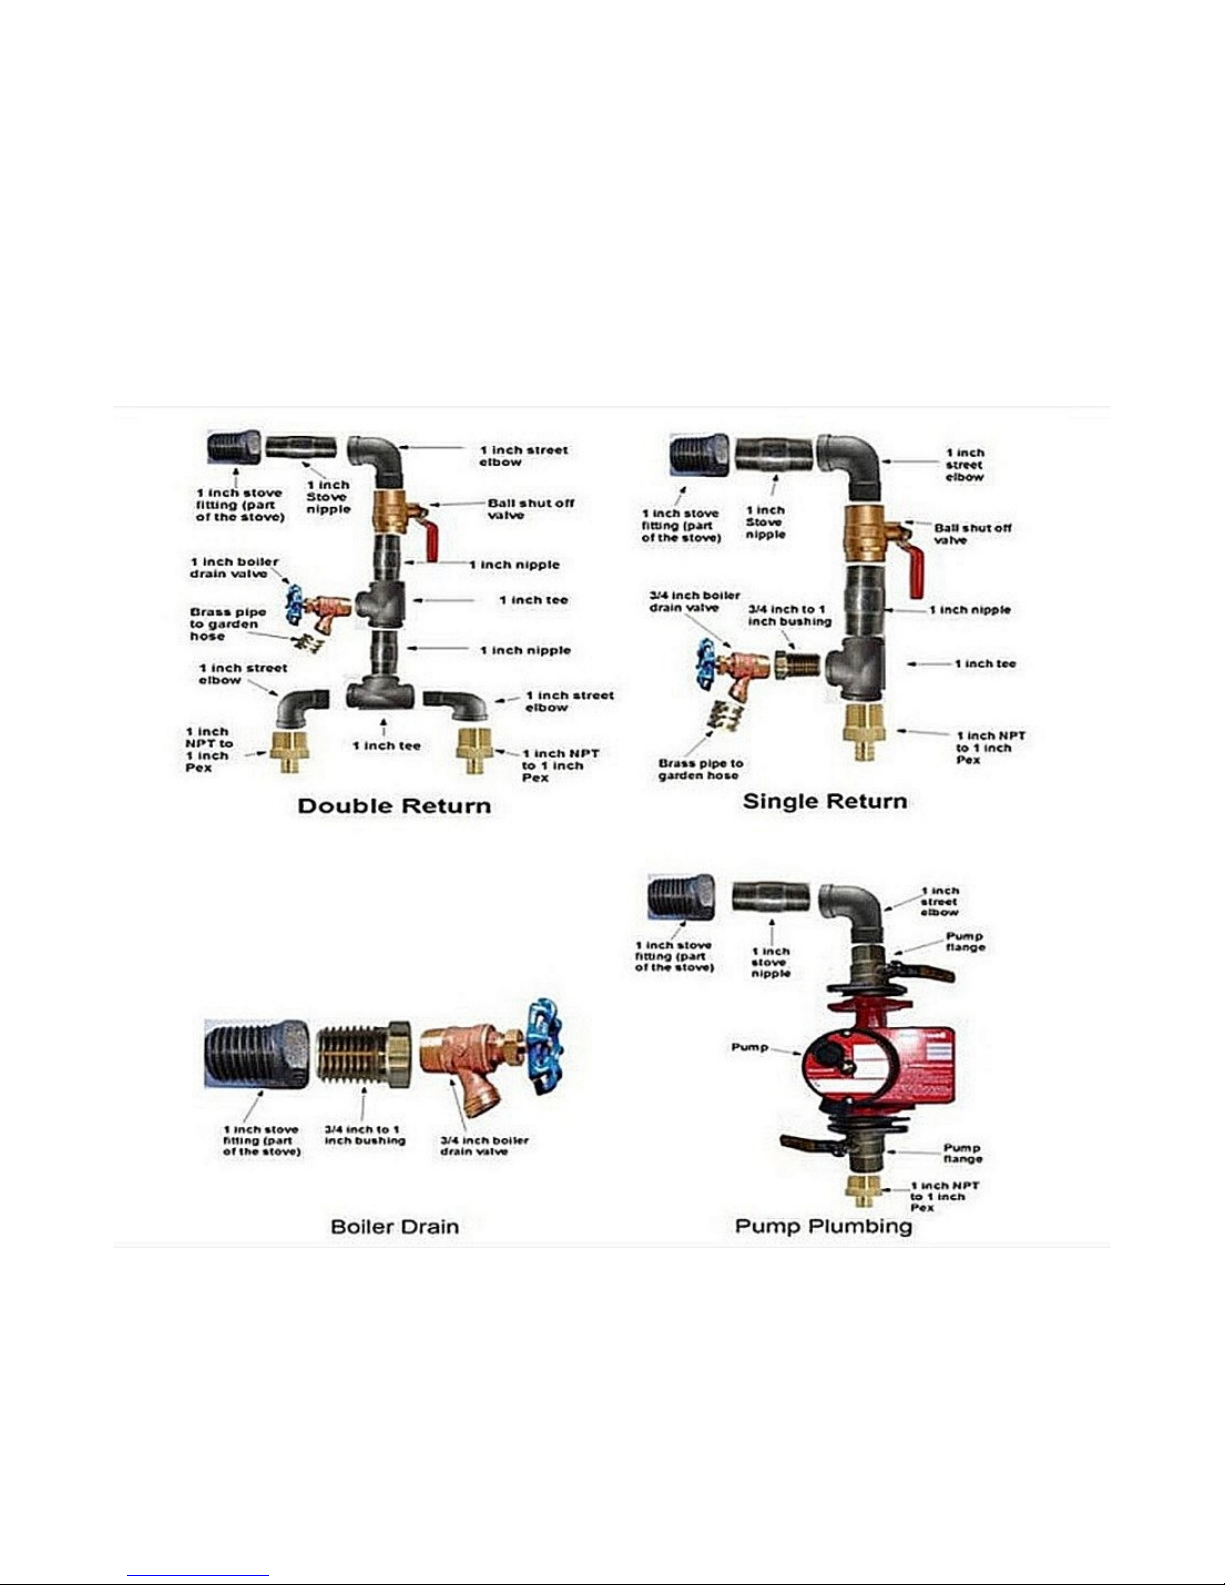
This is a typical example of the plumbing diagrams for the back ports on your stove.
The stove pump ports are shown here. The ports are female 1 inch NPT (National Pipe
Thread) and fittings are available at your local home improvement store.
Stove Water Ports

SECTION 2 – GETTING TO KNOW YOUR STOVE
Stove Construction
Firebox
Our firebox is 5/16” thick, which gives us one of the thickest fireboxes available.The
strongest structure is round and the weakest is square or rectangular. For longevity and
strength, our firebox uses this round boiler design. Round designs have fewer welds;
therefore, fewer spots for possible failure.
Water jacket
Our water jacket is 3/16” thick, and is also a round design, giving it maximum strength.
The water jacket surrounds the entire firebox of the stove to maximize heat transfer.

Sight Glass
A sight glass is a simple mechanical way to keep track of the water level in your stove.
With a quick glance, you know that your stove has the correct amount of water. If you
do not see water in the sight glass, water must be added to your stove. Commonly, the
water level in the gauge will settle just below the halfway point.
 Loading...