

Page 1
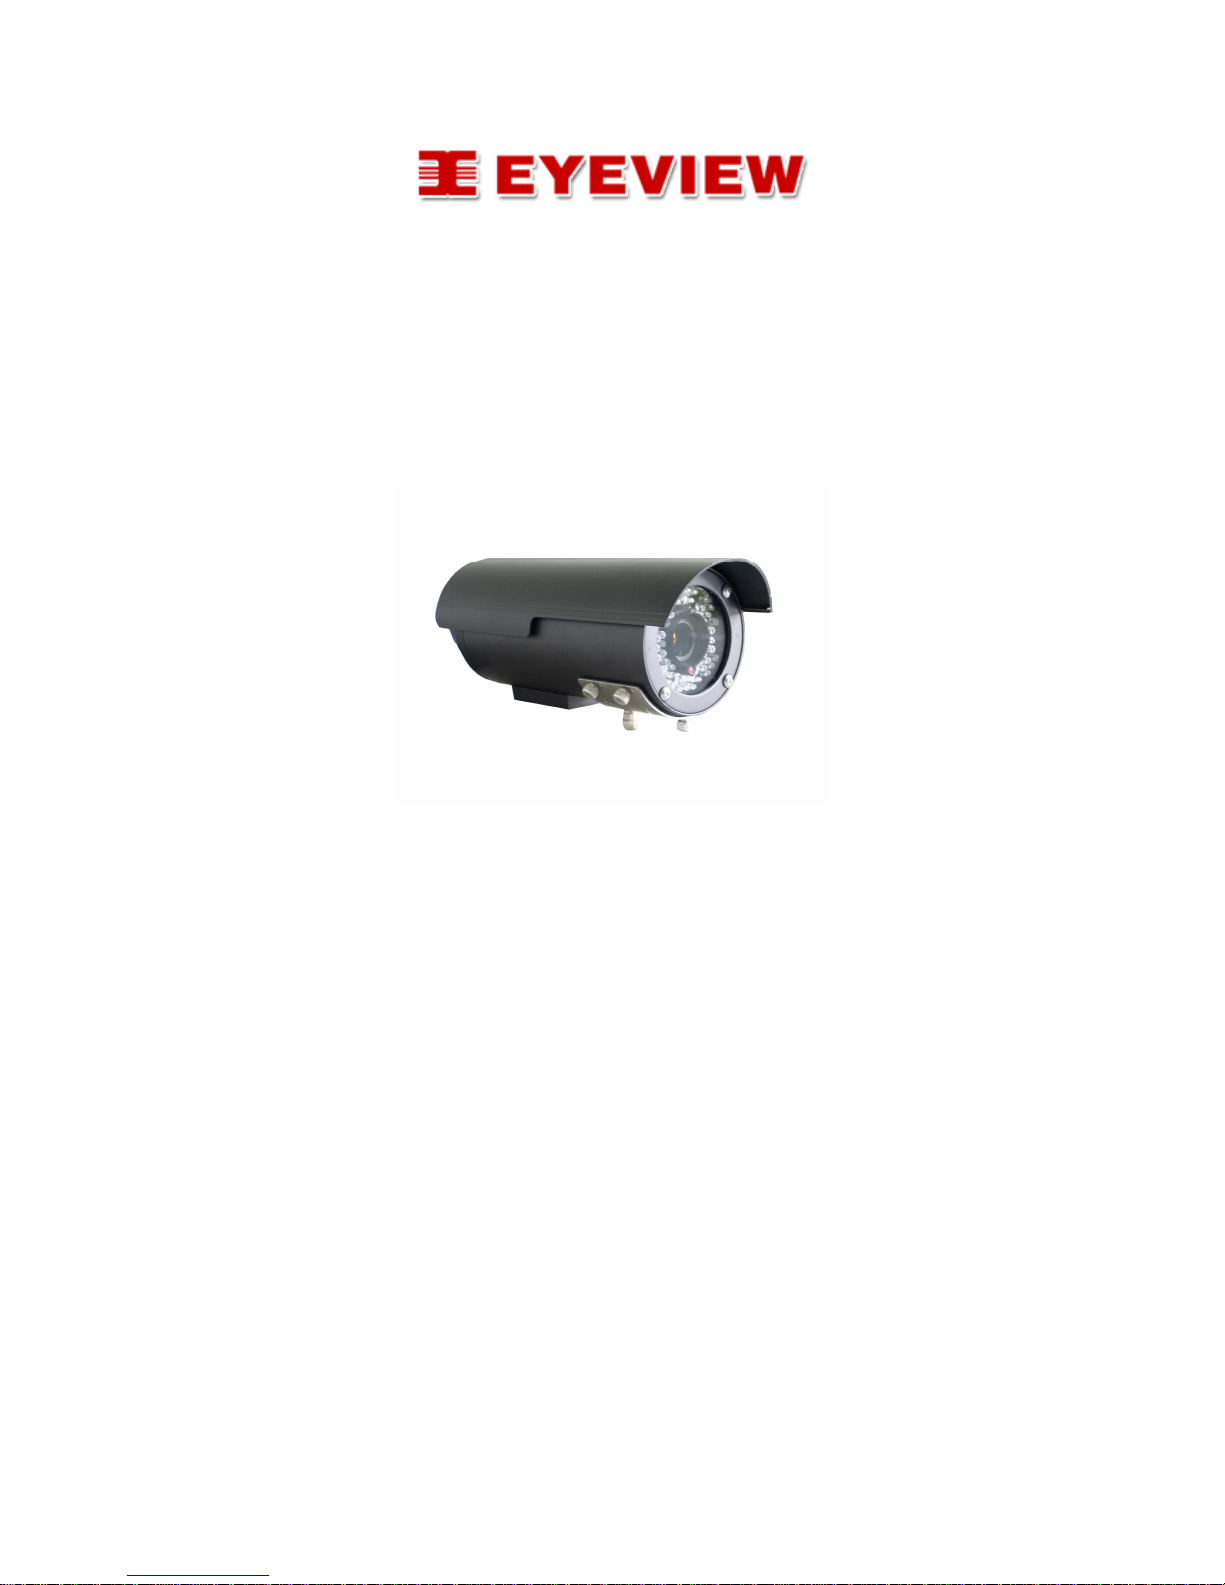
Outdoor Waterproof Varifocal
Color CCD Camera
Note: Please read the following before you start the
installation.
Page 2

Safety precautions
Select a proper location and use safe hoist for installing outdoor color
cameras.
Confirm that the hoist is capable of lifting to the installation position.
Proper protective measures must be provided in the hoist, for protecting
engineering staffs.
Confirm that power supply is 110V/220V. Ensure safety precautions for
preventing electric shock.
Warning indications for use
When using this product, please follow the local electrical appliance
regulations for safety concern.
This product is using AC110V~240V power input, for safety of use, do
not use any power supply other than that specified.
For the safety of the engineering staffs, apply power only upon
completion of installation.
Requirements for Operation environment
Environmental requirements for outdoor waterproof color cameras:
Environment temperature: -25°C to + 50°C
Environment humidity: ≦ 85%
Power supply: AC110V~240V
Page 3
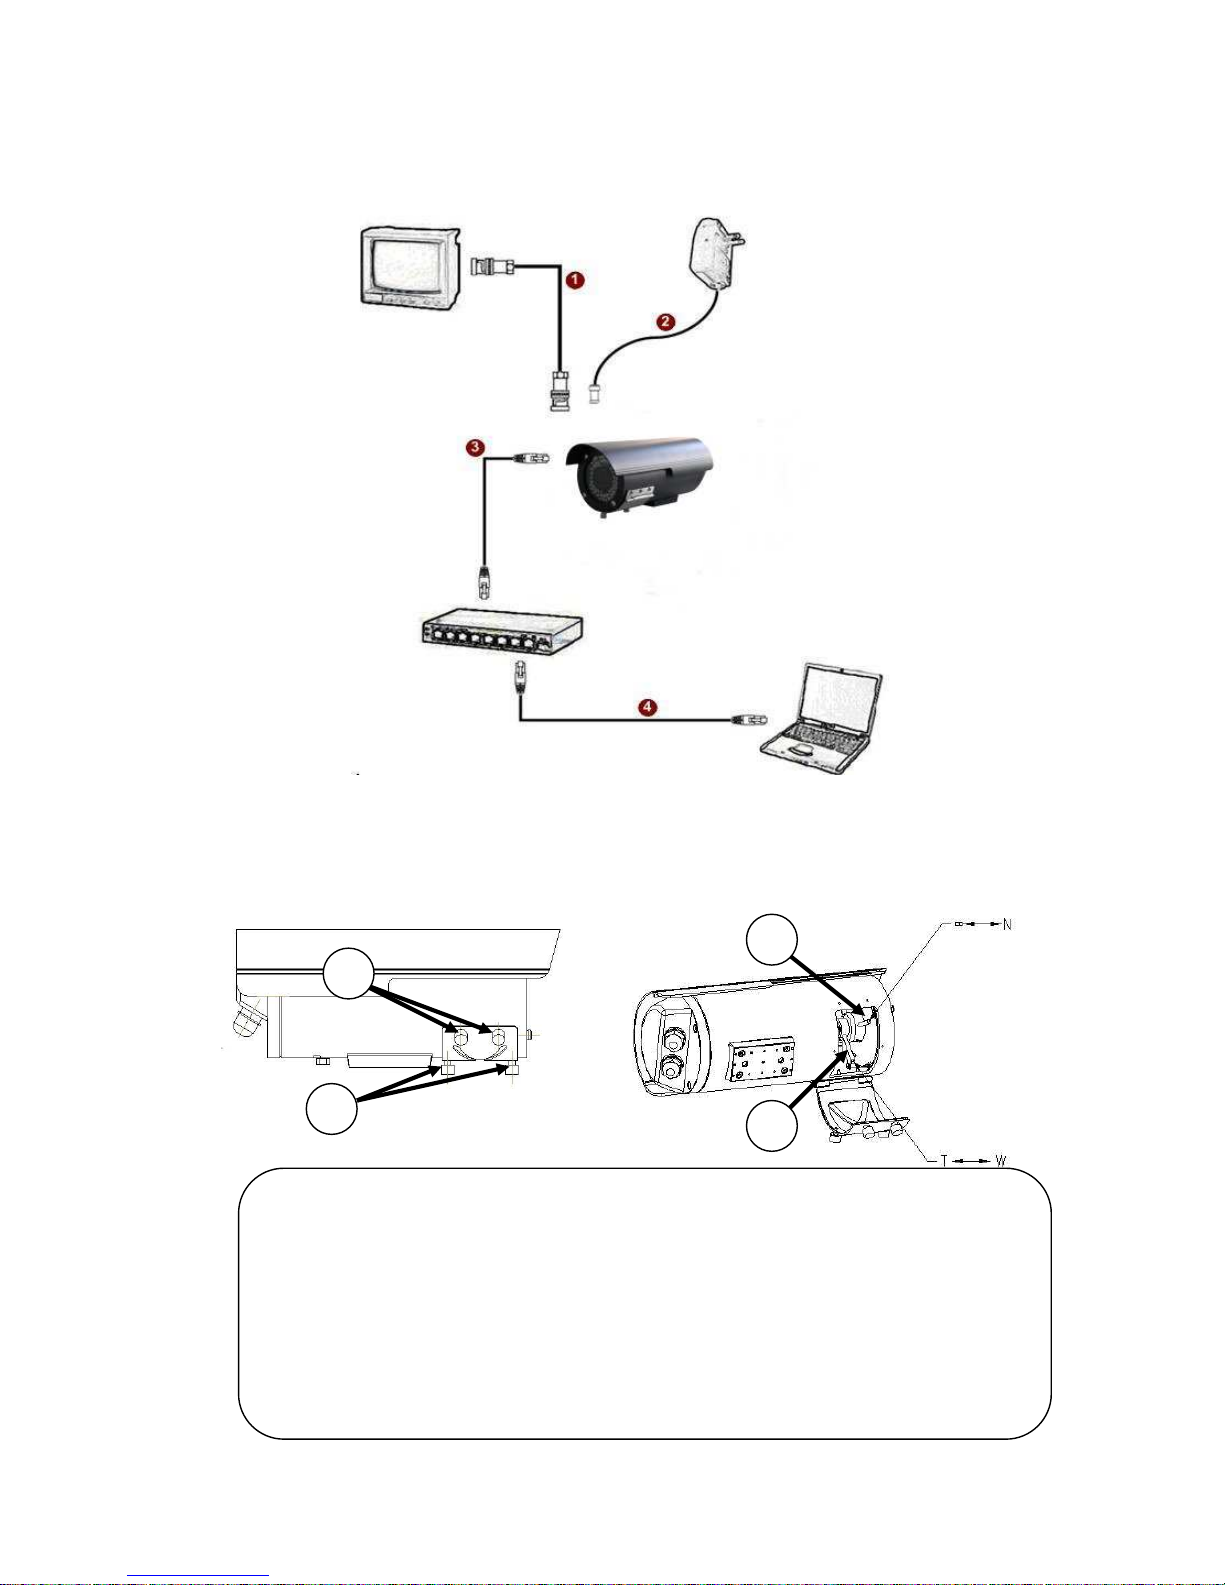
Connecting Chart
Modulation (For Varifocal Cameras)
1. Unfasten bolts and open the
cover.
2. There’re two triggers for modulating wide, tele and focus.
3. ① for modulating tele and wide, ② for modulating the focus.
4. After modulation, close the cover and make sure bolts are fastened.
It is recommended to use a screwdriver. The part 1 bolts need to be
fastened first then you can fasten the part 2 bolts.
2
1
1
2
Page 4
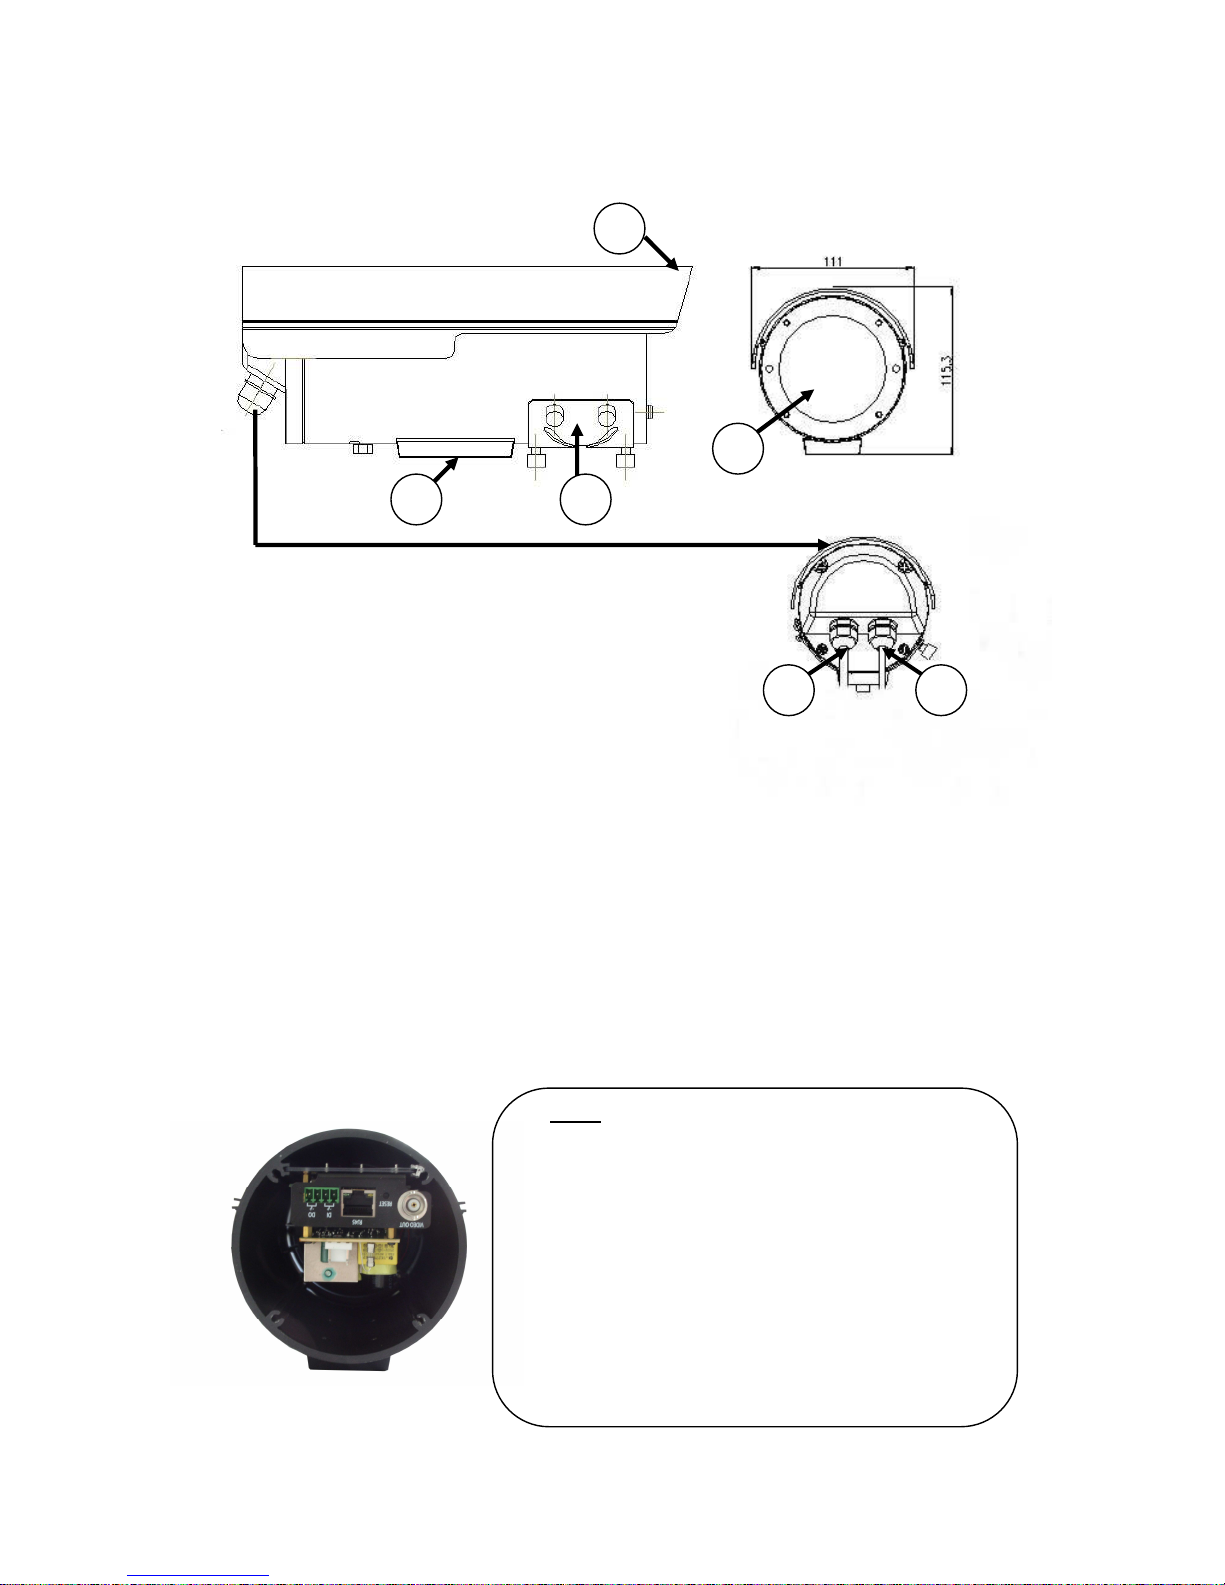
Components Descriptions
1. Shelter and top shell.
2. The place to fasten on the holder.
3. The modulation cover.
4. The Camera and LEDs.
5. AC power input.
Yellow & green wires connect to GND.
Blue & brown wires connect to the power (AC 110V ~ 240V).
6. Video or RJ45 cable output.
There’s only one socket for connecting wire. You can choose only
one display method for your IP camera.
*Notice
Before have RJ45 cable connected to the RJ45 port,
you must first have RJ45 cable through the cable
glands without the cable connector first, and then you
make the connector from there. (Because the RJ45
connect can’t fit through to the cable glands) Please
tighten the glands firmly by hand first and after that use
tool to tighten the knot for another 1/2 turn. Do not
over-tighten the glands for long life span purpose
1
4
3
2
5 6
2
Page 5
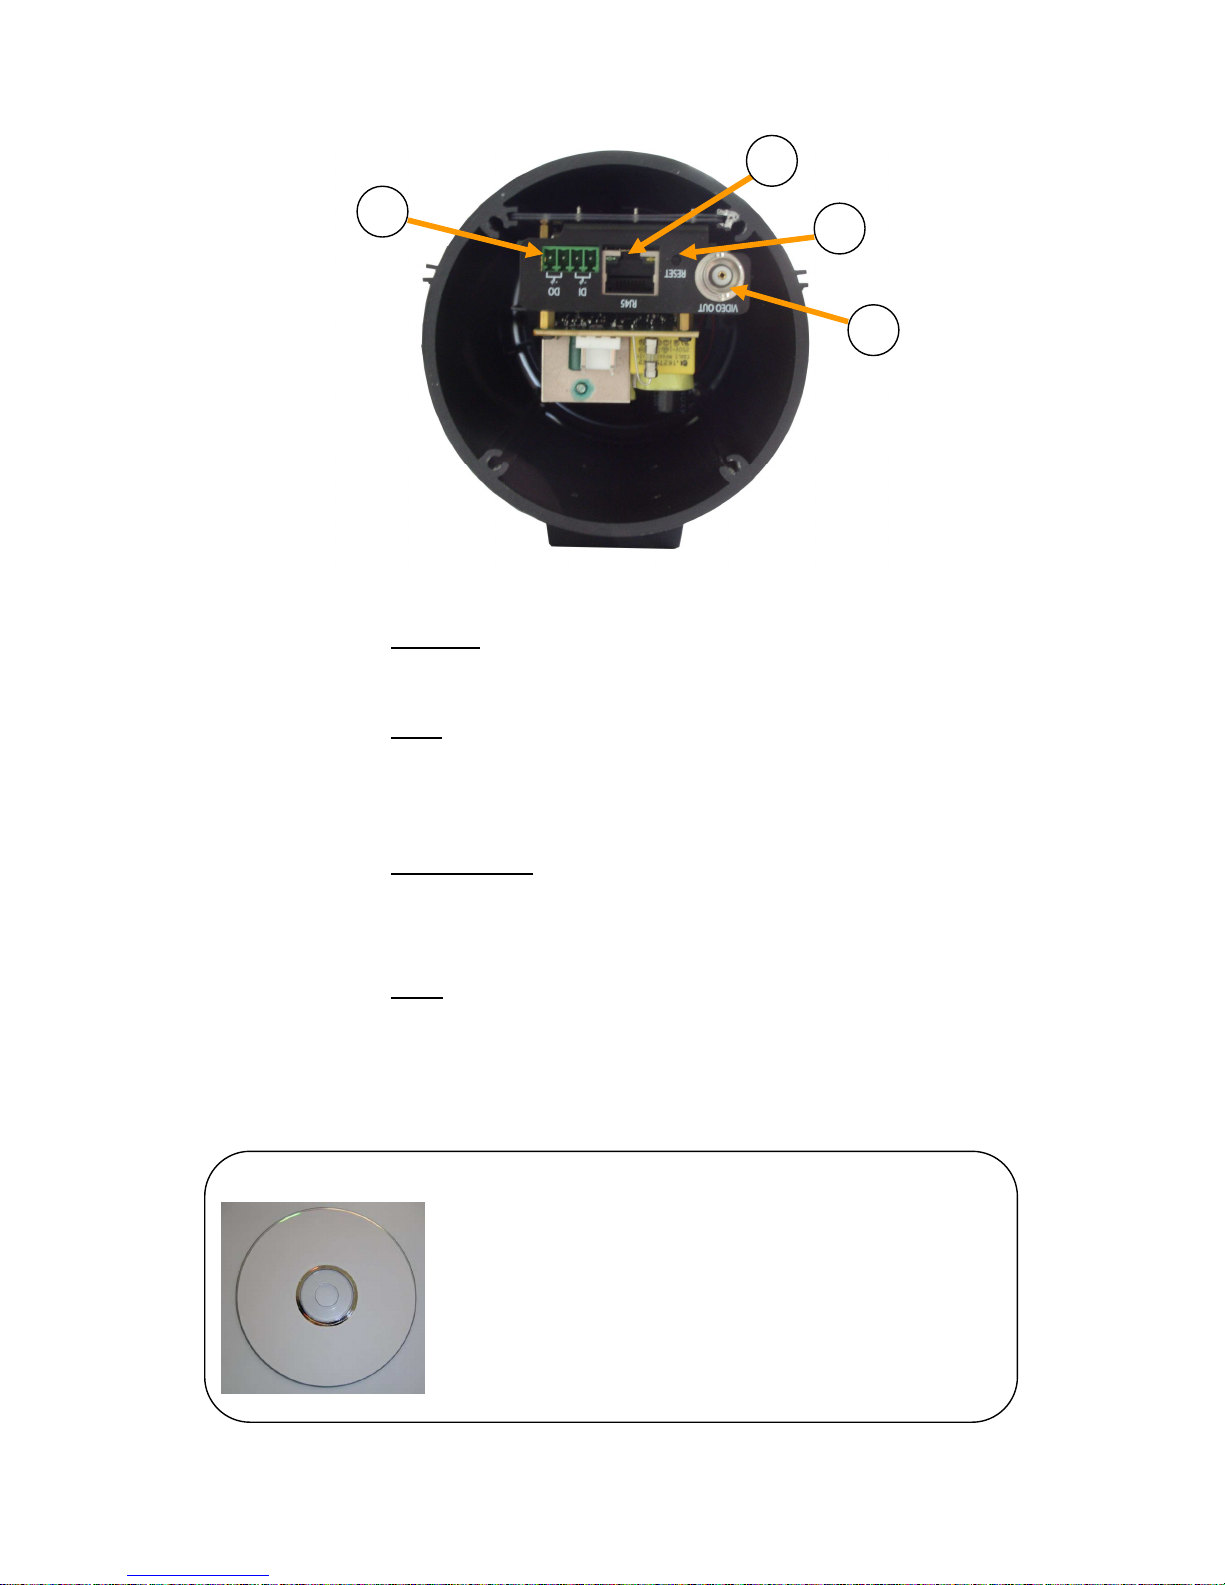
1. Video Out
Analogue BNC video out
2. Reset
Hardware reset button
(Press down the button for 3 sec for factory default setting)
3. LAN / WAN Port
10/100 Mbps auto sensing, fast Ethernet port for secure Local Network, or
WAN for FTTH or xDSL connectivity.
4. DI/DO
The IP Camera supports one digital input and one digital output.
DO: Logic Level 0: 0~0.5V; Logic Level 1: 2.8~3.3V
You will need to disassemble the camera before you plug in the device.
Eyeview IP Scan and NVR Software
Eyeview IP scan is a free Windows application discovers and
displays Eyeview devices on your network. The application can also
be used to manually set a static IP address. Eyeview NVR software
is also a free Windows application can display and record video for
users. Eyeview IP scan and Eyeview NVR software are available on
the CD supplied with the package.
4
3
2
1
 Loading...