

Eye Lighting HOF103, HOF104 Installation & Maintenance

Installation & Maintenance
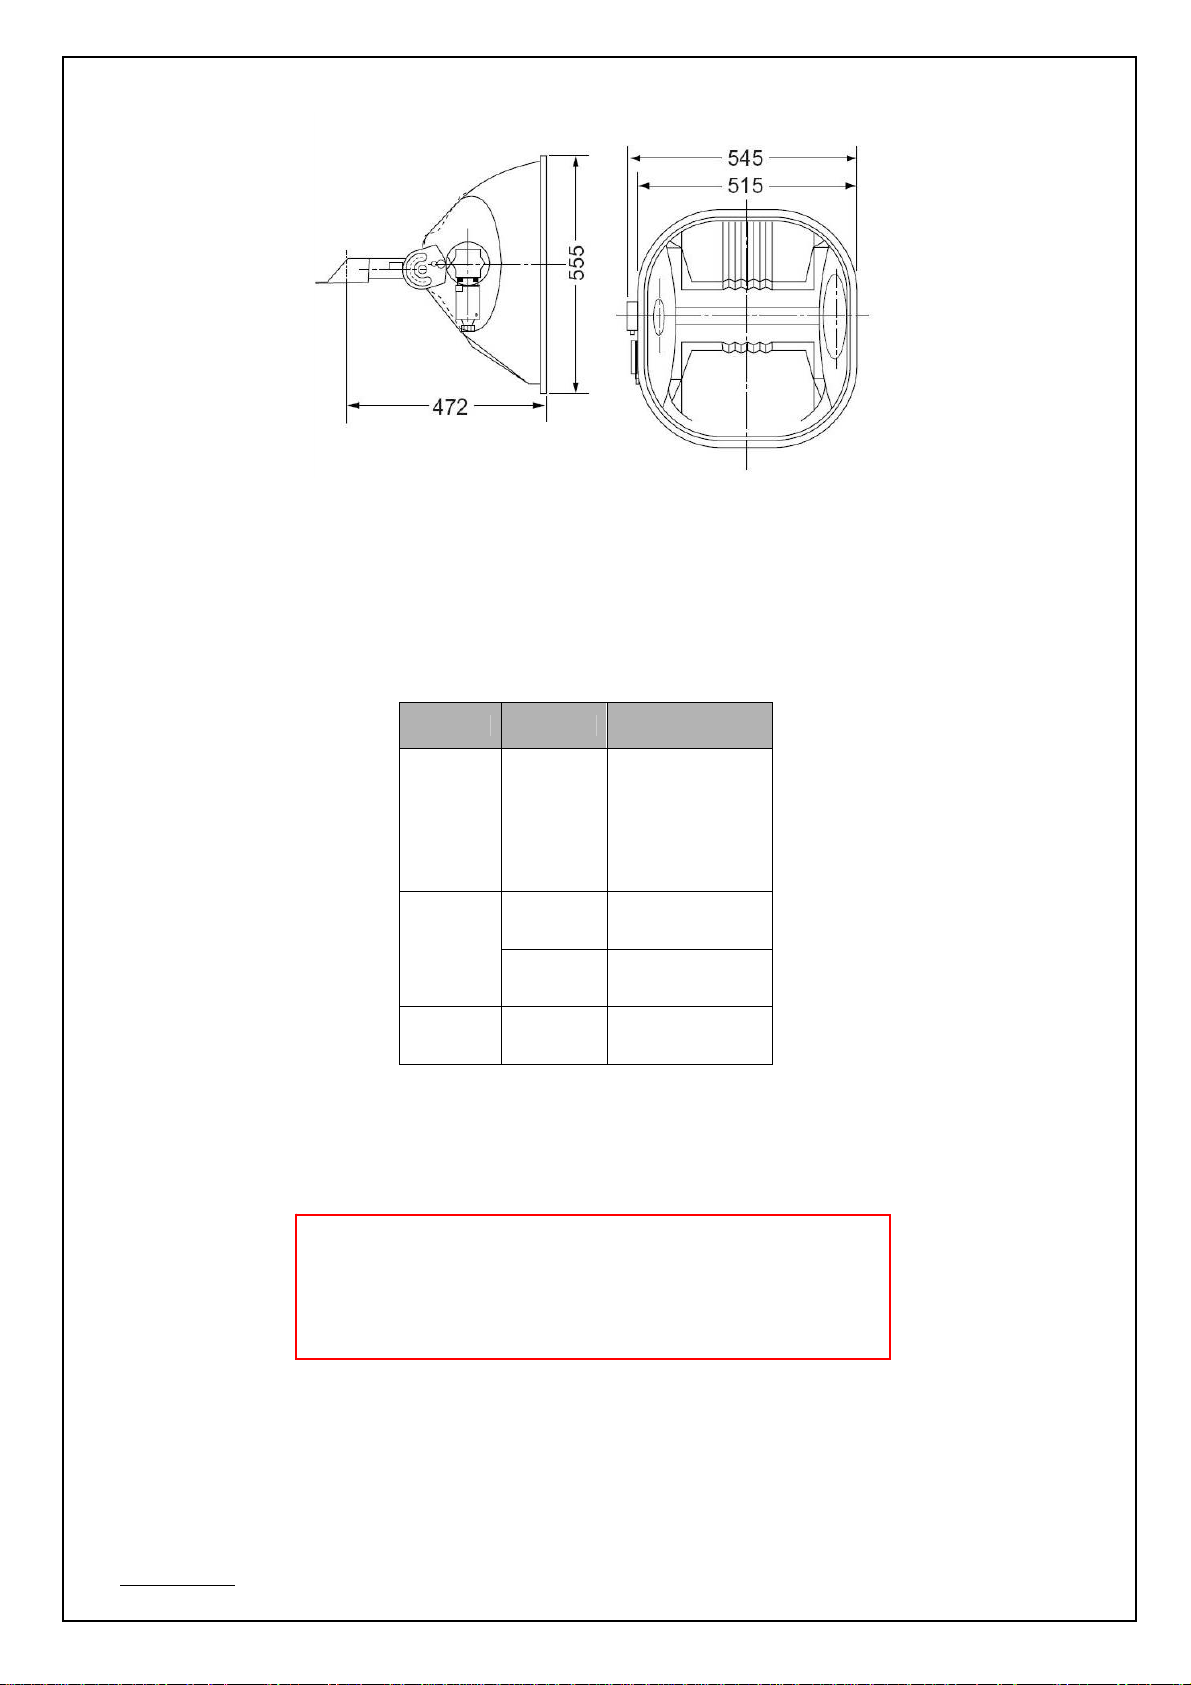
HOF103 / HOF104
CLASS I, IP65
Installation
The Eye Lighting HOF103 and HOF104 are floodlights for
indoor and/or outdoor (permanent) use, designed to be
operated in conjunction with remote control gear appropriate
for the lamp type and wattage in use.
The floodlight is designed to be securely mounted on a suitably
solid horizontal surface using 2x M16 bolts.
Lamp access is by the access cover opposite the lampholder,
secured by four wing screws.
Screw the lamp in to its full extent, ensuring that it’s secure,
but not over tightened.
Ensuring the gasket and joining surfaces are clean, replace
the access cover and tighten the wing screws evenly.
Incoming supply cables from the control gear are terminated in
the termination box via the 20mm threaded entry.
To maintain the integrity of the enclosure’s protection against
dust and moisture ingress, cable glands or conduit fittings
rated at least IP65 must be used.
Check that the cable glands are tightened correctly.
Floodlights must be installed within the maximum
recommended distance to the control gear, as applicable to
the type used.
These instructions should be retained by the luminaire owner
for reference, and made available as necessary, to ensure
future maintenance is carried out correctly.
Aiming
Adjust the horizontal aiming of the floodlight by loosening the
anchor and swivel screws (not supplied) fixing the base to the
mounting surface. Using the markings on the base plate as a
guide, adjust to the required angle and tighten the screws.
Adjust the tilt by loosening the four screws securing the
enclosure to the mounting bracket. Using the markings on the
pivot plate, adjust the floodlight to the required tilt angle and
tighten the screws.
General Operation and Maintenance
Failed lamps are to be replaced promptly, or the circuit
isolated, to avoid possible control gear damage. Continual
operation on supply voltage above that nominated on the
control gear will reduce expected lamp and component life.
Clean excessive build up of foreign material from outer
surfaces of the body. Clean the lens as required with warm
water and mild detergent.
Screws requiring loosening during future service and lamp
replacement should be greased for ease of maintenance. Use
silicone base grease only, as oil base grease may damage
some components.
Luminaires with damaged or cracked glass shall be removed
from service immediately.
Continuously operated lamps should be turned off at least
once a week for 1 hour.
Lamp Replacement
The luminaire is to be wiped clean of all dust and debris prior
to disassembly.
Access the lamp by loosening the four wing screws securing
the access cover opposite the lampholder.
Replace the lamp only with a type and wattage suitable for the
control gear in use. Screw the lamp in to its full extent,
ensuring that it’s secure, but not over tightened.
Ensure gasket and joining surfaces are clean, refit the lamp
access cover and evenly tighten the wing screws.
EL-IM002.00 Page 1 of 2
HOF103 / HOF104
Max weight = 8.8 kg
Projected Area = 0.28 m
2
LAMP TABLE
Type Wattage Lamp
M1000LE/BUH
MF1000LE/BUH
Metal
Halide
High
1000W
940W
Pressure
Sodium
1000W
Mercury 1000W HF1000PD
M1000B X/U
MF1000B X/U
MT1000B-BH-N
MT1000A-BH/67
NH940LX
NH940FLX
NH1000
NH1000F
For further enquiries, please contact:
Eye Lighting
15 Industrial Ave, Wacol QLD Australia 4076
Tel: (617) 3335 3588 Fax: (617) 3335 3533
Email: info@eli.com.au
EL-IM002.00 Page 2 of 2
Before carrying out any servicing on this luminaire, ensure
that the mains supply is fully isolated. High voltages,
greater than mains voltage, can be present during
Important – Safety
 Loading...