

Page 1

Mark II Assembly Manual Ver1.6
If you have questions that are not addressed in this manual, please email [email protected]
EyeDirect and EyeLiner are registered trademarks. USPat 6,044,226
Page 2
Introduction
Thank you for purchasing an EyeDirect® Focusing Device. The EyeDirect is extremely easy to use and as Philip Bloom, DP, Director/Filmmaker says, will become an
"essential piece of kit for direct-to-camera interviews". Visit eyedirect.tv on the web for videos of the amazing results
.
Package Check List
EyeDirect Mark II
adjustable, sliding 18 inch (45cm) base plate, consisting of base slider
with both 3/8x16 and 1/4x20 fastener holes and 18” top plate with slotted
holes for camera balance adjustment
4- ¼x20x ½”knobs to secure bottom sled to top plate
EyeDirect Box; swing out wing to accept Edison (conventional) mirror
assembly, optical quality beam splitter
Edison Mirror assembly; ABS plastic frame hardware; ¼x20 (standard)
Fastener knob
Rubber donut; to mask light from between lens and EyeDirect lens port
opening.
iPad® 2 holder with hook and loop fastening strips; to convert the device
into a teleprompter/autocue.
Optional 2.25 in. (57mm) riser; to lift Canon C300, DSLRs and other low
lens mount profiles to center of EyeDirect lens port opening
Optional SKB iSeries 2217-10 Waterproof case with custom cut foam
insert
“Essential piece
of kit for direct-
to-camera
interviews"
Philip Bloom, DP,
Director/Filmmaker
Getting Started with the EyeDirect Mark II
After the initial fitting of your camera to the EyeDirect, the setup time will be greatly reduced. This unit has
many adjustment options and this manual will assume a few common elements to help with this initial
fitting. We will assume you are setting up a professional camera, with a separate interviewer and not a
one-person-crew.
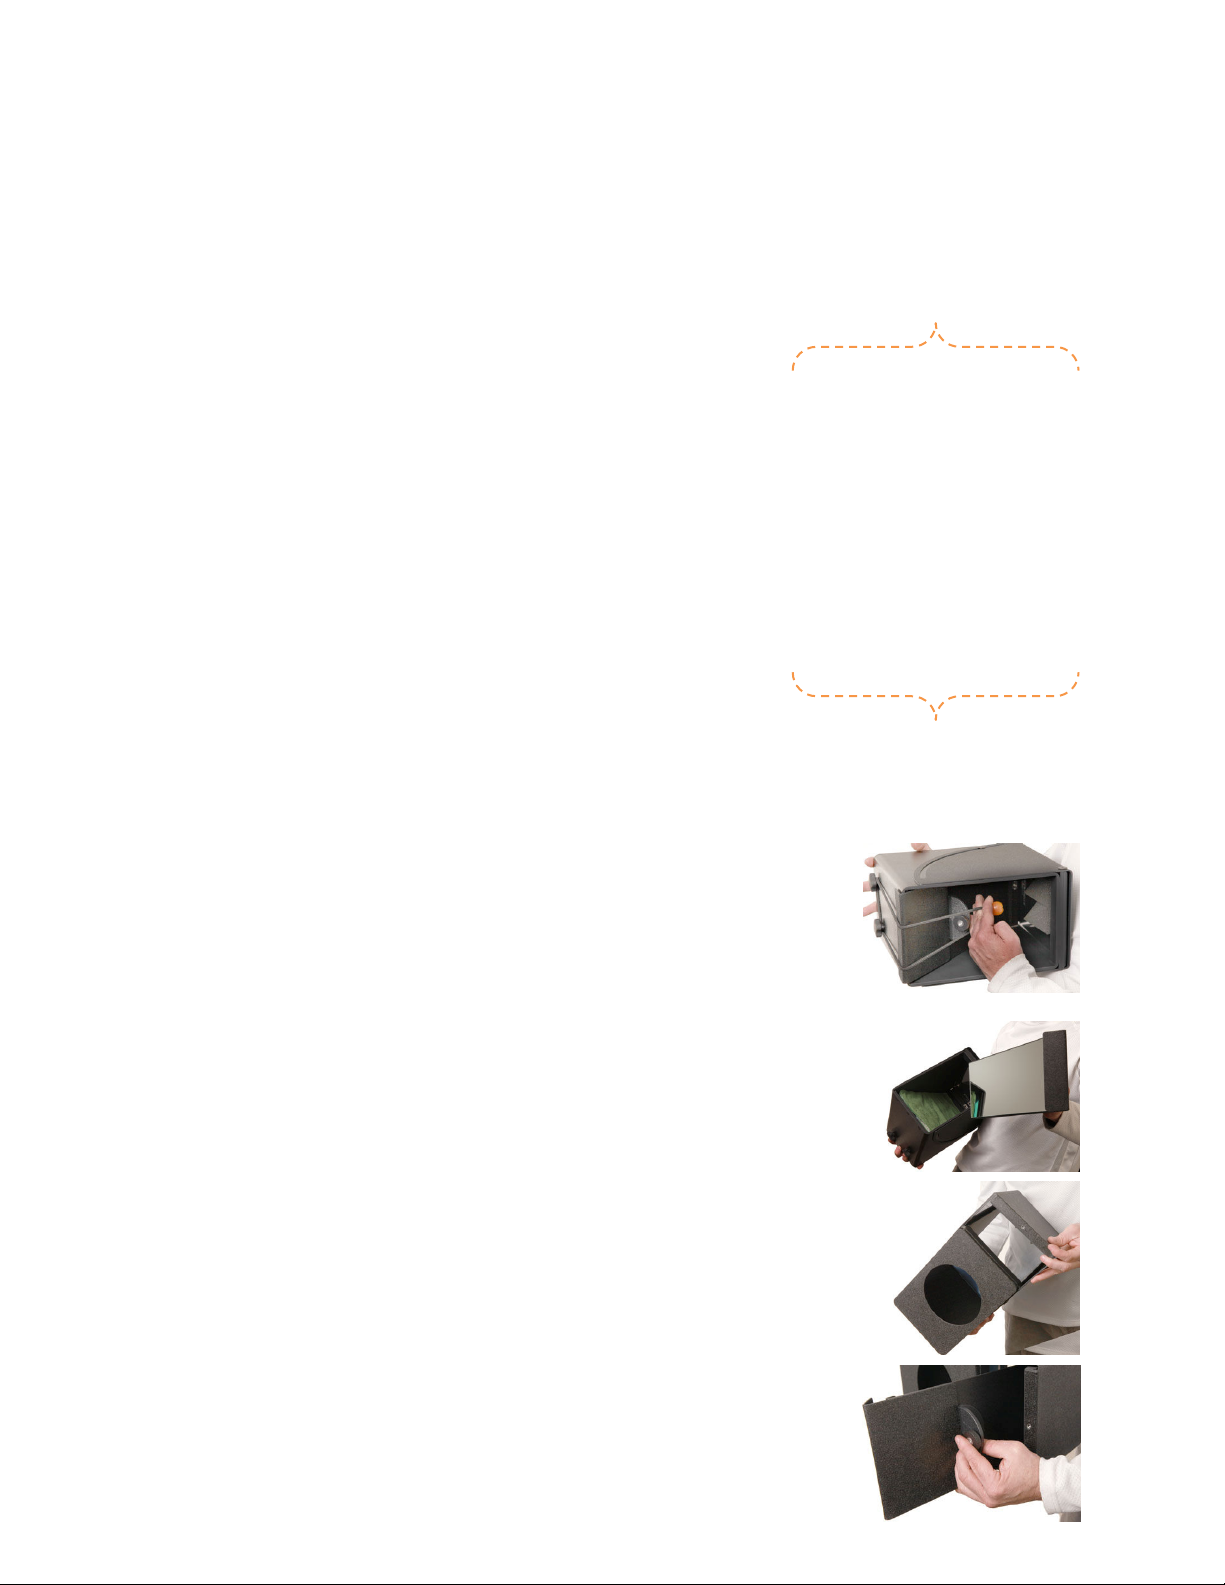
1) Release the elastic cord that holds the (Edison) mirror assembly
tightly against the beam splitter.
a. 50/50 Beam splitter measurement is 349mm x 157mm x 3mm
b. Both glass surfaces should be cleaned and handled as you would a nice camera filter
2) Use elastic cord as pictured, to secure the Edison mirror into place
during travel.
a. When packing for travel it may be necessary to remove beam splitter to avoid breakage.
3)
Confirm mirrors were not damaged in transit. (WARNING: IF GLASS IS
BROKEN, BE EXTREMELY CAREFUL OF VBROKEN GLASS DANGER)
4) Swing open the WING. The WING will hold the Edison mirror assembly
in place and allow for vertical and horizontal adjustment for the
interviewer's site line and comfort.
Page 3
5) EDISON mirror slides into the open WING and fastens in place with
a 1/4x20 tie down screw.
a.
A foam block is a light weight, vibration suppression device.
6) Tighten enough to hold in place, but resist tightening too much.
Set unit to the side.
a.
By design, the tie down screw is not to be overly torqued. It is tempting to move
the Edison mirror by hand without loosening the fastener. This will often results in a broken mirror.
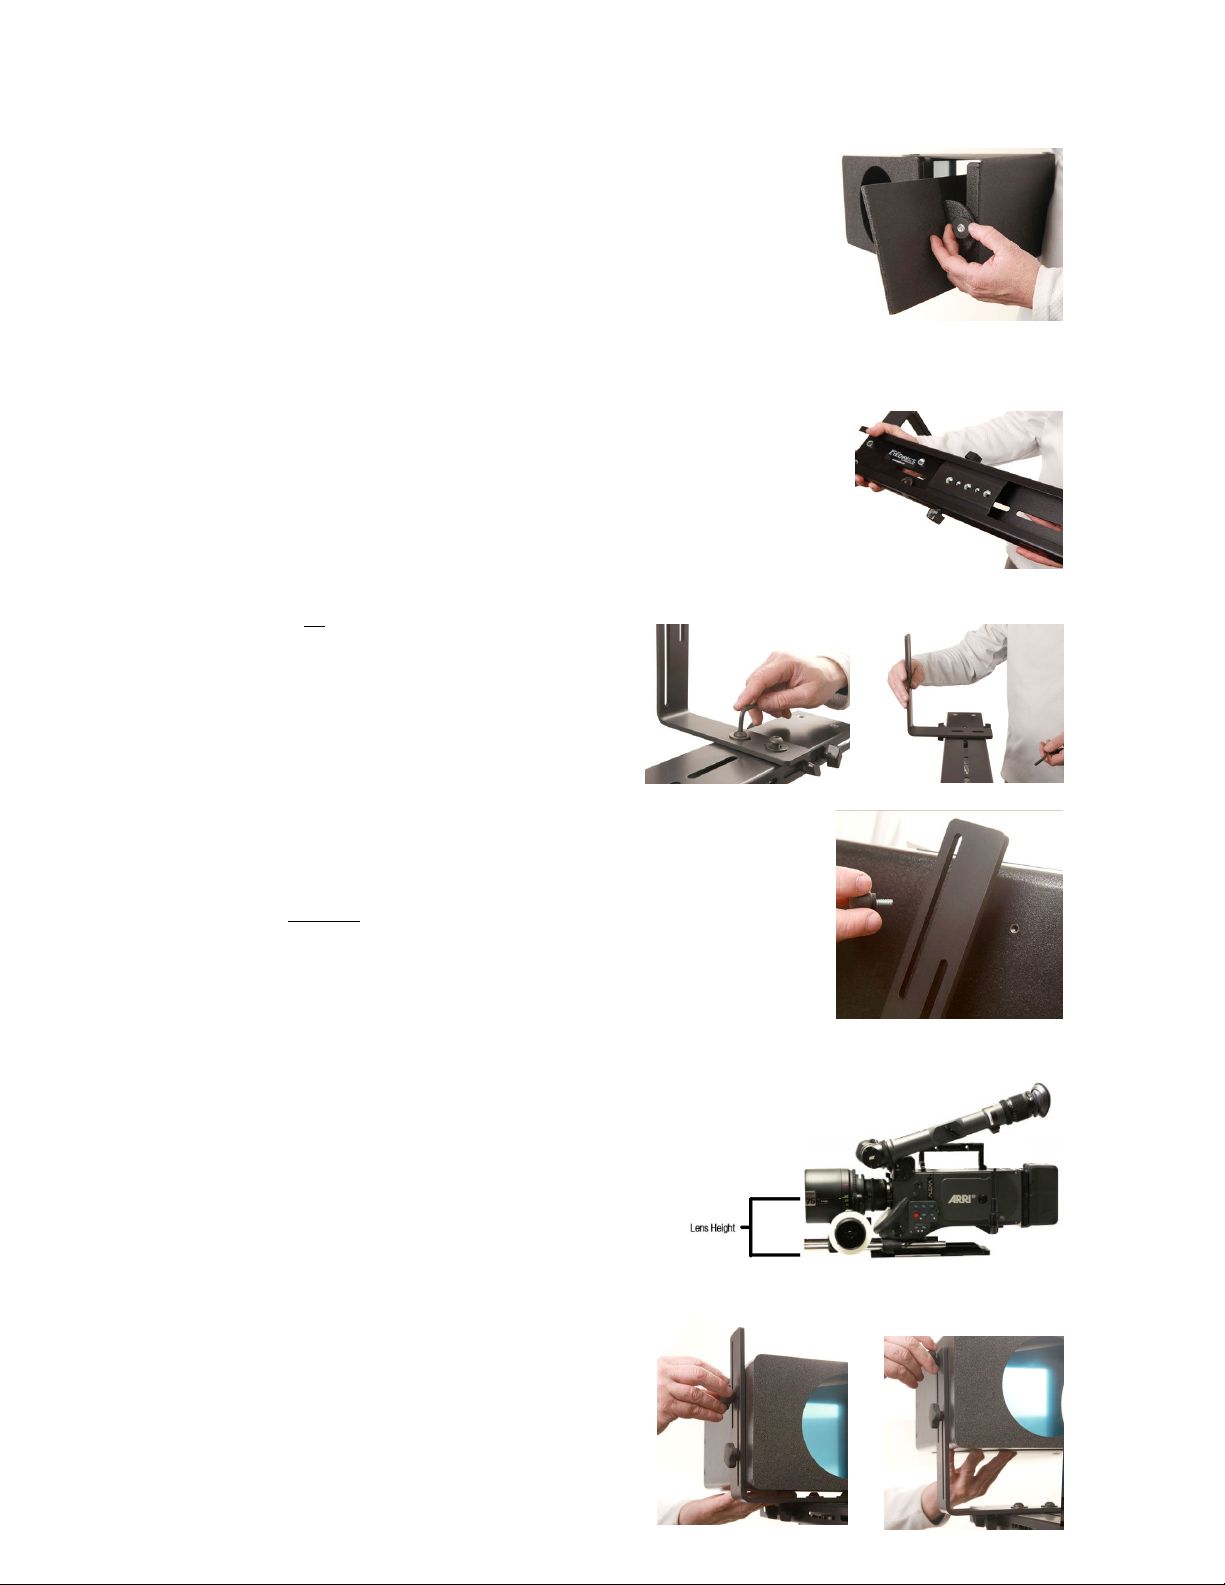
7) Determine initial desired adjustment of the base plate bottom sled.
The base plate has multiple 3- 3/8x16 and 2- 1/4x20 tie down holes.
Later in this manual you will see how to balance the unit and make a base plate position
selection before the entire unit it on top of the tripod. For all cameras, it is recommended to
secure the base plate with more than one tie down bolts.
8)
Orient the L Bracket to the adjustable base plate
camera person and an interviewer. The interviewer would be on the
right side as camera faces the subject.
a. Use the included 7/32 (standard) Hex/Allen Key wrench to
secure the L Bracket tie down bolts to the adjustable base
place.
b. There is a ½ inch (12mm) adjustment to each side of
c. Two pairs of 3/8x16 inch fastener holes are provided to
center.
allow the EyeDirect to be moved closer to the camera or
further away to accommodate longer lenses.
(as illustrated)
to the left side
9) Attach the mirror box with 1/2 inch 1/4x20 tie down knobs
(included).
a. IMPORTANT: Do not use a fastener that is longer than the enclosed 1/2 inch length... as the
10)
For best results, the lens height needs to be at least
3.5 inches (9 centimeters) from the base of the camera
to the center of the lens.
a. A sliding base plate, quick release or optional EyeDirect riser may
b. C300, DSLRs and prosumer cameras all need to be lifted to optical
c. (This height is required so the center of the lens will be in the
d. The camera’s lens center may up to 7 inches (177mm) high, as the
tip of the fastener may push through the black matte that protects the camera from
recording a reflection of that fastener
be needed to ‘lift’ the camera to this minimum height.
center.
center of the EyeDirect lens port hole.)
EyeDirect has an additional 4.5 in (115mm) of vertical adjustment
to accommodate.
. This configuration accommodates both a
Page 4
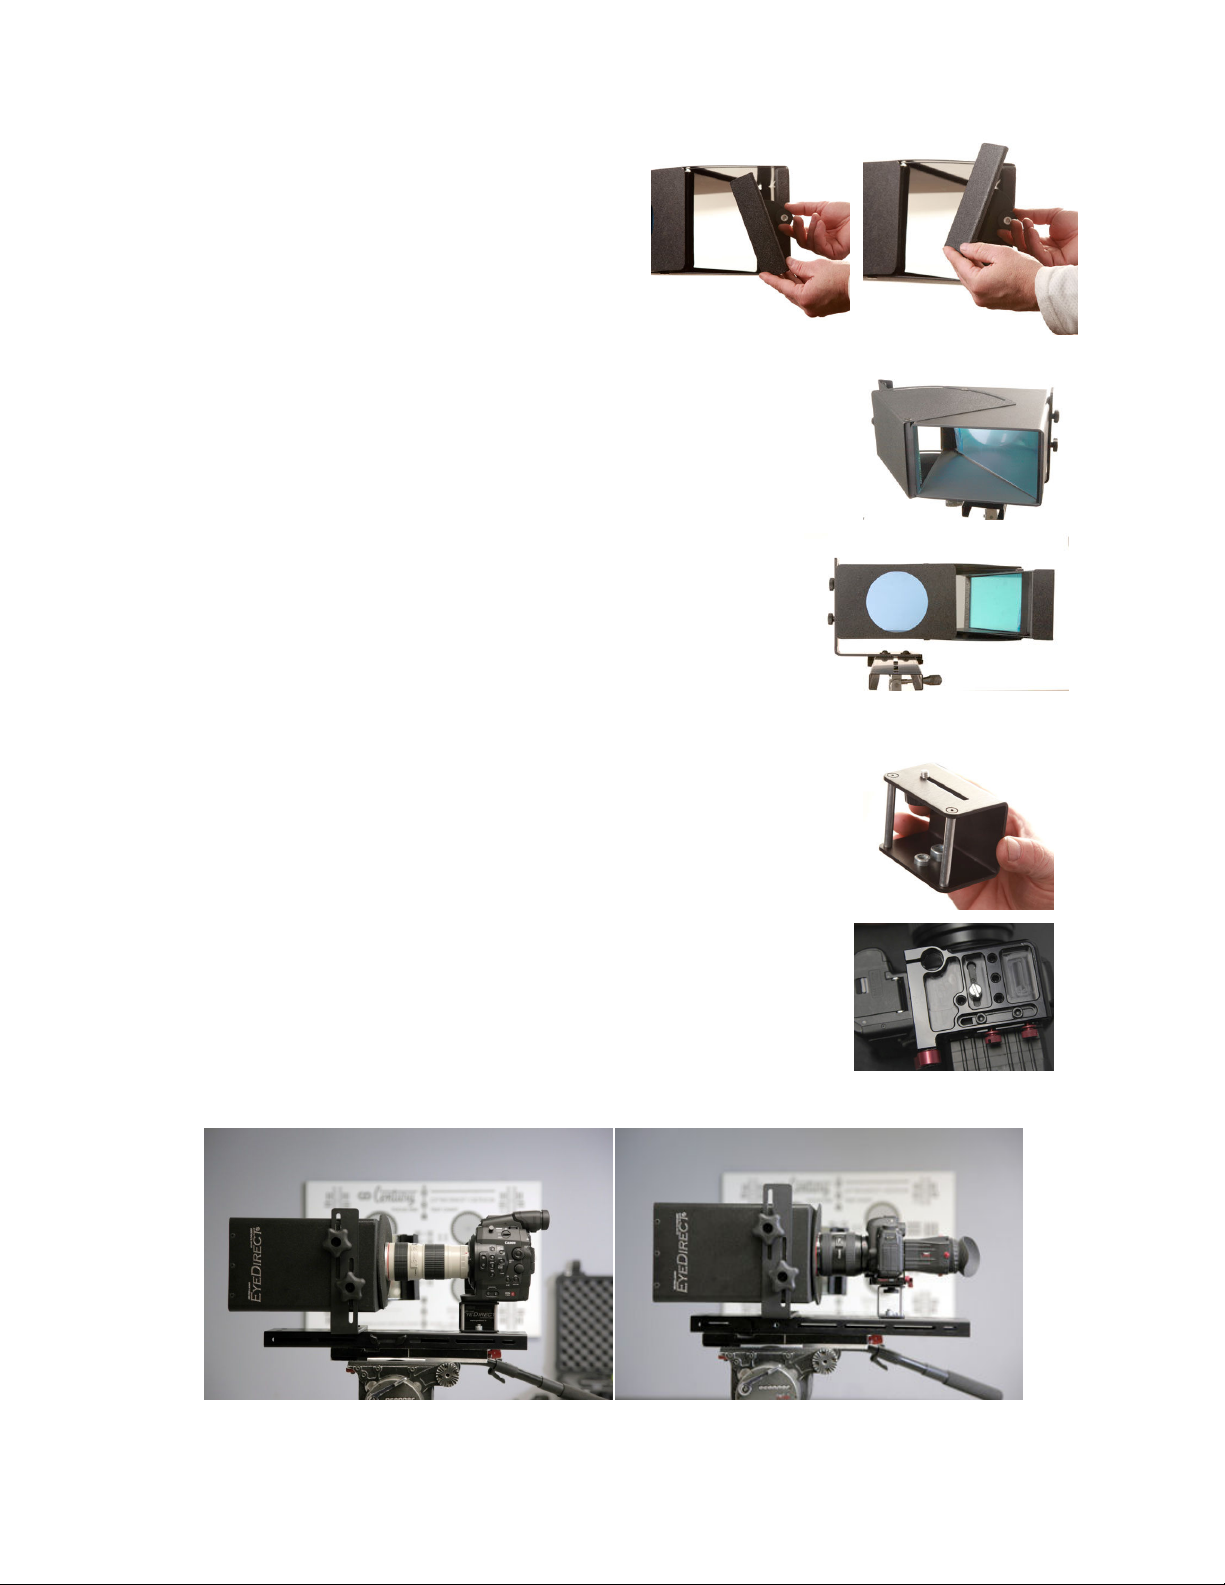
11) The Edison Mirror may now be adjusted up or
down to assist with eyeline and interviewer
comfort.
12) The device comes with a protective plastic film on the beam splitter
that must be removed before use.
13) Observe how the EDISON mirror may be moved up or down...
and the WING adjusted left and right... to optimize the viewing
area to the subject.
14) When using a small camera, like a C300, DSLR or prosumer video
camera with the 18 inch base plate, the optional 2.25 inch RISER will
assist in putting the camera lens at optical center of the EyeDirect.
a.
Additionally, there is left to right adjustment in the RISER to center DSLRs that have
camera tie down holes that are off-optical-center.
b.
Third party devices can also put the camera tie down hole off center and the riser
will compensate for that offset.
C300 with riser Canon Mark II with riser
Page 5
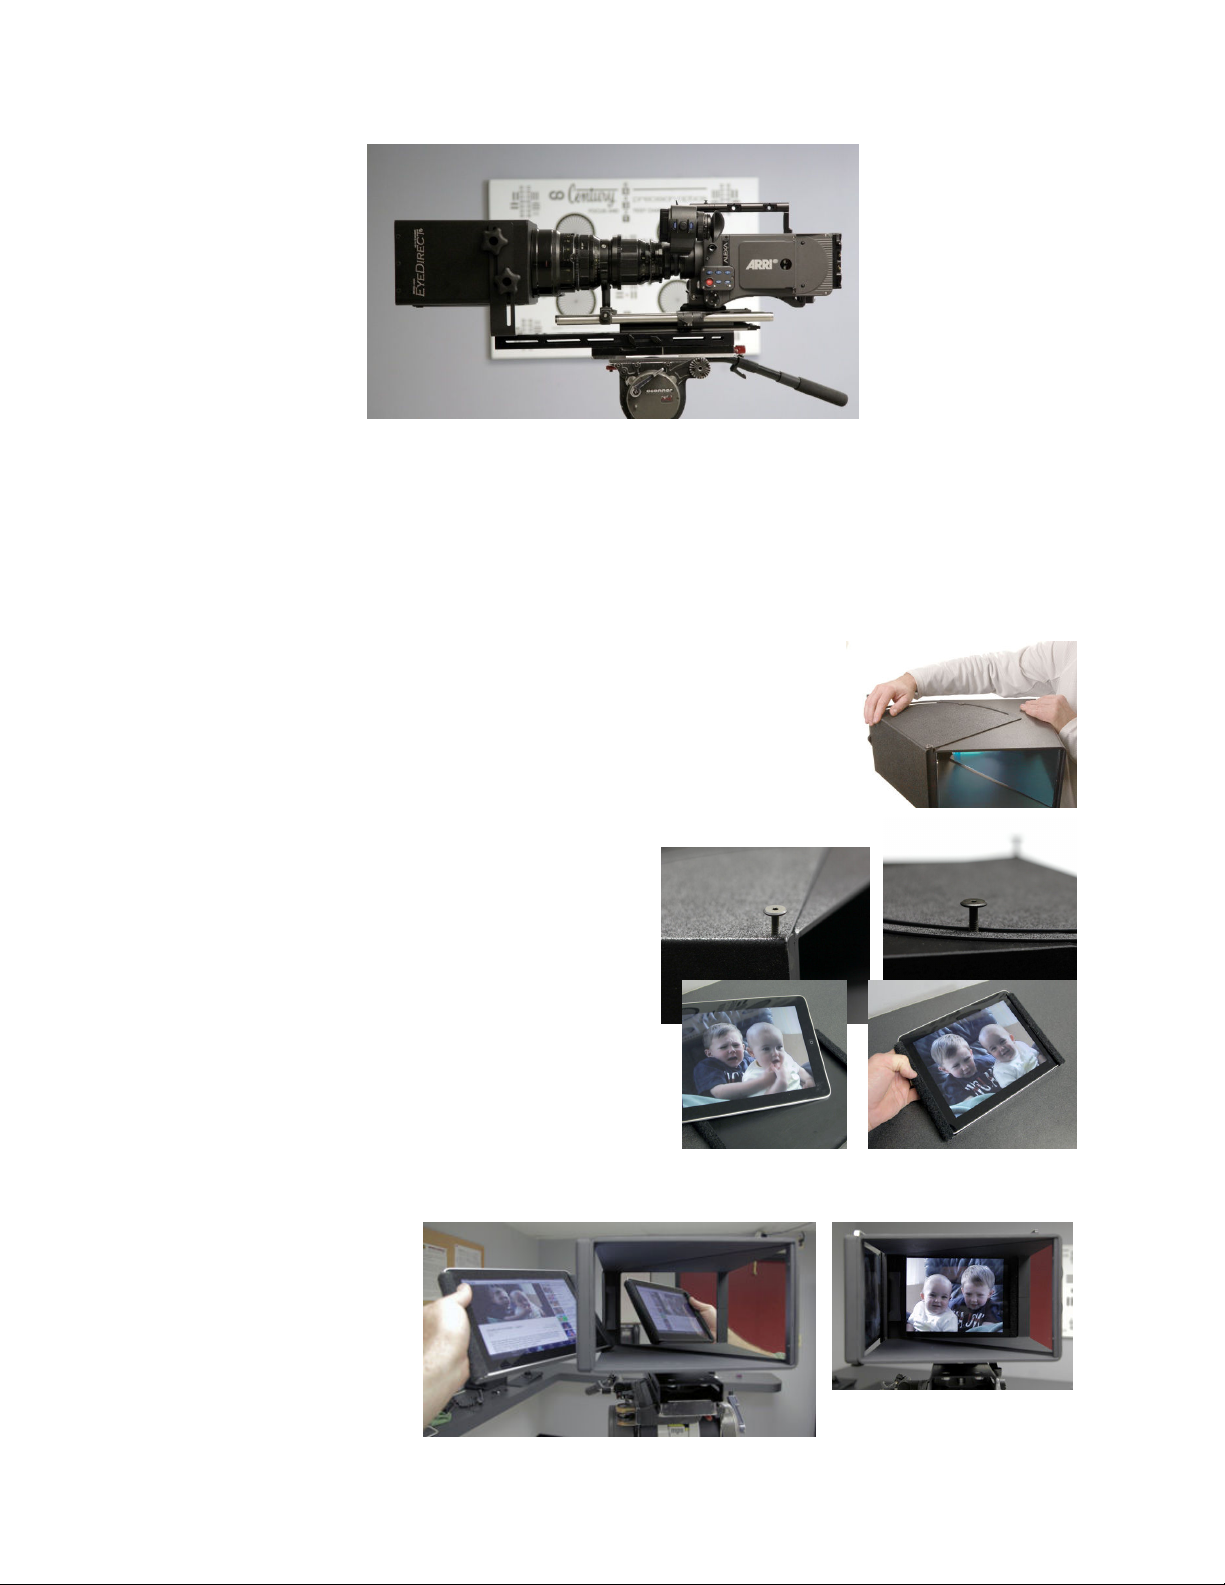
Arri Alexa with 18-100 Cooke Cine Zoom on Arri sliding base plate
Note the L Bracket has been moved to the furthest position on the EyeDirect adjustable base plate to a ccommodate the longer lens footprint.
iPad® 2 Teleprompter/Autocue Accessory- (Mark II only)
With the addition of an included ABS plastic holder, the EyeDirect Mark II user may attach their personal iPad 2 and create a
Teleprompter/Autocue. (Third party app software is required and not included.)
1) By removing the WING from the Mark II, this reveals hook and loop
fastener strips to which the accessory may be attached.
2) Use included 5/32" hex/allen key wrench tool
to remove 4- 1/4x20 fasteners on top and
bottom of wing
3) Attach iPad accessory securely.
a.
IMPORTANT: The hook and loop fastening system
may be undermined by dirt or debris that may be present
in a shipping case. Please be confident your iPad is
secure and do not install if you are not sure the iPad will
remain secure during operation and camera movement.
4) Once secure... and the WING is off of the Mark
II... then you may attach your iPad to the EyeDirect.
5) Attach iPad
accessory securely.
Page 6
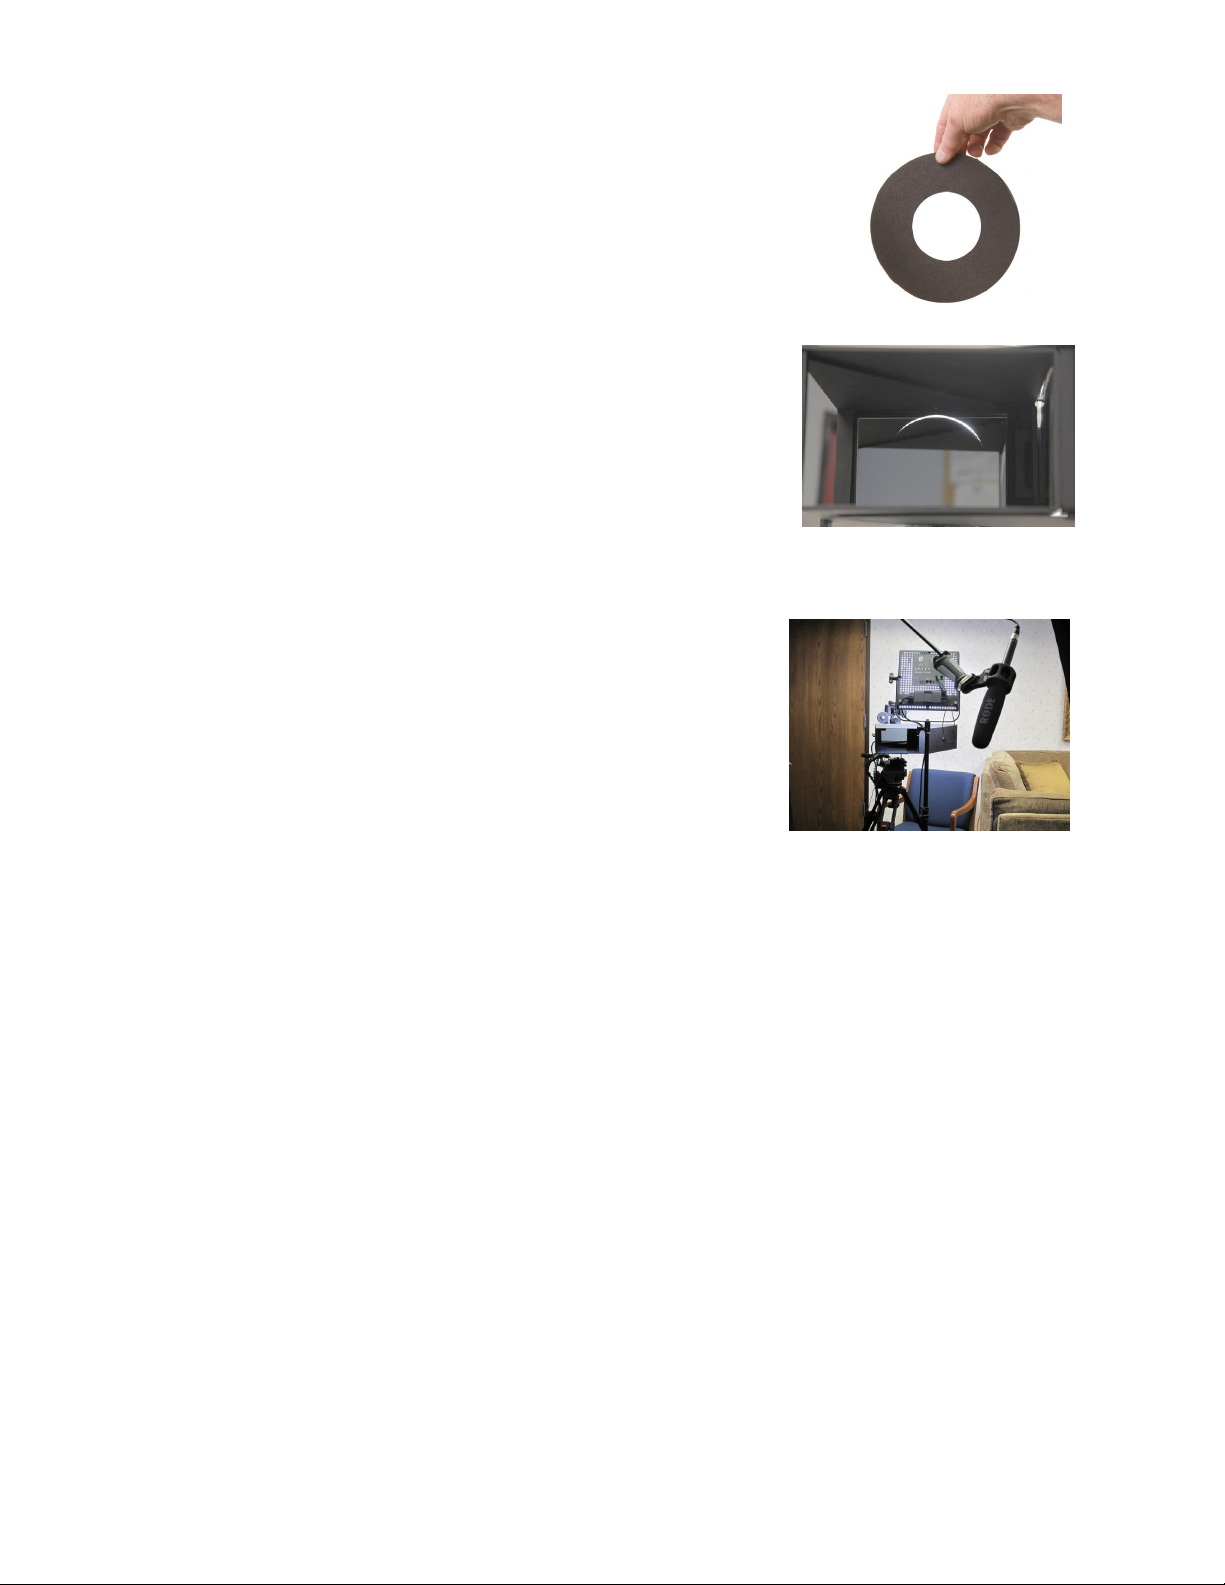
Rubber Donut
The RUBBER DONUT is used to put over the barrel of the camera lens.... and 'matte' the light that is seen
by the subject between the barrel of the taking lens and the EyeDirect lens port. Just like with an
Autocue/teleprompter, you want to provide a ‘black field’ behind the beam splitter for your subject to
look into.
1) Here you can see the light 'leaking' around the lens barrel which
may be distracting to the subject.
a.
Unlike the use of a donut in a matte box system, the fear is not light from behind
the camera hitting the ‘filter’ as much as it is a courtesy to the subject to have an
unobstructed ‘reflection’ of the interviewer.
Interviewer Light
It is important to provide a bright ambient environment or a light for the interviewer. Subject
will need the supplemental lighting to help ‘cut through’ the lighting that is on them.
 Loading...