

Operating Manual
iCAM500

iCAM500 Operating Manual Issue 9
Intentionally Left Blank
Document Number
313295
(See Last Page for Revision Details)
©2006 Extronics Limited. This document is Copyright Extronics limited.
Extronics reserve the right to change this manual and its contents without notice, the latest
version applies.
2

Contents
iCAM500 Operating Manual Issue 9
Contents..........................................................................................3
1.1 Functional Description..................................................................................................... 4
1.2 Delivered Components.................................................................................................... 4
2 Safety Information and Notes...................................................5
2.1 Storage of this Manual..................................................................................................... 5
2.2 List of Notes .................................................................................................................... 5
3 Operation & User Instructions .................................................7
3.1 Quick Start Information.................................................................................................... 7
3.2 How to install battery....................................................................................................... 8
3.3 Key Definition.................................................................................................................. 8
3.4 How to use iCAM500 as a Digital Camera – DSC............................................................ 9
3.5 How to use iCAM500 as Macro / Normal Lens...............................................................10
3.6 How to use iCAM500 with your PC to retrieve pictures...................................................10
3.7 Driver Installation (For Windows 98/98SE).....................................................................11
3.8 Removing iCAM500 From Your PC................................................................................13
4 Liability.....................................................................................15
5 Technical Data .........................................................................16
6 Certification..............................................................................17
7 EC Declaration of Conformity ................................................18
7 FAQ – Frequently Asked Questions ........................................20
8 Hints and Tips............................................................................23
8.1 Light Levels....................................................................................................................23
8.2 Holding the Camera Still.................................................................................................23
9 Manual Revision ........................................................................24
To get the best out of your iCAM500 please refer to Section 8
Hints and Tips of the Manual
3

iCAM500 Operating Manual Issue 9
1 Introduction
This manual contains data concerning explosion protection, operational data and
instructions for operating with a PC.
1.1 Functional Description
The iCAM500 is an intrinsically safe USB camera; the iCAM500 is suitable for
taking photos in hazardous areas (Ex areas, potentially explosive
atmospheres). The photos can then be viewed / edited on a PC located in a
safe area via the USB port. Viewing the photos requires no special software
because the camera acts like an external hard disk drive.
Further advantages:
• small size, light weight
• two alkaline cell supply size AAA
• close-up switch (for 15 - 30 cm distance)
• optical indicators for operation for noisy industrial environments
• 256 MB memory, sufficient for more than 400 photos (according to the
degree of compression)
• data retention for 10 years without supply
• USB memory stick for all kinds of data
• Sensitivity 10Lx (Images can be taken at lower light levels but quality
may be affected as the light levels diminish)
Special notes concerning the explosion protection:
• In a hazardous area the leather pouch for USB and battery cover must
be used.
• Do not open the USB or battery cover in hazardous areas.
• Do not take the hand loop, the USB lead or other accessories into
explosive areas.
• Ambient temperature -20°C ... +50°C
• Pay attention to the technical data and the safety advice!
1.2 Delivered Components
Delivery includes:
• USB photo camera iCAM 500
• 2 alkaline battery cells size AAA
• USB lead (not allowed in a hazardous area!)
• Manual for the Ex version
• Leather bag for battery and USB cover
• Carrier bag with belt clip and hand loop (hand loop not allowed in a
hazardous area!)
4

iCAM500 Operating Manual Issue 9
2 Safety Information and Notes
2.1 Storage of this Manual
Keep this user manual safe and in the vicinity of the iCAM500. All persons who have to work
on or with the unit should be advised on where the manual is stored.
2.2 List of Notes
In hazardous areas the battery and the USB cover must always be protected against
opening by the leather bag.
The notes supplied in this chapter provide information on the following.
• Danger / Warning.
o Possible hazard to life or health.
• Caution
o Possible damage to property.
• Important
o Possible damage to equipment.
• Information
o Notes on the optimum use of the device
Warning In a hazardous area the leather bag for USB and battery cover must be
used.
Warning • Do not take the hand loop, the USB lead or other accessories into
explosive areas.
Warning:- Do not open the battery or USB cover in hazardous areas.
Warning:- In hazardous areas any access to the battery or the USB plug is
prohibited.
Warning :- Operation with rechargeable batteries prohibited, even in safe areas.
Caution:- After exchanging of the battery, the camera function must be verified
before entering the hazardous area, e. g. by checking the flashing of the lamps after
switching on.
Caution:- Hand loop and USB lead are prohibited to be taken into hazardous areas.
5

iCAM500 Operating Manual Issue 9
Important:- Read the manual completely and carefully before operation. Only the
latest documentation is valid.
Important:- Installation, maintenance and cleaning of the units must only be
performed by persons trained and authorized for this purpose, insofar as they are
familiar with the units.
Important:- If it can be assumed that safe operation is no longer possible, switch off
the unit and secure it against being used again.
Important:- It is prohibited for the operator to open the units in a way that is not
described in this manual. This may only be done by specifically authorized personnel
of Extronics Ltd.
Important:- Modifications and conversions to the units are not permissible and will
cause the Ex protection and the guarantee to become void.
Extronics Ltd is not liable for any consequential damage.
Important:- The technical data specified for hazardous areas comply with the values
certified in the European EEx approval. The user bears the sole responsibility of
examining the equipment with regard to its suitability for the intended application and
environmental conditions. Extronics Ltd accepts no liability for any lack of suitability.
Important:- For installation, maintenance and cleaning of the units, it is important to
observe the applicable standards and provisions concerned with explosion protection
(VEN 60079-14, EN 50014 - 50039) as well as the Accident Prevention Regulations
and codes of practice in your region.
Important:- Clean with a soft cloth or brush. There are small gaps and holes in the
case, so do not use a fluid cleansing agent. Do not clean in the hazardous areas
because of potential static charging of the cleaning tool
6

iCAM500 Operating Manual Issue 9
3 Operation & User Instructions
Please note the safety advice and the data for hazardous areas use!
3.1 Quick Start Information
To Turn the Camera on
Press the button on the back of the camera for 4 seconds. The Camera operation
starts with one flash of the red L.E.D and the blue L.E.D flashing continuously.
If the camera does not start after 5 seconds, retry the above operation.
If the camera still will not start exchange the batteries. Please note that this is not
permitted in hazardous areas.
Selecting the iCAM500 Lens
Choose between standard distance and close-up with the macro switch. Refer to
section 3.5 for more detailed information.
Taking a Photo
Briefly pressing the button on the back of the unit again will take a photo. The blue
L.E.D on the side of the iCAM500 will light, and will stay lit for a few seconds during
this time the photo will be taken, the time is dependant on the illumination and motion
of the subject. The blue L.E.D stays on until the photo taking process is completed
and the picture is compressed and saved to the cameras memory.
When the camera is ready to take another picture the blue L.E.D will flash.
The camera switches off automatically after 90 seconds if the button is not pressed.
ICAM500 is a Digital Camera and a USB storage device.
When plugging iCAM500 into your computer, it can be used as standalone and
driverless USB storage device, with an available capacity of 256MB. It can support
different operating system including Windows, Apple Mac.
Prolonging the battery life
Please remove the battery, if you are not going to use the camera for a long time
period of time.
The Battery should last up to 60 days in normal conditions
7
iCAM500 Operating Manual Issue 9
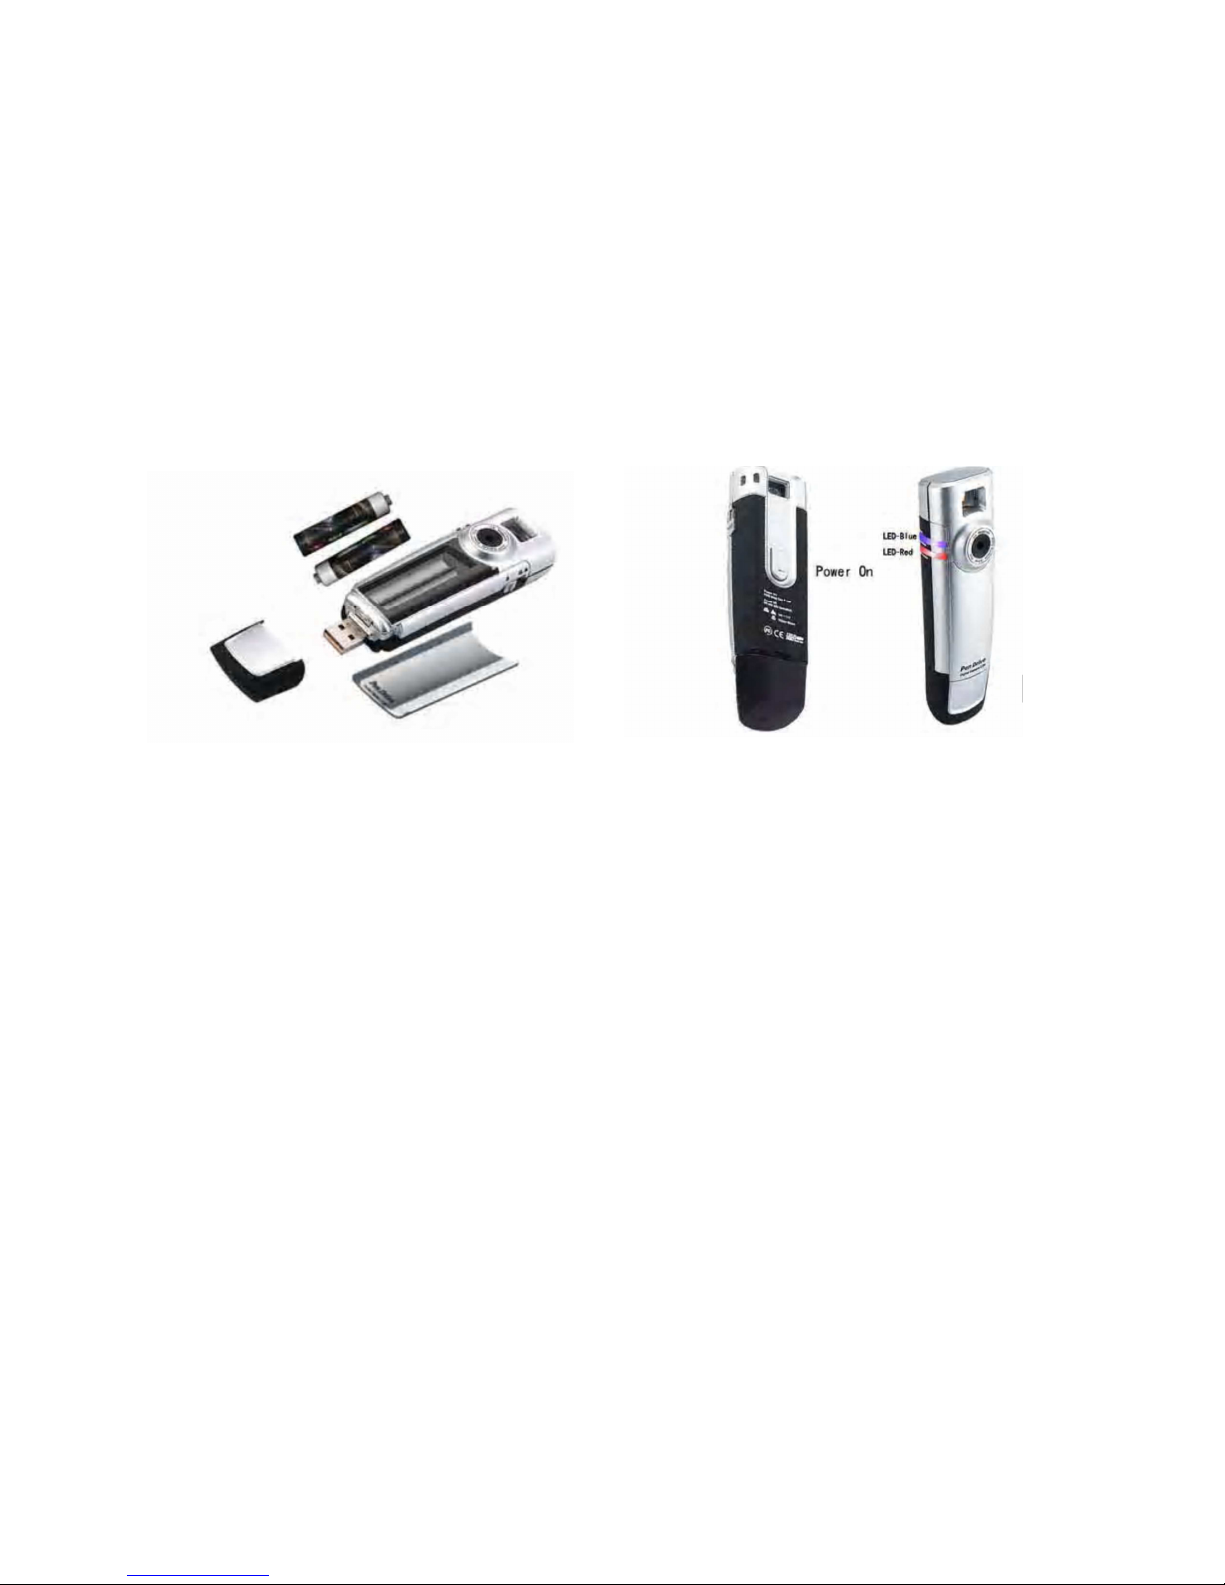
3.2 How to install battery
1. Remove the USB cover
2. Remove the battery cover by pressing down and sliding out.
3. Insert the batteries making note of the correct polarity.
4. Replace the battery cover.
3.3 Key Definition
When the device is being used as an USB flash drive, the Snap (Picture taking)
function will not work.
• Power On: Hold Power/Snap key 3 sec and release will turn the power on.
• Power Off: The iCAM500 will turn power off. When 90 sec without operation
8

iCAM500 Operating Manual Issue 9
3.4 How to use iCAM500 as a Digital Camera – DSC
3.4.1 Turning the power on
1. Press and hold the button for 3 seconds to switch on the camera.
2. The Red and Blue LED indicators will then light for around 1 second
3. The Red LED will then go out and the Blue LED will then be flashing indicating
a ready status.
3.4.2 Taking a Photo
1. Observe the item you wish to take a picture of through the view finder.
2. Check the iCAM500 is in the ready status (Blue LED is flashing),
3. Press the button to take a photo, Blue LED will then light while the image is
stored to memory.
IMPORTANT! Do Not move the Camera away from the Subject until the Blue
LED Flashes Once More
Moving the camera before the Blue LED Flashes will reduce the
quality of the image
4. When, the Blue LED flashes this indicates the image is stored and the
iCAM500 is ready to take another picture.
5. If the camera fails to take a picture the Red and Blue LED will be on at the
same time, this indicates that
a. The Internal Flash memory is full
b. The Battery is very low
9

iCAM500 Operating Manual Issue 9
3.5 How to use iCAM500 as Macro / Normal Lens
1. Turn on the Macro switch when target object is close to the iCAM500.
2. Turn off the Macro switch when target is far away from the iCAM500 e.g.
landscapes.
3.6 How to use iCAM500 with your PC to retrieve pictures
• Ensure your PC supports USB devices.
• Connect the iCAM500 to your PC’s USB port directly.
• The device will operate on Microsoft Windows™ 98/98SE, 2000, XP, Me, or MAC
OS v9.x above.
• The pictures can be viewed from the folder \DCIM\100MEDIA folder on the
iCAM500.
10

iCAM500 Operating Manual Issue 9
3.7 Driver Installation (For Windows 98/98SE)
3.7.1 Windows 98/98SE Installation
(1)To install the windows 98/98SE driver download the zip file called “iCAM500driver”
from the Extronics website, this can be found under the link below
www.extronics.com/drivers/icam500driver.zip
Download and save the zipped file to your system, unzip the file to a folder
When you have unzipped the file to a folder on your system, browse the folder and
double click the SETUP.EXE file.
(2) Follow the on screen instruction and press ”next >” to continue.
3) The System will install all the necessary files onto your Windows operating system.
When the setup installation is complete, click “OK” to restart the computer
11

iCAM500 Operating Manual Issue 9
(4) Once the installation is finished completely, you can see a “Removable Disk” in
“My Computer” when you plug your iCAM500.
3.7.2 Removing the driver for Win 98 / 98 SE
To remove the driver from the operating system, simply run the installation procedure
again, as if the drivers were being installed, when running installation again, it will
prompt you whether you want to remove the driver or not.
Make sure the device is not plugged in the USB port, then follow the on screen
instruction to un-install the driver.
12

iCAM500 Operating Manual Issue 9
3.7.3 Windows ME / 2000 / XP
For these three operating systems, NO Driver is required, because Windows has a
built-in driver to support the iCAM500’s USB removable disk.
Simply plug iCAM500 into the USB port and it will be recognized by the system. The
operating system will setup iCAM500 automatically without any need for a driver.
Once the installation is complete, you will see a “Removable Disk” drive in “My
Computer”.
3.7.4 Mac OS 9.x or above
No driver is required for these operating systems. Simply plug the iCAM500 into the
USB port and the system will automatically find iCAM500.
3.8 Removing iCAM500 From Your PC
Please remove your iCAM500 via one of the following methods. Incorrect removal of
iCAM500 may result in data lost.
3.8.1 Windows 98/98SE
You could unplug iCAM500 from the USB port directly once the LED stops blinking
and dimmed. The “Removable Disk” icon will disappear automatically.
3.8.2 Windows Me/2000/XP
Click the icon at the lower right hand corner, and a “Stop USB Mass Storage DeviceDrive (X:)” message will appear. Click the message to stop the device.
Click “OK” to confirm, then wait till the LED dimmed before removing from USB port.
3.8.3 Mac OS 9.x or above
Drag the “Removable Disk” icon to “Recycle Bin”, wait till the LED dimmed before
removing from USB port.
13

iCAM500 Operating Manual Issue 9
3.8.4 Important Notices
(1) In Windows 98/98SE, please install the driver before plugging in your device,
otherwise, Windows will ask you for a driver even after you have installed it.
(2) If you plug your iCAM500 into the USB port, the operating system finds it as a
new device, but you are unable to see the “Removable Disk” icon appear in “My
Computer”, please check and make sure you do not have any other drives or devices
which maybe conflicting with the devices drive letter. If you do, please force change
the drive letter of your iCAM500.
(3) Please remove the iCAM500 in the correct way (see section 4), otherwise, it
may result in data lost.
14

iCAM500 Operating Manual Issue 9
4 Liability
The technical data specified for hazardous areas comply with the values certified in
the European Ex approval. The user bears the sole responsibility of examining the
equipment with regard to its suitability for the intended application and environmental
conditions. Extronics Ltd accepts no liability for any lack of suitability.
15

iCAM500 Operating Manual Issue 9
5 Technical Data
Certificate no.: IBExU 06 ATEX 1044
Certification Type: II 2 G Ex ia IIC T4
Ambient temperature: -20°C ... +50°C
Supply:
2 alkaline cells size AAA
Type of cells: Duracell MN 2400 AAA, Capacity: 1150 mAh ...
... or further cells approved according to EN50020, §10.9:
Manufacturer: Type: Manufacturer: Type:
Daimon Alkaline Eveready Alkaline Energizer No. E92
Duracell Alkaline Plus GP Super Alkaline Battery 24 A
Duracell Alkaline Procell Varta Alkaline No. 4803
Duracell Alkaline Ultra Toshiba Alkaline LR03GR
Energizer Ucar Gold
Current consumption during operation ~ 130 mA
during standby: ~ 1 mA
Case:
IP protection: IP20
Material: ABS
Dimensions: 118 x 32 x 22 mm
Weight: ca. 50 g (without battery and bag)
16

iCAM500 Operating Manual Issue 9
6 EC Declaration of Conformity
17

7 Certification
ATEX Certificate
iCAM500 Operating Manual Issue 9
18

iCAM500 Operating Manual Issue 9
19

iCAM500 Operating Manual Issue 9
8 FAQ – Frequently Asked Questions
Q1 Can the iCAM500 support Linux Kernel version 2.3 or earlier?
No, the iCAM500 only supports Linux Kernel version 2.4.0 or later.
Q2 Which operating systems can the iCAM500 operate on?
The iCAM500 can be operated on any of the following OS’s. Windows 98, Windows
98 SE, Windows ME, Windows 2000, Windows XP, Mac 8.6 or above.
Q3 My computer cannot detect iCAM500. What should I do?
If you are using Windows 98 / Windows ME / Windows 2000 / Windows XP, make
sure the USB function is enabled in the BIOS, and Windows has detected the USB
port successfully. Then install the iCAM500 driver for Windows 98.
If you still have problem setting up the iCAM500, then contact one of our technicians.
Q4 What kind of data can be stored on the iCAM500?
You can save any type of files on the iCAM500, whether they are text, graphic,
program, music or multimedia files.
Q5 Will virus infect the iCAM500? How can I prevent it?
Yes, the iCAM500 is just like your hard drive, it can get a virus via any files that you
save onto it. Therefore anti-virus software is recommended.
Q6 Do I need to turn my computer off when installing the iCAM500?
No, the iCAM500 is a hot plug and play device. You can install the iCAM500 anytime
you want, even with the computer on.
Q7 Can the iCAM500 work on earlier PC’s?
Yes, as long as it has a USB connection interface available and driver has been set
up properly. Also the operating system must support USB devices.
Q8 The light is flashing on the iCAM500 when connected to my PC, what does
this mean?
When the light is flashing, that means the iCAM500 is in use and data transfer is
taking place between the iCAM500 and host machine.
Q9 Is it safe to remove the iCAM500 while files are being transferred?
No, when the light is flashing it means data transfer is taking place, do not remove
the iCAM500 as it may result in loss of file/data, or even damage the iCAM500.
Q10 What memory sizes are available for the iCAM500?
Only a 256MB Version of the iCAM500 is available.
20

iCAM500 Operating Manual Issue 9
Q11 Which personal computers does the iCAM500 support?
iCAM500 supports all PCs, which have a USB port connection and runs under the
operating systems that the iCAM500 supports (refer Q3). (Most of the PCs after 1997
have a USB connection)
Q12 Can the data on the iCAM500 be shared in a networking environment?
Yes, the data can be shared in a networking environment, as long as the host
machine enables the share function for the iCAM500.
Q13 Can the iCAM500 be used as a boot disk?
No, The iCAM500 Cannot be used as a boot disk.
Q14 Can the iCAM500 be formatted? Is so how?
Yes, the iCAM500 can be formatted under Windows 98, Windows ME, and Windows
2000 and Windows XP, using normal formatting function.
Q15 Can the iCAM500 be used under DOS environment?
No, because DOS does not support USB devices, so the iCAM500 cannot be used
under DOS environment.
Q16 If the iCAM500 is dropped in water, what should I do?
Dry the iCAM500 thoroughly before using the iCAM500 again. Otherwise the
humidity may cause a short circuit when iCAM500 is inserted into the USB port.
Q17 What is transfer rate of the iCAM500?
It can transfer files at a rate of more than 1.44MB/sec
Q18 What interfaces does the iCAM500 supports?
The iCAM500 only supports the USB interface. The iCAM500 can be inserted
directly into any USB port or connected to the computer through a USB cable with Atype plug and A-type receptacle.
Q19 How many times can the iCAM500 be used and how long can the data be
stored on the iCAM500?
The iCAM500 can write and erase at least 1 million times, while data on the iCAM500
can be stored more than 10 years.
Q20 What operating systems will the iCAM500 NOT support?
The iCAM500 will not support Windows 95a or Windows NT 3.51, since both of these
operating systems do not support USB devices.
Q21 How many iCAM500s can I connect to a single computer?
In theory, USB allows 127 iCAM500 to be connected to a single PC, but practically
under Windows operating system, due to the alphabetical ordering of the disk drive
and existing drives, the maximum iCAM500 that can be connected to a single PC is
23 by using USB hubs.
Q22 What type of memories does the iCAM500 use?
The iCAM500 uses highly reliable and non-volatile flash memory.
21

iCAM500 Operating Manual Issue 9
Q23 Can other programs be running at the same time while iCAM500 is in
used?
Yes, other programs/applications can be running at the same time while using
iCAM500.
Q24 Can I perform a ScanDisk on the iCAM500?
Yes, ScanDisk can be performed on the iCAM500.
Q25 Does iCAM500 resist vibration, magnetic fields and humidity?
The iCAM500 is highly resistant to vibration and can be operated under wide ranges
of magnetic fields and humidity.
Q26 When an application such as Word or Excel is running, what happens if I
pull the iCAM500 out?
If an application is running and you pull out the iCAM500, the computer screen will go
blank. Just press the “Esc” key to make the computer go back to normal condition.
Q27 What should I do if the iCAM500 icon does not appear/disappear on the
screen after inserting / extracting?
Simply click the “View” menu and select “Refresh”. Otherwise, please contact one of
our engineers.
Q28 What precautions should be taken while using the iCAM500?
Wait for a few seconds upon inserting and removing of the iCAM500, to give time to
the operating system to recognize the iCAM500. Avoid immediate removal after
inserting the iCAM500 or performing repetitive insertions / removals.
Q29 What happens if I drop the iCAM500?
There is no need to worry about dropping the iCAM500, because iCAM500 is
highly shock proof.
Q30 What are the differences between the iCAM500 and Compact Flash, Smart
Media, Multimedia card, Memory Stick, Secure Digital card and USB hard disk
drive?
The advantage of the iCAM500 over all the different memory cards is that it can be
connected to the USB port directly and the data can be accessed without an external
card reader, and the flash memory storage products and drives are not compatible to
each other.
USB hard disk drive is much heavier and more delicate than the iCAM500. It is only a
hard disk drive with a USB interface. iCAM500 is much smaller, lighter and rugged.
Q31 Can iCAM500 work in Windows NT?
No. Since Windows NT does not support USB devices, therefore, iCAM500 cannot
work under the Windows NT environment.
22

iCAM500 Operating Manual Issue 9
9 Hints and Tips
To help you get the best out of your iCAM500 please follow the tips below:
8.1 Light Levels
• The camera functions well down to light levels of 10Lux below this
you may notice a reduction of image quality.
• If you can increase the level of light on the subject you will be able to
improve the quality of the image
8.2 Holding the Camera Still
• When taking photographs the camera must be held still again this
will improve the quality of the image taken.
• Do Not move the camera away from the Subject until the Blue LED
Flashes indicating that the image is stored
• Hold the camera with both hands during the process of taking the
image
• Provide support for the camera by resting your elbows on a solid
object
23

iCAM500 Operating Manual Issue 9
10 Manual Revision
Revision Description Date By
1 New Manual 18/05/06 A Bates
2 User Instructions added 02/06/06 A Bates
3 Corrections 13/7/06 N Saunders
4 Battery type detail corrected,
cleaning instruction added
5 Memory size changed from 128MB to 256MB 25/09/06 A Bates
6 Added URL link for the 98/98SE driver 29/11/06 D Revell
7 Added Hints and Tips Section 19/12/06 D Revell
8 Changed Picture on the Front Cover 10/04/07 J Eastwood
9 High Res Picture Added 12/04/07 J Eastwood
10 EC Declaration Revised 16/11/07 J Eastwood
15/08/06 A Bates
24
 Loading...