

Page 1
complete user guide and installation
instructions befor
oduct to the power sou
DA2 HD 4K • Setup Guide
EEFF
DA2 HD 4K
CO
G
UT
OUTPUTS
1
2
SIGNAL
DD
Tx
Rx
G
INPUT
REMO
R
X
AAB
BC
C
Overview
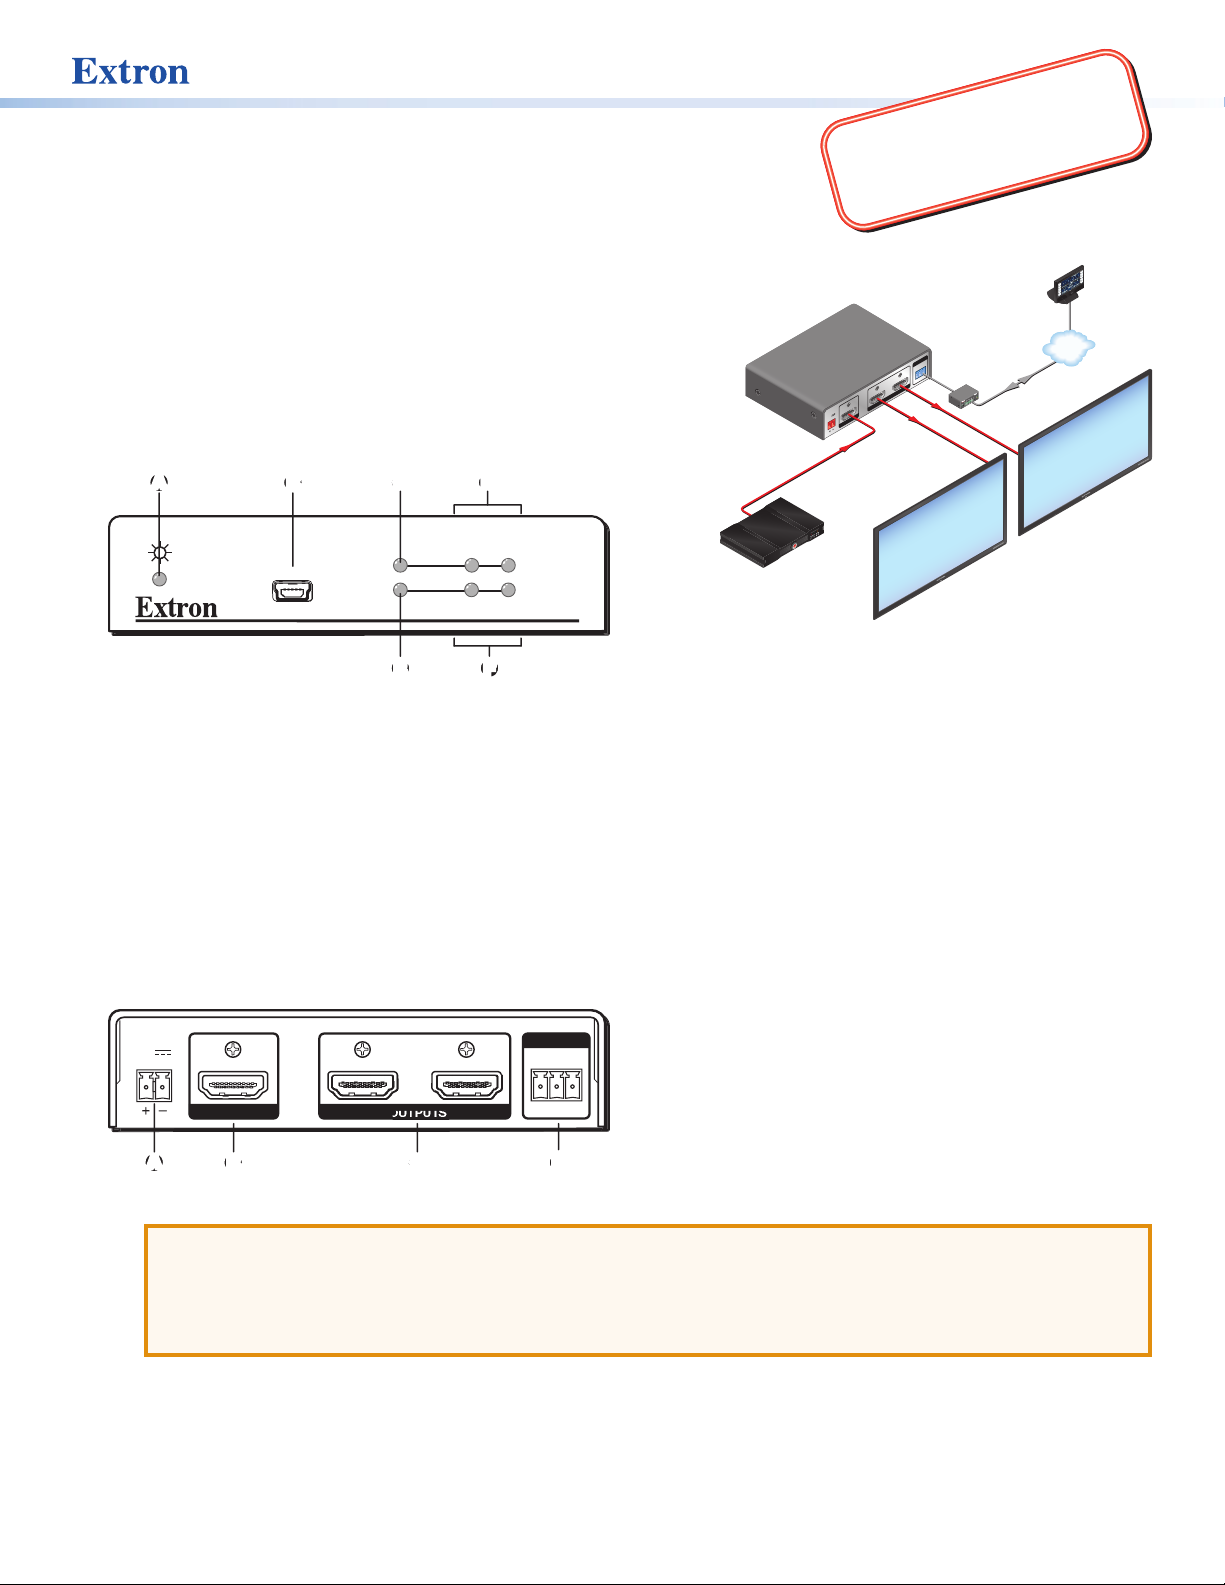
The Extron DA2 HD 4K distribution amplier distributes one
HDMIinput signal to two outputs simultaneously (following
the HDMI 1.4 specication at resolutions up to UHD and 4K).
This setup guide provides basic instructions for installation by
an experienced installer. For complete instructions, see the
DA HD 4K Series User Guide at www.extron.com.
Front Panel
AAB
BCCD
INPUT
INP
NFI
SIGNAL
HDCP
HDCP
CONFIG
D
OUTPUTS
12
DA2 HD 4K
Extron
DA2 HD 4K
Distribution
Amplier
4K Video Player
IMPORTANT:
Go to www.extron.com for the
e connecting the
pr
TouchLink
Control
System
REMOTE
RS-232
TxRxG
1 2
OUTPUTS
POWER
12V
0.4A MAX
INPUT
HDMI Cables
L 80
TUS
STA
LAY
P
POWER
USB
RD
A
C
SD
MODE
M
O
C
X
R
X
T
250
L
IP
1
2
R
3
®
0
0
1
Y
A
K
L
N
E
I
R
L
T
T
C
A
PU
3
N
I
1
R
I
3
1
4
3
2
1
4
2
4
2
RS-232
4K Displays
rce.
CR
V
D
V
D
C
O
D
M
A
C
P
O
T
P
LA
C
P
N
O
F
F
O
Y
PLA
IS
E
D
T
U
M
N
E
RE
C
S
P
U
N
E
RE
C
N
S
W
O
D
TCP/IP
80
L
MODE
Power status LED — Lights green when power is applied to the unit.
A
USB Config port — Used for SIS™ conguration, monitoring, and rmware updates.
B
Input Signal LED — Lights green when a TMDS signal is detected on the HDMI input.
C
Output Signal LEDs — Light green when HPD is detected from the corresponding sink device and when a TMDS
D
signal is detected at the input.
Input HDCP LED — Lights green when the source requires HDCP encryption and it has been authenticated with the
E
HDMI input.
Output HDCP LEDs — Light green when HDCP is authenticated between the DA2 HD 4K output and the
F
corresponding sink device.
Rear Panel
POWER
POWE
12V
0.4A MAX
0.4A MA
Power input — Connect the provided 12 VDC power supply to this two-pole captive screw connector.
A
ATTENTION:
• Do not connect the power supply before reading the Attention in the Power Supply section of the
• Ne branchez pas la source d’alimentation externes avant d’avoir lu les mises en garde dans la section
REMOTE
RS-232
RS-232
Tx Rx G
TE
INPUT
12
OUTPUTS
DA Series HD 4K User Guide.
«PowerSupply» du DA Series HD 4K User Guide.
HDMI input — Connect a source device to this female HDMI type A connector.
B
HDMI outputs — Connect up to two display devices to these female HDMI type A connectors.
C
RS-232 — Used for SIS conguration, monitoring, and rmware updates (Pin 1 = Tx, Pin 2 = Rx, Pin 3 = Ground).
D
Protocol: 9600 baud, 8 data bits, 1 stop bit, no parity.
1
Page 2
DA2 HD 4K • Setup Guide (Continued)
REMOTE
DB9 Pin Locations
DA2 HD 4K
SECTION A–A
Smooth
.
POWER
Installation
1. Mount the DA2 HD 4K in a suitable location (see www.extron.com for mounting options). Follow the instructions
provided with the mounting kit.
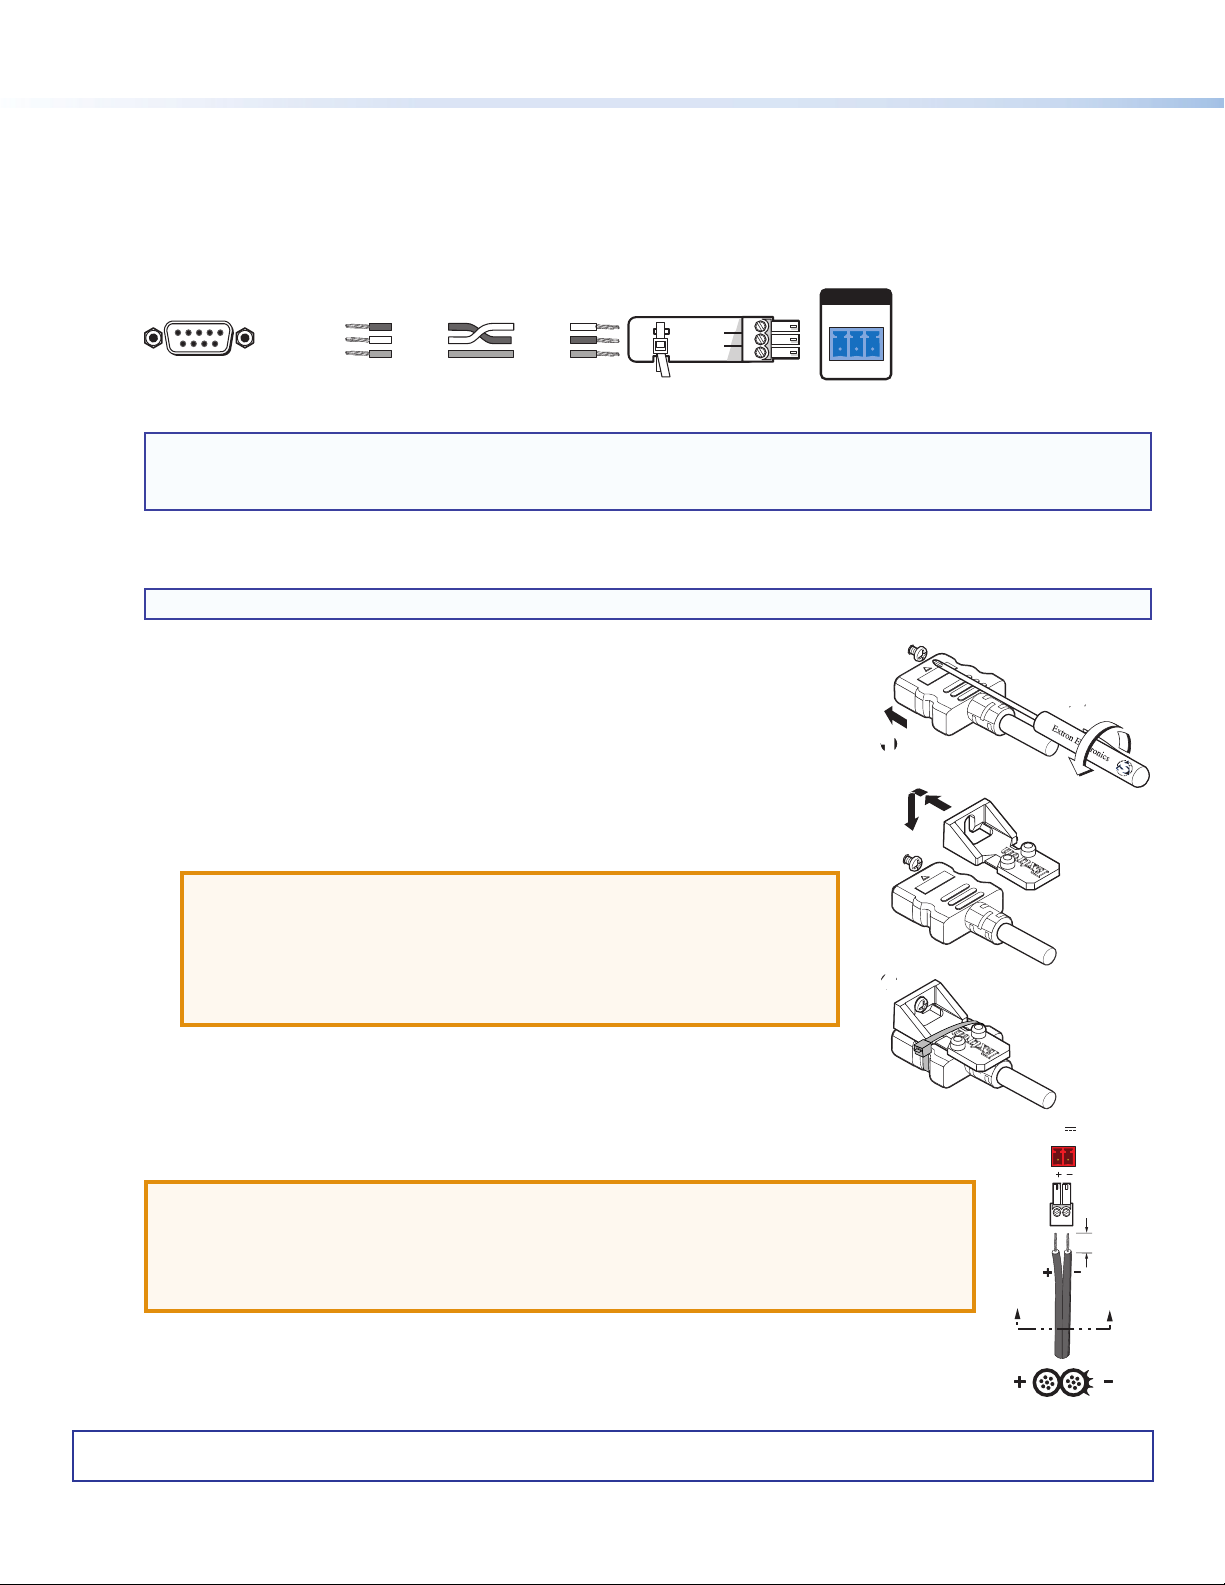
2. If required, connect a control PC to the USB Cong port (Front Panel B on the previous page) or RS-232 connector
(Rear Panel D on the previous page). To connect the rear panel RS-232 connector to a PC, ensure that the PC
transmit connects to the RS-232 receive and the PC receive connects to the RS-232 transmit (see the diagram below).
51
96
Female
Computer
Pin 2 = Rx
Pin 3 = Tx
Pin 5 = G
TransmitReceive
ReceiveTransmit
GroundGround
NOTE: Use SIS commands to congure EDID Minder
®
, mute the video signal, mute the audio signal, adjust
RS-232
Tx Rx G
the video color bit depth, or monitor the signal and HDCP status. See the “SIS Commands” section of the
DA HD 4K Series User Guide.
3. Connect the display devices to the rear panel HDMI outputs and power them on. Connect the primary display to
output 1. EDID from output 1 is stored automatically.
NOTE: Use the LockIt® HDMI cable lacing brackets provided to secure the HDMI connectors.
Follow these instructions to secure the input and output HDMI connectors to the
unit with the LockIt HDMI lacing bracket provided:
a. Plug the HDMI cable into the panel connection (1).
b. Loosen the HDMI connection mounting screw from the panel enough to allow
11
the LockIt lacing bracket to be placed over it (2). The screw does not have to
be removed.
c. Place the LockIt lacing bracket on the screw and against the HDMI connector,
then tighten the screw to secure the bracket (3).
3
3
ATTENTION:
• Do not overtighten the HDMI connection mounting screw. The
shield it fastens to is very thin and can easily be stripped.
• Ne serrez pas trop la vis de montage du connecteur HDMI. Le
blindage auquel elle est attachée est très n et peut facilement
être dénudé.
4
4
3
2
2
For information on safety guidelines, regulatory compliances, EMI/EMF compatibility, accessibility, and related topics, see the
Extron Safety and Regulatory Compliance Guide on the Extron website.
2
d. Loosely place the included tie wrap around the HDMI connector and the LockIt
lacing bracket as shown (4).
e. While holding the connector securely against the lacing bracket, tighten the tie
wrap, then remove any excess length.
4. Connect the provided 12 VDC power supply to the 2-pole captive screw connector.
ATTENTION:
• Do not connect the power supply before reading the Attention in the Power Supply
section of the DA Series HD 4K User Guide.
• Ne branchez pas la source d’alimentation externes avant d’avoir lu les mises en garde
dans la section «PowerSupply» du DA Series HD 4K User Guide.
5. Connect and power on the source device.
© 2015-2018 Extron Electronics — All rights reserved. www.extron.com
All trademarks mentioned are the property of their respective owners.
12V
0.4A MAX
(5 mm) Max
AA
Ridges
68-2636-50 B
3/16"
10 18
 Loading...