

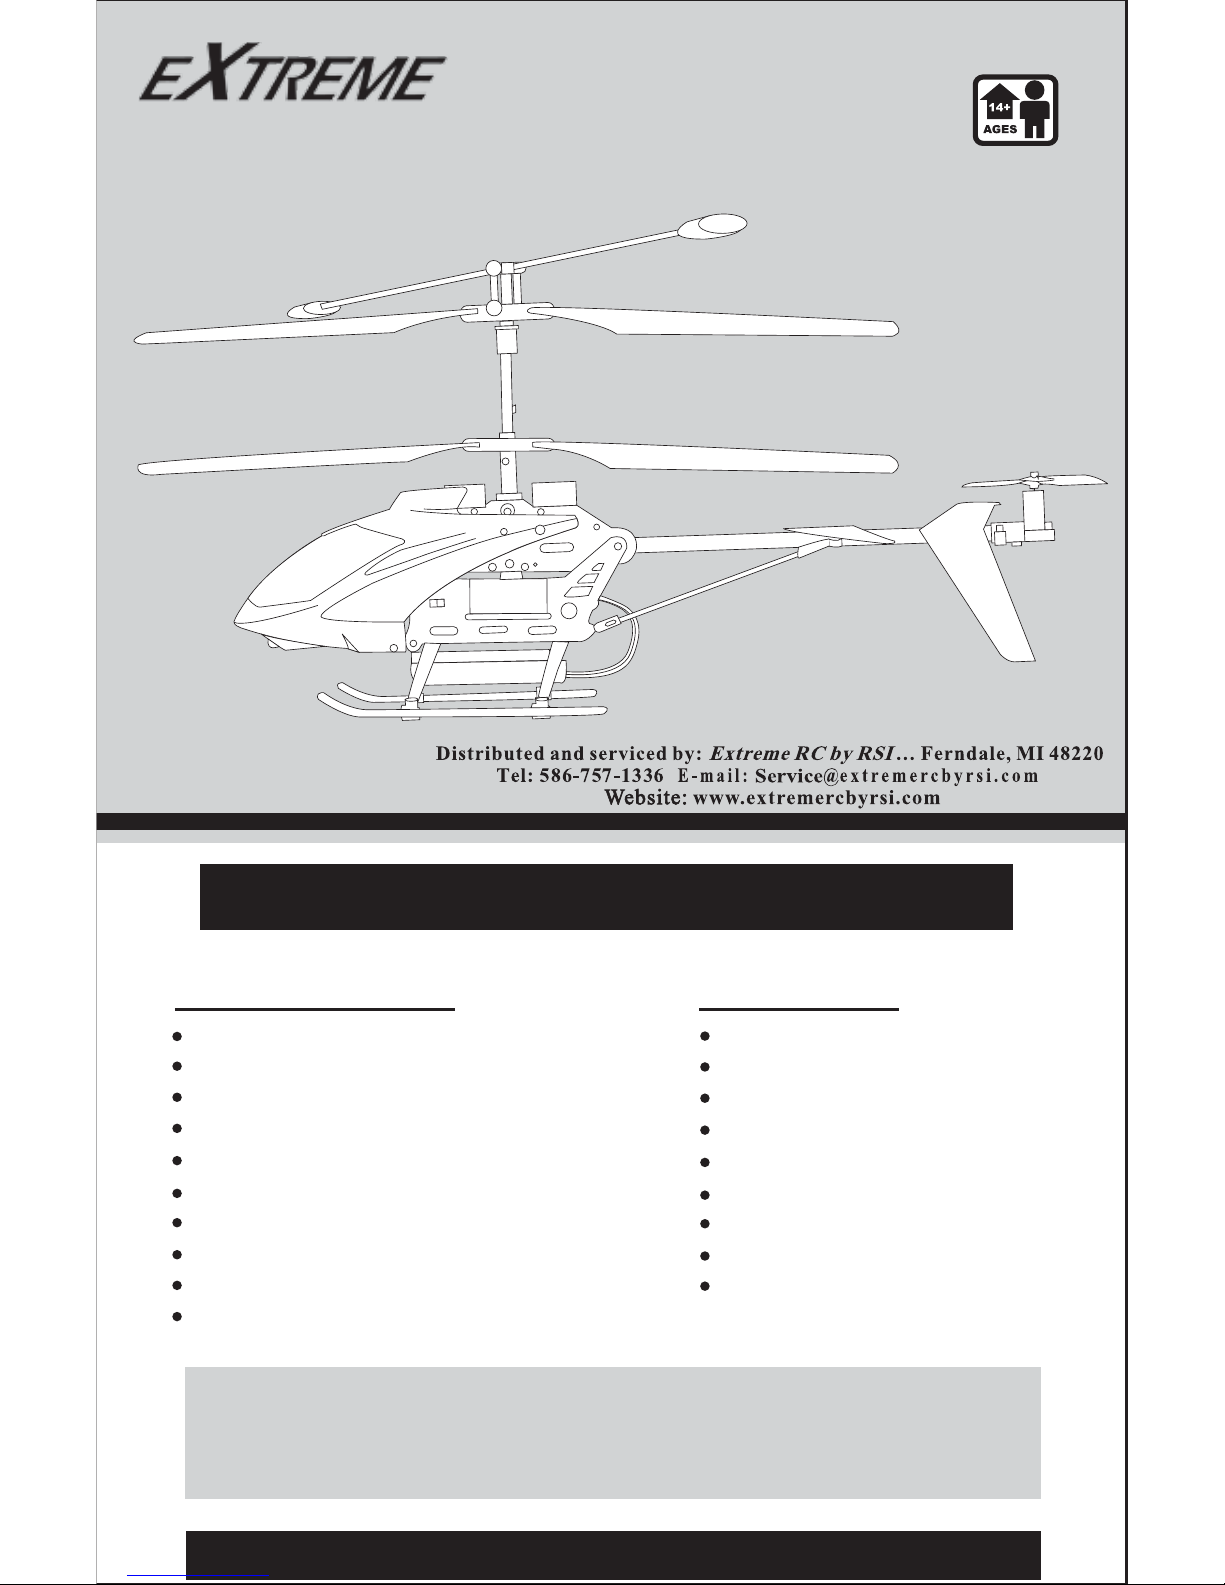
Extreme Networks S-6G Instruction Manual
Distributed and Serviced by: Extreme RC by RSI ... Ferndale, MI
Tel: 586-757-1336 x 1 ... E-mail: Service@extremercbyrsi.com
3.5-CHANNELS WITH GYRO SYSTEM
Instruction Manual
TM
Features Gyroscopic Stabilization Technology
for Smooth, Easy-to-Control Flight!
Manual contents
Safety instructions
Charging instructions
Flying instructions
Calibration trim control
Inputting ‘AA’ batteries into R/C
Changing R/C speeds fast to slow
Changing helicopter battery pack
Part list by number
How to turn lights on and off
How to set to low or high speed
Metal Body
Indoor/Outdoor Remote Control Helicopter
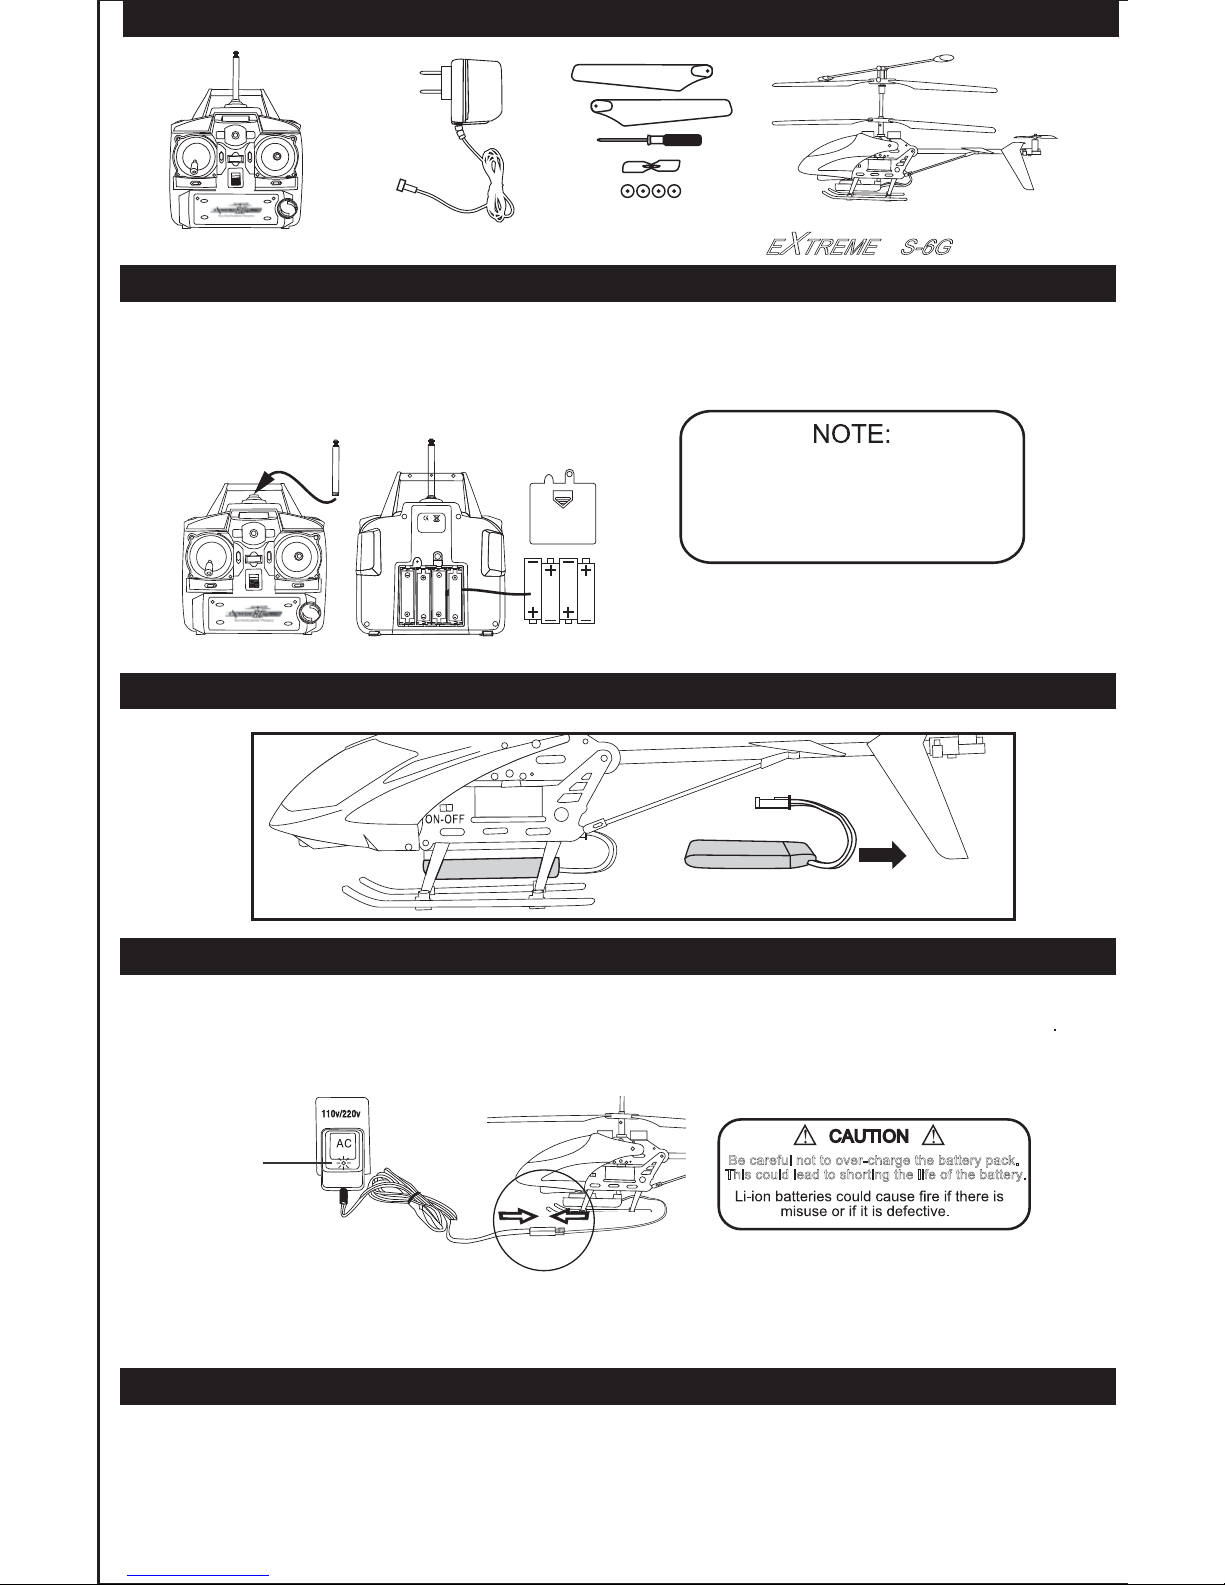
MANUAL CONTENTS and PACKING LIST
Packing list
Extreme flying helicopter
2-speed remote controller
Set of extra blades
Extra tail blade
A/C adapter power plug
Screw driver
4-Landing gear cushions
Manual instruction guide
Warranty card
Read the entire user’s manual before operation.
Save manual for future reference.
-pg 1--pg 4-
Open M-F 9-6 (EST) Sat 10-3 (EST)
S-6G
FRESH ALKALINE BATTERIES STRONGLY RECOMMENDED
Extra Parts
4. Stand back a minimum or 8’ from helicopter.
ON/OFF
ON/OFF
A/C Adapter
Remote Control
Please remove ‘AA’ batteries when not
using remote control for 60+ days.
Batteries may leak causing damage.
-pg 2-
3. Charge helicopter battery for 90 minutes, Flight time: Up to 10 minutes.
4. Unplug and put A/C charger away for safe keeping.
EXTREME S-6G
3.5-Channel
TM
Replace with Fully Charged Battery
Plug Wire Back into Port-Located in the Back of the Helicopter Body
Be careful not to over-charge the battery pack.
This could lead to shorting the life of the battery.
Carefully Unplug and
Pull Out the Battery
1. Turn on the power switch (ON/OFF located on the side of the body).
2. Place the helicopter on stable ground.
5. To deactivate the safety on remote, pull the left throttle up - then down. The safety is now
off and you can start flying.
1. Install antenna by screwing clockwise in the top of remote controller (Diagram 1 below).
2. Remove the screw on the battery cover of the remote controller.
3. Remove the back cover of the remote controller and install (4) ‘AA’ batteries (not included) into the back
of the remote (Diagram 2 below).
4. Replace battery cover and reinstall the screw.
Diagram 1 Diagram 2
3. Extend the antenna on the remote controller and switch the controller to ON.
The LED light on the charging adapter will GLOW RED to identify that the battery is not fully charged
The LED light on the charging adapter will GLOW GREEN to identify that the charging is complete.
1.Be sure the helicopter power switch is in the OFF position.
2.Connect the cable end to the helicopter adapter. Plug the adapter into a power outlet.
When the LED light GLOWS GREEN, your helicopter is ready for flight!
Charge
Indicator
Light
Please ensure the negative and
positive terminals of the batteries
are correctly installed.
Do not mix old and new batteries.
CHANGING HELICOPTER BATTERY FOR LONGER FLIGHTS
CHARGING THE HELICOPTER
YOU ARE NOW READY TO FLY YOUR HELICOPTER
PACKAGE CONTENTS
PREPARING THE REMOTE CONTROLLER
 Loading...