

Page 1
Receiver-Ready Aircraft by
67” Assembly Guide
Page 2
Please read the following paragraphs before beginning assembly of your aircraft!
THIS IS NOT A TOY! Serious injury, destruction of property, or even death may result from the misuse of this
product. Extreme Flight RC is providing you, the consumer with a very high quality model aircraft component kit, from which you, the consumer, will assemble a flying model. It is beyond our control to monitor the
finished aircraft you produce. Extreme Flight RC will in no way accept or assume responsibility or liability for
damages resulting from the use of this user assembled product. This aircraft should be flown in accordance
to the AMA (or alternate appropriate to your region) safety code. It is highly recommended that you join the
Academy of Model Aeronautics in order to be properly insured, and to operate your model at AMA sanctioned flying fields only (or the appropriate model aviation sanctioning body in your geogrpahical region). If
you are not willing to accept ALL liability for the use of this product, please return it to the place of purchase
immediately.
Extreme Flight RC guarantees this kit to be free of defects in materials and workmanship for a period of 30
DAYS from the date of purchase. All warranty claims must be accompanied by the original dated receipt.
This warranty is extended to the original purchaser of the aircraft kit only.
If you need assistance with your aircraft, please contact the selling dealer. In the United States, please contact us at info@extremeflightrc.com or 770-887-1794. It is your responsibility to ensure the airworthiness
of your model.
Required tools and Materials
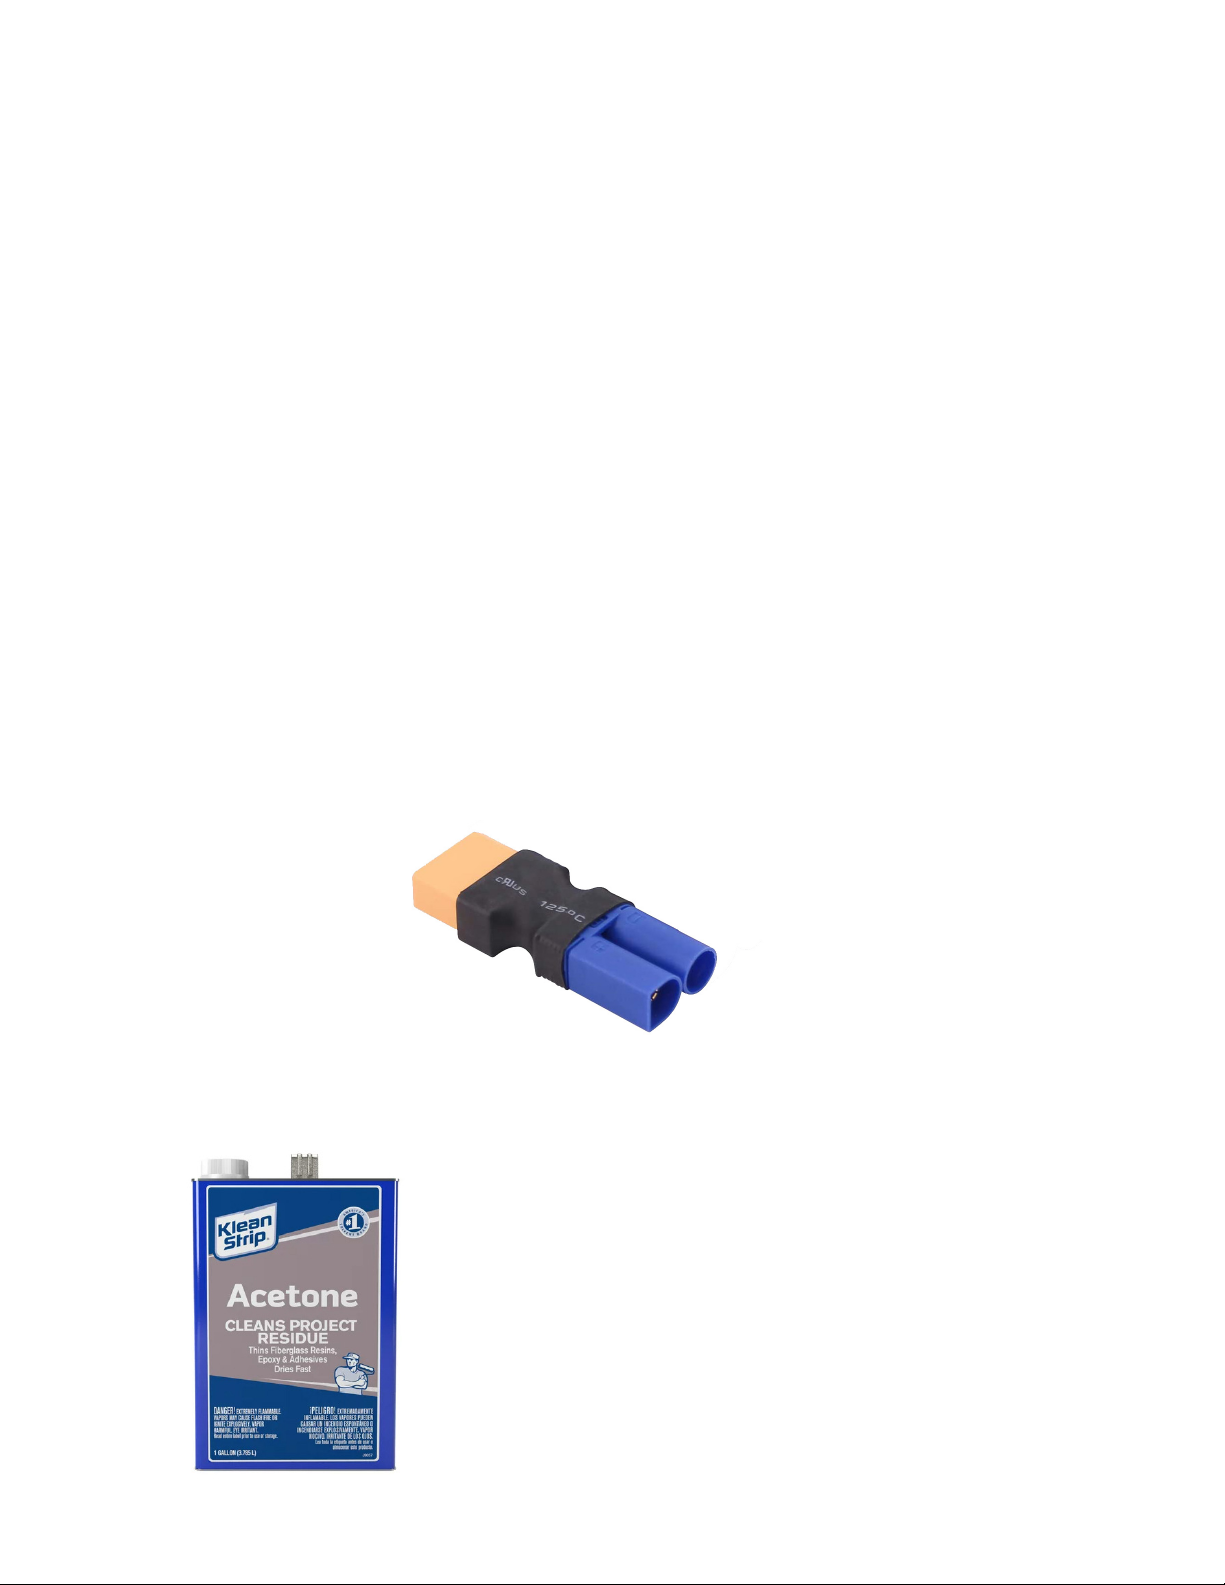
This Extreme Flight RXR aircraft requires your Transmitter, Receiver, Lipo Battery and any adaptor you need
to connect to your Lipo battery. Your 67” RXR comes with an XT-90 battery connector installed. A variety of
adaptors are availble to convert to nearly any battery connector.
You will also need thin CA glue and basic hand tools. We also recommend a threadlocker, such as Loctite
blue #242.
When using CA glue, if you spill excess glue onto
your airplane, we recommend Acetone (available
at hardware and home improvement stores) and
a paper towel to clean.
Page 3
1
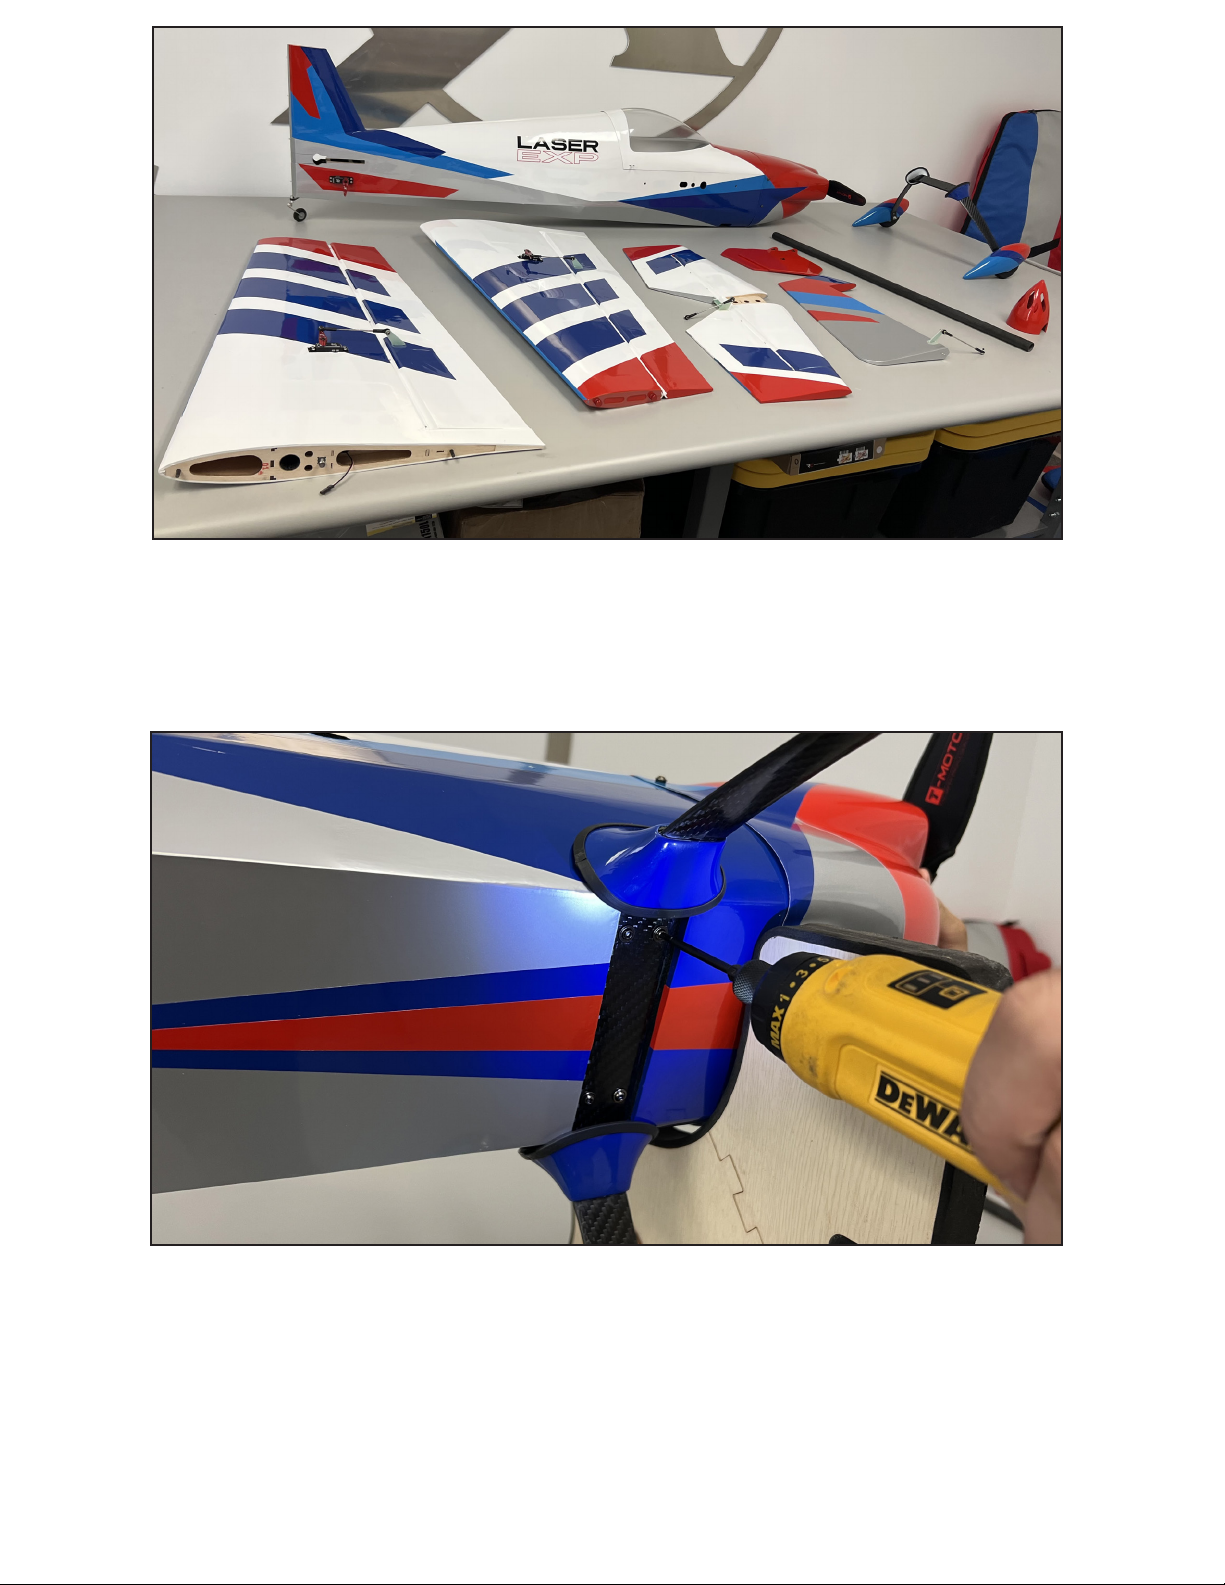
Unbox and unwrap all parts, check for any damage. If you need assistance, contact your dealer.
In the United States, contact Extreme Flight RC at the phone number or email address posted
on our website, www.ExtremeFlightRc.com
2
Attach the landing gear to the fuselage using screws, apply a drop of threadlocker to each screw.
Page 4
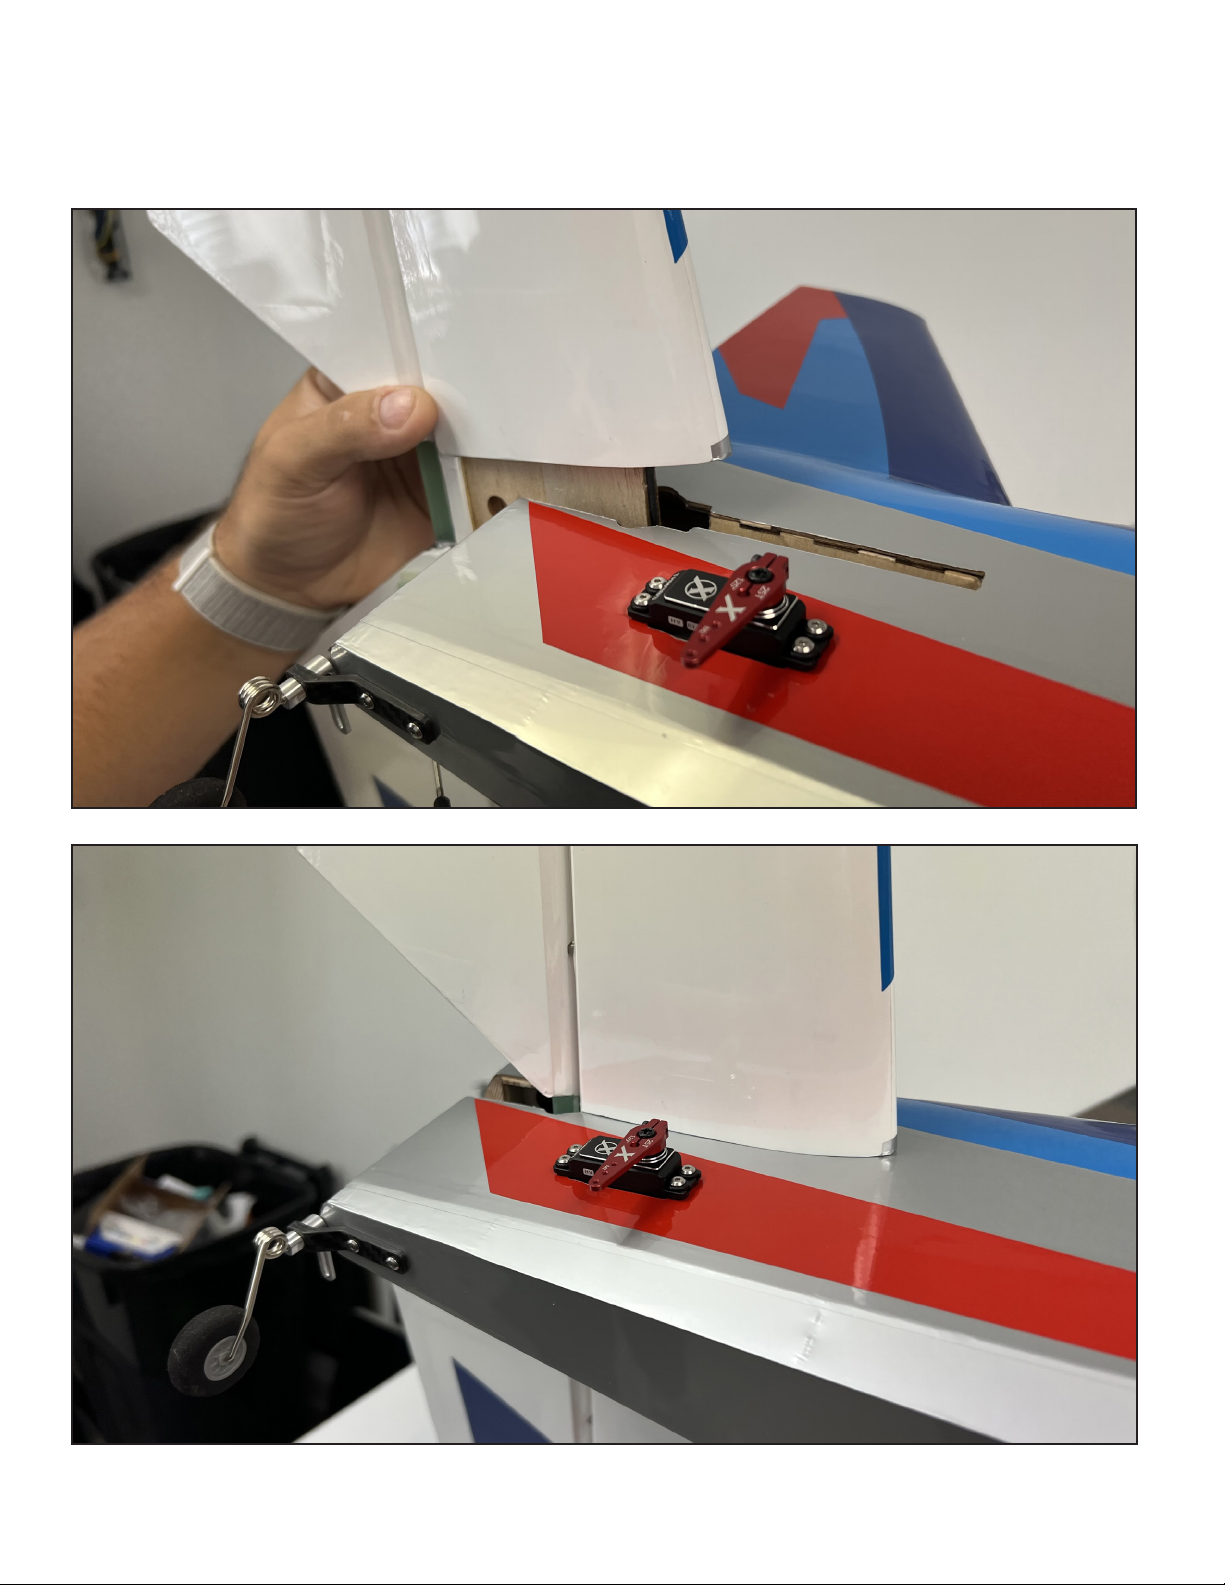
3
Slick the horizontal stabilier into the slot in the fuselage. Take your time. Make sure it is rightside-up, make sure it is fully engaged into the fuselage.
Page 5
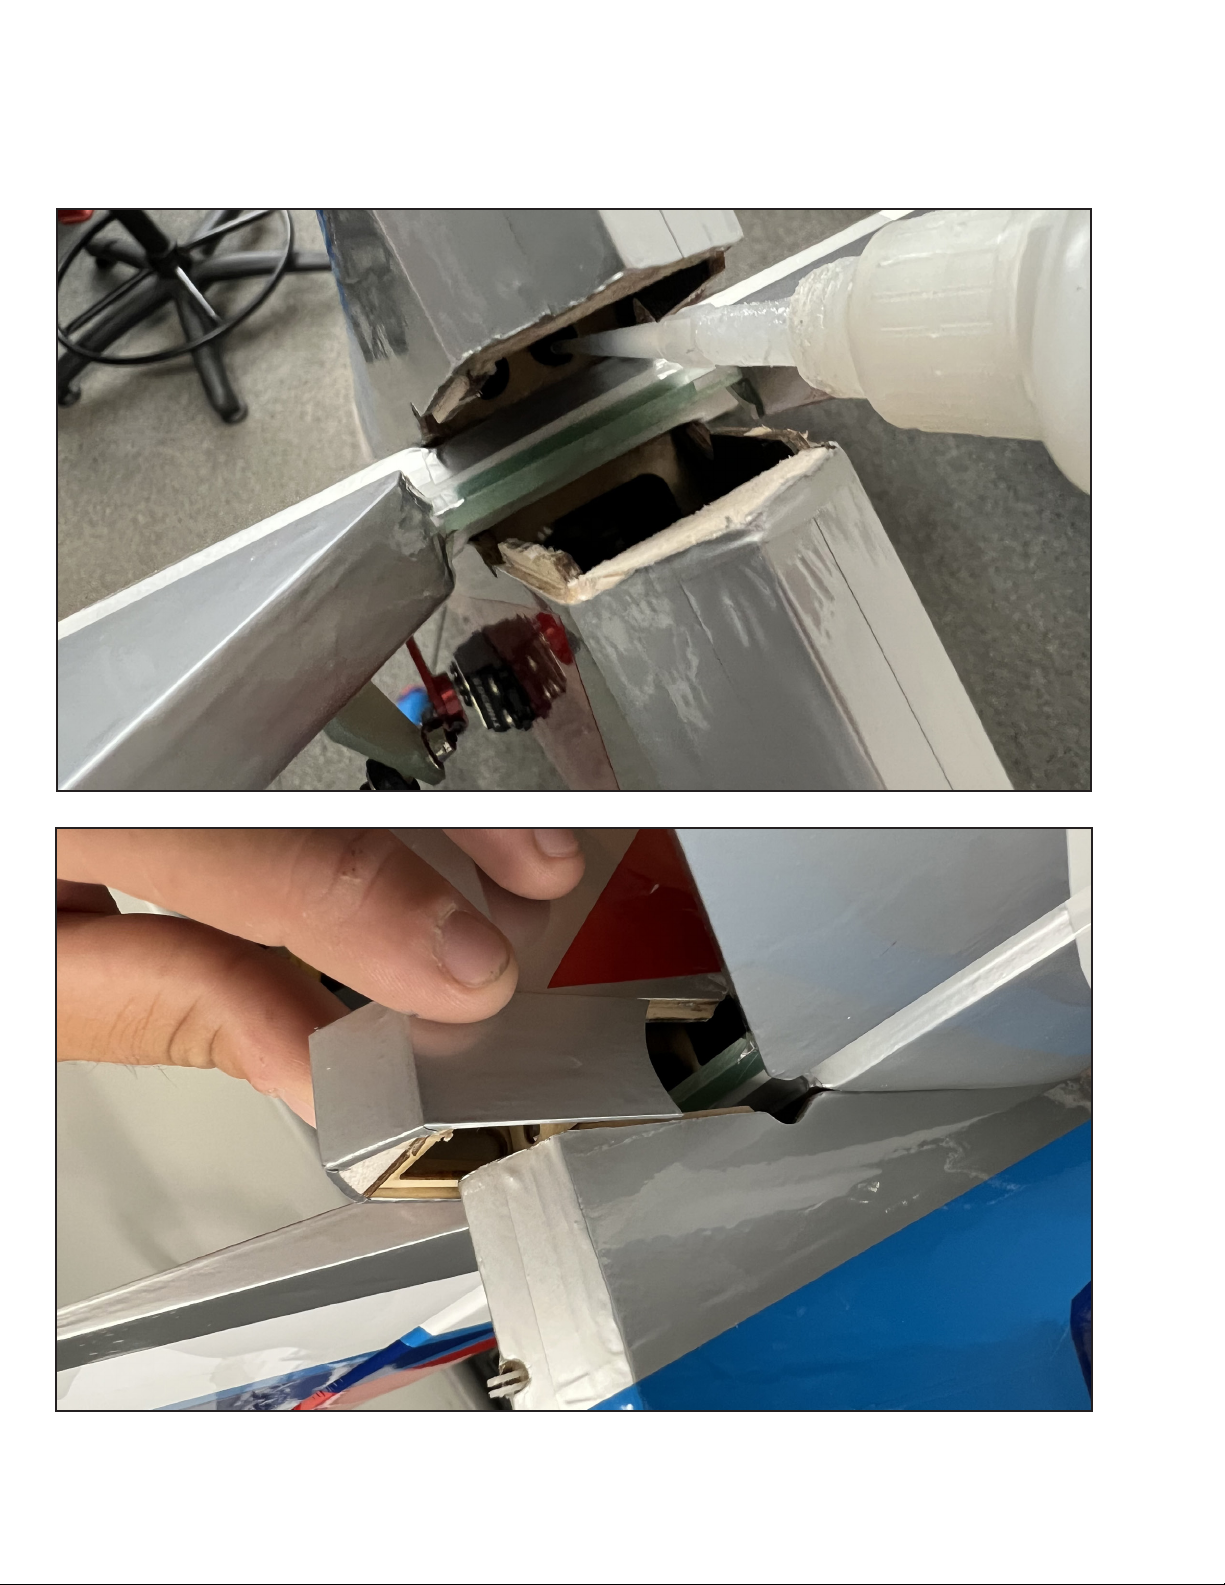
4
When you have the horizontal stabilizer fully engaged into the fuselage slot and slid all of the way
forward, apply thin CA glue to the joint as shown, top and bottom. Clean up any spilled CA glue
with acetone and a paper towel. Allow to cure. Locate the tail ller piece. Insert the ller piece to
ll the gap in the tail as shown. Glue with a few drops of thin CA glue. Clean up any spilled glue.
Page 6
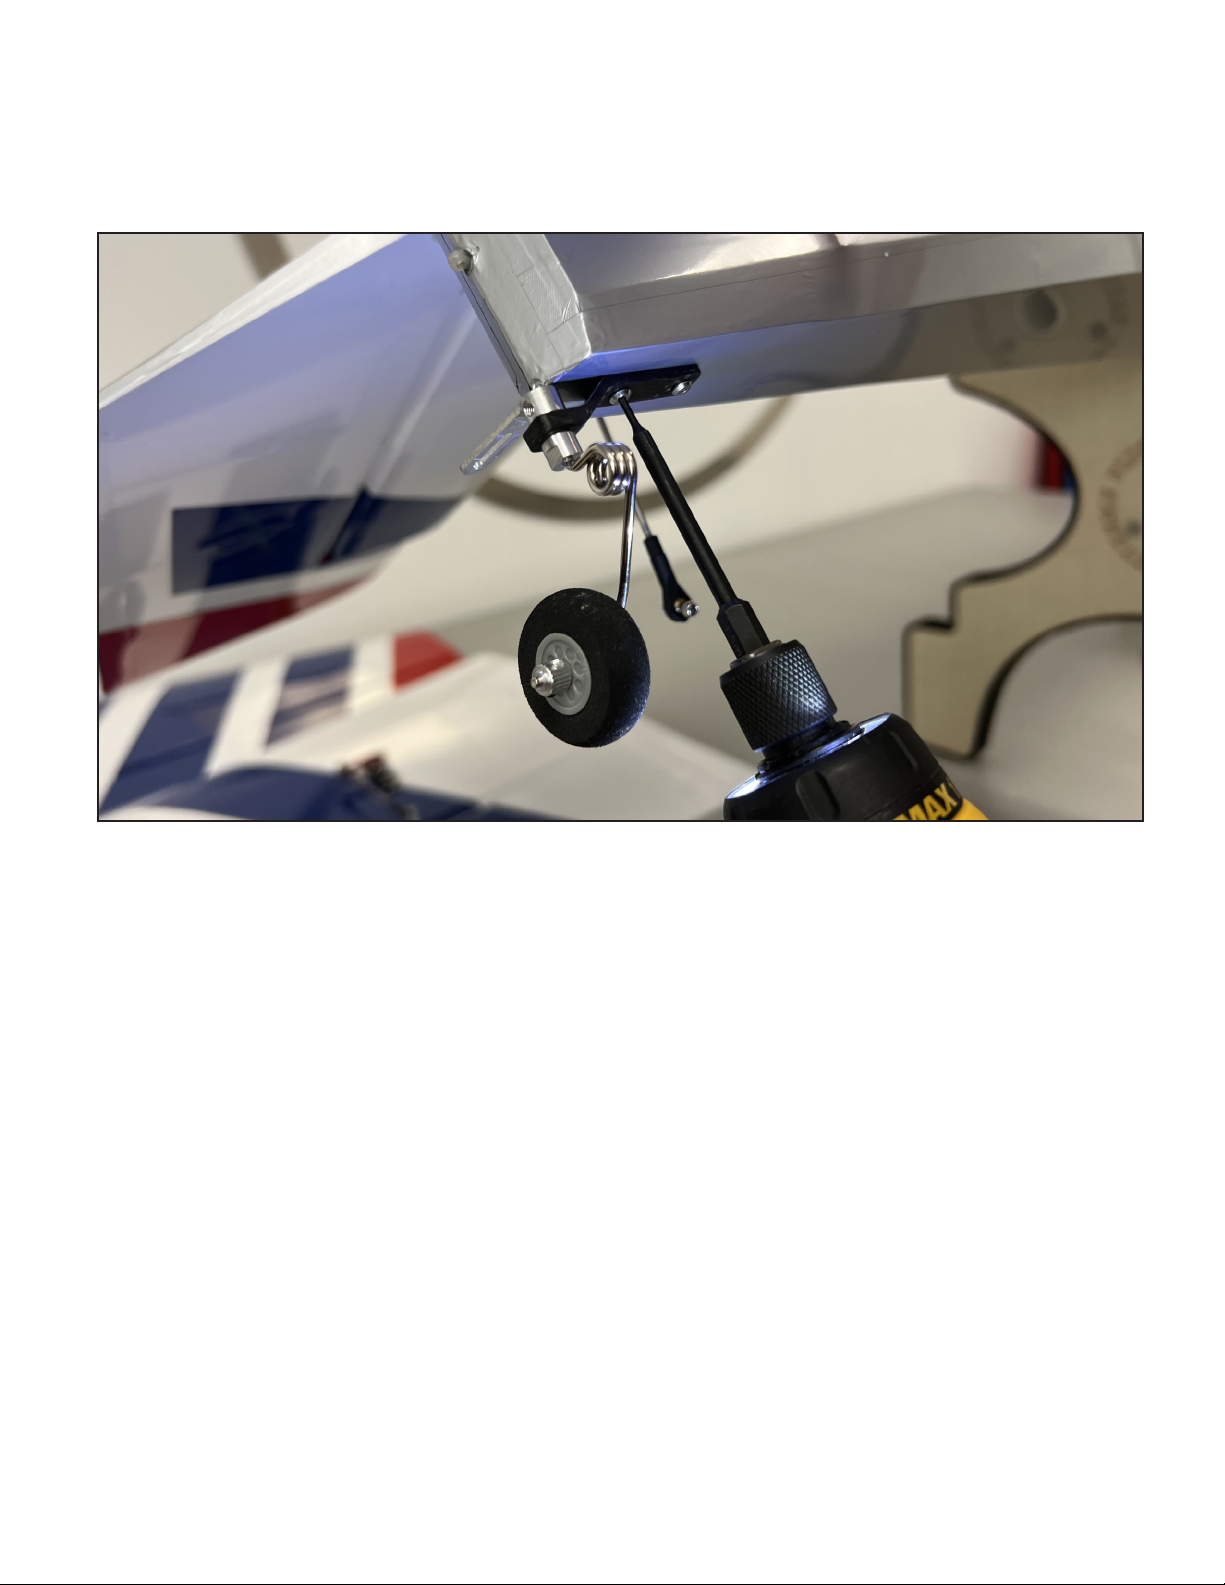
5
Remove the rear screw which holds the tailwheel bracket to the fuselage a shown, and swing the
tailwheel to the side.
Page 7
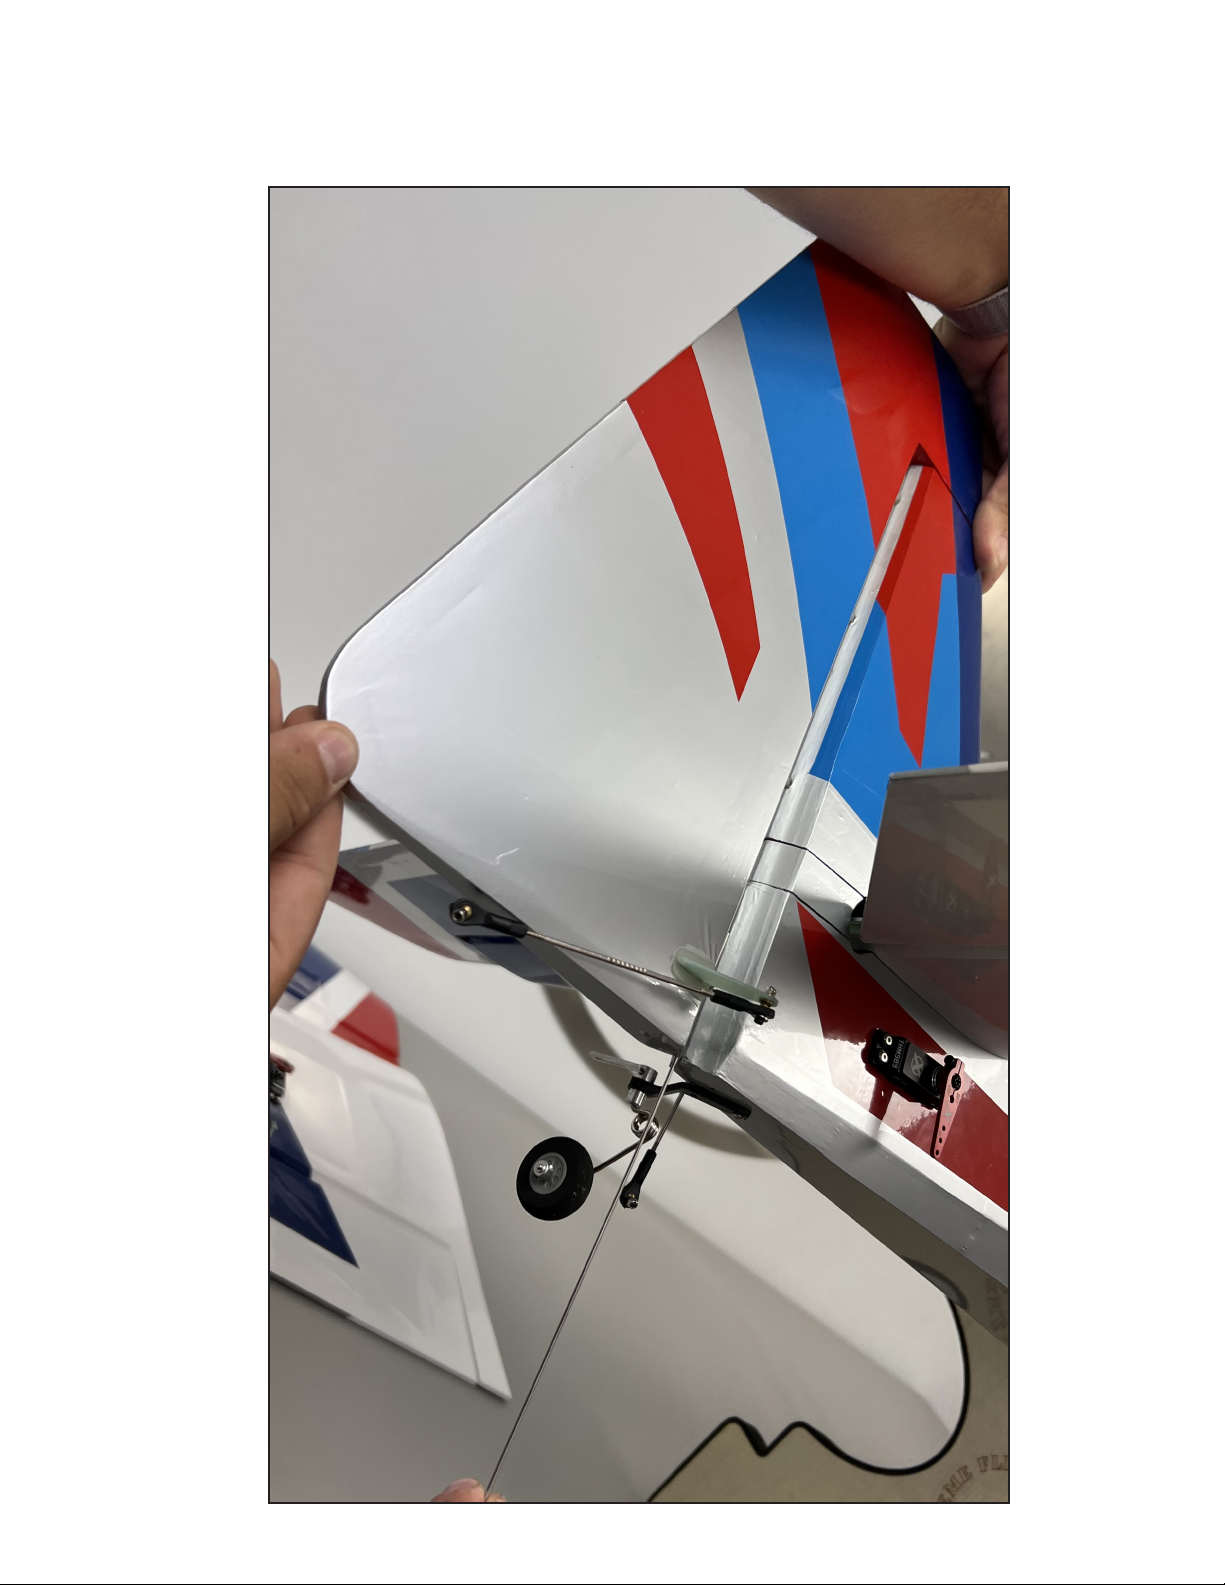
6
Attach the rudder by sliding the rudder hinge wire in from the bottom.
Page 8
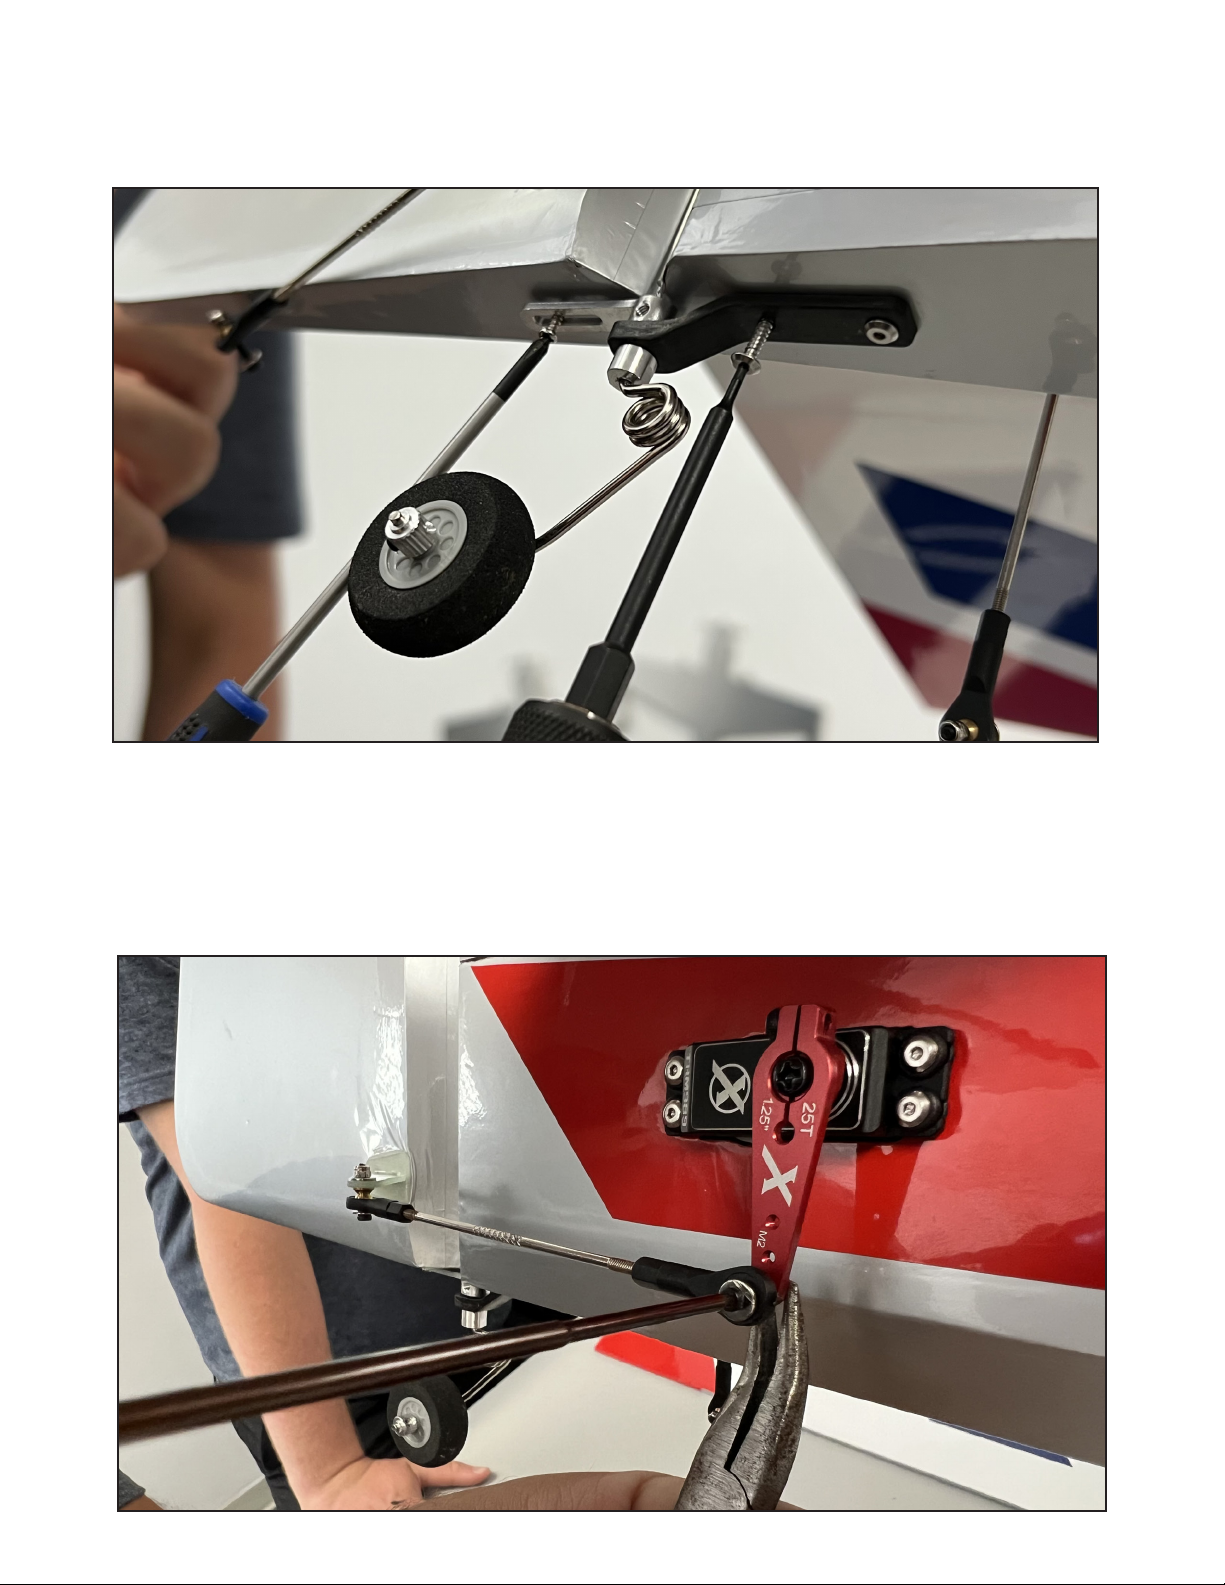
7
Straighten and re-attach the tailwheel bracket and replace the screw. Add the tailwheel tiller screw
into the bottom of the rudder as shown. Make sure the tailwheel and rudder move freely together.
8
Attach the rudder pushrod to the rudder servo arm as shown, tightening the locking nut on the
back side of the servo arm.
Page 9
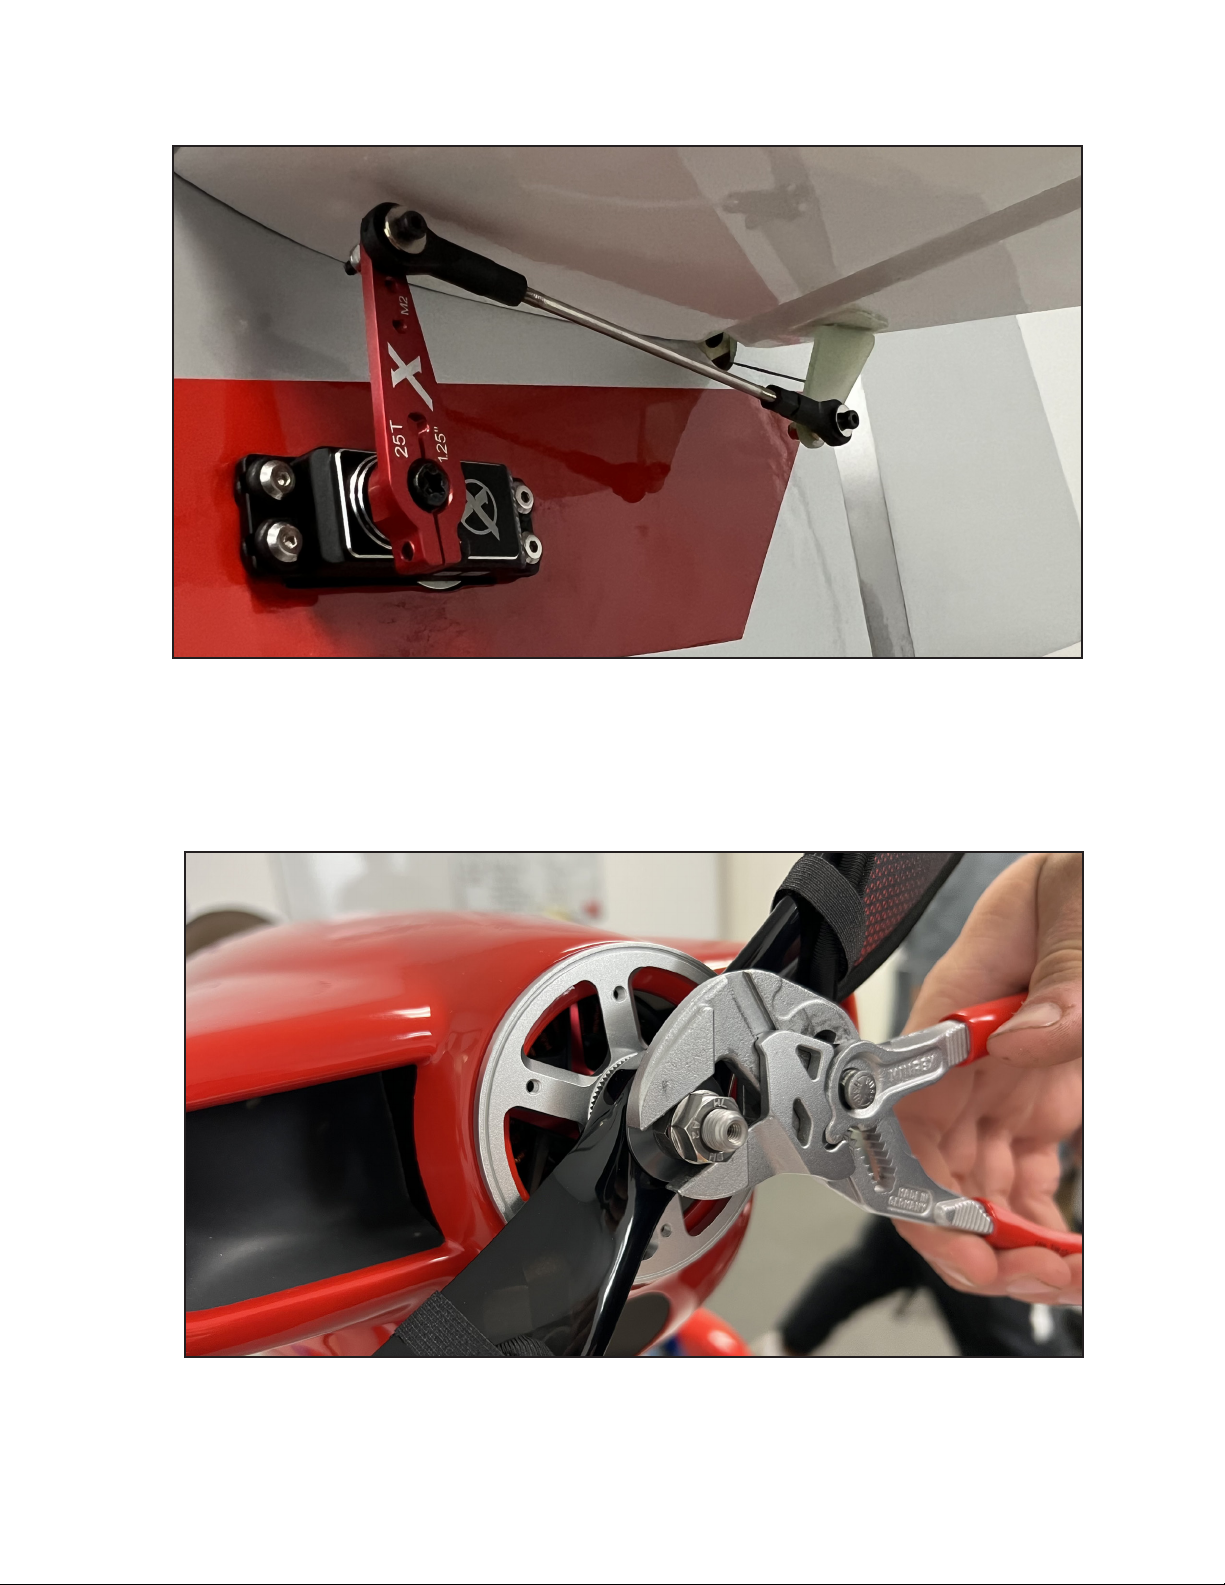
9
Attach the elevator pushrod as shown.
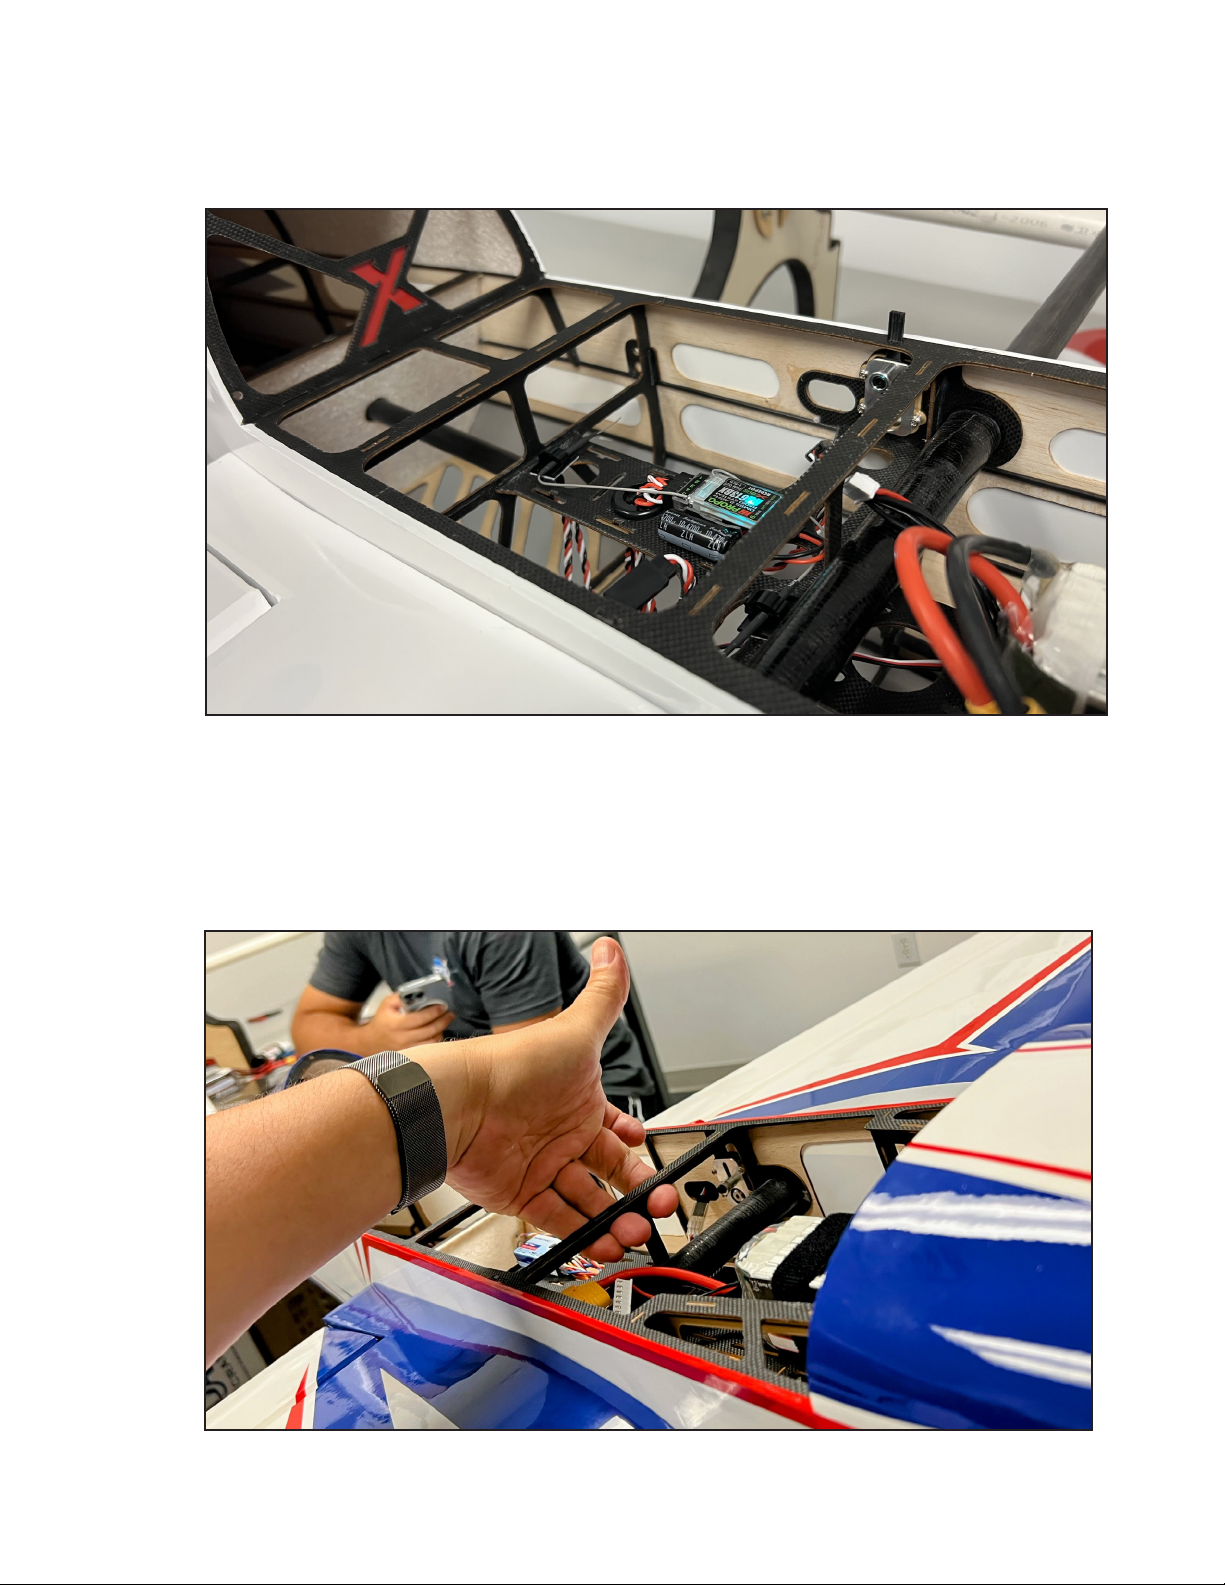
10
Remove the propeller by unscrewing the nuts before powering-on your aircra on the workbench. Never power up your aircra for programming or service until you remove the prop for
safety.
Page 10
11
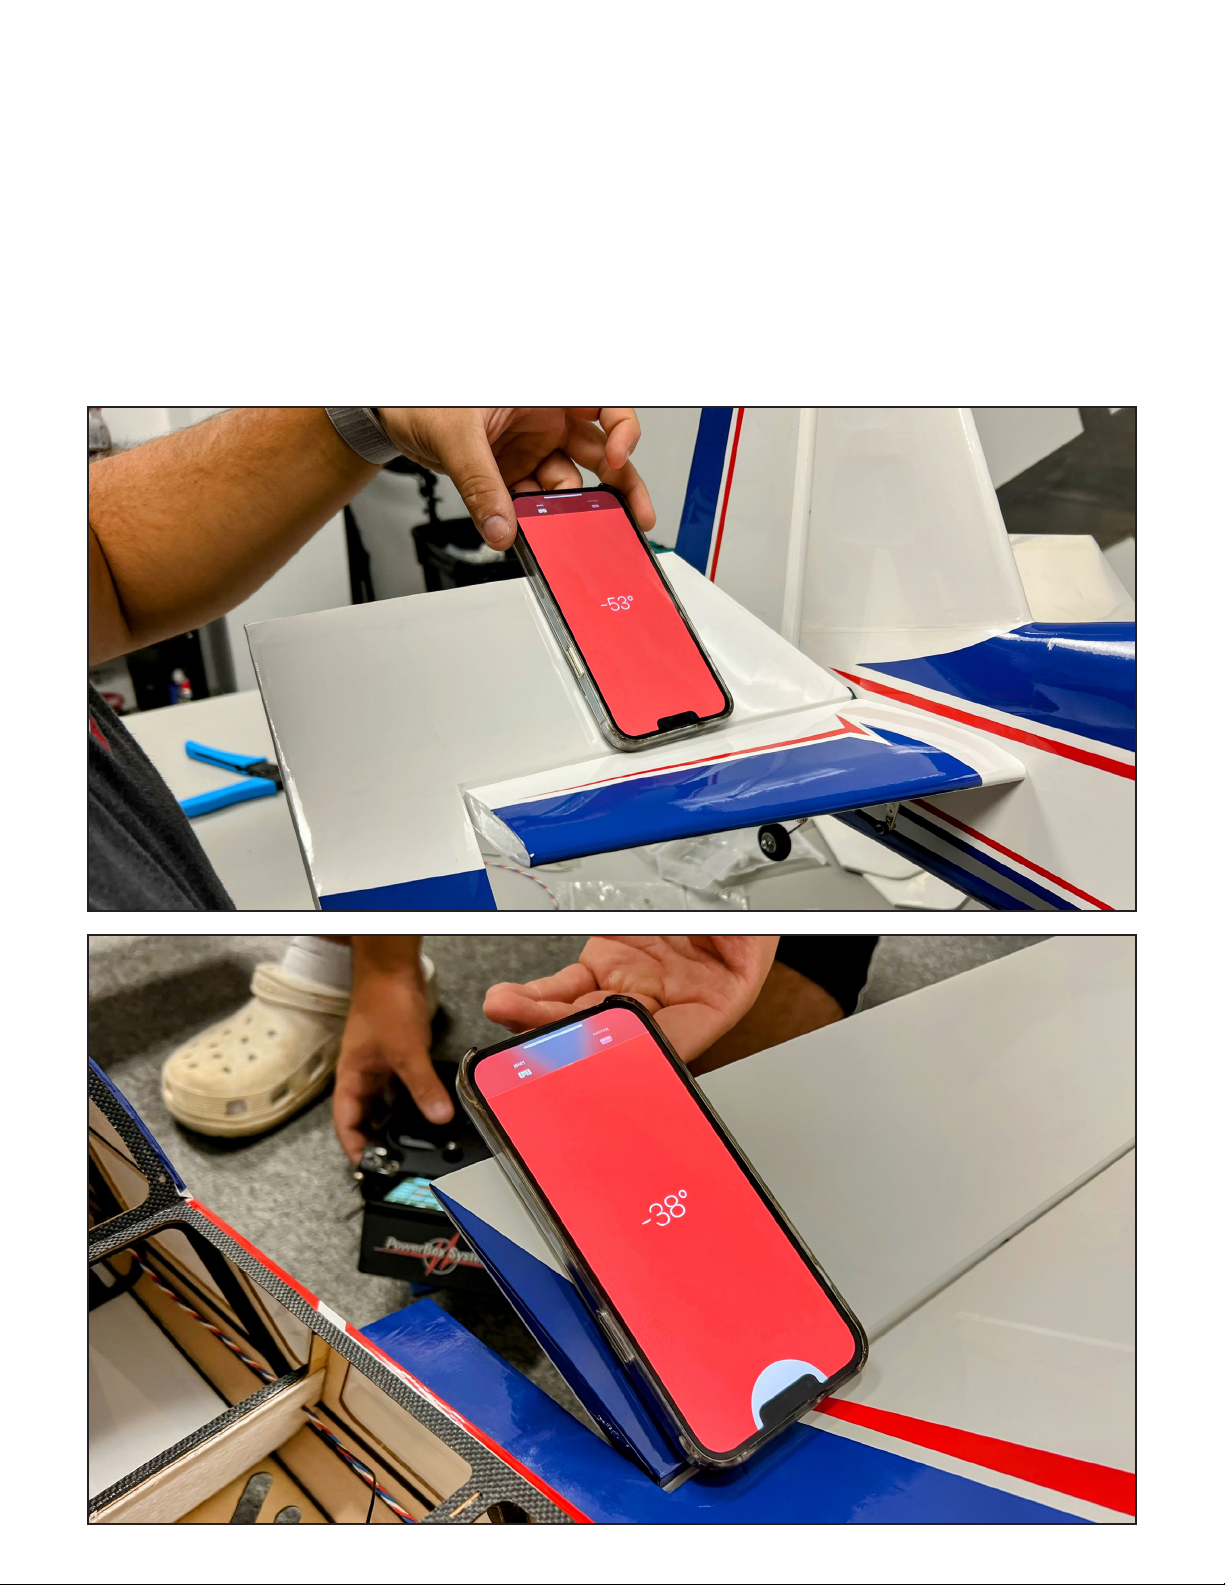
Install your receiver. A capacitor is provided for the ultimate in voltage protection, plug it into
any open channel.
12
Install your wings. Install your Lipo battery and check the balance of your airplane. Li the plane
by the fuselage former immediately behind the wing tube. Move your Lipo battery forward or
back until the plane hangs level in this poistion.
Page 11
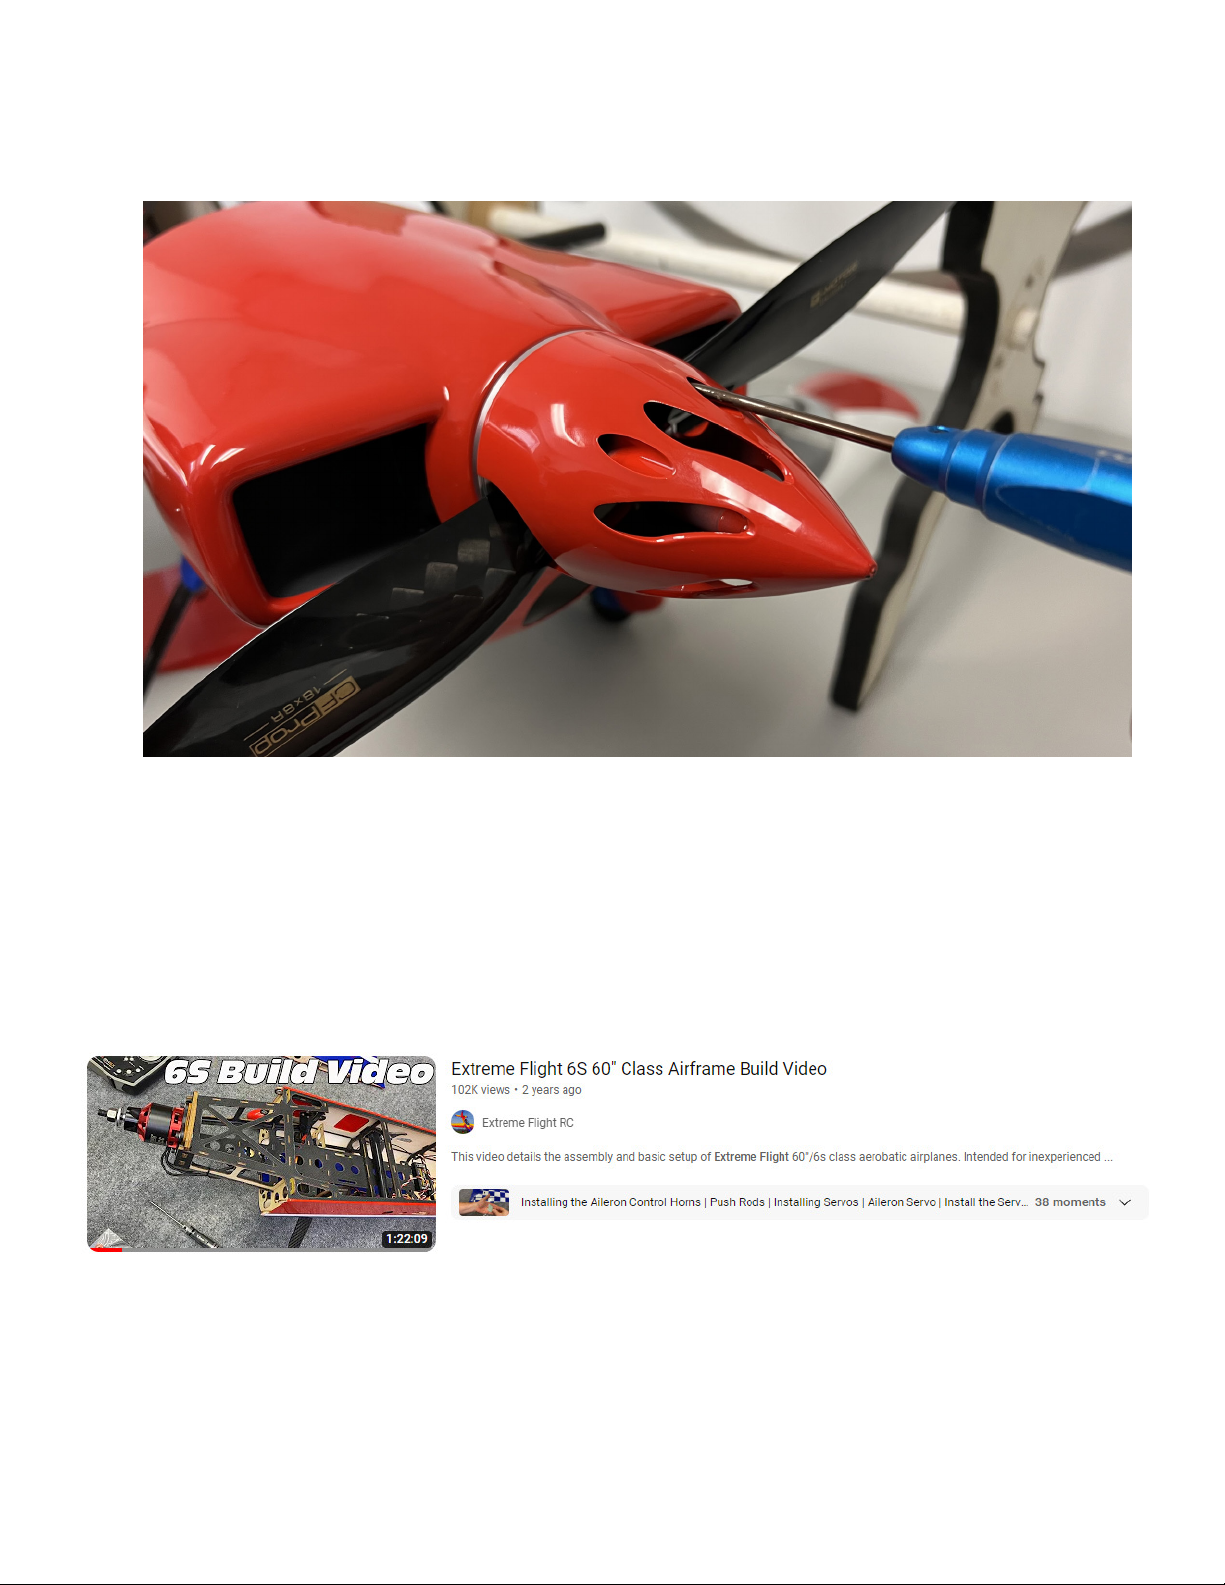
Use a cell phone with an angle-nder app or a throw gauge to set your control throws. We have
recommended a high expo value for your rst ights.
13
Elevator: Low Rate 8-10 deg. 15-20% expo
3D Rate 45-50 deg. 60-65% expo
XA/Tumbling rate 55 deg. 65-70% expo
Aileron: Low Rate 15-20 deg. 40-45% expo
High Rate 38-40 deg. 70-75% expo
Rudder: Low Rate 20 deg 40-45% expo
High Rate 45-50 deg. 80-90% expo
Page 12
14
Reinstall your prop and spinner.
15
Before ight, you should use a covering iron to run over all of the covering seams and stripes
on your aircra, and as your airplane is exposed to sunlight and the airframe adjusts to your
location, wrinkles will appear in your covering. You can shrink these wrinkles out of the covering with a covering iron or heat gun. If you have never worked with covering before, we recommend you watch a covering video, such as our Extreme Flight 60” build video on YouTube,
 Loading...