

extreme fliers MICRO DRONE 3.0+ User Manual
Micro Drone 3.0 +
User Guide

DISCLAIMER
Please read Instructions and Disclaimer carefully before operation. This product is not suitable for people
under the age of 14. By using this product you hereby agree to this disclaimer. You agree that you are
responsible for your own conduct while using this product and agree to never use this product in a way that
infringes personal privacy, local laws and regulations. Extreme Fliers shall not be held liable for any damage
or legal responsibilities and/or accidents resulting from the use of this product. Full guidance is available on
www.microdrone.co.uk
BRITISH CIVIL AVIATION AUTHORITY
1

13. Left control stick
Sideways banking
14. Sideways Trim
15. Standard & Stunt mode
12. Power switch
16. Mode 2 / Mode 4
3. Speed setting
2. Power indicator
1. Antenna
4. Gimbal
7. Turning trim
8. LCD screen
6. Pitch Trim forwards/backwards
5. Right control stick
forwards/backwards, left/right
9. Record Video,
start/stop for each press
10. Activate Smart Orientation
(see guidelines)
17. Remote Controller
(Transmitter) 11. Return Home (see guidelines)
MICRO DRONE 3.0+: Flight in the Palm of Your Hand
HANDSET
The Micro Drone 3.0+ is your personal Drone, bringing together sophisticated technology in a small size
Device. Whether you’re an expert pilot or first timer, it gives users a taste of features you would normally find
in a larger system, which is safe, fun, easy to use, that anyone can fly.
Always set the Home Point when activating Return Home and Smart Orientation.
11. Propeller Guards (optional)
9. Propeller: Red/Grey A
2. Motor Arm A
10. Battery
1. Shell / PCB
7. Propeller: Black/White B
8. Propeller: Red/Grey B
6. Propeller: Black/White A
4. Motor Arm C
15. Blue LED (back)
14. White LED (front)
12. Landing legs
13. Rubber tips
3. Motor Arm B
5. Motor Arm D
16. Magnetic Connector
19. Camera Antenna
18. Camera Module
20. Swivelling lens
21. Wired Connection Port
22. SD Card slot (optional)
17. Micro Gimbal
2
QUICK START GUIDE
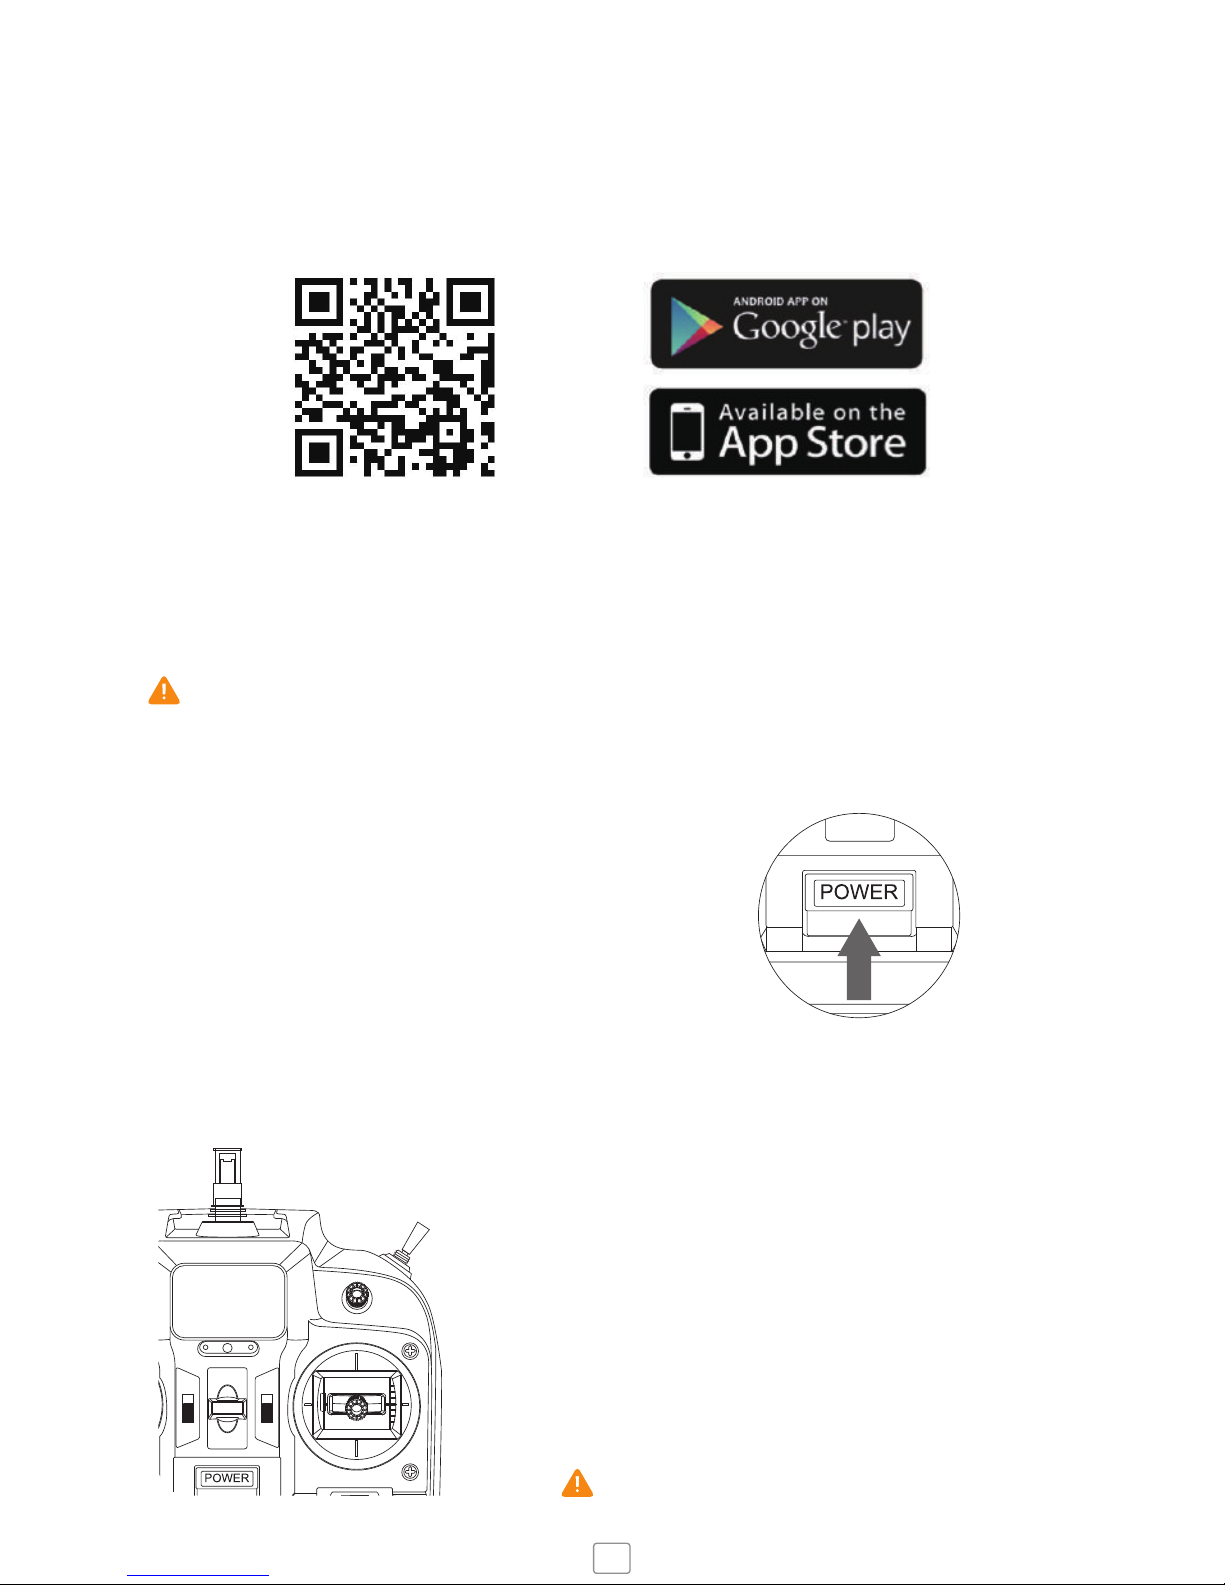
1. DOWNLOAD THE APP
2. CHECK / INSTALL BLADES
www.microdrone.co.uk/app
Watch training videos
MICRO DRONE 3.0 Watch training videos
Check you have the correct blades attached.
Check the clockwise and counter clockwise blade has been correctly installed on the corresponding
motor arm.
3. SET UP TRANSMITTER
Power on the handset
(4 x AA Batteries required).
Place the Drone on a flat, open ground with front
facing away from you.
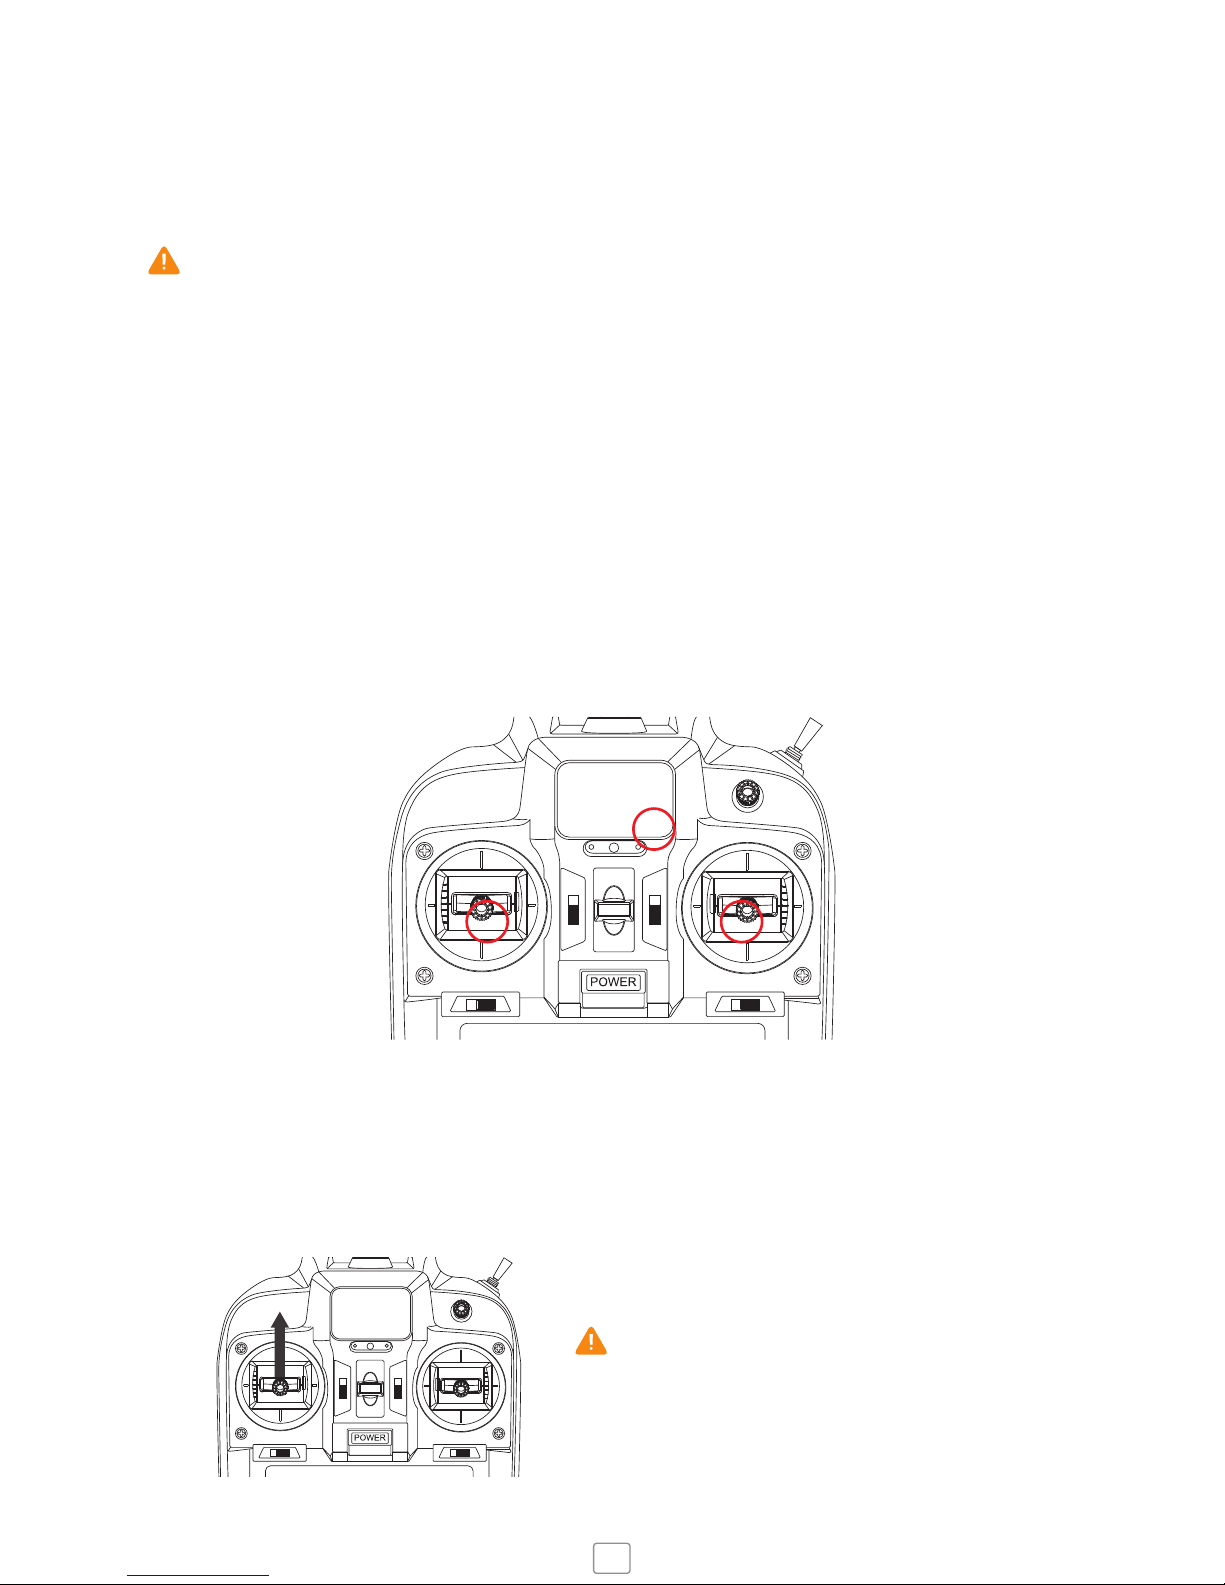
4. CHOOSE SPEED SETTING
Slow – ideal for beginners
Fast – highly responsive
Insane – suitable for expert users
3
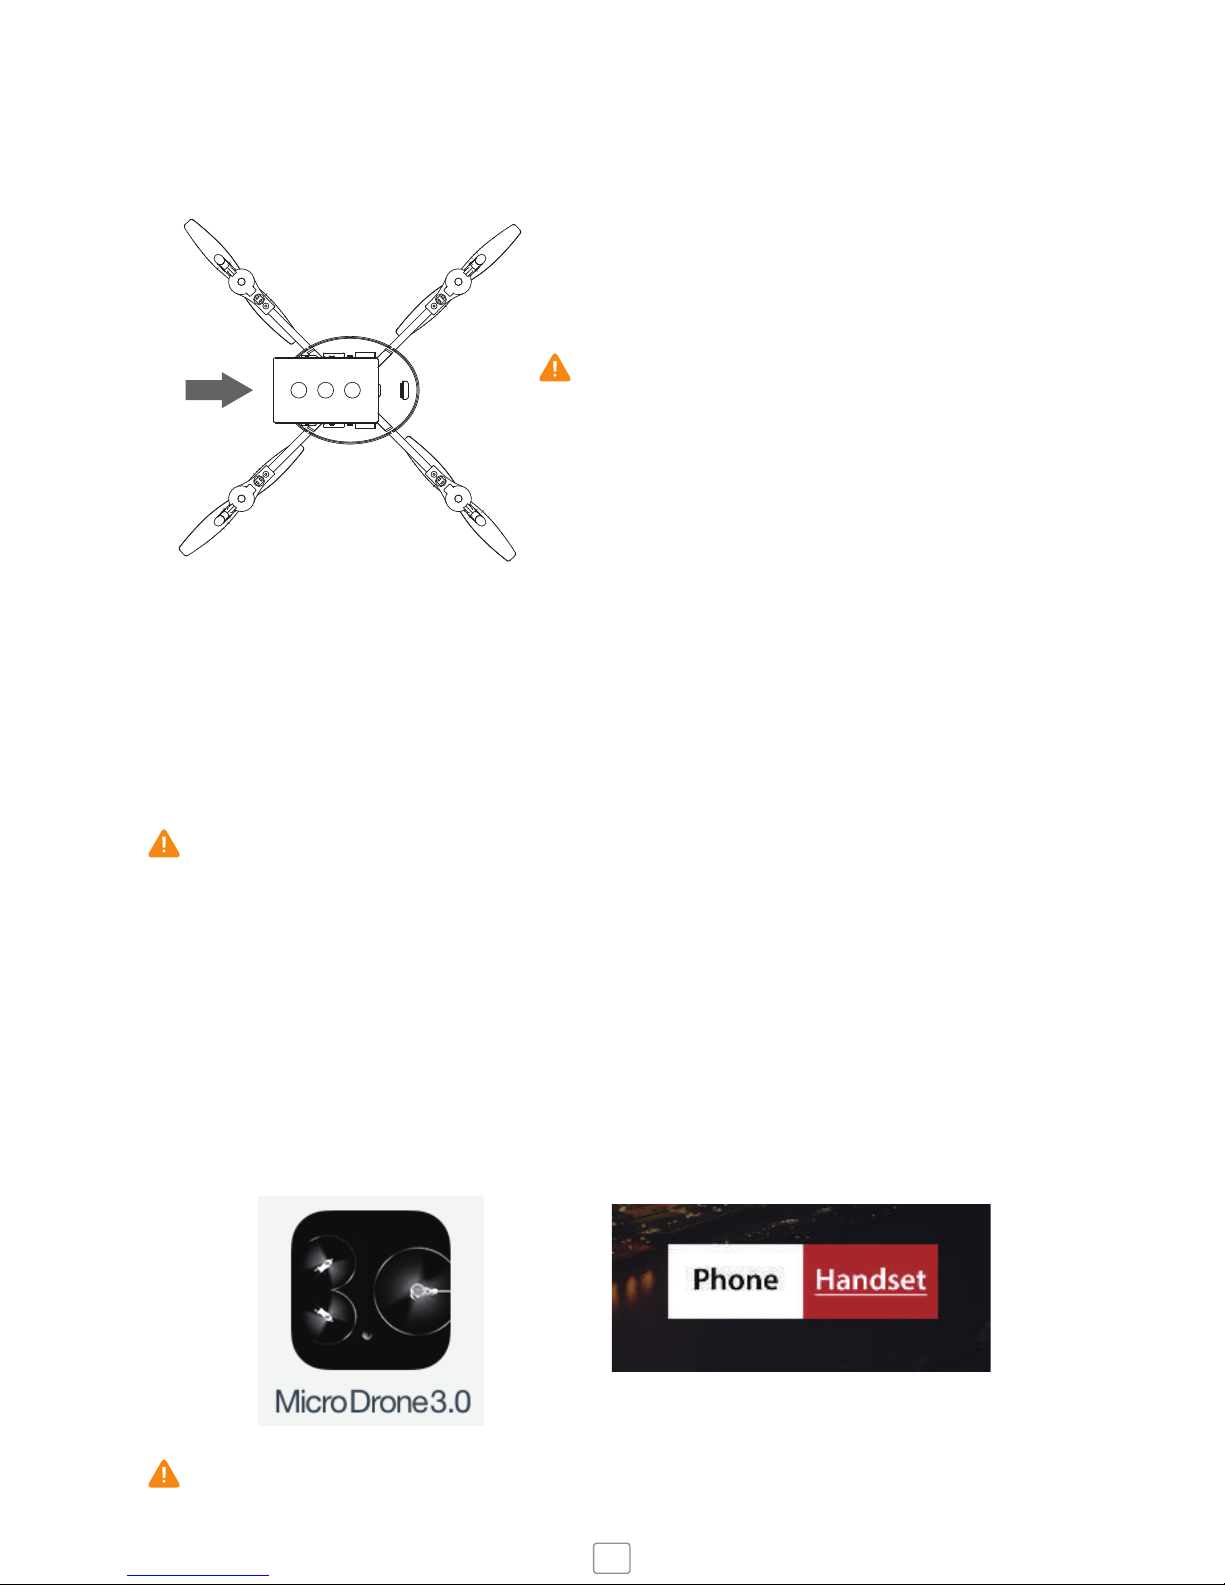
5. POWER ON DRONE
Insert the battery by sliding into position and attach the Camera with magnetic connection.
Do not force the battery
Pins may bend - carefully realign if necessary
6. SYNC THE DRONE
Wait until the blinking LEDs turn solid, then push the throttle stick up and down once.
Check propellers spin freely by applying a little power. Switching propellers will cause Drone
to flip over or not take off.
4
7. LAUNCH THE APP
Search and connect to Micro Drone 3.0 WiFi
Enter the Fly Screen
Select Handset or Phone in App Settings
Place Smartphone into Flight Mode to prevent notifications and incoming calls causing disruptions
5
10. TAKE OFF
Push the left throttle stick up slowly to take off
Gently toggle the left right control sticks to learn
basic navigation
Keep low altitude and use wide open space for first
flight
9. SET TRIM SETTINGS
Trim settings should be set to the centre point for balanced flying, indicated by long beep. Toggle the
trim buttons to make the Drone hover.
Keep low altitude and use a wide open space for first flight
8. SET GYRO HOME POINT
Place Drone in the direction you intend to fly.
When Drone and Handset is Synced, hold both control sticks to the bottom right corner for 5 seconds.
Essential for Smart Orientation and Return Home functionality.
 Loading...