


User’s Guide
XTNDAccess
™
IrDA PC Adapter

2
Copyright and Trademark Information
The information in this document is subject to change without notice.
Copyright© 2000 - 2001 Extended Systems Incorporated. All rights reserved.
This document refers to numerous products by their trade names.
XTNDAccess IrDA PC Adapter (ESI-9680) is a product of Extended Systems
Incorporated. XTNDAccess, JetEye, and QuickBeam Suite are trademarks of
Extended Systems Incorporated. All other designations are trademarks or
registered trademarks of their respective companies.
No part of this publication or software that accompanies it may be reproduced,
transmitted, transcribed or translated into any human or computer language, in
any form or by any means without the prior consent of Extended Systems
Incorporated.
Extended Systems Inc. • 5777 N. Meeker Avenue • Boise, ID 83713 • USA

3
Overview
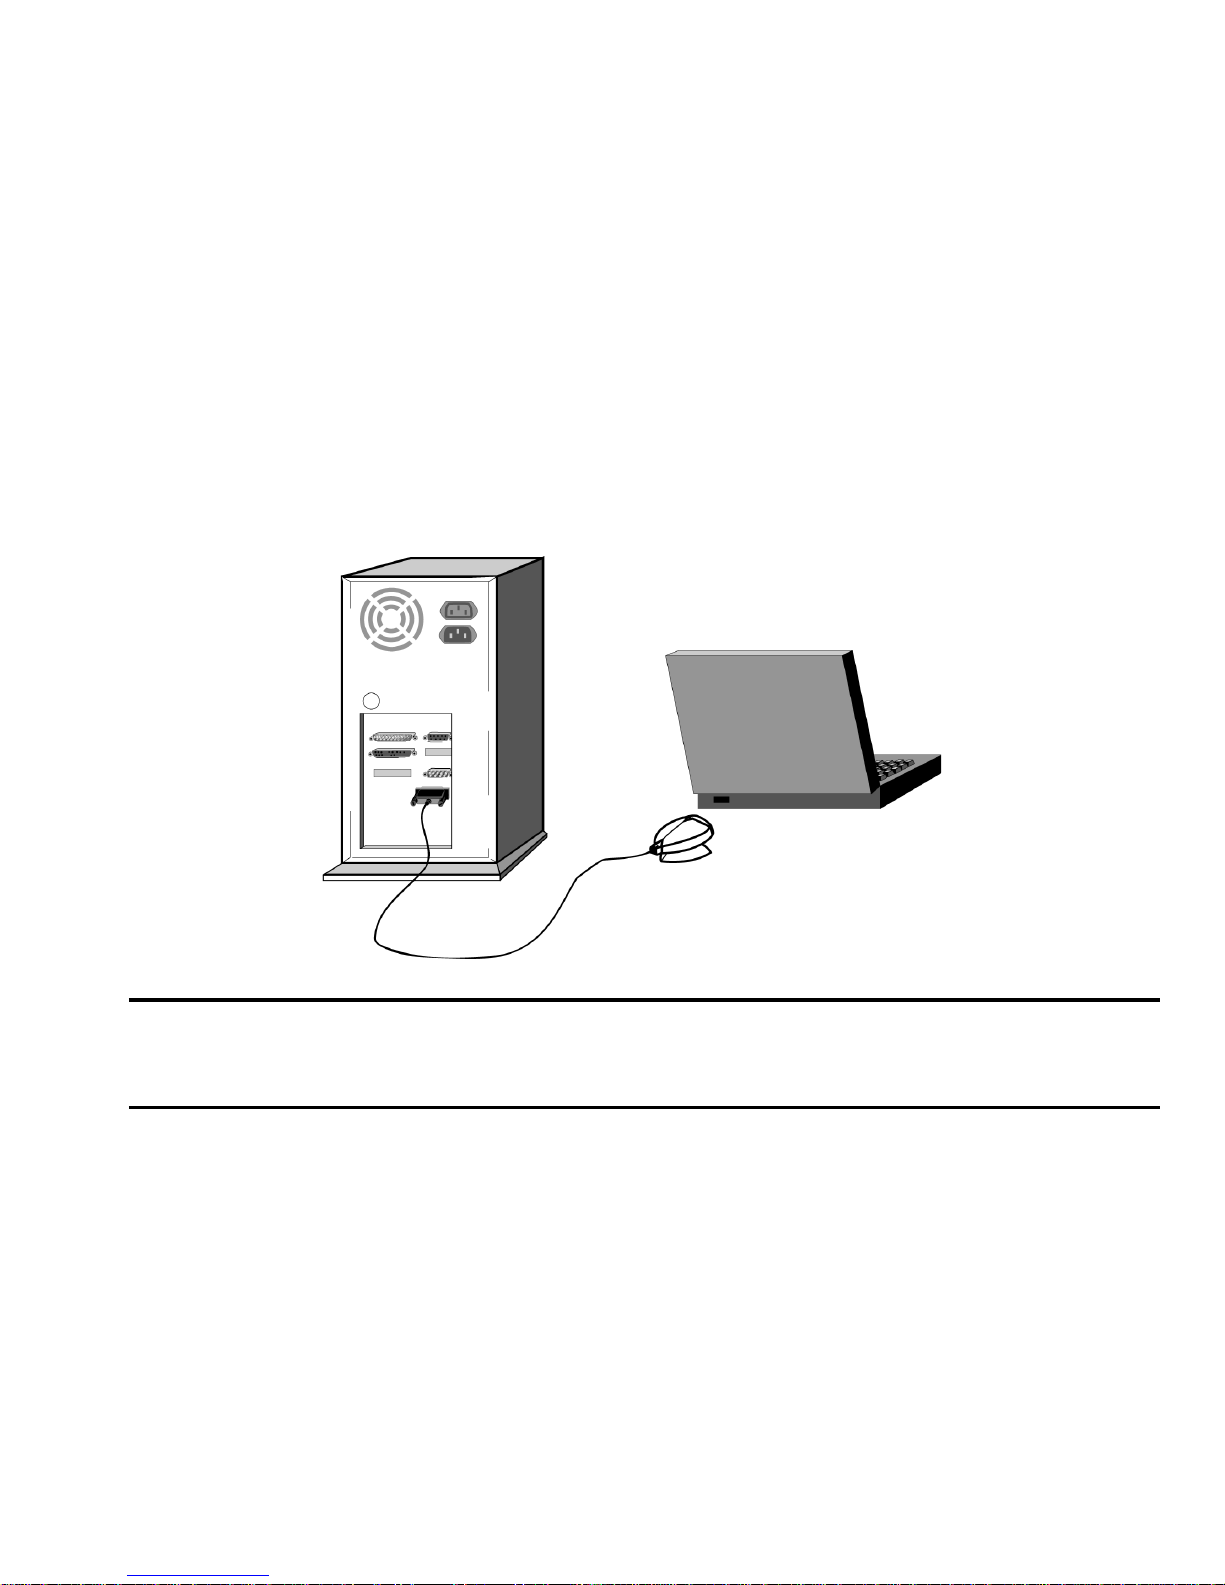
The XTNDAccess IrDA PC Adapter provides a cable-free method of moving
data between portable infrared-equipped devices and a desktop computer.
Typical portable devices include PDAs (Personal Digital Assistants), cellular
phones, digital cameras, Windows CE devices and portable computers.
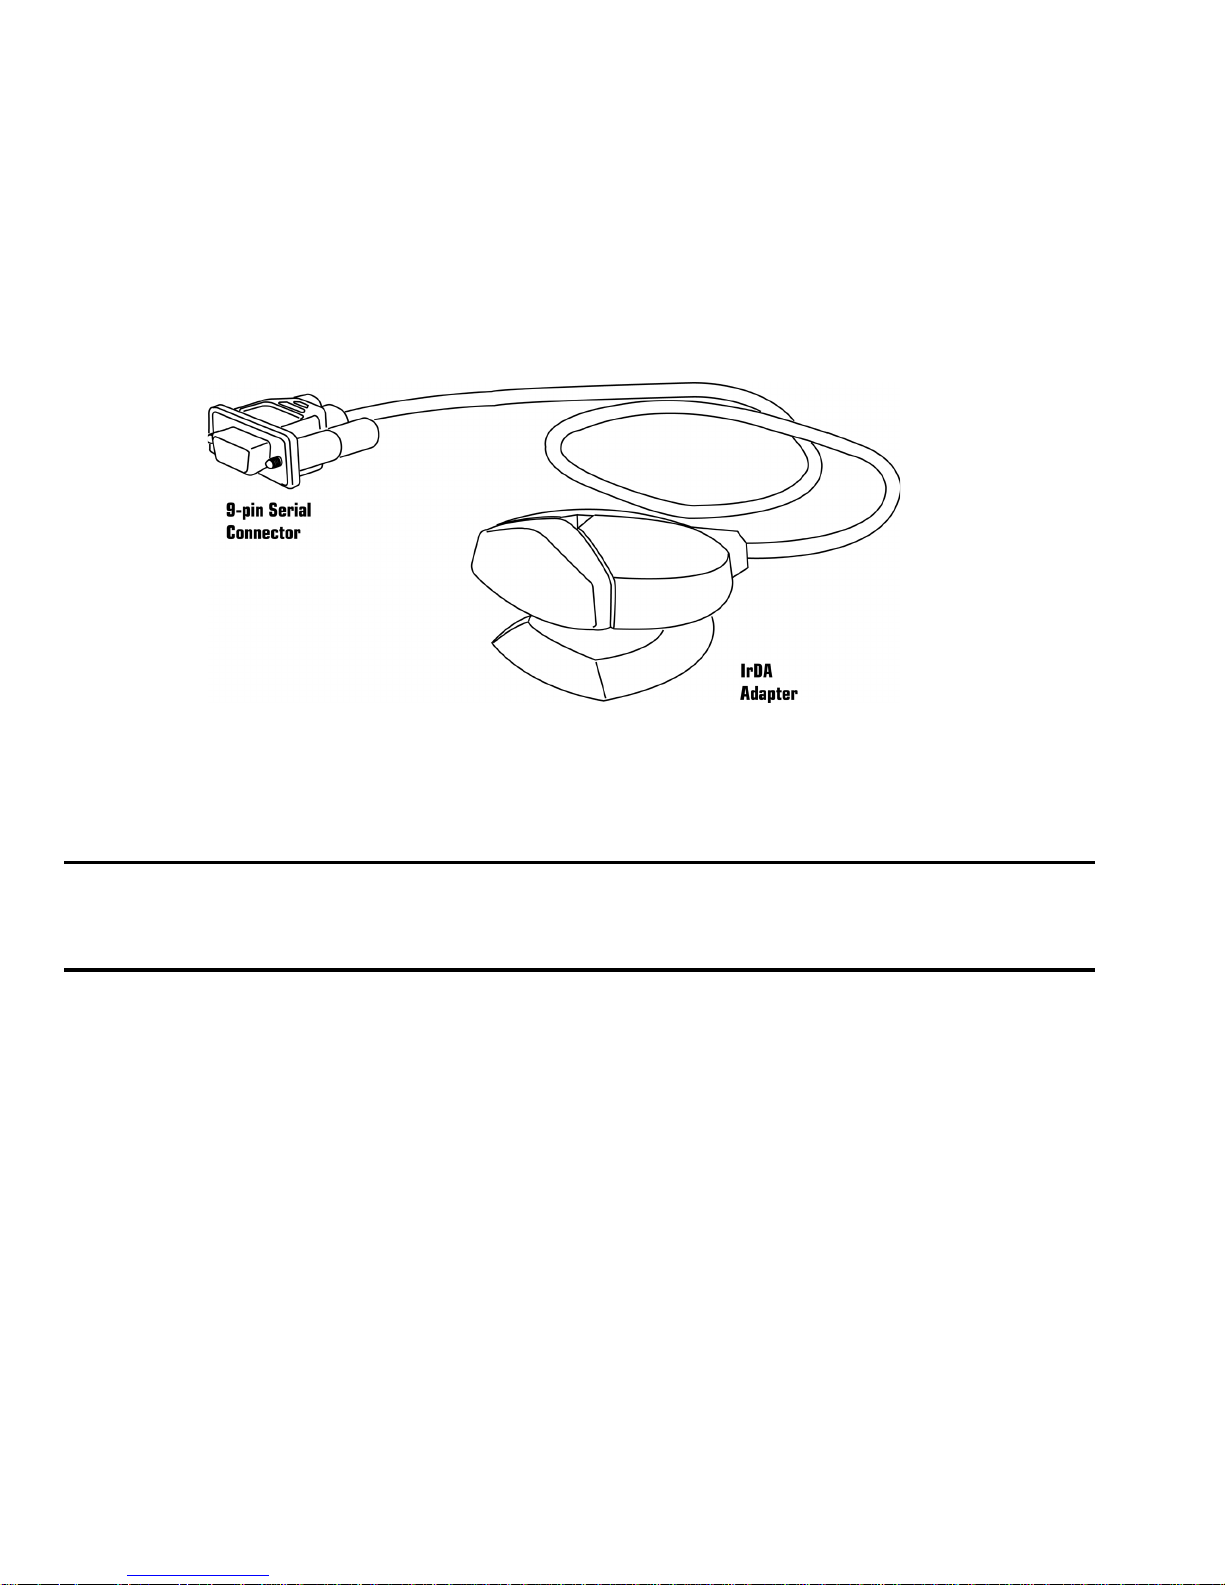
The Adapter connects to the 9-pin serial COM port of a desktop computer
and uses the IrDA 1.1 standard specification for a device that provides SIR
communication speeds. The maximum infrared speed for the Adapter is
115.2 Kbps.
The Adapter ships with QuickBeam Suite
™ software on the CD-ROM,
which includes the infrared drivers and applications needed to fully utilize
your XTNDAccess product.
XTNDAccess™
IrDA PC Adapter
User’s Guide
4
XTNDAccess IrDA PC Adapter Package Contents
In addition to the documentation, the Adapter package contains the following
items:
• XTNDAccess IrDA PC Adapter
• QuickBeam Suite CD-ROM
NOTE: Additional installation instructions and troubleshooting tips are
included in the online documentation on the CD-ROM.
System Requirements
• A desktop computer with a serial port and one of the following operating
systems: Windows 95, Windows 98, Windows NT, Windows 2000,
Windows Me, or Windows XP.
• A portable device with an infrared port meeting the IrDA standard.
5
Installing the Hardware
To install the Adapter hardware:
1. Turn off your desktop computer.
2. Attach the 9-pin serial connector to the serial port on your desktop
computer.
NOTE: Make a note of the COM port for this serial port which will be
referenced during the setup.
3. Turn on your desktop computer and follow the setup instructions
provided for your particular operating system.

6
Infrared Software Installation for Windows 95/98/NT
For Windows 95, 98 and NT operating systems, infrared drivers and
applications are provided on the QuickBeam Suite CD-ROM.
To install the infrared software:
1. Insert the QuickBeam Suite CD-ROM into the CD-ROM drive on your
desktop computer.
NOTE: If you do not have a CD-ROM drive, a utility is available on the
CD-ROM to build floppy diskettes. Find another PC with a
CD-ROM drive to build the floppies.
2. On the startup screen, select Install QuickBeam Suite.
3. Follow the install program instructions to complete the software
installation.
NOTE: Additional installation instructions and troubleshooting tips are
included in the online documentation on the CD-ROM.

7
Infrared Setup for Windows Me
For Windows Me, no additional drivers or applications are required to use the
XTNDAccess IrDA PC Adapter. However, the following setup must be
performed in order for the Adapter to work with your computer.
1. Verify the serial connector of the Adapter is attached to a serial port of
the computer.
2. On the Microsoft Windows Me CD-ROM, locate the Tools\Pssutil
folder . From within this folder, double-click the Irdasir.reg file and then
click Yes to update the registry.
3. Reboot if prompted, then perform the following steps:
a. From the Start menu, select Settings, Control Panel, and then Add
New Hardware.
b. On the Add New Hardware Wizard, click Next.
c. Click Next again to allow Windows to search for Plug and Play
devices. A list may or may not appear.
d. Select No, The device isn’t in the list, and click Next.
e. Select No, I want to select the hardware from a list, and click
Next.
f. Select Infrared devices as the Hardware type and click Next.
g. Click Next to continue the installation of the infrared device.
h. Select Infrared COM port or dongle as the Manufacturer
i. Select Generic Infrared Serial Port or dongle as the Infrared
Device and click OK.

8
j. Select ESI-9680 JetEye Serial Infrared Device as the Infrared
Transceiver and click Next.
k. Select the appropriate physical COM port to which the device is
connected and click Next.
l. Use the default Virtual COM and LPT port selections (unless other
numbers are desired) and click Next.
m. Click Finish. The Adapter will then begin to search for infrared
devices in range.
NOTE: Additional installation instructions and troubleshooting tips are
included in the online documentation on the CD-ROM.

9
Infrared Setup for Windows 2000
For Windows 2000, no additional drivers or applications are required to use the
XTNDAccess IrDA PC Adapter. However, the following setup must be
performed in order for the Adapter to work with your computer.
1. Verify the serial connector of the Adapter is attached to a serial port of
the computer.
2. From the Start menu, select Settings, Control Panel, and then Add/
Remove Hardware.
3. Select Add/Trouble Shoot a device. W indows will search for Plug and
Play devices and then return a list of device options.
4. Select Add a New Device and click Next.
5. Select Choose the device and click Next.
6. From the list of Device Types, select Infrared devices and click Next.
7. Choose Extended Systems as the manufacturer.
8. Choose ESI-9680 JetEye Serial Infrared Device as the infrared device
and click Next. The Adapter will now begin to search for infrared devices
in range.
NOTE: Additional installation instructions and troubleshooting tips are
included in the online documentation on the CD-ROM.

10
Infrared Setup for Windows XP
For Windows XP, no additional drivers or applications are required to use the
XTNDAccess IrDA PC Adapter. However, the following setup must be
performed in order for the Adapter to work with your computer.
1. Verify the serial connector of the Adapter is attached to a serial port of
the computer.
2. From the Start menu, select Control Panel, and then double-click the
Add Hardware icon.
3. From the Add Hardware wizard, click Next.
4. Select Yes, I have already connected the hardware and click Next.
5. From the list of installed hardware, select Add a new hardware device
and click Next.
6. Select Install the hardware that I manually select from a list
(Advanced) and click Next.
7. Select Infrared devices and click Next.
8. Choose Extended Systems as the manufacturer.
9. Choose ESI-9680 JetEye Serial Infrared Device as the Infrared device
and click Next.
10. On the Hardware to Install screen, click Next.
11. From the Serial Port list, select the COM port number to which the
Adapter is attached and click Next.

11
Using the XTNDAccess IrDA PC Adapter
Position the Adapter so the infrared window is within three feet (one meter) of
the infrared port of your portable device, leaving an unobstructed path between
the two units.
12. Click Finish. The Adapter will now begin to search for infrared devices
in range.
NOTE: Additional installation instructions and troubleshooting tips are
included in the online documentation on the CD-ROM.

12
Transferring Files
Windows 95/98/NT
The QuickBeam Suite CD-ROM includes the QuickBeam file transfer utility.
This utility allows you to transfer files and folders between two infraredequipped computers. QuickBeam must be installed and running on your
desktop computer prior to sending and receiving files. If you have QuickBeam
installed on your portable device, it must also be running before files can be
received.
To start QuickBeam, select Start, Programs, QuickBeam Suite and then
QuickBeam. Review the QuickBeam online help for specific features and
helpful user tips.
Windows 2000, Me, and XP
Use the WirelessLink infrared transfer utility provided in the operating system
to transfer files between infrared-equipped computers. Refer to the online help
provided with the utility for specific features and helpful user tips.

13
Troubleshooting
If you are unable to communicate between your desktop computer and portable
devices, your problem may be related to a variety of issues. Review the
following areas and make the necessary adjustments.
¾ Verify the indicator light on the Adapter flashes every 3 seconds. This
light indicates the software drivers are correctly installed. If the light is
not flashing:
• Use Infrared Monitor to verify infrared is enabled. To access Infrared
Monitor, double-click the Infrared icon located in the system tray.
• You may have selected the wrong COM port. Try to select a different
COM port:
1. Double-click the Infrared icon located in the system tray or
in the Control Panel window.
2. In the Infrared Monitor screen, select the Options tab.
3. Select a different COM port.
4. Click Apply.
5. Verify the indicator begins to flash on your Adapter.
• Restart the desktop computer the Adapter is connected to.
• Certain PCs with Windows Me and the ACPI bios disable the serial
port to save power. Visit our technical Web site for steps to correct
this issue.
• Verify the Adapter connection is tightly secured on your desktop
serial port.

14
¾ Your portable device may be out of range or misaligned with the Adapter.
Try repositioning the infrared devices.
¾ Isolate which device is not communicating by using a third infrared device,
such as a printer or another portable computer, to test connections.
NOTE: Additional installation instructions and troubleshooting tips are
included in the online documentation on the CD-ROM.

15
Technical Support Contact Information
Contact your local distributor/reseller representative for general support
questions concerning this product.
If you would like to contact us via the Internet, you can reach us at:
www.extendedsystems.com
Technical Support representatives, located in Boise, Idaho, USA, are available
from 7 a.m. to 6 p.m. (Mountain T ime), Monday through Friday, excluding
holidays. Representatives may be contacted by:
Email: support@extendsys.com
Phone: 800-235-7576 (US & Canada only)
(1) 208-322-7800
Fax: (1) 208-327-5004

16
Hardware Warranty
Extended Systems Incorporated warrants this product against defects in
materials and workmanship to the purchaser for a period of one (1) year from
the date of shipment. This warranty is limited to repair or replacement of the
product. This warranty does not include damage due to acts of god, accident,
misuse, abuse, negligence, modification, unsuitable environment or improper
maintenance. To obtain warranty service, the purchaser must first call Extended
Systems Incorporated for an RMA number, then return the product to
Extended Systems Incorporated for repair or replacement.
Purchaser shall prepay shipping charges for products returned to Extended
Systems Incorporated. Extended Systems Incorporated will pay for return of
the products to purchaser, except that purchaser shall pay all shipping charges,
duties, and taxes for products returned to Extended Systems Incorporated from
a country other than the United States.
Extended Systems makes no other warranty of any kind with regard to this
material. Extended Systems shall not be liable for errors contained herein or for
incidental or consequential damages in connection with the furnishing,
performance, or use of this material.
Within thirty (30) days of receipt should the product fail for any reason other
than damage due to customer negligence, purchaser has the right to return the
product for a full refund of the purchase price. If the purchaser wishes to
upgrade or convert to another Extended Systems product within the thirty (30)

17
day period, purchaser has the right to return the product and apply the full
purchase price toward the purchase of the other product. Any other return will
be subject to Extended Systems’ existing restocking policy.
EXTENDED SYSTEMS WARRANTS THAT THIS PRODUCT IS NEW
OR HAS BEEN REMANUF ACTURED T O MEET NEW ST ANDARDS
USING NEW OR SERVICEABLE USED P AR TS. EXTENDED SYSTEMS
INCORPORA TED MAKES NO OTHER WARRANTY , EITHER
EXPRESSED OR IMPLIED, WITH RESPECT TO THIS PRODUCT .
EXTENDED SYSTEMS INCORPORA TED SPECIFICALL Y DISCLAIMS
THE IMPLIED WARRANTIES OF MERCHANT ABILITY AND FITNESS
FOR A P ARTICULAR PURPOSE. Some states or provinces do not allow
limitations on how long an implied warranty lasts, so the above limitation or
exclusion may not apply to you.
THE REMEDIES PROVIDED HEREIN ARE CUSTOMER’S SOLE AND
EXCLUSIVE REMEDIES. IN NO EVENT SHALL EXTENDED SYSTEMS
INCORPORATED BE LIABLE FOR ANY LOST PROFITS, DIRECT,
INDIRECT, SPECIAL, INCIDENTAL, OR CONSEQUENTIAL DAMAGES,
WHETHER BASED ON CONTRACT, TORT, OR ANY OTHER LEGAL
THEORY.

18
Regulatory Information
FCC
This device complies with Part 15 of the FCC rules. Operation is subject to the
following conditions: (1) This device may not cause harmful interference.
(2) This device must accept any interference received including interference that
may cause undesired operation.
Canadian ICES-003
This Class B digital apparatus complies with Canadian ICES-003.
Cet appareil numérique de la classe B est conform à la norme NMB-003 du
Canada.
CE
The CE mark, located on this Extended Systems product, identifies the product
as being in conformance with the European CE standards applicable at the time
of manufacture.

19
VCCI
This is a Class 2 product based on the standard of the Voluntary Control
Council for Interference (VCCI) from Information Technology Equipment. If
this is used near a radio or television receiver in a domestic environment, it may
cause radio interference. Install and use the equipment according to the
instruction manual.

20
Extended Systems
5777 North Meeker Avenue
Boise, ID 83713 U.S.A.
www.extendedsystems.com
(800) 235-7576 • (208) 322-7575
Fax (208) 327-5004
Part Number 09680-0133
0110
Printed in the U.S.A.
Extended Systems, a leader in mobile information management, offers solutions that enable users to access,
synchronize, and retrieve information on demand. The company’s products include data synchronization and
management software, short-range wireless connectivity products (Bluetooth and IrDA-compliant), and client/server
database management systems with remote access capabilities.
 Loading...