

Page 1
User Manual
Digital Psychrometer + IR Thermometer
Model RH401
DP
AdditionalUserManualTranslationsavailableatwww.extech.com
Wb
H
umi
C
%
www.GlobalTestSupply.com
Page 2
Introduction
Congratulations on your purchase of the Extech RH401 Digital Psychrometer + InfraRed
Thermometer. This device measures Humidity, Air Temperature, Dew Point and Wet Bulb.
Advanced features include Infrared Non-Contact Surface Temperature Measurement, Data Hold and
programmable Auto Power Off, and an RS-232 interface for capturing readings to a PC using
optional 407752 software. The retractable probe protects the sensors when the meter is not in use.
Careful use of this meter will provide years of reliable service.
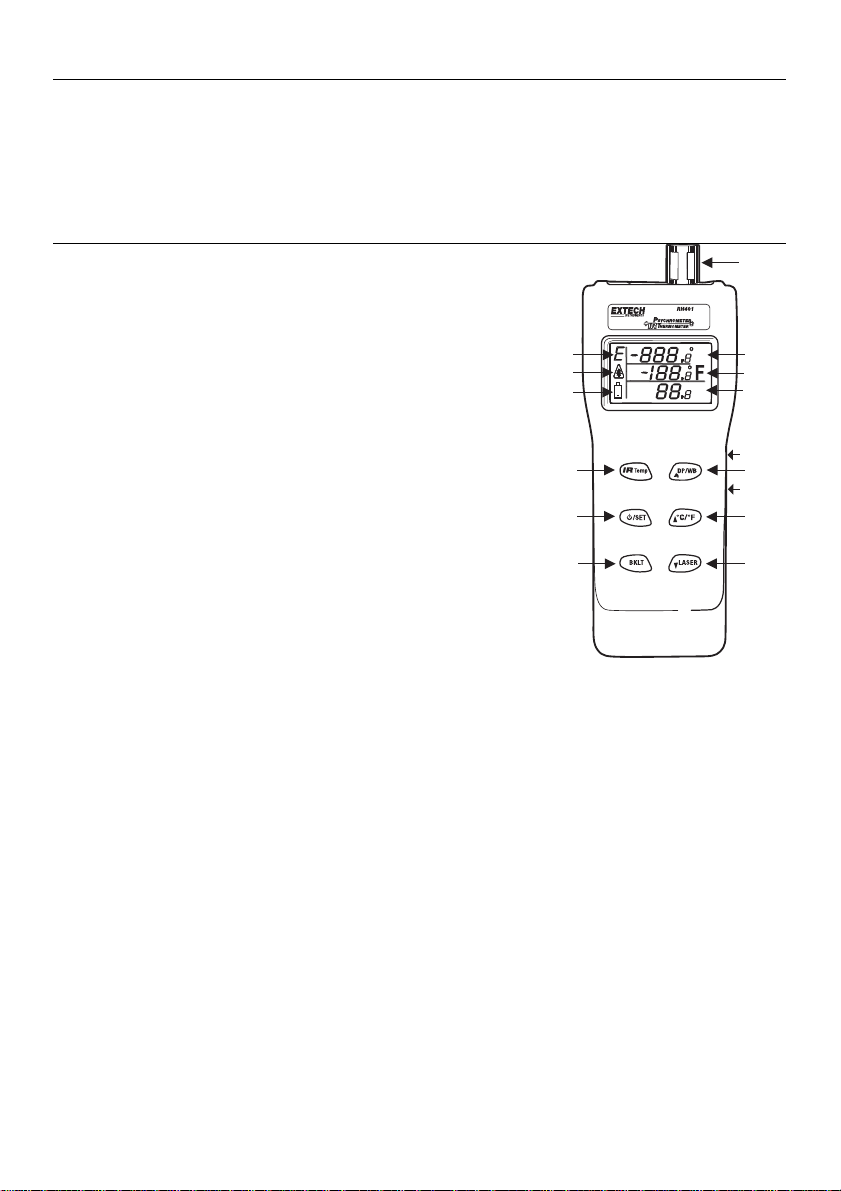
Meter Description
C
%
13
12
11
10
15
9
14
8
7
1. Emissivity adjust indicator
2. Laser pointer on indicator
3. Low Battery indicator
4. IR Surface Temperature button
5. ON/OFF/Setup button
6. Back Light button
1
2
3
7. Laser/Down button
8. °F/°C/Up button
9. Dew Point/Wet Bulb button
4
10. % Humidity display
11. Air Temperature, Dew Point or Wet Bulb display
5
12. IR Surface Temperature display
13. Extended probe with Humidity &
6
Air Temperature Sensors
14. PC interface port
15. AC adaptor jack
Note: The battery compartment is located on the rear of the instrument
DP
Wb
H
umi
2
www.GlobalTestSupply.com
RH401-en-GB_ V1.7 1/17
Page 3
Operation
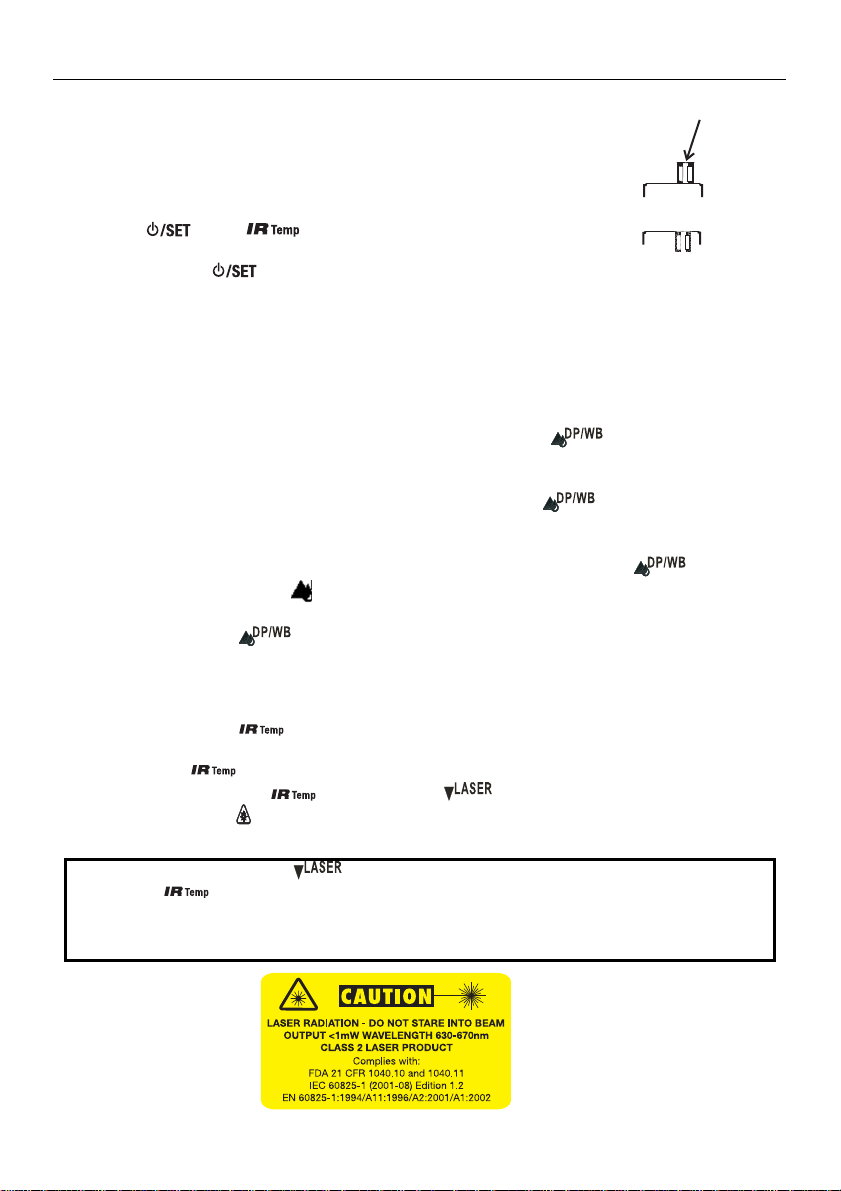
Retractable Humidity and Air Temperature Sensor
Press down on the sensor, located at the top of the meter, to release it.
Humidity and air temperature will not be displayed if the sensor is not
extended.
After use, press the sensor into the stored (protected) position.
Power ON/OFF
Press the
perform a short self-test when turned on.
Press and hold the
Humidity and Air Temperature measurements
1. Hold the meter in the area to be tested.
2. Allow adequate time for readings to stabilize.
3. View the Relative Humidity measurement in the lower display.
4. View the Air (probe)Temperature measurement in the middle display
Wet Bulb and Dew Point measurements
1. To display the Dew Point measurement, momentarily press the
DP appears in the middle display.
2. Dew Point temperature is now displayed.
3. To display the Wet Bulb measurement, momentarily press the
Wb appears in the middle display .
4. Wet Bulb temperature is now displayed.
5. To display the IR surface temp – DP temp temperature press and hold the
more than 2 seconds. The
IR Temp button. The differential temperature reading can now be viewed in the top display.
6. Press and hold the
temperature.
Non-Contact InfraRed Surface Temperature measurements
1. Point the meter toward the surface to be measured.
2. Press and hold the
3. View the temperature measurement in the upper display
4. Release the
5. While holding down the
pointer on/off. The
temperature measurement is active and the laser pointer is on.
(or the button) to turn power on. The meter will
button for three seconds to turn power off.
icon will appear in the top left corner of the display, then press the
button for more than 2 seconds to toggle the display back to IR
button.
nd the reading will be held on the display until a new reading is taken.
button, press the button to toggle the laser targeting
symbol will appear in the middle left of the display indicating that surface
Press Here
button until the symbol
button until the symbol
Sensor
Extended
Sensor
Stored
button for
WARNING! The Laser button
press of the
Laser or pointing the Laser toward anyone’s eyes. Mirrored surfaces near a measurement object
can redirect the Laser, use extreme caution. Do not allow the Laser beam to be directed toward
explosive gases.
button turns on the Laser beam. Avoid looking directly into the path of the
enables/disables the Laser pointer. When enabled, each
3
RH401-en-GB_ V1.7 1/17
www.GlobalTestSupply.com
Page 4

IR Emissivity Adjustment
Emissivity is adjustable from 0.3 to 0.99. The default value is 0.95 which is the typical emissivity
value of many non-metallic surfaces. If the surface to be measured is highly reflective and the
emissivity is not known, cover the surface with paint or tape to improve measurement accuracy. If
the emissivity of the surface is known, follow this procedure to set the value.
1. With the meter on, Press the
will flash on the top left side of the display.
2. Use the
3. When the desired setting appears in the display, press
normal operation.
Material under test Emissivity Material under test Emissivity
Asphalt 0.90 to 0.98 Cloth (black) 0.98
Concrete 0.94 Skin (human) 0.98
Cement 0.96 Lather 0.75 to 0.80
Sand 0.90 Charcoal (powder) 0.96
Soil 0.92 to 0.96 Lacquer 0.80 to 0.95
Water 0.92 to 0.96 Lacquer (matt) 0.97
Ice 0.96 to 0.98 Rubber (black) 0.94
Snow 0.83 Plastic 0.85 to 0.95
Glass 0.90 to 0.95 Timber 0.90
Ceramic 0.90 to 0.94 Paper 0.70 to 0.94
Marble 0.94 Chromium Oxides 0.81
Plaster 0.80 to 0.90 Copper Oxides 0.78
Mortar 0.89 to 0.91 Iron Oxides 0.78 to 0.82
Brick 0.93 to 0.96 Textiles 0.90
Spot to Distance Ratio
The 8:1 spot to distance ratio determines the size of the measured surface area with respect to the
distance the meter is held away from the surface.
up key and the down key to adjust the value.
Emissivity Factors for Common Materials
key twice to enter the Emissivity setting procedure.
again to save and return back to
4
www.GlobalTestSupply.com
RH401-en-GB_ V1.7 1/17
Page 5

Selecting temperature units of measure (C/F)
Press and hold the
oC/o
F button momentarily to toggle the temperature units.
Automatic Power OFF
The meter automatically shuts off after a programmed period of time.
To disable auto power off, with the meter off, press
and . When “n” appears, release
the keys and the meter is now in Non-Sleep Mode.
The power off time is adjustable from 5 to 600 seconds. To change the auto power off setting, press
the
the
key to enter the setting procedure. Use the up key and the
down key to set the value. When the desired power-off time appears in the display, press
key again to save the parameters.
Backlight
Press the BKLT button to turn the display backlight on. The backlight will remain on until the BKLT
button is pressed again or the meter is turned off.
Error Messages
An error message will appear on the display if the meter fails an internal diagnostic test.
1. E1 (Top display): IR temperature failure. Repair/replacement is necessary.
2. E2 (Top display): IR temperature >932°F (500°C).
3. E3 (Top display): IR temperature <-40°F (-40°C).
4. E9 (Top display): Calibration error.
5. E1 (Middle display): Temperature failure. Repair/replacement is necessary.
6. E2 (Middle display): Dew Point is out of range or Repair/replacement is necessary.
7. E3 (Middle display): Air temperature is out of range or Repair/replacement is necessary.
8. E1 (Bottom display): RH circuit error. Repair/replacement is necessary.
9. E5 (Bottom display): RH circuit error. Repair/replacement is necessary.
Setup memory
The selected display, emissivity value, auto power off time, backlight status and the laser pointer
status are stored in memory and will remain in memory as the user default setting until
reprogrammed by the user.
5
RH401-en-GB_ V1.7 1/17
www.GlobalTestSupply.com
Page 6

Calibration
The following verification and calibration procedures requires a humidity chamber or the 33% and
75% RH reference bottles which are supplied with the Model RH300-CAL kit.
RH Accuracy Verification
Checking the 33% or 75% RH Calibration
1. Insert meter’s sensor into the 33% or 75% salt reference
bottle.
Rotating the bottle will assist in placing it over the sensor.
2. Check the reading after 10 minutes
3. Verify that the reading is within the accuracy specification.
RH Calibration (33% and 75%)
This two-point calibration takes approximately one hour to
complete.
33% Calibration
1. Turn off the meter and insert the meter sensor into the 33%
salt reference bottle. Rotating the bottle will assist in
placing it over the sensor.
2. Hold down the
key to turn the unit on.
3. “32.8” (reading may vary depending on temperature) will
flash on the display. After 30 minutes, the flashing will stop
to indicate that the 33% calibration is complete.
75% Calibration
4. Insert the meter sensor into the 75% salt reference bottle. From a steady “32.8” display
press the
5. “75.2” (reading may vary depending on temperature) will flash on the display. After 30
minutes, the flashing will stop to indicate that the 75% calibration is complete and the
calibration data has been saved to memory.
6. The screen will return to the normal display. Calibration is now complete.
Note: If the salt at the bottom of the calibration bottles appears dry, the bottles should be
replaced.
and keys and then press the
button to enter the 75% calibration.
33% or 75%
Cal Bottle
6
www.GlobalTestSupply.com
RH401-en-GB_ V1.7 1/17
Page 7

RS-232 PC Communications Interface
The meter is equipped with an RS-232 PC interface jack (3.5mm phono) for connection to a PC.
The cable to connect the meter to the PC is included in the optional 407752 data acquisition kit. The
kit includes Windows
TM
compatible software that allows the user to store readings in a text file and
display real-time measurements in a series of selectable formats. For more information or specific
operating instructions, refer to the User Guide included with the 407752 kit or contact Extech
Instruments.
Specifications
Function Range and Resolution Accuracy
Humidity 0.0 to 100.0% RH ±3% RH (10 to 90%)
Temperature (Air) -4.0 to 122.0oF (-20 to 50oC) ±1.8oF (±1oC)
o
±3% reading or ±3
whichever is greater
±4% reading or ±4
whichever is greater
Temperature (InfraRed)
(@25ºC ±5ºC)
-4 to 842
o
F (-20 to 450oC)
-40 to -4 oF, 842 to 932oF
-40 to -20
o
C, 450 to 500 oC
Display Triple LCD with backlight
Sensor Type Humidity: Capacitance sensor; Temperature (air): Thermistor
Dew Point -90.4 to 122.0
o
F (-68 to 50oC) (calculated from humidity and
temperature measurements)
o
Wet Bulb -6.9 to 122.0
F (-21.6 to 50oC) (calculated from humidity and
temperature measurements)
IR Emissivity Adjustable from 0.3 to 0.99
IR Spot/Distance Ratio 8:1
IR Response Time 0.5 seconds
Operating Conditions -4 to 122
Storage Conditions -40 to 185
o
F (-20 to 50oC); < 99% RH non-condensing
o
F (-40 to 85oC); <99% RH non-condensing
Power Supply 4 x 1.5V ‘AAA’ batteries or AC adaptor
Battery Life approx. 150 hours (laser inactive); 30 hours (laser active)
Dimensions / Weight 6.8x2.7x1.9” (175x70x50mm); 4.9 oz. (140g)
C/6oF
o
C/8oF
7
www.GlobalTestSupply.com
RH401-en-GB_ V1.7 1/17
Page 8

Maintenance
Cleaning and storage
1. The meter should be cleaned with a damp cloth and mild detergent when necessary. Do not use
solvents or abrasives.
2. Store the meter in an area with moderate temperature and humidity (refer to the operating and
storage range in the specifications chart earlier in this manual).
Battery Replacement
When the battery power falls low, the
four (4) 1.5 ‘AAA’ batteries by removing the rear battery compartment cover and accessing the
battery compartment. Observe polarity when placing the batteries in the compartment. Ensure that
the compartment cover is securely fastened when finished.
Repair Services
Extech offers repair and calibration services for most of the products we sell. Call the Customer
Service Department for information on repair services available for this product.
Repair@extech.com or call 1-603-324-7800 press 4.
symbol will appear on the lower left of the LCD. Replace the
Copyright©2008‐2017FLIRSystems,Inc.
Allrightsreservedincludingtherightofreproductioninwholeorinpartinanyform
ISO‐9001Certified
www.extech.com
8
www.GlobalTestSupply.com
RH401-en-GB_ V1.7 1/17
 Loading...