

Page 1
1 PT400-en-GB_V1.1 10/18
USER MANUAL
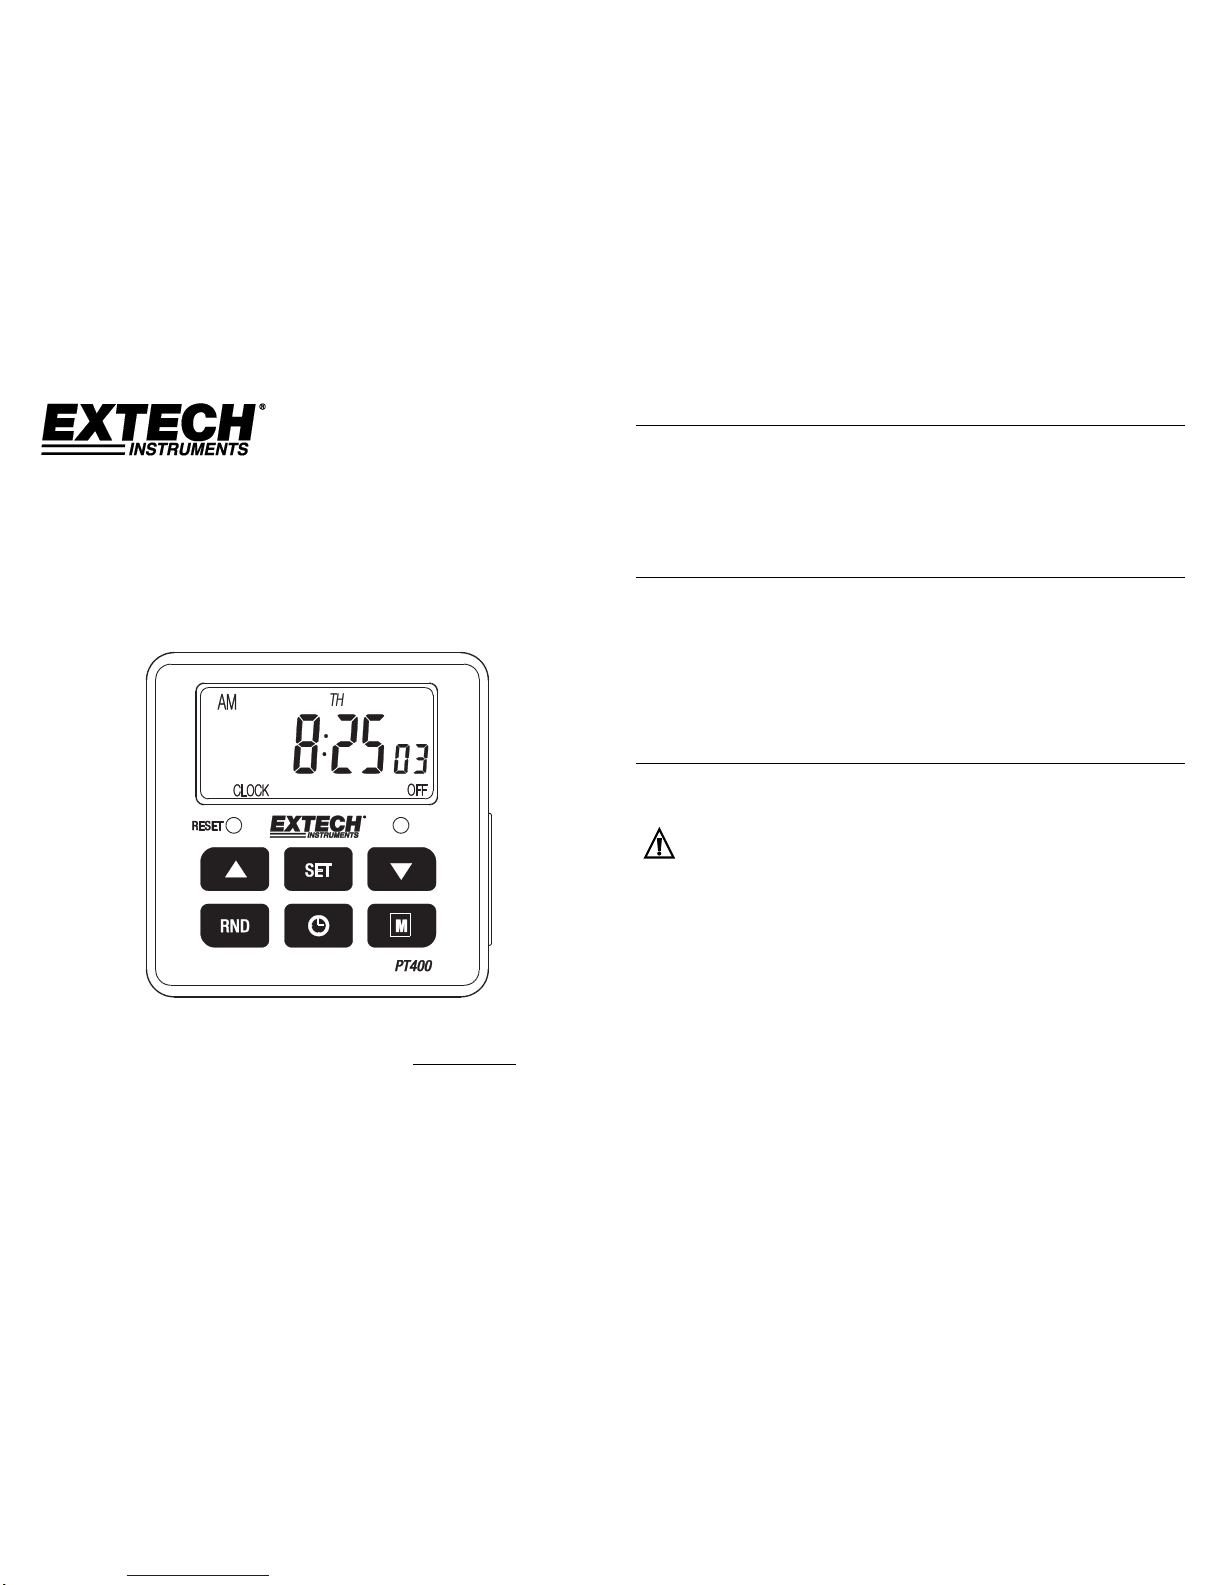
Model PT400
Programmable Timer
Additional User Manual Translations available at www.extech.com
Introduction
Thank you for selecting the Extech PT400 Programmable Timer. The PT400 is a programmable timer
that switches devices ON and OFF at user-programmed time events. It is ideal for energy saving and
home security. It also includes a countdown timer and a randomize feature.
This device is shipped fully tested and calibrated and, with proper use, will provide years of reliable
service. Please visit our website (www.extech.com) to check for the latest version and translations of
this User Manual, Product Updates, Product Registration, and Customer Support.
Features
10 ON/OFF timer programs with 16 options for day(s) combinations
12/24 hour mode selection
Daylight savings time mode
99 Hour, 59 Minute, 59 Second countdown timer
Manual mode for overriding pre-programmed ON/OFF timer settings
Reduces power consumption by automatically turning household appliances on and off
Anti-theft, random mode protects your home
Safety Information
To ensure the safe operation and service of the meter, follow these instructions closely. Failure to
observe warnings can result in severe injury.
WARNINGS
WARNINGS identify hazardous conditions and actions that could cause BODILY HARM or DEATH
Do not plug two or more timers together.
Do not plug in an appliance whose load exceeds 15 Amps.
Always ensure the appliance plug is fully inserted into the timer outlet.
Remove from main power if cleaning is required. Periodically wipe the case with a damp cloth
and mild detergent; do not use abrasives or solvents.
Do not immerse in water or any other liquid.
Do not plug the timer into a heater or similar appliance. Never leave heaters or similar
appliances unattended during operation.
Page 2
2 PT400-en-GB_V1.1 10/18
Description
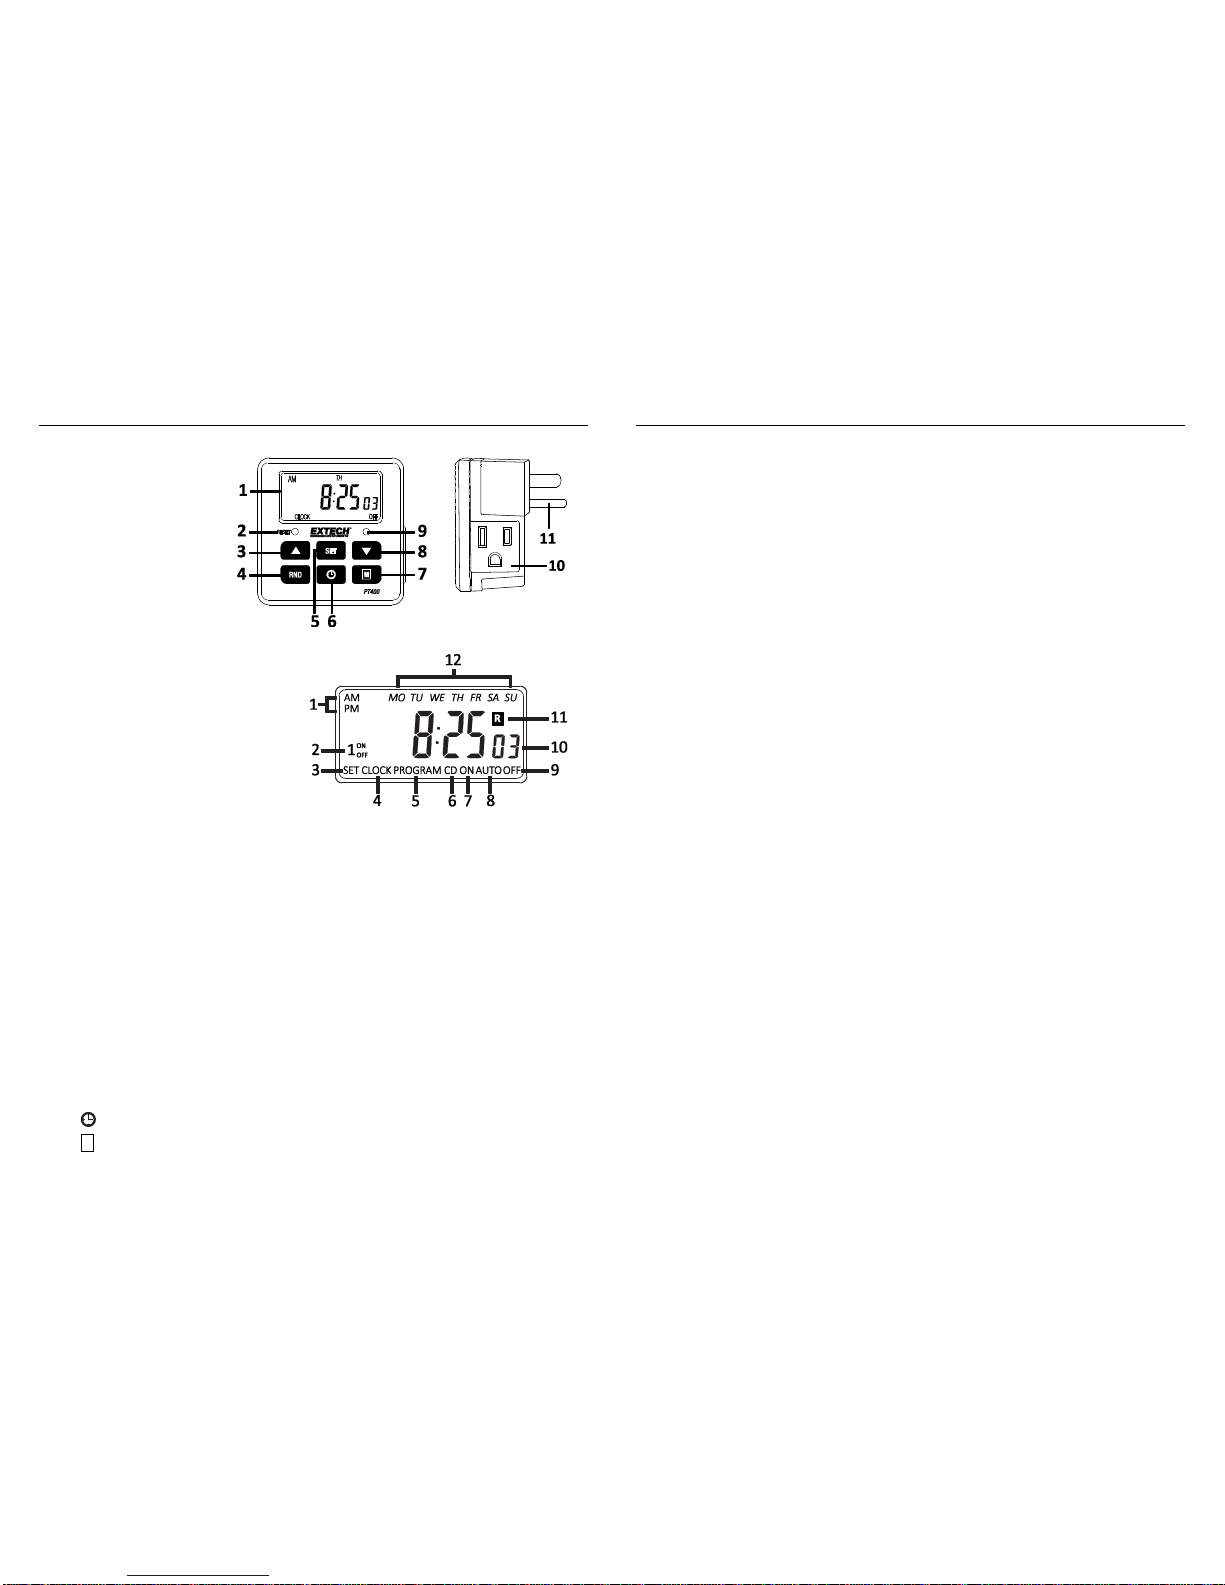
Meter Description
1. LCD
2. Reset button
3. button
4. RND button
5. SET button
6. Countdown timer button
7. M (Manual) button
8. button
9. Power ON/OFF indicator
10. Appliance outlet
11. Mains plug
Display Descriptions
1. AM or PM setting for Clock mode
2. ON/OFF Timer setting mode: 10
ON/OFF timers available.
3. Set: Flashes in clock setup mode
4. Clock: Appears when meter is in the
normal operating mode
5. Program: Appears while programming the ON/OFF timers
6. CD: Flashes when meter is in the Countdown timer mode
7. ON: Appears when user overrides the automatic mode by manually turning the timer ON
8. AUTO: Device will operate in program mode as setup by the user
9. OFF: Appears when user overrides the automatic mode by manually turning the timer OFF
10. Current time in hours, minutes, and seconds (HH:MM:SS)
11. R (Random mode): Timer will power ON/OFF at random intervals between 6PM and 6AM
12. Day(s) of the week: Timer can be setup in 16 combinations of day(s)
Button Descriptions
1. RESET: Clears ALL data in memory including current time and all programs
2. : Access ON/OFF Timer program mode and scroll through setup options
3. SET: Long press to set clock (day and time). Short presses to scroll through ON/OFF timer
program screens. Short press to save the selection
4. : Access the Countdown timer mode. Scroll through programming options
5. RND: Set or cancel random function
6. : Set or cancel countdown function
7. M Manual: Manually override the automatic ON/OFF timer to force the timer ON/OFF.
Operation
Initial Setup
1. Press the RESET button with a paper clip or similar object until the display goes blank. Release
the button and the PT400 will proceed to reset clock, clear all stored programs, and then display
the normal operating screen (‘CLOCK’ appears at bottom of LCD).
2. Program the clock (day and time) as described in the ‘Setting the Clock’ section.
3. Program ON/OFF Timers as described in the ‘Setting the ON/OFF Timers’ section.
4. Plug the timer into a 125VAC mains power outlet
5. When plugged in, the PT400 will begin charging the internal back-up battery. 14 hours is
required to charge battery fully but you can setup and use the device while it is charging.
Programming Note
For the programming steps below, if you allow 20 seconds between programming keystrokes, the
meter will automatically exit the programming mode and return to the normal operating screen. If
this happens, please re-enter the menu and continue programming.
Setting the Clock
1. From the normal display mode (‘CLOCK’ shown on bottom of LCD), long press the SET button.
The day of week and ‘SET’ will flash on the display.
2. Press or to set the day of the week.
3. Press SET until the hour digits flash.
4. Press or to set the hour.
5. Press SET until the minute digits flash.
6. Press or to set the minute.
7. Press SET to save and return to the normal operating screen.
Setting the ON and OFF Timers
You can easily set the Timer to turn ON and OFF automatically at certain days and times as detailed
below. There are ten (10) ON and ten (10) OFF timers; each timer has sixteen (16) options for
combinations of days.
1. Press to step through the ON/OFF timer screens. The first screen is 1
ON
(first ON timer) and
the second screen is 1
OFF
(first OFF timer), etc. ‘PROGRAM’ appears on the LCD.
2. At the desired timer screen, press SET. The day of the week and the ‘SET’ icon will flash.
3. Use or to scroll through the day(s) of the week. Stop scrolling at the desired setting.
4. Press SET button. The hour digits will flash.
5. Press or button to set the hour.
6. Press SET button. The minute digits will flash.
7. Press or button to set the minute.
8. Press SET to save.
9. Repeat the above steps for up to ten (10) ON and OFF timers.
10. Once all ON and OFF timers have been set, use the or button to step out to the normal
operating mode (‘CLOCK’ displayed) or wait 20 seconds for the meter to exit.
11. The timer is now set to turn ON and OFF at the time(s) specified.
Page 3

3 PT400-en-GB_V1.1 10/18
Manual Mode
In the Manual mode, you can manually switch the Timer ON or OFF. Turning the timer ON or OFF will
switch a connected appliance ON and OFF. Use caution when using manual control.
Manually turning the Timer ON or OFF overrides the user-selected ON and OFF timer programs and
so, the PT400 will not switch ON/OFF as programmed.
1. To turn the Timer ON manually, press the M button until ‘ON’ appears at the bottom of the LCD
and the LED indicator switches ON.
2. To turn the Timer OFF, press the M button until ‘OFF’ appears at the bottom of the LCD and the
LED indicator switches OFF.
3. To return to the automatic mode, press the M button until ‘AUTO’ appears on the LCD.
Random Mode
In Random mode, the timer will automatically turn ON at 10 ~ 31-minute intervals between the
hours of 6pm and 6am.
1. Press the RND button to turn the mode ON/OFF. ‘R’ will appear on the LCD when this mode is
active.
2. The Random mode is not available when programming the Clock, setting the ON/OFF timers, or
using the Countdown timer.
3. The Random feature will only function while in AUTO mode between 6pm and 6am.
Countdown Timer
The countdown timer switches ON or OFF, as set by the user, after a programmed countdown time
has elapsed. The maximum countdown time is 99 hours, 59 minutes, and 59 seconds.
1. Press to access the Countdown Timer. ‘CD’ appears on the display.
2. Press SET. ‘OFF’ will flash.
3. Press or to select ON or OFF. This tells the timer to turn ON or OFF after the countdown
timer times out.
4. Press SET. The hour digits will start flashing.
5. Press or to set the hour.
6. Press SET to save. The minute digits will flash.
7. Press or to set the minute.
8. Press SET to save. The second digits will flash.
9. Press or to set the seconds.
10. Press SET to save.
11. Press to return to the normal operating mode (‘CLOCK’ is displayed).
12. Press CD. The meter will begin counting down (‘CD’ will be flash on the display).
13. The countdown timer will not operate if the meter is MANUAL or RANDOM modes.
14. When the countdown time elapses, the ‘CD’ icon stops flashing, and the meter switches ON or
OFF (as set by the user). The LED indicator will turn ON or OFF accordingly.
15. Note that while the meter is counting down, programmed ON/OFF timer functions are
suspended.
12/24 Hour Mode
From the normal operating mode, press the countdown timer and SET buttons simultaneously to
toggle 12 and 24-hour modes.
Daylight Savings Mode
1. Press M (MANUAL) and SET buttons simultaneously. The display shows ‘S’ and the clock
advances 1 hour.
2. To revert, press MANUAL and SET again. The clock moves back 1 hour and the ‘S’ disappears
from the display.
Specifications
Display Multi-function LCD
Operating Voltage 125 VAC 60Hz
ON/OFF Timer resolution One (1) minute
Accuracy ±1 minute/month
Maximum Load 15A General purpose or Resistive, 10A Tungsten, 1/2HP, TV-5
Battery backup NiMH 1.2V > 100 hours
Operating Temperature -10 to 40oC (14~104oF)
Meter Dimensions 130 x 66 x 41mm (5.1 x 2.6 x 1.6”)
Weight 108g (3.8 oz.)
Safety compliance ETL listed
Copyright © 2017-2018 FLIR Systems, Inc.
All rights reserved including the right of reproduction in whole or in part in any form
ISO-9001 Certified
www.extech.com
 Loading...